Dress Form: Unvarnished Truth and a Game Changer
Two years ago I made my DIL Ashley a linen jacket for job interviews. It was a revelation! Working on another body (not mine) was SO EASY–I could see what needed fitting, figure out how to make changes, assess fit and lines. So I vowed to get a dress form. KaCHING! What I wanted was over $400! Nope. So I cast about for something less expensive. A local quilty friend had a friend with one to sell…done for $75. And it still mostly adjusted and wasn’t musty!
For your listening pleasure (you’ll need to read to the end to understand why), open this in a separate browser window.
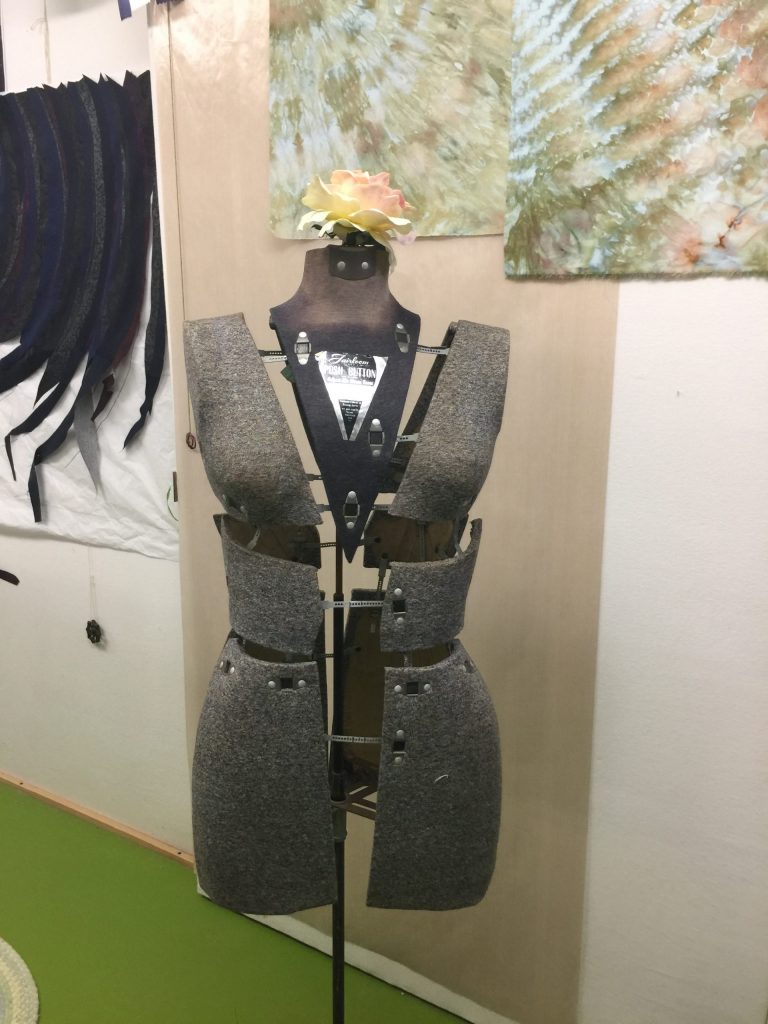
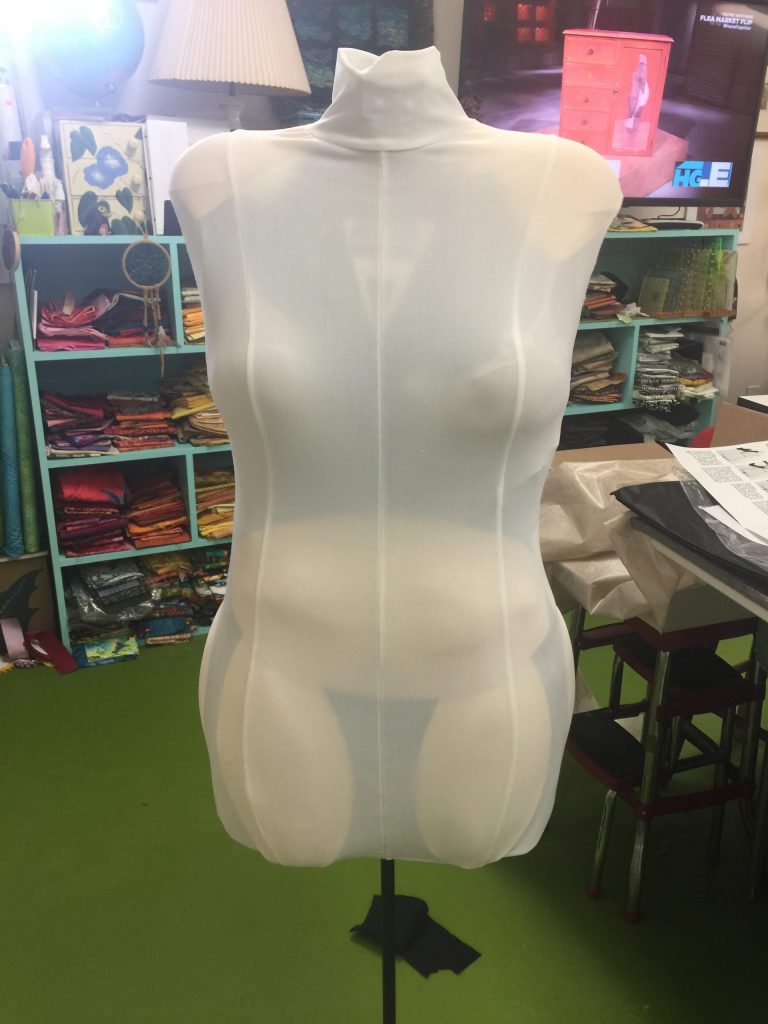
Front view: vintage dress form, not too rasty, sized out to replicate my measurements. 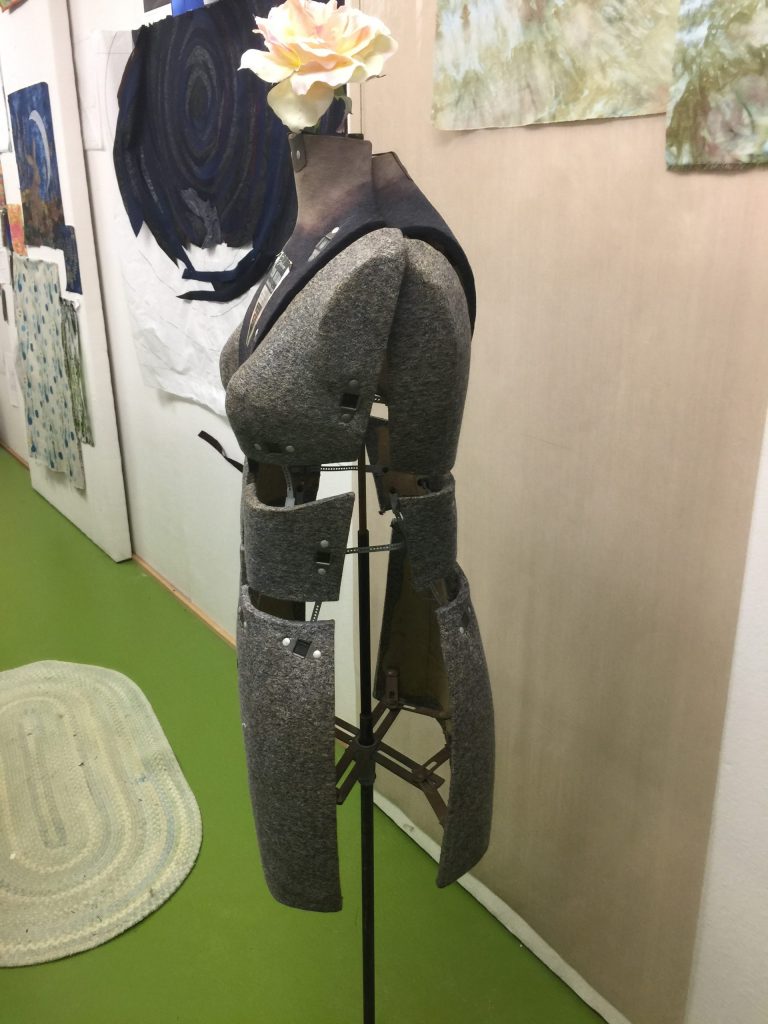
However, I discovered that the dress form and I were built on different molds. I honestly didn’t look as good as the dress form even though the measurements were correct. For starters, most dress forms start with a B-cup. The only time I was that large, I was nursing my sons! So I had to shrink in the torso to get a proper full bust measurement and shape, then pad out everything else to correct ribs, high bust, etc
But even that didn’t do it. Luckily I had long planned to get proper measurements done. Fiddlehead Artisan Supply (if you ever get to Belfast Maine, you MUST MUST MUST go there; quilt fabric, garment fabric, paint, art supplies of all sorts, crafting supplies….in other words, heaven!) has a classroom. Students can pay a VERY modest fee per hour for the teacher to come and help you. When I went, there was one student sewing and me getting measured. I figured I could try and explain to hubby what to do (but do I really want him to know my actual size? NO!) OR I could get someone who sews and would do it properly. Easy choice. The following is a chart I made to use at that session.
To prepare, I looked at patterns, sewing books and knitting books to figure out every conceivable measurement I might need, ever. And I put them into a chart. I have created this a PDF for you to use!
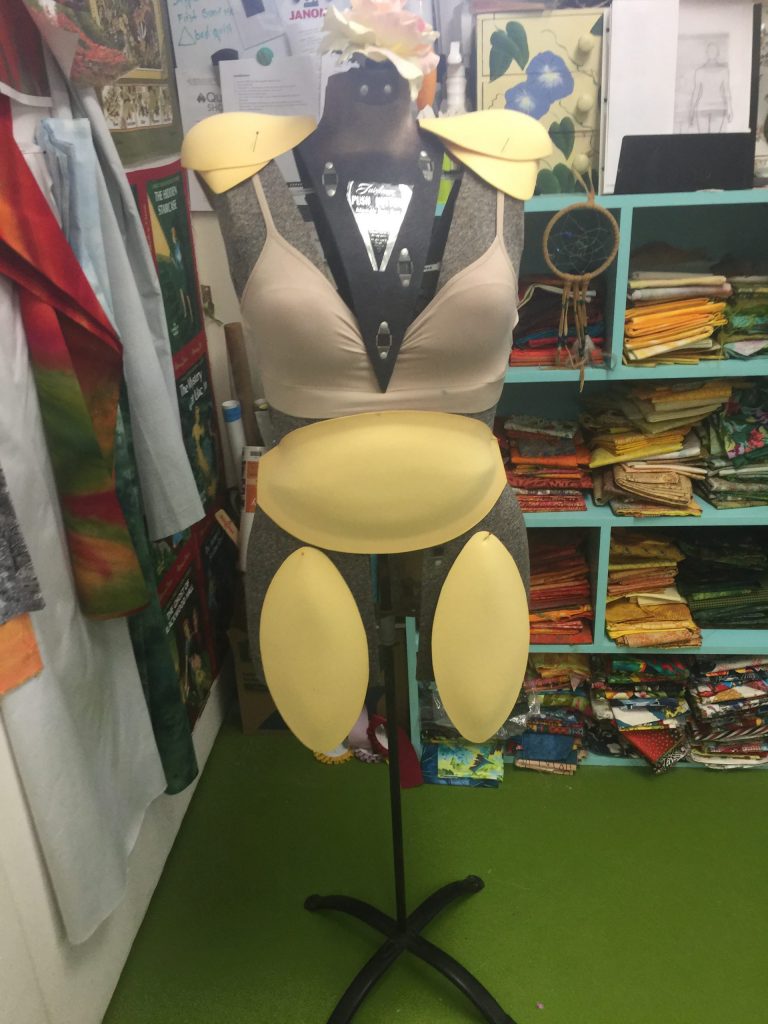
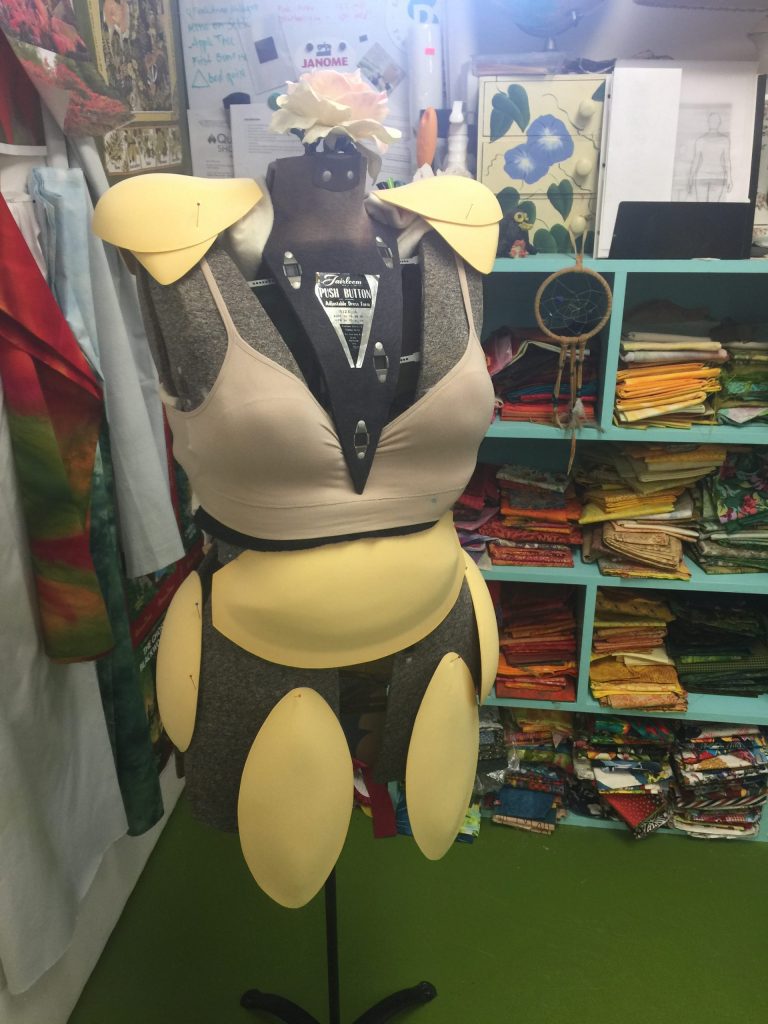
Pads added, front 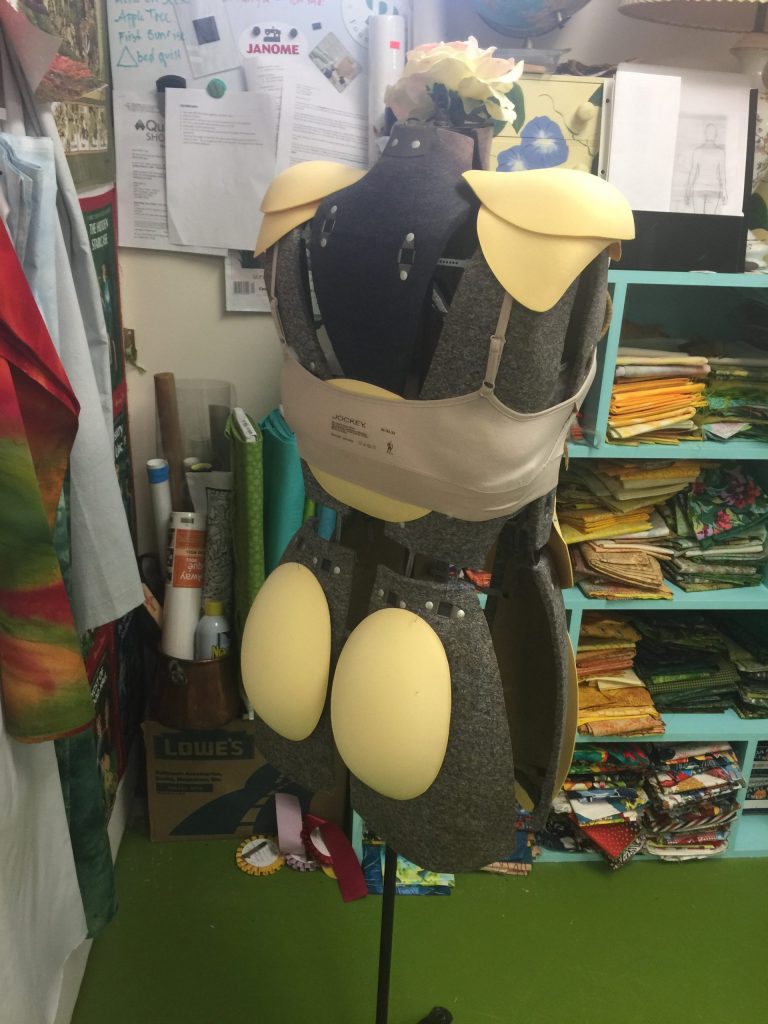
In having my measurements done, I discovered that not only were the bust shapes wrong for me, they were 2″ too close to the shoulders–I wasn’t that perky at even at 17! The fix for that (having surfed the internet to see how others modified dress forms) is to reduce the overall torso length until the apex of the breast is the right distance from the waist, then build up the shoulders. Revelation! Plus, that also meant I could make the shoulders wider and more square, like mine. However, there were still big gaps on the sides– hard to pin into those!
More pads added to the outer hip zone. 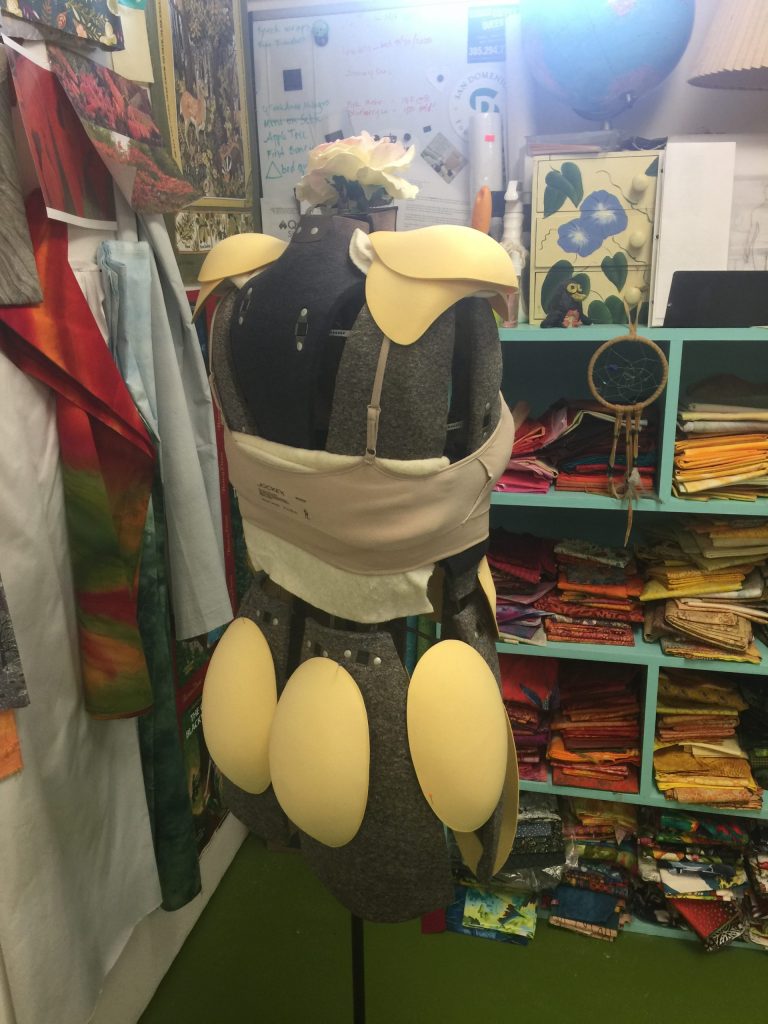
The second set of oval pads worked well to flesh out (hahahah) the hips. And because I needed the contract the torso to get the bust to work, I had to pad it back out to approximate my actual ribcage. If I ever get a modern dress form, I discovered there are “flat” dress forms for those with mastectomies or who are smaller than the industry standard patterns which are for B and C cups. Grump alert: Yet another blast from the fashion industry telling the smaller-busted amongst us that we are less than worthy (try finding an alluring bra in a small cup size–not!). Jerks. Anyway, at least I know that “flat” forms exist.
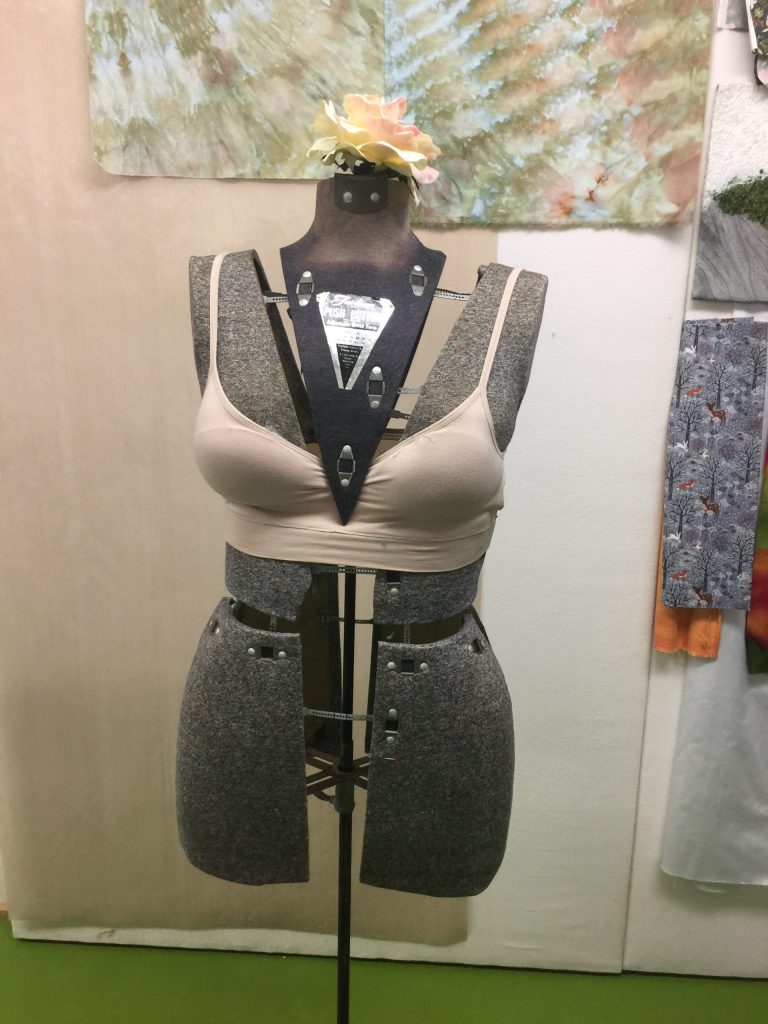
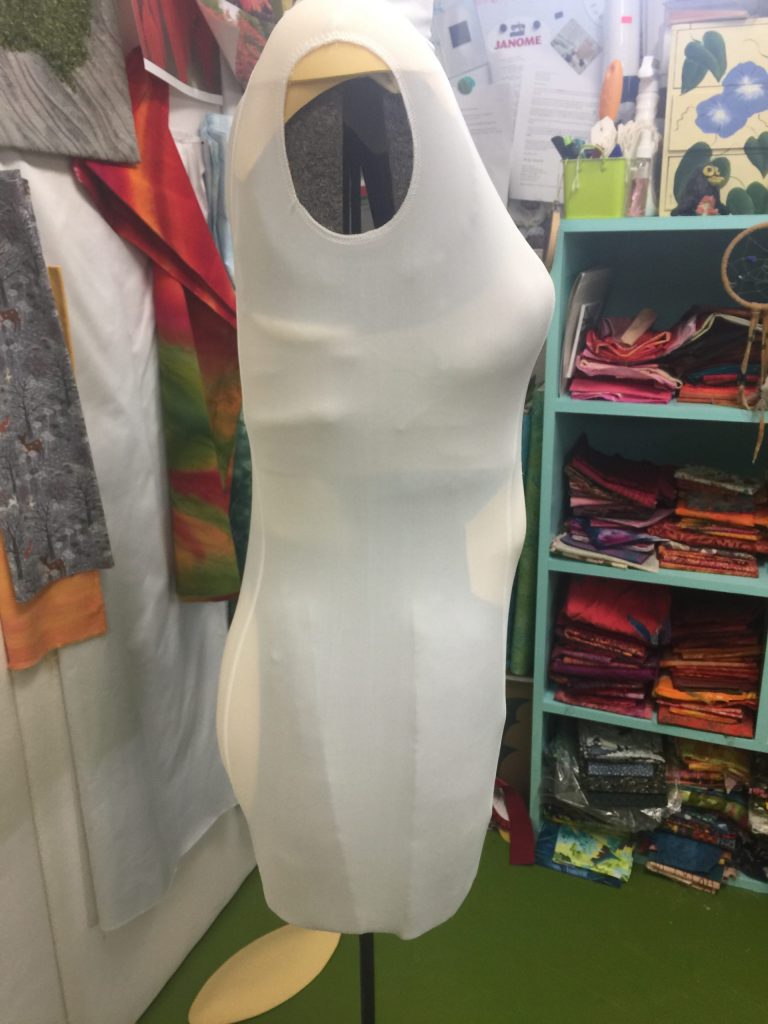
With the princess seam dress form cover added 
This is pretty close to how I really look…definitely close enough to do fitting on a fitted garment and get it to work. The larger sized “kit” comes with two covers, and I couldn’t figure out why. Turns out you use the one with SIDE SEAMS as you “build” the pads–the lycra cover hold the pads in place and allows easy adjustments and fine tuning. Then you are supposed to put the princess seam cover on top of that for opacity. Having the seams, which you can feel under the fashion fabric, is a good thing. Next time I’ll purchase both covers so I can feel the side seams as well
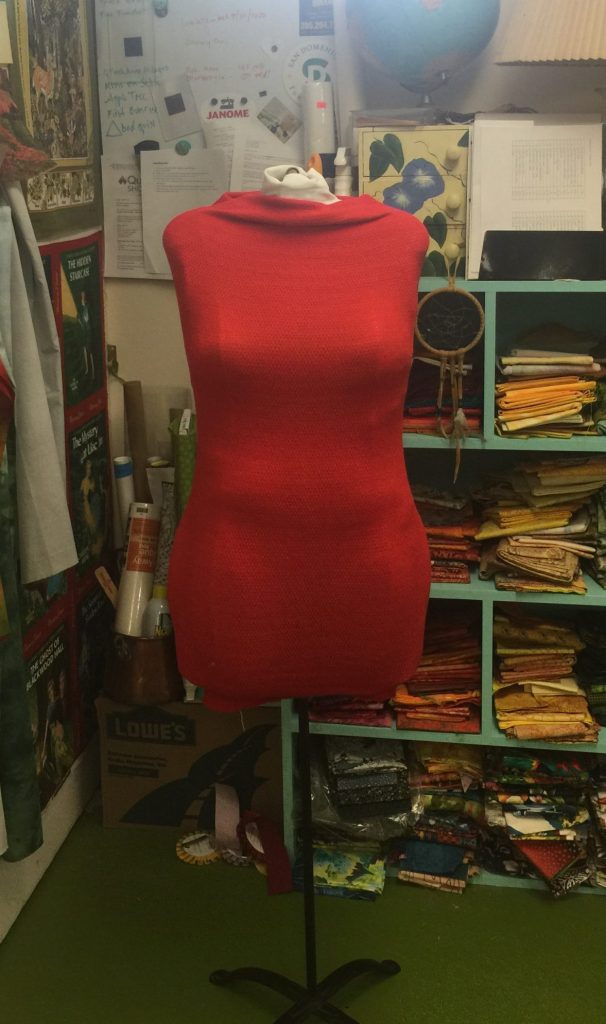
Side view before I got the hip and front thigh pads snugged in. Thankfully I am not as lumpy as the batting in the upper back. 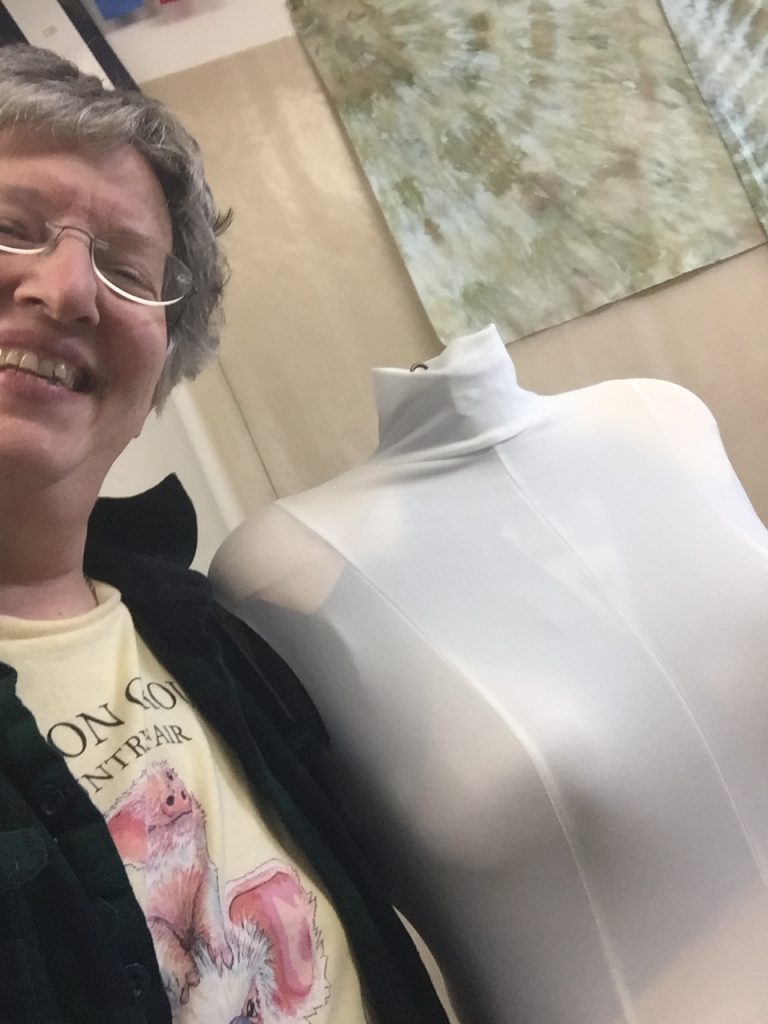
Me with Ailith Skye, my body double
I learned SO MUCH about the shape of my body in this process (and I’m fine with lumps…life is better with ice cream, although 10 pounds fewer lumps would be nice too….the 20 I need to lose ain’t gonna happen). And I learned about the pattern industry, the “blocks” (body shape bases they use) and fitting ease. I can now use my stand-by—measure a garment I have that fits the way I want and compare with what I measure on the pattern–along with the dress form and get a fit that I want!
In the coming weeks I’ll have several garment making posts. I have made a top, a skirt, a tunic, leggings, have another pair of leggings on the cutting table, and a pinafore/jumper on the design wall. Ailith (traditional Scottish name meaning seasoned warrior–my paternal grandmother was Irish but born in Glasgow, I am named after her, so I liked Ailith) has been a great help already. Can’t wait to share. Oh…and why red dress?
May 22nd, 2020 at 4:17 pm
Wow. You really recreated you’re shape and now have a pinnable dress form that can be adjusted if you lose or gain any weight. We all do. I love the red! Just another layer for you to pin into. I use the red tube dress fabric over plastic mannequins so they become pinnable. And when I drape a garnet it holds into the dress form. Congratulations. Thus will increase your dressmaking! Wish you didn’t live in the far side of the USA or I’d be sending over fashion fabric. Hugs Marty
May 22nd, 2020 at 4:47 pm
If you didn’t lie on the other side of the US I’d invite you over to play! THANKS SO MUCH!