Color Mixing for Dyers, week 2, continued… again!
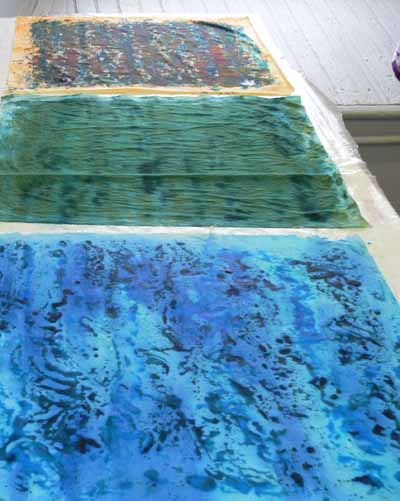
On the first day of the workshop, Carol invited us to pick a color which would be our “base” color to play with. Since I knew I needed to make some fabric for an art quilt destined to an invitational exhibit, I knew I wanted blues and greens, so I selected a somewhat teal blue. Here are some of our pieces batching on a work table. Please don’t ask me WHY I had never thought of something as simple as this: just lay your pieces flat, layer with a plastic drop sheet, add more pieces on top, another piece of plastic, etc.

This piece is one where I tried a variety of techniques on a half-yard length:

Then we started playing with resists: Elmer’s washable blue-gel school glue, cold wax resist, and Presist.
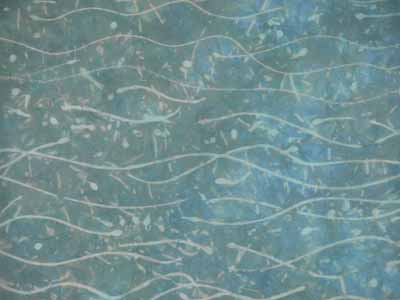
The gel-glue has the virtue of being inexpensive and available just about everywhere. Since I wanted fabric for a pond and stream, I figured I’d make watery-shaped marks and blobs. The drawback to the gel-glue is that it takes a LONG time to dry: even though it was moderately warm (low 70s, which for Massachusetts in October is warm) and not oppresively humid, it took well over a day to dry fully. First I painted over the glue gel with a thickened print paste mix plus dye plus dye activator, and batched it. Then, I wanted to add more color and texture, so I scrunched the whole thing up in a plastic container and dumped on more dye. This partially dissolved the gel-glue which then migrated and formed the “rice” pattern on the cloth…cool!
Presist is a VERY thick gooey stuff that looks like molasses, except thicker. You pour (slowly) some of the gunk onto a plate or other flat, plasticky surface. You either dip your stamp into the Presist or use a small make-up sponge to daub the presist onto your chunky stamp. I did that in the wave area of the 1/2 yard length shown above. This photo (for some reason the color in the photo is hideous–color accuracy on the photo above is better) shows what it looked like after a couple of overdyes and some drips and drops from the cold wax (next item):
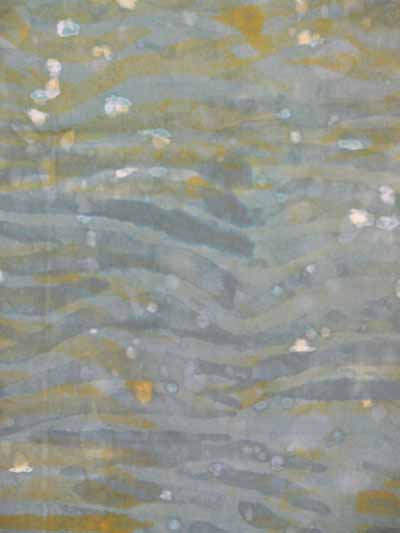
I love love LOVE the cold wax! The stuff is a milky white, in both color and consistency, and not inexpensive! You don’t have a lot of control with it but you can get these sweeping brush strokes for subtle overdyes. Here is a close-up of the upper section of the half-yard piece which shows some of the brushmarks and “water drops”. The color doesn’t photograph well (at least not with the time I spent setting up the shot!), plus it is very subtle to begin with. I would love to play with this medium more and see what I can do… I can see some awesome feathery-grass-like pieces in it. As with all wax (hot or cold!) you have to remove it; in this case, you can do the usual iron between newsprint or keep a plastic bucket (an old kitty litter bucket is perfect) for rinsing the wax out. The wax sticks to the side of the bucket instead of going down and coating your pvc water pipes in your house. That is a good thing!
Here is the print batching table once again, with three of my in progress pieces. As usual for wet cotton, the colors are deeper when wet.
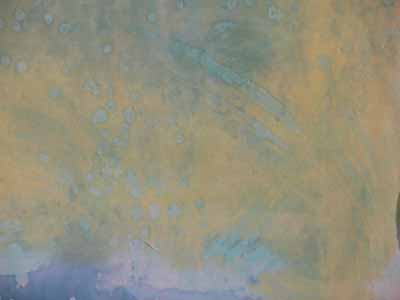
The piece in the middle in the photo above is shown in detail below: although it is pretty unremarkable as a piece of manipulated cloth, it will be very useful: think forest pond!
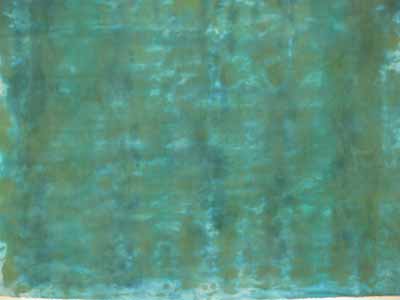
I made a second “monoprint” from the same leftover blobbies plus some more greenish print paste mixto make this more textured piece; think algae on forest pond!
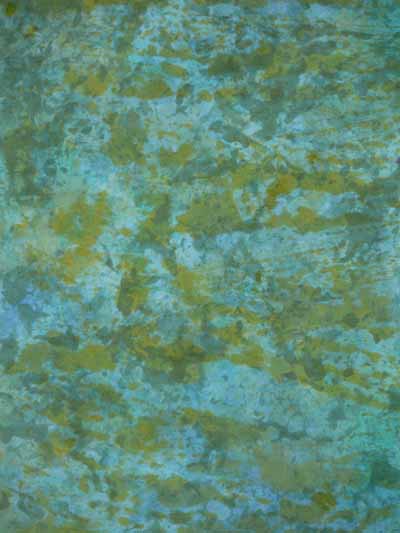
The piece on the bottom is one of my favorites. The blobbies are from using thickened print paste mix plus dye on vinyl, letting it separate into globs, taking a monoprint, then batching. After the piece was batched (to permit the chemical reaction between dye and cloth to happen), I allowed the piece to dry, then painted it with a thin wash of activated dye liquid, and here is the result:

Next assignment: make some art quilts out of the art cloth!
November 6th, 2007 at 8:46 am
The processes seem so interesting and fun…your posts on Carol’s workshop are very tempting.
November 7th, 2007 at 10:05 am
Those are awesome. Wish I had a class available
near me. Love reading your blog.
Doreen