Free-Motion Quilting, revisited
A post or several ago, I shared my new class sampler for my Intro to Free-Motion Quilting and mentioned I had received some threads from Gilbreath Threads to try out. I used the sampler as a way to test the threads:
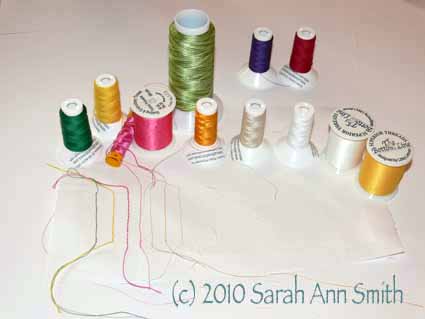
From left to right:
- Gilbreath Emerald green, cotton 30-wt, #253
- Gilbreath Yellow wool 12-wt
- Gilbreath hot pink silk (lying down) Seta Bozzolo 24-wt., #196
- Superior Threads 40-wt. poly, hot pink #820
- Superior Threads 40-wt poly, rainbows, green variegated #820
- Gilbreath orange/mango 40-wt Palio poly
- Gilbreath 40-wt ecru cotton, 2-ply, #025
- Gilbreath 50-wt white cotton, 2 ply, #000
- Superior 60-wt white poly (used in the bobbin), # 621
- Superior 60-wt yellow poly (used to sew down the binding), #641
- in the back, two Gilbreath threads not used because the colors didn’t work for this piece: 60-wt purple cotton, 12-wt deep red cotton
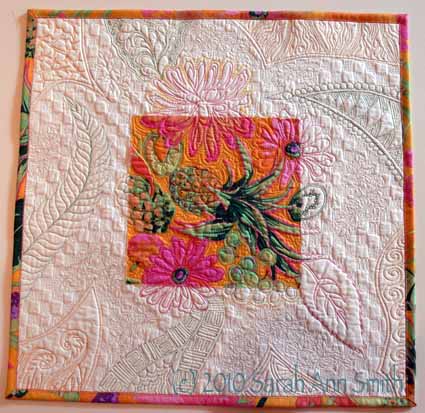
I don’t think I’ve ever used that many different types and weights of thread in one piece, but I’m thinking this could be something to add to my arsenal of techniques! At the top you can see the completed, washed piece before the final line of stitching in the ditch on the binding.
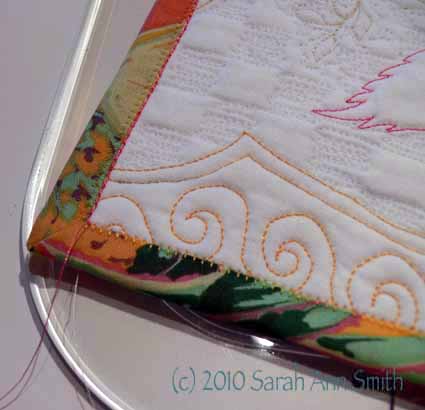
I applied the binding to the back, wrapped it to the front (the front side is 1/8″ wider than the back, so the stitching to apply it is on the back of the quilt, not the binding), and stitched it down using a buttonhole stitch and Superior Threads’ Bottom Line thread, a very fine polyester that blends in and is unobtrusive:
The last step is to use the triple-stretch stitch (a bold straight stitch) in the ditch to outline and accent the binding with the hot pink poly from Superior. See how it crisps up the edge in this photo which shows with and without the outline stitching? It’s a design choice; both ways are good, just pick the version you like.
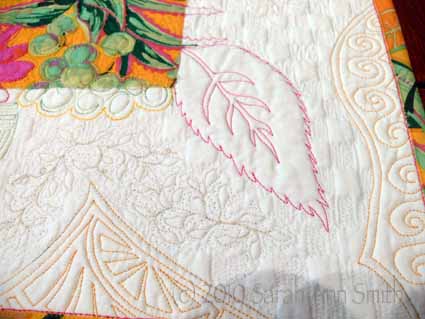
Here are close-ups of the quilting in this big-print class sample, which uses motifs from the Free-Motion Sampler (the magenta and lime quilted grid that is in the book) and my “More Machine Quilting” sampler which is featured on the cover of the book, the peach quilt:
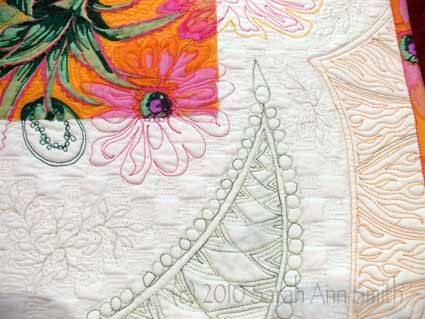 It has been a LONG time since I’ve washed a quilt after quilting it, and was very happy to see how the fabric holes closed up around the stitches. In this last photo, you can see where I added some stippling (ugh, but sometimes useful) around the ecru leaves after it had been washed. The needle holes in the checkerboard have disappeared, but you can (faintly) see them around the leaves. The quilt is now dampened and back in the dryer to remove those needle-holes too. Hmm…good learning piece: Use thick threads in the bobbin! Rinse and fluff in the dryer…. will have to try that with a very fused and densely quilted sampler and see what happens to the edges of the raw edge applique…. guess what my next class sample will be?
Hope you’ve enjoyed! Cheers, Sarah

October 3rd, 2010 at 7:07 am
Awesome! Especially the binding!
October 3rd, 2010 at 10:31 am
Another gorgeous project! I was just thinking of doing some small projects like that as I absolutely love, love, love machine quilting.
October 4th, 2010 at 1:57 am
You have done a great job! Really beautiful. As you can see, a lot of free motion quilting adds something special to it. I sure will make something like this as well.
Thanks for sharing, Marjolijn
October 5th, 2010 at 8:00 am
I love the new sample and want to do some projects like this. I think will be a fun class for you to teach and for anyone who takes it!
October 26th, 2010 at 7:13 am
[…] used the new floral sampler in class (which I shared here and here), and several of the students gave it a whirl. As usual, the class went by in flash–before […]
November 3rd, 2010 at 10:11 am
[…] the meantime, I’ve not been able to concentrate a lot on art quilts. But I liked that use-a-big-print sampler I made for my free-motion class so much that I decided to make a bed quilt, possibly as a project […]