More on the chair, and my "background" in upholstery (hah!)
Karoda asked if I had ever done anything like this (upholstery…not the flannel fiasco…more on that tomorrow) before. Well, sort of.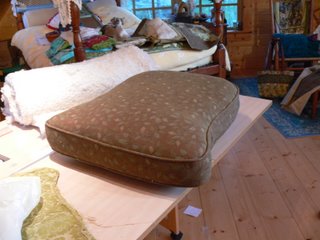
I got lucky…it wasn’t a difficult piece, needed no interior “re-hab” work done, and the fabric was durable (and not ravelly) with a print that didn’t need matching. I know there were mistakes…places where I didn’t get the grainline or cross-grain straight, but fortunately the print disguised my mistakes. I ended up doing two more upholstered pieces for her, so that plus the Singer book gave me enough confidence (along with lack of funds to pay someone!) to attempt this chair…although I’ll admit it’s a doozy! If I were REALLY good, I’d re-finish the wood, but I *know* I’m not up to that. I’ll settle for clean and not dog-chewed!
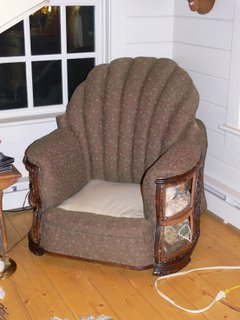
As you can see by the top photo, I got the seat cushion done…easy…have done a zillion of those when doing home dec work (including some that were almost as large as a twin mattress, I kid you not…those rich people have BIG window seats!). Even though the last iteration on the chair didn’t cover the horse-hair over springs, I decided my life would be easier if I did a “lining”, so I used the extra burlap to hold things in place on the back: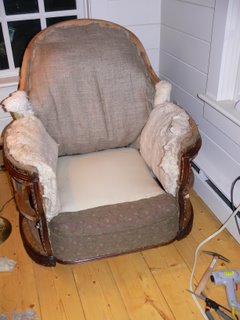
Then, I did the arms. 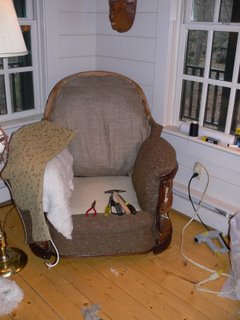 Ugh. They were not fun. Also, it appears I needed to have checked the tension (or get a different zipper foot), because the cording that runs in the center of the roll-arm was not properly encased, so after stapling the fabric on (and not wanting to take it off), I had to hand-stitch the seam. When they were done, I decided they needed more batting inside. I also decided that I wasn’t going to un-do them and start over, so they will eventually look a bit ripply. Oh well. I’m not in love with this fabric in the light in this house, so some day this stuff will go away, and I’ll re-do the chair and do it better. Yes, I have learned from this process.
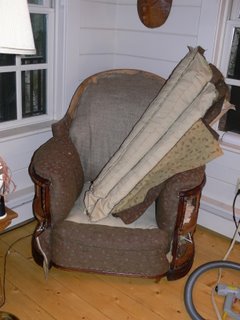
The only things left: the side panels (4) which flank the carved wood on the sides, the upper side panels, the cording and the back, and the dust cover on the bottom. Oh yeah, and order the trim and get it put on, too. That will take at least a week to ten days….sigh…..

November 30th, 2006 at 6:59 pm
Hi Sarah,
Kudos to you on all of your hard and impressive work! You are doing a fabulous job. Thank you for sharing this, and all of your projects with us.
Joan
November 30th, 2006 at 7:19 pm
Girl, I’m over the top impressed! I would like to undertake painting furniture but I think I’ll have to leave the uphostery work to the truly ambitious :0
November 30th, 2006 at 7:40 pm
WOW!
December 1st, 2006 at 4:17 am
Very impressive! You’ve got quite a skill there!
December 1st, 2006 at 11:14 am
Wow! Big job but it’s looking fantastic.
December 2nd, 2006 at 12:29 am
Many years ago I learned to upholster a wingchair with help from a friend and I have redone it a couple of times. It is VERY hard work–I still remember how badly my hands ached after a day of pulling and stapling and tacking. Your chair looks even more complex, but it is looking great! And don’t you love those old chairs? Deeper, sturdier, so much more comfortable than anything you buy these days. You will have a real treasure once you finish it.