Trees, how-to…because Caroline asked–thanks!
 Caroline asked if I would explain how I did the trees, so here you go! Caroline…your e-mail is set to no-reply in blogger, so I couldn’t respond to you personally…sorry!
I first fused a “background” of “treeness” 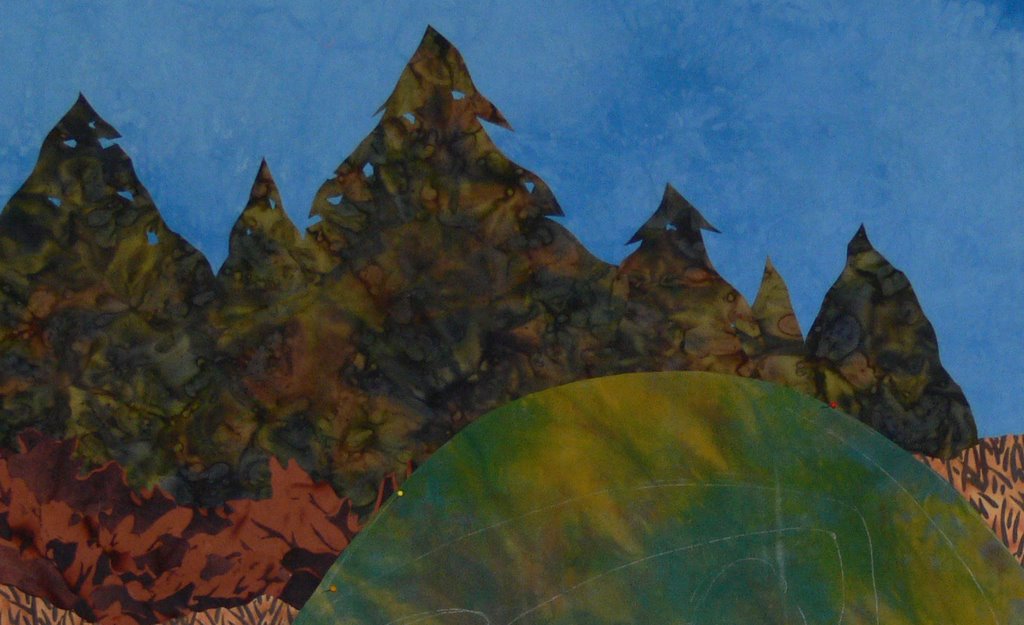 …basically a peaked section of green cloth with fusible web on the back (I use Misty Fuse, which is made by Teri Austin and available here, but Wonder Under or a similar, lightweight product would work). Near the upper edges, I take a pinch and snip off the tip to get a jaggedy hole like you would see in treetops, then fuse down.
Second, I cut “branch shapes” from different but blending green fabrics (in this case I used only batiks, but hand-dyeds and prints that look like treetops work, too) with fusible on the back. I randomly place these to get a good distribution of color and shape. 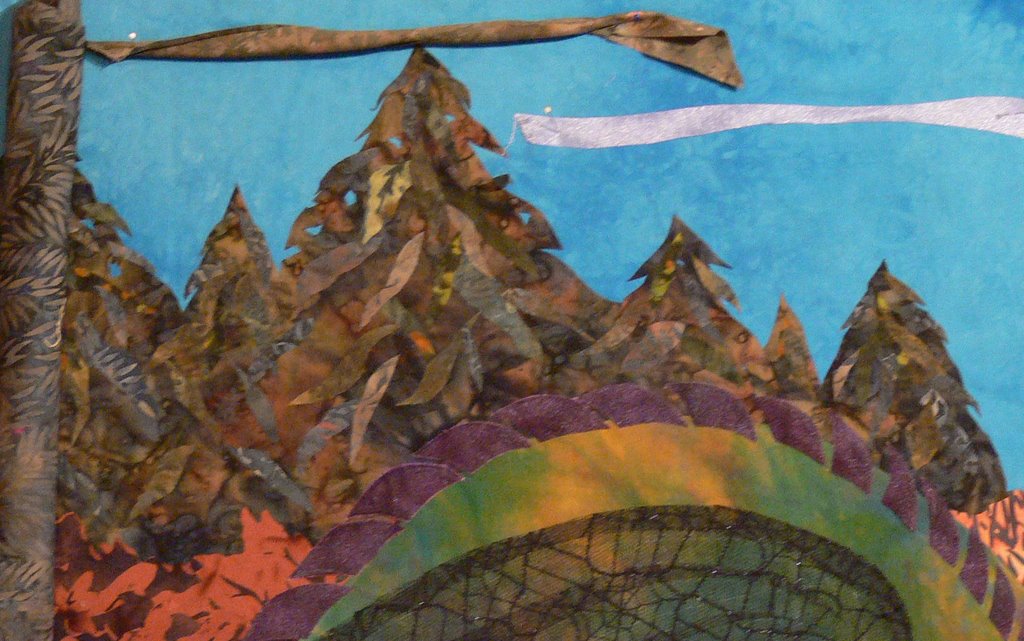
Next time you’re outside, take a look at the way the branches hang, and at the individual shape of the branches…kinda blobby!
Finally, I quilt using at least 2 or 3 colors of thread (more if the trees are in the foreground or large). I’m learning not to over-quilt! I had thought I’d make fringed boughs on all the fuse bits and in between, but when I had finished with one color of thread, on only part of the fused boughs, I liked the way it looked. I still needed to stitch down those fused bits and quilt the inbetween spaces, so I used a simpler outline pattern. I like the way it turned out. The photos, by the way, should be clickable to open up larger so you can see more detail…just move your mouse cursor over the picture and click (or right click if you have that option, to open in a new tab or new window depending on your browser software).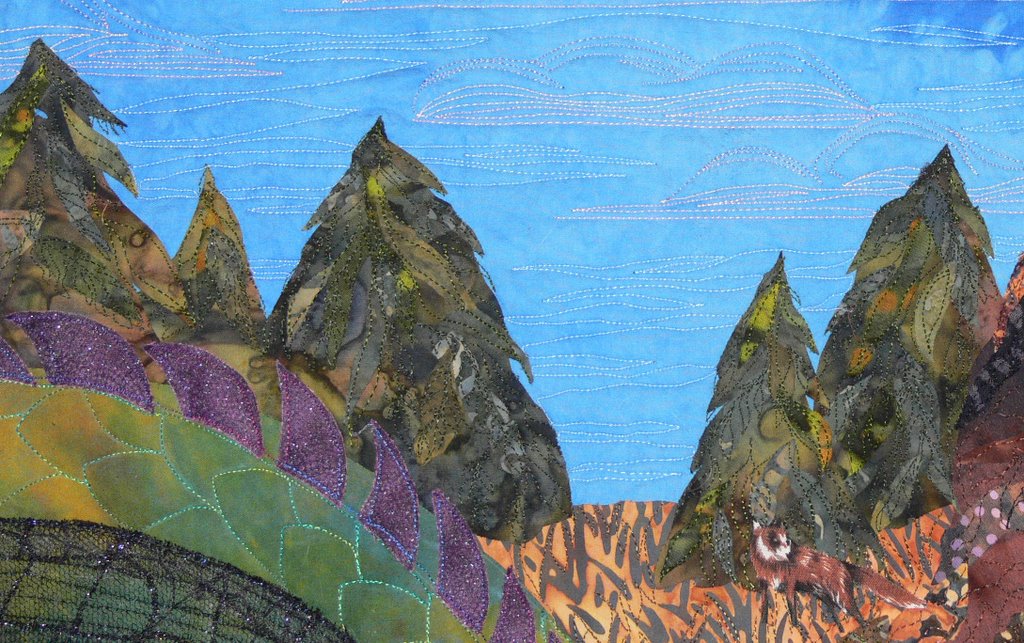
October 5th, 2006 at 2:24 am
I like the idea of cutting holes into the top of the tree shapes, very simple and effective.
October 6th, 2006 at 7:33 am
Thank you, Sarah; that’s very informative 🙂
October 6th, 2006 at 3:26 pm
Thanks for the explanation, Sarah. Will have to give it a try.