Sarah’s Invisible Pocket–a long, free lesson

Some of you may know that I work with Janome-America. They have graciously lent me a Janome 6600 (and before it, a 6500) sewing machine. In return, I have done a pattern for them and let them use my Bijagos Warrior in their ads (thank you Janome!!!!)–does it get any better? A loaner machine AND published! Thank you!
Now it is time to do another pattern, and with luck my Totebag with Mix-n-Match Pockets will be in an upcoming issue of the Janome International Digest (available from Janome-America and most Janome dealers—I’ll let you know what happens when it happens).
In the pattern, you get to make a totebag with NO exposed raw edges…everything beautifully finished inside and out, AND you get to pick a selection of pockets that suits your needs, from flat ones with pen slots to sunglasses to a water bottle (or folding umbrella) holster. But, the pattern got really long, so I did not include my “invisible pocket” that goes on the outside…. I’m going to offer this lesson to Janome as a web extra, but thought I’d share it here first just for you!
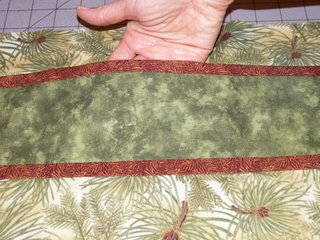
As you can see from the photo  here,
here,
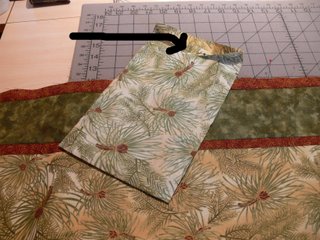
it appears there is no pocket at all on the outside of the bag…but there is! See:
To make this pocket, you’ll need a totebag body that has a seam near the top, OR you could make a slash/buttonhole pocket like on a tailored jacket. It’s a lot easier with a seam! To try my way, follow these steps:
Cut a long skinny rectangle to make your pocket. Six inches wide is enough to slide your hand in nicely but not droop or sag. Length is personal preference; I like mine fairly deep so stuff doesn’t fall out (ahem!), so I cut my fabric 6 x 19 inches.
Fold cloth in half, right sides together.
Beginning 1/4″ BELOW the open end, stitch 1/4″ seams down the sides.
Iron seams as stitched to “set the seam.” Then iron one of the top edge seam allowances down. Then pin that folded edge down to keep it out of the way for stitching.
Turn the pocket over and pin to the seam two inches or so down from the top edge of your totebag. 
When flipped up and over, there will be an opening at the top (it’s a good idea to place pins parallel to the edge, flip and double-check…sometimes it is easy to get this part backwards!). 
Stitch with 1/4″ seam allowance. You may wish to use very short stitch length at the start and end of the seam.
Clip at a right angle to the stitching to within 2-3 threads of the end of the seam. If desired, reinforce with No-Fray, Fray-Check or some other anti-fray product.
Turn pocket, so that it looks like the picture below. The brown “accent” strip is stitched on the horizontal seam, but has a raw edge on the vertical (which is, of course, a scant 1/4″).
Next, you’ll sew on the top strip of fabric.
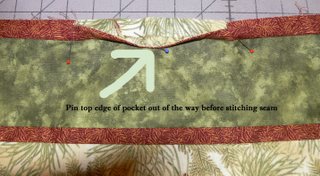
To prepare, pin the top edge of the pocket down and out of the way like this:
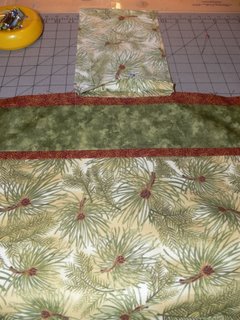
In this next photo, you can see that I like to put the new strip (which is at the top of the bag) underneath so that I can see what is going on with the pocket.


July 25th, 2006 at 1:34 am
Thank you, Sarah!
July 25th, 2006 at 7:12 am
Thanks for the lesson, Sarah. I think I will try that!