email Youtube

Home
Galleries
Blog
Workshops & Calendar
Store
Resources
About
Contact

Archive for November, 2008

Refining the t-shirt–how to take a boring t-shirt to fitted and fine!

Friday, November 14th, 2008

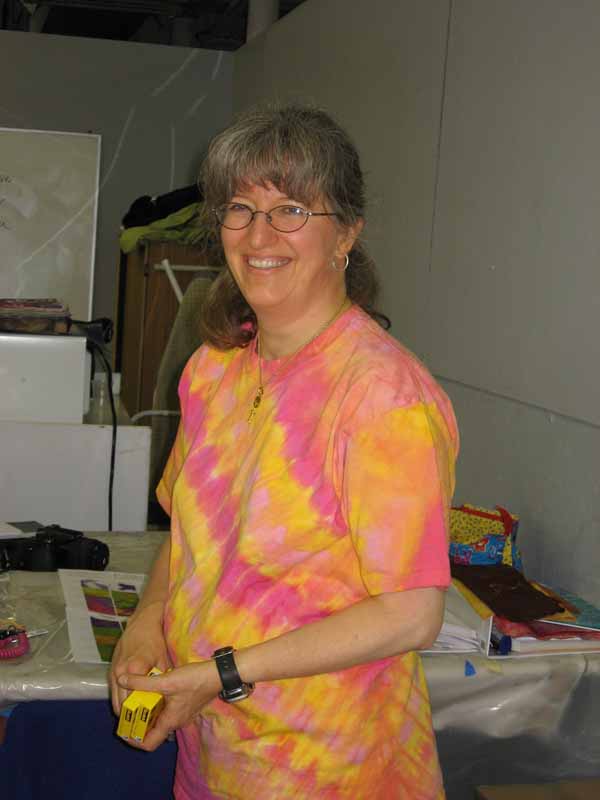
Quite a long time ago, about a year in fact, I took my second dyeing workshop with Carol Soderlund (wonderful! highly recommended!  go here to find out more!).  I tried again to get my dream-colored t-shirt, and this time succeeded! Here’s a picture Beth P. took of me (weighing, sigh, less than I do now):

SAS at Workshop in t-shirt

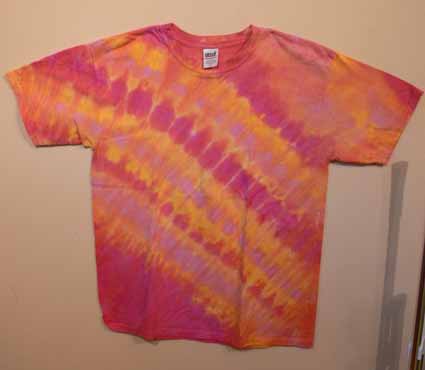
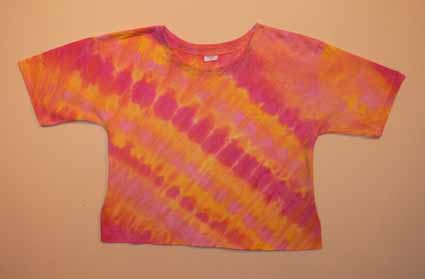
I knew back then that I wanted to re-make the shirt into a nicer top, but ProChem only had t-shirts in stock, plain old T’s.  Here is what the shirt looked like before I took to it with pins, sewing machine and scissors in late October:

T-shirt, before

I used fuchsia dye, the other red that is MX R4 (Fuchsia is 8R), a warm yellow and a cool yellow… it was pleated on the diagonal with the lines running from upper left shoulder to right hip.  The dye was then poured – squirted – painted on in the opposite diagonal.

First, I pinned out what I thought I wanted to take in on the sides and underarm, then went into the bathroom (which has a low enough mirror) to see how long I wanted the shirt to be.  I ended up cutting 5 1/2 inches off the bottom, then taking a 1 1/2″ hem.  I used a twin needle, which gives the double-straight stitch on the top, a zigzag on the bottom, and stretches just a little bit.

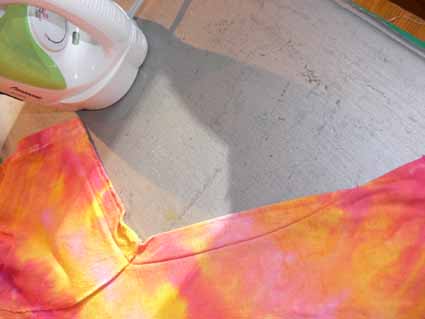
Second, I took in the sides (alas, I am not blessed with a generous bustline, tho in summer I actually am grateful), leaving the extra room at the bottom my hips need.  I also took in the sleeves a bit.  This photo shows the taper…from about 3/4″ at the hem of the sleeves, to a smidge over an inch at the torso, tapering to a point like a dart. I used the stretch stitch on my machine…basically it looks like three stitches on top of each other.

Side seam

For those of you with a larger bustline, you can also take vertical darts in the waist area underneath the bust for a more tailored fit…just put the shirt on inside out and pin.  Carefully.  Then REALLY carefully remove the shirt, try it on right side out and if it looks good, take it off even more carefully and stitch.

At first I wasn’t going to trim and finish the edges, but the amount taken in was enough that the underarm seam pulled unattractively, so I trimmed to 1/4″ seam allowance,  and zigzagged the edges.  Serging would also work, but I don’t have matching thread and didn’t feel like setting up the serger!

Square neckline mocked up

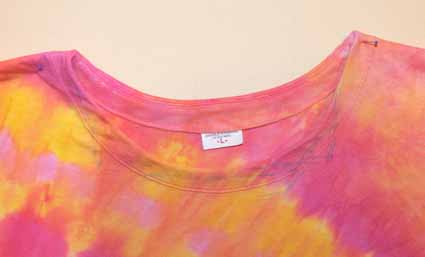
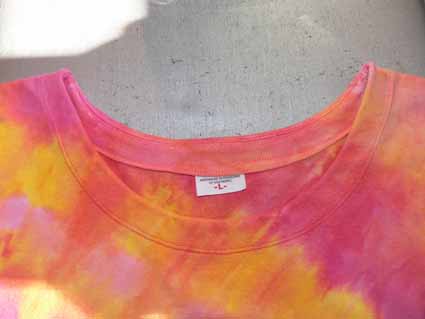
You might (?) be able to see the blue washout pen markings on the top in the photo above.  I look good in square necklines, so had planned to trim off the neckline edging and sew a facing using the cut-off fabric from the bottom.  However, I wanted this to be a simple tutorial, and–on a whim while checking out the fit after stitching the sides –turned the collar ribbing inside.  I liked the look!  So, I simply stretched the ribbing so that it would instead function as a facing, and topstitched it in place with the twin needle.  Here t is without the blue pen!

with blue stuff washed out, neckline

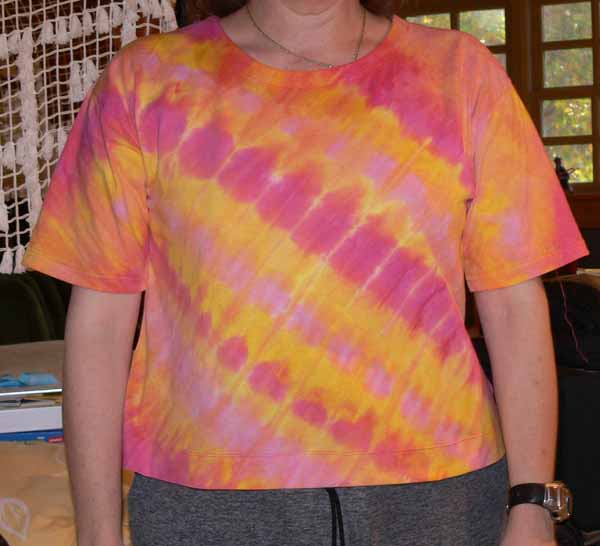
And here is a so-so picture of me (with no make-up and messy hair… what am I thinking putting a picture like this on the internet?????) in the shirt–sorry about the partial lobotomy…that’s what happens when you set the camera on timer to take a photo of yourself:

Sarah in shirt, angled view

And an even less flattering photo (I decided to decapitate myself with photoshop…the fat sloping chin was just too awful LOL!), but straight on so you can better see (?) the final result:

SAS in shirt, straight on

Remember the original look of the shirt?

T-shirt, before

Here’s the finished outline:

Finished shirt on design wall

All in all, I think it is a vast improvement over the baggy shirt.  Even with trying it on about four times, it took easily less than two hours to do everything.

Bow-Tucks Tote

Tuesday, November 11th, 2008

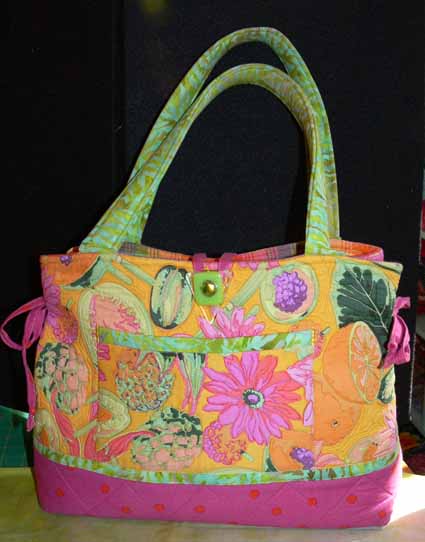
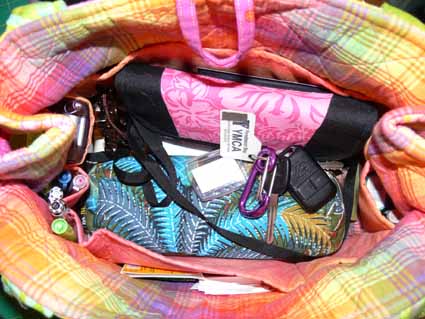
My how time flies!   I totally love my new totebag…which I made back in JULY!   I bought the glass button for it after teaching at Lowell, and here is is nearly November….. Well, better late than never!

Bow Tucks Tote

The pattern is by Penny Sturges of Quilts Illustrated (click on name for website homepage), and the pattern is listed here.  I think this must have been one of Penny’s first patterns, as the production value is–to be rather blunt–not so great…. the written instructions are on one page, the illustrations are on another….    Still, since I sew well I was able to make the pattern easily.  Because  the bag has fusible fleece on both the lining and the outside, it stands up beautifully, which I really like. I also really like how I customized the pockets… usually when I go to Houston / Festival I leave my regular purse at home, but this one is perfect…pocket for phone, for pencils, wide enough for wallet to go flat on the bottom, carry a small notebook AND the camera…. so it is going with me!

Tote inside

However, I would change a few things…. even my beloved work-horse Janome 6600 had trouble with the many thick layers on the sides where the pockets and lining (all with fleece) are stitched together. I think I’d trim the fleece so that it just barely misses getting stitched into the seams, at least on the pockets. One of the local quilters has made MANY of these, and she tried doing one with just a single layer of fleece, but we both agreed it was kinda floppy and we prefer the “stand-up-ish-ness” of the two layers.  Wonder if I can find a slightly lighter-weight fusible fleece somewhere?

And, I solved the problem of “embarrasing stuff spilling” by using an old round case, purchased in Gabon (central Africa) when we lived there in 1990.  All the little messy stuff goes in there…available but hidden.

Finally, the fact that you can tighten up or loosen the bows on the end means that when tied snugly to create the tuck, the opening on the top is really quite small…when on your shoulder it would be very difficult for someone to pick one’s pocketbook, so I don’t miss a zipper or flap at all.

The Elusive Crested Batiki Bird

Sunday, November 9th, 2008

Batiki bird

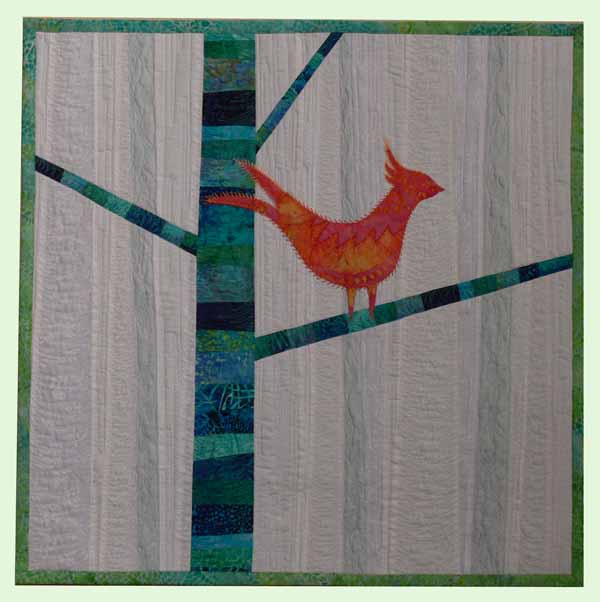
Thanks to Lark Books for letting me share this picture with you!   They are publishing another quilting book in Spring (May ish) 2009 geared to beginning and intermediate projects. I submitted several proposals, and they accepted this one, for a 26 1/2 square quilt or Euro Square pillow top.  Obviously, I’ll let you know more (like the title of the book) when it is out!

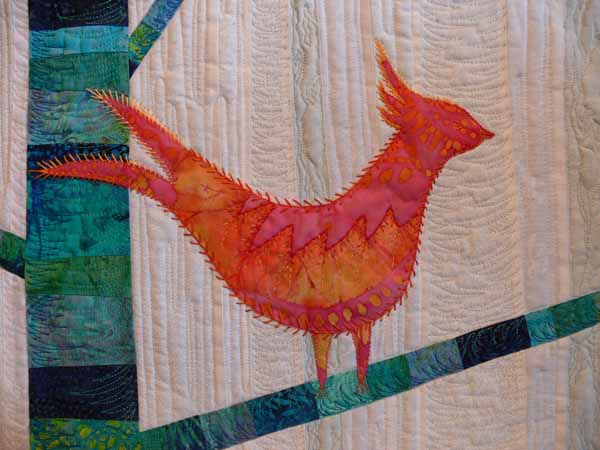
In the meantime, the piecing in this quilt is dead easy…NOTHING needs to match! It is four different white on white prints and a soft green-gray (used the wrong side to make the color even more muted) for the background.  The “birch” tree is improvisationally pieced also in  blue, aqua and green batiks, while the bird is fussy cut from a piece of batik. (Detail photos are clickable for larger views.)

Close up of Batiki Bird

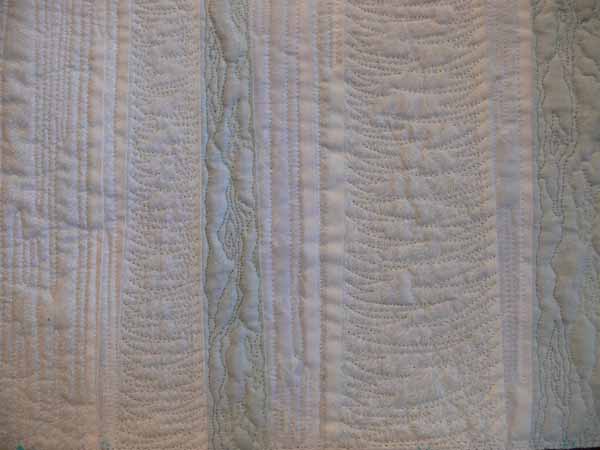
Oddly enough for me, after quilting the background to death (which IS typical), I hand embroidered the bird using some variegated DMC floss (one of the requirements was that all materials had to be pretty easily found, not like hand-dyed this or that or imported or whatever).  And here’s a close up of the quilting (can you tell I had fun?)

Quilting on batiki bird

And I MUST give credit where credit is due…. a whole bunch of years ago, when I lived on San Juan Island, we did a sort-of round robin with the Wednesday evening quilters (aka the Wild Rose Quilters):  each person (one a month until all of us got through) picked a block, then we all made blocks and gave it to the person.  Lunnette H-H. picked a block of birds, and we could make a sorta realistic bird or go wild.  Christy H.  made (or saw a block someone else made?) one of batik; when asked its name she said it was the rare batik-y bird.  I have always remembered and loved that name, so I adapted it to title this quilt… sure hope that’s OK!

How do you spell Joy? T-I-T-A-N-I-U-M

Thursday, November 6th, 2008

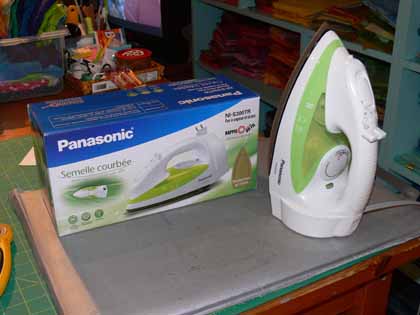
Yes, I am waxing rhapsodic about an IRON!  And the cherry on the sundae…it is lime green!

Panasonic Titanium soleplate iron

I had an iron by Panasonic with the Titanium soleplate for about 3 1/2 years before it died… I think the thermostat went haywire.  Alas, calls to Panasonic said they couldn’t repair it…it was “too old.”  Talk about a use-and-toss wasteful society!  Snarl… anyway, I couldn’t figure out a way to open it up without breaking the plastic housing, meaning even if I could find a handyman and the parts, or figure it out myself, I wouldn’t be able to re-assemble it.  Internet searches turned up the iron I wanted… In MALAYSIA!  Well, that wouldn’t work…

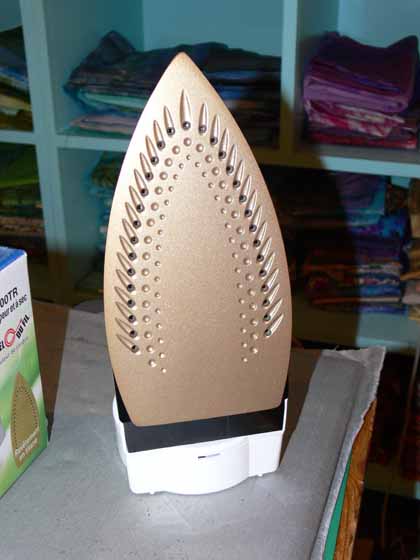
See, the problem is that MY definition of non-stick is different from most people, and different from iron manufacturers. To the companies that make irons, “non-stick” means doesn’t stick to fabric (well DUH) or to starch or spray sizing.   To ME, non-stick means you can get fusible adhesive web (Misty Fuse being my favorite, order here, or Wonder Under in a pinch) on the iron and wipe it off.  Other “non-stick” irons just didn’t cut it…only the golden-colored titanium soleplate seemed to make the critical difference.  The specifics:

Panasonic NI-S300 TR 1200-Watt Steam Iron with Curved Titanium-Coated Soleplate, white/green

Titanium soleplate iron

YES… it is TRUE!  You can put this iron down on top of fusible web, melt it all over the place onto the iron, then WIPE IT OFF with a paper towel!   No gunky mess, no “Iron-Off” brand hot iron cleaner with its seemingly-toxic fumes (that set off the smoke alarms!), no smelly dryer sheets to try to clean the iron, no scratchy salt-on-washcloth to try to clean the stuff off…. just wipe and go!

And where can you get this lime green beauty… AMAZON.com of course!  Here’s the link:

LINK TO Fuser’s Joy IRON by Panasonic

I can share this link now that I have mine…and my back-up iron is on order!  Yes, I have ordered a second, brand new iron as a back up for when this one dies…that’s how much I love these irons.

The only caveats I would add is that the soleplate can get scratched from pins, and after being dropped several times mine died after 3 1/2 years.  For $30, I can live with that.  I used to spend that much just on Iron Off or Faultless Hot Iron cleaner, and now I don’t have to breathe those nasty fumes from the cleaning products.

OK, I will now STOP raving about this wonderful iron…..

Over eighty percent voter turnout in Camden!

Wednesday, November 5th, 2008

Just a quick note…in amazement…. just read on the local on-line paper that voter turnout in Camden (with a population of  4042 in July 2007 according to one source, the US Census puts it at 5254, with 4221 of those being 18 or over) was over 3300 voters, or over EIGHTY percent of registered voters…. an astounding level of registration and participation.

WOW!

I can’t imagine there are many places in this country that exceeded that number…..well, apart from all the three voters in that tiny town in New Hampshire!