email Youtube

Home
Galleries
Blog
Workshops & Calendar
Store
Resources
About
Contact

Archive for the ‘Favorite Products’ Category

Christmas Quilts, Christmas Memories

Tuesday, December 27th, 2016

Christmas may be over officially for 2016, but it will come around again.  And now that the recipients (except for Kate C.–don’t read this post Kate!) have received and opened their gifts, I can share.   I’d love for you all to know about Christmas Quilts, Christmas Memories, edited by Karey Patterson Bresenhan and Nancy O’Bryant Puentes, the cousins who were half of the four (along with their mothers) who founded quilter’s Mecca, the International Quilt Festival.   This petite square book (my iPhone 6plus is a tiny bit taller) is a holiday gem of antique quilts and Christmas memories — and to my utter astonishment, including yours truly!
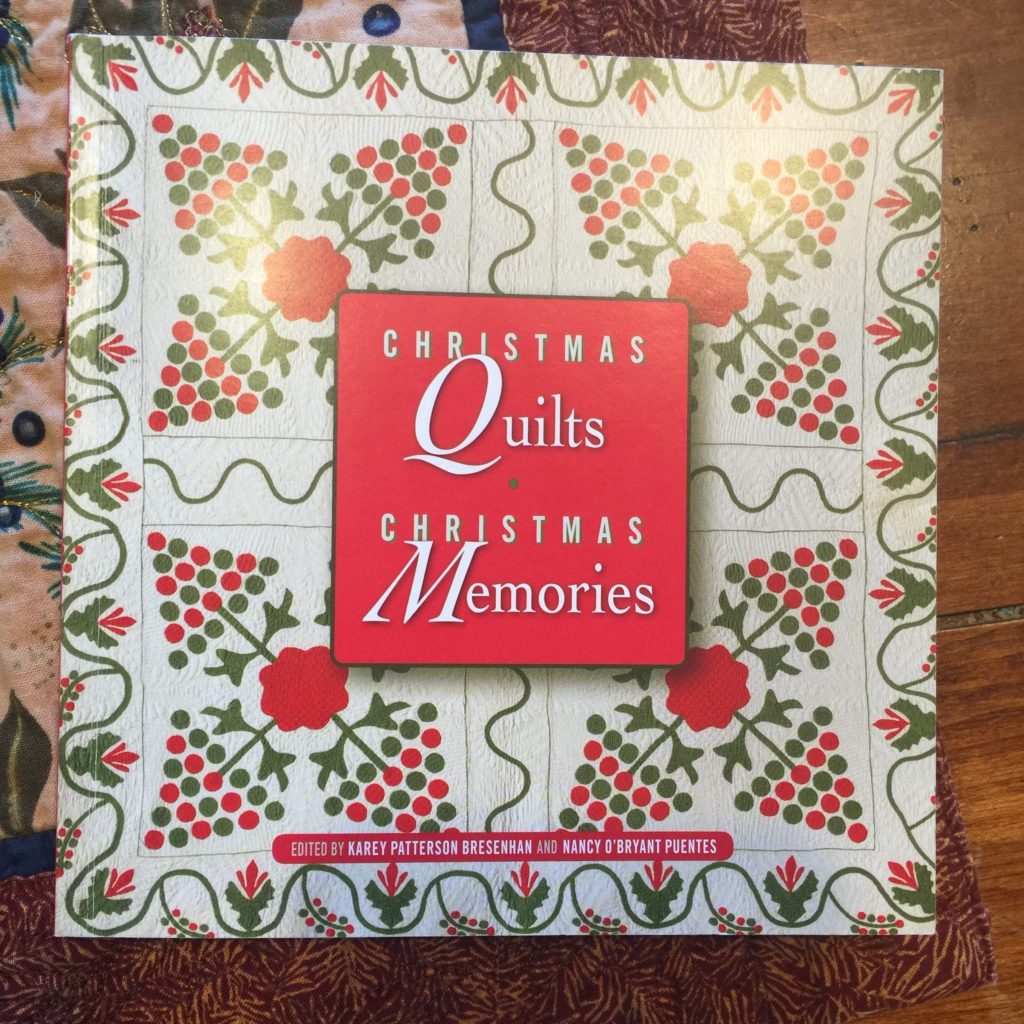
Christmas Quilts, Christmas Memories, Ed. Karey P. Bresenhan and Nancy O’B. Puentes, available from the Texas Quilt Museum

As a contributor, we received a complimentary copy at Quilt Festival this year.  I **devoured** the book on my flight home–literally read it cover to cover between Houston and Boston.  Well known folks from the quilt community and members of Karey and Nancy’s families shared special Christmas Memories with an antique quilt on the left page.   I was astonished that I know of or actually know most of the quilty folks in the book, and I just cherish that they shared their memories.  I knew I would order many copies to give before I got off the flight!  I gave copies to my sons hoping that they will eventually read the book and maybe find traditions they would like to start for their families and lives.
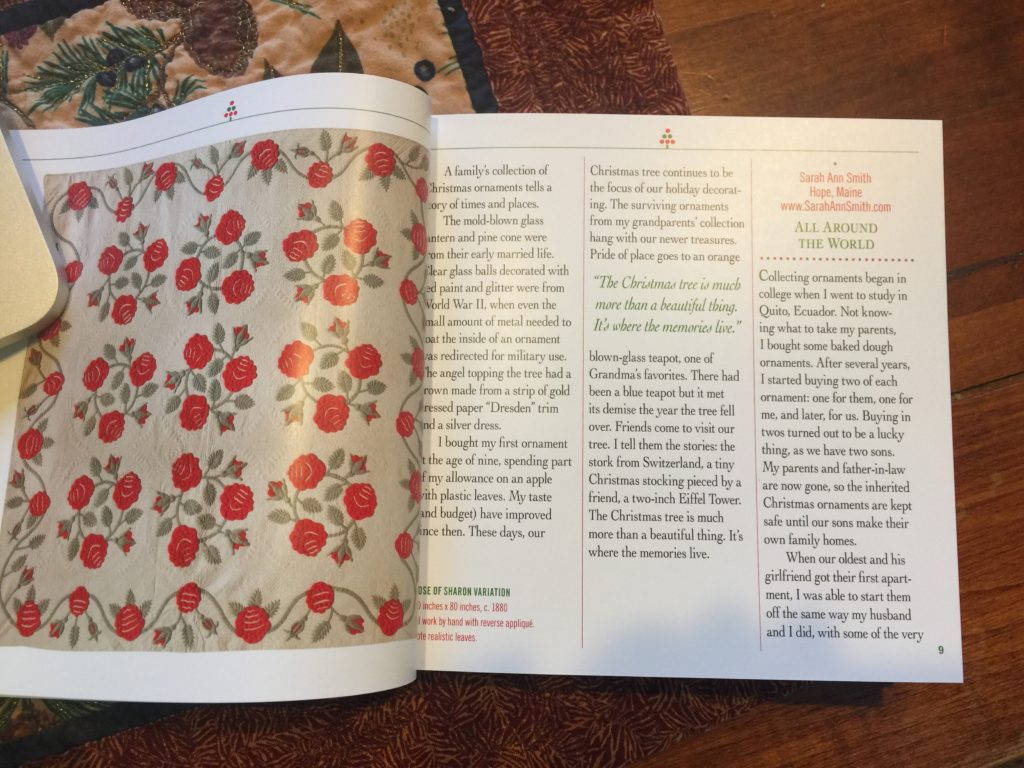
Here’s the start of my memory, about collecting ornaments from around the world, first as gifts for my parents, then as an annual tradition. What’s this year’s ornament going to be?

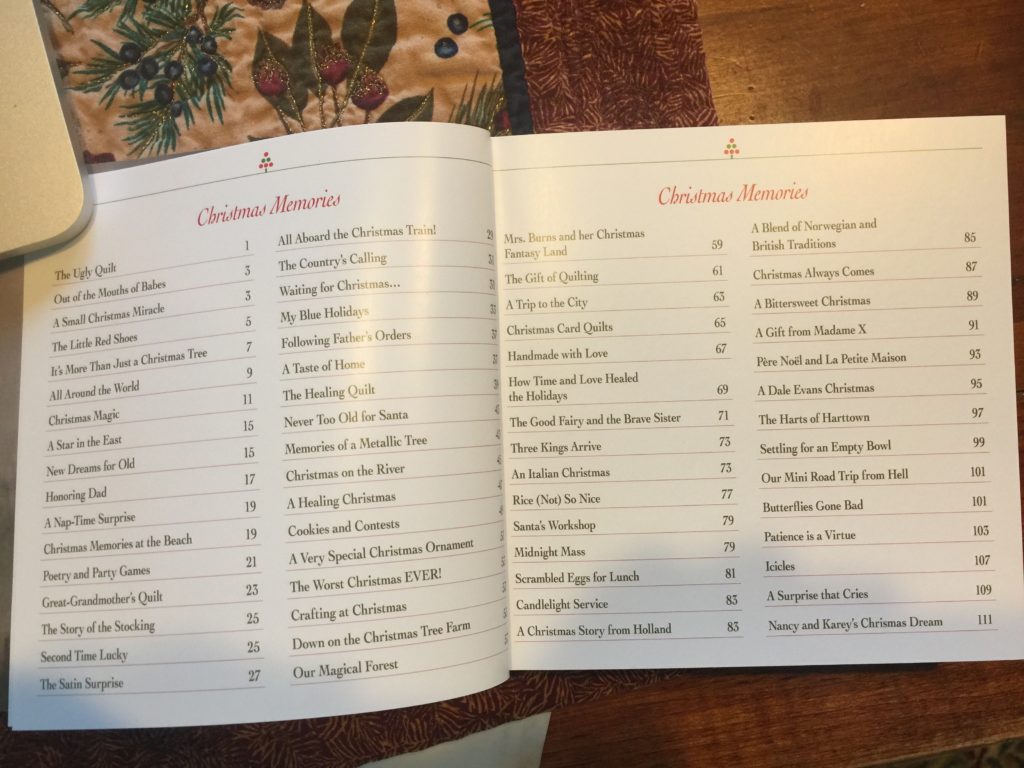
As I read through the book, I was more and more astounded that I was selected to have my memory included given who else is in the book.   As I read, I felt closer to those I know for their quilt pursuits, loved the glimpse into their every day lives and memories.   Here’s the stories and the contributors:

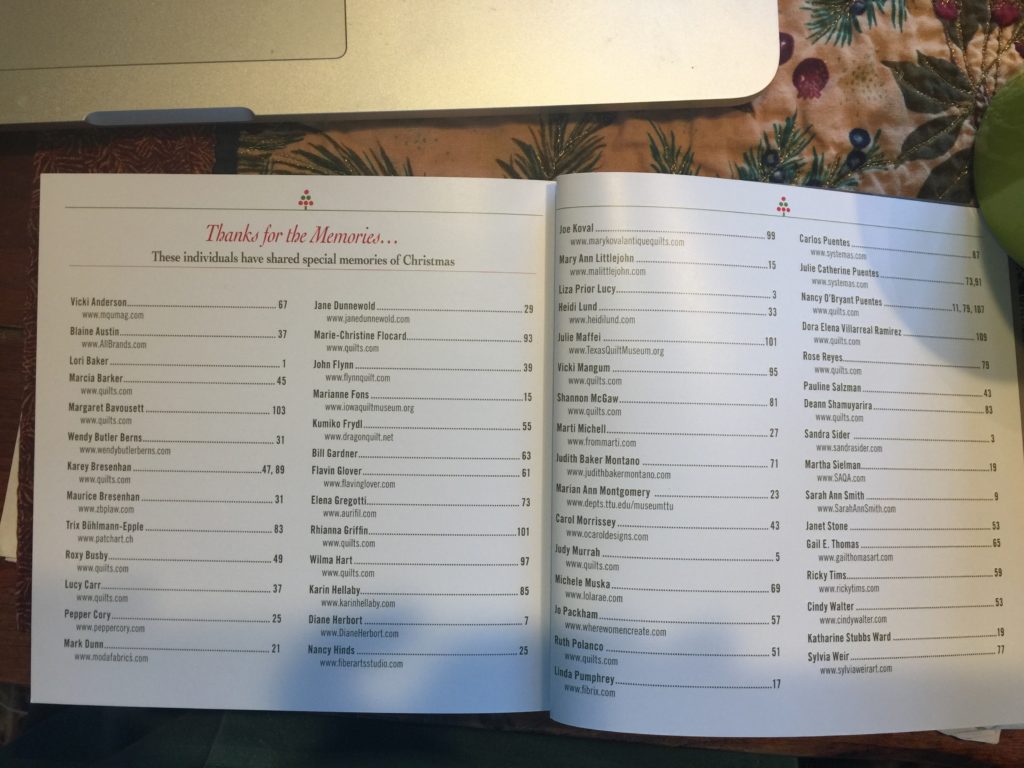
The Christmas Memories table of contents

and the contributors to the book

This book is small but delightful beyond all proportion to its size.  It is beautifully printed, fits nicely in your hands, and I’m so happy to have it, and still a bit gobsmacked to be in it!  You can order it from the Texas Quilt Museum website, here.

And what was this year’s ornament?  Well, one of the reasons our tree is groaning with stuff is that we added FOUR this year.  In my defense, the two blown glass ones were gifts for the boys to be taken to their own places when they are settled.   I am actually looking forward to sharing the bounty with them and not having quite so much to put on (and take off and put away) each year, but love sharing the story that goes with every ornament on the tree.
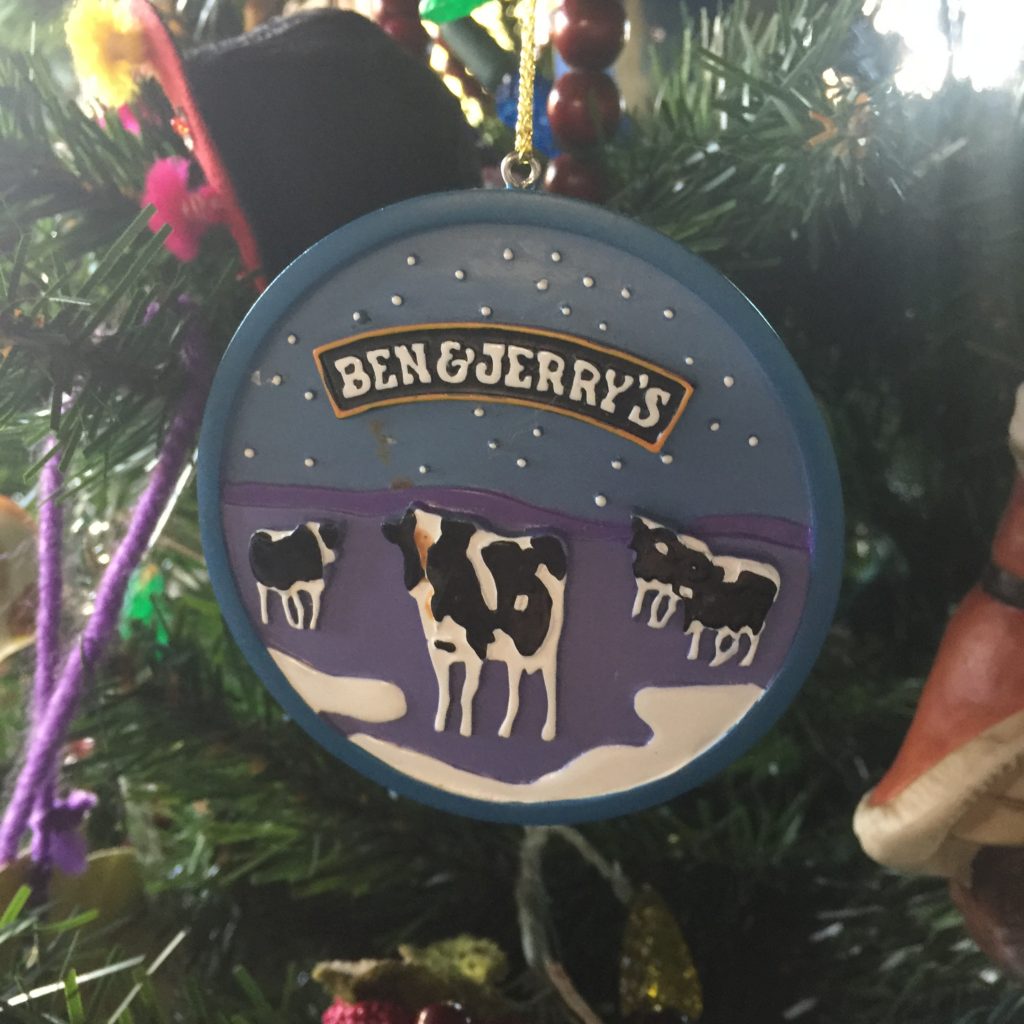
After Eli was accepted to F&M, we went on a college visit and took the long way home via Vermont and the requisite trip to Ben & Jerry’s factory (the original one) and tour. Of course I had to add an ornament–I navigate the world by ice cream stores!
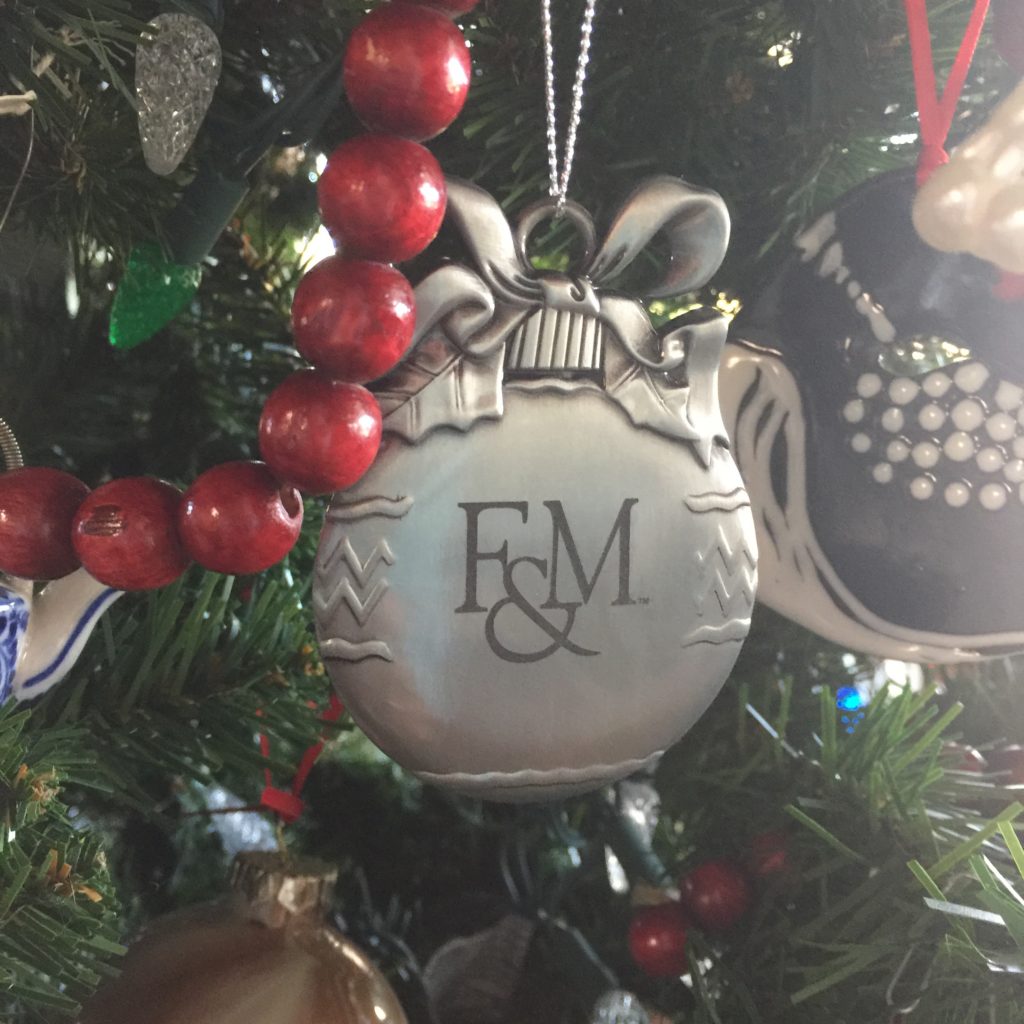
To commemorate Eli’s first year in college, a Franklin & Marshall ornament. Thanks to Eli for adding it to the tree.
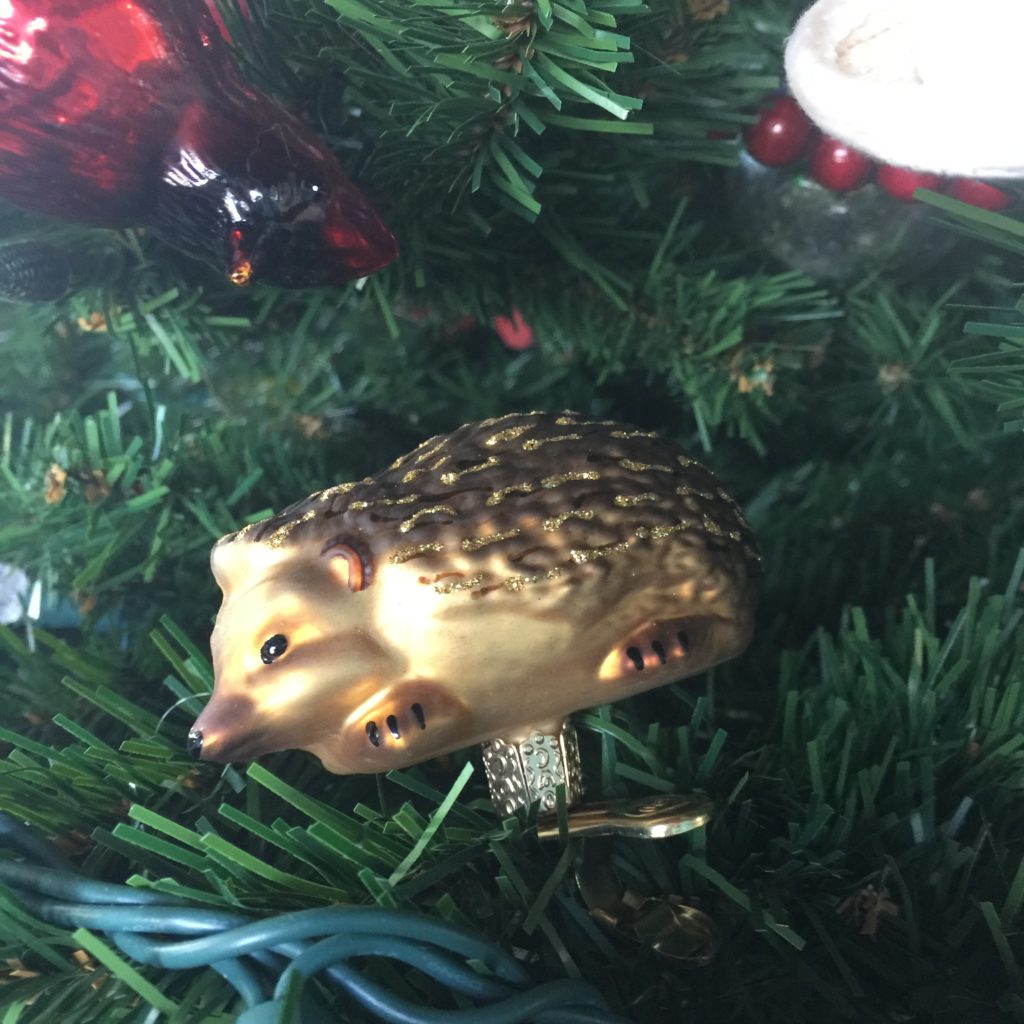
When Eli and I visited England 2 years ago, we went to St. Tiggywinkle’s hedgehog (and now other wildlife too) rescue, about an hour west of London. This one is for him.
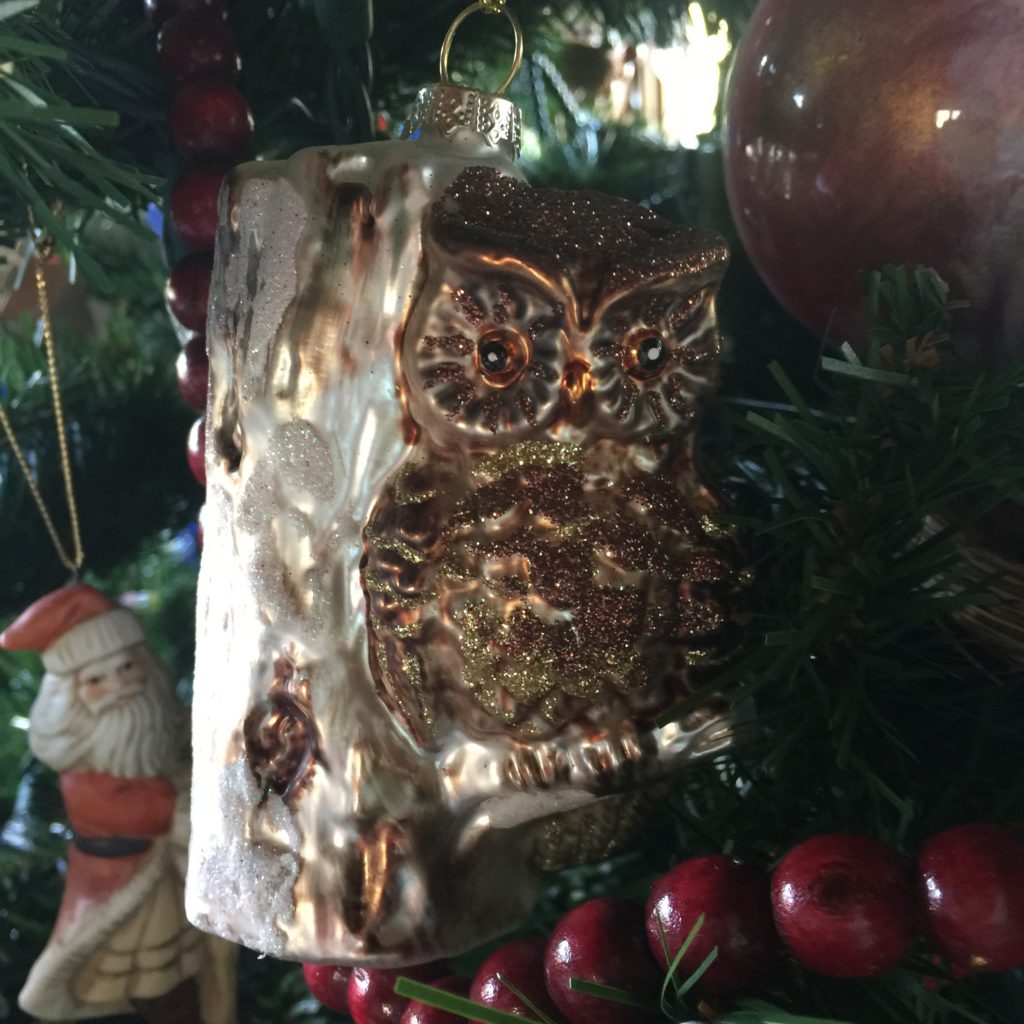
When we lived on San Juan Island when the boys were little, a great horned owl would perch in the fir tree beside our driveway, silhouetted against the night sky. Joshua remembers the owl and we were talking about it not long ago, so this one is for him.

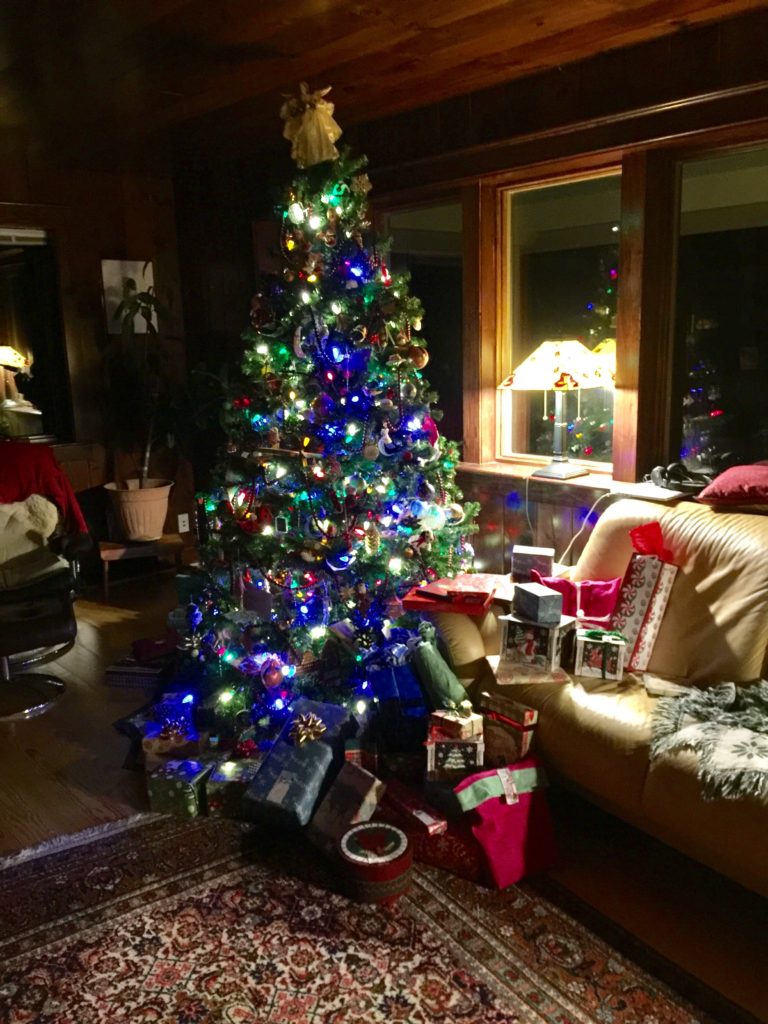
And here’s the groaning tree….honestly, I just LOVE IT!   And this year was beyond delightful because all three of the kids, Joshua & Ashley and Eli, helped trim the tree!

The tree on Christmas Eve after Santa arrived.  It was a particularly bountiful year!


Janome 9400 review

Monday, December 5th, 2016

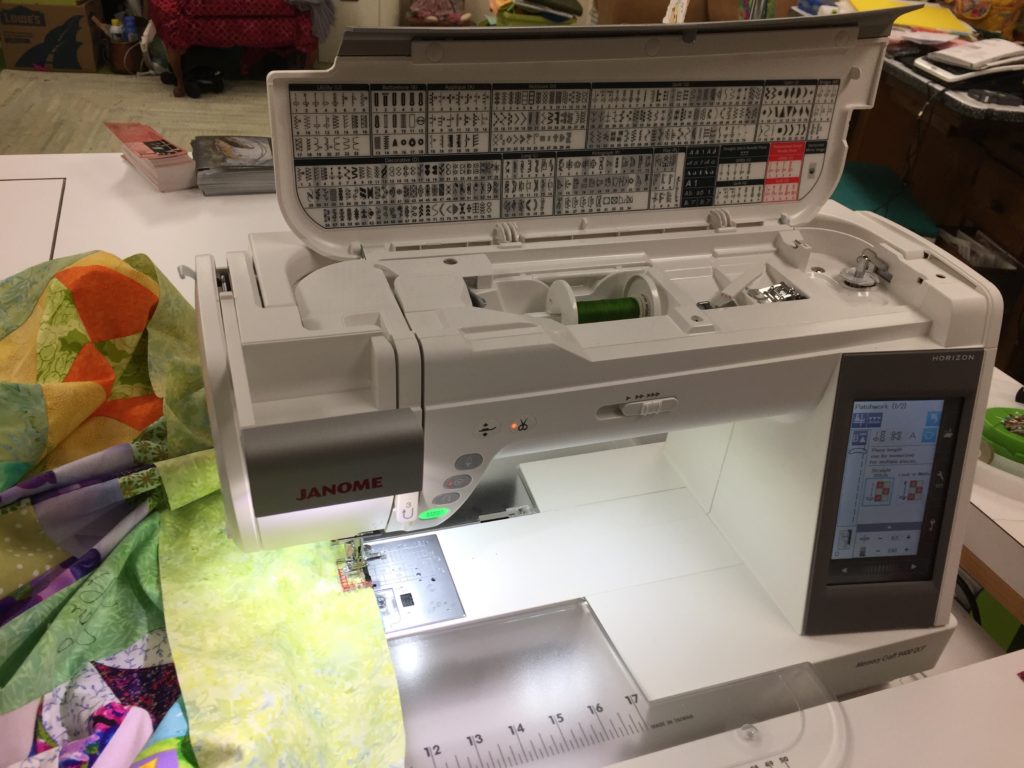
As many of you know, I’ve been fortunate to be affiliated with Janome America for many years and sew on their great machines.   They’ve come out with a new top-of-the-line NON-embroidery machine, the 9400.  And as I have come to expect, they take something that is already really good and make it even better.  We’re getting close to perfect!   To see the machine on the Janome site, go here.

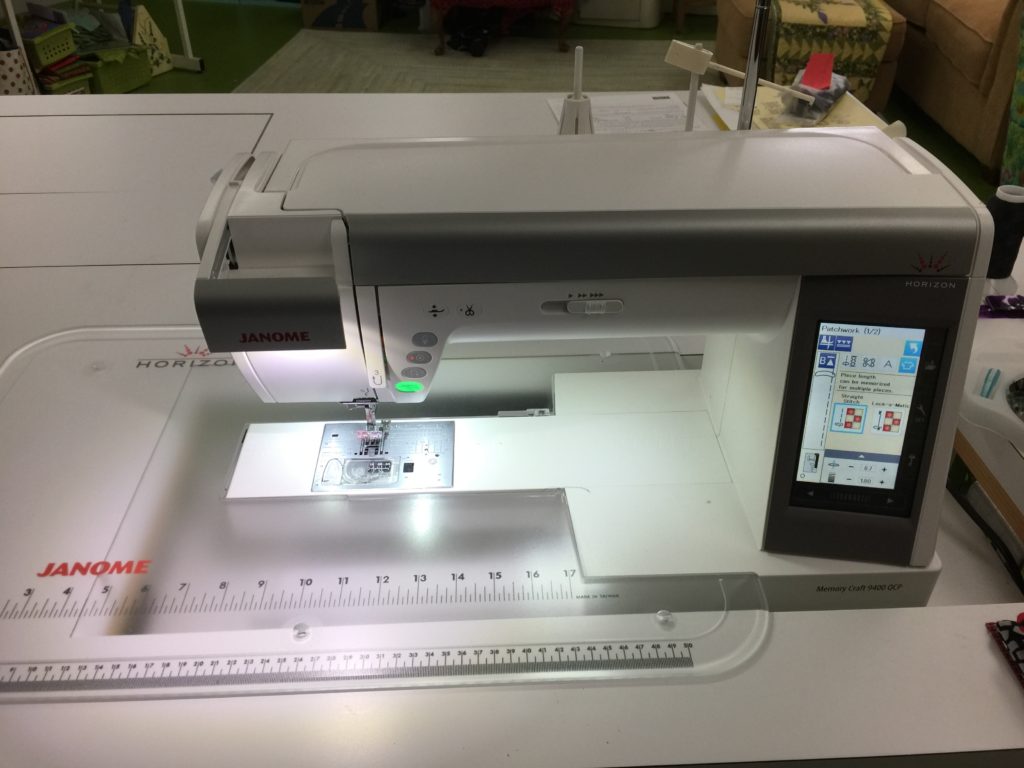
My newest sewing love, the Janome 9400!

My newest sewing love, the Janome 9400!  Notice the FABULOUS lighting?  I love the pull-out light, too!

Over the past few months I’ve been able to put the machine through its paces, making a knit top, finishing a set of quilted placemats, finishing a small bag with zipper, and (who me?) piecing several quilt tops.   The machine excelled at everything I threw at it!  The 9400 has taken many features from the top of the line embroidery and sewing 15000 machine, including that awesome light on the top left that slides out.  I think the design of it  on the 9400 is even better than on the 15000, as it curves a bit.

One of the first things I did was some class samples for my Easy-Peasy Inside-Out Bag….including installing a zipper.

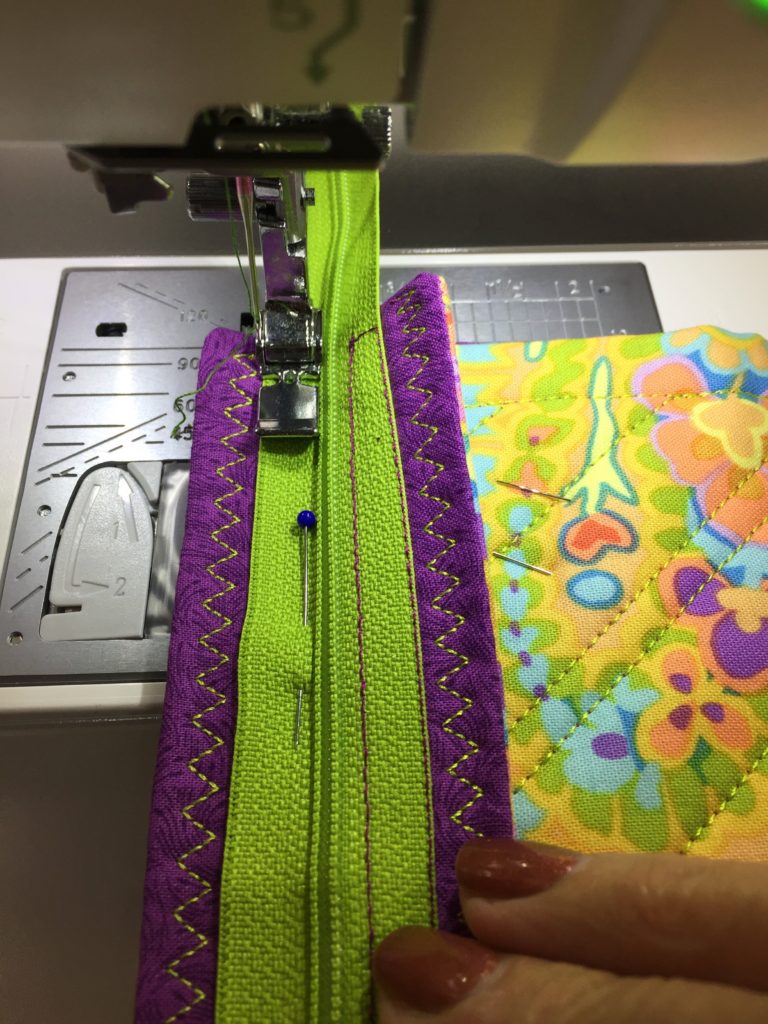
Zipper insertion for my Easy-Peasy Inside-Out Bag class sample.   Notice how the zipper foot fits PERFECTLY, allowing me to use the zipper coil as a guide and getting the stitching **perfect** ?  I used plum stitching as a decorative accent on the right side of the zipper, and am now stitching the second side of the left half of the zipper.

Zipper insertion for my Easy-Peasy Inside-Out Bag class sample. Notice how the zipper foot fits PERFECTLY, allowing me to use the zipper coil as a guide and getting the stitching **perfect** ? I used plum stitching as a decorative accent on the right side of the zipper, and am now stitching the second side of the zipper.

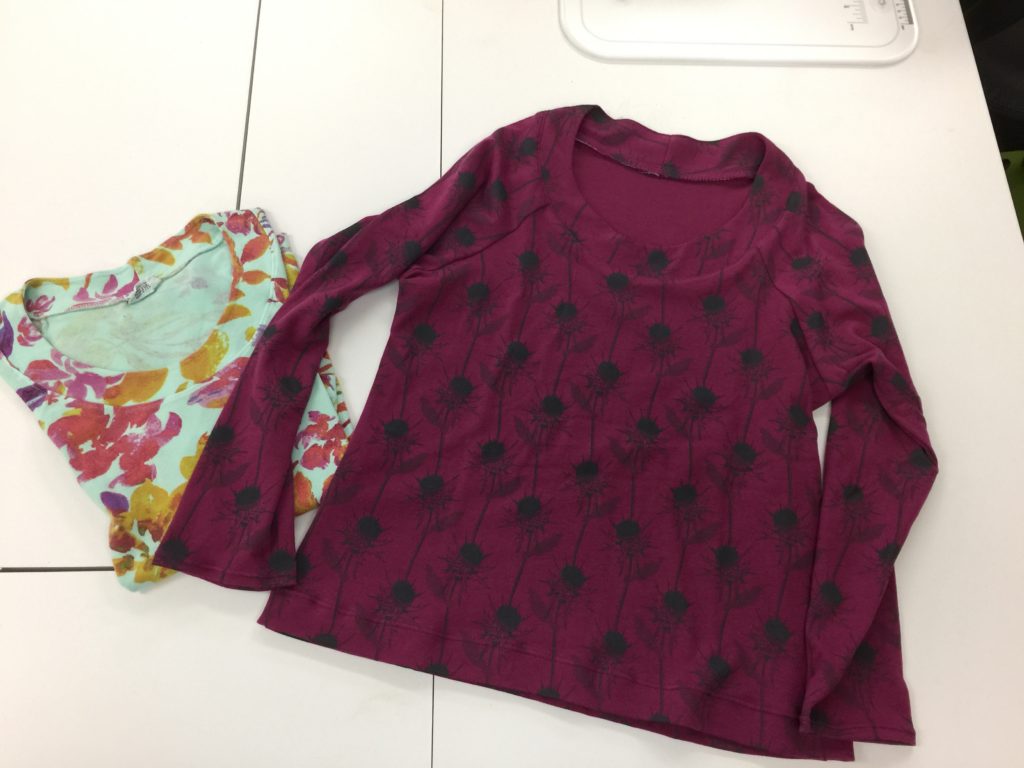
A bigger challenge, for both me and the machine, was to make a new top.  I fell in love with the plum knit and bought it a year or so ago.   I also love the aqua top, which is showing its age.  I did a “rub off” which is where you make your own pattern using an existing garment.  You can trace (with garment on top of paper) or rub (with garment under paper) to feel the edges and create pattern pieces.  I extended the sleeves from 3/4 to full length, and am delighted at the machine and the results.

Success!  I actually made a KNIT garment.  The original shirt (purchased) is on the left. After making the pattern from that shirt, I made the plum one on the right.  I'll do a separate blogpost later this week with more info on how I did it and which stitches used.

Success! I actually made a KNIT garment. The original shirt (purchased) is on the left. After making the pattern from that shirt, I made the plum one on the right. I’ll do a separate blogpost later this week with more info on how I did it and which stitches used.

I also have done quite a lot of piecing.  I used the P foot which comes with the machine for my quarter inch seams, but decided to use the optional Clearview foot which I prefer.   In a second project (which I can’t share yet because it is a Christmas surprise) I was astounded at how accurate my results were; I am NOT a piecer, and the feed on the machine worked very well (until my attention wandered, at which point I simply cut the threads, went back to my oops and fixed it).

Using the ClearView foot for piecing

Using the ClearView foot for piecing.  I really like the red 1/8 and 1/4″ markings. This foot is available for both Janome’s  7mm and 9mm machines (the 7 and 9 refer to the maximum stitch width–you need to be sure you get the correct one to fit the “ankle” for your machine). Have I said how much I love it?

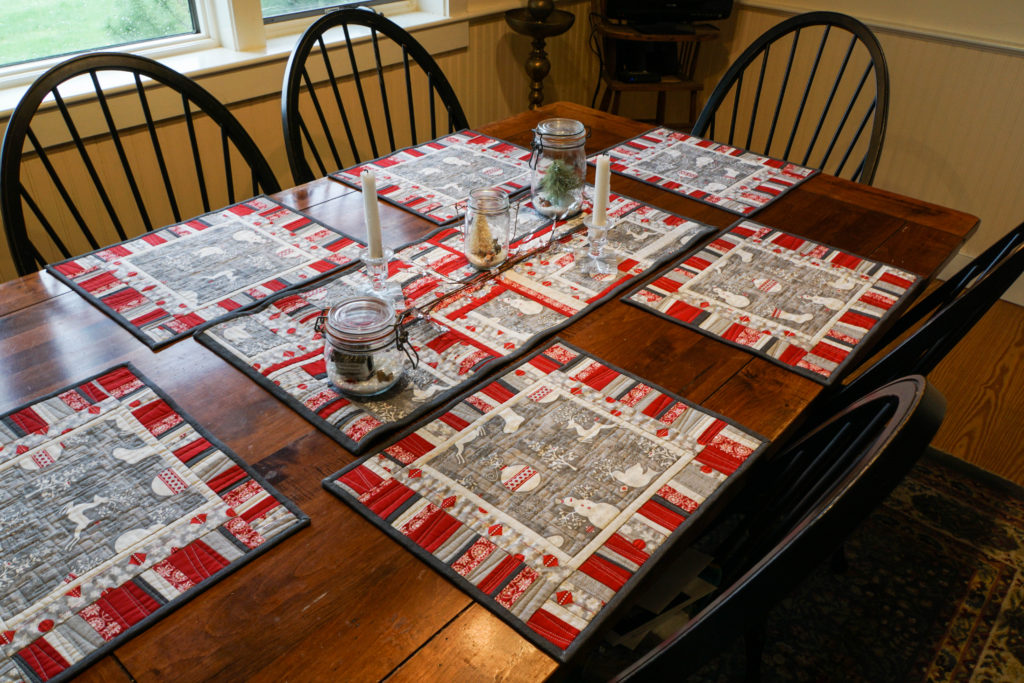
I also have been able to do both free-motion and walking foot quilting, though not as much yet as I would have liked.   I finished a set of placemats and table runner called Modern Winter, which I prepared for Janome’s blog.  You can find the pattern and information here.

Modern Winter placemats and table runner.

Modern Winter placemats and table runner. Instructions/pattern on the Janome site at the link.  

The one thing I keep trying to convince Janome to do is to create feet for the top of the line machines that is similar to the convertible FMQ (free motion quilting)  feet for the Janome 8900/8200 and similar which I think are the best quilting feet Janome makes.   In addition to the traditional “hopping” or darning foot used for free-motion quilting, the 9400, 15000, 12000 all have the QO and QC skimming FMQ feet which snap on to the ankle (which is really quick and easy).  However, these feet are clear plastic and not round.   They work great for most people’s purposes, but if you look at pretty much ALL quilting machines, the preferred and nearly universally available feet are metal CIRCLES.  The metal is stronger and can, therefore, be thinner, which affords greater visibility.  And by being a circle, you can echo quilt around (for example) an appliqué, then  continue with free motion without having to change feet.  This is a small quibble but one that is important to me.

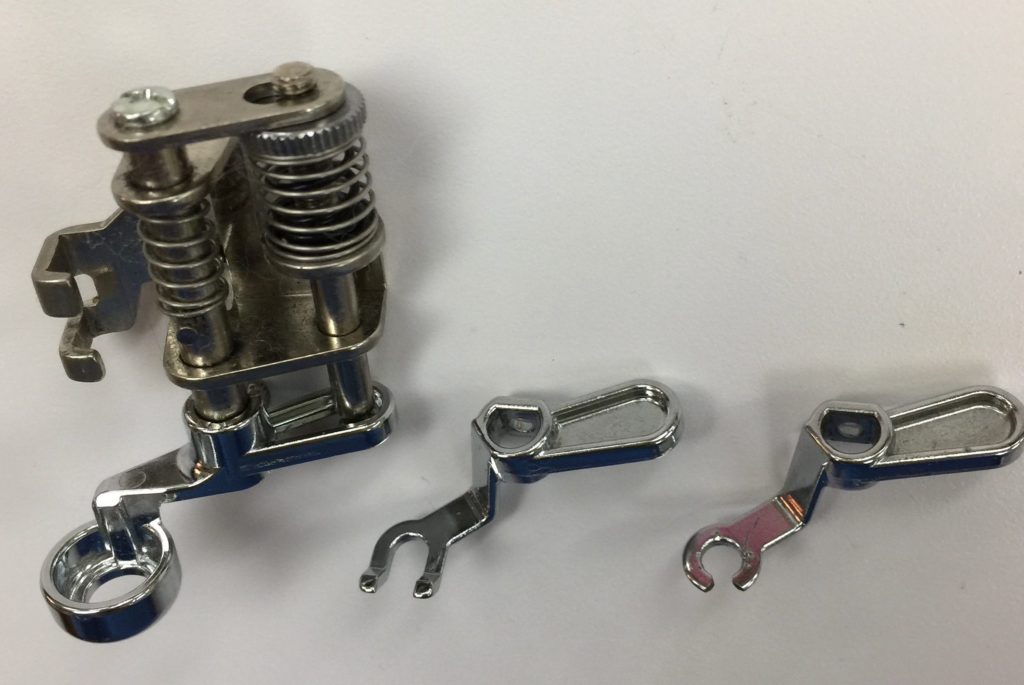
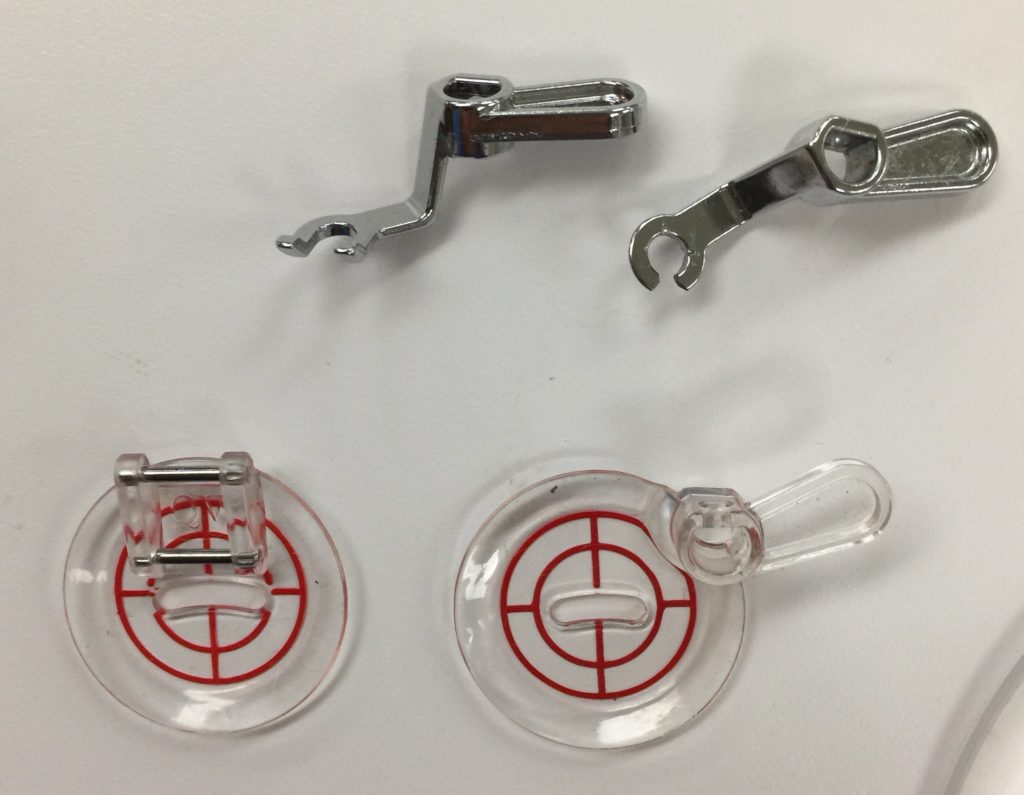
The foot on the left is the Ruler Foot for the 8900, and the two bits on the right are the optional bottoms for FMQ, the open U (as Janome made it) and the circle (which Janome made closed, but I used my Dremel to open up a tiny bit)

The foot on the left is the Ruler Foot for the 8900, and the two bits on the right are the optional bottoms for FMQ, the open U (as Janome made it) and the circle (which Janome made closed, but I used my Dremel to open up a tiny bit).  I would LOVE these options for the top of the line Janome machines (9400, 12000 and 15000).

One of the

One of the really cool things about the 9400 (which came down to it from the 15000) is the snap on feature for some of the quilting feet.  In this image, you can see the echo quilting foot, the clear disc with red circles/lines, for the 9400 on the lower left.  It just pops on and off the ankle like regular feet–fast, easy and effective.  The other three in this image are from the bottom of the convertible FMQ foot for the 8900; you have to screw them on to the holder which is a small fuss.  

I was MOST impressed at International Quilt Festival, Houston, this year.  I introduced myself to the president of Janome America to say thank you for Janome’s continued support for the past decade-plus, and to ask about developing these feet for the 9400 and 15000 (and 12000).  He whipped out a notebook and took notes!   So as soon as I finish this post, I’m going to follow up with him with details I’ve been mulling over on how best to meet ALL needs for quilting–both hopping and skimming. Love Janome’s responsiveness!  He said he’d send the info to headquarters in Japan–can’t do more than that!

Although you can read it on Janome’s site, I’m adding some info about the features and accessories included on this machine.  Best of all, a lot of stores are offering “Holiday Incentives” on the price!

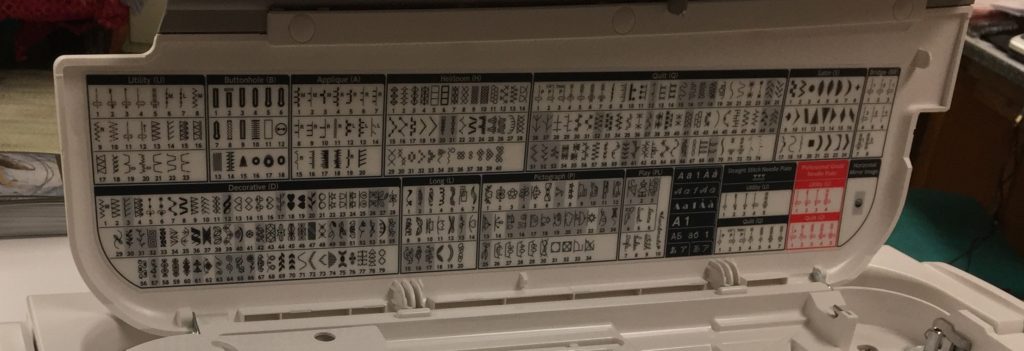
Janome 9400 Stitch Chart

Janome 9400 Stitch Chart…hooray, my favorite stitches are still here!

Key Features:

  • Top Loading Full Rotary Hook Bobbin System
  • 350 Built-In Stitches and 4 Alphabets
  • Superior Needle Threader
  • Cloth Guide Included
  • One-Step Needle Plate Conversion with 3 Included Plates
  • Detachable AcuFeed Flex Layered Fabric Feeding System
  • USB Port and Direct PC Connection
  • Stitch Composer Stitch Creation Software
  • Variable Zig Zag for Free Motion Quilting
  • Straight Stitch Needle Plate with Left Needle Position for 1/4″ Seam Foot
  • Professional HP Needle Plate and Foot
  • Advanced Plate Markings
  • Full Color LCD Touchscreen (4.4″ x 2.5″)
  • Sewing Applications On-Screen Support
  • Maximum Sewing Speed: 1,060 SPM
  • Full Intensity Lighting System with 9 White LED Lamps in 4 Locations
  • 11″ to the Right of the Needle
  • Retractable High Light

Included Accessories:

  • 1/4 Inch Seam Foot O
  • AcuFeed Flex™ Dual Feed Holder with AD Foot
  • Automatic Buttonhole Foot
  • Blind Hem Foot G
  • Button Sewing Foot
  • Cloth Guide
  • Darning Foot
  • Extra Large Foot Controller
  • Free Motion Quilting Closed Toe Foot
  • HP Plate and Foot Set
  • Open Toe Satin Stitch Foot
  • Overedge Foot M
  • Remote Thread Cutter Switch
  • Rolled Hem Foot
  • Satin Stitch Foot
  • Seam Ripper
  • Straight Stitch Needle Plate
  • Zig-Zag Foot
  • Zipper Foot E

So that’s my recap!  I’ll do a couple follow-up posts on the placemats and shirt projects.  Stay tuned!

Sweet Sixteen for sale…nearly new!

Monday, October 3rd, 2016

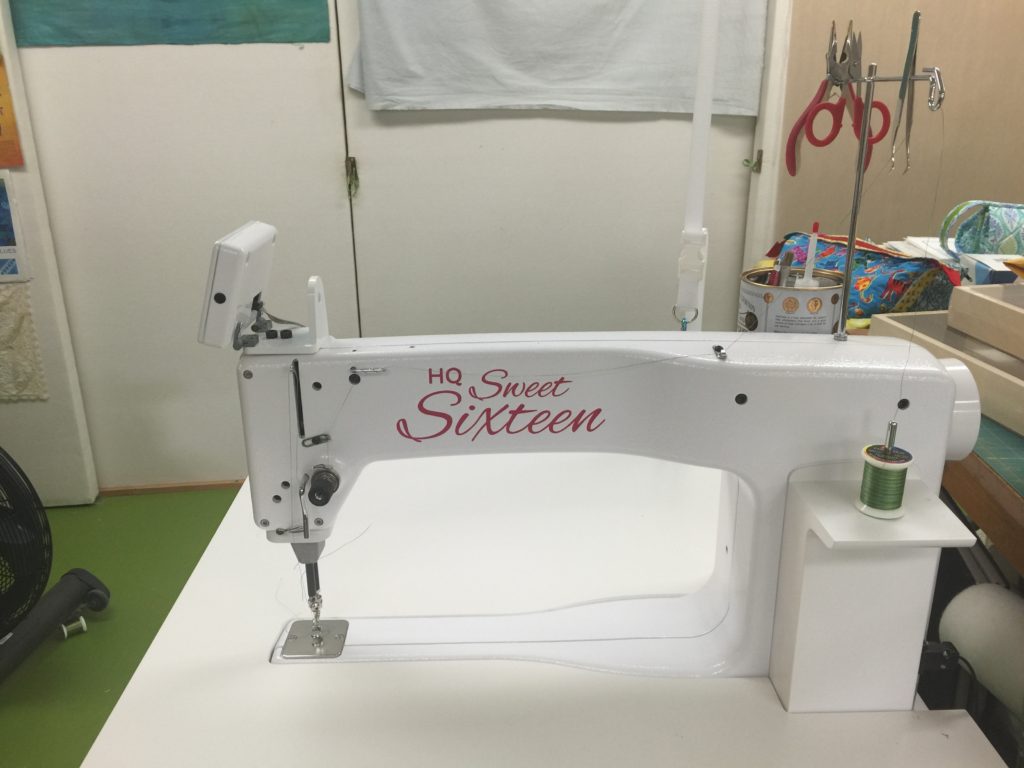
Update:  machine is sold.  About a year ago I took delivery of a wonderful machine:  the HQ Sweet 16 sit-down quilting machine.  It has both regular and ruler feet, all the regular parts.  In outstanding working order, well maintained, clean.  I’ve got all the original packing materials for transporting it to you.   I’m also including 14 M-class bobbins (empty) and a bunch of appropriate machine needles.  I will say the HQ dealer and tech support is OUTSTANDING.  I’ve decided to upgrade, and need to sell this one to make way for the next beastie.  MSRP is $5,599. For sale for $3750 plus shipping.  If you live within a 4 1/2 hour drive of Camden, Maine, I’ll deliver to your driveway free of charge!

Contact Sarah at the Contact Me page or comment on this post.  You can also find more information about this beauty on the Handiquilter site here and here.

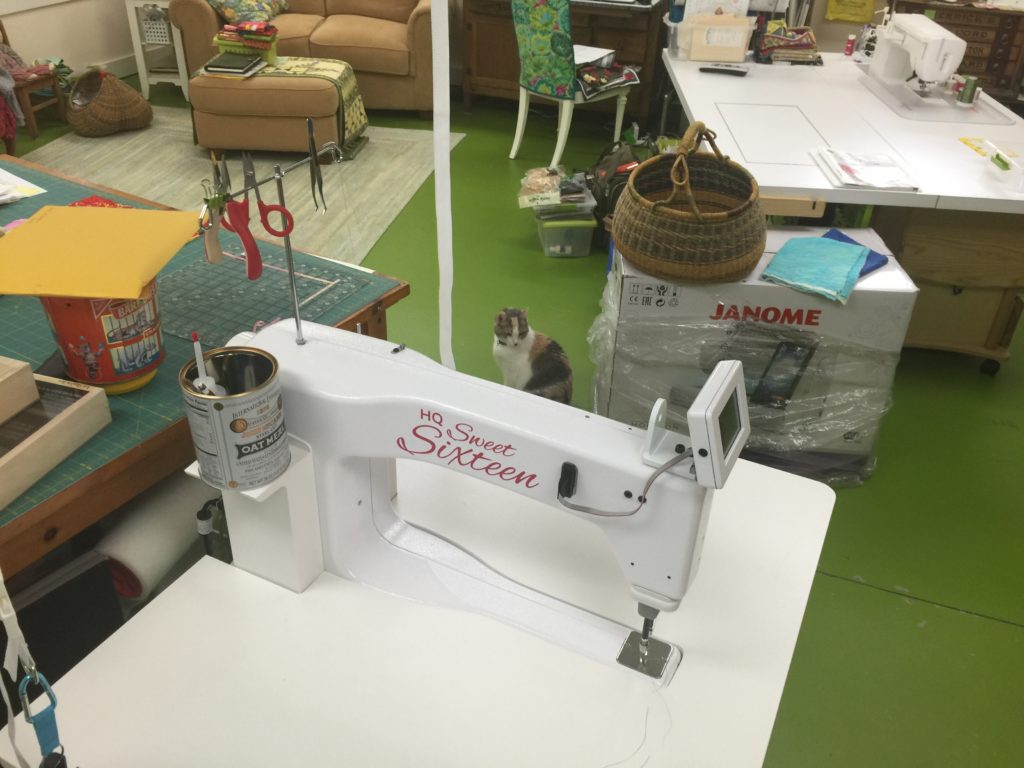
HQ Sweet Sixteen for Sale (Sept 2016), just under one year old, mint condition

HQ Sweet Sixteen for Sale (Sept 2016), just under one year old, mint condition.  Cat not included. This is the most recent version of the Sweet 16 and has the thread tension information (so it’s not a guessing game).  Does not have a stitch regulator, but it can easily be added (consult with your local Handiquilter dealer). Contact Sarah here, sarahannsmith.com/contact.php

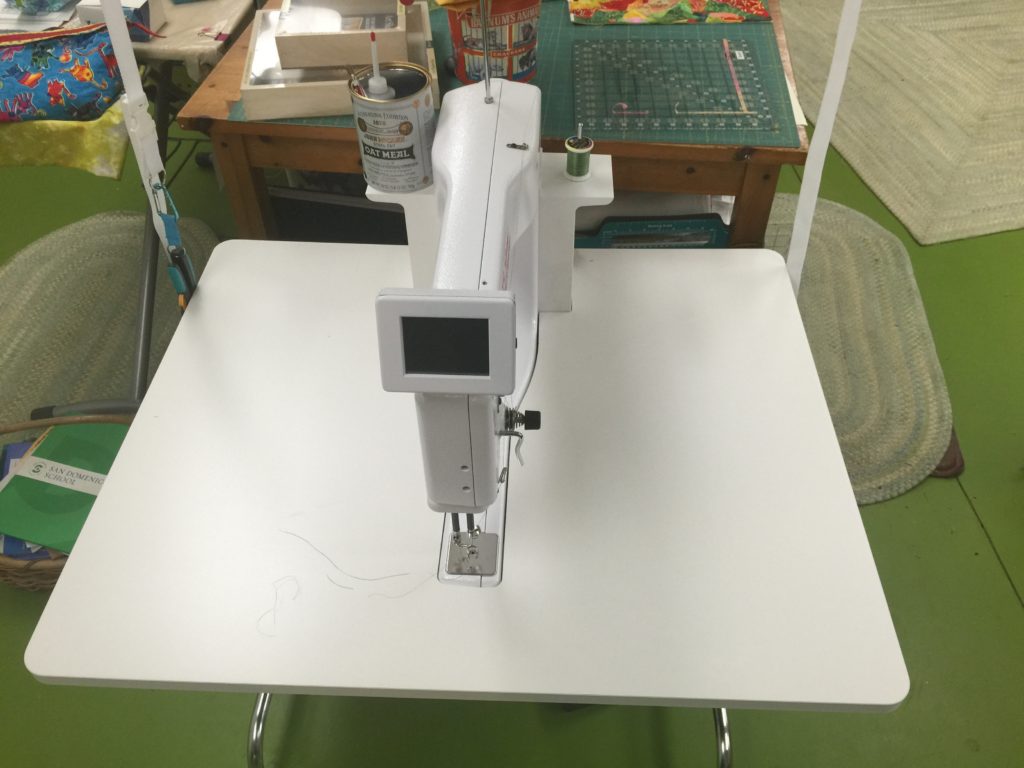
Straight on view of HQ Sweet Sixteen for sale. Use the contact me page at SarahAnnSmith.com for more info.

Straight on view of HQ Sweet Sixteen for sale. Leave a comment or use the contact me page at SarahAnnSmith.com if you are seriously interested and have questions.  More pictures at end of blogpost.

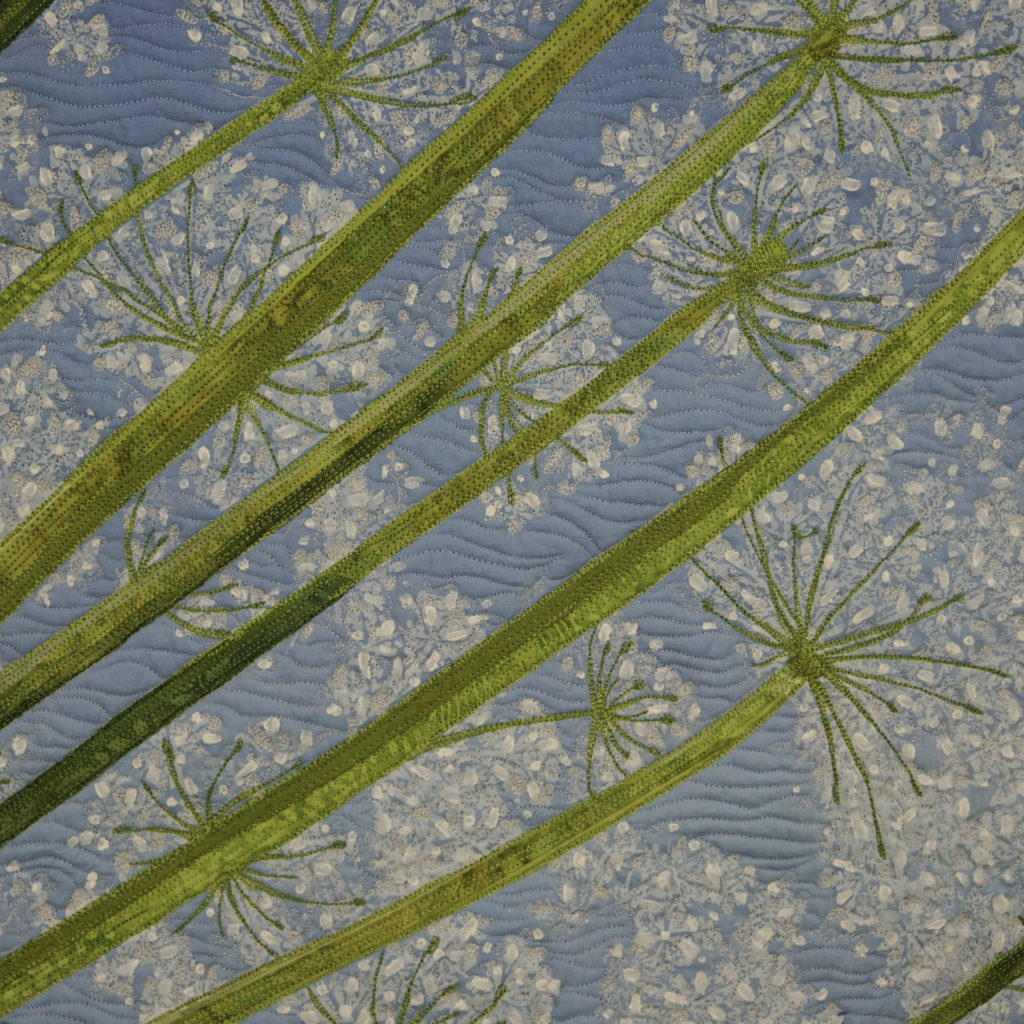
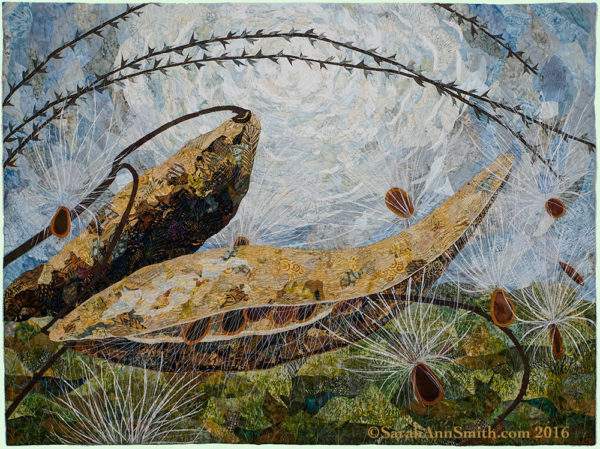
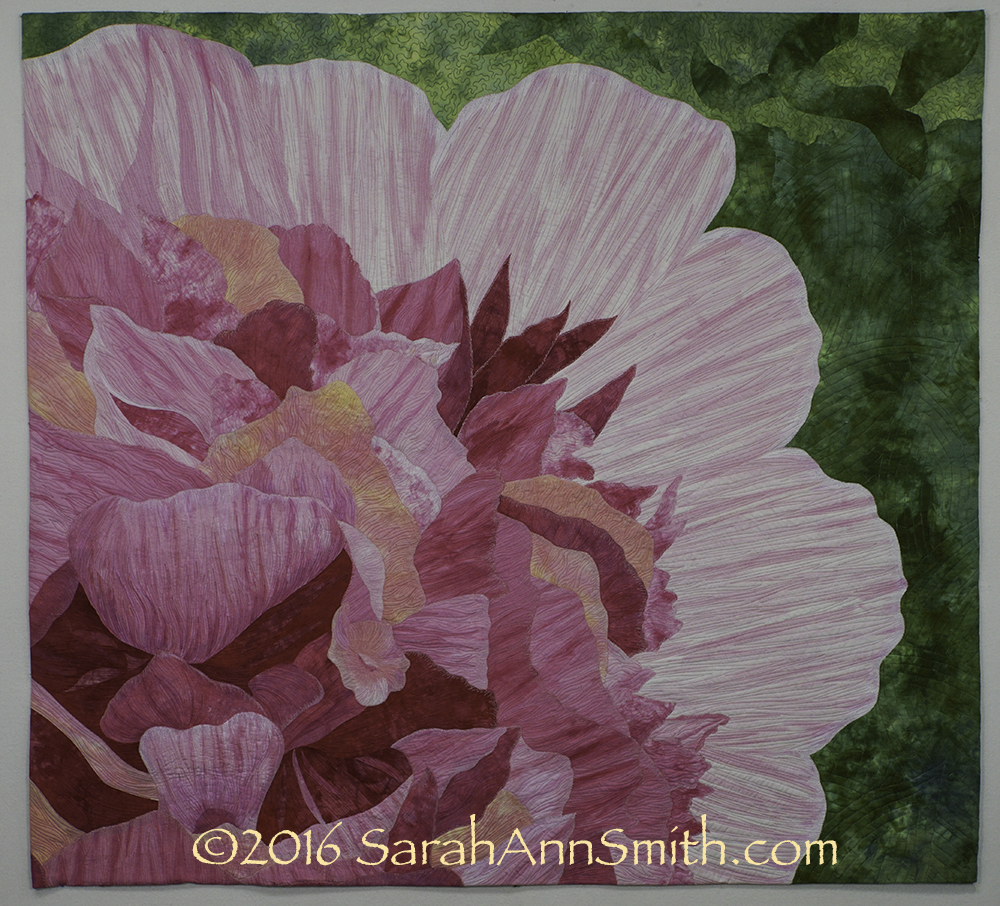
Here are three quilts I have quilted on this beauty, so you can see the quality of the stitching:

Umbelliferous: Queen Anne's Lace No. 1, quilted on the Sweet Sixteen sit-down machine for sale.

Umbelliferous: Queen Anne’s Lace No. 1, quilted on the Sweet Sixteen sit-down machine for sale.

Detail showing quality of stitching, Umbelliferous: Queen Anne's Lace No. 1, (c) Sarah Ann Smith.com

Detail showing quality of stitching, Umbelliferous: Queen Anne’s Lace No. 1, (c) Sarah Ann Smith.com

My most recent project, Peony, done on the Sweet 16. ©SarahAnnSmith.com

Milkweed No. 1, ©SarahAnnSmith.com. Quilted on the Sweet 16 that is for sale.

Milkweed No. 1, ©SarahAnnSmith.com. Quilted on the Sweet 16 that is for sale.

My most recent

My most recent work, Peony, quilted on the Sweet 16.  ©SarahAnnSmith.com

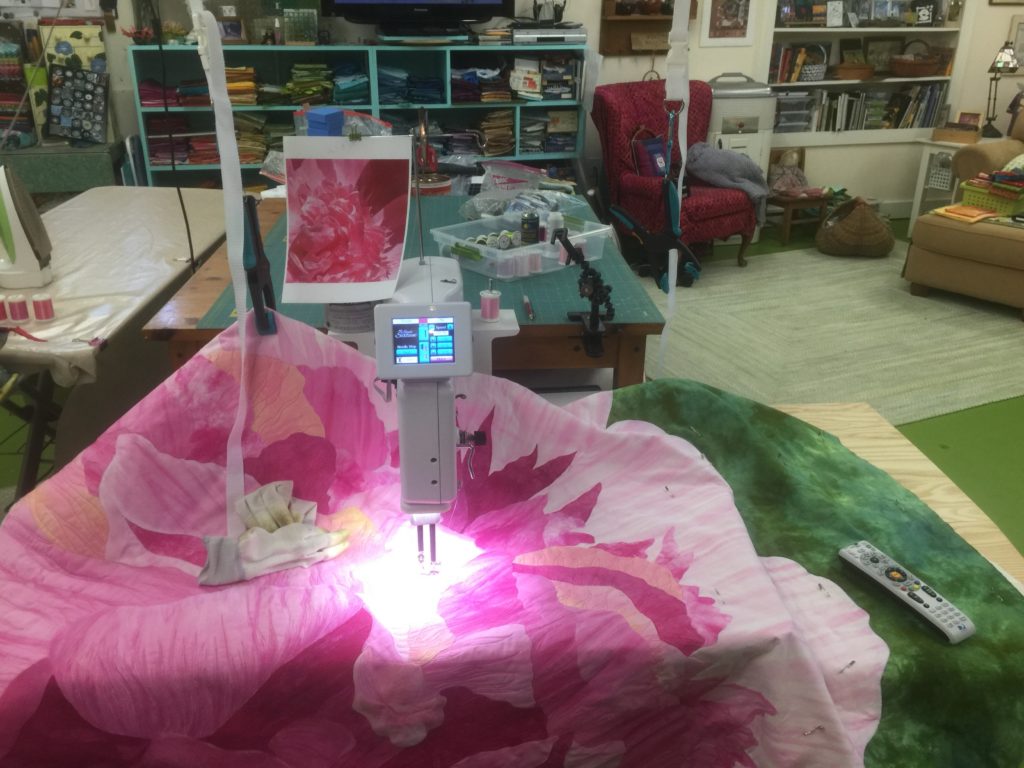
Working on the lighter petals on the big peony quilt. It will finish about 45x55 I think.....depends on how much I trim off and/or turn to the back.

Working on the lighter petals on the big peony quilt. It will finish about 45×55 I think…..depends on how much I trim off and/or turn to the back.

Side view

Side view.

HQ Sweet Sixteen, less than a year old, for sale! Contact Sarah at the Contact Me page or comment on this post.

Janome’s 100 Blocks project, Nine Squares

Friday, November 13th, 2015

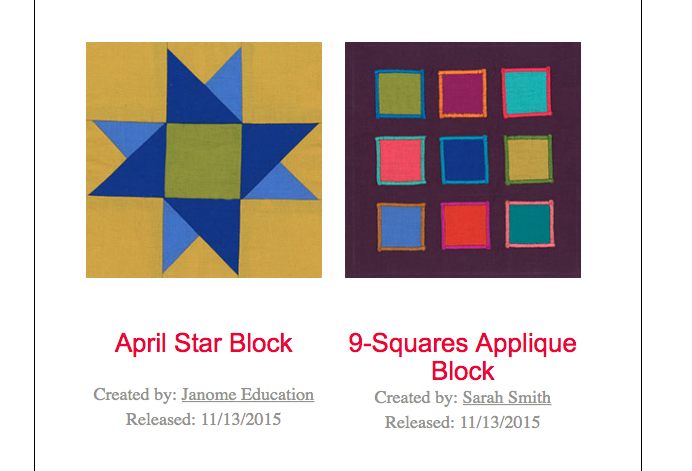
Hi all!  Janome’s 100 blocks project is bubbling along, and today they are featuring my second block as one of today’s two blocks:

Screen Shot 2015-11-13 at 9.40.48 AM

9-Squares Applique block by Sarah Ann Smith

To get a PDF download with the instructions for my 9-squares blocks, click Sarah’s 9-squares block.

I am really enjoying seeing the blocks come to my inbox every day.  Just click on the hotlink in the first sentence and follow the links/instructions to sign up for notifications (optional) or just get to the PDF instructions.

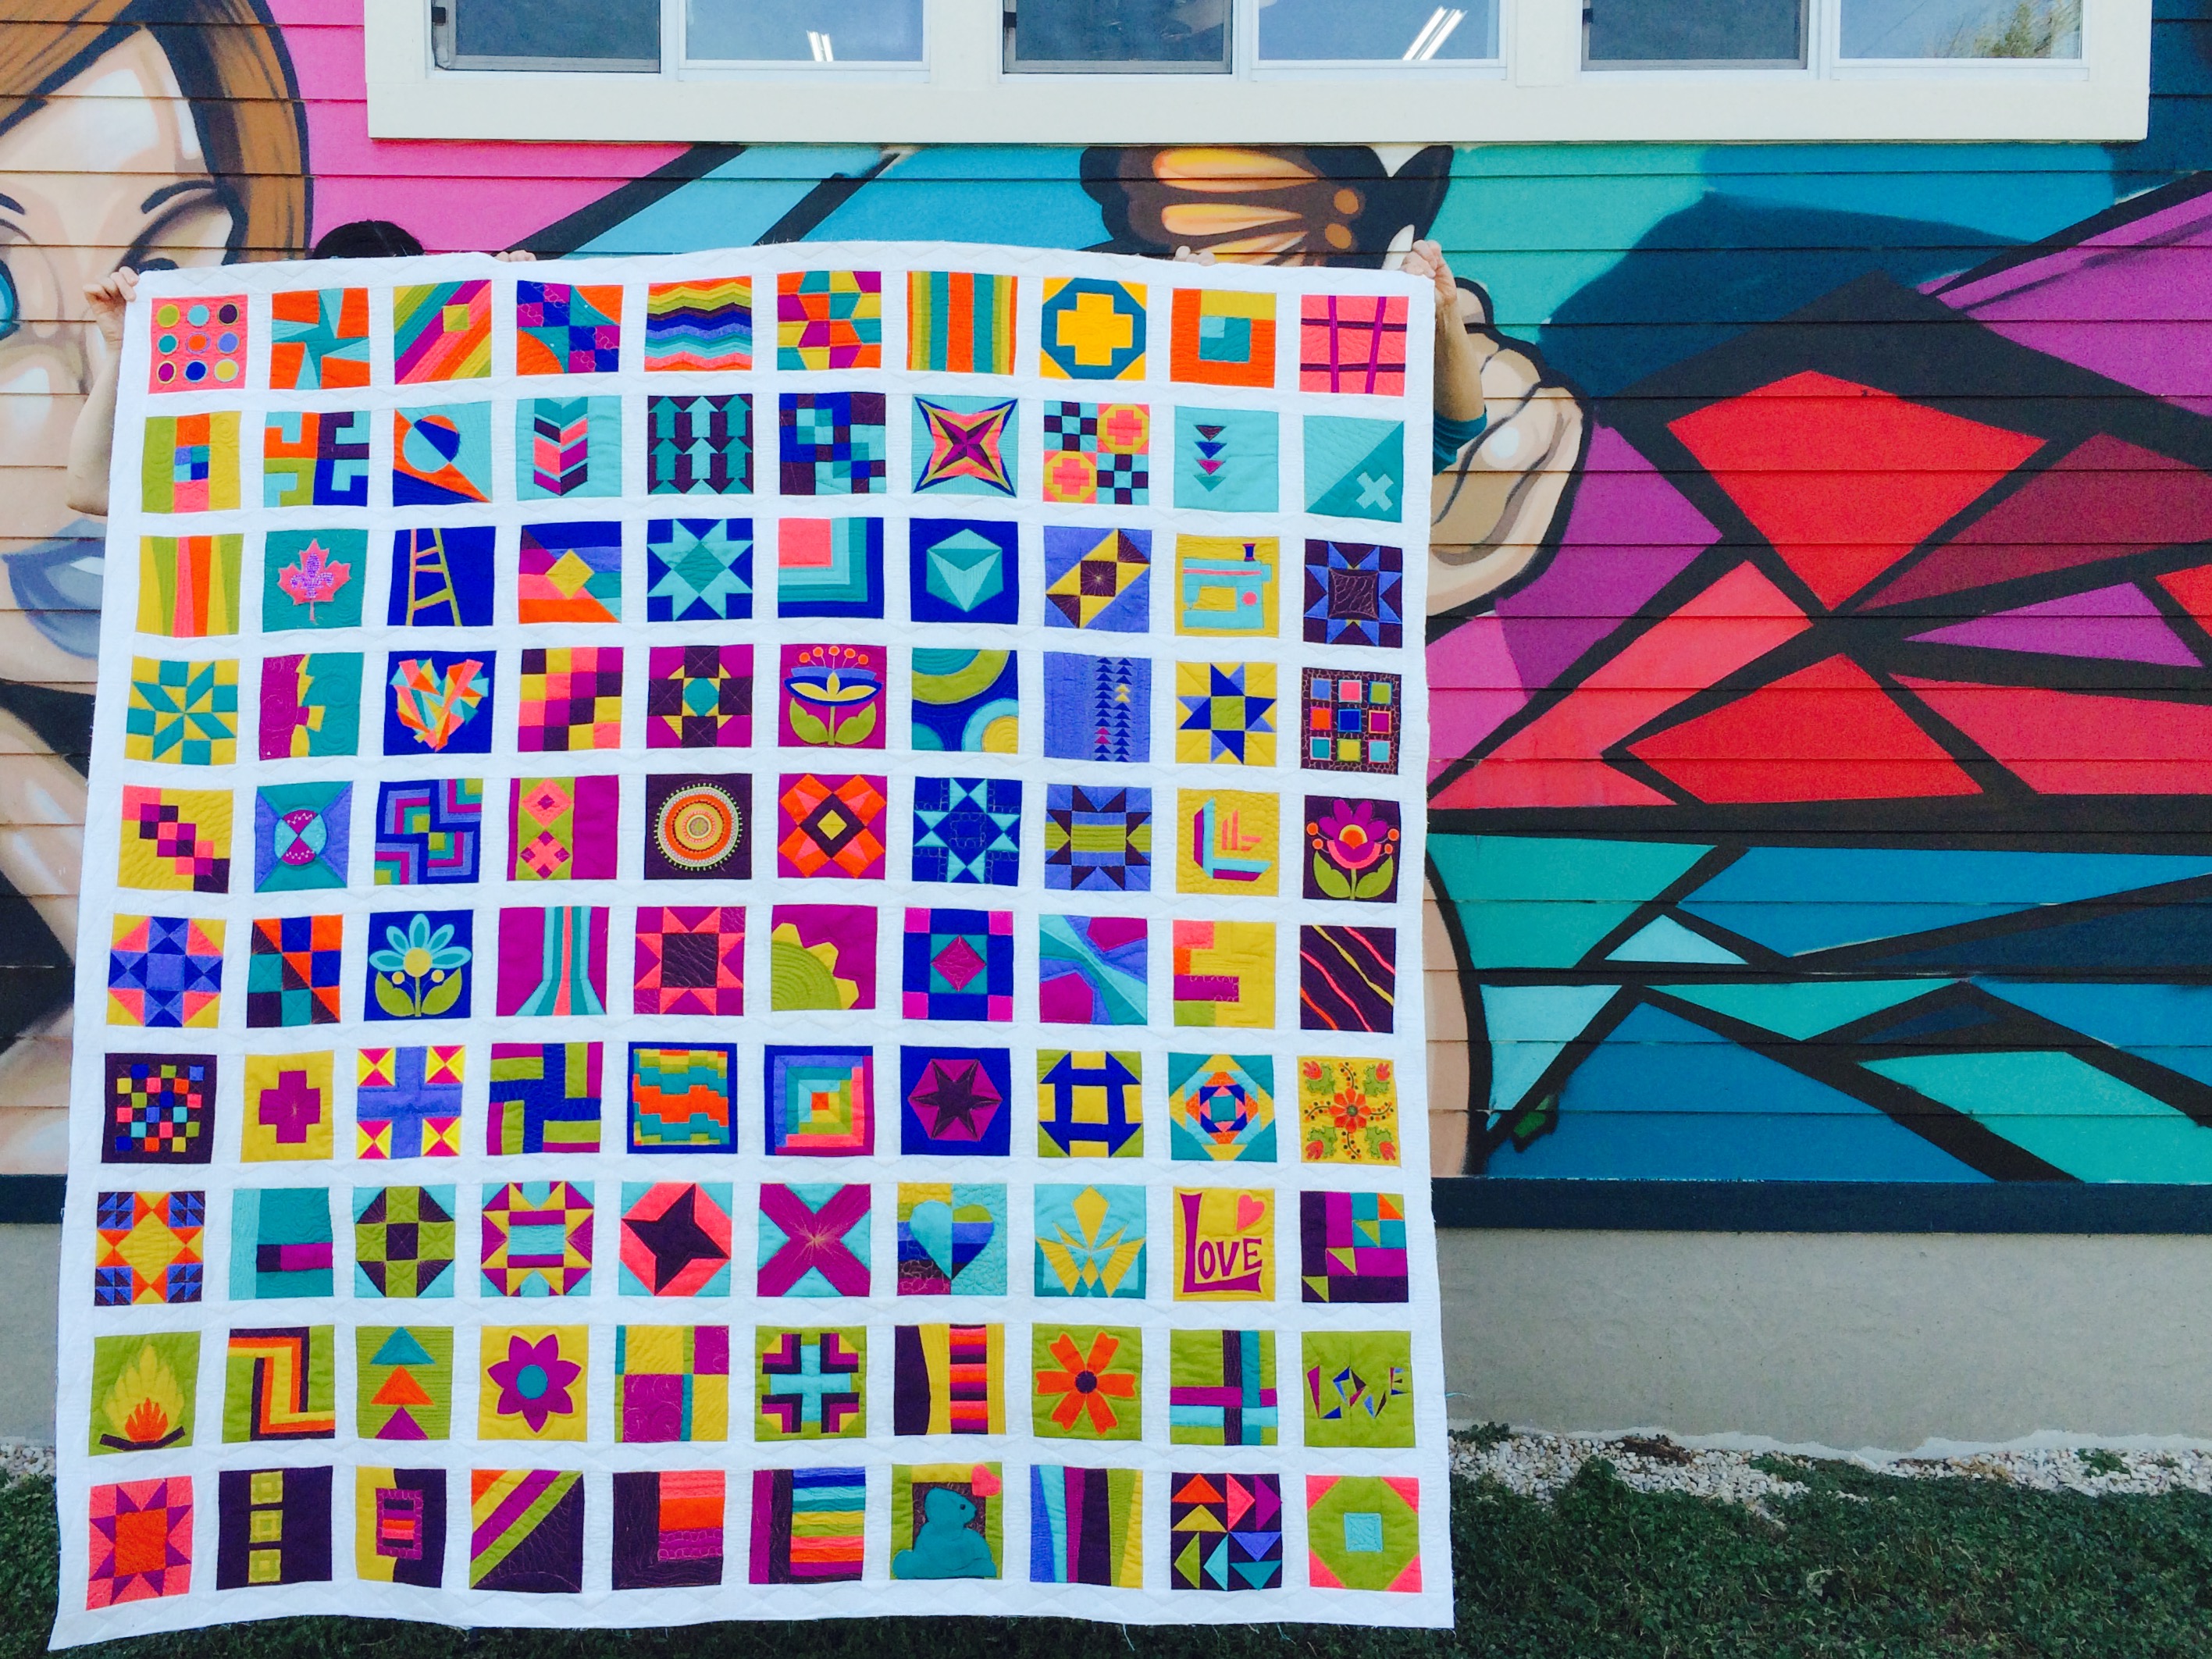
100QuiltBlock

Doesn’t this quilt look fabulous photographed against that colorful wall? My blocks are the first one ( nine circles, Row 1, top left), Row 4 last block (the nine squares), Row 5 (bulls-eye with decorative stitching in the center…will publish next week), Row 6 (last block, wavy inserted skinny strips), Row 7 first block (mini checkerboard) and Row 7 rainbow log cabin in center). I’ll announce each time my patterns post.  Right click to view larger.


Janome’s new Skyline S7 Sewing Machine

Monday, October 26th, 2015

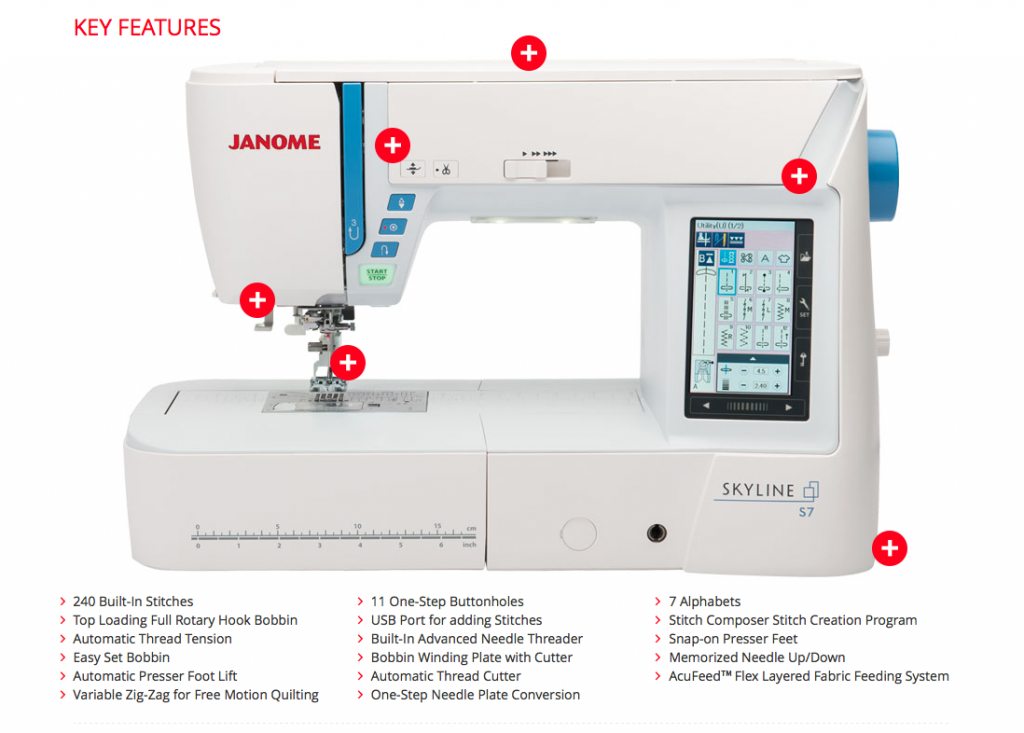
Janome never ceases to amaze me with the quality of its machines.  The Janome Skyline S7 is a more modestly priced machine than what I have used for the past decade, but it has features straight from the top of the line 15000 (click on the link to open a new tab to Janome’s page with all the features).   If your budget or preferences don’t run to expensive machines, this machine may have all the versatility and dependability that you need with the right sticker price.  I am, quite bluntly, surprised and pleased at the wide array of features and outstanding performance of the S7.

Here’s the nice photo of the S7 from Janome’s site (NOTE:  photos are mostly clickable to view larger):

A screen capture from the Janome America website. To link to the site, go here.

A screen capture from the Janome America website. To link to the site, go S7 and scroll down.

Also from the Janome site, the included parts. Pretty much everything you need for routine sewing.

Also from the Janome site, the included parts. Pretty much everything you need for routine sewing.

And much less fancy shot of the S7 in my studio:

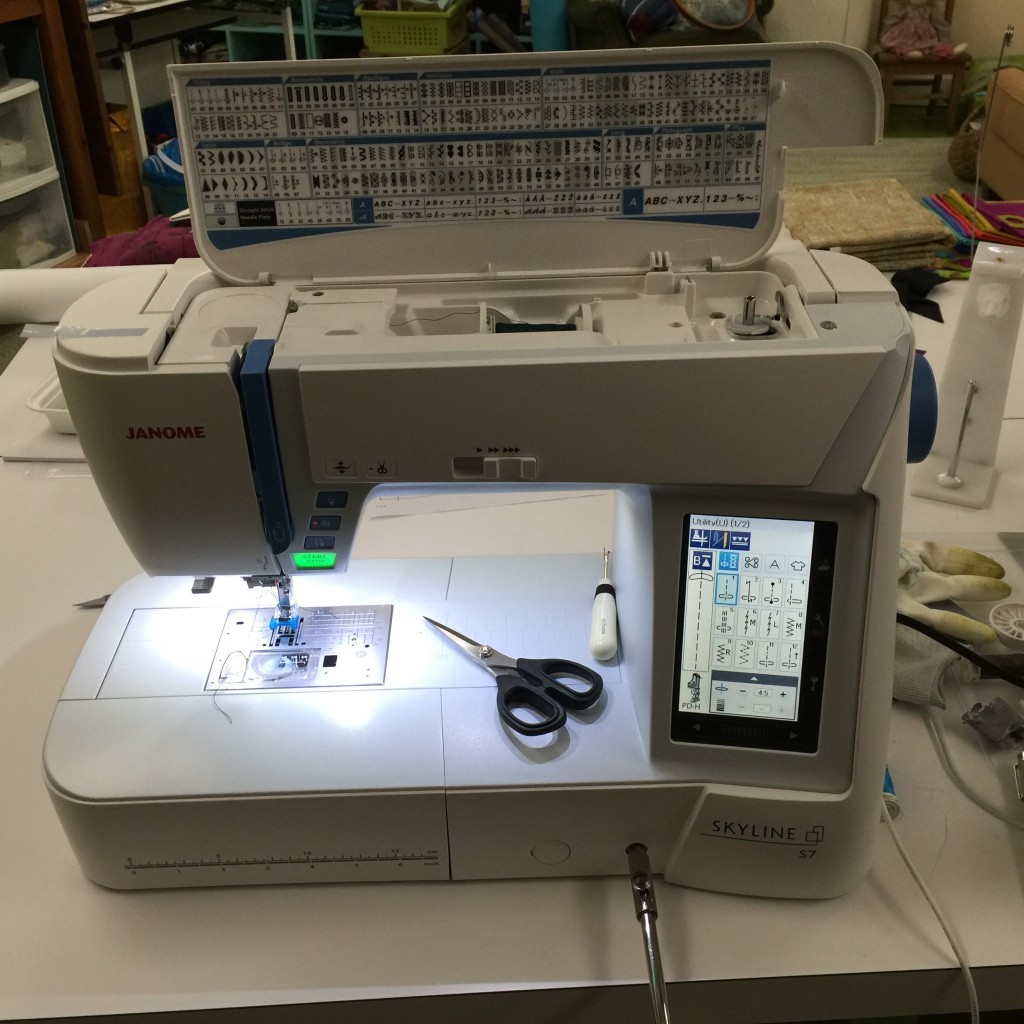
The Janome Skyline S7 in my studio.

The Janome Skyline S7 in my studio.  Notice the wonderful knee-lift in place!

I prepared a variety of projects to work on during my brief loan period for the Skyline S7, which Janome introduced/debuted at Janome Institute late this August and is now arriving at Janome dealers.   I had piecing for quilting, mending and repairs, sewing a new top, free-motion quilting, and decorative stitching.  The machine handled every task like a champ.  Here’s a teaser…keep reading to find out more about this block:

IMG_6042

For free instructions on how to use the built-in stitches to create this block, see below. This block will work with Janome’s ongoing 100 blocks in 50 days project; read more about the 100-Blocks Janome 100 Blocks.

Now…back to the regular review (I just wanted to tuck the pretty block up top!)

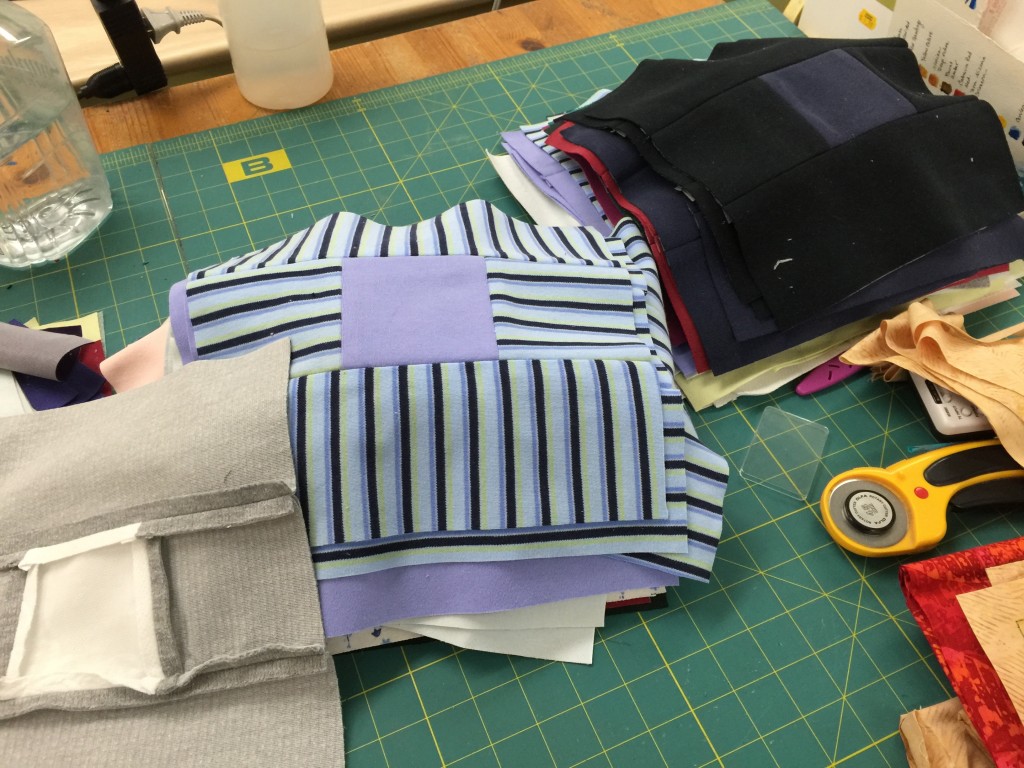
I've been piecing some blocks (who me?): made of turtleneck shirts. Eek! I had to stabilize all of them with interfacing (gray one in lower left corner). As expected, the machine breezed through without nary a burp.

I’ve been piecing some blocks (who me?): made of turtleneck shirts. Eek! I had to stabilize all of them with interfacing (gray one in lower left corner). As expected, the machine breezed through without nary a burp.  Because of the thickness of the fabric, I did find using a leader/ender so the stretchy fabric didn’t get pushed into the opening was a good thing.  Of course, I could have (and should have) used the straight stitch plate instead!

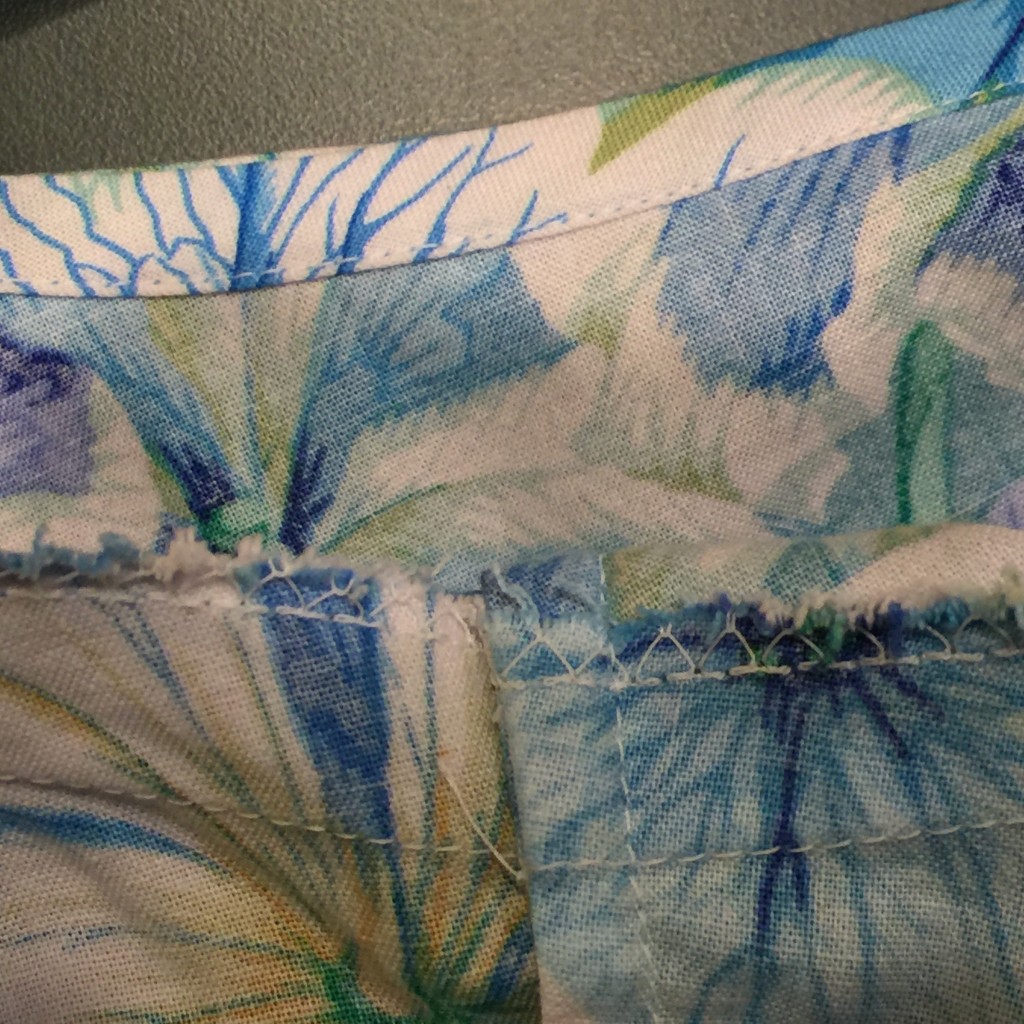
I had a tunic top cut out to make on this machine (see blogpost here or just scroll down two posts–and take a look at the review of the Janome15000 App while on your way).  I like a nice, clean finish.  So I used French seams (center vertical), overcast (using one of the utility stitches), and a bias edge as you can see in the next photo.

Seam finishes in my tunic: bias facing, on the top, overcast edge at the armscye (set in sleeve seam) and French seam (enclosed raw edges) on the side seam.

Seam finishes in my tunic: bias facing, on the top, overcast edge at the armscye (set in sleeve seam) and French seam (enclosed raw edges) on the side seam.

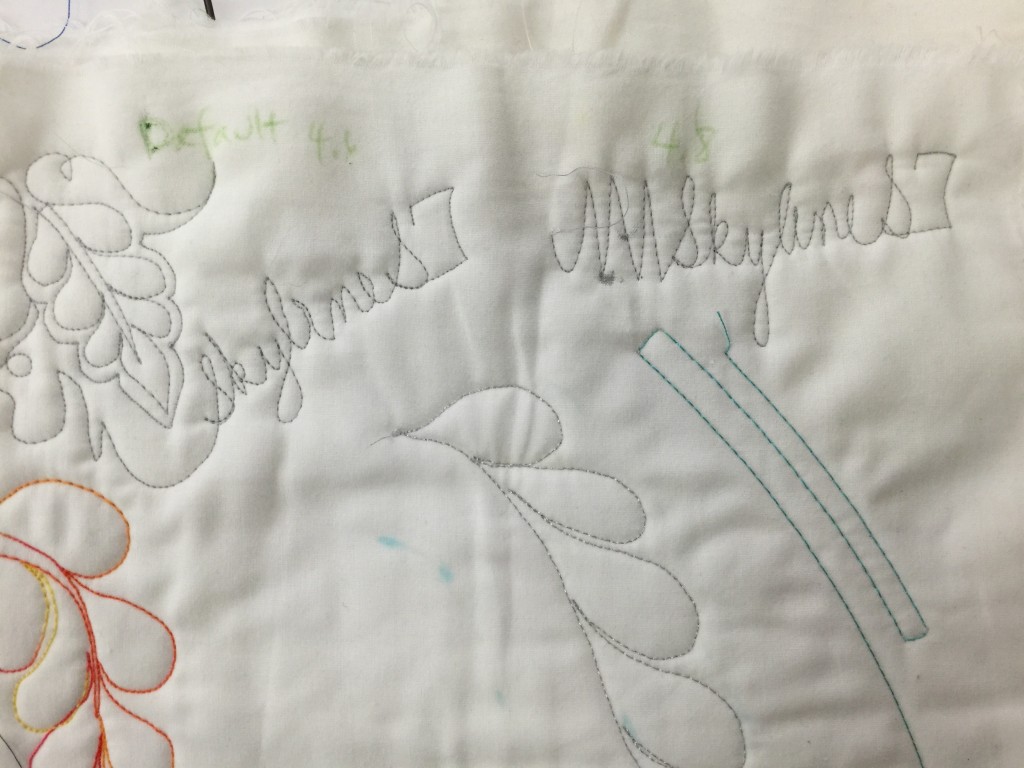
I did a quick free-motion quilting practice using the open toe foot skimming foot.  The default setting with my preferred threads, a 40-wt shiny poly in the needle and a 60-wt fine poly in the bobbin, wasn’t quite perfectly balanced for that thread combination, so I adjusted the balance by one notch and it looks excellent.  This is a common adjustment when using threads that are not identical.  Why do I use a thinner thread in the bobbin?  For art quilts, durability for wear and washing isn’t an issue.  And with the density of my stitching, the finer bobbin thread means less thread-build up, not as stiff, and more miles of thread to the bobbin!  ALWAYS test a potential new machine with the fabrics, batting and thread combinations that are your favorites–not whatever the sewing machine store has on hand!

Test free-motion stitching on the S7.

Test free-motion stitching on the S7.  You can see my note that says “Default 4.6” and “4.8.”  After looking at the back having stitched the first feather and name, I decided I wanted to have the balance adjusted slightly.  I always test for stitch balance with two contrasting colors so I can see what is happening.

Reverse of FMQ.

Reverse of FMQ.  The stitching on the right is the default setting.  I was seeing a TINY bit too much of the needle thread on the back, so I loosened the top tension one notch.  The second stitch out, on the left in the photo above, is better.  The tiny bit of dark you see is the shadow inside the needle hole.  A bit of moisture/steam or just time will close up those needle holes.  (Click for larger view)

The drawbacks to the S7 were VERY few and minor:  the harp, the space between the needle and the housing on the right, is that of a standard sewing machine.  I’ve been sewing on the machines with a longer harp area for a decade now.   However, I have also quilted a king-sized quilt (carefully) on a machine with a smaller harp than this one.   If you want to quilt king-sized quilts at home you might want to consider a longer harp, otherwise, you’ll be fine with this machine.  Also, the machine does not come with an extension table included.  These are minor quibbles:  this is a great machine for someone doing garment and home dec work, and for someone who is newer to quilting and doesn’t want to spend the bigger bucks for the larger machine.

Note:  one commenter told me “a regular sewing machine has a harp area of 6″-7″ and the S7 has a harp area of 8.25″ That makes it even more of a real winner (I hope you correct this on your S7 evaluation.)”   OK, I don’t have a measuring tape or the time to check this out (plus the machine is back at Janome), but let’s just go with “the harp area is smaller rather than larger.”  You can still quilt on it!  <grin!>

Janome makes a “Quilting Kit” to go with it that includes an extension table and my most-favorite-in-the-world convertible free-motion quilting foot.   The Skyline quilting kit part number is (according my lovely Janome contact) 003863402005, and comes with an extension table, appliqué foot, clear view quilting foot, ditch quilting foot, open toe satin stitch foot and (drum roll please!) the convertible free motion quilting foot set that is my fave!

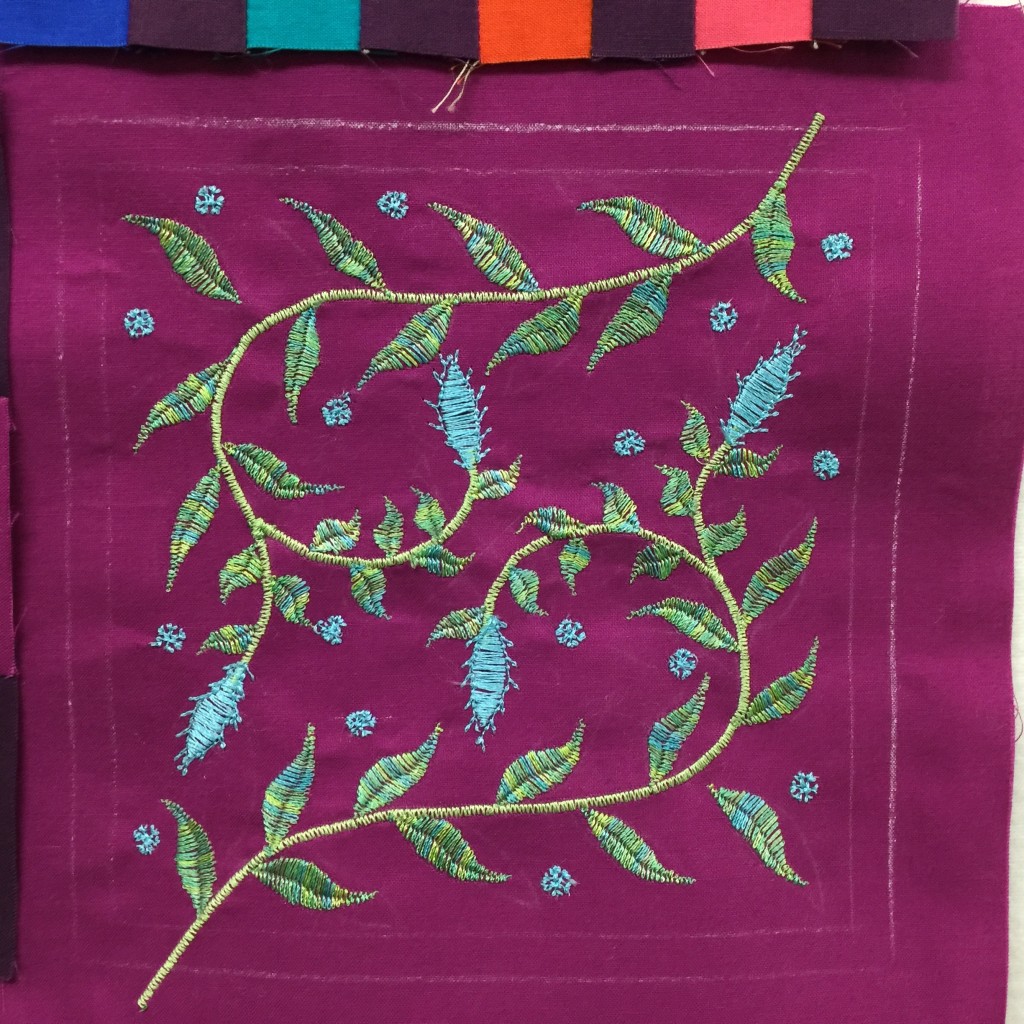
My final test was the decorative stitches.  I’ve been able to be a part of Janome’s 100 blocks in 50 days project (ongoing now, here).  I liked the Michael Miller Cotton Couture fabric SO MUCH (silky, soft, glorious) that I made extra blocks for myself, and designed this embroidered block to go with mine. Here is the PDF for my Janome Embroidered Block .  Basically, start with a 7 inch block and stabilizer suitable for the weight of your cloth; you want to cut large because stitching can shrink a block a bit.  Basically, cut it big and trim to exact size when done.  Use a satin stitch (a short length zigzag) to create two stems coming in from opposite corners of the block.  Use the Satin Stitch leaf (built in on the S7–similar stitches on other machines) and adjust the stitch length (doubled on some) following the instructions in the manual, width and stitch density (refer to the PDF) to stitch out the leaves using my block as a general guide for placement–you don’t have to be exact.   I outlined the leaves with an overcast stitch from the basic utility stitches menu.  Then use the snowflake stitch, reduced in size, to make the “dots” in the background.  When complete, trim to 6 1/2 inches to match your other “100 Blocks” project.

Notice that I chalk marked a 6 inch square and a 5 1/2 inch square inside it. I needed to know the edges of the finished block, and wanted to leave a bit of clearance around the design so none of the decorative stitching accidentally ended up in the seam allowance.

Notice that I chalk marked a 6 inch square and a 5 1/2 inch square inside it. I needed to know the edges of the finished block, and wanted to leave a bit of clearance around the design so none of the decorative stitching accidentally ended up in the seam allowance.