email Youtube

Home
Galleries
Blog
Workshops & Calendar
Store
Resources
About
Contact

Archive for the ‘Winter’ Category

A Snowy Owl at the Library of Congress!

Wednesday, January 1st, 2020

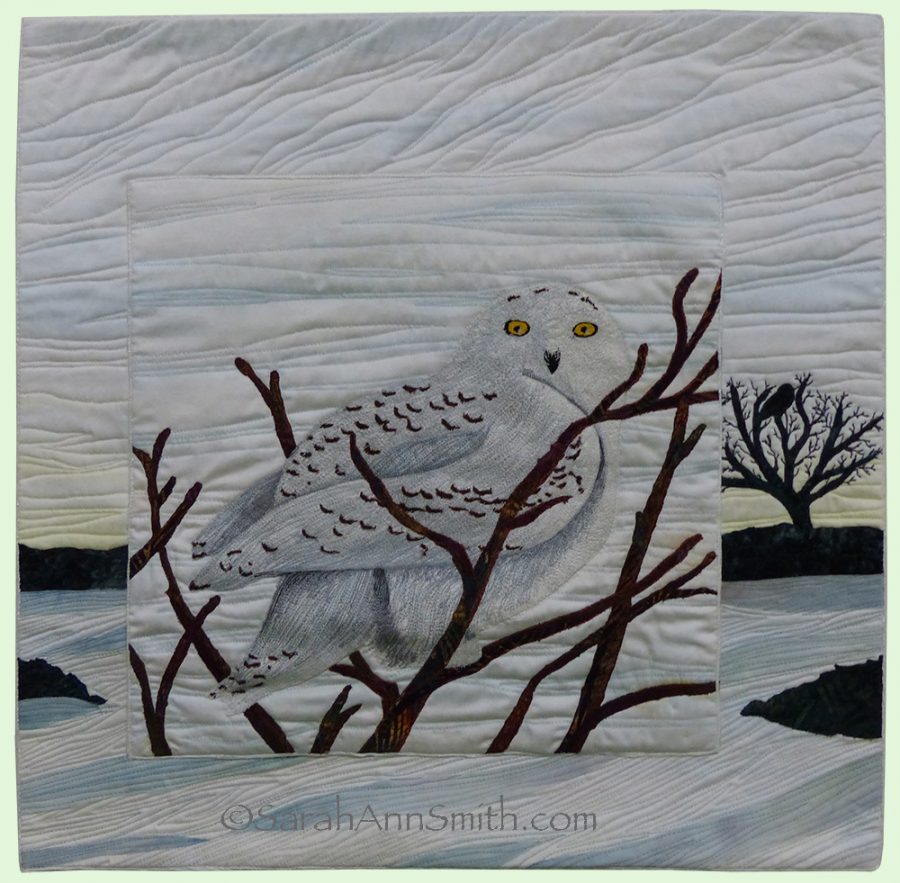
Well today sure started off well…. got an email from curator and exhibit organizer extraordinaire Donne DeSoto that my Snowy Owl, from Acadia National Park, will be on display at the Library of Congress soon! Here’s the LoC’s information on the exhibit–I SO wish I lived close enough to go see it!

Here’s my owl, based on photographs I took at nearby Clarry Hill Ridge. Of course I had to pick something from Acadia National Park, here in Maine. The fabrics are my hand dyes, include a little bit of paint, and lots of threadwork!

This quilt is part of the Inspired by the National Parks exhibit which debuted in the National Parks Centennial Year. The exhibit will finish its phenomenal run in February at the Mancuso Brother’s Mid-Atlantic show. Donna told me the exhibit has been to THIRTY ONE venues in the three years it has traveled! That is astounding! So many thanks to Schiffer Publishing for putting out the tome with all our quilts and to the other participants. But most of all, special thanks to Donna. I can’t even begin to imagine how much work it is to keep tabs on so many quilts and get them traveling so many places for multiple years. THANK YOU DONNA!

Christmas Bag tutorial and fine finishing tips

Sunday, December 22nd, 2019
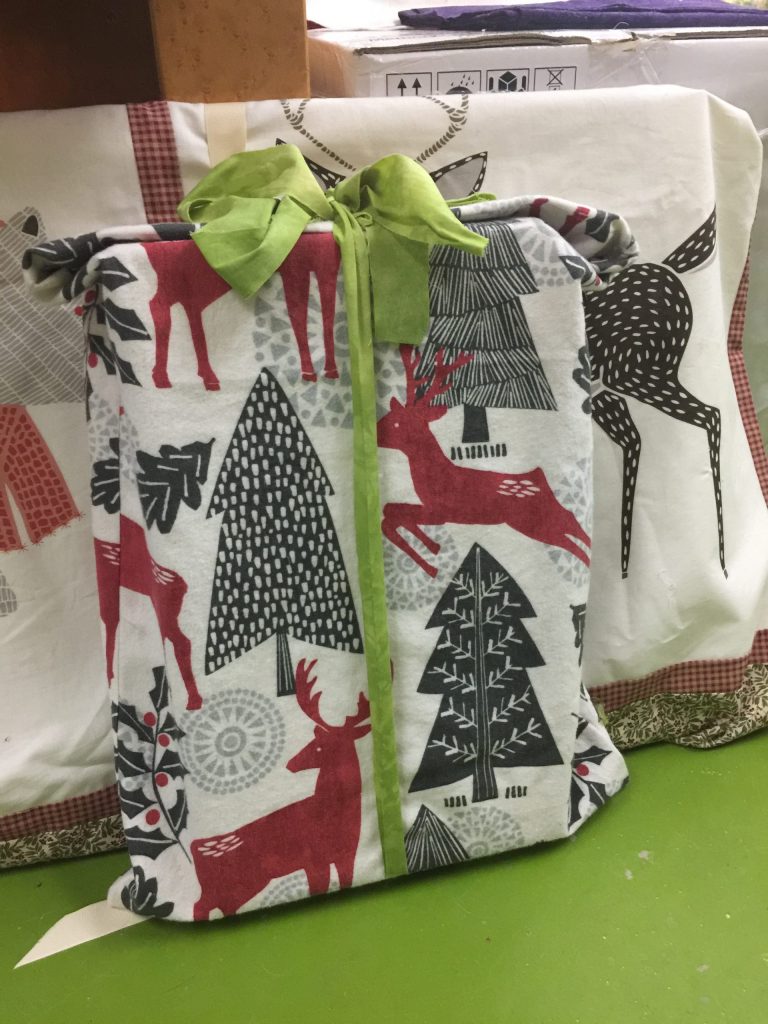
A quick Gift Bag Tutorial–took about half an hour even *with* being fussy! Used leftover flannel, and a trimmed off bit of fabric from a quilt back or edge as the ribbon! Read on….

Sometimes it is possible to whip up a quick something just before Christmas…I’ll have to back-to-back posts (I hope) about sewing for the holidays that include this tutorial on zipping up a quick gift bag and, next, the wonderful York Pinafore pattern from Helen’s Closet patterns.

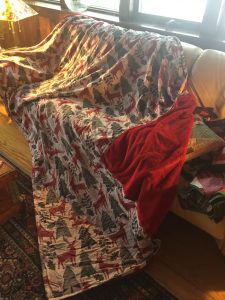
Last year Shannon Fabrics sent me a number of different fabrics including Cuddle and Luxe, fleece and faux fur type of fabrics. They sent a vast amount of this soft and silky red (available at Fabrics.com). I’m not positive which color way it was, but it was similar to this one. I finally purchased a flannel sheet, queen size, to make a throw that is big enough for two to snuggle or to use as a cover on a twin bed! It is more than a tad wrinkled here because it has been in recent use…it’s winter in Maine! Thank you Shannon Fabrics!

I needed the Queen Sized sheet so it would be long enough for the red Luxe that is so silky soft. That meant I had quite a bit leftover…so I thought I’d make a garment (next post). Once that was made, I still had leftovers so I whipped up two gift bags and thought I’d share it as a tutorial.

Tutorial:

  1. Cut two rectangles of fabric or one very wide rectangle. Place right sides together.
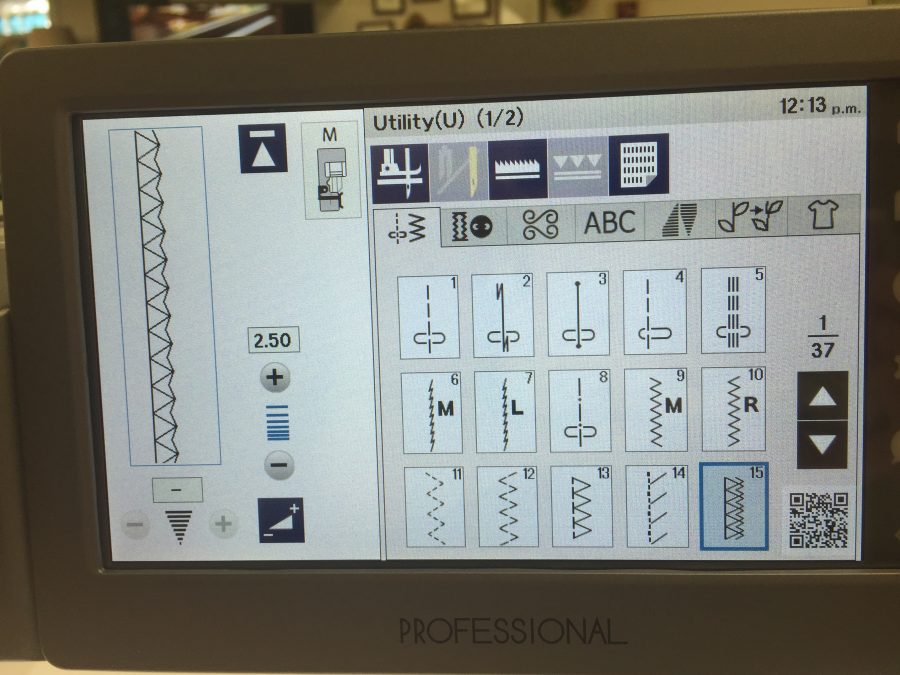
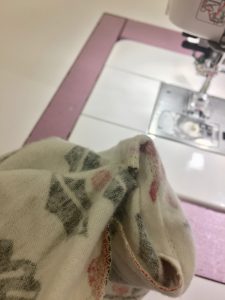
  2. Clean finish edges. You can use an overcast stitch as I did (photo below) or use a french seam (google it, or I’ll do a tutorial eventually of some basic things every sewist should know). Using the Janome’s “M” overcast foot gave results as good as a serger.
Janome America sent me the amazing new M7 Continental sewing machine (several blogposts in the new year…phenomenal machine!). I used the zigzag overcast stitch and the M foot which comes with the machine to clean finish the edges of the bag.

3. Sew a simple straight seam just inside the overcast edges. Sometimes the contents of gift bags can be heavy, and especially with soft and stretchy flannel, I felt a little extra stitching was a Good Thing.

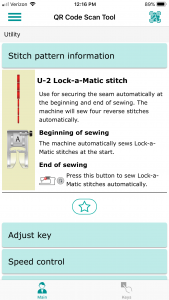
I’d never used the Lock-a-Matic stitch before because I learned to sew when we were lucky to have a simple zigzag on a machine and not all the bells and whistles.
Janome has designed the AcuSpark software. In the previous photo that QR code I pointed out: use your phone to scan and it will pull up a screen with helpful information. Here, I’ve got the one for the Lock-a-Matic Stitch!

Having started sewing when dinosaurs roamed the earth and you were lucky if your machine did anything besides a straight stitch forward and back, I am so used to just doing the lockstitch or backstitch myself that I likely will keep doing that, but this stitch automatically does a securing backstitch at the start of a seam and, when you press the back arrow, at the end. I had been concerned that it might sew a lockstitch when you pause in the middle of a long seam to re-position your hands, but it doesn’t, which is good!

4. Turn your bag right side out.

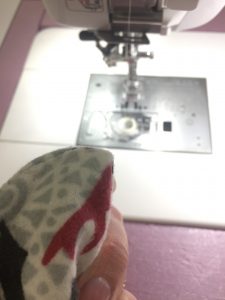
Once your seams are finished, turn the bag right side out. I like to fold the corners so that both seam allowances are to one side. My hand is inside and I’m pinching the corner together. Then keeping hold of the seam allowances, turn.

Pretty good corner, and I haven’t even eased it out yet!

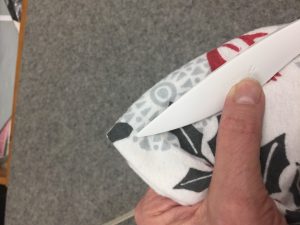
5. At the ironing board, use a point turner to coax the corners out to perfect.

I have several point turners. This is one I bought just this year. Make by Clover, it is beautifully smooth, and has a Hera Marker (sharp edge for marking lines on cloth) on the other end. It is longer than most point turners, curved to fit the hand nicely, and I like it better than any others I have tried.

Lookit how perfect that corner is! Square as can be! I created this method for corners when doing custom home dec work for an interior designer. Some of the upholstery fabrics were so thick that I was afraid if I clipped the corner, the old school way to deal with bulk, the fabric would unravel and ruin the project, and the fabric was crazy expensive. This is secure and gets even better results.

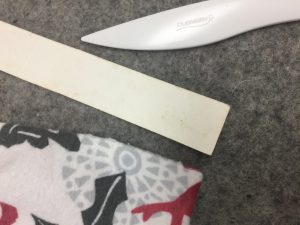
6. Hem the open end. The interior designer I worked for taught me about using poster board (or tag board or an old manila folder) to make templates for turning hems. When making curtains, the extra weight of a doubled hem helped them hang well. I called it the turn-turn hem, since you turn up two full hem-depths.

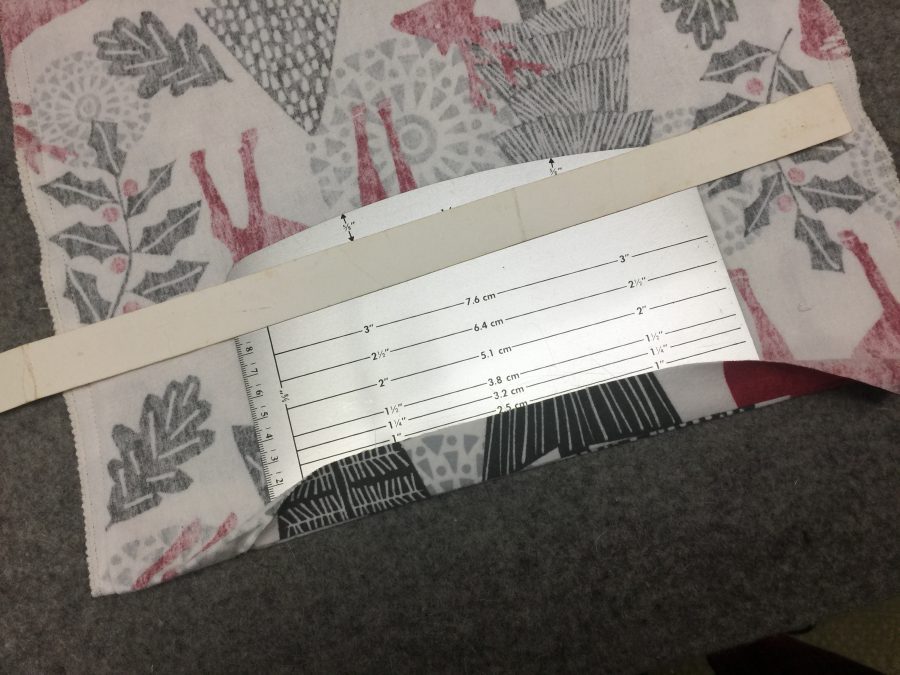
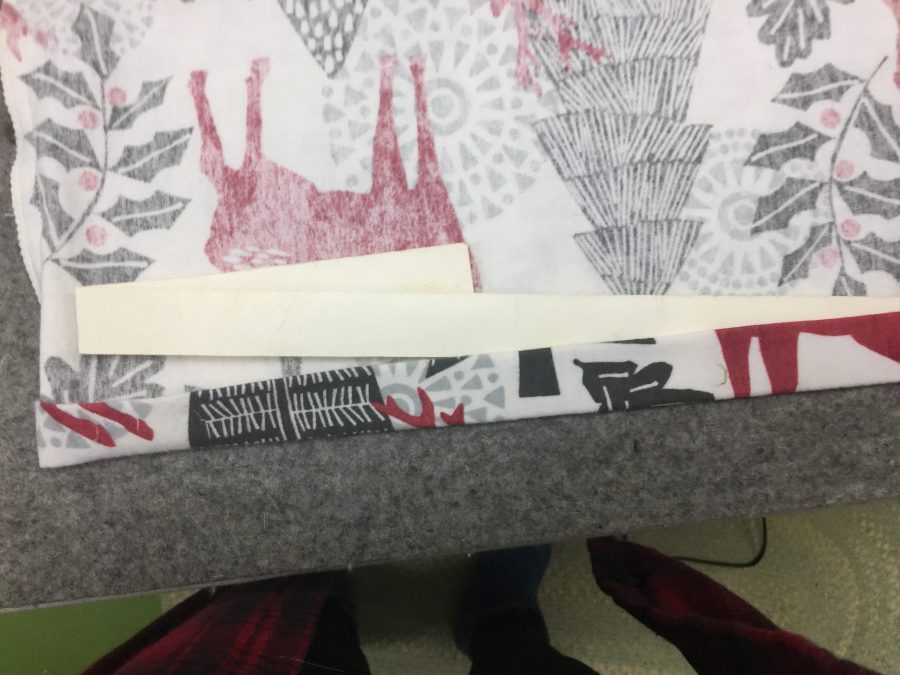
This is the first turn. I’m showing the poster board 1″ wide strip I have used –I am not exaggerating same piece of paper– for over 17 years. Place your fabric right side down on the ironing surface. Fold the hem up over the poster board, lightly snugging the board into the fold with your fingers. Press. Steam is fine–use it all the time and the poster board is still in great shape. You can also use the Dritz EzyHem tool, available everywhere. The metal is nice because it gets hot which helps set the crease, but it is short, maybe 6-7 inches. The poster board is fabulous for things like curtains and custom sheets because you can get a really long run done all at once without wobbles.
Then you turn the hem up again. Usually I keep the poster board inside the first turn and just roll it up, but for photo purposes I wanted to show you that it is the same idea.

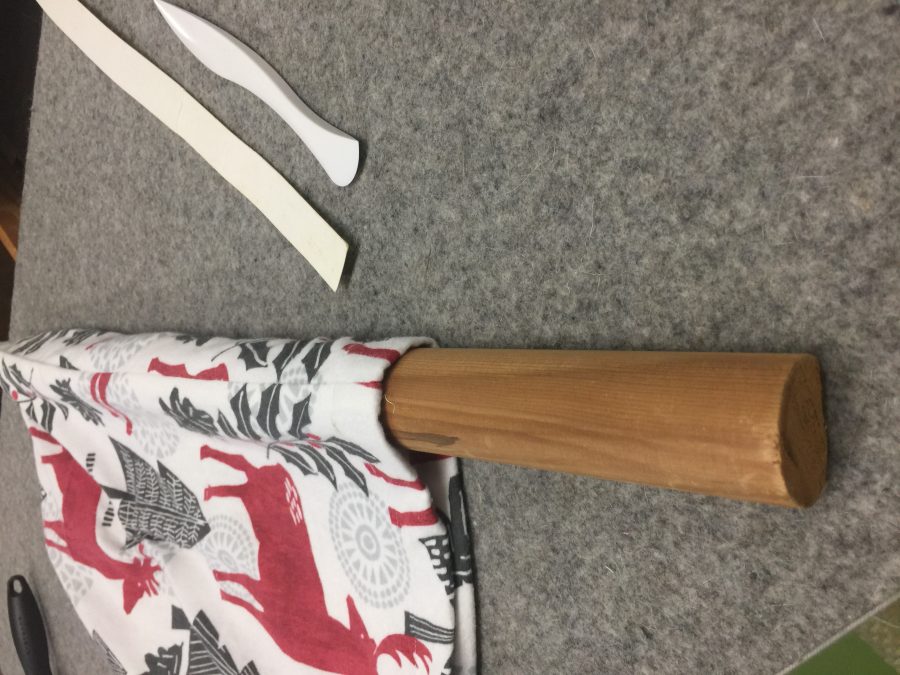
7. Press your seams to one side. Using a seam roll –in this case a piece of cheap stair handle from the big box DIY store. Dressmaking suppliers sell beautiful hardwood (maple usually) seam rolls for Lotsa Bucks. This pine stair rail handle was a few dollars for 24 inches. Sits flat on the ironing surface and does the trick.

You can see the flat end of the stair-rail-as-pressing-dowel. I’ve got the seam centered on the top and have pressed the first part of it. This set up is perfect when you don’t want the edges of the seam allowance to show through to the front of your fabric.

8. Give your bag a final press, tuck the goodies inside, and tie shut. I think, having found that strip of green, that instead of buying ribbon I might “make” some from leftover bias bindings (unfinished on the edges) or making some straps (turn seam allowances under, sew folded edges together) to use as ties for future years. Here’s that original photo again:

Someone has a special surprise inside!

Christmas Quilts, Christmas Memories

Tuesday, December 27th, 2016

Christmas may be over officially for 2016, but it will come around again.  And now that the recipients (except for Kate C.–don’t read this post Kate!) have received and opened their gifts, I can share.   I’d love for you all to know about Christmas Quilts, Christmas Memories, edited by Karey Patterson Bresenhan and Nancy O’Bryant Puentes, the cousins who were half of the four (along with their mothers) who founded quilter’s Mecca, the International Quilt Festival.   This petite square book (my iPhone 6plus is a tiny bit taller) is a holiday gem of antique quilts and Christmas memories — and to my utter astonishment, including yours truly!
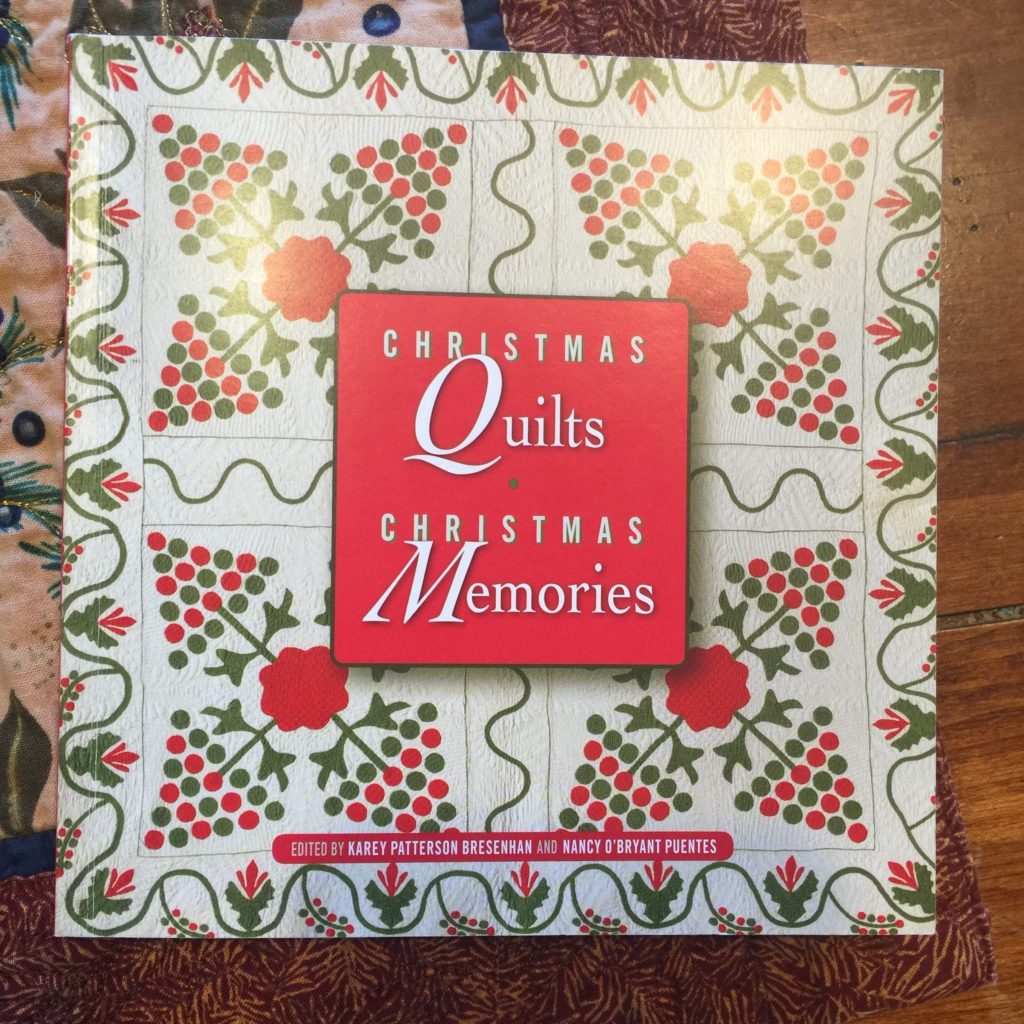
Christmas Quilts, Christmas Memories, Ed. Karey P. Bresenhan and Nancy O’B. Puentes, available from the Texas Quilt Museum

As a contributor, we received a complimentary copy at Quilt Festival this year.  I **devoured** the book on my flight home–literally read it cover to cover between Houston and Boston.  Well known folks from the quilt community and members of Karey and Nancy’s families shared special Christmas Memories with an antique quilt on the left page.   I was astonished that I know of or actually know most of the quilty folks in the book, and I just cherish that they shared their memories.  I knew I would order many copies to give before I got off the flight!  I gave copies to my sons hoping that they will eventually read the book and maybe find traditions they would like to start for their families and lives.
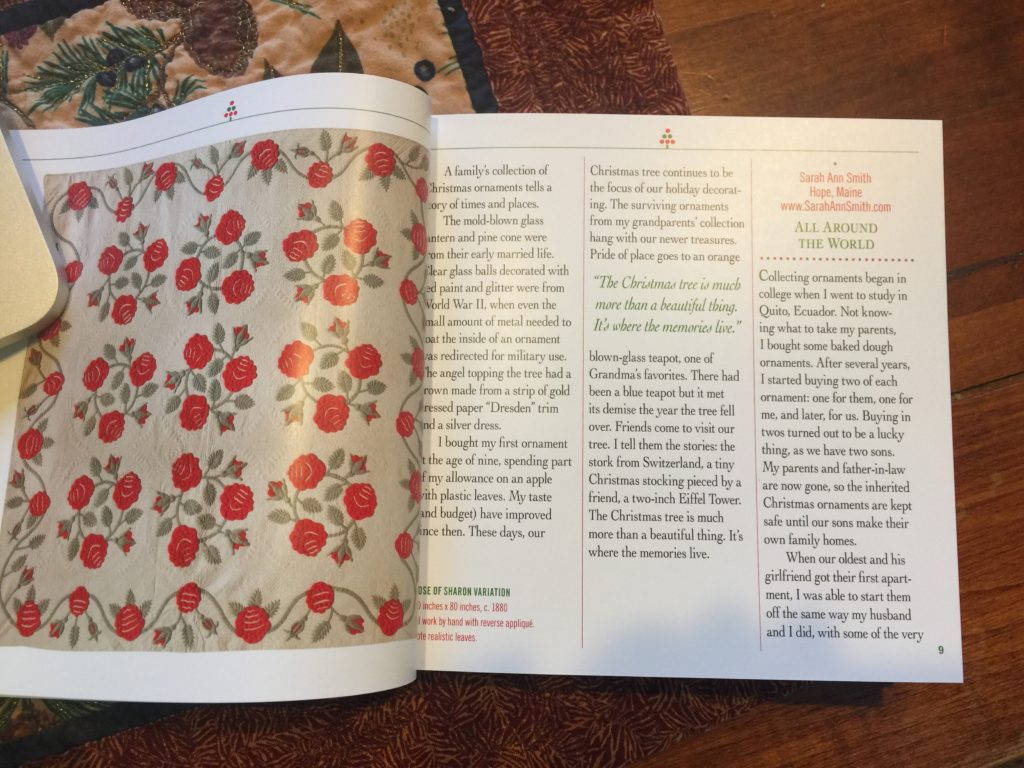
Here’s the start of my memory, about collecting ornaments from around the world, first as gifts for my parents, then as an annual tradition. What’s this year’s ornament going to be?

As I read through the book, I was more and more astounded that I was selected to have my memory included given who else is in the book.   As I read, I felt closer to those I know for their quilt pursuits, loved the glimpse into their every day lives and memories.   Here’s the stories and the contributors:
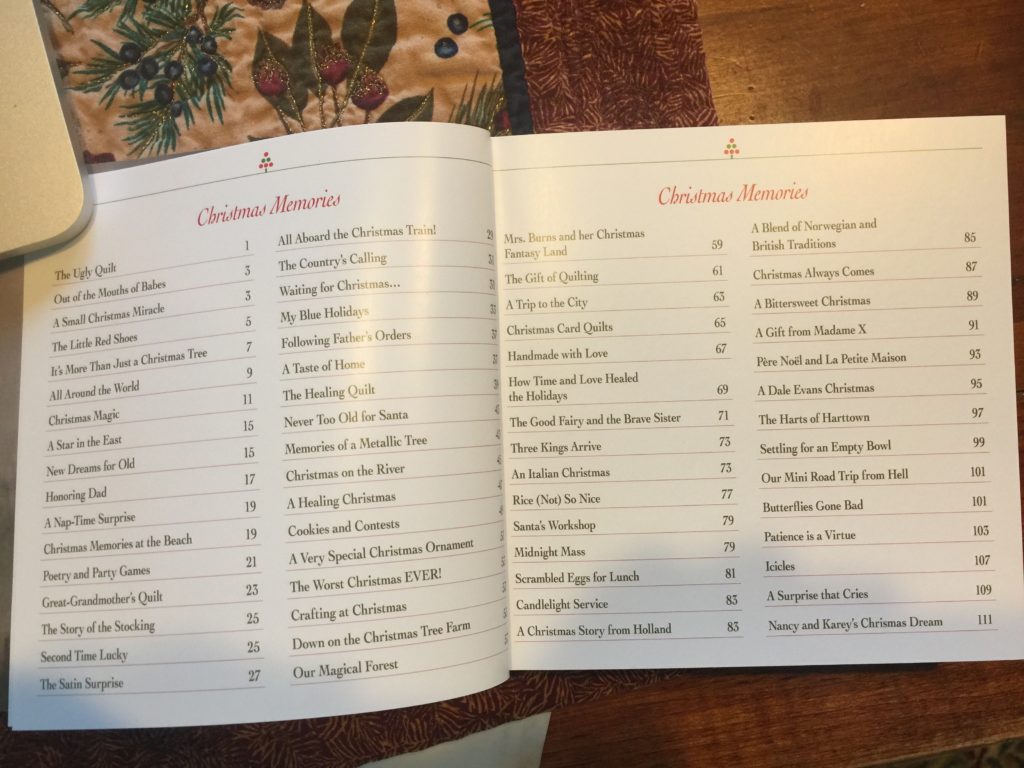
The Christmas Memories table of contents
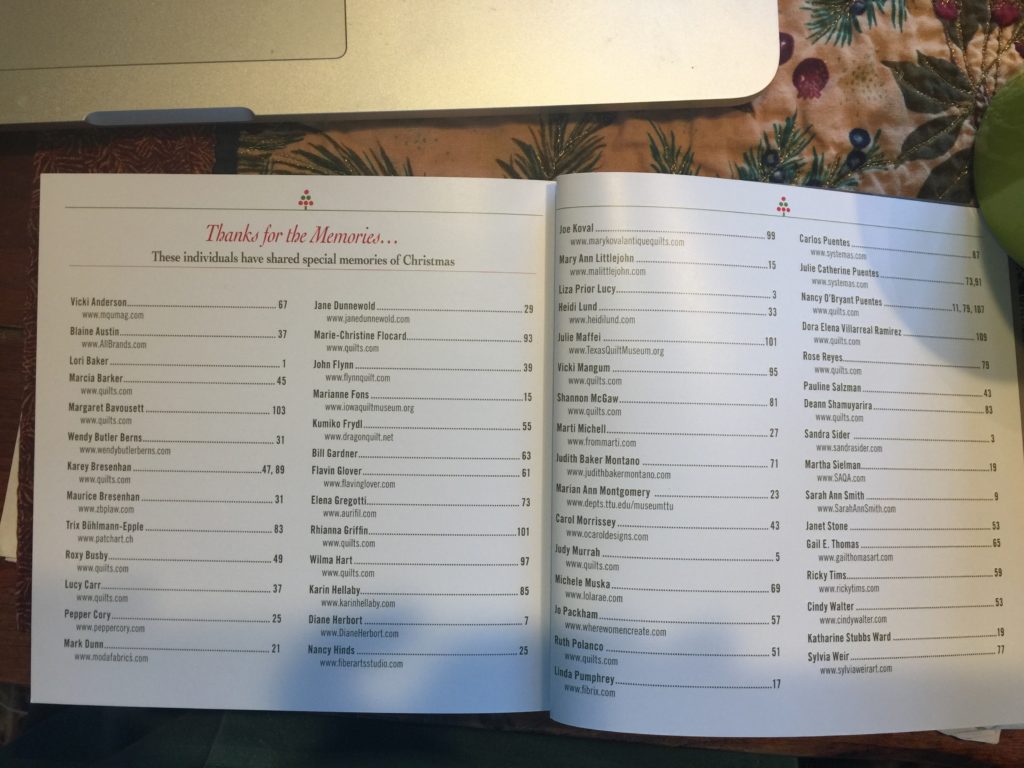
and the contributors to the book

This book is small but delightful beyond all proportion to its size.  It is beautifully printed, fits nicely in your hands, and I’m so happy to have it, and still a bit gobsmacked to be in it!  You can order it from the Texas Quilt Museum website, here.

And what was this year’s ornament?  Well, one of the reasons our tree is groaning with stuff is that we added FOUR this year.  In my defense, the two blown glass ones were gifts for the boys to be taken to their own places when they are settled.   I am actually looking forward to sharing the bounty with them and not having quite so much to put on (and take off and put away) each year, but love sharing the story that goes with every ornament on the tree.
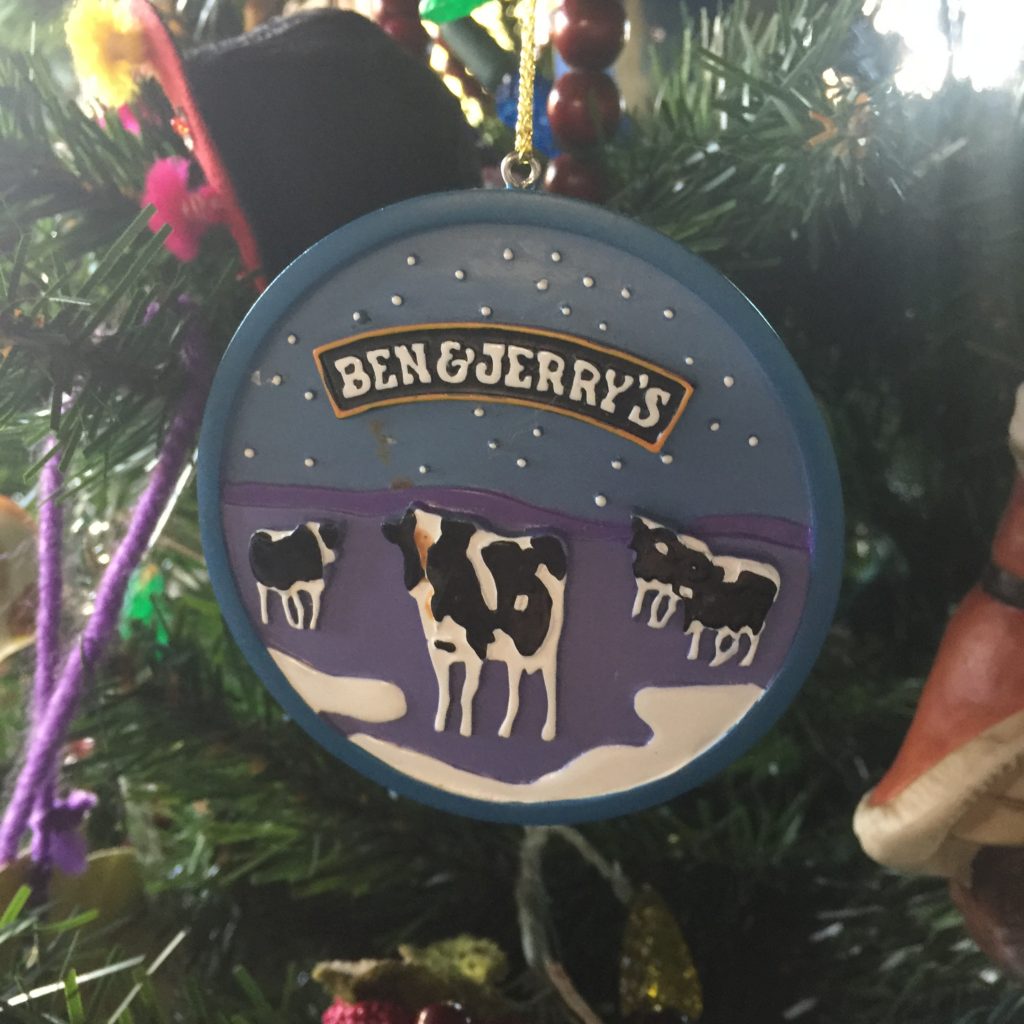
After Eli was accepted to F&M, we went on a college visit and took the long way home via Vermont and the requisite trip to Ben & Jerry’s factory (the original one) and tour. Of course I had to add an ornament–I navigate the world by ice cream stores!
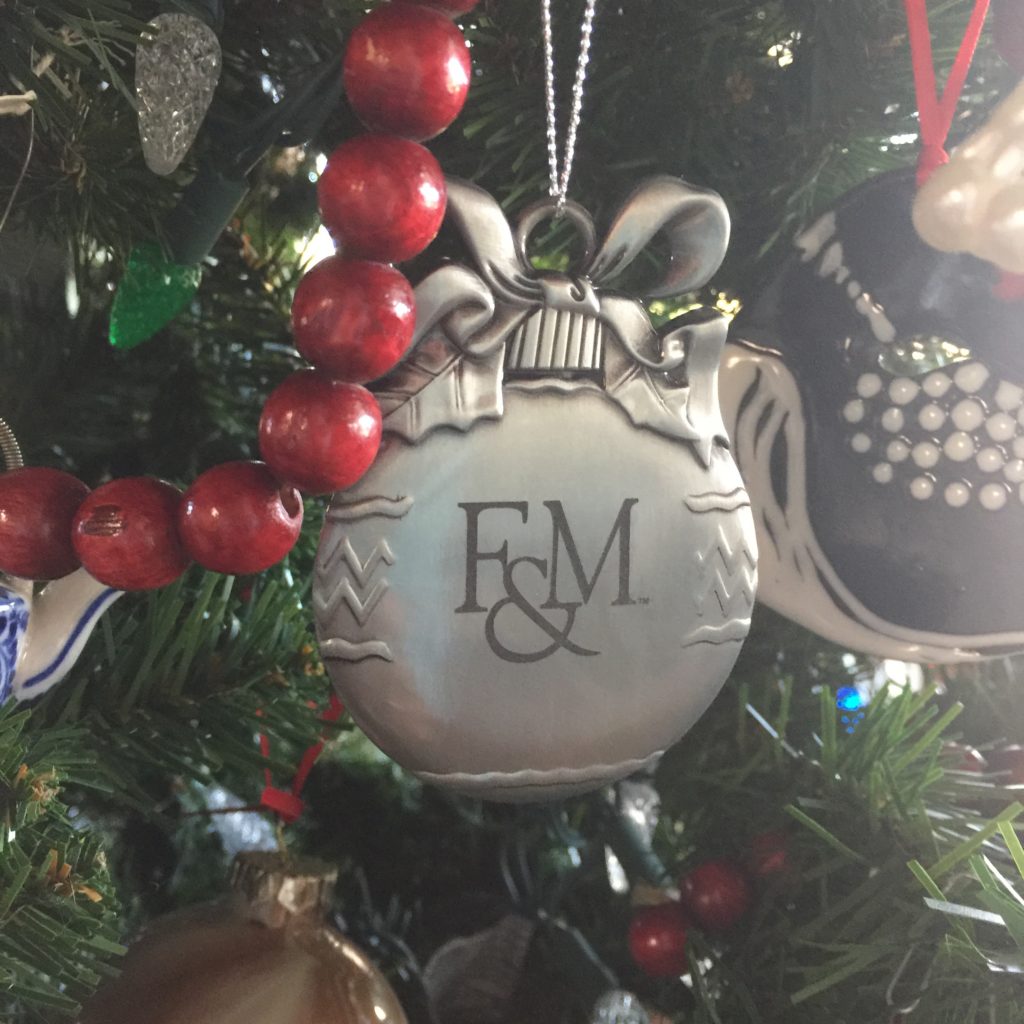
To commemorate Eli’s first year in college, a Franklin & Marshall ornament. Thanks to Eli for adding it to the tree.
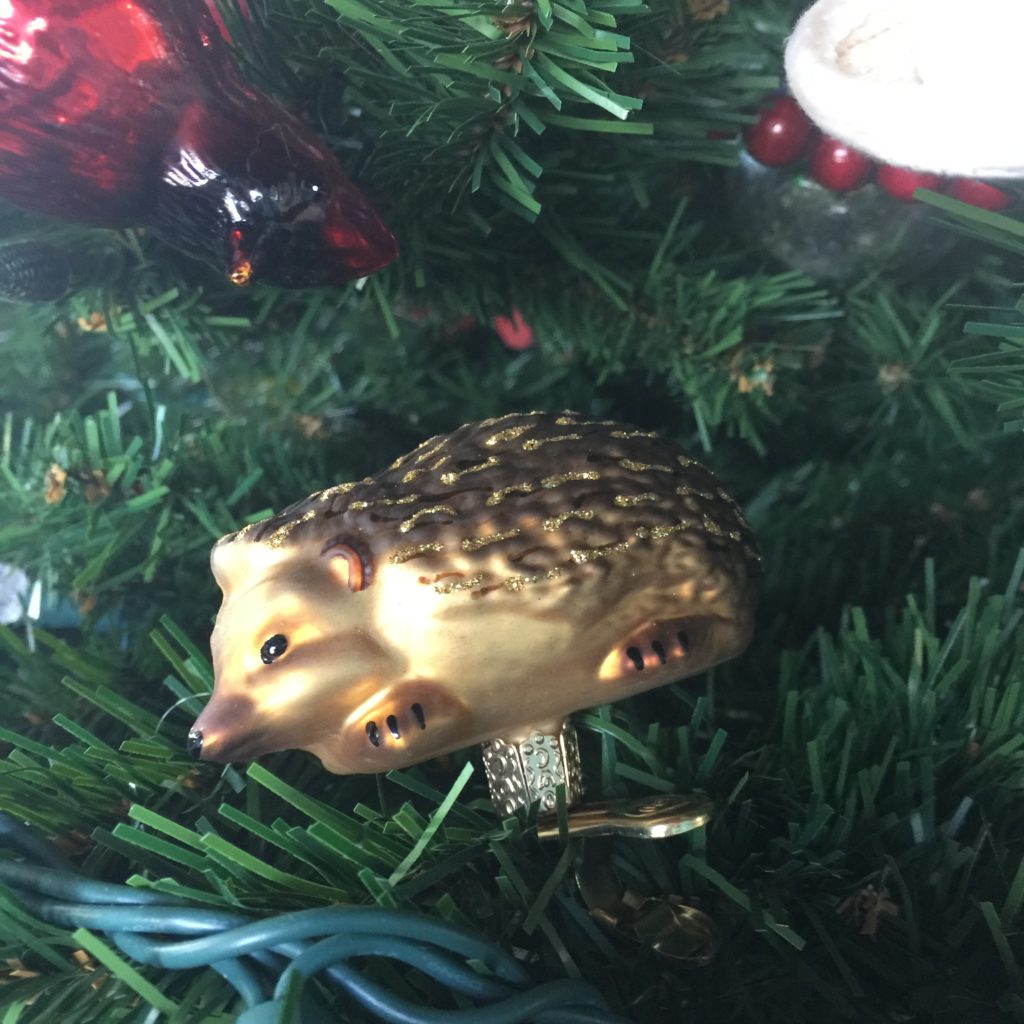
When Eli and I visited England 2 years ago, we went to St. Tiggywinkle’s hedgehog (and now other wildlife too) rescue, about an hour west of London. This one is for him.
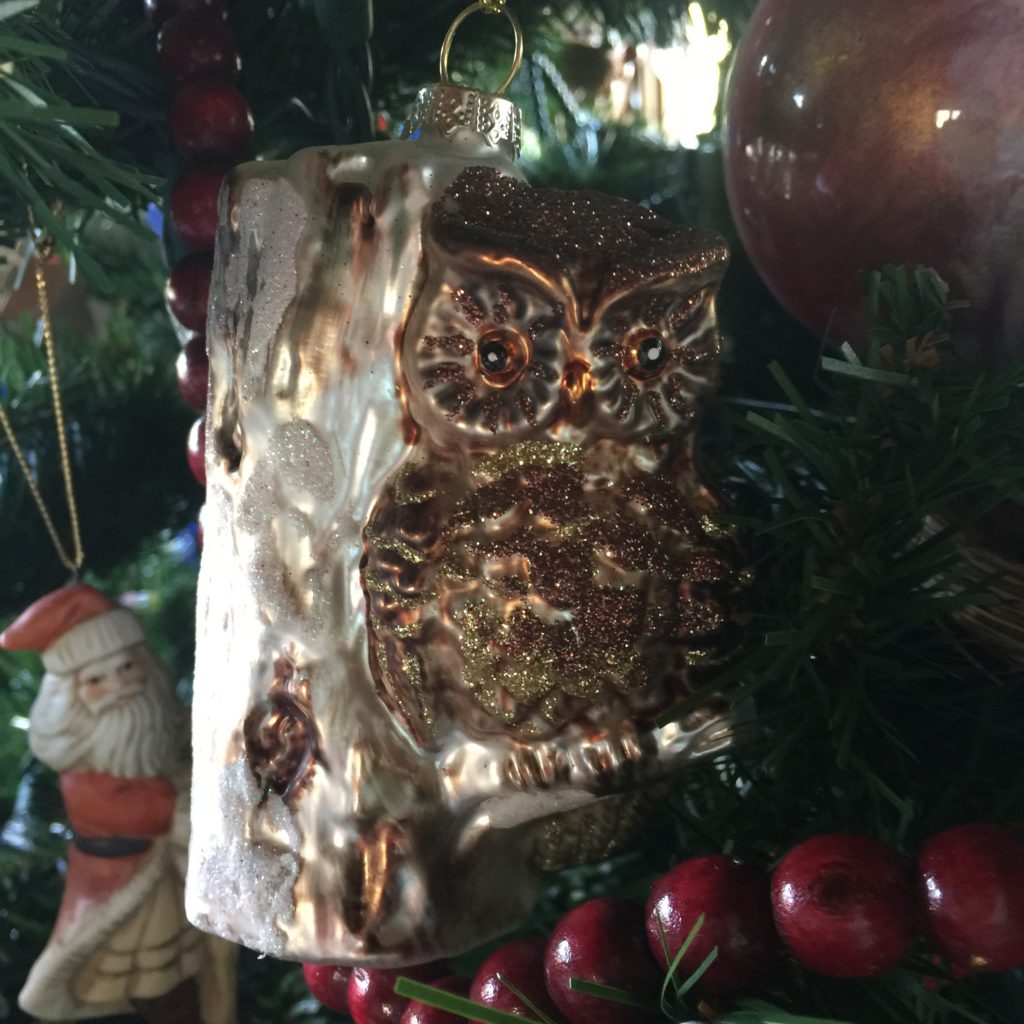
When we lived on San Juan Island when the boys were little, a great horned owl would perch in the fir tree beside our driveway, silhouetted against the night sky. Joshua remembers the owl and we were talking about it not long ago, so this one is for him.

And here’s the groaning tree….honestly, I just LOVE IT!   And this year was beyond delightful because all three of the kids, Joshua & Ashley and Eli, helped trim the tree!
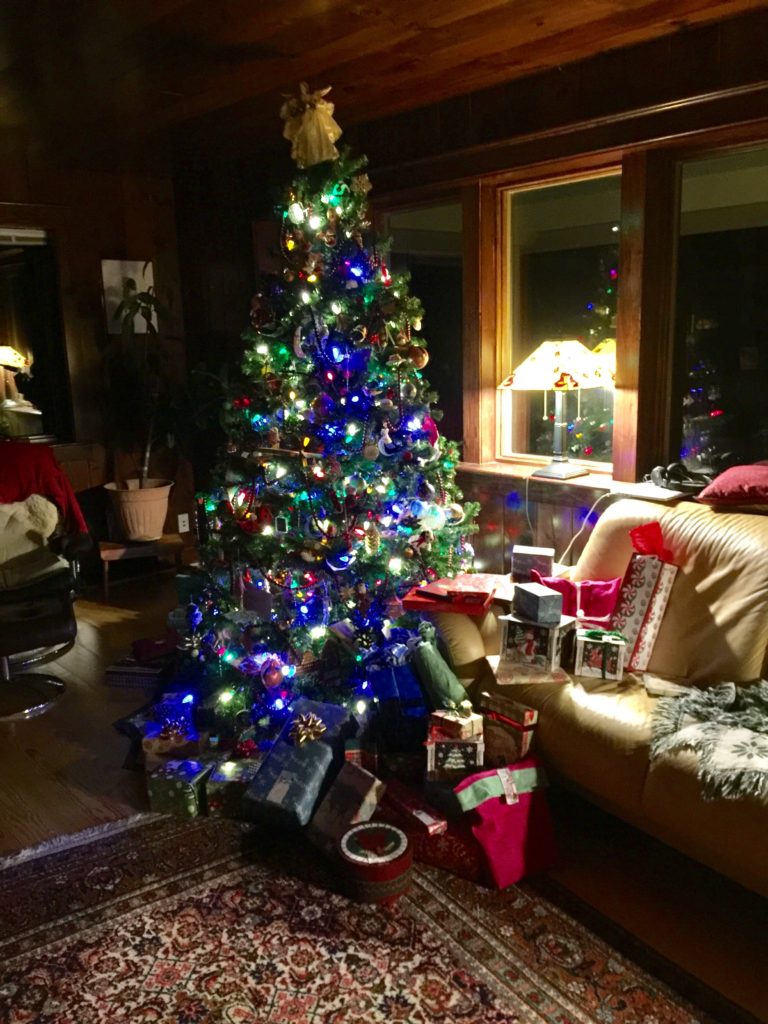
The tree on Christmas Eve after Santa arrived.  It was a particularly bountiful year!


Lonni Rossi Embroidery design!

Wednesday, October 21st, 2015

So besides photography, what have I been up to these past six months and more?  Well, a lot of teaching, a lot of work, and not a lot of free time.  And oh yeah, being exhausted from the thyroid stuff (which is FINALLY improving…we may finally have the right RX…will see in a month).  So I have neglected the blog plain and simple.   I’ll try to fix that!  Today just a brief tease:

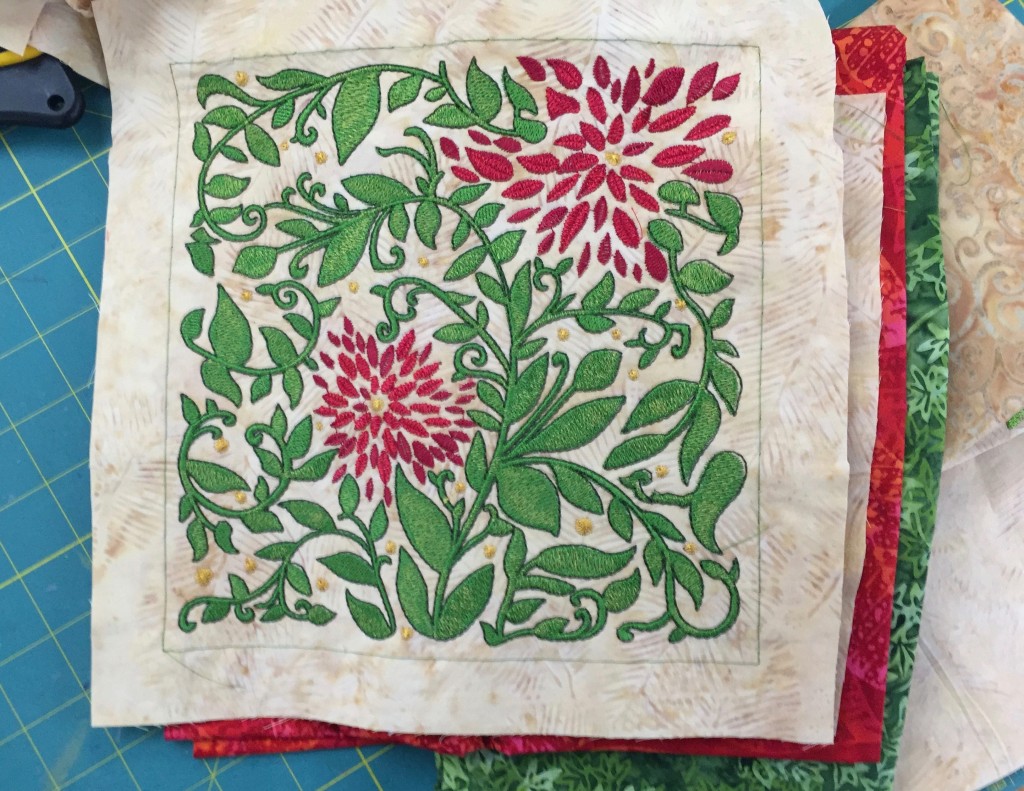
Lonnie Rossi embroidery design available from Janome, included on the Janome 15000.

Lonnie Rossi embroidery design available from Janome, included on the Janome 15000.  The red and green will be part of what I plan to do with this block.  Sorry the photo is a little blurry–I’ll fix that by the time I get the project done! 

Can you believe that I, the “never do anyone else’s designs” person and “embroidery really isn’t me”, have enjoyed learning about embroidery on the phenomenal Janome 15000 that I currently have on loan (thank you again Janome-America).  Most of the included designs are, well, why “embroidery is not me.”  But Lonni’s designs ROCK!   The one above was done in a totally different colorway–soft greens, some peach.   Well, not me.   Has opened up a world of possibilities, including perhaps some of MY designs finally getting refined and submitted for consideration by Janome!  [Taylor, I promise, I really have stuff for you! I just need to make it good enough to send in!]

As part of the Janome Artist-Teacher loan program, I make stuff that Janome can blog about or use in their booths to show what can be done with their machines.  I thought the flowers looked like poinsettia as well as chrysanthemums, so I changed up the thread colors to reds, green and gold (not metallic).

I am also not someone that loves fiddling with computerized stuff on a machine.  I have to say, this machine has made it SO EASY.   Another thing that has helped immensely if an App from Jim and Diane Stutsman, available for iOS devices (iPad and iPhone), that teaches you everything but everything about the 15000.  I’ll review that in my next post.  It costs only $59.95 US, and all I can say is that if you have this machine, you will NOT regret spending that $60.  Totally worth it.

Anyway, when the winter Janome project is made with this design, of course I’ll share here.  The pattern will be available for free (here or on Janome or both…I’ll let you know), along with exact thread colors, yardage, etc.   Stay tuned!

Gosh it feels good to be back in touch (and have a functioning brain and body…now, to do something about the pudge and lack of fitness….)!

Re-Entry!

Tuesday, November 25th, 2014

As usual, re-entry to home life after Houston is a whirlwind, as you might gather by the absence of posts here!  Joshua’s birthday is always just a few days after my return, so usually the suitcases aren’t emptied and put away before I’m shopping for birthday dinner and so on.  Life was complicated by the snowstorm which cancelled my flight from Boston, causing me to drive home in the snow in the dark in a rental car.   At least they cancelled flights early, so I got home not much later than I would have had I waited in  Boston for my connecting flight.  In the next few posts I’ll share International Quilt Market and Festival, but first, a little bit of home.  Since US Thanksgiving is in two days, and since there is nothing I am more thankful for than my family and home, let’s start here.

Getting up the driveway the night before I took this picture was entertaining.  Our plow guy had to use his backhoe there was so much snow, and IT got stuck due to soft / not frozen earth and deep, wet snow.  I left my car at the bottom of the drive and walked the last quarter mile uphill to the house.  But it sure is glorious when the sun comes out!

Getting up the driveway the night before I took this picture was entertaining. Our plow guy had to use his backhoe there was so much snow, and IT got stuck due to soft / not frozen earth and deep, wet snow. I left my car at the bottom of the drive and walked the last quarter mile uphill to the house. But it sure is glorious when the sun comes out!

asdf

Aren’t those colors fantastic?

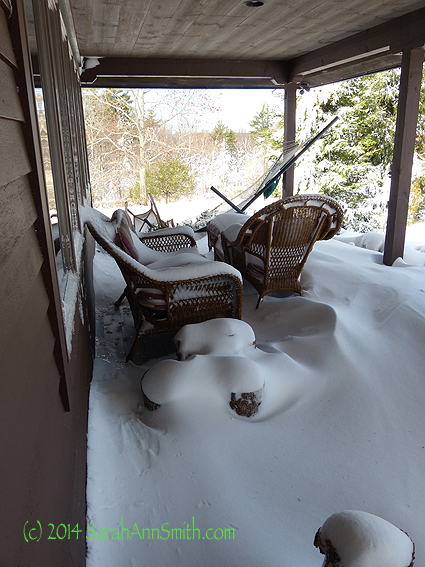
Guess we should have taken the settee and rockers in a bit earlier.  They are now stashed in the garage!

The snowy front porch.

The snowy front porch.

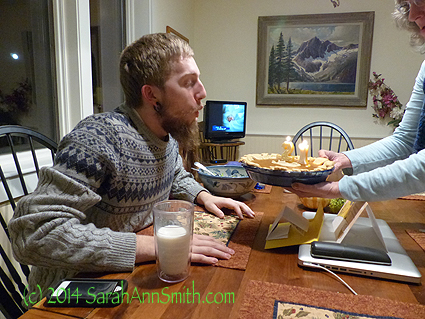
Then, pumpkin pie.  The shopping list for Joshua’s birthday always begins with fixings for his birthday pie, which is what he has wanted since he was about 10.  We’ve kept the “year” / age candles as the boys grew, and keep re-using them.  Joshua is now starting his third decade—how can he be 21????????

Thanks to Eli for getting the shot--mama delivers the pie.  Yes, Joshua shared LOL, but we did send them home with the nearly half-a-pie leftovers, which I expect were gone by breakfast the following morning.

Thanks to Eli for getting the shot–mama delivers the pie. Yes, Joshua shared LOL, but we did send them home with the nearly half-a-pie leftovers, which I expect were gone by breakfast the following morning.  Notice he’s wearing the sweater Eli and I bought him in England?

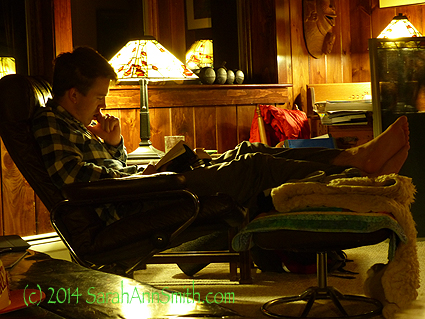
Then I was sneak-attack with the camera.  None of them were thrilled, but what the heck.  I’m Mama, and I want pictures!

Ashley, Joshua being our goofball, and Paul on the sofa.

Ashley, Joshua being our goofball, and Paul on the sofa.

Eli, muttering because he knows I'm taking a picture, but I love this one!

Eli, muttering because he knows I’m taking a picture, but I love this one!

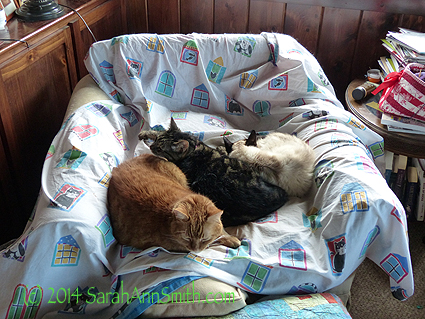
And the next day, three fourths of the feline contingent:

L to R:  Tyger, Hannah Chan and Zeus.

L to R: Tyger, Hannah Chan and Zeus.

I’ll have a new post tomorrow starting with International Quilt Market.