email Youtube

Home
Galleries
Blog
Workshops & Calendar
Store
Resources
About
Contact

Archive for the ‘Professional quilting’ Category

Things to think about when teaching on the road….

Wednesday, January 13th, 2010

A question arose on the QuiltDesigners Yahoo group recently (many of the designers also are quilt teachers) about digital projectors.  That led  to a longwinded reply on my part, and it occurred to me that you folks might like to read some of what we need to think about when we travel, schlep mountains of stuff–HEAVY stuff–to teaching venues, and have to invest in the equipment.  Though teachers’ fees might seem high, when you spread the income out over the days you travel for which you are not paid, the prep for each class for which you are not paid, the cost of handouts and class supplies it’s not very much in the end (usually I don’t charge for routine stuff–only add a kit fee if the cost is something like $10 per student instead of $2–even in a class of 24, that’s $48 out of pocket for handouts etc).  My laptop bag probably has about close to $5000 in laptop, projector, videocam, cables, not even talking about the WORK that goes into the programs and whatnot.   So here goes…

The digital projector model I have (bought about 15 months ago) is probably not made any more but the best advice I got was:

  • buy the lightest weight one you can afford—they seem to gain an ounce with every step down every airport concourse!
  • buy the most lumens you can afford—many places that we teach and lecture there is a lot of ambient light. You need to be able to project a good image on the wall (or white flannel or foam core!) with light from windows, etc. I think mine is 2600 (the most in the under $1000 range when I purchased), and it did great in the well-lit classrooms in Houston. Use them for teaching, not just lectures….

I bought a very inexpensive, very small video camera and small tripod. I set them up on my table to project live demos on the wall, and students love it! I understand you can now get “wireless” communication between camera, laptop and projector in some instances/situations. That would be good. That snake’s nest of cables is a trip hazard! The tripod I bought is a mini…good for using directly between me and the sewing machine to get images of the needle/foot area. A taller one, set to the side to “beam down” on demos I do would also be useful, but don’t have it yet. There are also gooseneck cameras, so you can have this little bitty “eye” reach over from the side and look straight down on what you are doing. That might be a solution.

Jan Krentz has done up small “slide show demos” of things she demos in class. First she demonstrates the steps live, then she’ll put on the slide show on “loop” (endless repeat). The key instructions are written onto the slides that are projected. She can walk around the room and help while things are playing, students can look up and follow along at their own pace. This is my goal…to prepare mini-presentations that need this method for my classes. While I teach things that don’t always lend themselves to this approach, it’s fabulous when it does help you.

Also from Jan I learned about pre-class information/entertainment. Jan has her projector on before the class begins with instructions on what you need out and ready, and what can stay stashed under the table until later. Brilliant! As students filter in they can read and heed, while Jan gets to greet new students instead of endlessly repeating herself (well, she probably does that, too, but still….).

In a lecture Jan gave up here in Maine, she also told us a little about herself and San Diego (she lives near there) at the start. So I did up a “pre-show entertainment” for Houston, with slides of Camden, Maine through the seasons, our house, a not-close-up shot of the kids (they’re not identifiable really in it) and the dog…. and students really seemed to enjoy looking at the pictures. That meant *I* had time to get set up and prepped for class. So often I find students want to chat and be friendly–I do too, but I really MUST prep and have things ready to go the minute time starts!

From TSA (the US Transportation Security Agency): I bought a special laptop briefcase which means I don’t have to take the laptop out of it. It also holds the projector and all cables. HOWEVER, that is too much stuff for the scanners to cope with. It is faster if I leave the laptop in the case as it was designed to reveal the laptop, but remove the projector and baggies of cables/cords and put them in the gray bin.

I bag my stuff by product: all the projector stuff goes in one sturdy ziploc baggie, all the videocam stuff in another, the iPod and phone chargers and cords in a third. I just empty that compartment of the briefcase–four items (projector and three baggies) into a bin and I’m through easy peasy. Re-packing that section of the briefcase is fast then, too!  Mo’ bettah!

Another jem from Jan Krentz: Buy some of the day-glo/ bright colored Duct Tape and make “tags” for EVERY cord, cable, laser pointer, remote control, and put your name and contact info. With a glance around the room at the end of the day I can tell if one of my lime-green-tagged items is mixed in amongst the snarls of other black cables around the room. And if one gets left behind, folks can contact you and return it.  This saved me $80 for a remote control I left on a podium up in Augusta, Maine..phew!

Finally, take a small surge protector (mine is in the baggie with the projector stuff), but ask your hosting venue to have a long extension cord–they just weigh too much to haul around.

Thanks to Jan for sharing so much of her hard-earned knowledge with newbie teachers!  I took a traditional workshop with her up here in Maine because I wanted to watch her teach.  I had met her the year before when we were both teaching in Paducah at the big AQS show; we shared a 2-hour van ride to and from the airport, plus ran in to each other in the room where the teachers shipped-ahead boxes were stashed.  She was SO generous, plus she’s nice and I learned a ton, both in Paducah and in her class up here.  THANKS, Jan!  Her website is here–I can heartily recommend classes with her.

Cheers, Sarah

PS–late additions:

Photograph all your equipment—every cable, remote, everything.  In Photoshop or printed out add the item name and product number, along with the 800 number of the company (both manufacturer or place where you can order re-supplies).   Keep this photo at home, and another in your travel bag.  Make sure the 800 number for the company is on it so if a piece breaks (like heaven forfend the lightbulb) you can order replacement parts ASAP/overnight delivery.  I order much of my photo stuff from B&H Photo Video in NYC, and have their phone number too.

Numbering stuff is good, too.  Then you can do a quick count:  if I have four items in the bag, I need to look for one more thing–that idea.

I also made a “cheat sheet” on setting up the projector and laptop.  I need to plug in the projector, turn it on, link up the laptop with the USB cable, THEN start up the laptop.  Otherwise the projector has “issues” finding the laptop which leads to needing to re-start the laptop.  Since I don’t use the set-up all the time, I keep a page with instructions to myself inside a page protector in my bag to remind myself of those little things.  Those friendly quilters asking to help sometimes distract me and I get confused with all the cables, etc.

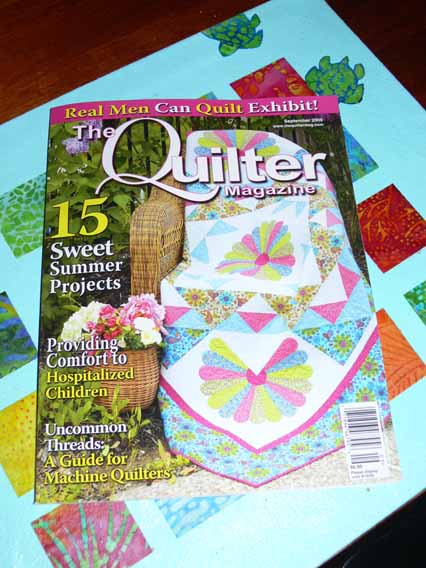
A Brief Detour: The Quilter Magazine (Sept)

Friday, July 17th, 2009

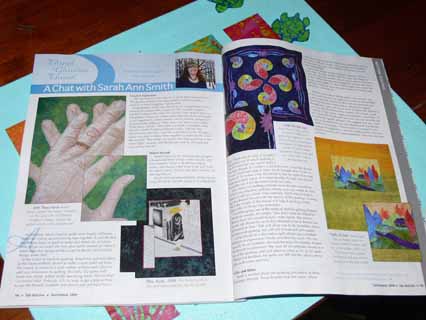
Woohooo…..  a while back my contact at Janome America (I am VERY fortunate to have a loaner Janome 6600 from them, thank you Janome-America for your support!) called to ask if she could interview me about thread.  It turns out she moonlights writing for The Quilter magazine….

2009.07.Blog.TheQuilter002 I had thought I would be one of several people quoted in a longer article, as she had also spoken with Bob Purcell, co-owner with wife Heather, of Superior Threads (which also happen to be some of my favorite threads…I must, literally, have several hundred spools!).  Well… it ended up being a 2-page profile!

In the magazine’s machine quilting section are an interview with longarm master quilter Renae Haddadin, the profile of me,  an article (I’m guessing this one is also by my contact) on “choosing the Perfect Thread:  a Machine Quilter’s Product Guide” and one by Morna Golletz of the Professional Quilter Magazine on a machine quilting career.

2009.07.Blog.TheQuilter001

Thanks A. for calling, asking me, and turning it into a whole article (and bless you for mentioning the book up front!)!

Moo Cards

Sunday, October 26th, 2008

Oh what FUN!  I’ve been hearing about these Moo Cards for a while now on the QuiltArt list.  When I got the opportunity to participate in the Open Studios (blogpost here), I decided it was time for something a bit fancier than business cards made on my printer at home.

If you stop by my table at Open Studios on Wednesday, October 29th, I’ll have them there for the taking!  Also when I demo in the Misty Fuse booth on Thursday and Saturday mornings, somewhere around 11 or 11:30 ish……. See you there I hope!

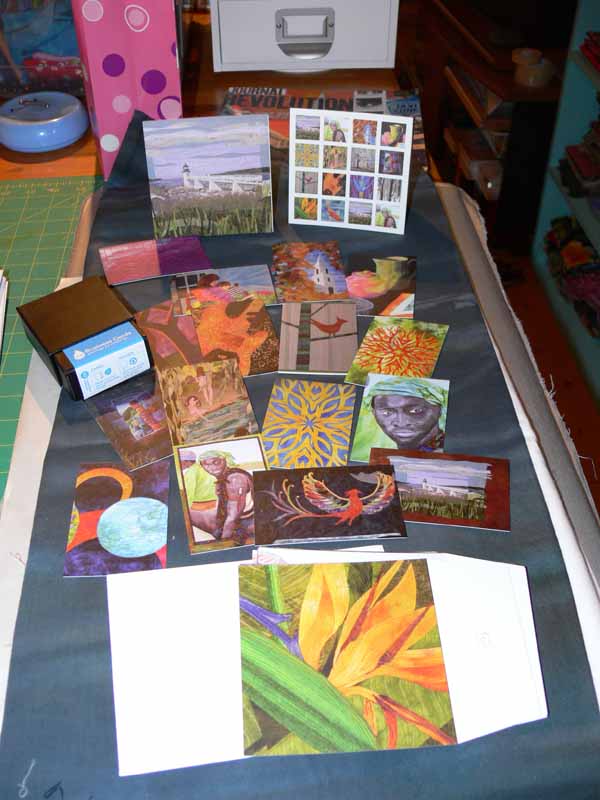
Wide angle of Moo Cards

I had not realized the cards were printed in England, but even at that the cost for 200 2-sided (color both sides) business cards and sixteen easel notecards was only $120 including shipping!   The quality of the cards is astounding…. in the photo above, you can see the selection of cards (I had 24 different images, could have had more but decided just to go with these).  One side of the heavy, glossy cardstock is one of my quilts.  The reverse (and of course forgot to include that in the photo) has another photo… I used the yellow-blue Hawaiian quilt since it is also the background for my website and blog plus all my contact info in a coordinating turquoise ink.  They also include a nice black card holder box (on the left toward the back).

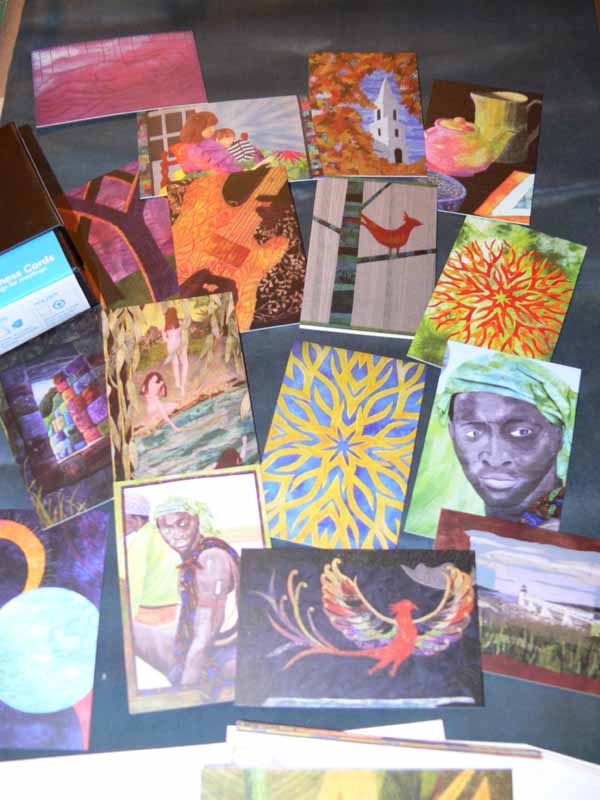
The notecards, seen at the back, have a square photo and a trapezoid-shaped white “wing” that bends back, allowing the card to stand up on a desk.  The sixteen cards plus envelopes cost about $25….(that was included in the amount above).  Anyway, I am thrilled with the quality, and will order from them again.  Here’s a closer view of the business cards:

Moo cards, business cards only

Here’s to hoping the cards will, eventually, lead to some contacts that might lead to some teaching jobs!

Book Review: Digital Essentials

Wednesday, August 27th, 2008

Bottom line:  if you take digital pictures, enter quilt shows, want to print photos onto fabric, want to print photos from your printer at home, want to design quilts on the computer, or learn to manipulate photos, or learn to use your photo editing software more effectively, want to know how to get the color in the photo to look like it does in real life, and THEN want the print to have the same colors…. BUY THIS BOOK!  This book will be an essential reference tool in my library, I can tell already.  It is not a sit down and drool over the pictures book, but it is a book you will use again and again and again!

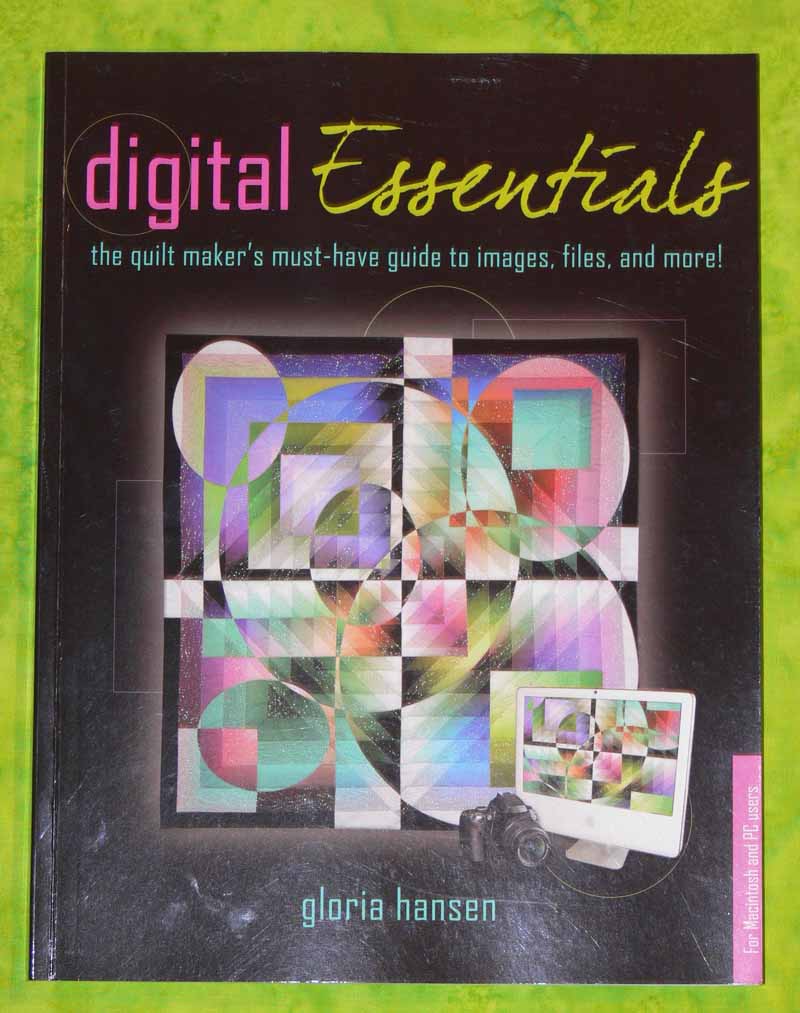
Digital Essentials

The caveat up front: Gloria is the one person I wanted to design my website, and she and Derry did a fantabulous job.  That probably makes me slightly biased, but as anyone on  the QuiltArt e-list knows, Gloria’s knowledge (and generous sharing of that information) on the list are such that most of us have an e-mail folder entitled “good stuff from Gloria”!

The subtitle to this information-packed book is “the quilt maker’s must-have guide to images, files and more!”.  I couldn’t agree more….   for both MAC and PC uses, Digital Essentials is written by Gloria Hansen, who is not only an award-winning quilter (major ribbons at both AQS and Houston in the past year alone!), but also an award-winning website designer with her partner Derry Thompson of Gloderworks, and a top-notch photographer. In just browsing the book when it first arrived, I learned stuff, was impressed with how well laid-out the book is, and how Gloria makes a seemingly complex subject understandable.   Digital Essentials is published by the Electric Quilt Company, ISBN 1-893824-64-0.  The book is available by mid-September from Gloria here, from Amazon, or ask your local quilt shop to stock it!

At first I intended to review this book in one fell swoop.  But….. There is SO much in the book, and as always I am so pressed for time, that I thought I’d do a synopsis of what is in the book, then later on work my way through a couple of the chapters that teach things I really want to know, and share the results with you as I can get the time to do the work.

The book is in four major sections:

  1. The Fundamentals
  2. Working with Images
  3. Saving for the Web
  4. Reference

Start at the beginning:

Let’s say it right up front:  computer lingo and camera lingo can be really daunting.  But I realized it is the same situation quilters face when dealing with art terminology.   I tell students in my “If you can write your ABCs, You can Draw” class, folks are intimidated by the vocabulary of art:  composition, complementary colors, tangents, value.  But it is just words.  We can all learn what they mean.   When we started quilting we probably didn’t know Log Cabin meant a block, not a building, and Baltimore Album was a style of quilting form the mid 1800s, not a photo album about Maryland!

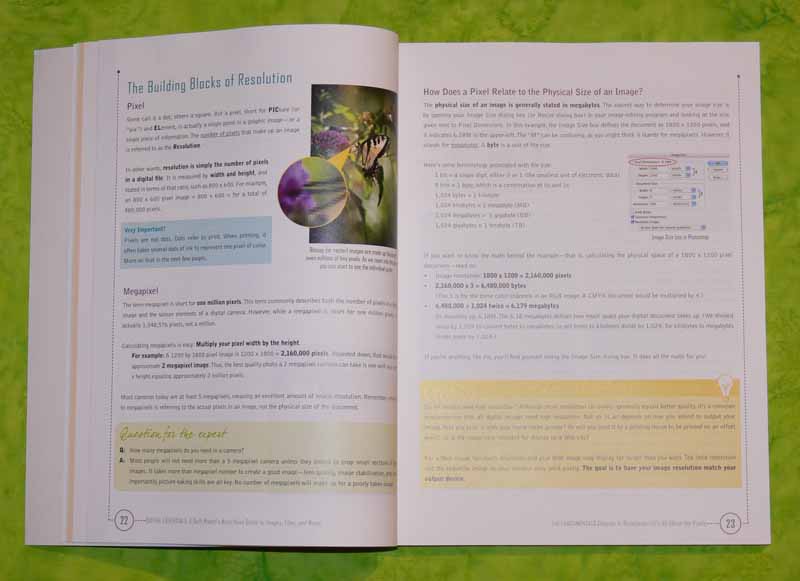
And that’s how Gloria begins:  by explaining what all those not-really-daunting words mean.  Best of all, she uses pictures and pictures of drop-down screens from commonly used picture software to illustrate.  The book’s layout and color-blocking help organize the text, making it easy for you to scan and find what you need, as well.

p. 22-23

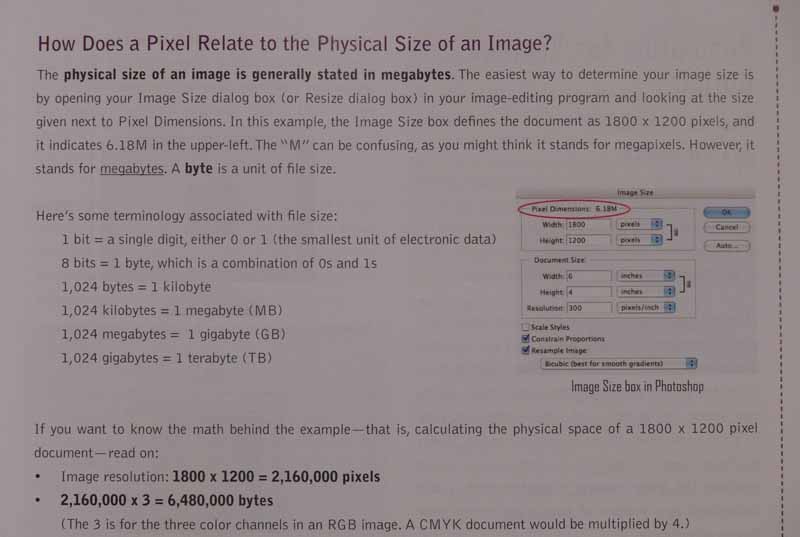
Especially helpful are the red ovals on the screen shots which help you know WHERE on your screen to look!

Red ovals

Getting the color right…from real life to captured image to computer screen to print out… is key.  In Chapter 5, Gloria breaks down what to do into a step-by-step process.  I can tell that this isn’t something I want to do late at night when my biorhythms are at their worst, but I can also tell that if I simply take it one step at a time, I can do this…and there is no way I could have figured it out on my own (well, at least in this century).

The next two sections — images and the web:

I’ve learned some of the things in these sections by doing, by using Gloria’s help to me individually and to the QuiltArt list over the past four years.  But already I have learned there are different ways to crop things that may make my life simpler and faster (more time to quilt, or sleep! is a good thing).  As I have time to work with the book, I’ll come back to these topics.

Resources:

OH how I LOVE a book with a good index…. this one is four FULL pages, which means I can find what I want quickly, instead of having to flip through many pages….

There is a Reference Guide with commonly asked questions…and the pages on which to find the answers!

There is a comparison of Photoshop, Photoshop Elements, and Paint Shop Pro, and also a glossary.  Let’s face it…we can read the definitions but they don’t always imprint (at least on my brain).  Having this mini-dictionary in the back is eminently helpful.

The last test:

I’ll challenge myself right here, in print.  I want to understand a few things.  Let’s see if I can find the answers in the book….

1.  What are layers and how can I use them?

2.  Can I manage to create a somewhat kaleidescopic image on my Mac laptop using Photoshop elements?

3.  How can I (easily?) watermark the photos I post to my website and blog?

4.  How do I get the colors of my photos to be the same as the actual cloth, so that entries accurately reflect the quilt?

5.  When I download photos from my camera to the laptop, why do they come out at 72 dpi and HUGE size (about 35×42 inches)?  I shoot at maximum resolution.  Can I adjust either the camera or the software so they display at 300 dpi and smaller size?

6.  What is Unsharp Mask????? And why do I need to use (or not use) it?

I’ll work through these questions over the next couple of months (I hope), and I’ll share my results.

Book Review/ Masters: Art Quilts

Thursday, August 14th, 2008

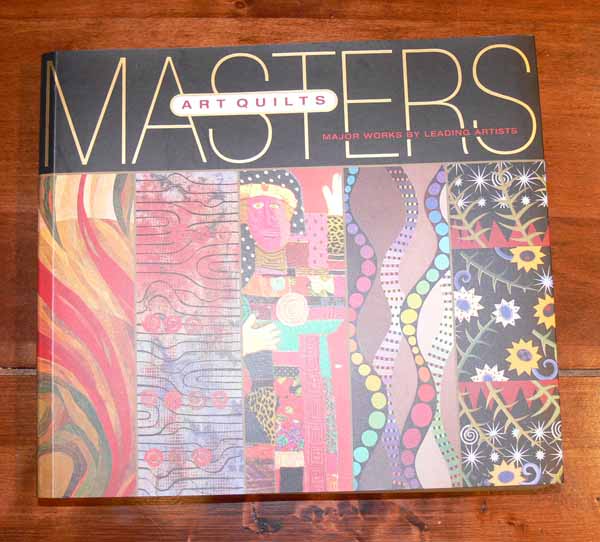
For the past month or so I’ve been enjoying the Lark publication Masters:  Art Quilts (subtitled Major Works by Leading Artists).   This book is one in a series of fine arts and crafts such as Porcelain, Beadweaving, Gemstones, Glass Beads and others (forthcoming) on Wood Turning and Gold.  This series is a nearly square 9×8 inches, and hefty…the shortest is 300 pages, with the Art Quilt volume the heftiest at 416 pages. (Note: all photos in this post are clickable to see them a bit larger–scroll down for LOTS of great review pics.)

Masters Art Quilts Cover

How author and curator  Martha Sielman, executive director of Studio Art Quilt Associates (SAQA ) and an art quilter herself, managed to whittle her selections down to a mere 40 of the many, MANY outstanding art quilters working today I do not know.  What I can say is that she did a smashing job of selecting a representative sampling:  from some of our trailblazing artists to some newcomers who deserve to be included in the top tier, from abstract to highly representational, from those who work exclusively with fabric and thread to those whose quilts are nearly encrusted with embellishments, and from around the world, Martha has included something for everyone’s taste, and introduces us to some quilters we may not have known–well, even though I read voraciously and troll for news of the art quilting world outside the United States, there were some artists that were new to me.  The artists (in the order in which they are presented in the book) are:

  • Jane Sassaman
  • Michael A. Cummings
  • Ita Ziv
  • Cher Cartwright
  • Noriko Endo
  • Deidre Scherer
  • Carolyn L. Mazloomi
  • Hollis Chatelain
  • Linda Colsh
  • Charlotte Yde
  • Joan Schulze
  • Judith Content
  • Kyoung Ae Cho
  • Jette Clover
  • Eszter Bornemisza
  • Pauline Burbidge
  • Yvonne Porcella
  • M. Joan Lintault
  • Katie Pasquini Masopust
  • Nancy N. Erickson
  • Susan Shie
  • Caryl Bryer Fallert
  • Jeanette Gilks
  • Jane Burch Cochran
  • Pamela Allen
  • Therese May
  • John W. Lefelhocz
  • Miriam Nathan-Roberts
  • Jenny Hearn
  • Terrie Hancock Mangat
  • Wendy Huhn
  • B.J. Adams
  • Inge Mardal and Steen Hougs
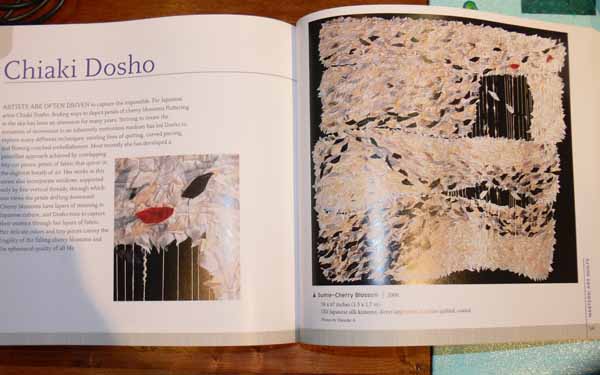
  • Chiaki Dosho
  • Inge Hueber
  • Michael James
  • Velda E. Newman
  • Anne Woringer
  • Clare Plug
  • Elizabeth Brimelow

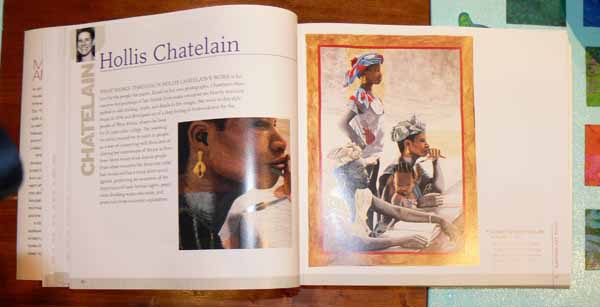
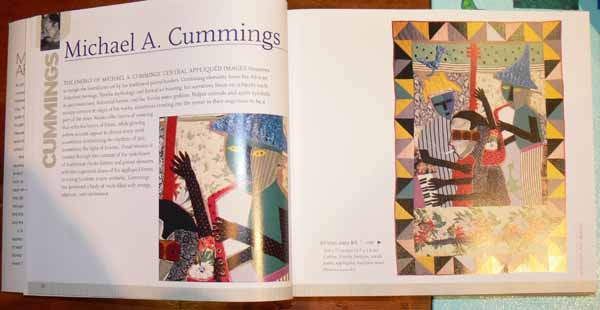
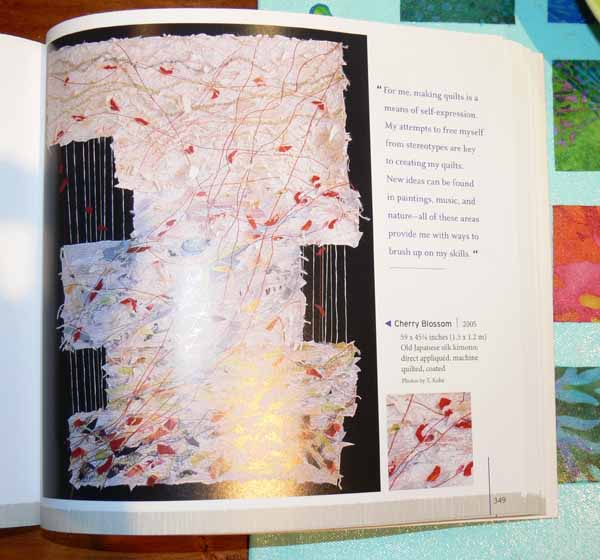
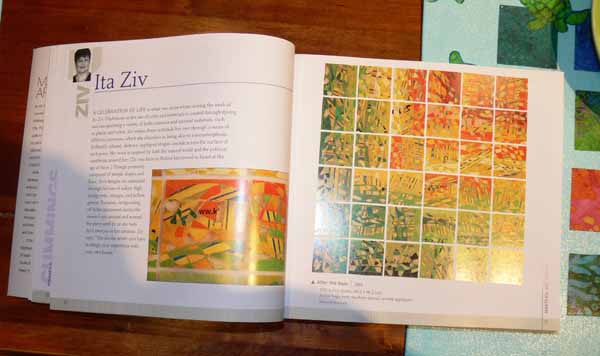
The book begins with a brief Introduction by Martha Sielman, and is followed by profiles of the artists.    Forty art quilters are included, each with 10 pages.  Each “chapter” begins with an introduction written by Martha and a detail photo on the left-hand page, while the full quilt is showed as large as can fit on the page on the right.  Each photo has the title, year it is made (which allows one to see progression in the artists’ work and style), size, and a brief summary of techniques.  On the subsequent pages, full-shot photos of an representative sample of that artists’ quilts are accompanied by quotations from the artists that give insight to their style, goals and personality.

With only a few exceptions, the photography is outstanding, showing even the stitching detail.  For those not familiar with taking photographs of quilts, it is challenging (to say the least!), so the ability to see this level of detail throughout the book is a rare treat.  Here are some of my favorites, beginning with one of my quilting idols, Hollis Chatelain:

Hollis

I had not known of the work of Michael Cummings:

Michael Cummings

or Kyoung Ae Cho before, but I am certainly glad I do now….time to go surf the internet, eh?

Kyoung Ae Cho

and a photo of another of her pieces:

Cho, second piece

Ita Ziv of Israel uses highly unconventional materials, like the bags you get while shopping!

Ita Ziv

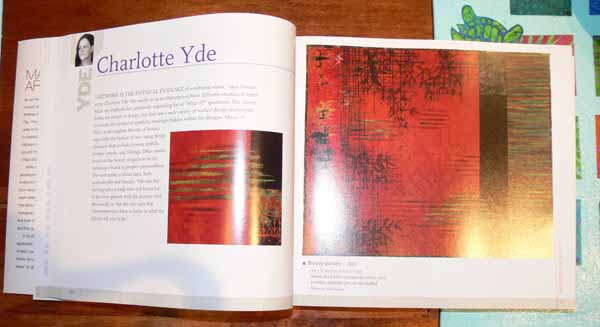
Charlotte Yde’s name was familiar, but I got to see some new works:

Charlotte Yde

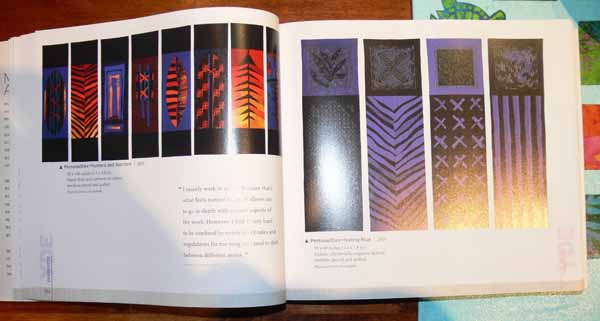
I love her bold use of color, her often monochromatic quilts, and in these pieces the repeated shield or banner shapes:

Yde, additional pieces

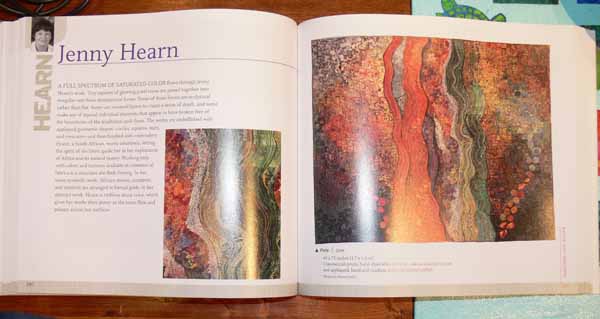
Jenny Hearn’s work reflects her South African heritage though it is not always obvious.  There is a rich complexity to the visual texture:

South Africa

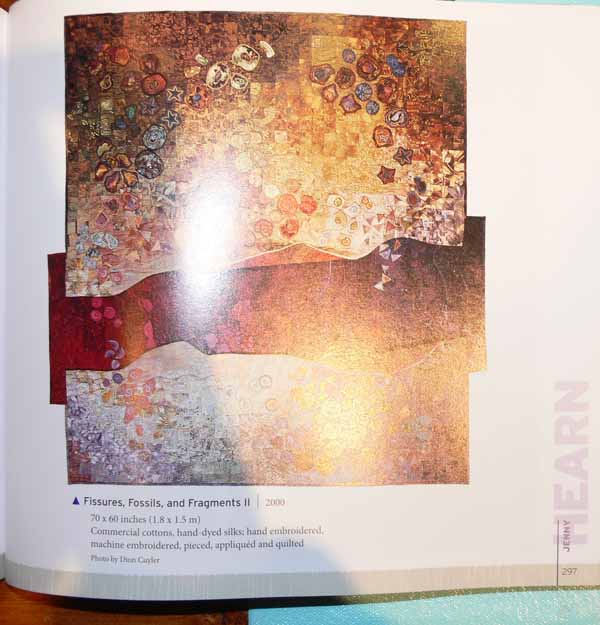
and another piece (by the way…sorry about the flash glare!)

Jenny Hearn 2

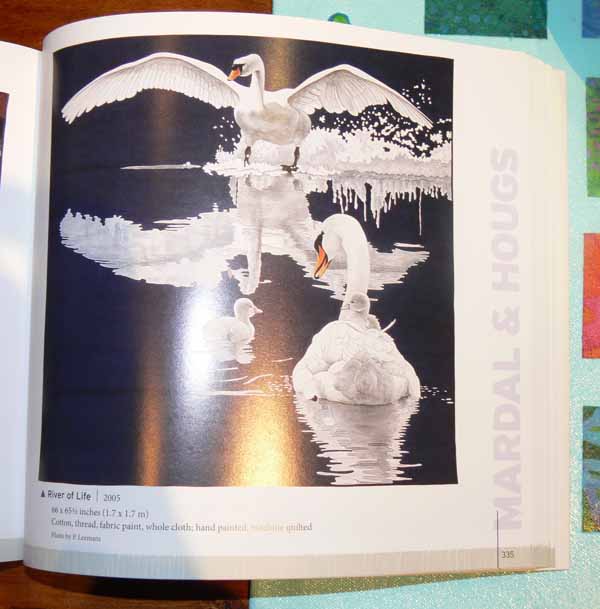
Inge Mardal and Steen Hougs’ quilts always stop me in my tracks when I see them in a show.  They are very large….often between 5×5 or 6×6 feet!   They are densely quilted, and glorious:

Mardal and Hougs

I honestly don’t know how Martha managed to restrain herself to a mere forty art quilters….  each and every chapter is a feast for the eyes.  I also don’t know how Lark managed to publish such a sumptuous coffee-table book for only 24.95.  If you purchase this book from SAQA store, part of the proceeds will go to support the efforts of the Studio Art Quilt Associates promote our art form.   It is also available here at Amazon.com. Like The Art Quilt by Michael Kile and Penny McMorris, this book encapsulates the best of the best at a specific point in time.  I expect that this book, too, will become a classic and a valuable reference.  It’s also just a joy to sit down and savor.