England 2014: the 13th, Stonehenge
Saturday, October 4th, 2014This late afternoon visit is one of the memorable moments of my life. If you stick with me and go through this post, you’ll not only see photos, but two short videos I took while walking inside, so you get to walk along with me!
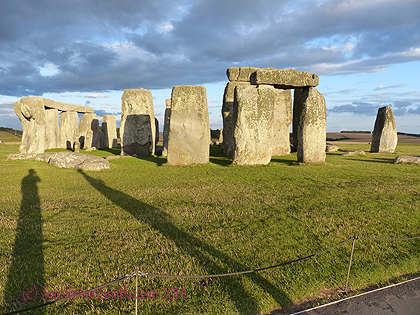
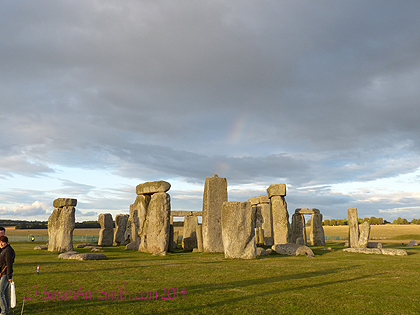
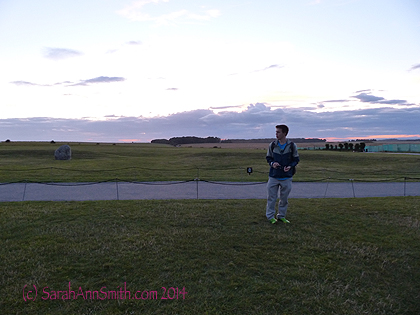
On the perimeter path at Stonehenge at about 7 pm. On a typical summer’s day, some 3000 tourists visit Stonehenge, which is located on the Salisbury Plain. They must keep to this walkway around the stones because they were being loved to death, with folks compacting the soil so much it was disturbing the structures. But with our after-hours tour, we got to go inside.
The tour Eli and I took, with Premium Tours and here, visited Bath, Lacock and Stonehenge (first part of the day blogged about here). For a considerable (but worth it!) sum, a few companies are allowed to bring a tour bus in at either sunrise or sunset, before or after the general public is allowed in, so you have the grounds to yourself. Since at least when I was in school in England in 1978, you couldn’t walk near to the stones but on a path a distance away (where I took this first photo). Now, these groups are allowed (in groups of 25) INSIDE the CIRCLE! Keep reading…the best, longest video is toward the end of the post in sequence.
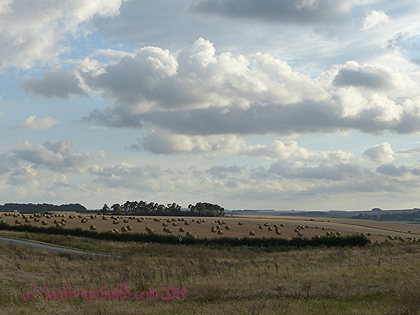
The Salisbury Plain as seen from the grounds at Stonehenge.
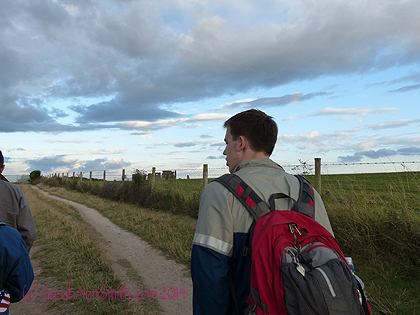
Eli on the approach road toward the stones, which are to the left of his face. The new wonderful visitor’s center is some distance removed so you get a feeling for the vastness of the plain and the size of the stones as you approach the circle, as people would have eons ago. Just to the left of Eli’s head, about the level of his chin, you can see a structure beyond the fence post…that’s it. Seems small on the broad horizon. Just wait!
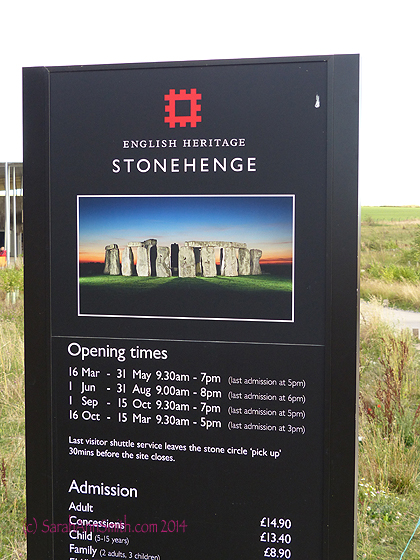
The official sign near the visitor’s center
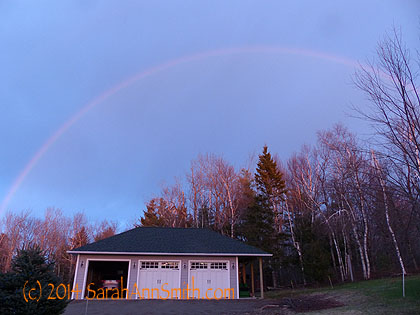
From that perimeter pathway. As the sun began to set and the clouds began to disperse, a rainbow appeared!
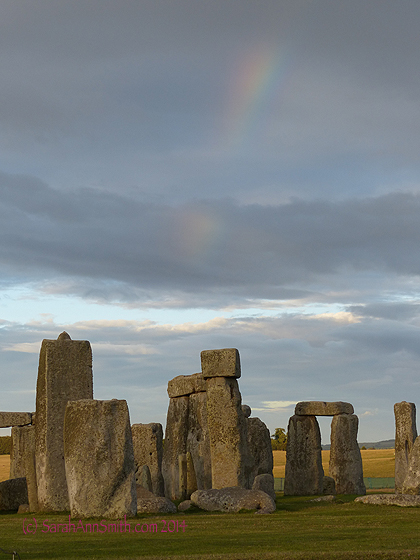
I moved a bit around the path so that it looks like the end of the rainbow is in the middle of the stone. Just looking at this I am transported to the cool evening air, the rustling of the strong breeze….the hush as we all stood looking. There were the 50 people on the bus, our tour guide and two security guards. LOTS better than a throng of thousands like during the day!
The site allows only 25 persons at a time inside the circle, and you are not allowed to touch the stones. Luckily, Eli and I got ourselves into the second group.
At one of the signs on the perimeter path–yes, we were really there!
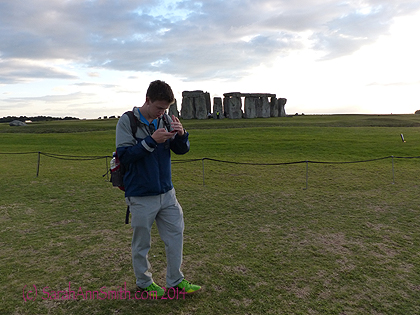
Even a teenager could be impressed, getting out his camera and checking the photo.
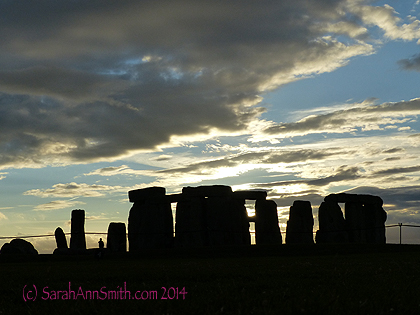
Metering the camera on the sky led to this stunning silhouette as the sun started to go down. Notice the guard on the left, to give a sense of how BIG these stones are!
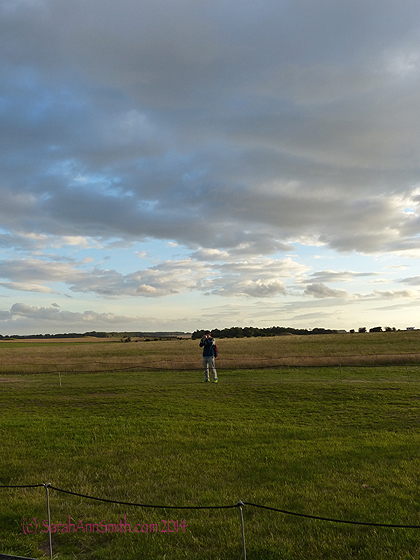
And Eli, moving away from the path and the circle to get a wide angle shot. Just by the trees on his right is a major road, the equivalent of a US interstate. They are working on relocating that major road farther away from the site.
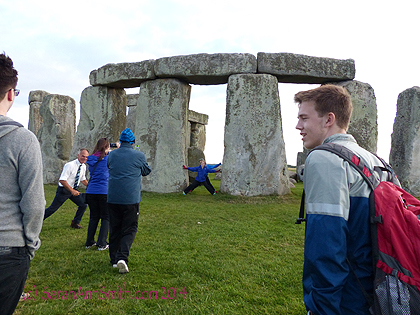
After the first group, it was our turn to go inside. The guide (the guy in black pants and white shirt on the left) had the kids go first and pretend to push the stones apart.
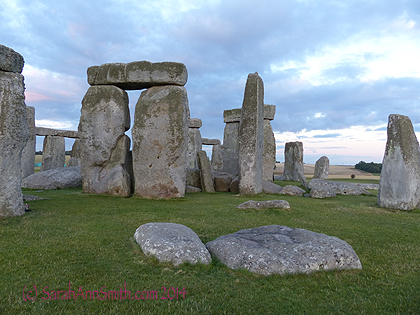
From inside the circle. That tallest stone in the center has a nipple on top: at the top of each of the standing stones is a nipple with a corresponding divot on the under side of the lintel / cross-piece. Amazing to think considering what tools they had when this was built.

At the top, where the cross beam rests atop a post, a bird’s nest.
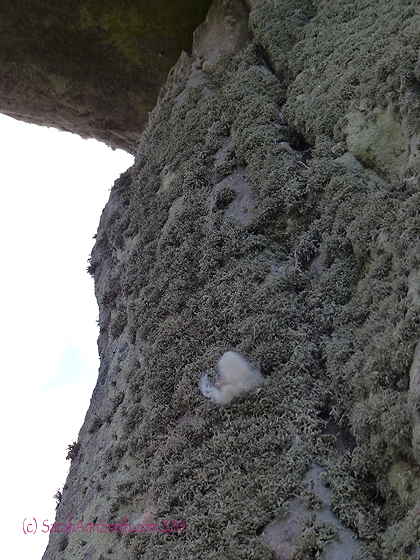
And about five feet above my head, a stray bit of wool blown from a sheep somewhere, stuck on the lichens.
Here’s the first video, me turning around inside the circle; if you click on the four arrows at the bottom of the screen it will go full-screen (then press escape to go back to regular view):
Stonehenge 1-Inside the Circle from Sarah Ann Smith on Vimeo.
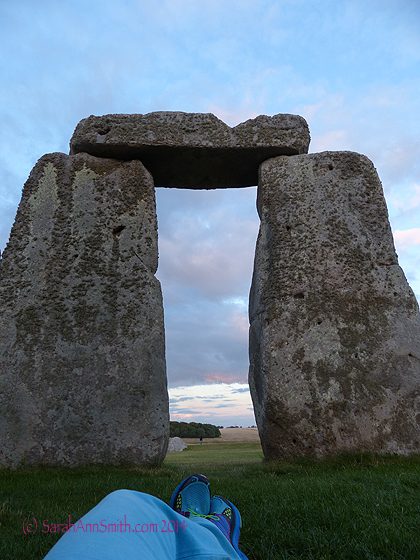
Decided to lay down on the grounds–no, didn’t feel any deep vibrations or communication from the other side!

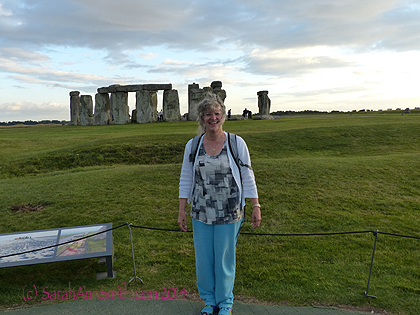
Eli at Stonehenge.
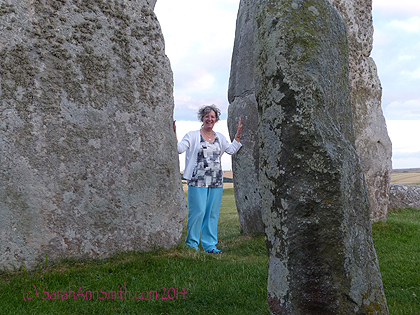
And me, carefully NOT touching the rock!
The sun begins to set on the Salisbury Plain.
And the second video, walking around the stone circle. Remember, if you click on the four arrows at the bottom of the screen it will go full-screen (then press escape to go back to regular view). Come walk with me and listen to the wind and sigh:
Stonehenge 2–Outside the Circle from Sarah Ann Smith on Vimeo.
Then the sunset began to glow…OH MY!
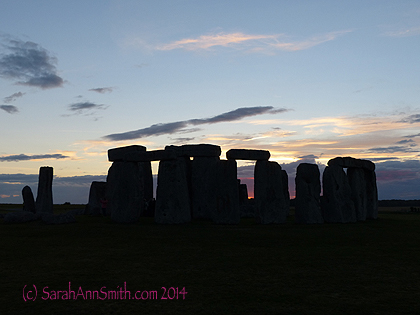
Sunset at Stonehenge, August 13, 2014. SIGH. Contentment.
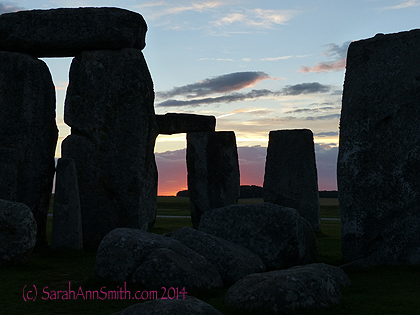
Sunset, again, at Stonehenge, August 2014.
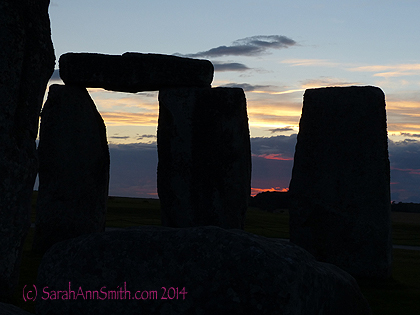
And it seemed the horizon was ablaze…Stonehenge, August 2014.
Everyone was just awed–we were all walking around smiling and awed from ear to ear. It was a long day, and at about 8 pm we began the trip back to London and our hotels. Worth. Every. Penny. Expensive, but worth it. A memory for a lifetime, and so glad I got to share it with Eli. SIGH. Contentment.