email Youtube

Home
Galleries
Blog
Workshops & Calendar
Store
Resources
About
Contact

Archive for the ‘Home’ Category

Recycling bags

Tuesday, March 13th, 2012

When we moved into our house last year we wanted to use the area under the benches in the entry as our recycling zone.  However, the space was too small for small laundry baskets, and too shallow for tall garbage cans, and everything else was really kinda too small.  So I decided I needed to MAKE some totes to take recycled glass,  metal, plastic and paper to the dump.  I really like the overall shape and style of the re-usable bags Hannaford grocers sell, so I used that as my basic idea.  Then I used my two empty birdseed bags and threw myself upon my friends for more; Kathy was in the process of moving and building a new house, so she gave me her entire stash of empty bags and I used them ALL!
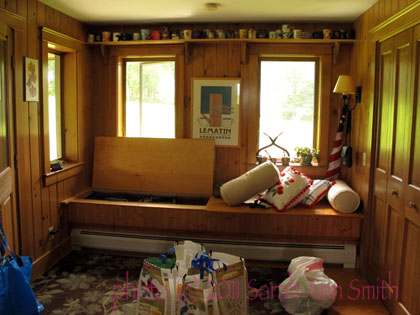
The bench, with the left side up and various stuff on the floor and the right side of the bench making a mess.

Here is what the inside looked like using large drawstring garbage bags on the hooks I installed:
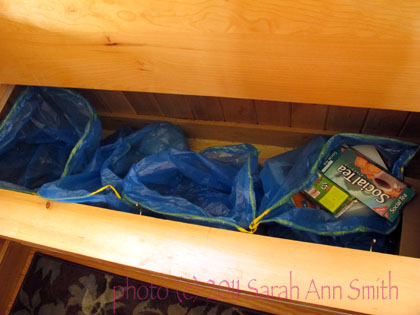
The bags shlumped and were an utter nuisance, hard to get stuff in without entirely clearning off the bench, etc.

So I sketched out dimensions and plans for bags that would work:
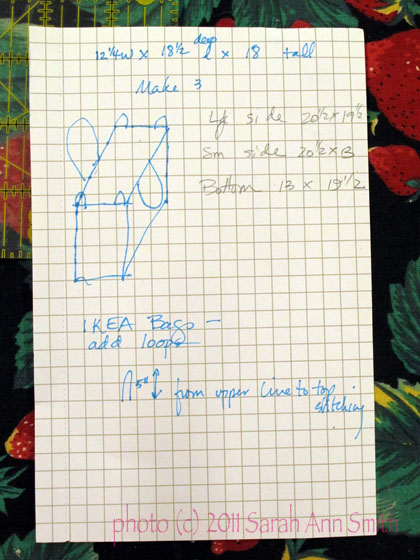
My working sketch...very rudimentary! The IKEA bag is that big blue one they sell for a dollar...use that on the right side of the bench for the voluminous redemption stuff and for the paper, which seems to clone itself at night. In Maine we pay a deposit on soda, Gatorade, wine etc. bottles, and get the nickels back at a redemption center, not the dump so having an extra large bag means we don't have to go as often.

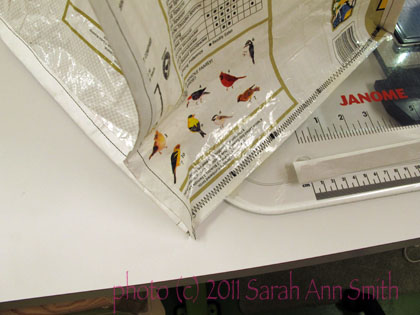
Then, time to sew.  My corners weren’t the neatest.  But I made each large bag from about 1 1/2 birdseed bags, then used recycled tyvek envelopes cut into strips to “bind” the seams:
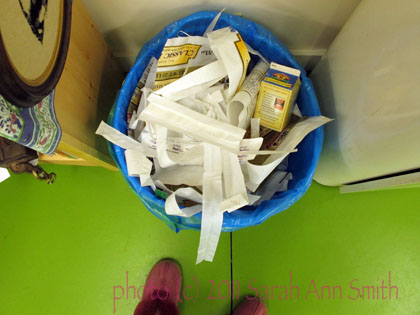
"taped" seams with strips cut from recycled Tyvek mailing envelopes

The leftovers...aren't you proud of me? I didn't KEEP all that clutter! It's in the garbage bin in my studio!

DRUM ROLL please:
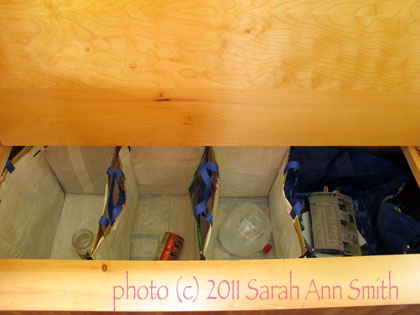
Done and in place! Each bag has blue handles (which in this photo are tucked between the bags), and at the four corners there are small black loops that slide over the hooks so the bags stay upright, open and in place. Left to right: glass, metal, plastic, paper (more or less alphabetical so I can remember what goes where and don't have to open the lid all the way to toss stuff in)

The bags are PERFECT!  The only snag is that they do get rather full, and that overhang on the back of the bench kinda makes it a pain to get the bags out.  So I just remove the least-full bag first and turn the others sideways after removing them from the hooks.  The hooks work well… I bought single hooks from Walmart to be thrifty . Shoulda bought sturdy double hooks from the hardware store, as one of the cheapo hooks has already broken.  Having two-hooks per unit would make it easier to remove just the full  bag, but it still works.

We’ve used these for over half a year now.  They are holding up quite well, and rinse out easily if someone (AHEM, guys!) doesn’t quite rinse out a container before chucking them into the bags.

Hope this might inspire you to make your own recycling center!


Painting–the inside of the house, part 2

Tuesday, March 6th, 2012

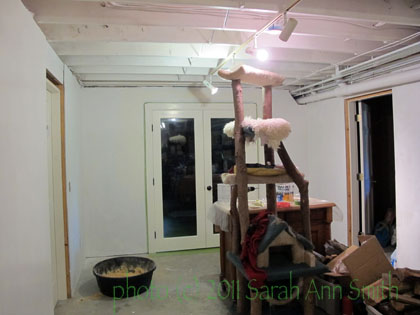
So here was the really big change and paint job:   The basement has a long rectangular area in the center, with rooms off of it:  a utility room (housing the furnace, oil tank, etc), a wood room (to hold all the wood for the winter heating by woodstove), a workroom, a space they used as a family room (with NO windows and painted an icky dark green with drab taupe on the ceiling) and we use as storage), and what has become my studio.  This area was painted a “roasted pumpkin” color…think the color of pumpkin pie, but a tad more orange-y.  Not a bad color, but not on walls of an area with no windows!  The stairs down to the basement were the same color.

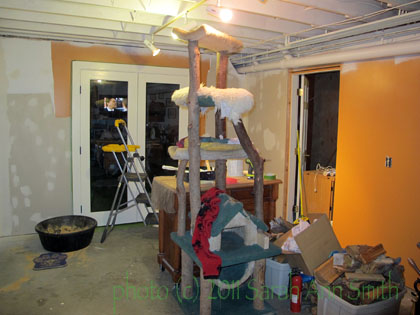
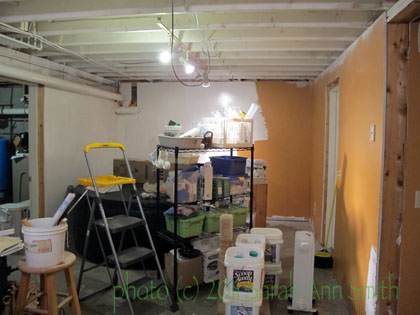
Stuff pushed to center, prior condition...unpainted drywall and some of that pumpkin color....


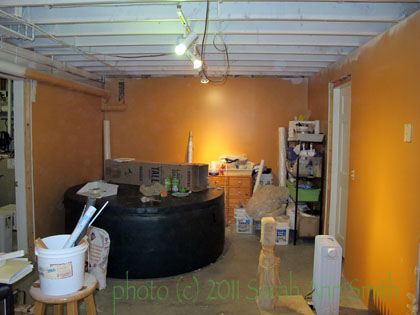
The other end, in pumpkin. Yes, that is a hot tub. In a windowless basement. ??? Never used. Time to sell it I think....

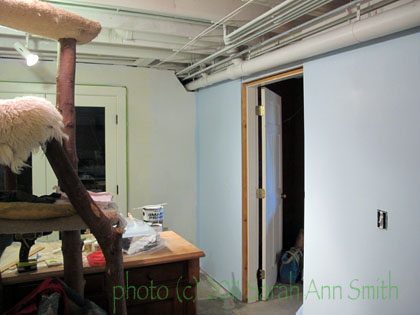
So last summer, I took a gallon of leftover sky blue (from the boys’ bathroom) and mixed it with a gallon of white to lighten it somewhat, and painted the walls in the center area.  First, it needed a primer though to cover up that dark pumpkin:

Looking better with the primer just on part of the walls

Hallelujah....lighter! brighter! What a welcome change!

Next, Blue:

primer on the wall on the left, blue (first coat) on the right

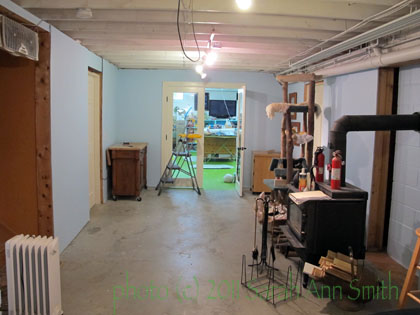
Looking toard my studio...isn't that BETTER?!!!!

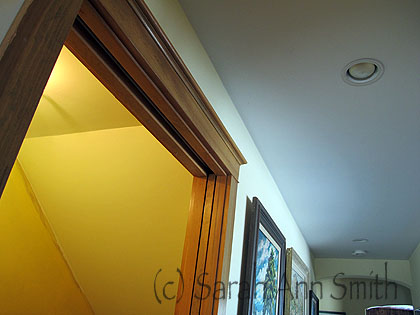
The stairs down (see on the far left in the photo just above) was just as awful.   So I tackled that about two weeks ago:

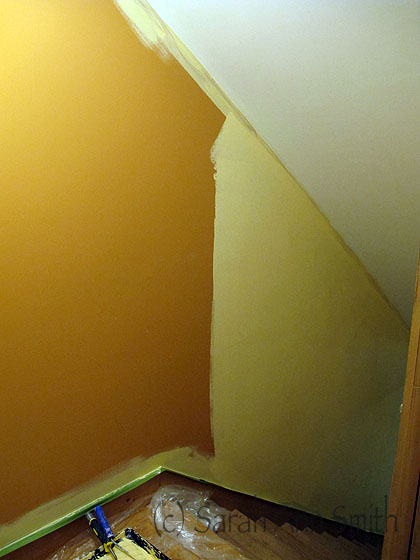
I painted the ceiling, too, in the stairs. It had been smudged when the previous owners moved out, and was this gloomy color. The light fixture alters the color somewhat, but in this photo you can see how gray the ceiling is in the rest of the house/hallway, ad the warmer "gardenia" color I put on the stairway ceiling

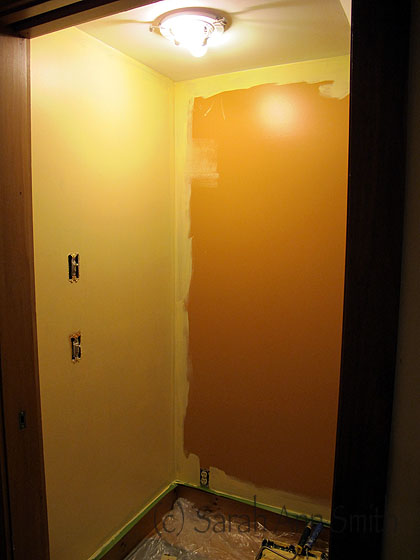
And getting rid of the last of the pumpkin just this past month:

Stair landing, halfway done

A nice Sunrise yellow color replaced the pumpkin! Mo bettah!

Painting–the inside of the house, Part 1

Thursday, March 1st, 2012

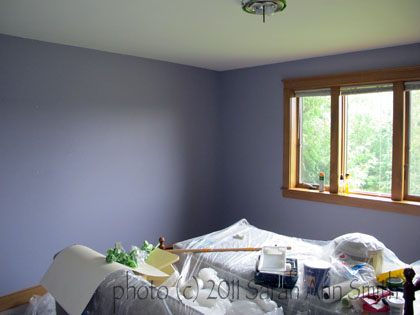
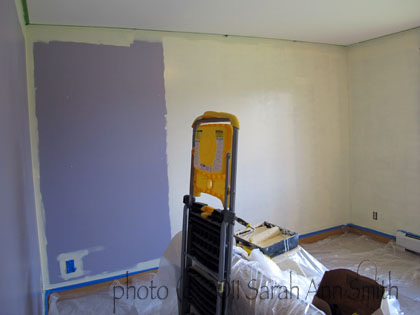
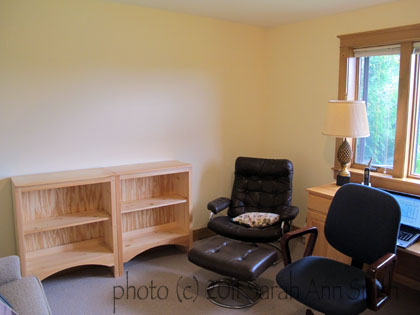
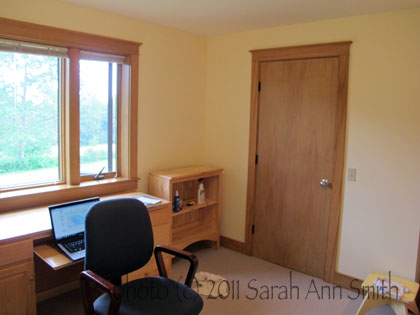
I never did blog about all the painting I did last summer/fall, and just finished more.  The house we moved into last February was in great shape but we decidedly did not share the previous owner’s taste in color.  At all.  When we moved in, we had painters do Eli’s room, the two bathrooms,  the dining room and my studio, but left the rest to do ourselves (meaning me).  Joshua wasn’t happy with the idea of moving at all, and instead of painting the lavender (Shudder) color in his room, just covered it up with posters.  When he moved out last July (and he’s doing GREAT by the way), Paul took that room as his office.  I realized the ceiling was grim…very dingy and gray ish in color.  So I painted not just the lavender walls, but the ceiling.  With the help of Leanne at the local EBS (Ellsworth Building Supply, a small Maine lumber company/hardware store), we chose Gardenia, a warm white. What a difference color makes…and not just in quilts!

Before: very lavender. VERY. and it turns out even the ceiling paint was tinged (and dingy-ed?) lavender....

Ceiling has been painted, cutting in with the pale yellow Paul chose....

Then,

The largest wall, halfway done...takes a lot of pale yellow to cover medium lavender!

Done....that long wall is no longer purple!

This is called turning gloom into happy!

And the other side of the room, again in sunny, happy yellow

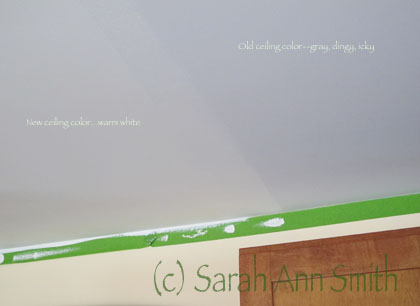
I discovered the ceilings throughout the house were this dingy grayed white.  UGH.  So I decided the entire house needs new ceiling color.  I can tell you, I DETEST painting ceilings, but I will do it.  In February, I did the kitchen and entry hall (all one big space).  Since a photo of a ceiling isn’t exactly exciting, you only get one:

The kitchen ceiling...original color on right, improved color on left, and green tape!

So after doing THAT obnoxious job, I treated myself to some quilting.  WOOT!  Back soon with quilting, Cheers, Sarah

Fog and Snow

Wednesday, February 1st, 2012

At long last we got a light dusting of snow yesterday—it has been a balmy, mild winter here in the far northeast corner of the US.  Until yesterday afternoon (January 31st for heaven’s sake!) we could see bare ground in way too many places.  Better today…. though I am mystified how it can be 95 percent humidity when it is 23 degrees F (below freezing for those of you on C. scale).  But, that meant we woke up to this:

I love it when the branches are all white.....

So this morning when I went out to do this,

Mom! STOP taking pictures, I wanna GO! I smell critters!

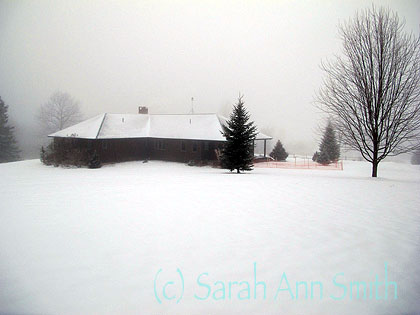
I took the camera!  Since the snow barely covers the ground and walking is easy, I went up behind the house and took this shot:

From behind the house, the view obscured by white fog

By this time last year we had about 18 inches, not two, of snow!  But I love how sometimes crystals grow on the branches and dried grasses:

Isn't that just spectacular, those shards of gentle ice?

And the pine grew the crystals too

And I’m still obsessed with milkweed pods and Queen Anne’s lace… this shot could so easily be turned into a great graphic design for fabric:

Queen Anne's Lace stalks that didn't get mowed before winter set in

I may have to go try this photo again…. it is a bit hard to see the ice crystals against the background of snow, but I love the crystals and how the dried flower pot makes a cup or nest of snow:

A nest of snow

Here’s to hoping we get at least one good blizzard this winter.  I love staying home, snug and warm, reading and (if the power doesn’t go out) quilting!   Now, to get down to the studio.  Nope, breakfast first, THEN studio!

Begin with art

Monday, January 2nd, 2012

What a concept… blogging about art on a blog named Art and Quilting in Camden (and now Hope, Maine, too!)….

Last year, I found myself with unaccustomed time on Christmas day and did a collage that soothed my soul and fed my need to create.  This year, I hoped to do the same but was instead happily busy with family and food and joy!  So I decided to make and keep some time on New Year’s Day for art… I think this is something that needs to turn into a tradition!

This year’s collage got a jump-start when I popped into Camden National Bank in mid-December and they had give-away calendars…those little ones that make a triangle stand on your desk and have photos.  The theme for 2012 was “Images of Maine.”  Perfect!   The 2012 collage turned into one about Home in Maine for me….

My January 1, 2012 collage

From time to time I also troll through magazines that are headed to recycling and cut out words and tear out pages with pictures I might like.  So this time I found this catalog (Title 9) where they use REAL (very athletic, on the young side, ages early 20s to 40 ish, trim and fit…sigh) where one of the models was Sarah…  for each one they had asked them to fill in (or their creative catalog person got REALLY creative) questions, including “Most At Home”–her reply, “in Maine.”  And her friends call *her* the Energizer Bunny, too!   Too fun…so of course I tore that out and modified a couple answers.  I used the Jan. 1 date from the calendar, and seven of the photos, plus others from my stash.

The big photo on the left page is of downtown Camden — our local “hub” which is a town of under 6,000 — decked out for Christmas.  I love the torn edges, but also liked the perforated bits so kept some of those.

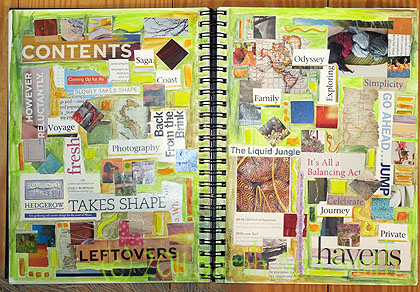
My collage from Christmas 2010 is in here, and it was interesting to compare… that one has words like Back from the Brink, Coming up for Air, Jo ahead….Jump,  Saga, Family, It’s all a balancing act.  Certainly tells the story of where I was.

2010 year-end collage

I used aquarelle pencils an small squares (1 inch) of color cut from magazines, and it is more colorful–I was trying to brighten up my life and my pages.  This year’s is much more peaceful… the chaos has, I think, finally ended.  It’s all about “home in Maine.”   Anyway, after looking at that one I then thought The “Winter’s End” page that I added to this year’s might be metaphorical as well as literal…..It’s time to begin anew, to create and to revel in life!

It’s nice to have time and folks with whom to share!  HAPPY NEW YEAR!