email Youtube

Home
Galleries
Blog
Workshops & Calendar
Store
Resources
About
Contact

Archive for the ‘Janome’ Category

Janome Education Summit 2018

Wednesday, May 30th, 2018

Many of you know I have been a Janome Girl for a long time.  I was beyond fortunate to be able to attend Janome-America’s first ever Education Summit last week in New Jersey.  It brought together Janome Educators–those wonderful folks who work in show booths for Janome, Janome dealers, in classrooms at quilt shows, around North America, the National Spokespersons for Janome for both the US, Kimberly Einmo, and Canada, Tamara Kate, as well as many Janome Artisans (like me) and Janome Makers.   As someone said at the start, I am in awe of the talent in that room, and my awe only increased as the week progressed.   I’ll share what we did over several blogposts because it was WAY to much fun and educational to fit into one post.  A bunch of us from the summit are blogging, so I will link to their posts at the end (and perhaps in a separate post, too).  A HUGE HUGE HUGE THANK YOU to Janome America–I think all of us are still floating on the collective energy and inspiration!

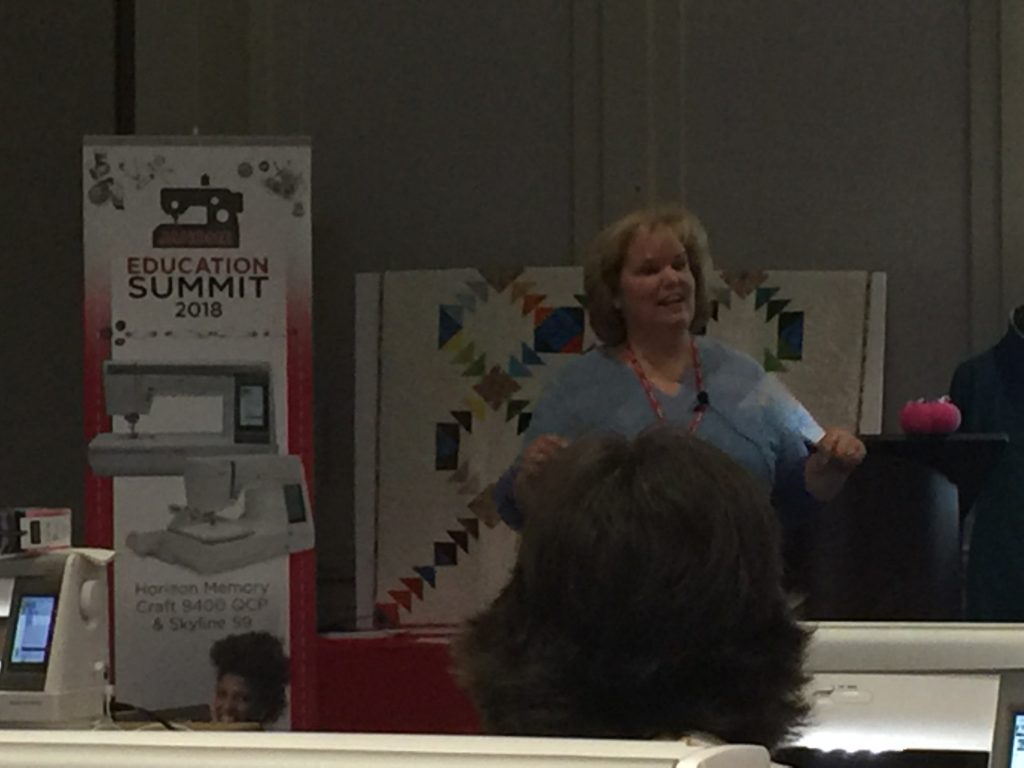
Our welcome and first session were from Janome’s new US Spokesperson, Kimberly Einmo. She’s well known for her many books on Jelly Roll quilts, great traditional piecing techniques, and being an all around nice person.

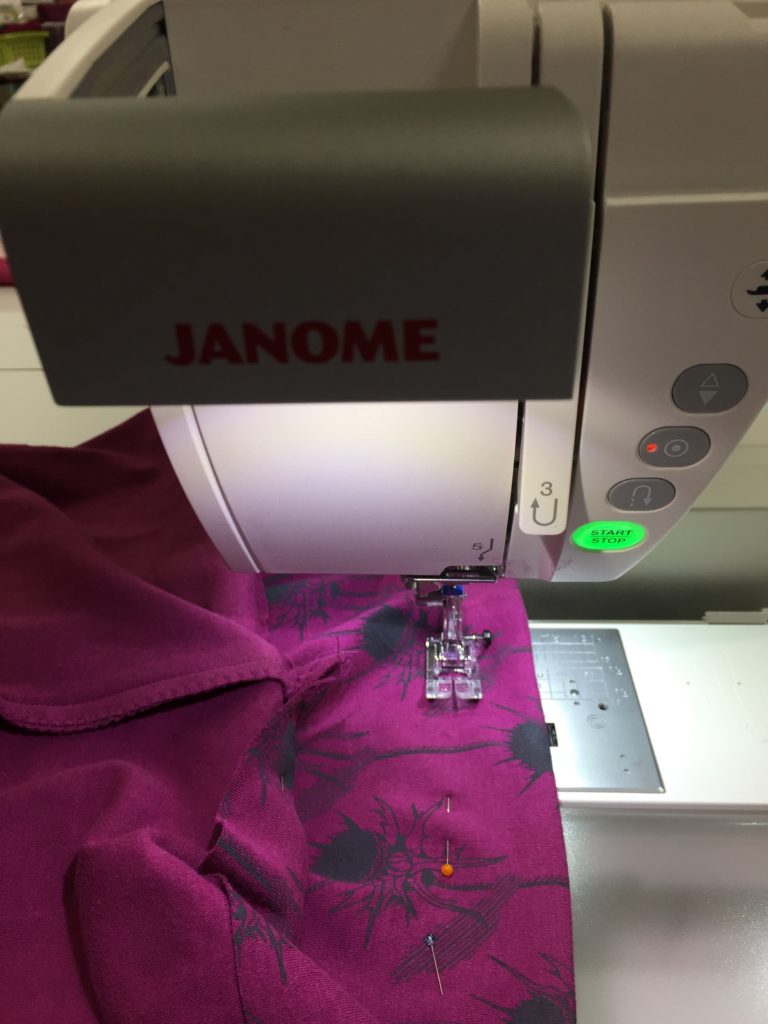
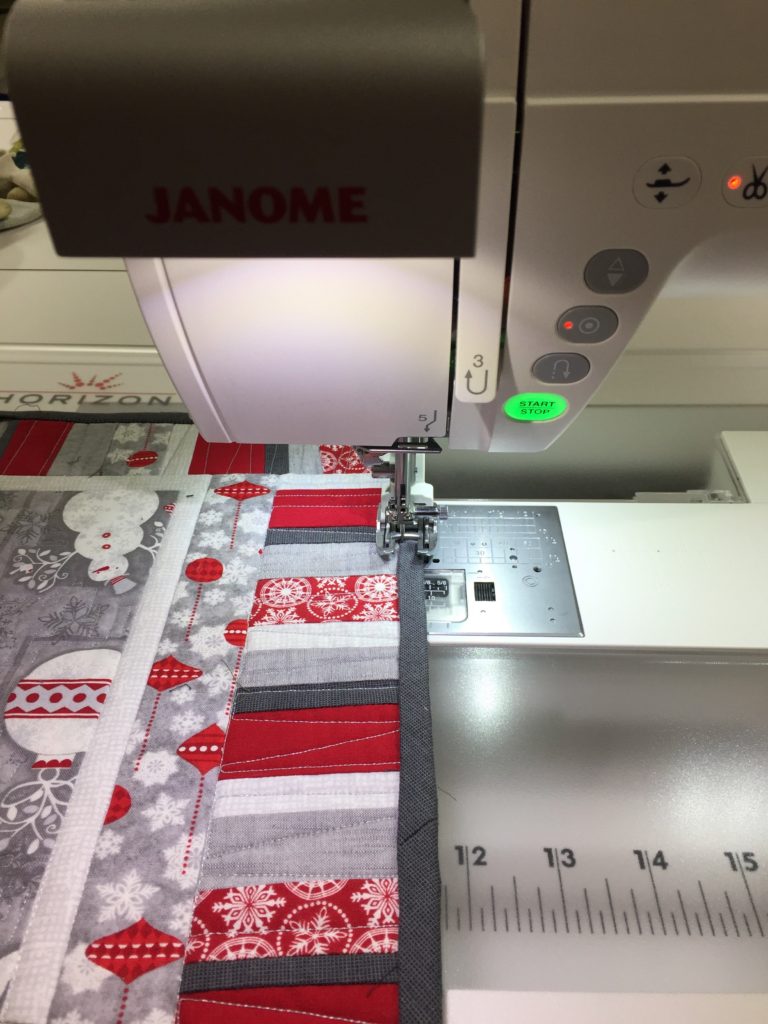
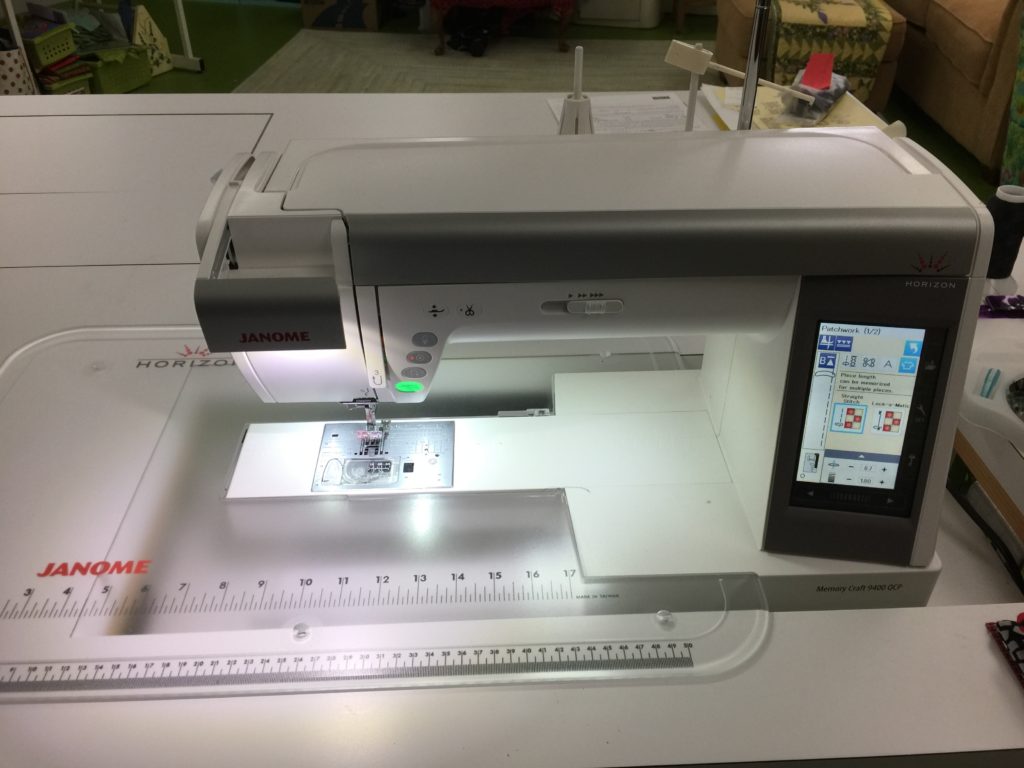
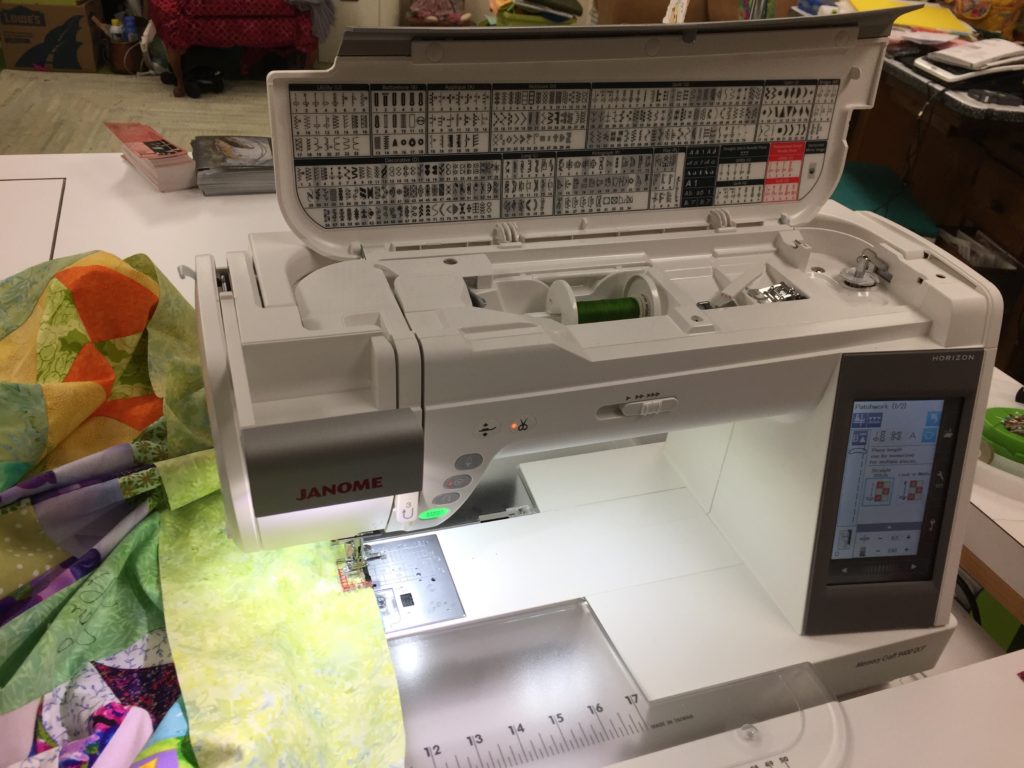
We began by working on the Janome 9400, the machine I have in my studio.  You will have to pry it out of my cold dead hands.  I love what I can do on this machine. Stay tuned for different session work on it (as well as all my garment sewing and a lot of my quilting).

The swag that came from attending this Summit was unbelievable–thanks to ALL the donors.  Kimberly designed a ruler for flying geese and has a new line of fabric, Solid-ish which was one of our first delights. I had admired it on Facebook posts, but OMG it is SO much prettier in person!   And I am now a convert to specialized rulers.  This ruler makes it brainless and possible for even me to get perfect points (and I totally mean that, not just complimenting because we got a freebie, it really works).

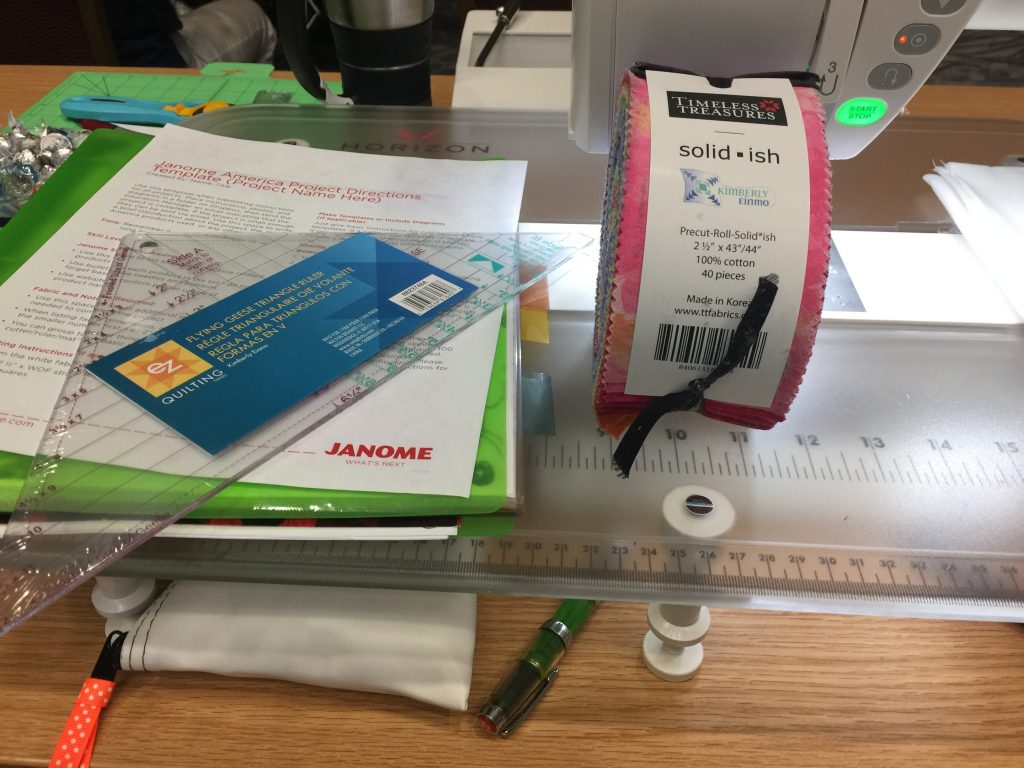
Check with your local shop or online for solid-ish. There’s a warm pink and coral and yellow that I want some yardage! Well, the aquas too, and the greens…..

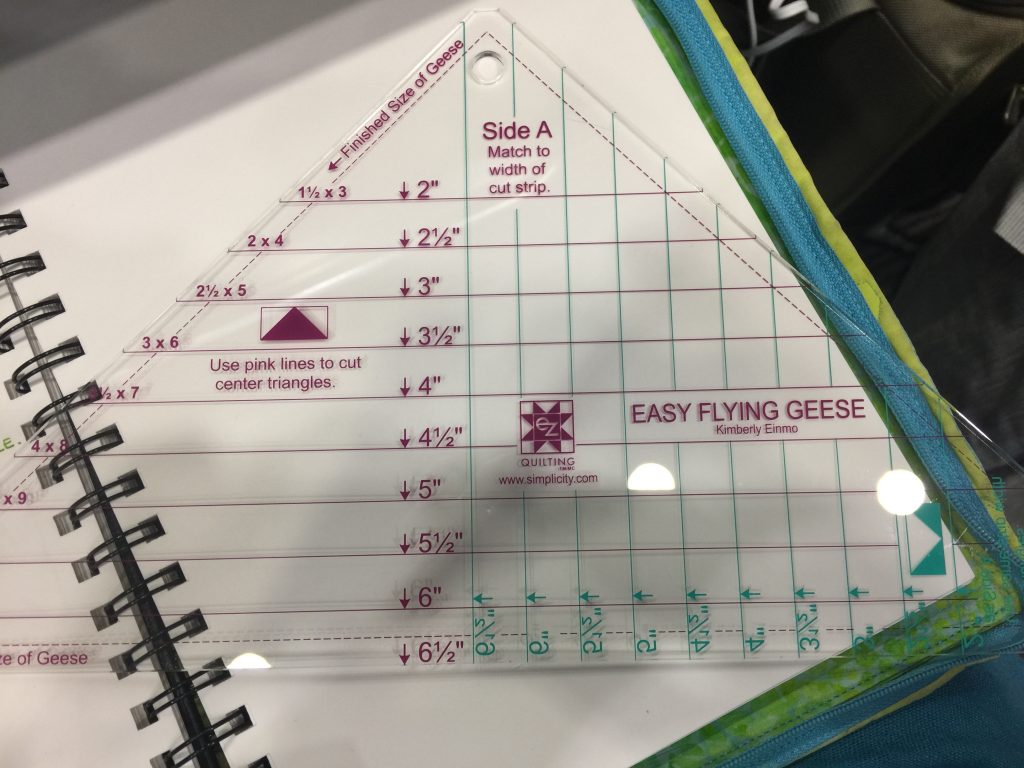
Even I can use a ruler like Kimberly’s Easy Flying Geese: the colors are pink and mint for breast and ovarian cancer awareness. If you can read the writing, in this case the pink, that makes the geese (notice the darkened triangle above the 3 1/2″ line?). If you can read the blue (flip the ruler over), it is for the background pieces. Easy peasy.

One of the first and most useful tips came at the start:  ya know how Jelly rolls and other precuts have pinked edges and shed bits of thread and lint like crazy?  Lint roller them FIRST, before you undo the package!!!!!   Brilliant!

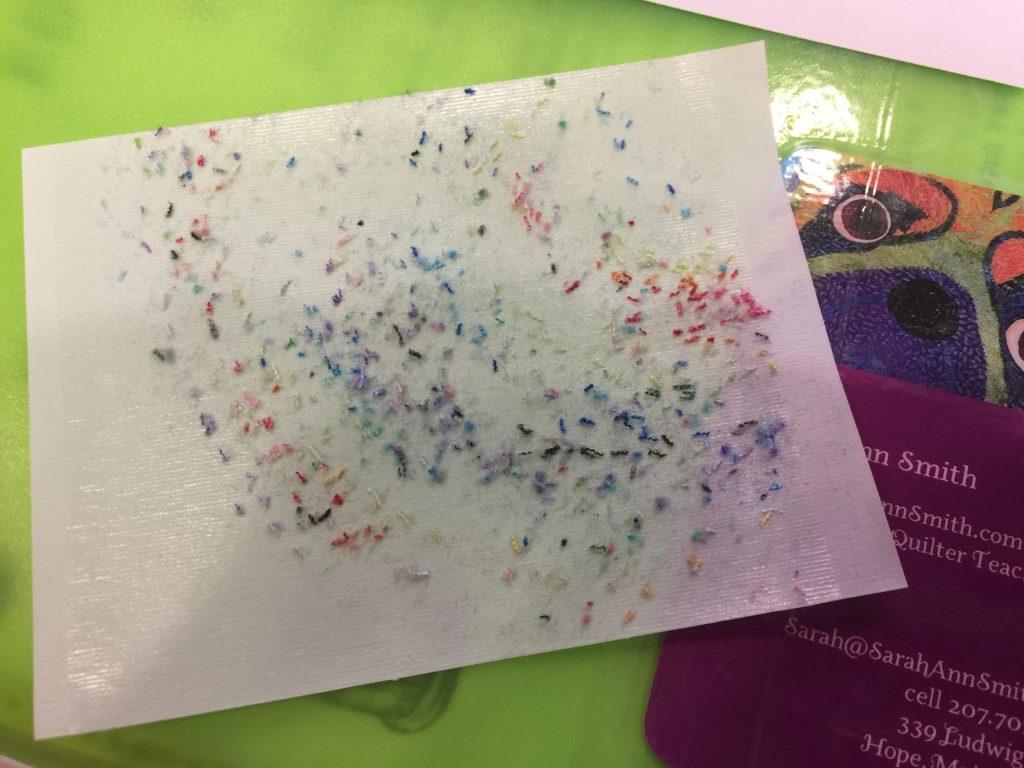
If you lint roller your jelly roll, you end up with lots less floaty bits messing up your clothes and studio!

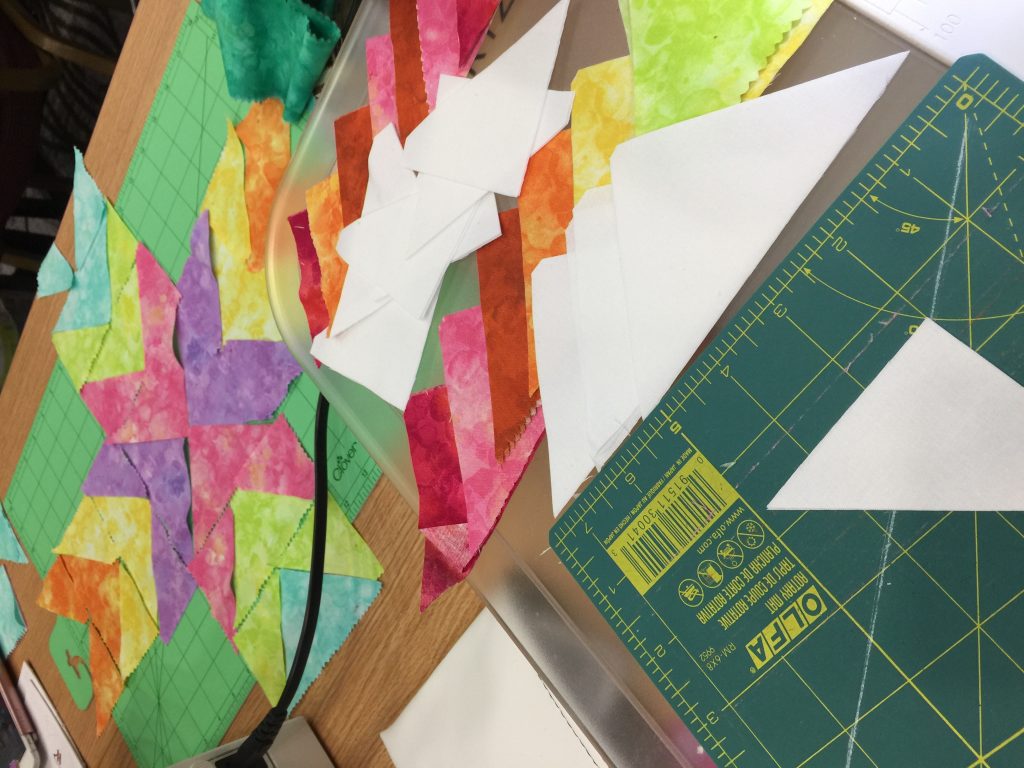
This shows my pieces laid out on my sewing machine table and a block in progress by Kimberly Coffin, my tablemate, whom you can find at her website Sweet Red Poppy.

I tend to stress in classroom situations and my brain freezes, so I don’t accomplish a lot.   But I do start thinking.  I totally want some play time to make more geese and maybe some placemats, a wall quilt of the modern persuasion…. I saw what Tamara Kate was doing and totally thought that I need to get out of my box and play.   Go check Tamara Kate’s website Kayajoy for inspiration.

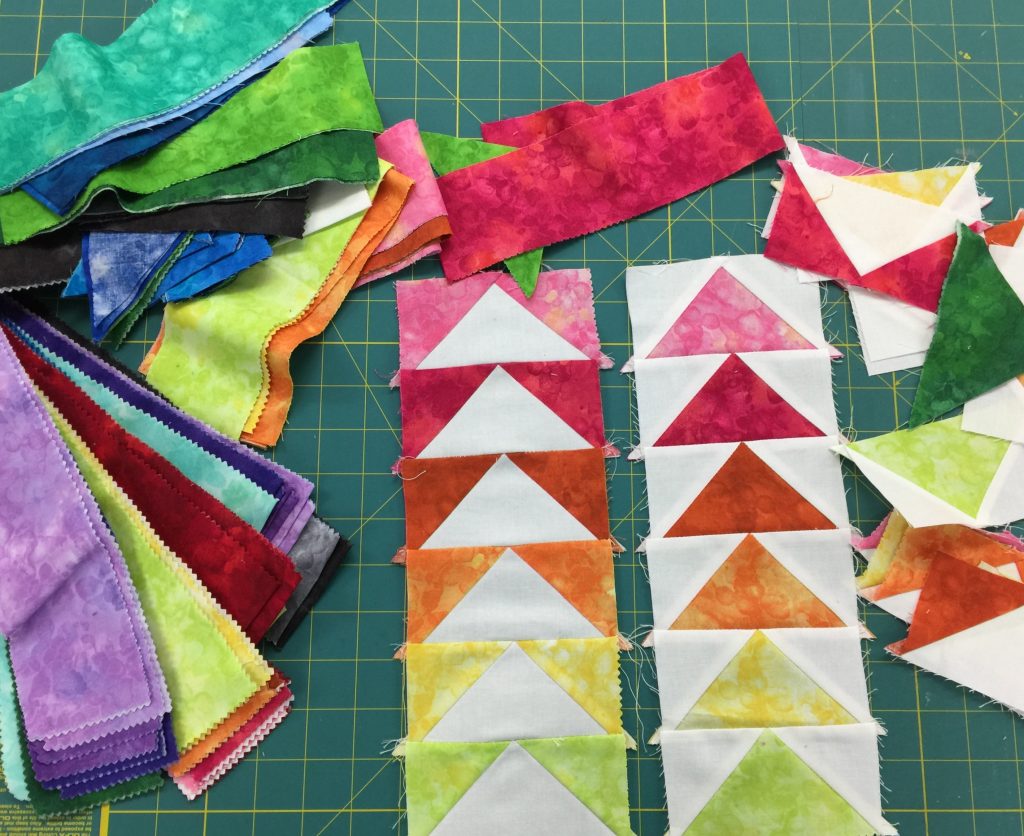
My flying geese…. I need some new placemats for spring and summer, so think I’ll order some of my favorites…that magenta, and the bottle green, and the turquoise…oh dear…..

More soon!   Next post will be about ruler work with Amy Dreishbach Johnson of Sew Simple of Lynchburg VA.

SaveSaveSaveSave

SaveSave

She makes clothes, too!

Saturday, December 10th, 2016

It has been a while, but I have gotten back to making clothes over the past year or two.   I began life as a garment sewer, but abandoned that when I discovered quilting.  Now that I am getting older, I find that I don’t always like the generic stuff available and have begun sewing clothing again.  Sometimes, I find the PERFECT top though, and can’t find it again.  That leads to making your own patterns.

Success! I actually made a KNIT garment. The original shirt (purchased) is on the left. After making the pattern from that shirt, I made the plum one on the right. I'll do a separate blogpost later this week with more info on how I did it and which stitches used.

Success! I actually made a KNIT garment. The original shirt (purchased) is on the left. After making the pattern from that shirt, I made the plum one on the right.

The aqua shirt on the left, from Habitat, is a favorite.  It is also getting old and tatty.  I found the plum knit (Anna Maria Horner) at Alewives Fabrics a couple years ago made up in a dress.  They had 1/2 yard more than needed for the dress, so I bought all of it.  But I decided rather than make a summer dress, I would make a top and leggings or two tops out of it, since it seemed more autumn-y to me.  The fabric is long since sold out, but Alewives has a great selection and does mail orders!

I took some cheap paper (a roll of medical exam table paper bought from my doctor about six years ago and the roll is still not near done) to make tracings of the original shirt pieces (which involves some creative pulling and pinning to get things like the sleeves outlined) to make a pattern.  I smoothed out the lines, lengthened the sleeves from 3/4 to full length for winter, and cut out my fabrics.  For my shirt, I used a lightweight fusible interfacing for the neckline, but mine turned out a bit stiffer, so maybe next time I’ll try a LOT of starch and no interfacing.

When sewing knits, you want to use a stitch that has some stretch in it and a BALLPOINT or Jersey needle–this keeps it from cutting holes in the knit fabric.  You can use a straight stretch stitch that is standard on even the most basic machines…it looks like three vertical lines next to each other, stitch 5 in the photo below.

Utility stitches on the Janome 9400. These stitches are available on even the most basic machines.

Utility stitches on the Janome 9400. Most of these stitches are available on even the most basic machines–the only ones you might not find are 6, 7, 12 (reverse), and 18.

A few thousand years ago, I took some sewing on polar fleece classes, and in those learned to use a zigzag for stretchy side seams on garments, so that is what I used for this top.

asides

This photo shows that I used stitch 6, which I think of as a lightning zigzag, for the seam, and  Stitch 18 for an “overcast” stitch before trimming away the excess on the edges.  I like a nicely finished garment!   One could also use stitches 10 or any in the 13-23 range for an overcast if you don’t have something like 18 on your machine.

To hem my top, I used a Ballpoint Twin needle (i think mine is a wider separation between the needles, nearly 1/4″).  When sewing on knits, always use a ballpoint so the tip doesn’t cut the threads in the knit fabric.  I wound some thread onto an extra bobbin and placed it on the second spindle.  Then you thread the machine holding both threads as if they were one.  After passing through the last thread guide (photo below), hand thread (don’t use the automatic needle threader as it won’t go to the correct spots) the needles.

Twin needles

Twin needles make a lovely stitch.  The bobbin thread forms a zigzag, which makes the seam stretchy (which means the stitches won’t pop and break when you stretch the hem).

Sewing the hem. I am using a line on the throat place as a guide to create a gem that is about an inch deep.

Sewing the hem. I am using a line on the throat place as a guide to create a hem that is about an inch deep. After stitching, trim away excess fabric above the stitching.

I’m fairly pleased with my top.  I’d do the interfacing slightly differently next time (and yes, there will be a next time–the neckline on this top is flattering on me and comfortable), but the Janome 9400 performed flawlessly.  WOOT!


Modern Winter Placemats and TableRunner

Wednesday, December 7th, 2016

Last December at our local Coastal Quilters Christmas/Holiday meeting, we had a little game where you each bring a giftie, and end up with a different giftie.  I ended up with a lovely set of fat quarters in very “Quilt Modern” colors:  the red, white and gray winter themed ones.  I decided to add some new winter placemats and table runner made from the theme fabric using improvisational piecing. You can find the pattern at Janome America’s blog, here.

Modern Winter placemats and table runner.

Modern Winter placemats and table runner.

I added the solid red and dark gray fabrics.  I will advise you:  MEASURE YOUR TABLE FIRST.  I made the placemats first, rather oversized.  I had two of them bound.  Then I discovered they were too big, had to pick off the binding, cut them down (the instructions on the Janome site are for my final size), and re-do.  Erk.

Depending on the fabric you select as a feature fabric for the centers, you can adjust the size of the inner borders (or omit them entirely).  I had just a half yard of the feature print, so I needed to use smaller cuts and build them out.  If you buy a little more, then you can omit the inner border and strips.

An overhead

An overhead view of the table runner; I used the few remaining bits of the feature print and built them out with strips, then fit them together.  Can you say “liberal use of partial seams?”

Overhead view of placemat

Overhead view of placemat

My favorite way to do bindings is by machine.  My secret:  glue stick!   I only use the glue stick on things that will be washed (probably often), so I wouldn’t do this on a high-end art quilt, but for a baby or bed quilt or table linens?  You betcha!

stitching down the bindings on the Janome 9400

Stitching down the bindings on the Janome 9400.  Love that pull-out light!  I sew the binding to the back, wrap it to the front, then at the ironing board use glue stick on the seam allowance.  I press the binding down and it stays put–no pins!  no bumps!  no wiggling out of place! 

I used a blanket stitch, with the straight part in the “ditch” (just to the left of the dark gray binding), and the “zig” going onto the binding.

I used this stitch to finish the bindings, and used the mirror image button (above in yellow) so that the swing of the stitch goes to the right of the straight line (see the stitch as displayed at the left of the screen).

I used this stitch to finish the bindings, and used the mirror image button (above in yellow) so that the swing of the stitch goes to the right of the straight line (see the stitch as displayed at the left of the screen).

A closer view. The needle just barely misses the binding when going straight, then swings over onto the binding to hold it in place.

A closer view. The needle just barely misses the binding when going straight, then swings over onto the binding to hold it in place.

Back view of my quilting. I used a FMQ ruler (thicker than a cutting ruler) with the QO foot (this is not necessarily recommended, you really should use a proper "Ruler Foot" but I was extra careful)

Back view of my quilting. I used a FMQ ruler (thicker than a cutting ruler) with the QO foot (this is not necessarily recommended, you really should use a proper “Ruler Foot” but I was extra careful) to do the straight line quilting across the strip sets, then used a squared off loop in the background of the feature fabric bits.

It must be good: it has passed the cat-sitting-on-it seal of approval!

It must be good: it has passed the cat-sitting-on-it seal of approval!


Janome 9400 review

Monday, December 5th, 2016

As many of you know, I’ve been fortunate to be affiliated with Janome America for many years and sew on their great machines.   They’ve come out with a new top-of-the-line NON-embroidery machine, the 9400.  And as I have come to expect, they take something that is already really good and make it even better.  We’re getting close to perfect!   To see the machine on the Janome site, go here.

My newest sewing love, the Janome 9400!

My newest sewing love, the Janome 9400!  Notice the FABULOUS lighting?  I love the pull-out light, too!

Over the past few months I’ve been able to put the machine through its paces, making a knit top, finishing a set of quilted placemats, finishing a small bag with zipper, and (who me?) piecing several quilt tops.   The machine excelled at everything I threw at it!  The 9400 has taken many features from the top of the line embroidery and sewing 15000 machine, including that awesome light on the top left that slides out.  I think the design of it  on the 9400 is even better than on the 15000, as it curves a bit.

One of the first things I did was some class samples for my Easy-Peasy Inside-Out Bag….including installing a zipper.

Zipper insertion for my Easy-Peasy Inside-Out Bag class sample.   Notice how the zipper foot fits PERFECTLY, allowing me to use the zipper coil as a guide and getting the stitching **perfect** ?  I used plum stitching as a decorative accent on the right side of the zipper, and am now stitching the second side of the left half of the zipper.

Zipper insertion for my Easy-Peasy Inside-Out Bag class sample. Notice how the zipper foot fits PERFECTLY, allowing me to use the zipper coil as a guide and getting the stitching **perfect** ? I used plum stitching as a decorative accent on the right side of the zipper, and am now stitching the second side of the zipper.

A bigger challenge, for both me and the machine, was to make a new top.  I fell in love with the plum knit and bought it a year or so ago.   I also love the aqua top, which is showing its age.  I did a “rub off” which is where you make your own pattern using an existing garment.  You can trace (with garment on top of paper) or rub (with garment under paper) to feel the edges and create pattern pieces.  I extended the sleeves from 3/4 to full length, and am delighted at the machine and the results.

Success!  I actually made a KNIT garment.  The original shirt (purchased) is on the left. After making the pattern from that shirt, I made the plum one on the right.  I'll do a separate blogpost later this week with more info on how I did it and which stitches used.

Success! I actually made a KNIT garment. The original shirt (purchased) is on the left. After making the pattern from that shirt, I made the plum one on the right. I’ll do a separate blogpost later this week with more info on how I did it and which stitches used.

I also have done quite a lot of piecing.  I used the P foot which comes with the machine for my quarter inch seams, but decided to use the optional Clearview foot which I prefer.   In a second project (which I can’t share yet because it is a Christmas surprise) I was astounded at how accurate my results were; I am NOT a piecer, and the feed on the machine worked very well (until my attention wandered, at which point I simply cut the threads, went back to my oops and fixed it).

Using the ClearView foot for piecing

Using the ClearView foot for piecing.  I really like the red 1/8 and 1/4″ markings. This foot is available for both Janome’s  7mm and 9mm machines (the 7 and 9 refer to the maximum stitch width–you need to be sure you get the correct one to fit the “ankle” for your machine). Have I said how much I love it?

I also have been able to do both free-motion and walking foot quilting, though not as much yet as I would have liked.   I finished a set of placemats and table runner called Modern Winter, which I prepared for Janome’s blog.  You can find the pattern and information here.

Modern Winter placemats and table runner.

Modern Winter placemats and table runner. Instructions/pattern on the Janome site at the link.  

The one thing I keep trying to convince Janome to do is to create feet for the top of the line machines that is similar to the convertible FMQ (free motion quilting)  feet for the Janome 8900/8200 and similar which I think are the best quilting feet Janome makes.   In addition to the traditional “hopping” or darning foot used for free-motion quilting, the 9400, 15000, 12000 all have the QO and QC skimming FMQ feet which snap on to the ankle (which is really quick and easy).  However, these feet are clear plastic and not round.   They work great for most people’s purposes, but if you look at pretty much ALL quilting machines, the preferred and nearly universally available feet are metal CIRCLES.  The metal is stronger and can, therefore, be thinner, which affords greater visibility.  And by being a circle, you can echo quilt around (for example) an appliqué, then  continue with free motion without having to change feet.  This is a small quibble but one that is important to me.

The foot on the left is the Ruler Foot for the 8900, and the two bits on the right are the optional bottoms for FMQ, the open U (as Janome made it) and the circle (which Janome made closed, but I used my Dremel to open up a tiny bit)

The foot on the left is the Ruler Foot for the 8900, and the two bits on the right are the optional bottoms for FMQ, the open U (as Janome made it) and the circle (which Janome made closed, but I used my Dremel to open up a tiny bit).  I would LOVE these options for the top of the line Janome machines (9400, 12000 and 15000).

One of the

One of the really cool things about the 9400 (which came down to it from the 15000) is the snap on feature for some of the quilting feet.  In this image, you can see the echo quilting foot, the clear disc with red circles/lines, for the 9400 on the lower left.  It just pops on and off the ankle like regular feet–fast, easy and effective.  The other three in this image are from the bottom of the convertible FMQ foot for the 8900; you have to screw them on to the holder which is a small fuss.  

I was MOST impressed at International Quilt Festival, Houston, this year.  I introduced myself to the president of Janome America to say thank you for Janome’s continued support for the past decade-plus, and to ask about developing these feet for the 9400 and 15000 (and 12000).  He whipped out a notebook and took notes!   So as soon as I finish this post, I’m going to follow up with him with details I’ve been mulling over on how best to meet ALL needs for quilting–both hopping and skimming. Love Janome’s responsiveness!  He said he’d send the info to headquarters in Japan–can’t do more than that!

Although you can read it on Janome’s site, I’m adding some info about the features and accessories included on this machine.  Best of all, a lot of stores are offering “Holiday Incentives” on the price!

Janome 9400 Stitch Chart

Janome 9400 Stitch Chart…hooray, my favorite stitches are still here!

Key Features:

  • Top Loading Full Rotary Hook Bobbin System
  • 350 Built-In Stitches and 4 Alphabets
  • Superior Needle Threader
  • Cloth Guide Included
  • One-Step Needle Plate Conversion with 3 Included Plates
  • Detachable AcuFeed Flex Layered Fabric Feeding System
  • USB Port and Direct PC Connection
  • Stitch Composer Stitch Creation Software
  • Variable Zig Zag for Free Motion Quilting
  • Straight Stitch Needle Plate with Left Needle Position for 1/4″ Seam Foot
  • Professional HP Needle Plate and Foot
  • Advanced Plate Markings
  • Full Color LCD Touchscreen (4.4″ x 2.5″)
  • Sewing Applications On-Screen Support
  • Maximum Sewing Speed: 1,060 SPM
  • Full Intensity Lighting System with 9 White LED Lamps in 4 Locations
  • 11″ to the Right of the Needle
  • Retractable High Light

Included Accessories:

  • 1/4 Inch Seam Foot O
  • AcuFeed Flex™ Dual Feed Holder with AD Foot
  • Automatic Buttonhole Foot
  • Blind Hem Foot G
  • Button Sewing Foot
  • Cloth Guide
  • Darning Foot
  • Extra Large Foot Controller
  • Free Motion Quilting Closed Toe Foot
  • HP Plate and Foot Set
  • Open Toe Satin Stitch Foot
  • Overedge Foot M
  • Remote Thread Cutter Switch
  • Rolled Hem Foot
  • Satin Stitch Foot
  • Seam Ripper
  • Straight Stitch Needle Plate
  • Zig-Zag Foot
  • Zipper Foot E

So that’s my recap!  I’ll do a couple follow-up posts on the placemats and shirt projects.  Stay tuned!

Teaching at Quilt Festival Houston–sign up soon

Sunday, October 2nd, 2016

Online signups for classes at International Quilt Festival in Houston end on October 7th !!!!! I’d love to see you in one of my classes.  Here’s my very busy line up!

Screen Shot 2016-07-19 at 4.39.58 PM

I’m thrilled to be so busy and hope to meet many of you.  Here’s a blogpost about The Nest, a new and totally fun half-day (or full day if a guild wants a full day) class, it’s a blast and the extensive kit/materials provided make it easy to prep.  I’m also teaching my intermediate/advanced Tame Fussy, Fiddly Threads for Machine Quilting class for those of you who want to learn more about the “cranky” threads–that really aren’t cranky if you just learn how to use them!

Houston has revamped the catalog a little bit. There are now (yeah!) pictures in the catalog (not just online) and there are weblinks so you can go to my website for the FULL supply list and handouts.   To shorten the process, if any of the above look good to you, you can go to my class listings page here for info about my classes.  Each description has a hotlink to the pdf Supply list.  If I have blogged about a class, that also is in the description.  You can also find all my supply lists in one place on my Resources page.  If you click on “Resources,” Look at the jump links at the top.  Click on Class Supply Lists and it will jump you down the page (instead of having to scroll down).

Here are some more blogposts about the classes I’m offering in Houston:

Decorative Stitch Applique here and here

Easy-Peasy Inside-Out Bag here

Can’t wait to see you in Houston!