email Youtube

Home
Galleries
Blog
Workshops & Calendar
Store
Resources
About
Contact

Archive for the ‘Art’ Category

Drawing Upside Down

Tuesday, May 26th, 2009

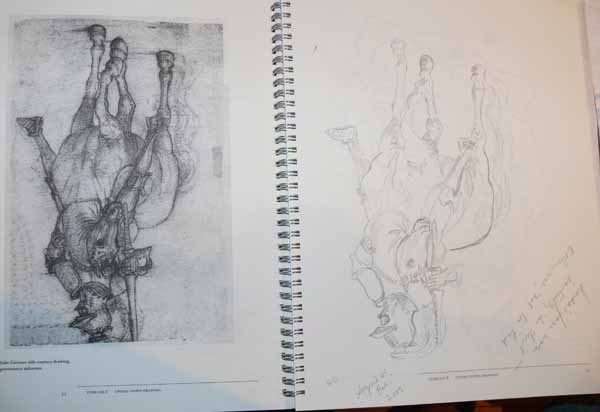
One way Betty Edwards has taught students to see what is actually there—as opposed to what they THINK they see—is to have them draw things upside down.  This skill is part of what she calls “Perception of Edges.”  (As always, these exercises come from The New Drawing on the Right Hand Side of the Brain, available at Amazon and elsewhere.  I purchased the companion notebook so I would have everything in one neat and tidy place, but you don’t need the workbook.  You can do all the exercises on your own paper.)

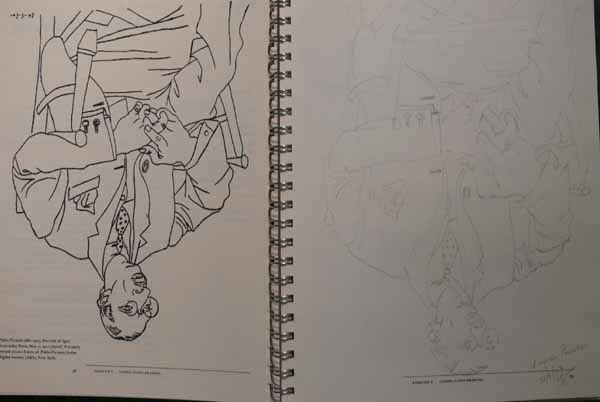
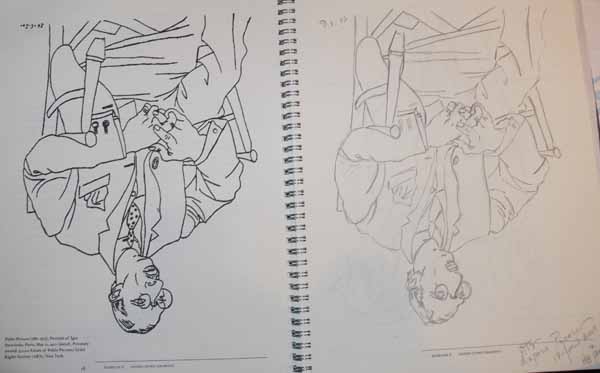
Here is a drawing by Pablo Picasso and my attempt to duplicate it in pencil from five years ago.  Not great…obviously it is larger than the reproduction on the facing page…sorry the sketch is so light…I tried the merge/layers thing to darken it, but my photoshop skills aren’t that advanced….

200905blogdrawing0122

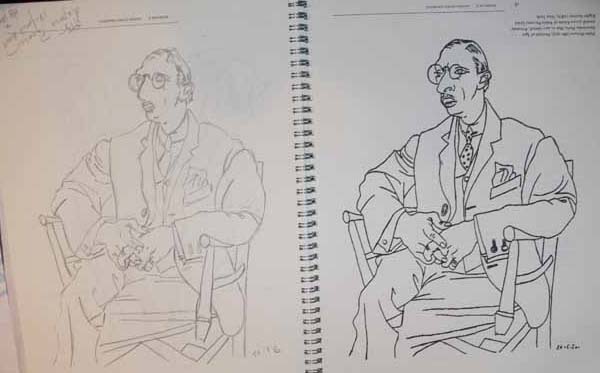
Here is my 2009 version.  Better.

200905blogdrawing006And right side up:

200905blogdrawing006b

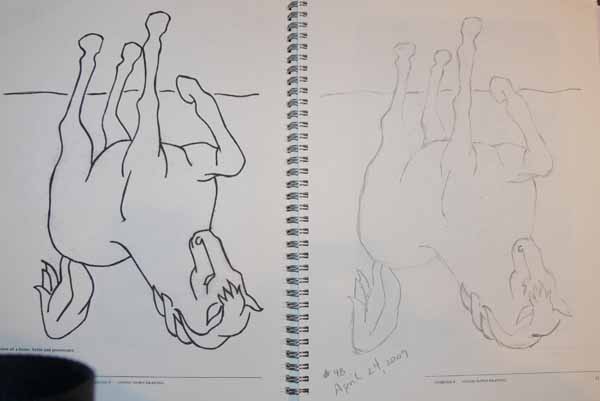
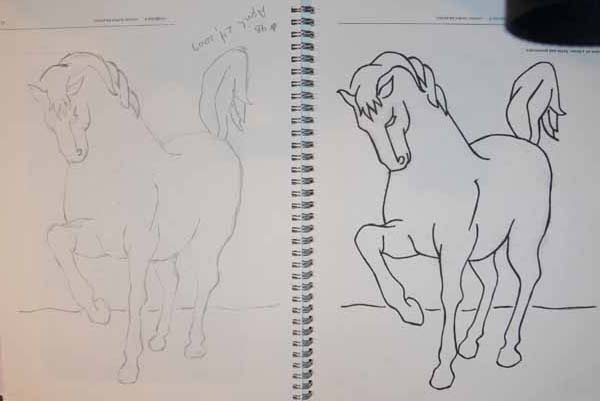
This time I decided to do all the upside down exercises (one still to go I think).  Here is a simple line drawing from a horse.   It makes me think that doing the exercise with a child’s coloring book could be useful…..

Upside down line-drawing of horse

Upside down line-drawing of horse

And right side up:

200905blogdrawing005b

I was VERY happy with how this turned out, as it is much more complex to me.  The horse’s face was not quite right.

200905blogdrawing004

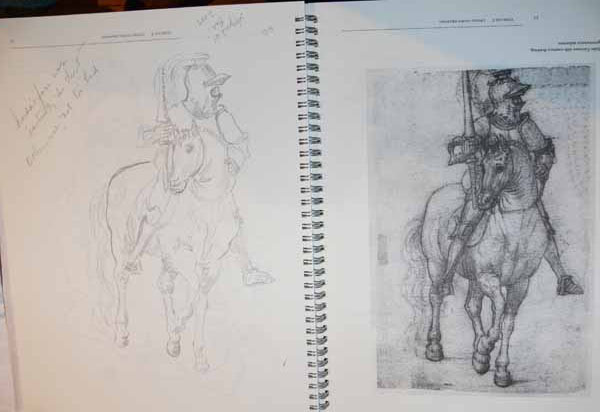
When I turned the picture right side up, I saw it instantly and was able to improve it.

200905blogdrawing004b

I don’t think I got the lance (in the knight’s left hand) quite right…. the head / helmet area might need some work, but also, life happens and I couldn’t spend all my time drawing….  good enough.  At least I’m practicing.

Sharing pencil drawings on the Web

Saturday, May 9th, 2009

Lily Kerns, who knows all sorts of computer stuff and teaches it at www.QuiltUniversity.com, shared the following:

Here is a tip you might find useful.

Pencil drawings are often very hard to see  on the web.  If you open the image in any program that uses layers,  copy and then paste the image as a new layer.  Use the Multipy blend function and adjust its intensity if necessary.  This increases the contrast to make it much more visible.  You may need to combine the layers before saving…

You can use a program’s contrast functions to increase its visibility, but the Multiply works better.  I don’t know if you would want to do this yourself for images that come in or just share the information…but for whatever it is worth to you.  <G>

Lily

Thanks Lily!  I’ll try that with my next drawing posts!

Drawing, in the beginning

Tuesday, May 5th, 2009

Hi everyone!  Thanks to the wonderful response to my posts over on the Quiltart list, I have set up a new blog— See*Draw*Quilt*Learn (link is also on the left) — for anyone who wishes to join in working on improving their drawing skills.  To begin, I’m planning on working through the companion workbook to the New Drawing On the Right Hand Side of the Brain by Betty Edwards.  If you’d like to participate, and/or if you ‘d like to be a contributor to that blog, surf over there and sign up by contacting me (but please read the first post to find out the general guidelines).

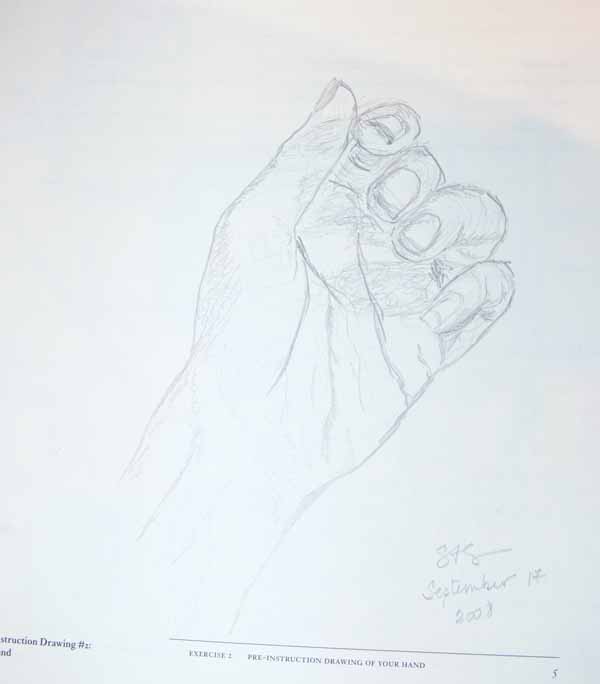
200905blogdrawing008

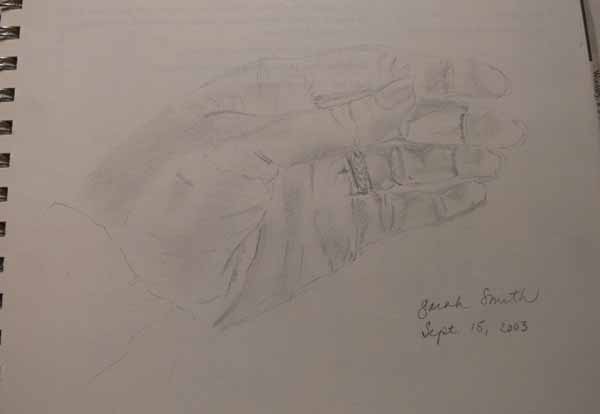
I thought I’d start things rolling by sharing my “pre-instruction” drawings from both the first time I did the workbook, in 2003/4, and the current one.  As I mentioned earlier, here, I think I could learn more by doing the exercises again.  The picture above is the 2009 drawing of my hand (photos are clickable for a larger view)… I deliberately worked (relatively) quickly, and didn’t do shading.  I think when I did my 2003 version, I had read ahead about shading and whatnot…. here is that one:

200905blogdrawing014

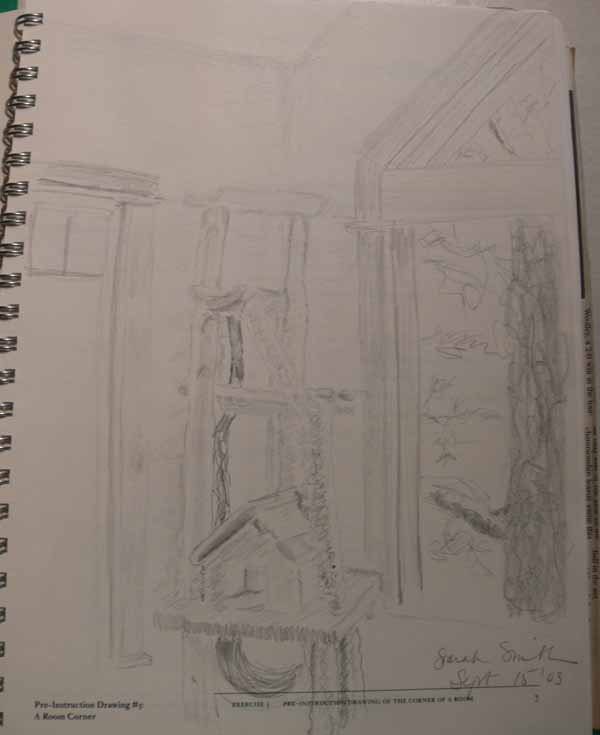
We were also to do a room/corner.  Since we moved, I couldn’t do the same corner.  Here is the living room corner in 2003:

200905blogdrawing013

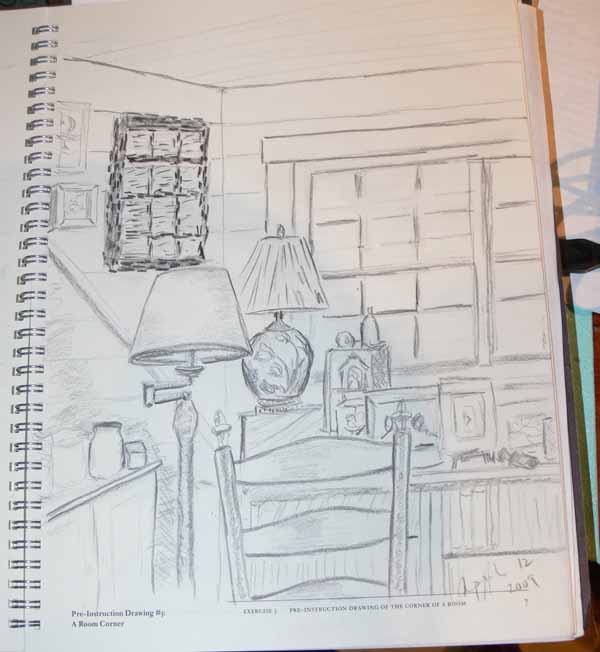
and the corner of my studio in 2009:

200905blogdrawing007

The piece on the wall, next to the window, is this totally cool (and really challenging to draw) 3-D ish wool “window” by Frances Caple, who lives in the Hebrides.  She asked about a trade, and loved my Rites of Passage quilt.  I loved her windows, so she made this one special for me, and we swapped!  I’ll have to take a picture of my mini “art wall” to share with you… next post tho, want to get this one online.

Suzanne Riggio’s St. Mary’s School Quilt

Sunday, May 3rd, 2009

The first time I went to International Quilt Festival in Houston, Texas, was the first year for the Journal Quilt Project.  Two series in particular grabbed me and wouldn’t let me forget them:  Maria Elkins’ feathers and Suzanne Riggio’s rooftops.  You can see Maria’s here, and Suzanne’s here (hers are the second row down in the first “bank” of journal quilts on that page).  To see more of that first year’s journals, click here.  I didn’t know at the time how many glorious quilts Suzanne had already made, and clearly with more to come.

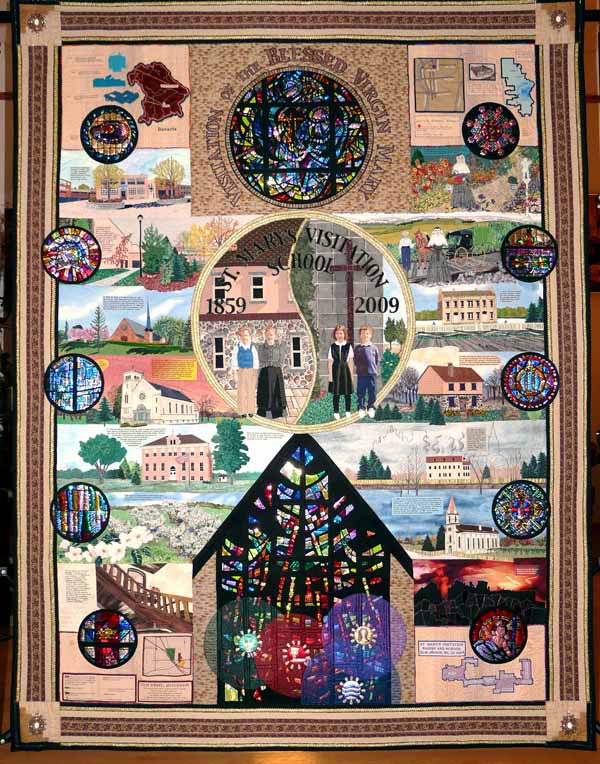
Recently when I posted to the QuiltArt list about my drawing, Suzanne saw my post and must have remembered my San Domenico quilt (here and here plus additional blogposts in late June 2006) and sent me this jpeg of her quilt for St. Mary’s school.  Since she doesn’t have a blog, online album or website, I asked permission to share it with all of you and the quiltart list by posting it here:

200904blogsuzanneriggio001

What is astonishing is that during the eleven years this quilt was in the making, Suzanne had severe back problems, surgery, is now in a wheelchair, and STILL the art will come out, and come out stupendously well!  I just get goosebumps thinking about the quilt, her affection for her school, her art…the whole kit and kaboodle!

Suzanne wrote to me that the quilt “will live is a two-sided glass case with oak surround in the new atrium at St. Mary’s School.  (The names of the graduates and the history of the school are on the back.)”   The new wing will be dedicated on May 31, with archbishops and all.  I expect there will be MANY looks of awe and dew-y eyes!

Addendum:  some new information from Suzanne:
FYI, St. Mary’s is not my school.  We came to St. Mary’s Church in 1996 from West Virginia (36 years).  I had a solo quilt show at St. Mary’s in 1998, and that was the inspiration for the commission to do a sesquicentennial quilt for their school, due in 2009.  I knew nothing about the school at the time and had to do lots of research.

It was a school started by the School Sisters of Notre Dame who got their start in Bavaria in 1833.  Milwaukee was mostly settled by Germans, especially Bavarians, and was a good place for a “mission.” The sisters continued to sponsor the school until 1913 when the parish took over.  But the sisters continued to teach and administer.  The last SSND principal was Sister Betty–the quilt is dedicated to her.

In the course of my work, I applied for and received a couple of grants from the Wisconsin Arts Board to make this work of art.

The work contains historic stained glass (prismatic foil), maps, buildings then and now, lots of text giving the history, a quartet of kids representing 1859 and 2009, the sacraments kids receive, monstronses, gardens and orchards, sunrises, the names of graduates on the back, and a lot more.

Thanks Suzanne for letting me share this incredible work!  The photo is (theoretically) click-able to view slightly larger.

Learning to SEE

Wednesday, April 29th, 2009

200904selfportrait006200904selfportrait001About five or six years ago, having taken a phenomenal workshop with Hollis Chatelain in 2002 at Kalispell (Montana)’s Quilt Gallery (for which I saved up for two years and drove a thousand miles each way!), and while at another well-done workshop with Jane Sassaman, I came to the conclusion that what I needed was not so much quilting workshops, but ART lessons.  I needed to learn to SEE. I learned other good stuff from Jane, but that was the prize realization!

In a nutshell, I wasn’t getting things to look like they really look OR the way I wanted them to look…I needed to learn how to translate what was in front of me into cloth and in some way other than photos and tracing… I wanted to be able to DRAW so that I could make the quilts in my head.

However, I then lived on San Juan Island, Wash. state, which is 2 hours by ferry from the mainland; while there were assorted painting classes available on the island (population year round about 7,000), there were no basic DRAWING classes, and I needed that first.  So I purchased The New Drawing on The Right Hand Side of the Brain by Betty Edwards (click on title to go to amazon listing) and, to make myself do it, the companion workbook which really makes it such a no-brainer to do that you have no excuse for NOT doing the exercises.

I told some of my quilty friends, and two, Lunnette and Linda, both asked if they could do it with me.  That was the best thing that could have happened… because of our committment to one another, we really worked hard to get the “homework” done.  Lunnette’s sons were mostly grown and gone, but Linda (working full time as a teacher no less) and I had wee  ones at home and work, so the two of us were ALWAYS doing things at the last minute.

When we began, I was skeptical that it would really work, but we decided to give it a go.  As part of the process, you are asked to do several pre-instruction drawings, then not look at them until you complete the training.  The three of us did our self-portraits, and while none were stupendous, you could tell who was who, and a stranger looking at them could have done so, too!  Here is my pre-instruction portrait from Fall 2003:
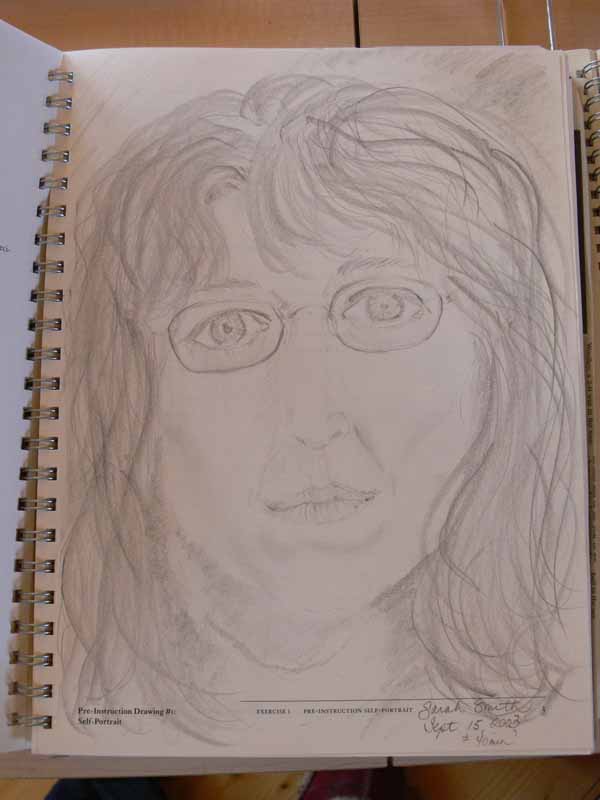
200904selfportrait005

It took us nearly a year to complete the “course” and we rushed toward the end, as we ended up moving in June 2004 and we all really wanted to finish it together.  Here is my end-of-course portrait:
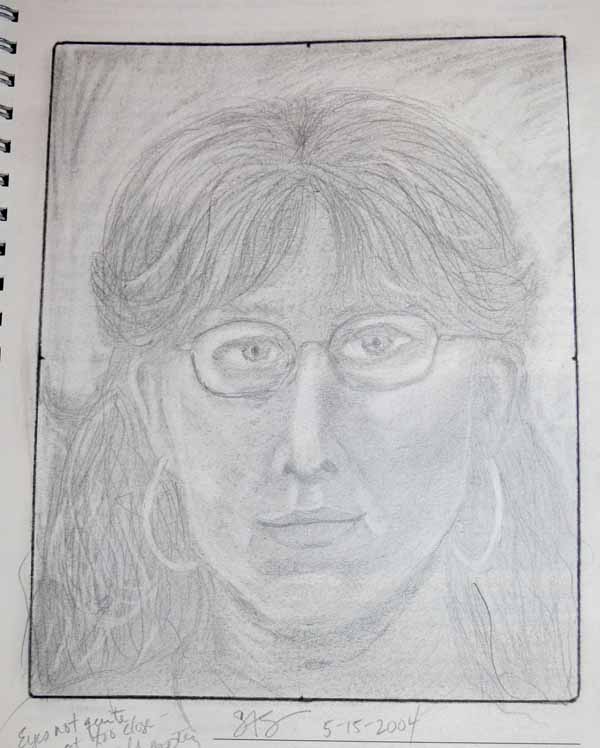
200904selfportrait004

Quite a bit better, eh?  My notes say “eyes not quite correct.”  Very true.

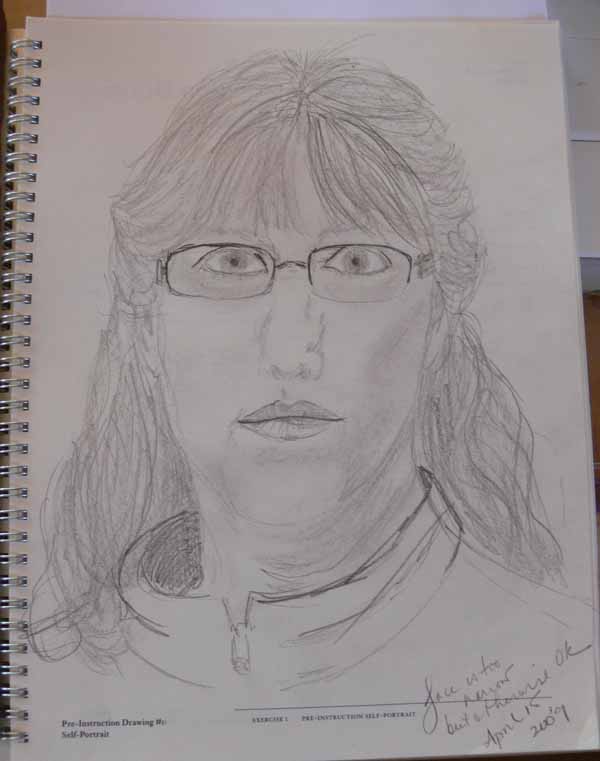
Now, nearly six years later, (well OK, a year ago, five years or so later I bought the stuff, but it has taken until now to get the time to do this) I decided that I might benefit from doing the workbook and exercises again.  My “seeing” skills are better, but I need more practice.  So, following the instructions more or less (they said use a 2B pencil, and I used a 4B) I did this drawing.
200904selfportrait003

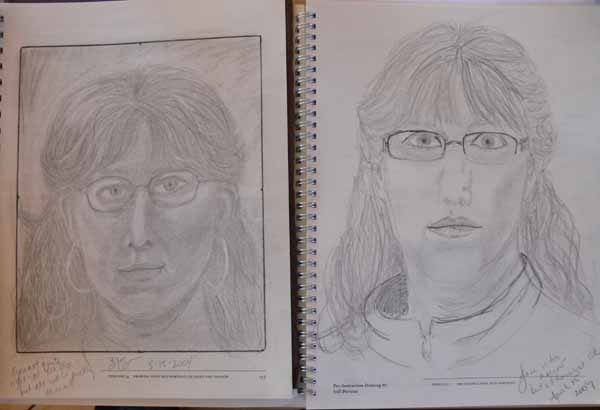
Once it was done, I pulled out the old workbook for comparison.  I’m happy to say I have not gotten worse!  Here are the two side-by-side:
200904selfportrait002

In the new portrait, the face is a bit too narrow, but otherwise it is pretty good.  The eyes are better (and new glasses), and I think the hair is actually better, but the nose in the one from 5 years ago is much better.  The current one also needs more shading, but (in a feeble self defense) that is hard to do with a single pencil… you need the soft ones and smudging….  Anyway, I had forgotten, however, that part of the education is learning to create a ground–to shade the paper to a mid-tone, then work darker AND lighter (the eraser as a drawing tool…was that ever a lightbulb moment!)

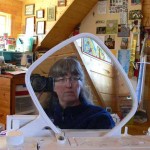
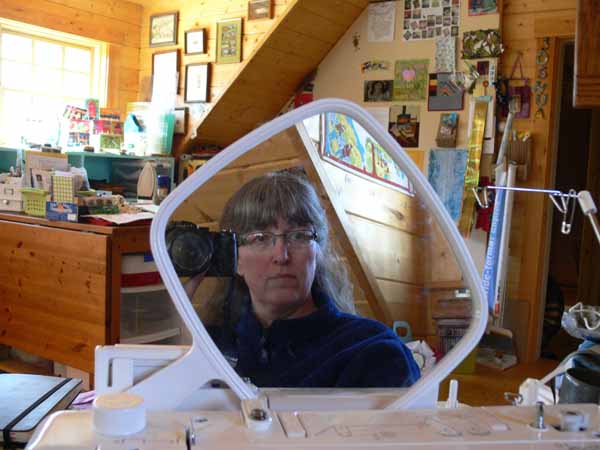
To give you an idea of what I was looking at when I did this self-portrait, I managed to take this photo… and you can see my packed studio (and more packed design wall) in the background.  I propped the mirror on the flip-up stitch display on my Janome 6600 (note:  I took the photo in the afternoon, and the sun had shifted so the lighting on my face is different):
200904selfportrait006

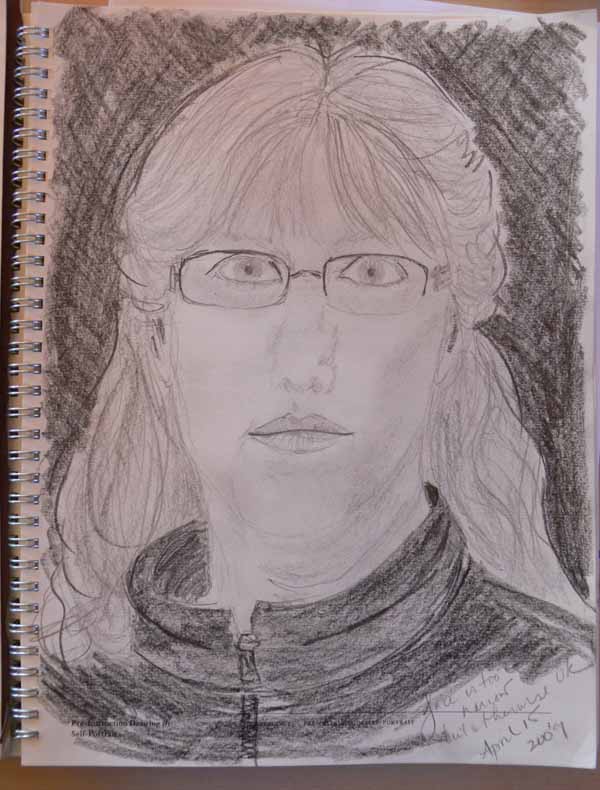
And after looking at the “after” portrait from 2004, I went back and darkened up the background and added a bit of shading.  Better.  Face is still too narrow, but looks better. I also appear younger than I actually am… I think that is because there isn’t enough shading, but I need to learn how to convey (sigh) sagging skin and other vagaries of age.
200904selfportrait001

I’ll be curious to see what I can learn by the time I get to the “after” this time around.  Since it took a year last time, and since I don’t have two friends to keep me on track this time, don’t hold your breaths, but I will share…when I’m done.