email Youtube

Home
Galleries
Blog
Workshops & Calendar
Store
Resources
About
Contact

Archive for the ‘Art’ Category

Foto Friday

Friday, July 3rd, 2015

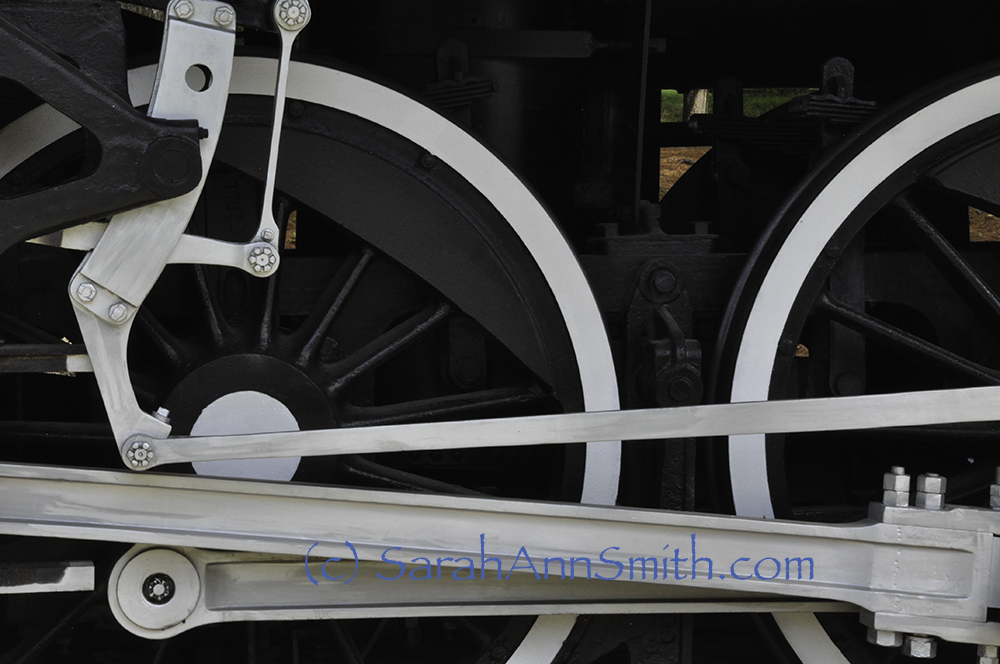
So I’ve been taking this online photography course (the 52-week challenge) with Ricky Tims this year.  I decided maybe I should start posting my photos, as we have learned a lot.  So I’ll begin with my photo for Week 25, which was “Do Over #2,” meaning we could re-visit any lesson.   I re-did a number of lessons, then selected the best photo to submit.  I like this one so much I may turn it into a quilt!

Detail of the train engine at the Shelburne Museum, Shelburne, VT.

Detail of the train engine at the Shelburne Museum, Shelburne, VT.

Whooda thunk it–me, the lady all about color, considering a somewhat abstracted black and white……hmmmm……Anyway, ENJOY.  And to my fellow citizens, Happy Fourth of July!  To our neighbors to the North, Happy Canada Day two days late!

PS:  since I expect I’ll get asked, the class is closed to new enrollees.  Our sign up was in December, and I expect Ricky will offer this 52-week challenge again.  To see all his offerings, visit www.letsquilttogether.com.


Insalata, a Food for Thought Quilt

Friday, April 17th, 2015

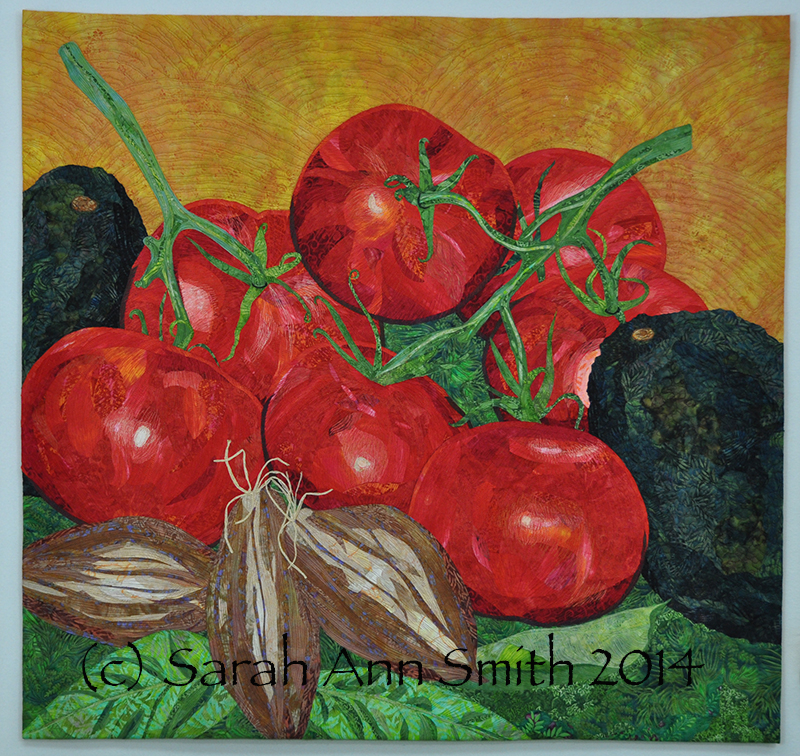
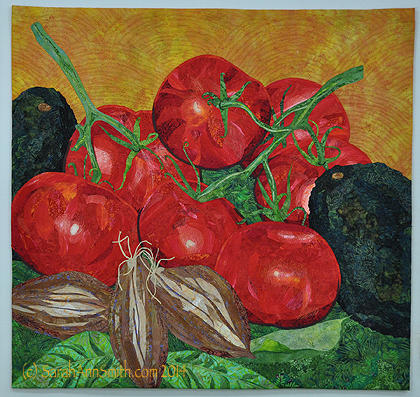
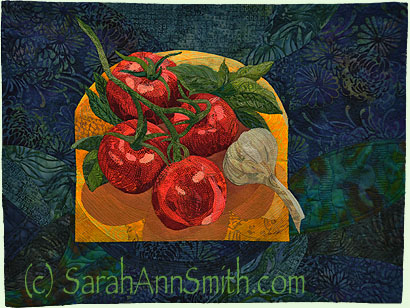
A short while ago I shared with you a first peek at my new quilt, Insalata:

Insalata, (c) 2014  Sarah Ann Smith.  Premieres April 10, 2015, at the Food for Thought exhibit at the National Quilt Museum, Paducah, Kentucky, USA.

Insalata, (c) 2014 Sarah Ann Smith. Premiered April 10, 2015, at the Food for Thought exhibit at the National Quilt Museum, Paducah, Kentucky, USA.  Size:  40 x 42.5 inches.  For sale.

When I made the tomato quilts that were the featured project in my workshop DVD for Quilting Arts, From Photo to Threadwork, including fabric collage and machine quilting (see here for the DVD or here for download), I knew I had one more tomato quilt in me.

I grew up in a town called San Anselmo, California, and mom lived there until she moved to Maine in 2008.  She and two friends would go out for lunch once a month, and often went to a restaurant called Insalata.   So she took me there, too, when I visited.  I LOVED the Chicken Fattoush salad, inspired by Lebanese and eastern Mediterranean cuisine!  I also loved the artwork.  The restaurant is in a building that, when I was a kid, was the Crocker National Bank.  If you were alive in the 60s you remember those banks with the really high (like 2-story) ceilings!  What to do to decorate the place?  She painted the ceiling a dark brown, used something warm colored on the walls (don’t remember what) and had some over-sized paintings made including some of persimmons that were each larger than a beachball.  The canvas wasn’t stretched, but hung from gromments/hooks on the wall; these pieces were easily 4-5 feet tall and over 12 feet wide.

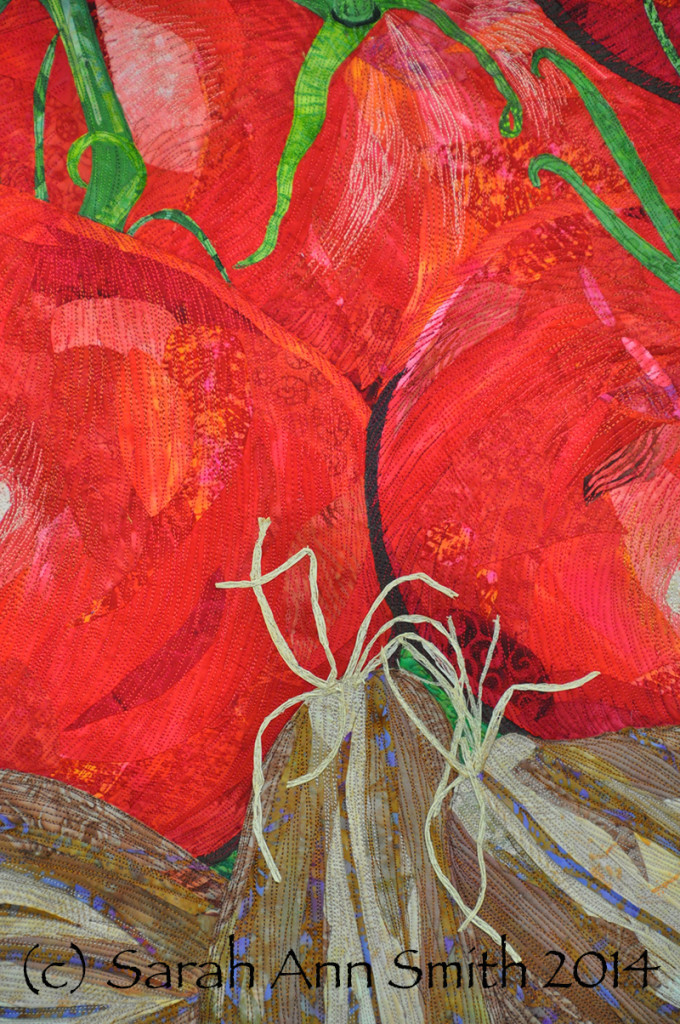
Detail of raffia "roots" on the shallots. Insalata by Sarah Ann Smith. (c) 2014

Detail of raffia “roots” on the shallots. Insalata by Sarah Ann Smith. (c) 2014  Click for larger view.

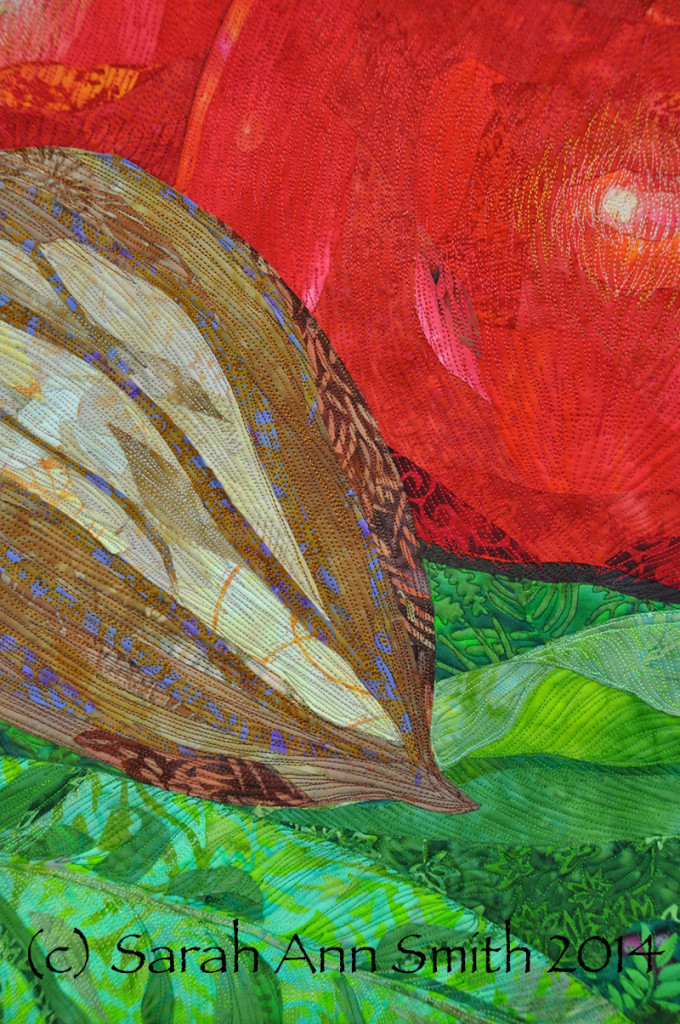
Detail photo 2, Insalata, by Sarah Ann Smith (c) 2014.  Click for larger image.

Detail photo 2, Insalata, by Sarah Ann Smith (c) 2014. Click for larger image.

Each of the tomatoes is about the diameter of a beach ball!   So now I think I’ve finished with tomatoes.  For the time being.  Hope you enjoy!  And if you like this one, please be sure to visit the slideshow on the SAQA website of the entire Food for Thought exhibit, here.

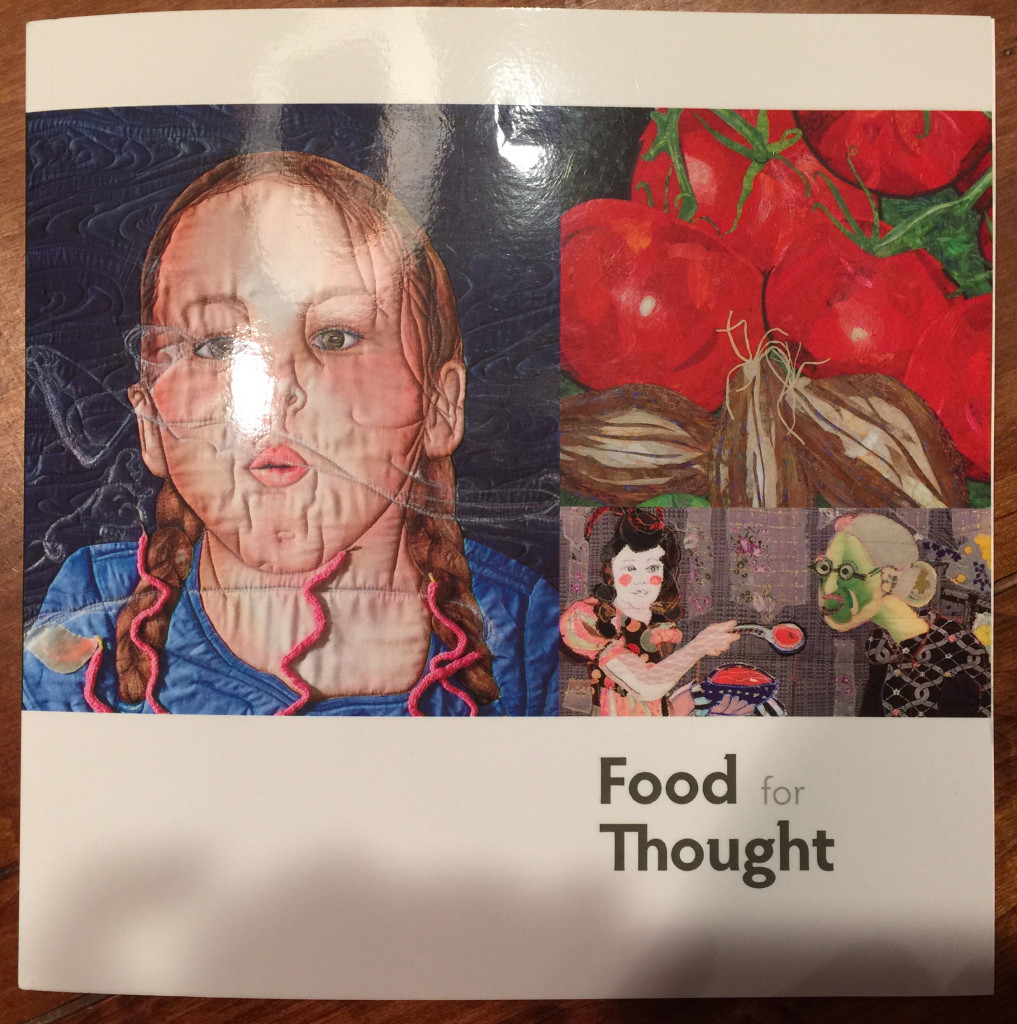
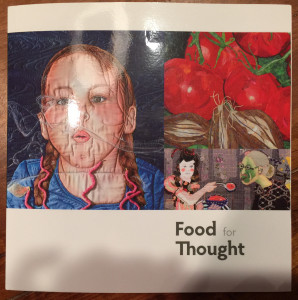
The new Food for Thought catalog from Studio Art Quilt Associates.  Available to order here.

The new Food for Thought catalog from Studio Art Quilt Associates. Available to order here.

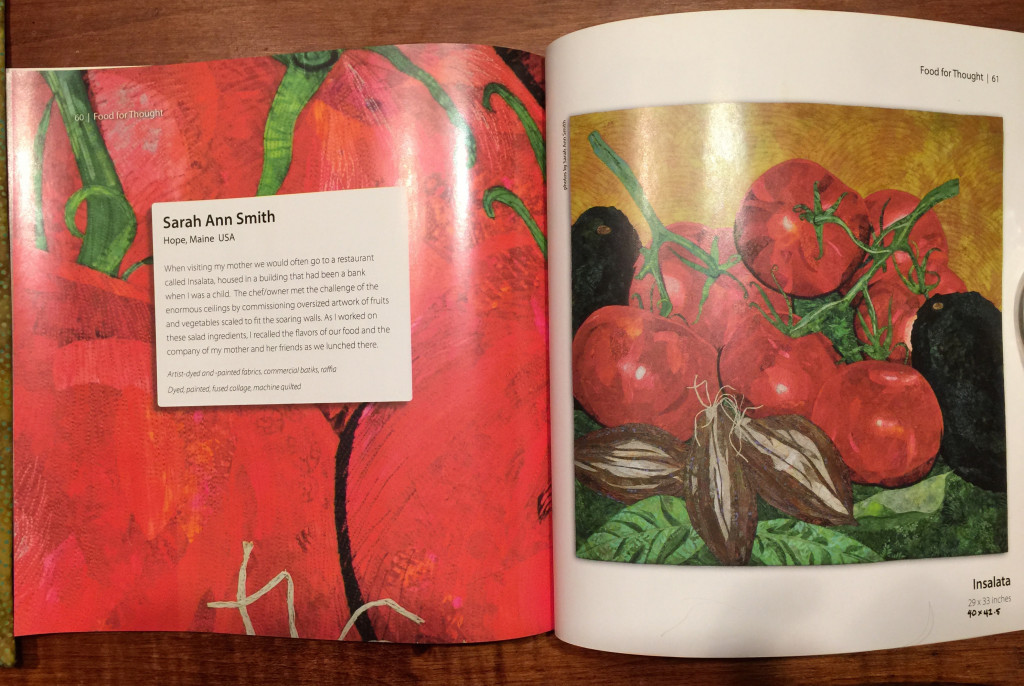
My pages in the catalog.  Great layout and design on the pages--love the enormous detail photo on the left.  The booklet is about 8.5 inches square.

My pages in the catalog. Great layout and design on the pages–love the enormous detail photo on the left. The booklet is about 8.5 inches square.

A little bit of Art

Wednesday, April 15th, 2015

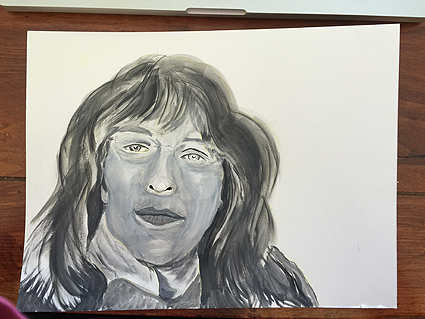
To jump around in time and take things out of sequence, the day after I returned from Florida I got together with my older son’s girlfriend, Ashley, to work on an assignment for her college art class (I LOVE getting to share in my son’s and her assignments and learn stuff).  I lent Ashley some art supplies to save her the expense since I had plenty.  I hadn’t used my gouache much, so when that assignment came up, she asked if I would like to do it with her.  YES!

Ashley's finished self-portrait..isn't this fab?  This beginner has great potential!

Ashley’s finished self-portrait..isn’t this fab? This beginner has great potential!

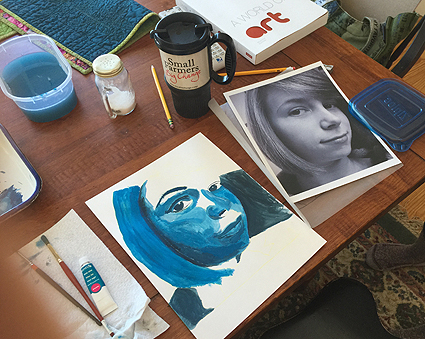
The assignment was to take a black and white photo of yourself–a head shot (or color and then remove the color) with good contrast.  Size:  about 8×10 or a little larger.  You were then to trace/copy the shapes in various values onto bristol board (a card-stock weight paper with a shiny finish) and use black, white and one other color to create a monochromatic self-portrait.  Ashley did the assignment as given (good decision–see above), but I decided to muck around a bit (see lower down).

Here's Ashley's in progress.

Here’s Ashley’s in progress.

At first, I thought I’d do the portrait as a “grisaille” or toned underpainting, then go over it with a single color.  But once I got it done, since I don’t really know what would happen with the gouache–likely it would either lift the grays underneath or just cover them up–I left it grayscale.

My first effort.  Clearly I need a bit of instruction in handling gouache, but not too bad.

My first effort. Clearly I need a bit of instruction in handling gouache, but not too bad.  I kinda messed up the eyebrow and lid crease on the left, but it could be a lot worse.

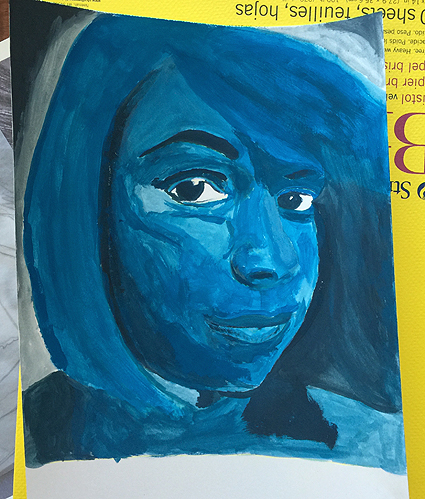
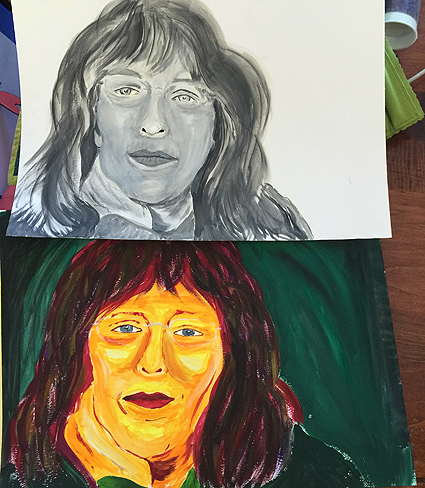
I finished a bit earlier than Ashley, so decided I’d do a second, much faster, and be more loose in my application of utterly non-realistic colors.  You could scare a child into blindness or nightmares with this!

My two self-portraits.  The upper one isn't bad.  The lower one, just plain freaky!

My two self-portraits. The upper one isn’t bad. The lower one, just plain freaky!  But they do look somewhat like me.  Just hope I don’t look as saggy-chinned and jowelly and scary as the one in color!


Next post:  More Hawaiian applique in Florida!

Food for Thought! A SAQA Exhibit

Thursday, April 9th, 2015

The Studio Art Quilt Associates (SAQA)’s newest touring exhibit of art quilts debuts this month at the National Quilt Museum in Paducah, Kentucky, just in time for the annual AQS Quilt Show in Paducah.  I’m thrilled to be among the 34 artists in this exhibit, and equally thrilled with the exhibit catalog (which just happens to be available for sale here on the SAQA website–thank you to Deidre Adams for doing such a great job on it.)  More information about the exhibit is here on the SAQA website.

The new Food for Thought catalog from Studio Art Quilt Associates.  Available to order here.

The new Food for Thought catalog from Studio Art Quilt Associates. Available to order here.

My pages in the catalog.  Great layout and design on the pages--love the enormous detail photo on the left.  The booklet is about 8.5 inches square.

My pages in the catalog. Great layout and design on the pages–love the enormous detail photo on the left. The booklet is about 8.5 inches square.  Click to view larger.

When visiting my mother we would often go to a restaurant called Insalata, housed in a building that had been a bank when I was a child. The chef/owner met the challenge of the enormous ceilings by commissioning oversized artwork of fruits and vegetables scaled to fit the soaring walls. I loved the persimmons, especially, and remembered it as I made another quilt in my tomatoes series.   As I worked on these salad ingredients, I recalled the flavors of our food and the company of my mother and her friends as we lunched there.

Insalata, (c) Sarah Ann Smith 2014.  First major presentation in public at lecture, Tuesday, How Did She Do That?

Insalata, (c) Sarah Ann Smith 2014.  For sale.  40 x 42.5 inches.

My first tomato quilts became the basis of my Quilting Arts/Interweave video workshop which teaches my collage process.  As Helen Gregory, VP of content for F+W said, the title may be the longest ever:  Art Quilt Design from Photo to Threadwork, with Fabric Collage and Machine Quilting (link here, also available as a download here).  But as she also said, there is just so much in it!  Here’s one of the early tomato quilts:

Tomatoes425Green001

Insalata is made of Artist dyed and painted fabrics, commercial batiks, poly-wool blend batting, textile paint, Mistyfuse, crisp interfacing, Superior Threads 40-wt poly and 60-wt poly thread, raffia.  Techniques include dyeing and painting fabric. Fused collage. Intensely machine quilted.

The exhibit will travel to Great Britain (England and Ireland) next year, and additional venues thereafter. Sure hope I get to see it in the cloth somewhere!


Quilting the Garden: Thread Coloring the Flower

Tuesday, March 31st, 2015

In my last post, I told you about my new series of workshops.  Click here  (or scroll down) to read the previous post.  The first workshop, From Photo to Flower Collage, can be a one or two-day workshop.  This time, it will be two-days (click here for more information, there are just a couple spots left).  The second workshop, ThreadColoring the Flower (click here) is booked this time as a one-day class.
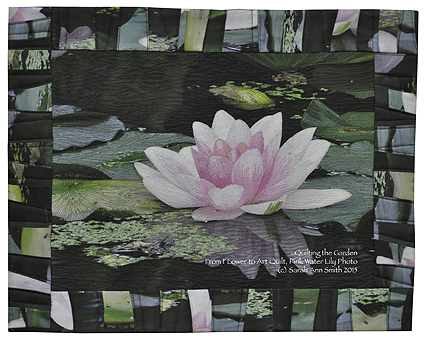
The Pink Water Lily from my ThreadColoring the Flower workshop.

The Pink Water Lily from my ThreadColoring the Flower workshop.  www.SarahAnnSmith.com (c) 2015

The water lily photo for the workshop. Photo (c) SarahAnnSmith
The water lily photo for the workshop. Photo (c) SarahAnnSmith

The Close up of the wild Day Lily, also used in the workshop. (c) Sarah Ann Smith.  PS:  Sorry about all the watermarking and copyright notices--after the incident where someone created derivative copies of my work, I'm being even more  diligent about marking stuff.  So sad to have to do this!

The Close up of the wild Day Lily, also used in the workshop. (c) Sarah Ann Smith. PS: Sorry about all the watermarking and copyright notices–after the incident where someone created derivative copies of my work, I’m being even more diligent about marking stuff. So sad to have to do this!

Again, students begin with a choice of two images:  the pink water lily or the orange day lily.  This time, however, students choose in advance which flower, because I provide them with a photo printed onto cotton sateen (done at Spoonflower).  Why?  You know how you go to a workshop, and are lucky if you get the top done in time to begin quilting at the end of the day?  I wanted students to have the entire day to learn how to use and blend the thread so that they learn the process.  If they begin with the image already on the cloth, they can get straight to the thread-coloring without worrying about “messing up” the top on which they worked so hard.

Along with the approx.  11 x 14 inch photo-on-fabric, the kit includes five spools of Superior Threads 40-wt. trilobal polyester thread for quilting the flower (students need to provide their own greens or purchase additional–I wanted to keep the cost of the kit down by requiring only the threads needed for the flower), and stabilizer to help prevent distortion from the dense stitching.  We’ll talk about tension, needles, stabilizing for dense thread-work and more.  However, if students wish, after working a bit on the photo-on-fabric, they are welcome to switch over and start quilting their collaged flower (if they were in the Photo to Flower Collage workshop, of course).
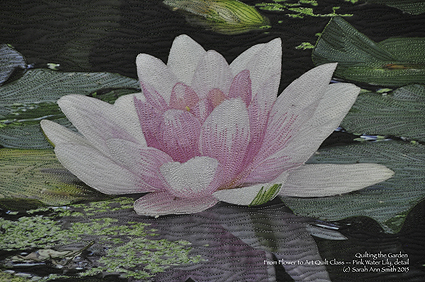
Detail of the Pink Water Lily shows the dense stitching.

Detail of the Pink Water Lily shows the dense stitching.

For my Water Lily quilt, I took a second photo, cut it up, and used it as a frame for the small quilt.  The Day Lily is simply quilted and aced, as are most of my art quilts, with no border.
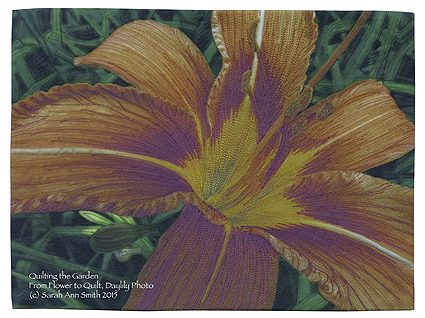
Quilted DayLily.

Quilted DayLily.

I’m so psyched about the trip to North Carolina–I’ll get to meet internet friends who are taking the class, and spend THREE DAYS with some of them, plus visit Program Chair Debby Harwell, whom I met in a dyeing workshop with Carol Soderlund (at ProChem in Massachusetts) lo these many years ago.  This is gonna be a blast!  I can’t wait to share what the students do.  Now, I just need to figure out how to take photos and blog from my ipad!