email Youtube

Home
Galleries
Blog
Workshops & Calendar
Store
Resources
About
Contact

Archive for the ‘Lino-cutting’ Category

Still, Still, Still

Saturday, December 24th, 2011
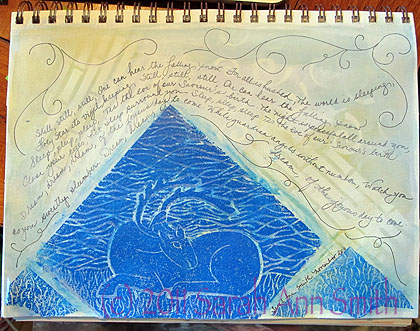
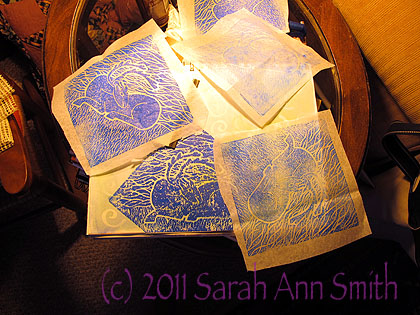
Still, Still, Still is a carol the middle school chorus sang last year. I journaled the lyrics around this print of the stag. I first printed the reindeer directly on the page, but the print didn't work so well. So I printed onto tissue, then glued the tissue over the somewhat not-crisp original print onto the page. This made a sort of "echo" in the image. The background was done in Jane LaFazio's Mixed Media journals online class at Joggles.com.

For once, I actually thought ahead a bit.  Last spring, I did a presentation for my local quilt group, the Coastal Quilters, because they had been kind enough to award me a $50 scholarship to help pay for a class.  I took two online classes, one of which was lino-cutting with Dijanne Cevaal.  Last Christmas I had gotten this idea to make an ornament for my Frayed Edges friends for this year, so I noodled around Google Images to find pictures of stags and reindeer and prepared a drawing to use for a new lino-cut that is really a hybrid of about 20 pictures.  Then I finished the carving as part of my demonstration.

The resting reindeer, on tissue, on cloth, and in my sketchbook

In Fall, I finally got around to printing what I needed to make some ornaments.  At Thanksgiving time, I decided that I needed to make a few more, as it was time to give thanks, especially to some very special teachers at Camden-Rockport Middle School who have been wonderful to both of our kids.  Our younger son is in 8th grade, so this was our last chance to say a special thank you.

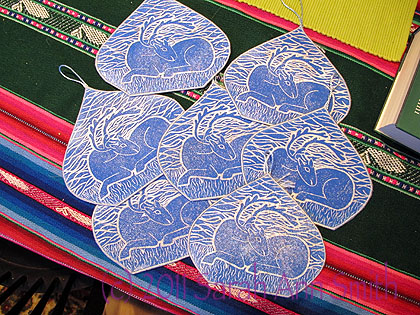
I made a run of 14 ornaments for family, friends and teachers.

The block is 6 inches, with the design carved on point.  I trimmed the prints on cloth to this “onion dome” (like you see in Russian churches) shape.  They are printed with Speedball Printing Ink, which I discovered the hard way last year is NOT water-fast.  Like a drop from the iron will make a blotch.  Erg.  So after printing these I sprayed with with Krylon Spray Fixative, which I hope will help.  The prints are fused to Peltex, a stiffener used in fabric postcards, and quilted with Superior Threads Glitter thread (the pearl color).  Unusually, I satin-stitched around the edge instead of using a yarn…nothing I had looked as good as a nice tight satin stitch.
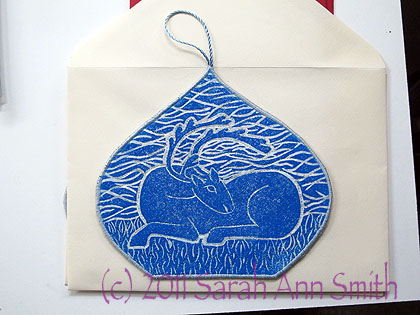
A closer view of one with a more dense coating of ink that some of the others... I like it both ways.
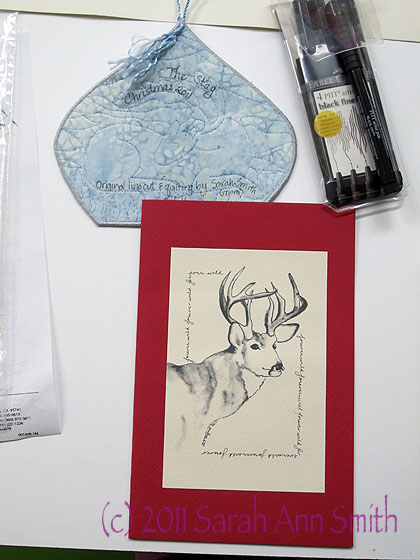
I decided the ornaments needed a special card, so I used the stag I drew (see my earlier post this month) and photocopied onto a heavy card stock and made the note cards. Finding big envelopes was a challenge! You can see the back of the ornament at the top left, so you can see the quilting.

May tomorrow find you with those you love, with a moment of calm and joy and art and beauty.

Sunflower Lino-Cut

Tuesday, July 6th, 2010

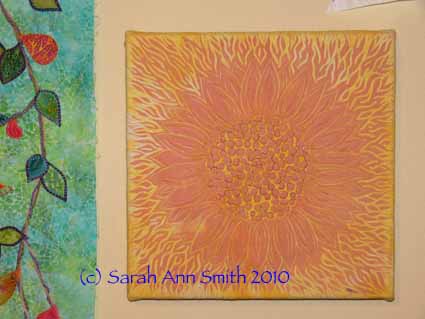
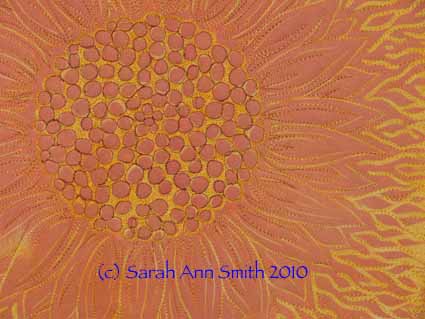
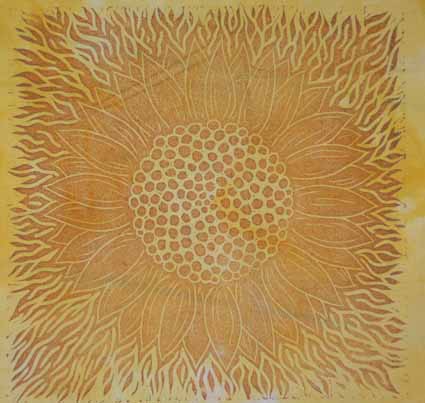
Back during winter, I took an online course on Lino-cutting with Australian Dijanne Cevaal (her blog is here).  One Sunday while watching the Winter Olympics, I began carving this 12″ block–it took most of four hours to Oh-So-Carefully cut (and not slip) just the pebbly center, but it was SO worth the ache in my hands.  I just love the way this turned out:

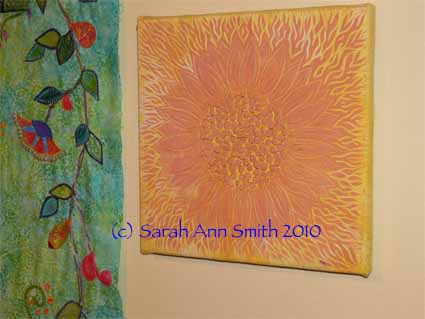
You may be able to get more feel for the quilting from this angled shot:

The quilt was quilted, then wrapped onto artists’ stretcher bars (staple gunned to the back), then finished the back with a nice cloth cover.  Here’s a detail:

Hope you like it!

PS–Dijanne offers the course periodically.  If you are interested, surf over to her blog and ask when it is next scheduled.  OK…just checked, next session starts July 14, so am posting this earlier than I initially planned!  If you move fast, you can take the class soon!

Fabric Postcards

Monday, June 21st, 2010

A brief detour from the Arizona trip…..

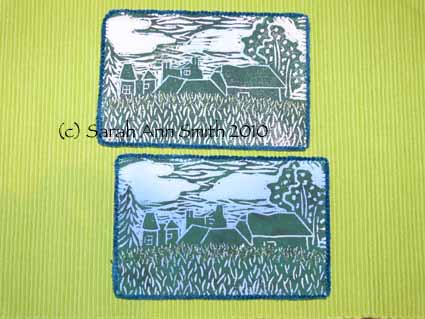
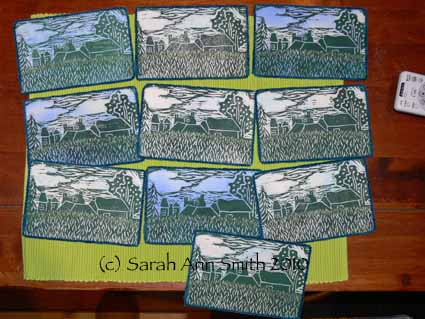
I’ve been a  part of Postmark’d Art’s last two swaps.  This time, I used one of the exercises from my Lino-Cutting class (blogged about in January and February).   I rooted through about (no kidding) 20 years of old photos to find this one of a farm in southern England, which I snapped in about 1984.   It was funny, I thought I used to be a good photographer, taking good and artsy shots.  Hmmm.  Not so much.  Some were good, but most were….ummm…boring!   It appears I have trained my eye for composition somewhat in the intervening decades!   Anyway, this one was good, so I used it to cut a lino-block.

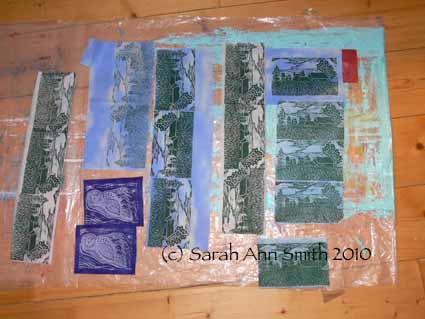
Here are the assorted prints drying on the floor:

Some blurred a bit, and will be cut up, tossed, or printed over.  Others turned out great!  I used three fabrics:  a pale baby blue fossil fern (the one that looks grayish), a commercial sky print (the bright one), and a blue fabric I painted and fiddled with (and used some for the mermaid I blogged about recently).  There are also two guardian Owls for a friend whose husband passed away recently.  Owl’s are a favorite of hers (I carved the block during the class with her in mind!), and decided that she and Lou needed a guardian Angel Owl.

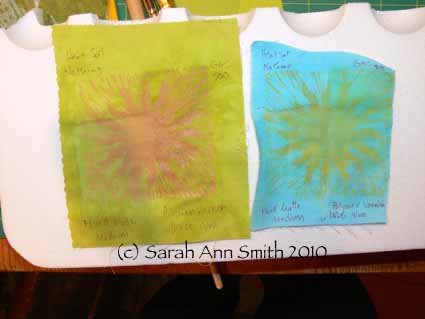
One difficulty I have had with the class, is that the teacher–Dijanne–is from Europe and Australia, and not so familiar with US brands.  The Speedball water-based printing ink that I find makes the best prints is, shriek!, not wash-fast!!!!!   So I have begun doing some testing.  Here I took prints (heat set with the iron and not) of a sun, then treated each with various things like soft gel medium, a varnish for textiles, GAC 900 (a compound for using paints on textiles), and nothing. I also want to run another test where I treat the fabric FIRST, then apply the Speedball ink.   I don’t like how on a couple of these the color of the fabric changes so much (not to mention how stiff it got)!  I also have tried using Krylon Spray Fixative, an archivally safe spray fixative; it is often used on top of pastels so they don’t smudge.   Anyway…here’s a picture of the test, in progress.  I next need to soak these and see what happens.  Stay tuned!!

And here’s a shot of all the postcards in the swap:

Lino-cut sunflower, part 2, and owl revisited

Sunday, March 21st, 2010

In my last post, I shared the carving of the 12 x 12 inch sunflower block, and a while ago the first attempt to print with the owl block (about 4×6 inches).  Well, the Speedball water-based printing ink arrived.  I only ordered one tube, copper metallic, to test it.  Shoulda ordered more!  It prints MUCH sharper, cleaner prints–I’ll put side by side of the owl in textile paint and ink below.   But first…the sunflower…..Oooooh la la!

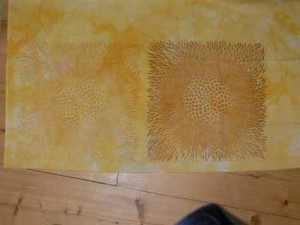
Here are the two prints I’ve made so far:

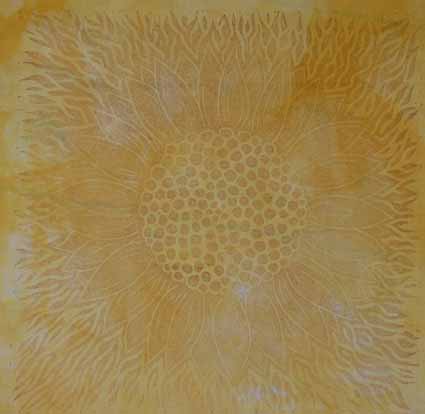
The one on the left is the first attempt.  Since the copper color of the ink is about the same color as the linoleum, it is almost impossible to tell visually by color if you have enough ink.  Clearly not.  The second print on the right is much better.  Oddly, thought the ink appears metallic in the tube, it doesn’t look metallic on the cloth.  Still, I really like it.

I ADORE this block. I was thinking of cutting it apart into three sections:  the center, the petals and the outside.  But what if I mess it up?  So I think I’ll keep this one as is, then carve another center and another ring of petals separately, so that I can print the block in different colors for each segment.  My mind is already racing on how I can use this to create new cloth, made a t-shirt, and basically have a ball. Here are closeups, first of the too-pale version.


This one will make a good candidate for overprinting with a different stamp in darker ink.  The darker print is much better, but I have to work on getting an unwrinkled “underneath”…I protected my padded surface with a plastic garbage bag that has fold marks in it, and they showwed up in the print:

In my earlier post about the owl, I mentioned that I didn’t care for the heaviness of the lines to the owl’s left:

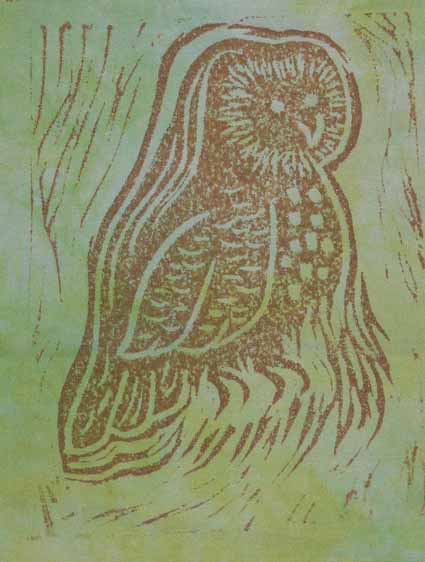
So I removed some of the lines and tried printing again.  On this one also I had the same issue with guessing how much was enough ink, the first one being too pale, the second and third better:

Here’s a closer view of one of the better prints:

There is a learning curve, but I am moving along it, and this is GOOD.  And I can see having a lot of fun with this technique.

More lino-cutting

Saturday, March 6th, 2010

Heads up!  Dijanne is beginning a new lino-cutting class on March 8th! To sign up, visit her blog and contact her by clicking here.

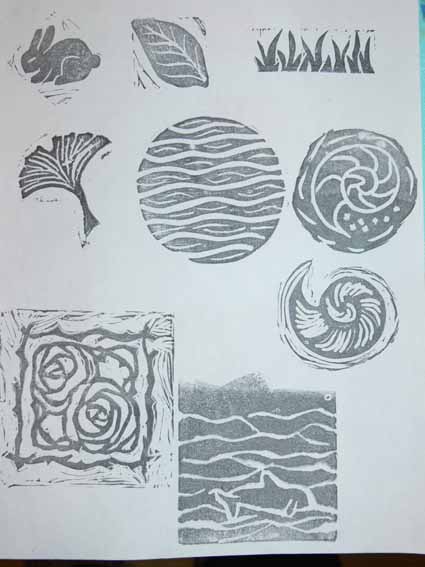
I’ve been trying to work on my online lino-cutting class with Dijanne Cevaal during the Olympics and breaks from working on that quilt I can’t tell you about yet.  I’ve been having FUN! One of the exercises was to cut a monogram / initial.   As part of that, I decided to print up some stamps I had carved in the past and share with the class, so thought I’d share them here, too.  The older stamps are all done in either Speedy-Cut (a somewhat soft, rubbery material, or a generic version of same), an art eraser (the grass)  or the cuts-like-a-hot-knife-in-butter MasterCarve (the bunny and leaf in the top row are on opposite sides of the same block).  The sheet below is an 8 1/2 by 11 inch (about A4 size paper) piece of paper.  The rose block is about 3 1/2 inches square, the bunny maybe 1 1/4 inches across (printed on point).

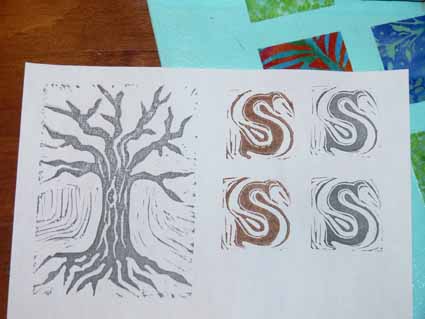
Here are the carvings for class (the “S”) and an older tree of life design printed onto paper with textile paint (brown) or stamp pad ink (black):

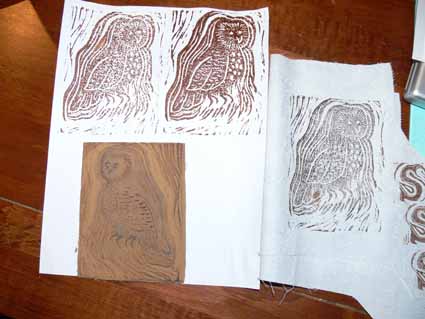
I also did an owl in Dick Blick (online purveyor of art supplies) Wonder Cut, a type of linoleum.  It is about 1/4″ thick, and feels like tightly compressed sawdust.  It is harder to cut than the rubbery stuff, but easier than the Golden cut or battleship gray linoleum.  Since I have (I think) incipient arthritis and other issues with my hands, I used that first:

I didn’t really like the three echo lines to the left of the owl, so I subsequently removed them.  I’ll share prints made with the revised version a few blogposts down the line…..The lino cut is at the bottom, the paint on paper prints at the top, and paint on cloth to the right (along with a few attempts with the “S”).  I need to get a better print on cloth… I think I figured out the trick.  It is called buy MORE paint supplies, the kind suitable for lino-printing! More on that later, too….. you get the same exploring and learning curve I had!

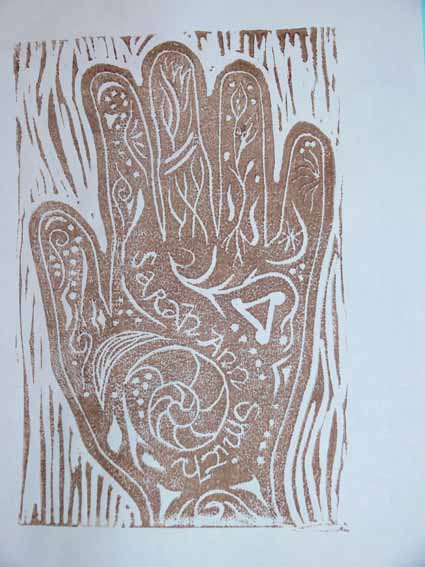
Last, a stamp I made a while ago to use on labels.  It is large… 5 1/5 by 8 inches (half a sheet of paper).   I traced my hand then drew inside it, then carved the whole shebang into the soft-cut rubber.  I had thought I would need to make this into a Thermofax screen for screenprinting, as I was not having luck getting such a large surface colored up with textile paint and printed before the paint began to dry.  However, with my buy-more-stuff discovery, maybe I don’t.  Hmmm….I’ll have to go try the new stuff with this stamp….hmmmm……

Anyway, hope you like my total collection of stamps, which will be growing!  I like the lino-cutting!