Joshua, the quilt in progress, #1
Saturday, April 10th, 2010A short while ago, I was able to share the finished results of my most recent “big” (36 x 48 inches) quilt, a portrait of my son Joshua. I love seeing quilts come to life, and watch the creation process when other folks make things, so I thought I’d share how this one came together.
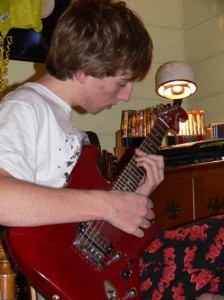
First, several months before I finally got to cut fabric, I took photos of Joshua playing guitar (after asking nicely for a few weeks, I finally pinned him down one evening). Sitting on the floor to get a not-the-usual angle, I took about 60 or 70 snapshots, many of which I was able to rule out immediately (mostly due to closed eyes, mouth hanging open, blurry fingers). I narrowed it down to three: one for the position of his head (mouth closed, eyes open–on the right, below), another for the position of his hands and body (on the left), and a third for some extra details on the room.

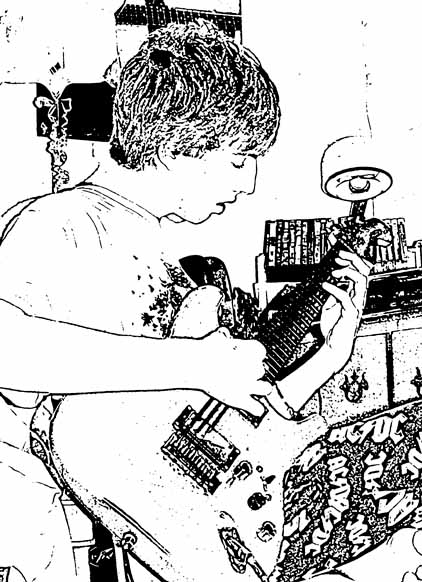
Then, I fiddled around in Photoshop to come up with a line drawing.
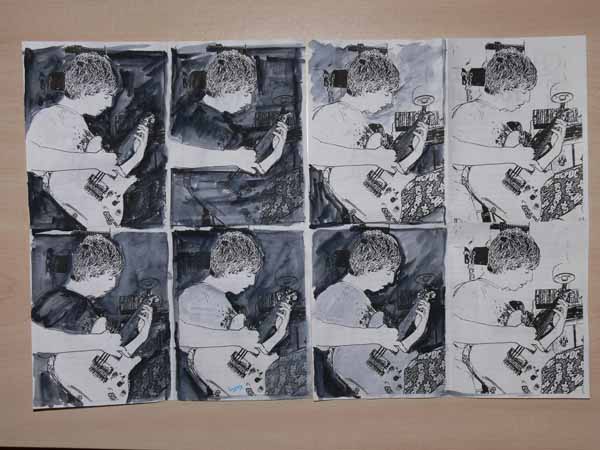
I sized this so that it would fit four times on a piece of paper and did what is called a value study. I learned about this from an online educational resource (pay to play–thanks Deirdre for sharing this one with me!), www.artworkshops.tv , an online tv/classroom site. I watched the video by Polly Hammett on Design with the Figure. One of the things she showed was doing quick thumbnails (quickie outlines) of her intended composition, then using ONLY black and white, blocking out what would be light and what would be dark. By using only black and white, you get immediate, stark visuals on the shapes and negative spaces (the shapes between), which gives you an idea how the composition will work.
This exercise was INVALUABLE! Since I never went to art school (last class was my one and only year in art in high school), I’d never heard of this, though it is probably a basic! Here is a snapshot of the value sketches I did, except I “cheated” took a shortcut by using the Photoshop Elements outline. The two on the far right are the “blanks.” The one I ended up using is the bottom row, third over: Joshua’s face and arms are light, the background is deep dark, the guitar medium in value (again, I fudged a bit on the black-white only and expanded it to include a gray). PS–this one photo is clickable for a larger view:
This helped me decide on my colors. I knew that I wanted Joshua to be the focal point, with his guitar as the secondary focal point. That meant if Joshua’s skin was to be light, the wall needed to be dark, not the celery green it really is. If you look again at the value studies, you can see how much more his face pops when it is against something super dark, not just “gray” or medium value. I also darkened up the dresser, bedding, and eliminated details (posters, books on dresser, clutter!) to make my life easier and to make the composition more focused.
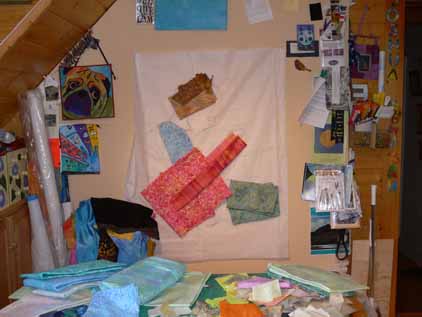
Next, I used my laptop, hooked up to my digital projector, to project the main photo onto the design wall, where I had taped up paper (medical exam table paper, long, cheap, taped together–bought a roll from my doctor for $5 and it is 3+ years old and still plenty left) and traced out the outlines. Here’s a photo of the drawing on the design wall with preliminary fabric ideas pinned to it:
Next, I’ll show how and where I chose to begin…the hardest part first!
PS: Norma asked what process I used in Photoshop Elements. I’ve tried to duplicate it and I THINK this is what I did:
I think I converted it to grayscale first; Go to Image, then Mode, then click on Grayscale.
Then, under Filters/Sketch/Stamp, click on stamp and adjust the light/dark slider to about 2… I think.
I just tried to re-do this, and that is as close as I can get. Shoulda taken notes!
