email Youtube

Home
Galleries
Blog
Workshops & Calendar
Store
Resources
About
Contact

Archive for the ‘Drawing’ Category

Sketching Spring

Sunday, April 29th, 2012

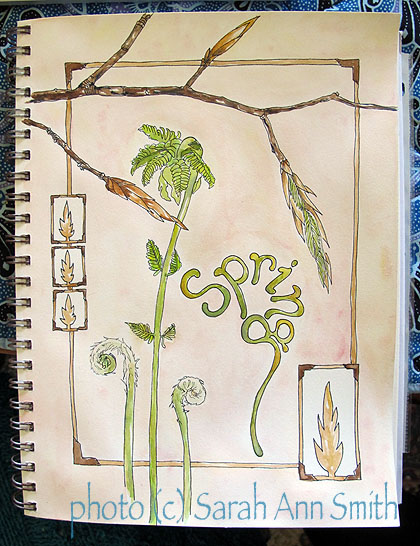
Hi everyone! I’ve been seriously absent, mostly busy!  I taught in Arkansas, got home at suppertime (stopping at Eli’s track practice on the way home from the airport), off to Coastal Quilters the next morning, unpacked that day, repacked the car the next day, and the following morning off to Massachusetts for a dyeing workshop!  More on all of that, but for today I’m sharing what I’ve just finished… lesson 4 in Jane LaFazio’s Joggles class, Watercolor Sketchbook:  designs from life.

The finished sketch/lesson

This lesson was “from the mountains,” so my garden filled in!  I chose fiddlehead ferns, a sure sign of spring in Maine, and the tightly furled (and opening) leaf buds of the beech tree.  As I wrote to the class:

I just adore the beech leaves, how they cling so tenaciously to the branch throughout winter, only relinquishing their hold when new growth finally forces them off and to the ground.

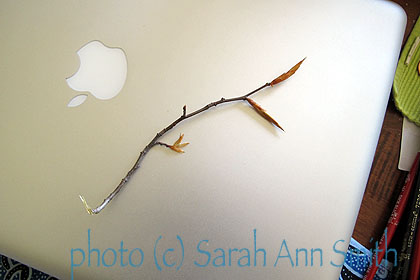
I’m posting a photo of what I sketched, but alas I waited too long and things kinda wilted, so I picked a second branch so you can see the long, slender, tightly furled leaf bud.
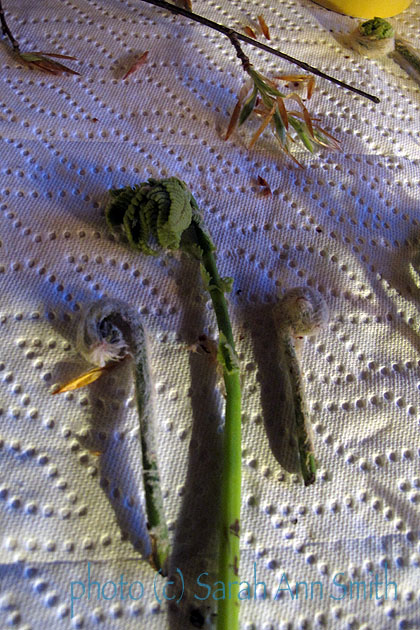
What I sketched, slightly wilted (with a strong afternoon sidelight and long shadows from the window)


Beech sprig on my closed laptop

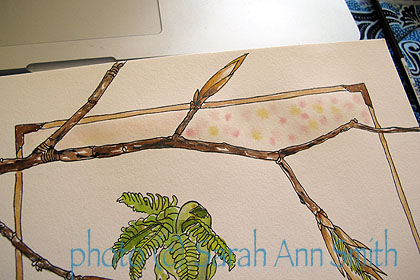
I really liked Jane’s page with the two rectangles of leaves and the background of larger leaves and paint coloring the page around the boxes (not shown…in the lesson). I tried to do a similar tint/wash on this, but think I might better have stopped before that step. I was tired of plain backgrounds, but think this painting-in-back would be more effective if I had multiple smaller boxes/windows for the composition rather than this view. I included one photo of how *I* flooded in color: dampen section, add dots of thinned color, blend with a flat brush.

wet into wet....

…..I ended up with stronger blots of color than I wanted, tried to lift, then got sorta yucky rubbed areas. I do think I may want to use a less wet approach on this paper and then make myself a “mixed” journal of both mixed media and watercolor papers, or just suck it up and pay for a large watercolor paper journal period.

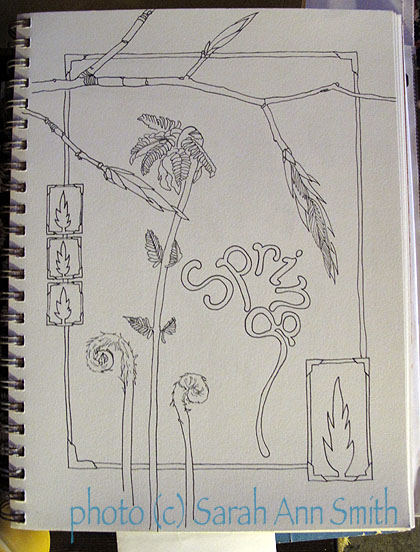
I DO like my “photo corners” tho! And it is curious that I, who adore vibrant color, am having fun with more subtle colors… AND (drum roll! ) I managed to remember to take photocopies of just the inked drawing for possible “other use.” What a concept…my brain was engaged!  Here’s the inked page (draw in pencil, draw in with ink, erase pencil) and the page with the greens and browns added, but no background wash.  I think maybe I should have stopped here, but so it goes.  Turn the page, try again!
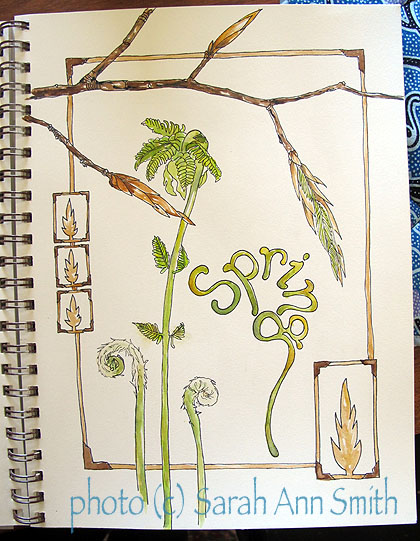
The inked outlines

At least with my current skill level, I think maybe I should have stopped here and not added the wash of color in the background

Anyway, here ’tis. Now for lesson 5 and back to lesson 3….. Constructive criticism is most welcome and appreciated!

The same applies for all of you…. should I have stopped

Sketching on location: coffee cups!

Friday, November 4th, 2011

OK…so I was actually (who me?) spontaneous this summer and signed up for a www.Joggles.com class with Jane LaFazio, Sketchbooks and Watercolor on Location.  The idea is/was that you go OUT to sketch and sketch from the real thing, not a photo.  I am SO GLAD I did…I’m having a ball, so much so that (as I’ve mentioned before) I signed up for a second class.  This post is about the first class, and one of the early lessons.

So I dropped the son off to run at the high school (this was late summer), and treated myself to tea and sweet at a nearby spot.
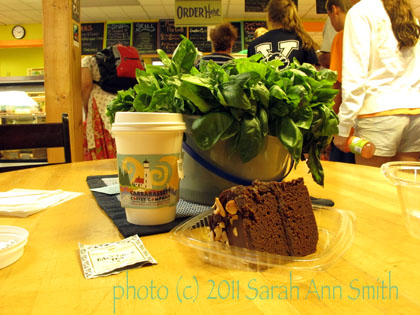
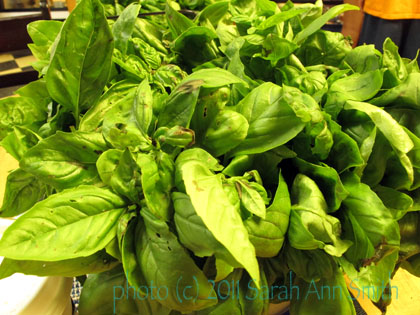
Told the child I wanted /needed about an hour.  After dithering about what treat to get, I finally sat down at this table with LUSCIOUS basil.

I briefly considered including the basil in the sketch. I then realized I'd be there 'til midnight if I tried, and decided (who me?) to go simple. OK, to go not as complicated.

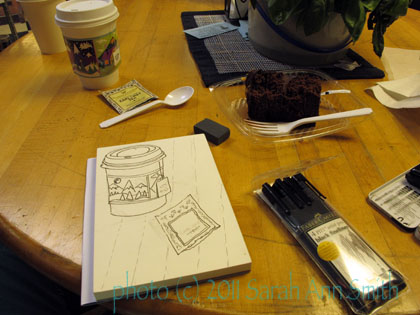
Then I finally began to sketch.

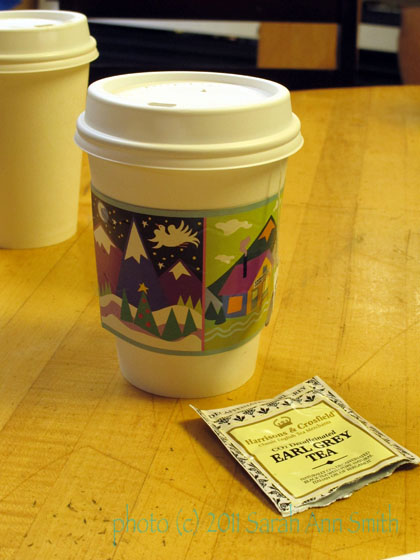
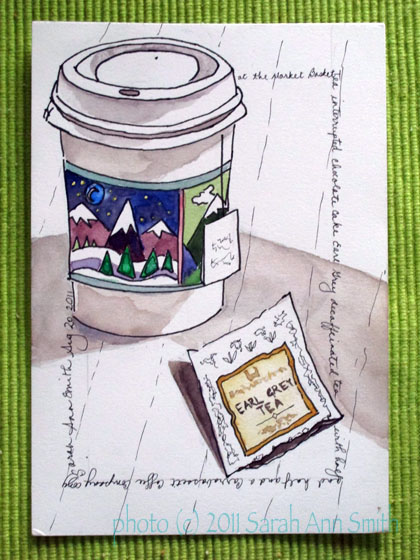
A close-up of the cup and tea bag. Don't you just LOVE the cup sleeve, from the Carrabassett Coffee company?

Here is the sketch, done first in pencil, then inked in with a Pitt pen.  Of course, 20 minutes after I arrived I get a call:  “Mom, it’s too hot to run!”  Me:  “remember I said I needed about an hour?”  Then, “you’ll have to wait for me for another half hour…find a shady spot to sit.”  Sigh.

Inked in....cup is too short and not tapered enough, but still OK.

SO…. I packed up my cup and supplies and the rest of the chocolate cake (slurp), and retrieved the child and headed home.  It actually was pretty warm.  Then I set things up at home.  The shadows/light were different, but close enough….

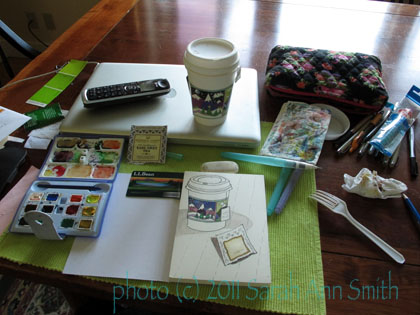
Adding color at home, on the dining table, lacking the usual clutter around my spot.

And the final sketch:

Not too bad for a beginner....the curve of the cup isn't quite off, and the tea bag looks like it is levitating a bit, but not too bad....

Considering I’m just starting with watercolor, I’m pretty happy.  I have discovered that having REAL watercolor paper makes a world of difference, and having little water in the brush makes it much easier to stay within the shapes and not bleed and make yucky stuff! FUN!

Waffles

Tuesday, October 25th, 2011

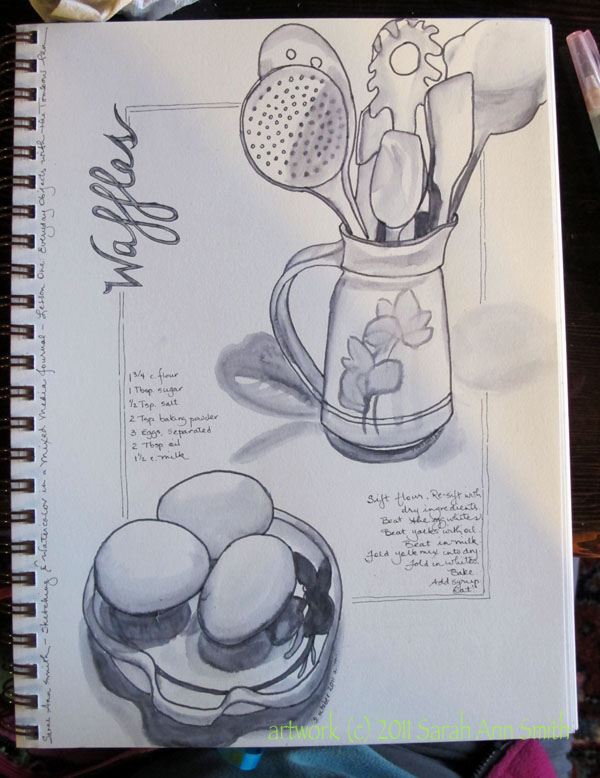
I found it…the last photo of the page with the pitcher and eggs.  Someone in the online class commented that it looked like breakfast. Well, it did!  So I turned it into a journal page about a family favorite:  Waffles!  I’m fairly happy with the way it turned out:

The finished journal page, complete with recipe. Click for larger view.

Back soon with more fun stuff!

Cookie? PLEEEZE cookie!

Wednesday, January 20th, 2010

Deborah Boschert, one of my Frayed Edges mini-group, is also part of a wonderful project called Twelve  x 12.  They have a blog here, and a website here, and even better…..well, not sure if I can tell you about it yet but there is something really cool coming in their future!   So hold on to that thought.  Anyway, Deborah now lives (sob we miss her) near Dallas, and the Dallas Quilt Guild is hosting a 12 x 12 challenge.  The rules:  anything goes as long as it is 12 by 12 inches.  Deborah invited us to participate and send quilts to hand in the show this March.  Well…..

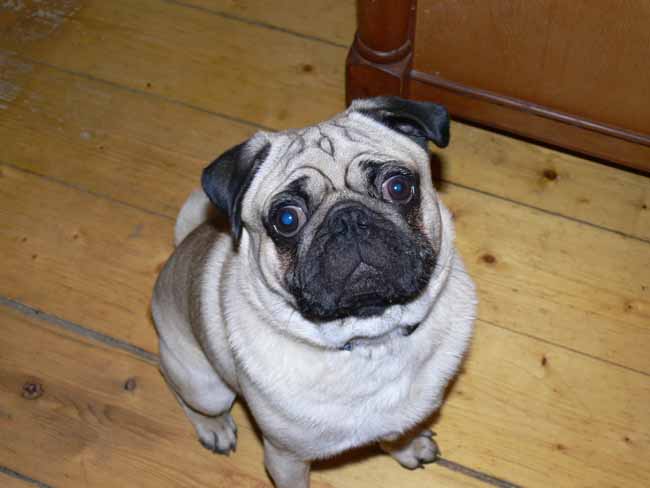
I was totally, utterly blocked.  I had NOT A CLUE.  Not a whiff of an idea.  Inside of brain darker than a cave in a coalmine with no lights.  Nada.  Nicht.  Zip.  Zilch.  Then I had to walk the dog.  This dog (note…there are fifteen photos in this post, and all are clickable for a larger view):

Isn’t he CUTE?  Even from the hind view with curly little tail and dog butt, he is CUTE.  Well, the good news is that the quilt is NOT of his hind end.  I figured the cuteness of a dog’s butt is not necessarily appreciated by all, but how could ANYONE not love a pug mug?   So, I scoured through the umpteen thousand (literally) photos on my hard drive, found the one above, and cropped the photo:
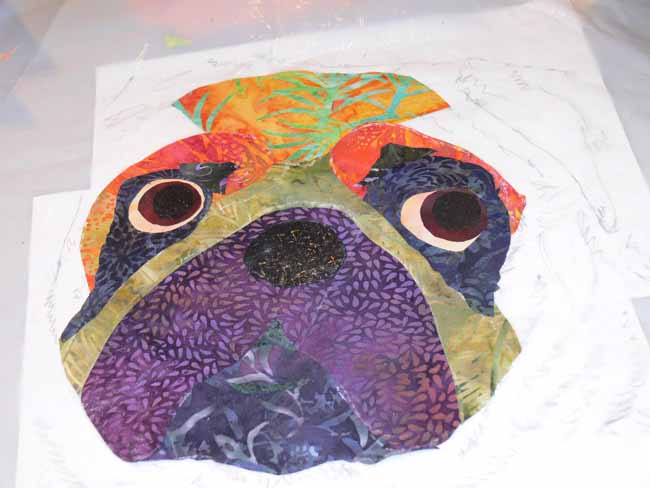
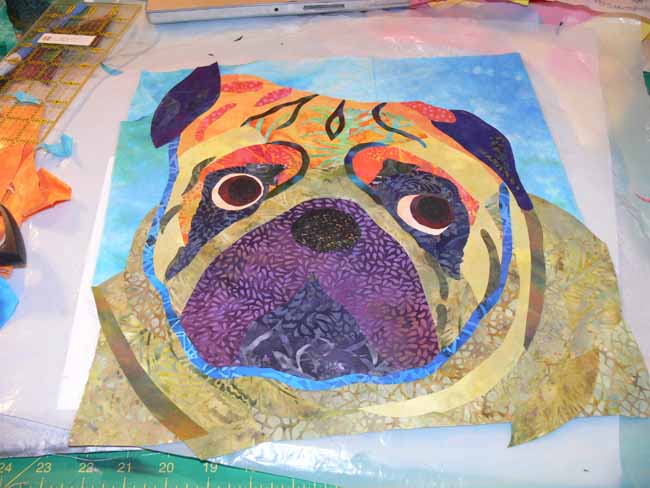
Then I decided to use value as my plan of attack for fusing up this puppy.  At first I selected beige, tan, charcoal, and went YUCK.  I wanna play with color.  Back in the fused fabric stash they went.  Out came the colored fused stash.  I started with medium values…some lovely turquoises.  Then lights, deep darks, and some transitional values.  Not suprisingly, the light lights were yellows, the deep darks were navy and purple.

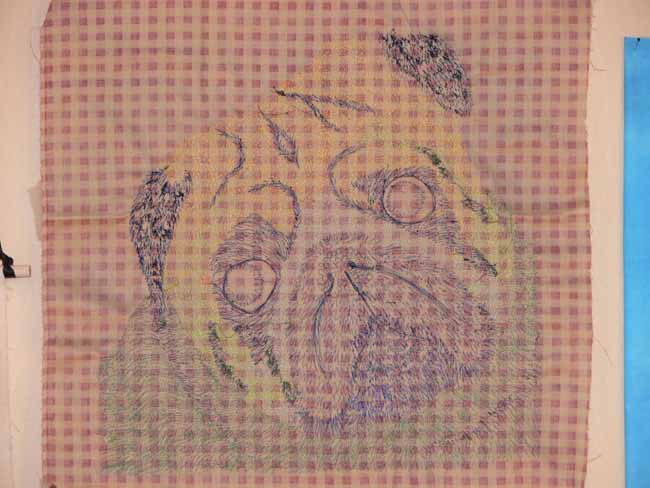
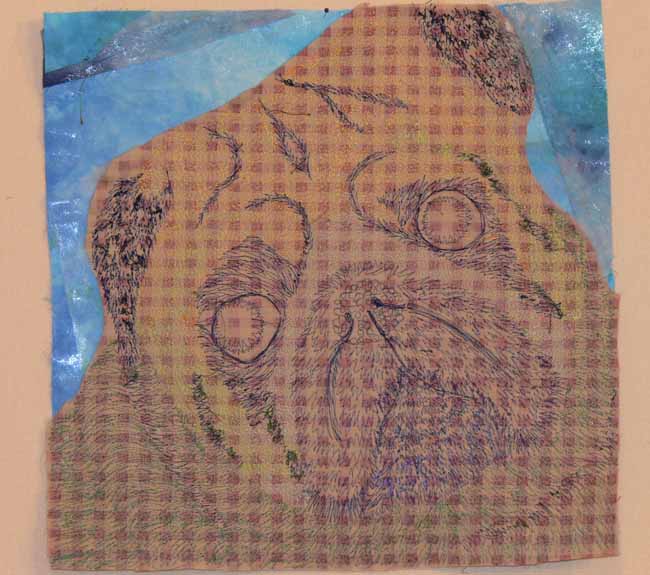
To get ready, I enlarged the photo to 12 inches on my computer, got out the large tracing paper, and traced his outlines.  This tracing was my pattern guide in cutting the pieces of fabric for his sweet face.  Here is the first bits:

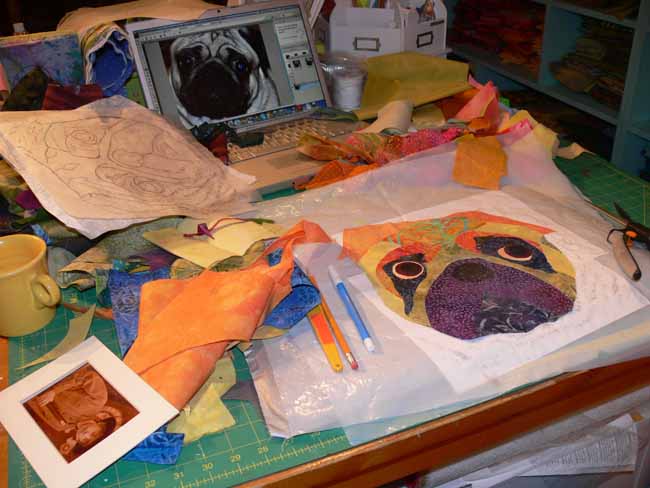
Then a bit more work–you can see the tracing in the top left, the laptop with the cropped photo for reference, and the scattered bits of pre-fused fabrics tossed about (and note the yellow mug…I LOVE the fiesta ware!):
Here’s a close-up of the pug at this stage:

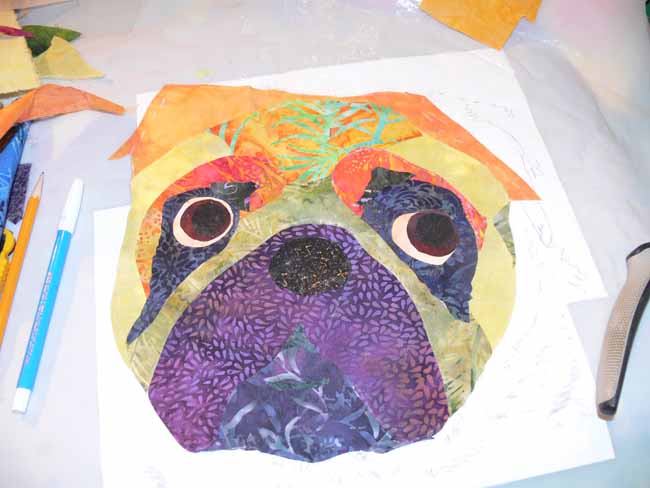
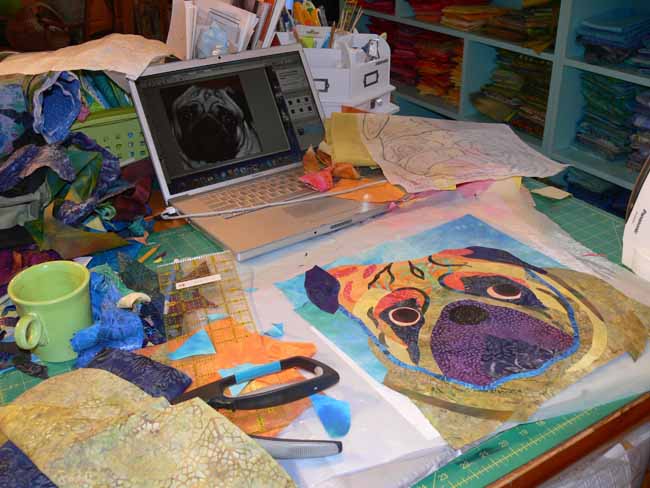
Then even more; I have added the background, but notice the face is kinda upright, not that cute cocked head, the quizzical look (note the green fiestaware mug):

Edges trimmed, but face is still upright…wrong!

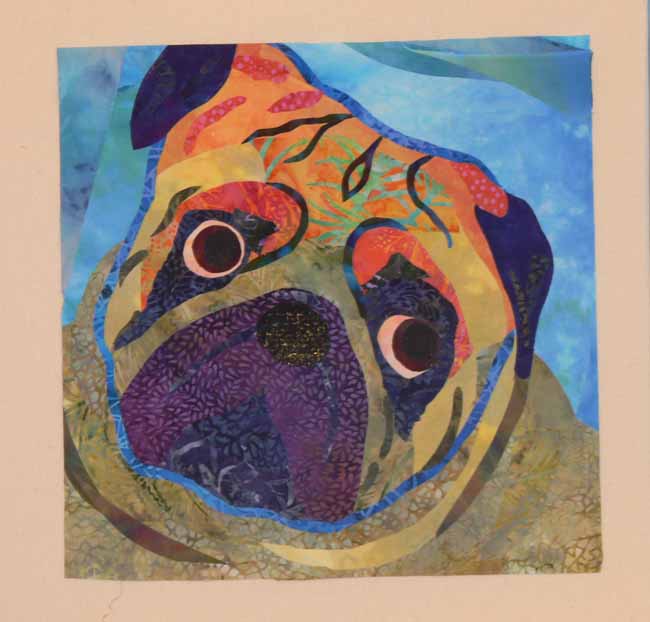
So after uttering a few cuss words at having not noticed I was trimming him with his head in the wrong position, I sliced things off and fused up some more background–and yes, there is an “issue” with the shape of his head on the left, but I knew that would be cropped off so I ignored it:

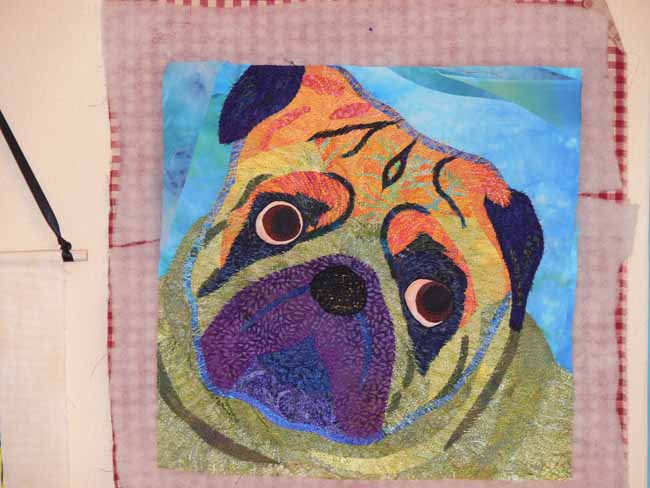
This shows ‘Widgeon quilted (tho not the background…more on that in a sec):

and a close-up:


Here’s what it looks like from the back:

Next, I trimmed away the “middle-backing” and the wool batt I was using from under the turquoise background:

I then added cotton batting and the “real” backing and quilted the background, plus some of the major creases in his pug mug:

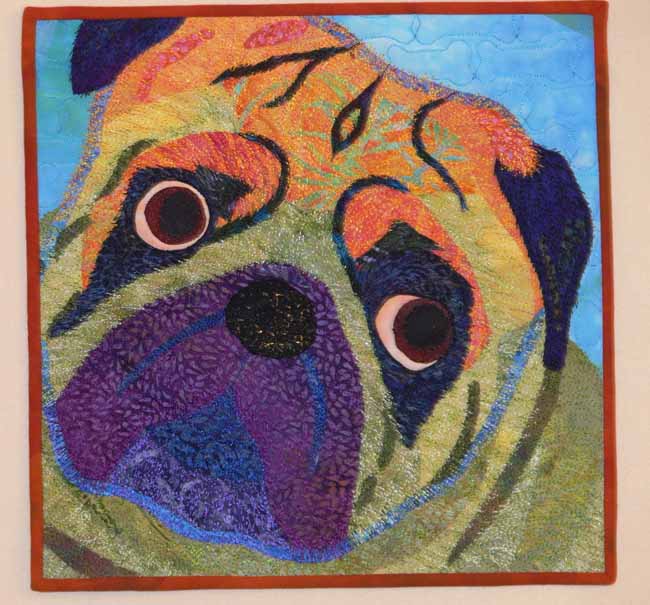
Finally, I had thought I would face the edges.  I used an old rust colored fabric on the back, and for the facings, and realized it looked MUCH better than the turned/faced edge.  So I found a better quality hand-dyed and made narrow bias bindings:

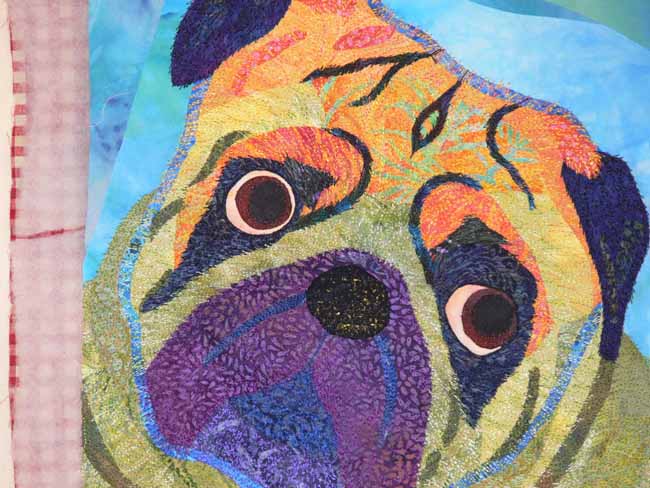
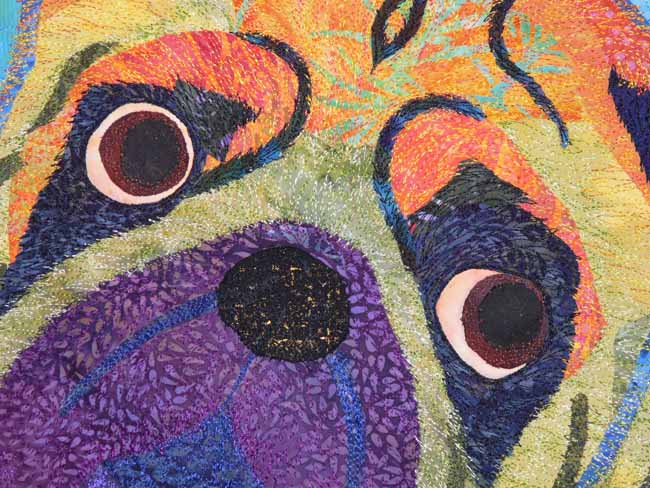
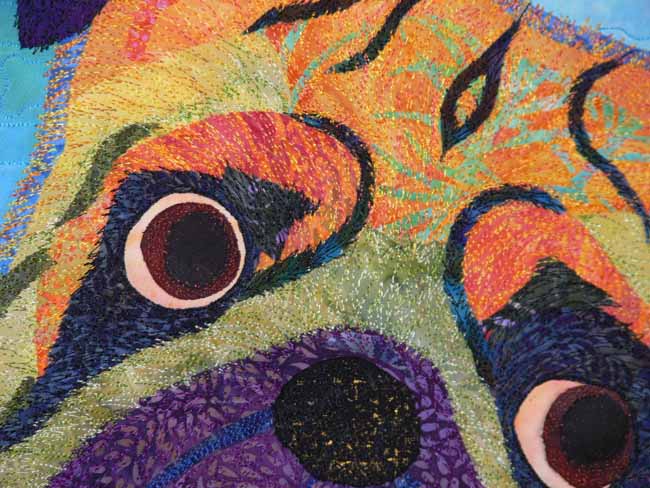
Last but not least…two close-ups.

Hope you liked the journey through the process. The quilt started out with a working title of “You want me to sit STILL?” (as in sit still so I can take a picture of you!), but that evolved into either “Walkies?  Puhleeze walkies!” or “Cookie???? PLEEEZE cookie!”  Eli (the dog is really his) and I both liked the Cookie version better, so that’s the title!

I absolutely ADORE this little 12 x 12 inch quilt… I think I did OK, because each time my sons see the quilt they start grinning, too!  Of course, we are biased and utterly in love with the little dog-beast!

Quilt Festival: Fabric Postcards/Chunk and Jigsaw

Tuesday, November 17th, 2009

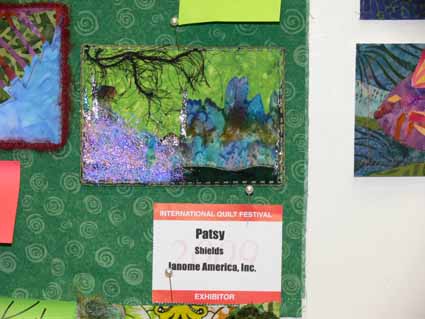
One of the lessons learned is to  get your class a good title AND a good class description.  I clearly failed on the Chunk and Jigsaw Fusible applique!  The class had only 7 students, but I opted not to cancel (I was given the choice), figuring getting paid for seven students is better than none, and they had already planned and prepped, and I had spent more money and time on kits and materials for this class than any other, so I might as well.  In reality, the class is using fusing and other art techniques to make fabric postcards (or slightly larger) pieces in the class.

2009.10.blog.TeachingThurs012

Well, it turned out we had a ball!   I decided the best way to organize things was to demo the fusing first, have students fuse up a stash of fabrics (thanks to IQA for providing extra ironing stations in the hallways….due to electricity charges and wiring you can only have two irons in a classroom, clearly not enough for full classes!), then move to art techniques in the late morning and afternoon.  I set up an “Art Smorgasbord” in the back of the room, with materials and supplies for various techniques at three tables / workstations.

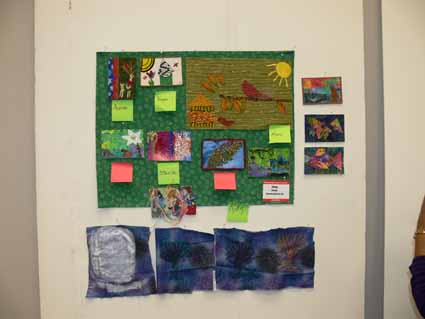
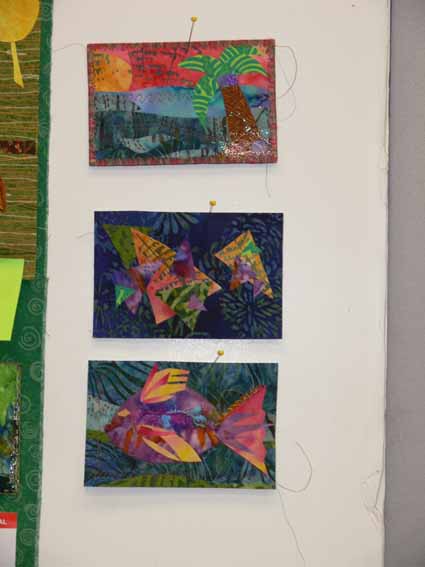
At the end of the day everyone put their stuff up on one of the foam core sheets and we all took pictures (photo above).  Among the techniques we tried were angelina (a hairy fiber that is sparkly which you can emboss with a stamp), making your own stamps from rope, glue, “stuff” (such as metal washers), foam sheets (I used Darice Foamies from Wal-mart…an adhesive backed foam that you can cut with scissors), painting on fabric, freezer paper stencils to stencil, couched yarns and other stuff, making your own cording from yarn, strips of fabric and whatnot, scrunching/texturing fabric…. and finally, my favorite finish for postcards:  the couched-yarn edge.  I made sure everyone tried every technique or had some of the materials to take home and try.

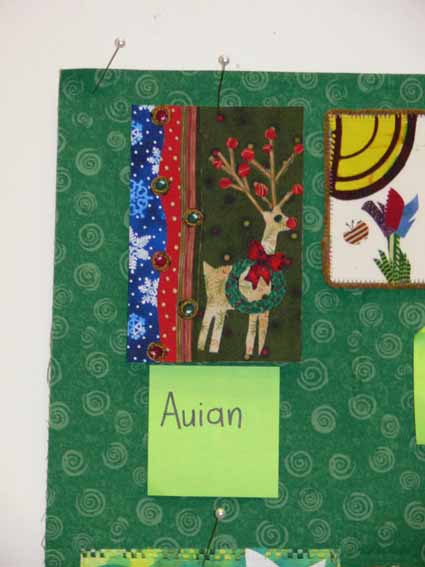
Here Auian made the most adorable reindeer…she had brought many Christmas fabrics, and I am totally in love with this guy!:

2009.10.blog.TeachingThurs011

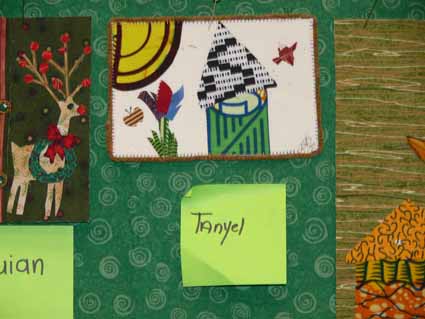
and her friend Tanyel made some wonderful postcards with her to-die-for selection of African fabrics:

2009.10.blog.TeachingThurs010

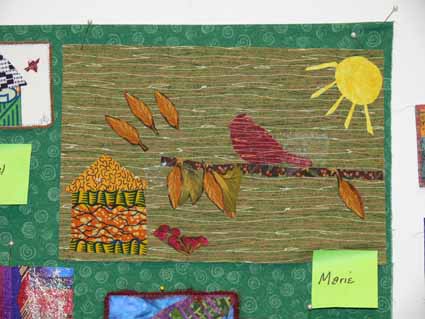
Marie used both African and regular quilting fabrics and my Little Brown Bird pattern to make her own, slightly larger quiltlet… wish I could see this one when it is done! I was SO excited… early in the day I did a small exercise that helps folks understand that drawing really can be easy if you just break it down into basic steps and concepts…and Marie said she actually thought that now she might really be able to draw, and she never had before…WOOOOHOOO!!!!!  I think what I love best about teaching is when I can help a student realize that the really CAN do it!

2009.10.blog.TeachingThurs009

and

2009.10.blog.TeachingThurs008Our fantabuloso Janome rep (who helped with the machines, and tips and all sorts of fun stuff) got to join in the fun on Thursday since we were so few– it was truly a pleasure to have her in the classroom helping, she was everything you  hope a classroom company rep will be!

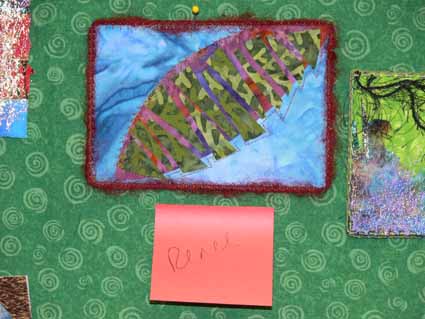
Renee worked quietly over on the side of the room and boy did she cut loose!  Her mom and dad are both artists, and you can tell she is comfortable in a creative, free-form environment.  Plus, her taste in colors and fabrics and mine overlap a lot… I loved what she has done in these cards:

2009.10.blog.TeachingThurs007

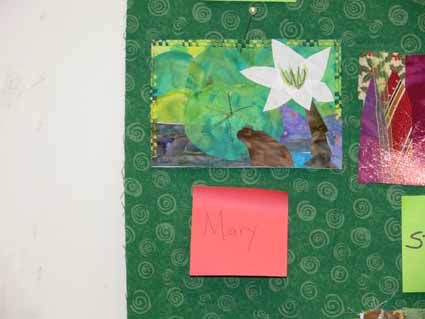
Mary’s frog and lily make me think of spring.  I also shared in the class how to use some funky tape-yarn to “bind” or edge-finish a postcard.. that’s what Mary has done on the top edges here:

2009.10.blog.TeachingThurs006

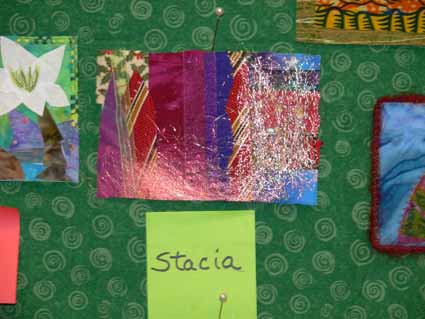
Stacia had fun with abstract design and Angelina:

2009.10.blog.TeachingThurs005

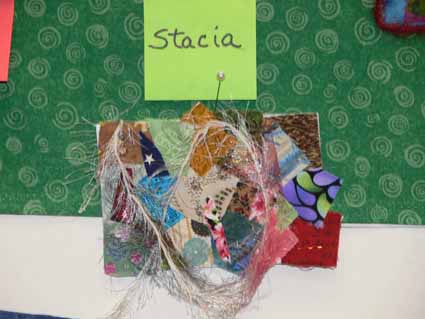
I’m not positive, but think this one may be Stacia’s also:

2009.10.blog.TeachingThurs004

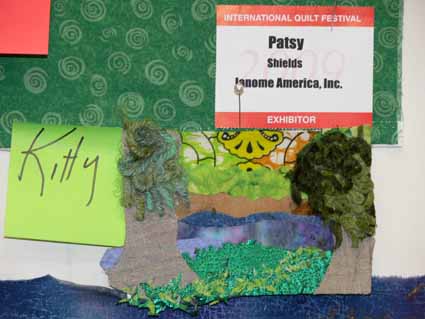
Kitty said she likes to work in series, and this is part of her seasons series:

2009.10.blog.TeachingThurs003

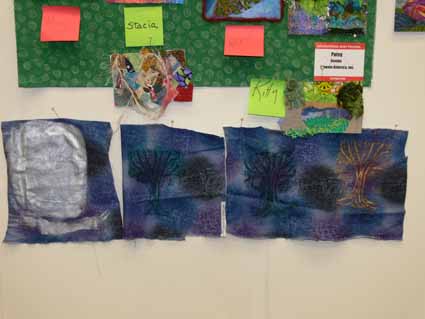
She also used the paintsticks and a stamp I had made of cardboard and glued twine (done in the shape of a tree)  with the Shivas to color this cloth for future use:

2009.10.blog.TeachingThurs001

Last but not least,one more beauty from Renee:

2009.10.blog.TeachingThurs002

It was a great class to end my first teaching stint in Houston.  Because the class was so small, it was very informal and we got to sit close and work together to do some truly fun stuff!

I’ve just sent in my application to teach again next year in Houston…here’s to hoping!   Thanks to ALL my students, it was truly a privelege to be able to come teach and to have you in my classes.