email Youtube

Home
Galleries
Blog
Workshops & Calendar
Store
Resources
About
Contact

Archive for the ‘PDFs’ Category

Rockin’ Retro Apron in Kitschy Cocktails, Part 2

Friday, February 21st, 2020
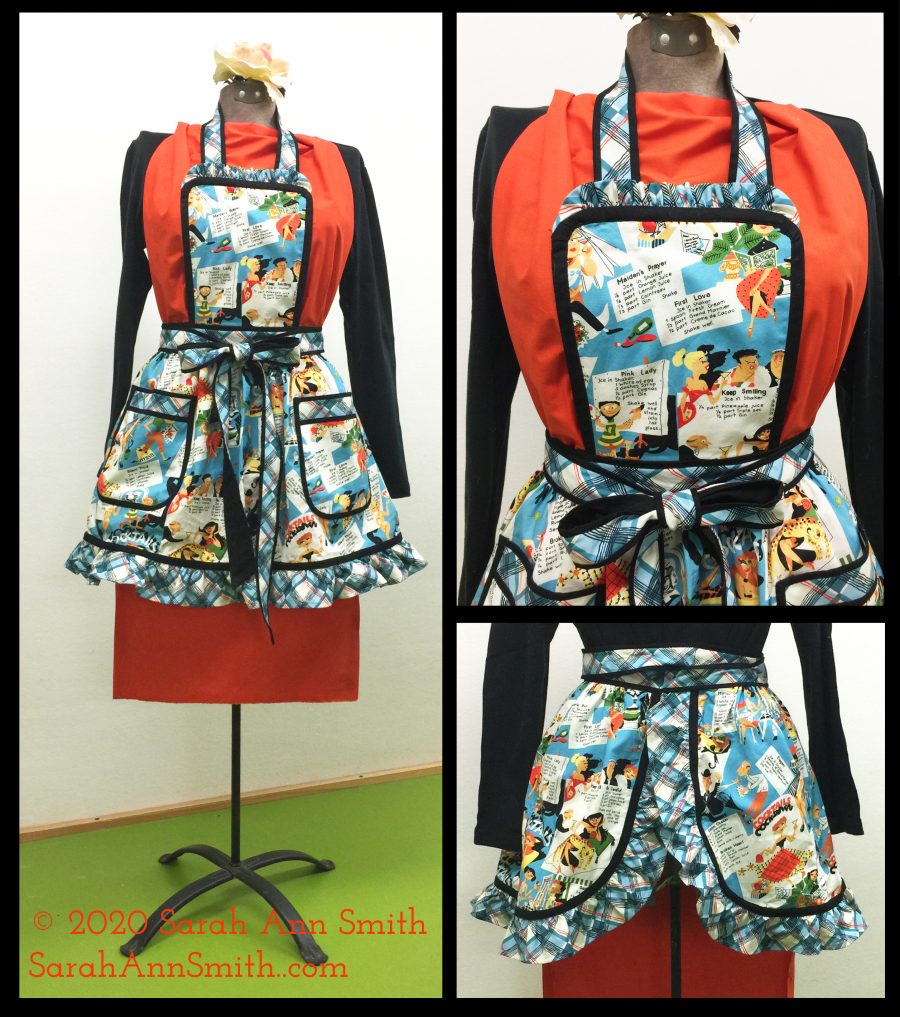
For Part 1, go here.

Today we’ll continue constructing your fun and funky Rockin’ Retro Apron. Fabric requirements, layout/cutting instructions and making the apron skirt are all in Part 1, here. You can download a formatted and numbered pattern–free in 2020!–with ALL the instructions and requirements at Rockin’ Retro Apron in Kitschy Couture. The fabric was provided as part of the Michael Miller Brand Ambassador 2020 program, and my brilliant Janome M7 Continental is provided to me as a Janome Artisan. Thank you!

Make the Apron Ties and Neck Strap

  • Spray starch the bias-cut plaid for the ties and neck strap.  Stiffening this fabric slightly will make the following steps less fiddly.
  • Sew an inch-wide strip of black to the short pointy end of each of the waist ties. Press as stitched, then press seam allowances toward the black.
  • Sew the plaid to the black apron ties and neck strap only.  Do not sew the waist portion, which is handled differently.  
  • Press as stitched.  Press seam allowances toward the black. Turn straps/ties right side out.  You can use a narrow pole/stick/curtain rod to make this easier:  turn the first couple inches by hand, then slide onto the top of the curtain rod and gently coax the entire strap until it is all right side out. 
  • Press, centering the plaid and coaxing the seam allowances toward the black.  Because the black is cut wider than the plaid, it wraps to the front to create an accent edge.  The seam allowances should be underneath this accent edge.  Leave the square end open.  On the pointy end, trim to 5/8” from where the short black piece is stitched to the plaid.  Turn under about 3/8” and press.  You can machine or hand stitch this opening. 
  • Stitch on the edge of the black or in the ditch so the seam allowances stay where they are supposed to.  This will help a lot once you start wearing and washing it—worth the extra effort.!

Make the Apron Bib

FITTING NOTE:  Because of different body types, you will want to adjust the width of the bib and the  length of the bib and strap to flatter your body.  Cutting measurements are for my medium-sized build.  I actually wish I had made the bib an inch shorter, so those with an average or larger bust size should be fine.  Measure before you cut and before you sew.
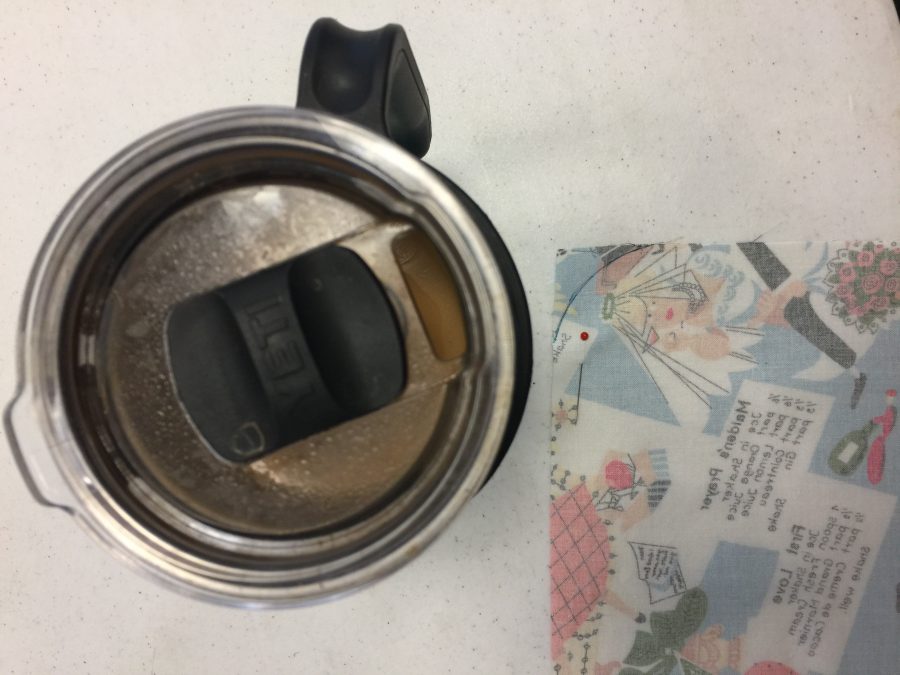
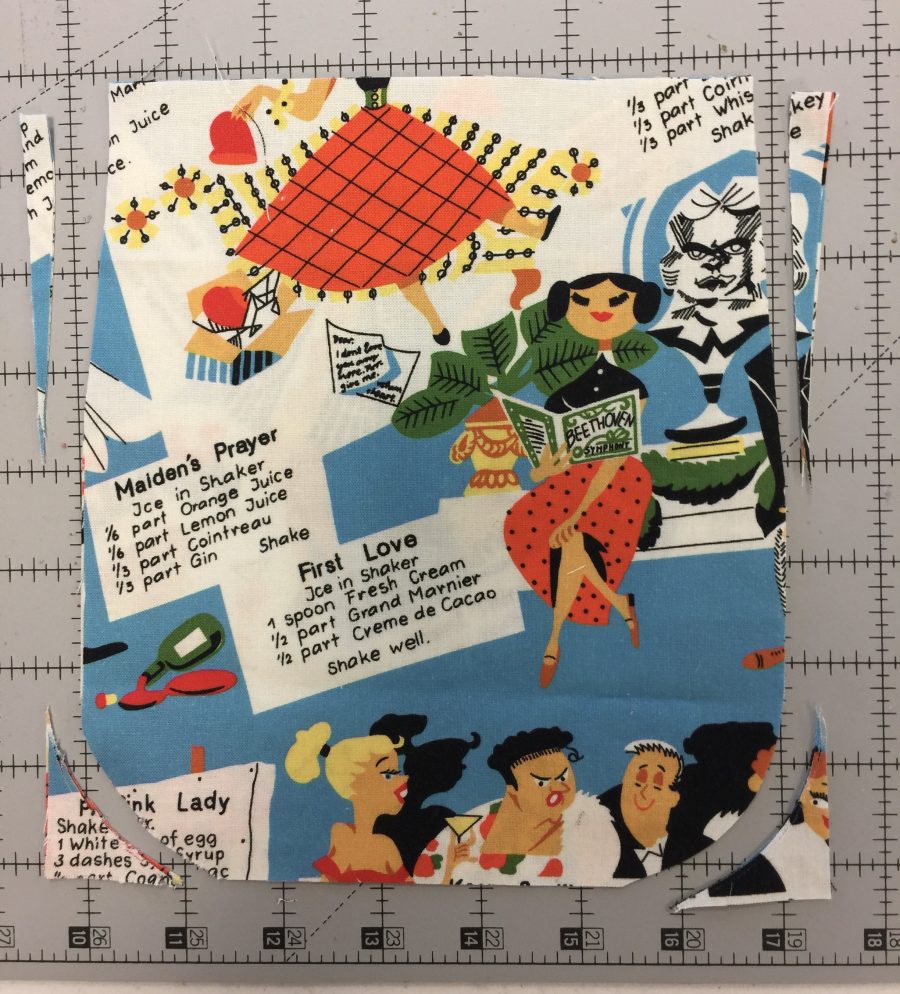
Use something like a mug lid to round the upper corners of the bib.
Trim slivers off the bottom edge of the bib (optional). This photo is of the pocket, where you do the same thing.
  • Use something round to curve the top edges of the apron bib, see first photo above.  I used the lid of my travel mug.  Just draw a line around the curved edge, then trim off on both sides of the bib, second photo.
  • Optional:  taper the lower edge of the bib by trimming two skinny triangles off the lower edges. Mine were about 3/8” wide by just under 6” tall, center and right photos.
  • Gather bib ruffle.  Fold fabric in half, wrong sides together.  Sew basting lines at ¼” and ½” and gather as before.  This will be a very tight gather, which helps the ruffle stand upright.  If yours is too long when gathered to your preference, trim as needed—see next steps. 
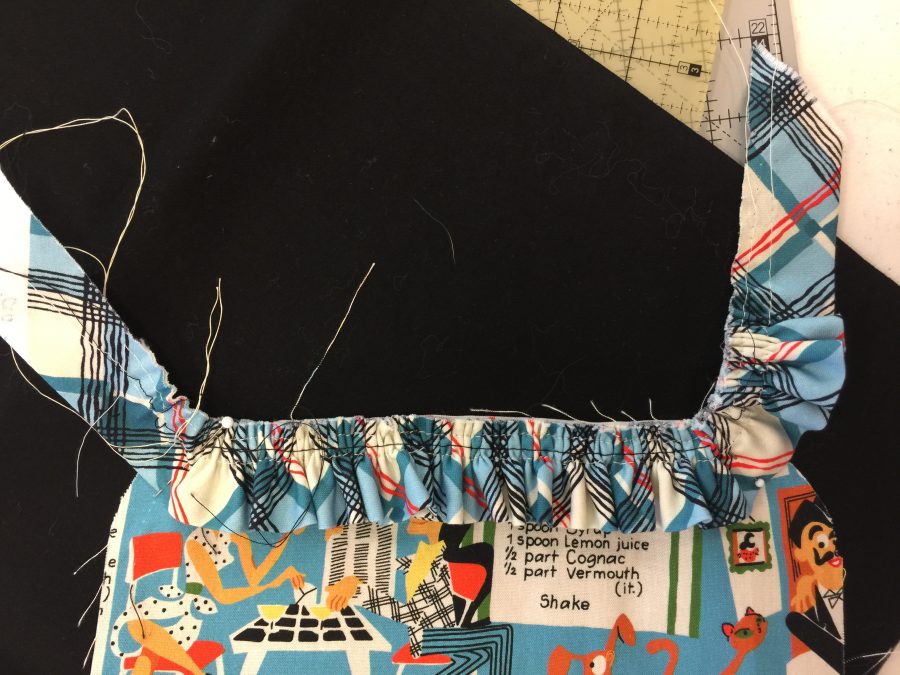
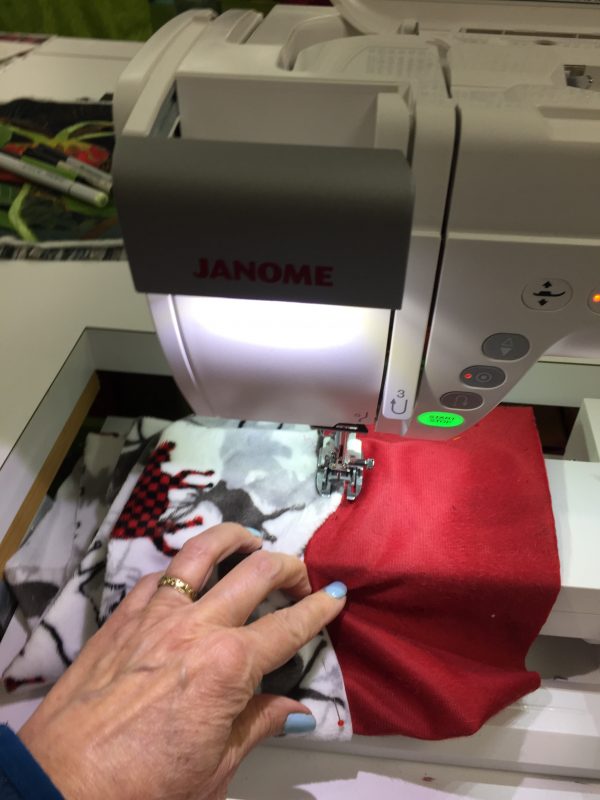
  • Pin ruffle to the bib lining (inside piece). See photos below.                                                                  
  • Curve the ends of the strip up, see second and third photos, below. Be careful (if this sort of thing bugs you) to make sure the curved ends are symmetrical.  Ahem—guess which one I am.
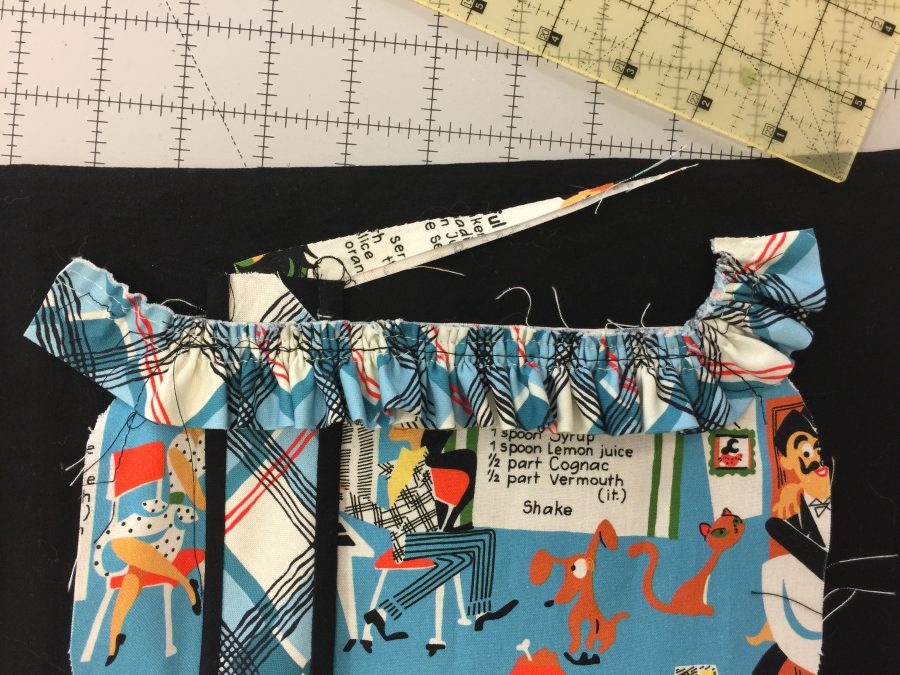
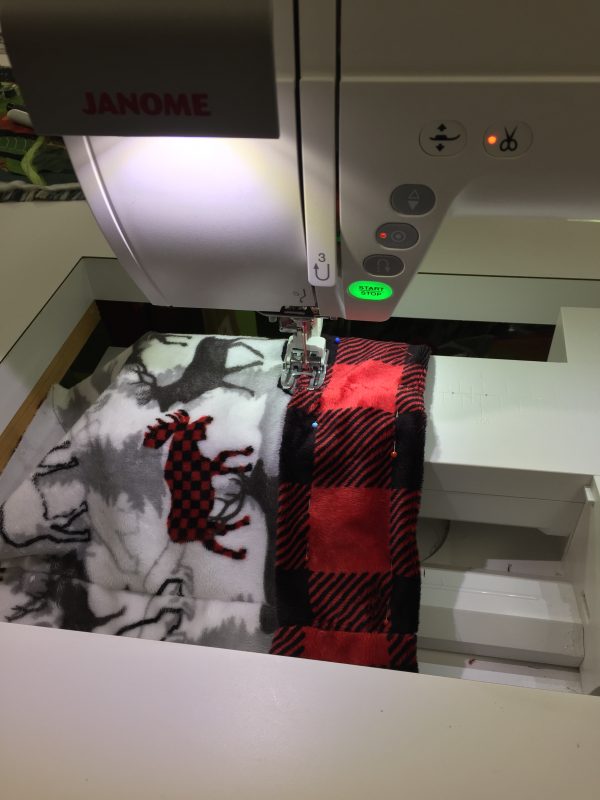
  • Tuck one end of the neck strap between the ruffle and the bib lining, photo on right below.  Be sure the plaid side of the strap is as pictured so that it will face the correct direction when the bib is completed.
  • BASTE by machine.  
  • Turn up to make sure it looks good.  Adjust if needed, especially on the ends.  
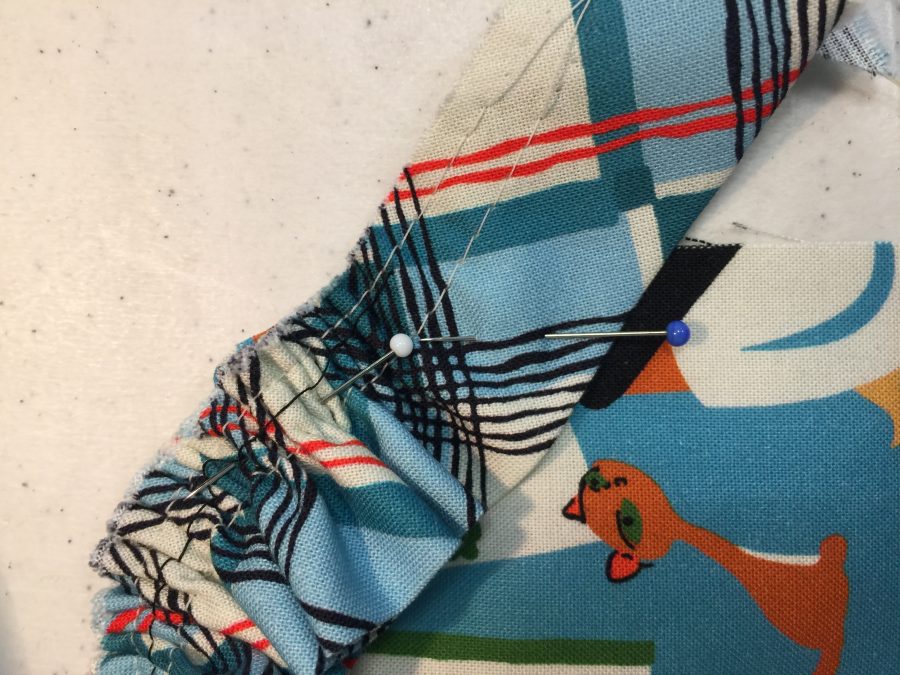
Curve the end of the gathered bib ruffle up–see the overall photo at the start of the post to guide you.
The top of the bib lining will look like this once you have basted the ruffle in place. Don’t be like me…remember to tuck in the neck strap so you don’t have to pick out some stitches. Ahem. See next photo.
Insert the neck strap as pictured and baste along with the ruffle.
  • Prepare front of bib.  
    • Cut black bias the length of the outside edge of the front bib plus 1” just in case.
    • Press ¼” under along one long edge.  
    • Pin to the right side of the bib front with the fold edge turning under towards the center of the bib.  
    • Baste on outside edge.
    • Press towards the center, easing excess in the rounded corners.
    • Applique/stitch the black trim to the bib.  I used glue stick to “pin” the black in place and sewed used the edge-stitch foot/quarter inch foot with the flange and a straight stitch.  
  • Pin bib front and bib lining right sides together.  Sew 3/8” seam.  You may wish to sew a basting stitch seam first to make sure everything at the top is correctly placed and the corners and ruffle turn nicely.  If you do, adjust as necessary, then sew the final seam.

Prepare the Pockets
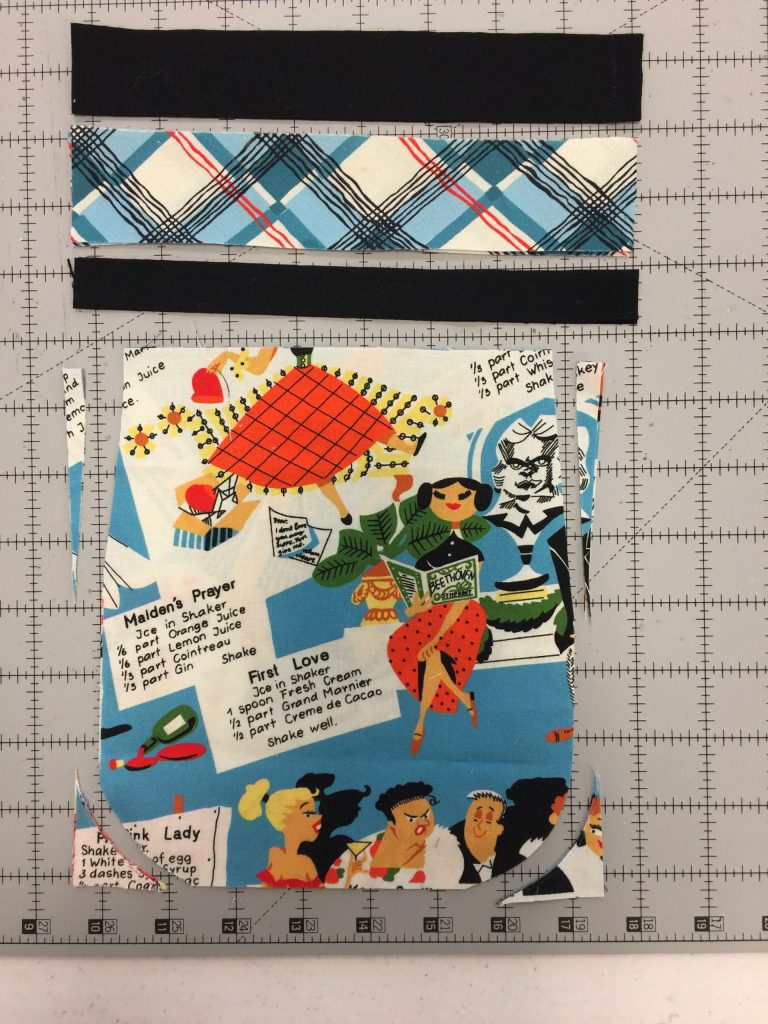
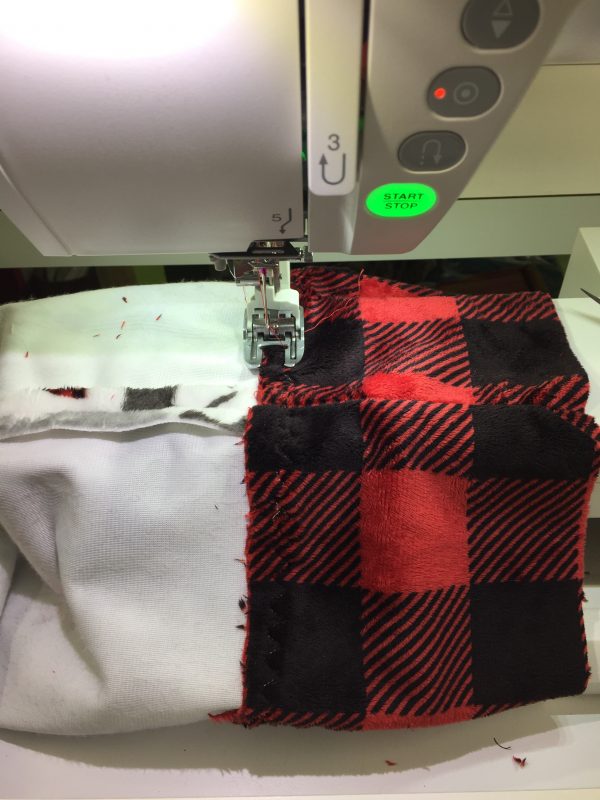
You’ll need a wider black band, the plaid strip, and a narrower black band. These strips are sewn together, then sew the right side of the strip to the wrong side of the pocket top. Press, then fold the strip to the front and topstitch in place.
  • Create plaid-and-black band for the pockets.  
  • Sew a ¾” strip of black (straight of grain) to bottom edge of starched plaid strip.  Upper photo.
  • Sew a 1 1/8” strip of black to the top of the pocket.  Upper photo.
  • Sew wide black strip to the back of the pocket with a ¼” seam.  Press as stitched, then wrap the strip around the seam allowance.
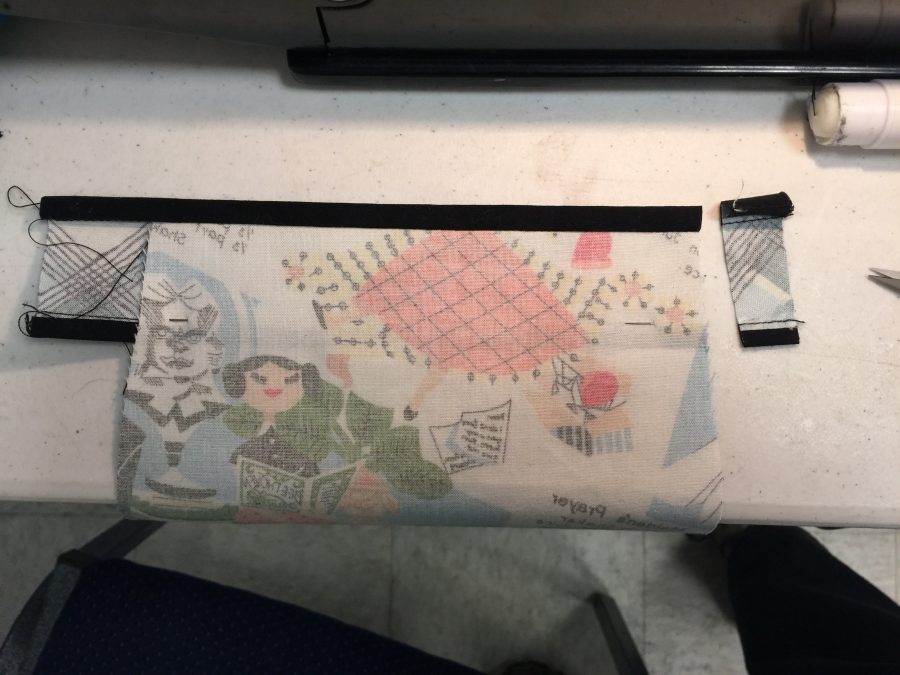
Wrap the strip to the front, trim, and stitch in place.
  • Wrap the bias unit to the front and applique in place.  Stitch in the ditch or on the edge of the black.  Photo above.
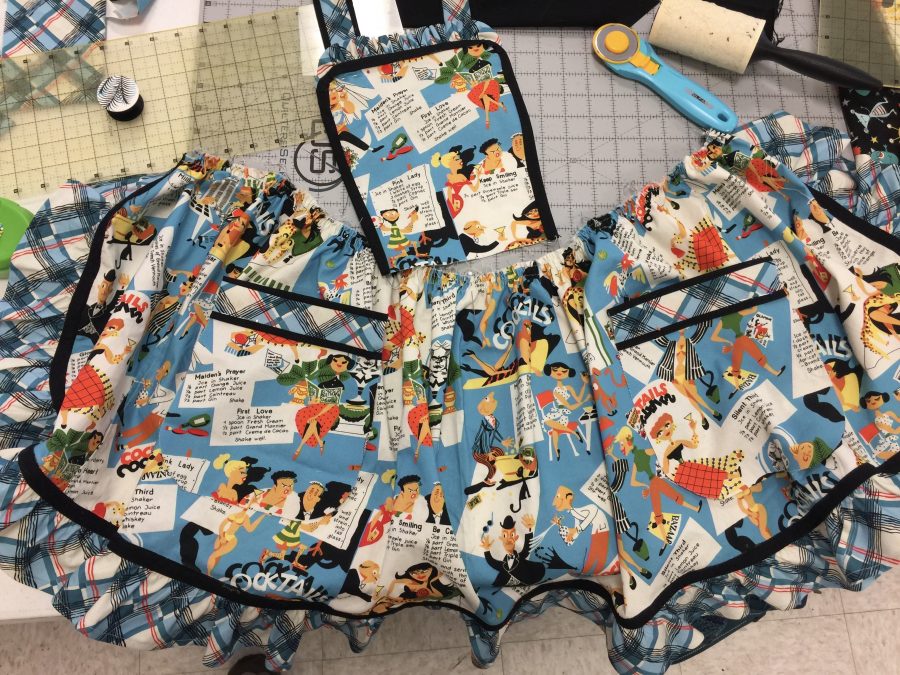
Pockets are positioned 6″ to either side of the center, but the black edging has not yet been applied.
  • Press under ¼” on long side of 1 1/8” bias black edging that is long enough to go around the pocket. and extend about ¼” beyond the top edge.  If making two pockets, repeat. Turn under top edge of black trim even with top edge of plaid section.

And that’s it for today! In the final post we will manage the waistband–it took some mental gymnastics to figure out the easiest way to encase all raw edges, have long ties, and have it look good, but I figured it out. Stay tuned!

Remember, you can download the complete Rockin’ Retro Apron pattern here. It’s also listed under Tutorials (lotsa good free stuff on there) on my Resources page.

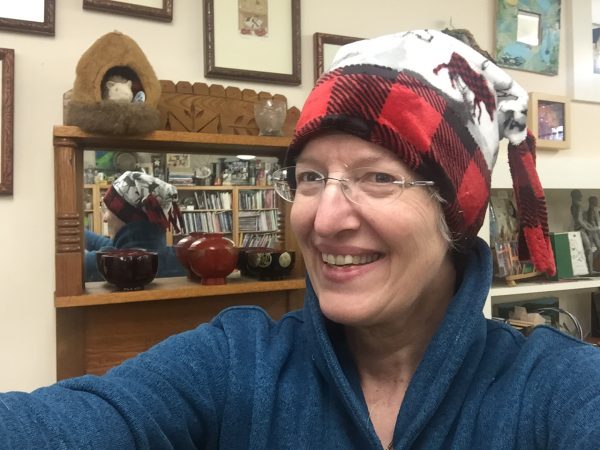
Free and quick Shannon Cuddle Fleece Hat pattern!

Saturday, December 1st, 2018

Hi everyone…is anyone else madly trying to figure out what to do for Christmas gifts?  Here’s a FREE pattern by me, with major thanks to Shannon Fabrics for the Cuddle fleece.  Literally you can make a couple of these in an hour or so–give yourself three hours and a yard and you can make half a dozen in production-line mode!

How many selfies do you need to take to eliminate many chins or no chin? LOL! I love my soft hat!

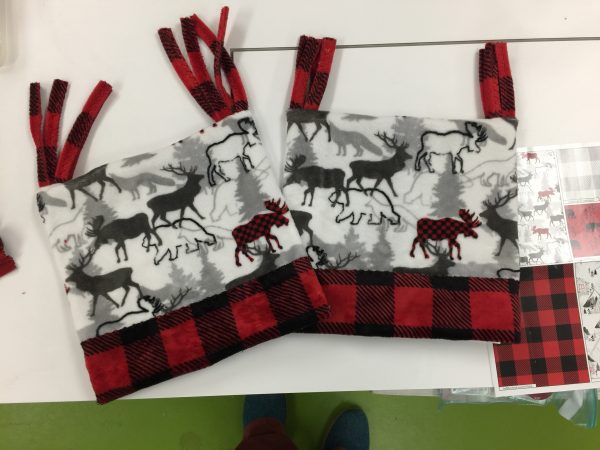
And here is what the hat looks like, flat:

Two hats…I mean I used up EVERY LAST BIT of scraps! One hat for me, one to send to Shannon for them to use as they wish!

Here’s the pattern in PDF form…and typed out below:

Shannon Fabrics Cuddle Hat in an Hour

You’ll need:

¼ yard (about 8 ½ lengthwise grain by 22-23 inches) fleece for main fabric

5” by 22-23 inches for contrast

Scraps or yarn for hat tassels

How to:

  •  Measure your head around the forehead:  ______ + 1 “ =  ________  cutting width

Tip: In my case, my head measures 22 ½”.  I found that I wanted my hat to be snug so it would stay on in the wind, so I used a larger seam allowance.  My hat **finishes** at 21 ½” or one inch smaller than my head circumference. Depending on what you find comfortable, you may find that a cutting width exactly the same as your head circumference is just perfect.   

  • Cut main body fleece 8 ½” high by cutting width.  Make certain that the lengthwise (not-stretchy) grainline runs vertically and that the stretchy cross-grain is what goes around your head!
  • Cut hat band fleece 4 ½” by cutting width (if folding under) or 3 ½” by cutting width (if using raw edge).

Option:  vary the width of your band depending on how warm you want it to be and the pattern (if any) of your fleece.  My main fabric is not fuzzy on the inside and I wanted soft, so I have 1 ¼” of the red checked fleece on the inside and about  1” folded under on the outside edge so that there are two layers of fleece to keep my ears warm on a windy winter’s day.

  • Pin seam and test the fit: now is the time make adjustments to snug it up if needed.
  • Sew seams on hat body and hat band using a narrow zigzag, about 1.0 width and 3.0 length.
  • Pin the seams open.
  • Place the hat band and hat body WRONG sides together, matching the seams and overlapping about ½”. Stitch with a serpentine (wavy multi-stitch), 3-step zigzag or narrow zigzag to secure each raw edge.  You will sew two lines of stitching, one on each side of the overlap.
  • Because the fleece is thick, and because I wanted the soft part next to my forehead, I didn’t use a typical garment seam. Instead, I overlapped the two fabrics, wrong sides together, and sewed them with a serpentine stitch. I did this twice, on either side, so I would catch both edges of the overlap.

Sewing the other side of the band

I then turned the plaid to the outside and brought it up above the seam that joins the top of the hat to the “cuff.”

  • Turn the hat band to the outside of the hat body and turn up.  If you are making a thicker band, turn under about an inch; if you are not making a thicker band, simply fold up.  Pin the edge in place; carefully put on the hat.  If you want a narrower contrasting band, now is the time to trim or fold under more.
  • Sew the top edge of the contrasting band using the serpentine  / 3-step zigzag / narrow zigzag stitch.

Optional:  make some tassels. I used a 1” strip of fleece from the selvedge (leftover from another project) and folded it in half wrong-sides together and sewed with the serpentine stitch.  Cut into 9-11” (or thereabouts) lengths.  I opted for four strips which I then folded in half. 

  • Turn the hat inside out. Centering the seamline in the center back, pin right sides together.
  • If using tassels, tuck them into the seam at the corners so that the folded edge is even with the raw edge of the seam.  I placed two at each corner.
  • Sew the seam using a narrow zigzag.

Tip:  sew from the center to the outside edge, pivot at the end and sew back to the center about ½.”  Repeat from the center to the other end.  This is easier than sewing all the way across beginning at the bulky outside edge.

  • Turn right side out and wear with joy!


Merry Mistletoe, a new free project

Wednesday, December 16th, 2015

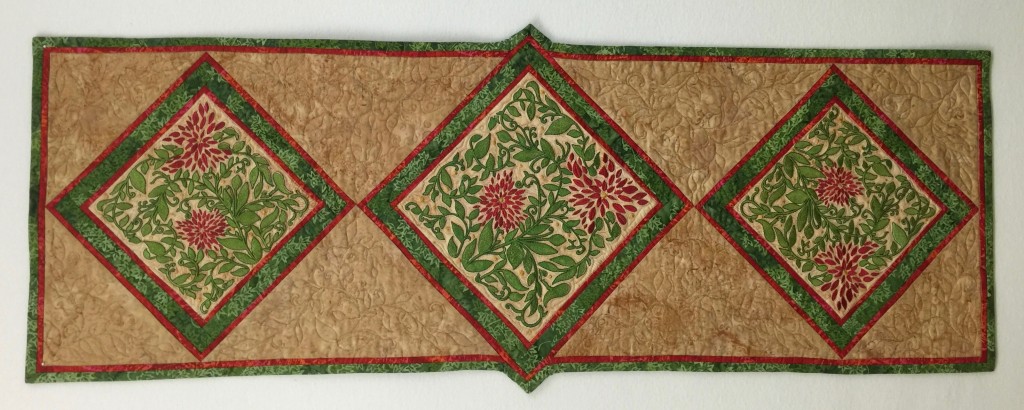
Hi all!   At long last the new laptop has arrived, the nearly-deceased one is retired, and I’m scrambling to catch up.  So first things first!  Janome has published my freebie table runner pattern on their website and blog as part of the holiday celebrations. As always, thanks to Janome America for having me in their Artist and Teacher program for lo these many happy and productive years.

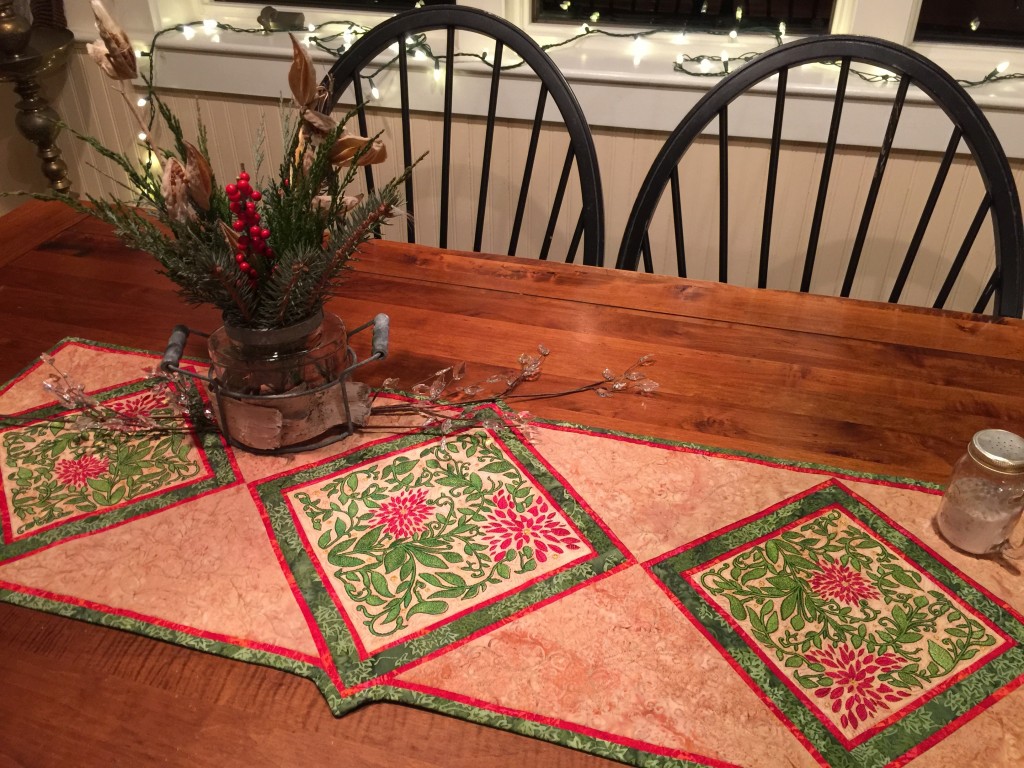
A table runner I made to feature the Janome 15000's beautiful embroidery

A table runner I made to feature the Janome 15000’s beautiful embroidery.  And no, my table is NEVER this tidy.  My laptop lives where the lower left corner is and there is always a pile of “to do” stuff!

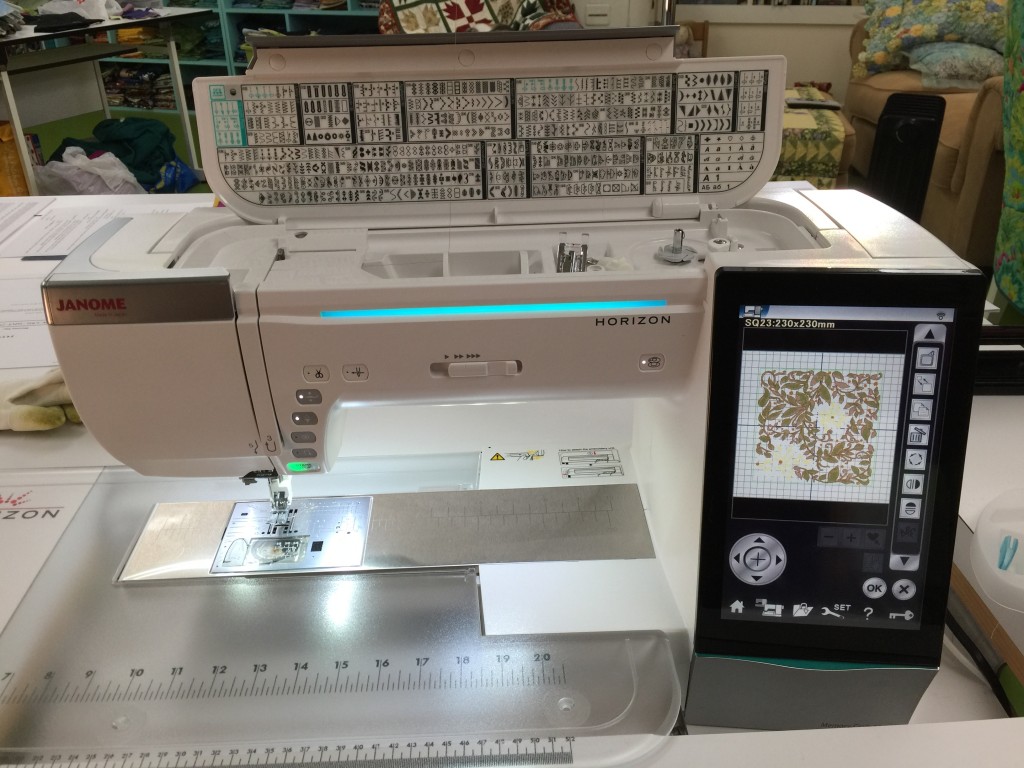
I used a Lonni Rossi embroidery design built in on the Janome 15000 I am currently using.  I altered the colors of the built-in design to a wintry, holiday palette of red, green and golden tan.  Honestly, I never thought I’d like machine embroidery (the wanting to do my own thing stuff), but this design is so gorgeous and even *I*, a soul who doesn’t like uber-computerized machines, was able to stitch this out nearly perfectly the first try!

To see the project on the Janome site, go here and scroll down to December 14, 2015 or go here.   To download a PDF including full color photos with some neat tips for getting those skinny red strips to be perfect, go here.

The plain old vanilla photo of the table runner.

The plain old vanilla photo of the table runner.

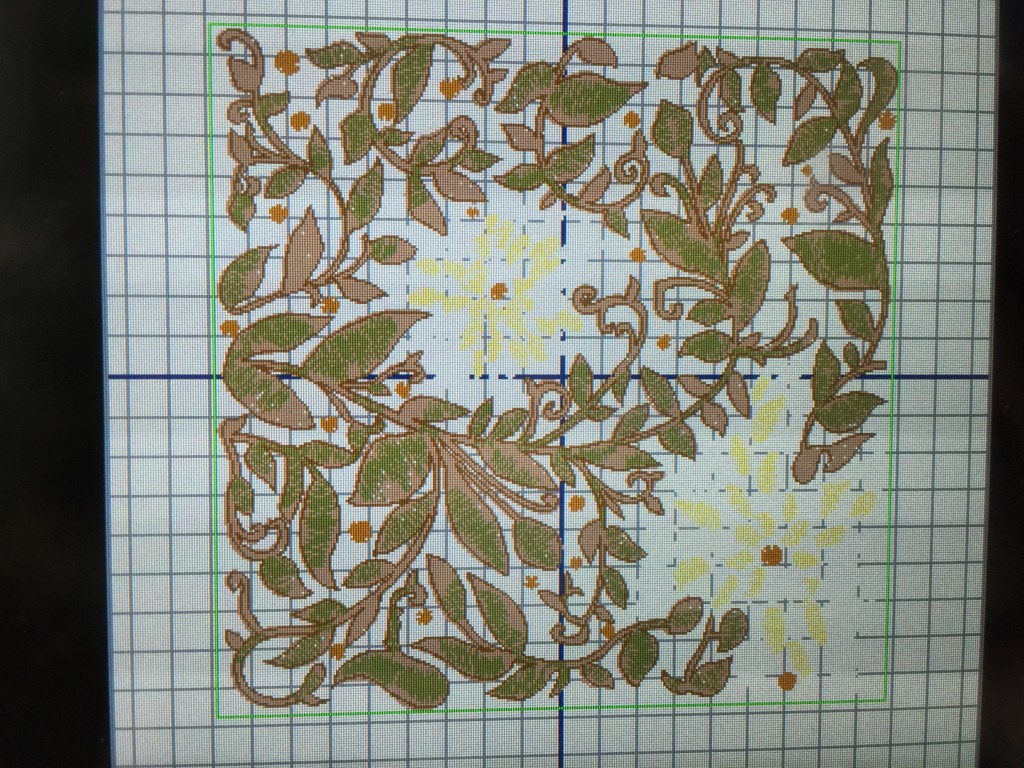
Here’s what the project looks like in the original color selection on my 15000.  Quite a difference, eh?  And here is the boring, straight-on view of the table runner.

The Janome 15000 open to the Lonni Rossi block in the original colors.

The Janome 15000 open to the Lonni Rossi block in the original colors.

Close up of the original color way on the machine.

Close up of the original color way on the machine.

I’ve got one more version/colorway, but it is a gift (as yet unfinished) for Christmas, so I’ll just have to share it and add it in here later!

If you don’t have this machine, never fear–you can just insert your favorite embroidery or fabric instead of doing this beautiful design.


Leaf and Vine Motif

Tuesday, June 16th, 2009

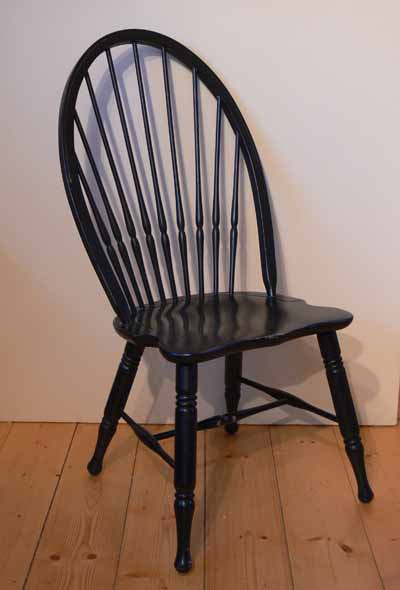
The newest issue of Machine Quilting Unlimited is out, complete with my article on Negative Space or what I like to think of as “the spaces in between.”  I promised a download of the leaf and vine motif from the feature quilt, Little Brown Bird, which I’ll share in another post.  For a full discussion of negative space, you can buy a copy of the magazine here, but here is a quick recap.  Think of a chair with slats on the back:

sasmithaprilmquxsmall009

The spaces between the spindles on the back are “negative space.”  The chair itself is the “positive” image.  Likewise, the spaces between the legs and rungs are negative (or “in between”) space.

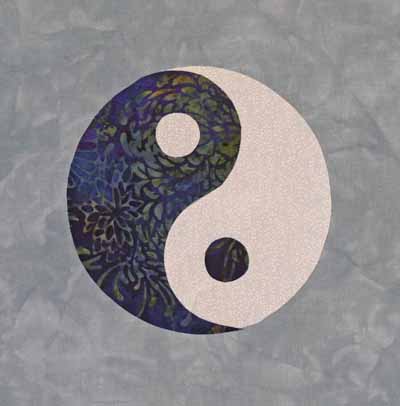
For the article, I created some examples based on the principles of Notan.  The definitive book is Notan:  The dark-light principle of design by Bothwell and Mayfield.  The Yin/Yang symbol is the class example of positive and negative space.  Each teardrop shape is identical to the other, but one is dark and one is light.  The two are perfectly balanced, and the proportions of the small circle within the teardrop, the shape of the large end of the teardrop, and the entire circle are all geometrically related:

sasmithaprilmquxsmall002

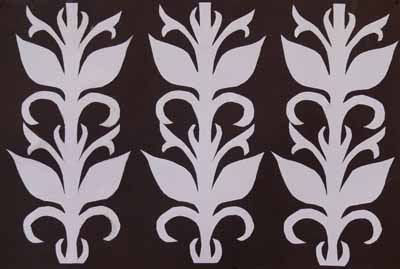
Here is the vine motif I developed:

sasmithaprilmquxsmall001

If you like this motif, I’ve prepared a PDF which you may download for your personal use.  Since it is under copyright, please don’t sell it or use it in classes you might teach (without receiving my written OK first), or other nefarious stuff… please DO use it in your quilts, modify it, and have fun.   Also, this is my first time trying to create a down-loadable PDF, so I’m hoping it works!  To download the PDF version (with the black removed so it doesn’t eat up your ink), click here: leafandvinemotifpdf

Enjoy!

New Art Quilts (!!!)

Wednesday, April 15th, 2009

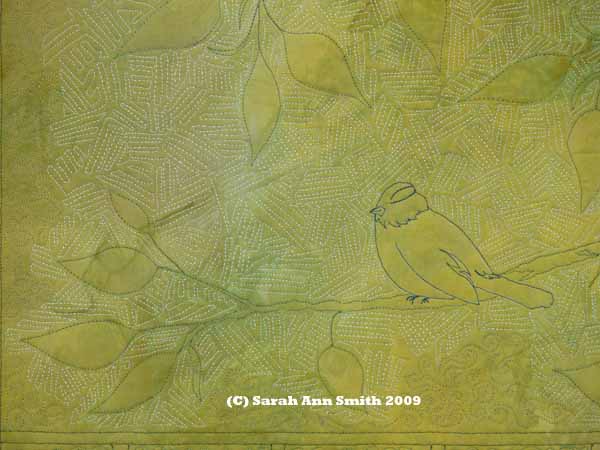
200904blog004

Hi all!  It is frustrating sometimes to be working, working, working, and feel like I can’t really share stuff yet!  In this instance, I finished writing my next article for Machine Quilting Unlimited (click here for more info on the magazine), which will be on negative space (basically, the spaces between….alas you’ll have to wait for the magazine to come out to learn more!).

For the magazine, I decided to use one of the exercises I illustrated to make a design which I then used as a quilting motif, and made a small wholecloth quilt.  The picture above is a detail photo….you’ll have to wait for the design, but I’ve decided to upload it to my blog/website as a free pdf for folks to download when the article is published in July…let’s hope that I can get the pdf thing to work!

Anyway, I totally love how this little quilt turned out and think I may enter it in an art quilt show this summer.

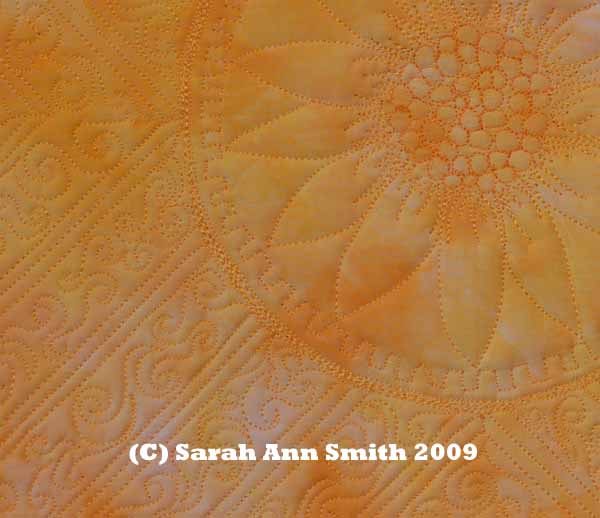
I also needed an alternative to the photo/illustration I intended to use in a different part of the article.  I had hoped that I could repeat an image from one article (in the April issue) to the next to illustrate my points…both to save on work, but mostly to show that the design principles I’m teaching  are all interrelated.  Alas, no go.  So I whipped out a new sample, and here’s another detail:

200904blog001

I really like this one… it would work well for traditional quilters, and art quilters can really soup it up….hope you like it!