email Youtube

Home
Galleries
Blog
Workshops & Calendar
Store
Resources
About
Contact

Archive for the ‘Patterns’ Category

Getting ready for Houston

Thursday, November 5th, 2009

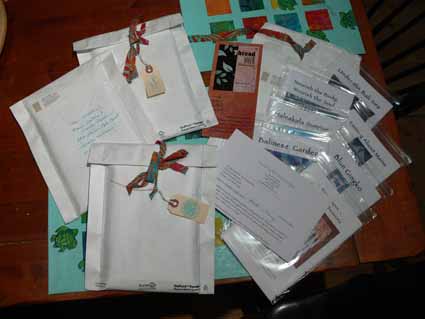
Last minute preparations for going to Houston included packets to give to the major distributors (the folks from whom Quilt shops buy their patterns, notions, books and whatnot) with my line of patterns and letting them know about my book, ThreadWork Unraveled.  Of course, none of the regular envelopes was the correct size..too large, too small, none just right.

So I decided to think like my friend Deborah, who is amazing at putting together lovely package presentations.  I decided to use cloth ties or tags or something…and went looking for white envelopes, not boring manila.  I wanted my package to stand out. Then I measured and sewed up the tyvek envelopes so the contents wouldn’t slop around, punched holes to add the tag which has a custom “Sarah by the Sea” stamp on one side and a hand-written “thank you” on the other side, and tied things up!

2009.10.blog.Getting Ready003

So far, EE Schenck (out in Oregon) gets the prize for the most prompt reply (alas a thanks but no thanks).  Will have to follow up with the others.

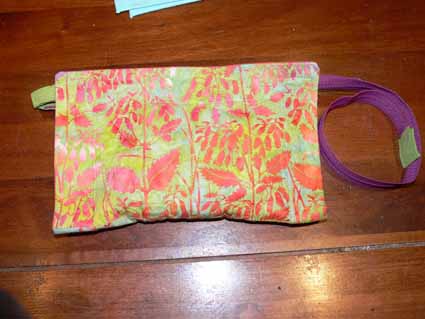
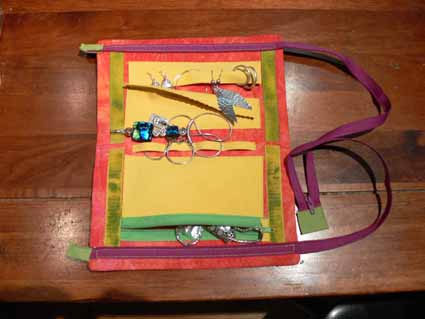
And, inspired by Margarete Steinhauer’s jewelry bag in the current 2009-2010 Quilting Arts Gifts magazine, I decided to make my own.  Margarete’s cinches up into a little snug ball.   Of course, my suitcases are always crammed, and I am so intensely visual I want my jewelry case to open up flat.  So I made this:

2009.10.blog.Getting Ready002

Here it is open:

2009.10.blog.Getting Ready001

I used an idea from Diane Rusin Doran (who had two awesome projects in the same issue, won a third place in the same category as I did in Houston, and is just cool and fun!), to wit:  paint white velcro so it matches your project—reject the tyranny of white-black-beige!  Diane suggested using a thin, ink-consistency paint.  I didn’t have any so I thinned some leaf green Setacolor.  Kinda blotchy, so while in Houston I bought some Jacquard Ink! From Jane Davila’s Flourish booth to try next; you can find these items at her website store, here (if you don’t find it on the website…e-mail her….they have it and you can order it for sure!).

This project is definitely a prototype…the long zipper (which I had on hand) allows the bag to open flat but is a nuisance in real life, so I’ve got an idea for an improvement.  Then maybe I’ll submit it to Quilting Arts Gifts for next year’s issue and see if I can finally get a pattern in it!

Back next with pictures from the show floor and my classes!

Birch Pond Class

Monday, March 16th, 2009

200903blogbirchtreesclass001

Today’s post is about a new pattern I’ve designed to help folks who want to start art quilting or for folks who are experienced art quilters but want an appealing yet fairly easy pattern.  The class to teach Birch Pond Seasons (when I get winter and spring made, I’ll have four views of the same pond across the four seasons) for the first time went swimmingly well as you’ll see by the photos!  The pattern itself will be available in about two months (guessing…have to send it away for printing the large sheet this time).

As you might guess by that rather extended absence from the blog, I’ve been busy! Between the first draft of my next article for Machine Quilting Unlimited magazine, getting together the stuff for taxes (not only ours but mom’s, too…bleah), attepting to get some sleep, going to wrestling meets, the usual family and household stuff, making a new small quilt for the article, and teaching, I’ve been rather behind the curve.  A while back, I got to teach my Birch Pond landscapes pattern for the first time at Maine-ly Sewing, and it was a gas!  I will definitely be polishing up the instructions, sending the pattern off for printing (it’s oversized, and copies at Staples are about 6 times more expensive than shipping it away and getting it professionally printed).

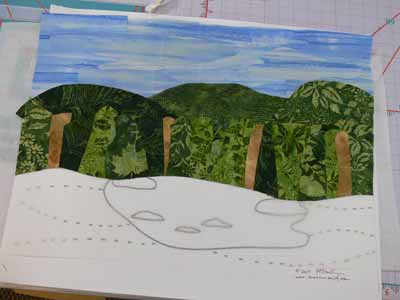
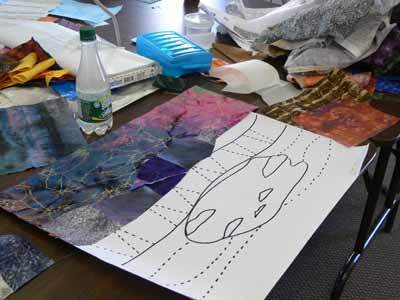
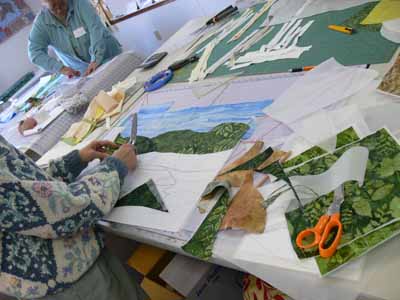
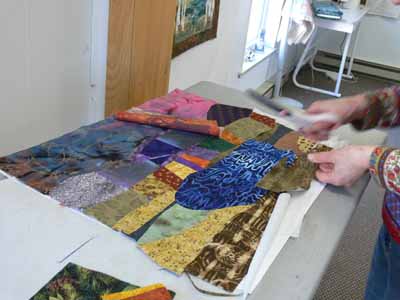
After showing the students how to fuse up fabric (both large chunks and smaller bits) they began composing their quilts.  The easiest way proved to be setting out the large pattern (the piece of paper is about 18×22), placing parchment paper on top of the pattern, then the pre-fused fabrics on top of the parchment.  Here you can see the pattern through the parchment on the lower half of this quilt.  This student did a fabulous job with her sky; she had one piece of fabric that was perfect, but WAY too narrow, so we cut, spliced and overlapped for it to look like a summer’s cloud-dotted sky.

Another student chose a dramatic lightning-streaked sky and dark mountains for her quilt:

200903blogbirchtreesclass009

200903blogbirchtreesclass012

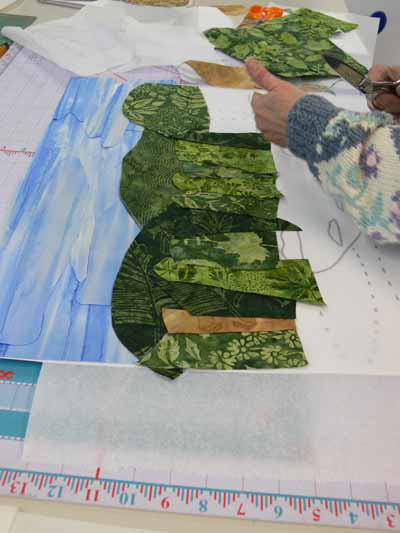
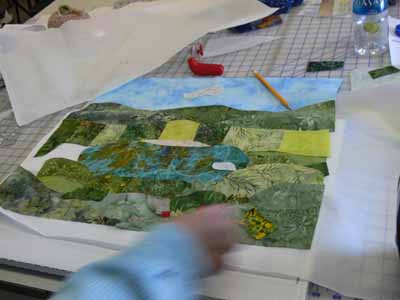
Working from farthest away (sky) to the front (foreground), we began with the sky, then the distant hills, then what I have called “the woods behind the pond.” You could cut a single swath of fabric to go across the entire quilt, but I think by cutting chunks and “piecing/fusing” a band, you get greater depth in the piece:

Creating the woods behind the pond

Creating the woods behind the pond

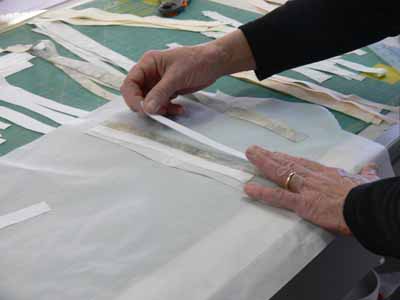
To make the tree trunks, we created “new fabric” by cutting strips of white, cream and gray, then cross-cutting into tree trunks:

Using strips to create new "fabric"

Using strips to create new "fabric"

One student decided to go for wild and funky colors… I’d love to see how this one turns out after she adds the birch trees, foreground plants and quilting.  Here is her quilt at the adding the pond stage:

Adding the foreground in the wild and funky one

Adding the foreground in the wild and funky one

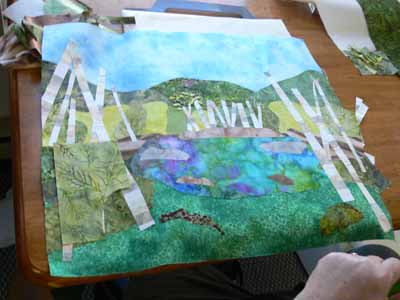
After the pond, we added the foreground and rocks:

Adding the foreground and rocks

Adding the foreground and rocks

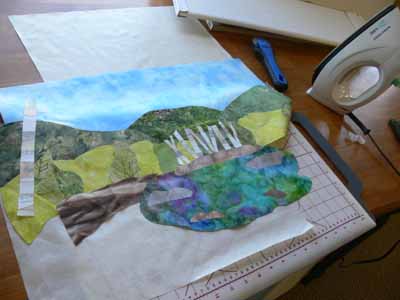
Or, you could add the birch trees behind the pond first:

Adding the birch trees behind the pond

Adding the birch trees behind the pond

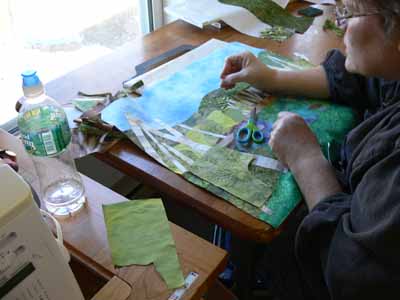
Two sisters took the class together, and decided to combine forces.  Rather than both of them working separately, they decided by late morning to create one quilt together and get it to nearly-done stage, then make another at home.  Here is one of them “building” the scene and adding the birch tree trunks first:

Building the scene

Building the scene

Finally, a nearly complete top (minus borders):

Birch trunks added...next, foliage!

Birch trunks added...next, foliage!

At the end of the day we discussed border selection, quilting designs (the ones on my quilts, which you can see here, are designed to be do-able by newbie machine quilters), and  using a facing to finish the edges.

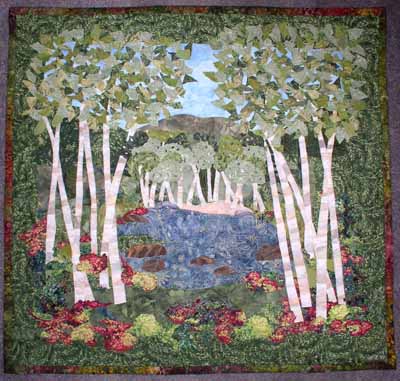
And thanks to one student who went home and finished up, a finished student quilt…hoooray!  I REALLY like how she added red flowers going back to the sides of the pond…really helps lead the eye to the pond and the birch trees behind it:

Finished student quilt (thanks Martha!)

Finished student quilt (thanks Martha!)