email Youtube

Home
Galleries
Blog
Workshops & Calendar
Store
Resources
About
Contact

Archive for the ‘Teaching / Classes’ Category

Second Printing!

Monday, May 3rd, 2010

Well there is LOTS of news–with the best saved for last (yes, I’m evil…<GRIN>):

  • I’ve been to Arizona to teach, blogging to come
  • the family joined me and we visited Flagstaff (which is an awesome and friendly town!) and various points including Monument Valley, the Grand Canyon, Meteor Crater, the Wupatki ruins and Sunset Crater…and oh yeah, Sedona…more on that later, too
  • the laptop DIED—deceased, defunct, digitally toes-up—36 hours BEFORE I was supposed to give my slide lecture to the Arizona Quilt Guild.  We went to plan B, it worked, and everyone was gracious and understanding.  That morning I ordered the new laptop
  • I visited my beloved sister in law in LA for the first time in 27+ years, we went to the Getty and had a grand time, blogging on that to come too
  • I was home 3 days then went to Hingham, Mass., to teach at the Herring Run Guild, yes..blogging to come…and 90 minutes after I left for there my new laptop FINALLY arrived two weeks after I ordered it

and at long last….DRUM ROLL and unabashedly SNOOPY DANCING with wild ABANDON:

  • ThreadWork Unraveled has–in a mere six months–gone into a SECOND PRINTING!   I just can’t believe it… most books go into print once, are sold, and that’s it.  Thanks to phenomenal word of mouth starting with so many of you dear readers out there in cyberspace and good reviews hither and yon, the book has already gone into re-print!

So I invite you to join me in silly dancing, chocolate, a nice chilled glass of white zinfandel or your favorite sip-able (sp?), and CELEBRATE!

I’ll be back once I catch up on 2 1/2 weeks of work, student inquiries, teaching applications, quilt show applications, assorted mountains of paperwork etc. with lots of blogposts with lots of photos!

Cheers, Sarah the Elated (and really happy to be sleeping in my own bed with family close by!)

Teacher makes a new vest

Saturday, April 17th, 2010

As this post goes live, I will be finishing up teaching for the Arizona Quilt Guild.  It’s pretty neat:  I fly in to Phoenix on Tuesday and teach at a shop in the greater Phoenix area on Wednesday.  On Thursday, my host/program chair drives me to San Manuel (north of Phoenix, south of Flagstaff) for teaching, then on to Flagstaff that night.  I discovered that our hotel there is literally right on the old Route 66!  I’ll be teaching there on Friday, and giving a lecture on Saturday.

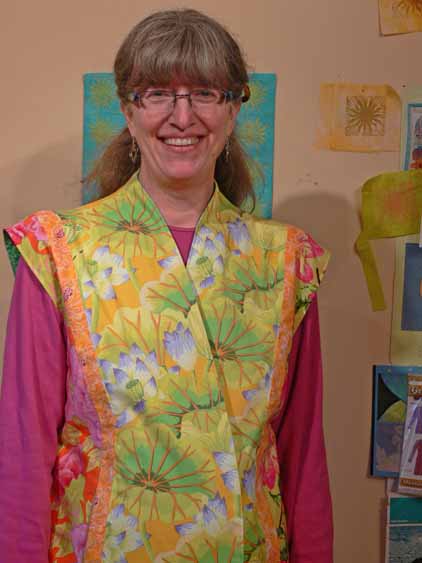
As a traveling quilt teacher, you need several things…above all compact, lightweight clothes because most of one’s suitcase is filled with teaching stuff!   And it helps if the clothing is bright so folks can see you if you are lecturing in a large hall or teaching in a crowded classroom:

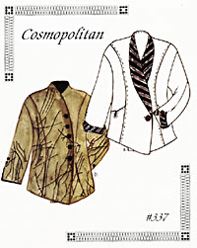
I hadn’t made a new vest in years, and needed something.  Because I am on my feet going around the classroom all day, I need something not-hot.  I picked this pattern, Cosmopolitan 337, from Lois Ericson of Design and Sew.  The pattern  also has instructions for making a vest:

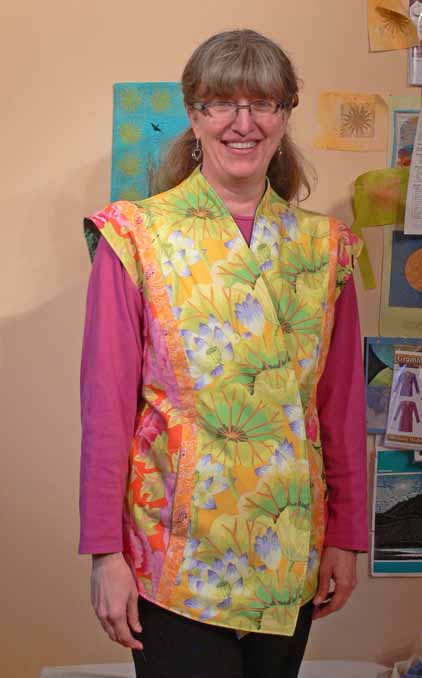
I found the pattern online here…I’ve never shopped there, but at least they have it!  I bought mine at Quilt Festival last year….it says Lois has retired, so I guess I’d better stock up on her patterns that I love and don’t have yet!  Here’s a full shot of the front (please ignore the chin that is succumbing to age and gravity):

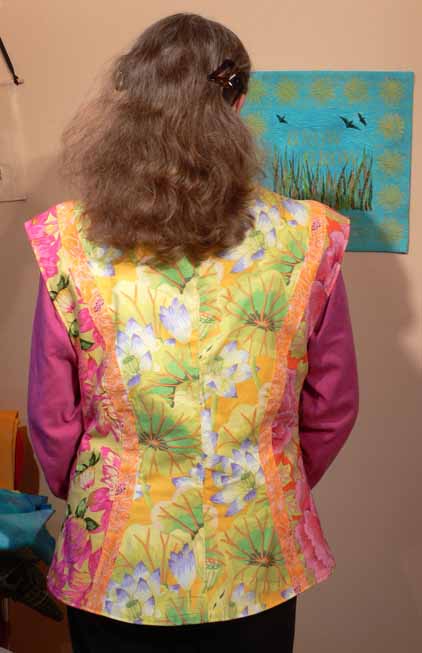
The vest, it turns out, was a bit large—which makes sense since jackets are supposed to be roomy.  So I did quite a bit of down-sizing (yeah!), and reduced the drop shoulder by nearly two inches.  I added the coral inserted stripes (love the effect), but next time  rather than try to reduce the panels on both sides of the princess seam, I would take the stripe out of the center pieces, which are a bit wide to my eye–definitely OK and wearable (and don’t you LOVE that print … wish I had even more of it…sounds like a trip to Alewives Fabrics is in order).  I opted for in-seam pockets (yeah!  Pockets!), but there are also some really cool patch pockets… next one!  Here’s the back, with my hair only slightly frowzy:

I used a nice batik for the lining and was careful, sorry I didn’t take a picture, and can use it reversed, too!  I also like that it covers the tuckus (aka posterior).  I still haven’t done a closing…not enough time before getting on the plane.  That can happen later!

Student work

Monday, March 8th, 2010

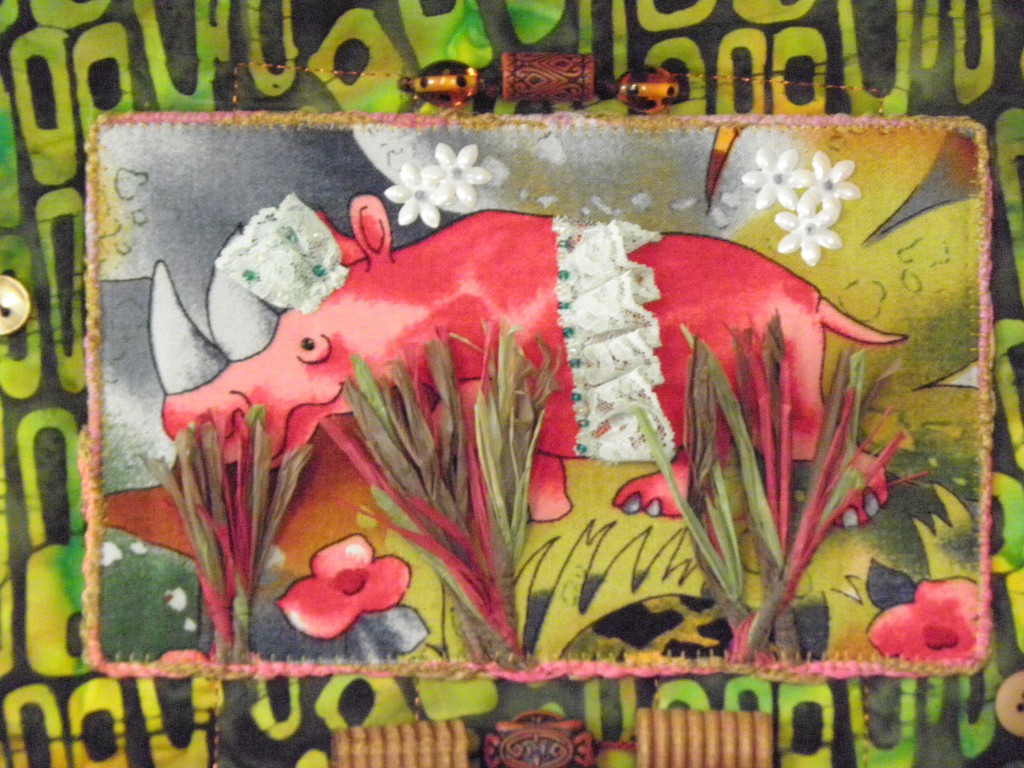
One of the coolest things when you are a teacher is when a student writes to you with what she has learned and used from your classes.  Last week, I was tickled pink to receive an e-mail from Susan Molin who took my Fabric Postcards class at the Merrimack Quilt Guild in New Hampshire in late January.  The first picture I saw was this wonderful rhinoceros…doesn’t he just make you grin?

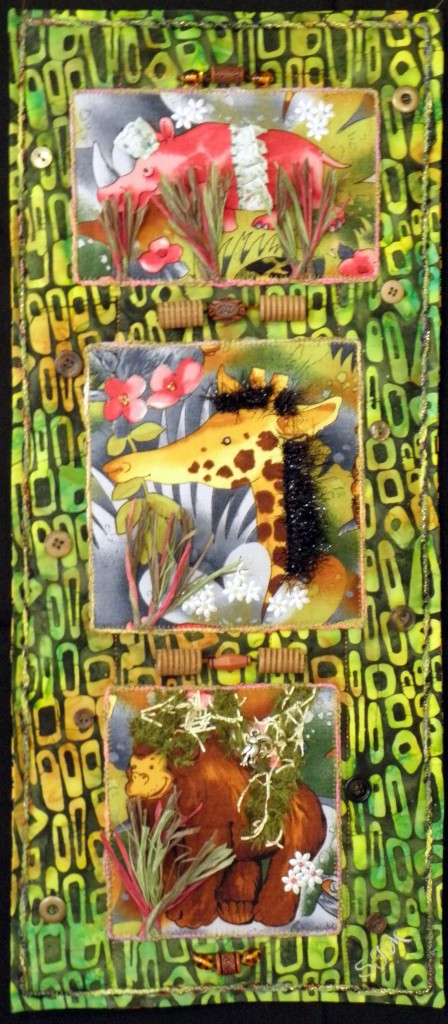
I think Susan did a fabulous job using the printed fabric, the yarn-edge finishing technqiue, and creative embellishments.  I had shared a piece or two that I did where I made the postcards first, then applied them to a quilted background (for example, the Mountain Seasons pattern in my book, ThreadWork Unraveled, is made that way).  The photo of the overall quilt, Jungle Play,  is a tad blurry, but I’m including it anyway so you get the feel for how she has done the piece:

Here is the giraffe–the “hair” for the mane is PERFECT:

and the gorilla–love those hanging-down branches:

I like how Susan has used understated quilting, creative beads and buttons, and couched yarn to the background quilt.   Very effective!  Thanks so much Susan for sharing with me and letting me, in turn, share here on my blog!

Merrimack Quilt Guild

Saturday, January 30th, 2010

As you might have guessed by the lapse in posts, I was busy/away.  Last weekend was fun… on Thursday evening I gave my Decorated Quilt lecture for the Merrimack Quilt Guild of Plaistow, NH (about a stone’s throw from the Mass. border, literally!) and on Saturday taught Fabric Postcards,

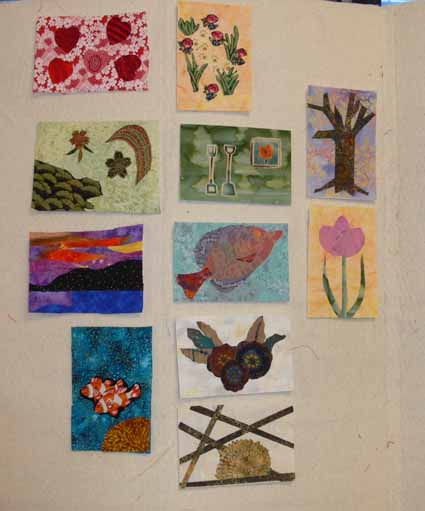
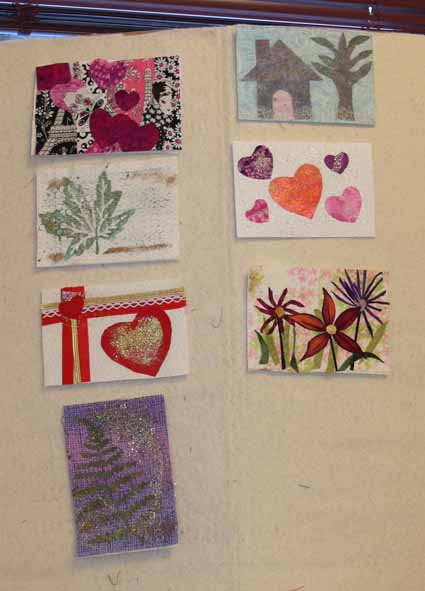
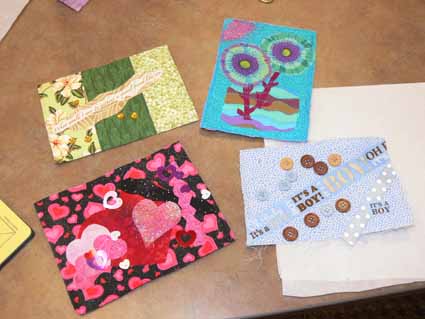
which is really a play-day with an introduction to a bunch of art quilt techniques.  Instead of having to buy a zillion things and stuff, I HAUL a zillion things and stuff and folks can try fusing to collage their postcards, Angelina, fabric stamping (I demo stamp carving, so they can see how easy it is, but too sharp tools, too many distractions to do that in the class with so much else going on), fabric rubbings, using found objects as stamps, resists and rubbing plates,  freezer paper stencils, assorted paint techniques, and finally couching yarn as an edge finish. (PS… given the costs of shipping, this class is now available only within a 2-day drive of home…..)

Because it was just a wee bit too far to drive home on Thursday getting home at 2 in the morning on Friday, then get up at 4 in the morning to drive back down on Saturday , my gracious host Cathy Harnish invited me to stay with her, and on Friday—oh joy of joys–we went to Ikea!  I’ve been to this one about three years ago (for a one hour zip through en route to somewhere), and the one in Seattle maybe 8 years ago?   The first time I drove through Boston after we moved to Maine, I just about flipped out…this bridge had NOT been there when I was in grad school in 1981-3!  Since I was a passenger this time, I got to snap pics.  It is supposed to echo the shape of the nearby Bunker Hill monument (an obelisk) and the sailing ships of the days of yore.  It is GORGEOUS…there is a great abstract quilt in this bridge’s lines:

I did pretty well, buying not much–a bamboo placemat for rubbings in the class (which I forgot to unpack and USE in this class…next workshop!), a small lamp for the hall at home, and some shadow boxes in my quest for more ways to display and sell small quilts.  BUT, I saw this… I WANT THIS KITCHEN.  I WANT LIME GREEN COUNTERS!

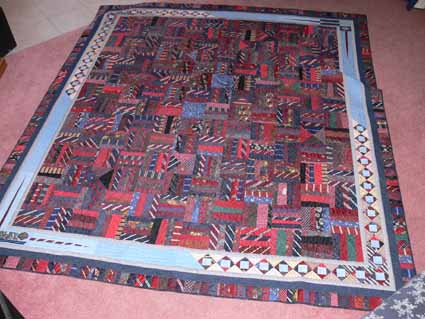
On Friday night, Cathy invited over a table full of guild members, with her dear hubby braving the table of women.  We had show and tell after, too.  While I was there, Cathy shared this commissioned quilt she did for someone made of ties and shirts.  I LOVE LOVE LOVE this border, and think it may be one of the most effective I have seen anywhere–it may have been dictated by the size of the embroideries on the shirts and the leftover scraps, but it is brilliant:

On Saturday, we had a quick set-up time, and then got going.  The morning on this class is learning to use fusibles, especially my favorite  MistyFuse (light hand, easy to use, never any “issues”).   The class was great, and enjoyed the “art smorgasbord” in the afternoon when I set out all the goodies to enjoy.  Everyone always enjoys something different… there are a few things I don’t use hardly ever, but every time I think of eliminating them from the class, there is someone who finds it to be “THEIR” thing, so I keep the materials and techniques included.

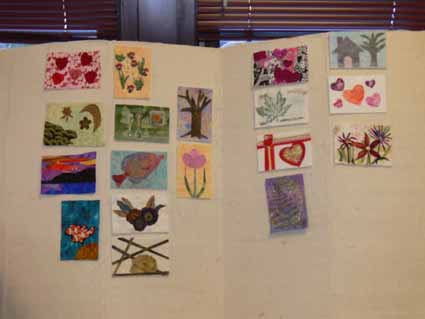
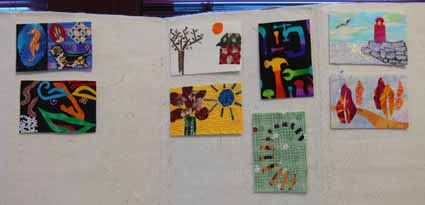
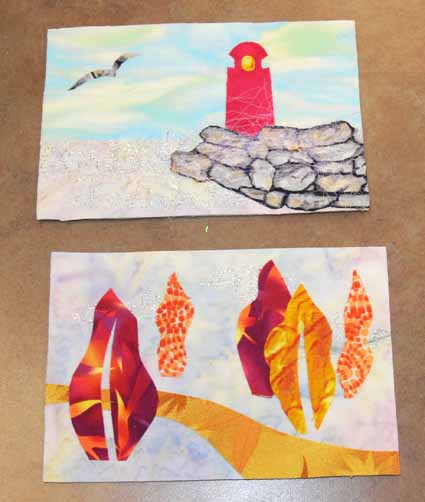
I’m afraid I didn’t get names for the makers of all these cards, but thought I’d share them with you… great variety!  Clearly the upcoming Valentine’s Day was on a couple of minds….

Thanks to all who attended the lecture and came to class… it was, as always, a gas!

Things to think about when teaching on the road….

Wednesday, January 13th, 2010

A question arose on the QuiltDesigners Yahoo group recently (many of the designers also are quilt teachers) about digital projectors.  That led  to a longwinded reply on my part, and it occurred to me that you folks might like to read some of what we need to think about when we travel, schlep mountains of stuff–HEAVY stuff–to teaching venues, and have to invest in the equipment.  Though teachers’ fees might seem high, when you spread the income out over the days you travel for which you are not paid, the prep for each class for which you are not paid, the cost of handouts and class supplies it’s not very much in the end (usually I don’t charge for routine stuff–only add a kit fee if the cost is something like $10 per student instead of $2–even in a class of 24, that’s $48 out of pocket for handouts etc).  My laptop bag probably has about close to $5000 in laptop, projector, videocam, cables, not even talking about the WORK that goes into the programs and whatnot.   So here goes…

The digital projector model I have (bought about 15 months ago) is probably not made any more but the best advice I got was:

  • buy the lightest weight one you can afford—they seem to gain an ounce with every step down every airport concourse!
  • buy the most lumens you can afford—many places that we teach and lecture there is a lot of ambient light. You need to be able to project a good image on the wall (or white flannel or foam core!) with light from windows, etc. I think mine is 2600 (the most in the under $1000 range when I purchased), and it did great in the well-lit classrooms in Houston. Use them for teaching, not just lectures….

I bought a very inexpensive, very small video camera and small tripod. I set them up on my table to project live demos on the wall, and students love it! I understand you can now get “wireless” communication between camera, laptop and projector in some instances/situations. That would be good. That snake’s nest of cables is a trip hazard! The tripod I bought is a mini…good for using directly between me and the sewing machine to get images of the needle/foot area. A taller one, set to the side to “beam down” on demos I do would also be useful, but don’t have it yet. There are also gooseneck cameras, so you can have this little bitty “eye” reach over from the side and look straight down on what you are doing. That might be a solution.

Jan Krentz has done up small “slide show demos” of things she demos in class. First she demonstrates the steps live, then she’ll put on the slide show on “loop” (endless repeat). The key instructions are written onto the slides that are projected. She can walk around the room and help while things are playing, students can look up and follow along at their own pace. This is my goal…to prepare mini-presentations that need this method for my classes. While I teach things that don’t always lend themselves to this approach, it’s fabulous when it does help you.

Also from Jan I learned about pre-class information/entertainment. Jan has her projector on before the class begins with instructions on what you need out and ready, and what can stay stashed under the table until later. Brilliant! As students filter in they can read and heed, while Jan gets to greet new students instead of endlessly repeating herself (well, she probably does that, too, but still….).

In a lecture Jan gave up here in Maine, she also told us a little about herself and San Diego (she lives near there) at the start. So I did up a “pre-show entertainment” for Houston, with slides of Camden, Maine through the seasons, our house, a not-close-up shot of the kids (they’re not identifiable really in it) and the dog…. and students really seemed to enjoy looking at the pictures. That meant *I* had time to get set up and prepped for class. So often I find students want to chat and be friendly–I do too, but I really MUST prep and have things ready to go the minute time starts!

From TSA (the US Transportation Security Agency): I bought a special laptop briefcase which means I don’t have to take the laptop out of it. It also holds the projector and all cables. HOWEVER, that is too much stuff for the scanners to cope with. It is faster if I leave the laptop in the case as it was designed to reveal the laptop, but remove the projector and baggies of cables/cords and put them in the gray bin.

I bag my stuff by product: all the projector stuff goes in one sturdy ziploc baggie, all the videocam stuff in another, the iPod and phone chargers and cords in a third. I just empty that compartment of the briefcase–four items (projector and three baggies) into a bin and I’m through easy peasy. Re-packing that section of the briefcase is fast then, too!  Mo’ bettah!

Another jem from Jan Krentz: Buy some of the day-glo/ bright colored Duct Tape and make “tags” for EVERY cord, cable, laser pointer, remote control, and put your name and contact info. With a glance around the room at the end of the day I can tell if one of my lime-green-tagged items is mixed in amongst the snarls of other black cables around the room. And if one gets left behind, folks can contact you and return it.  This saved me $80 for a remote control I left on a podium up in Augusta, Maine..phew!

Finally, take a small surge protector (mine is in the baggie with the projector stuff), but ask your hosting venue to have a long extension cord–they just weigh too much to haul around.

Thanks to Jan for sharing so much of her hard-earned knowledge with newbie teachers!  I took a traditional workshop with her up here in Maine because I wanted to watch her teach.  I had met her the year before when we were both teaching in Paducah at the big AQS show; we shared a 2-hour van ride to and from the airport, plus ran in to each other in the room where the teachers shipped-ahead boxes were stashed.  She was SO generous, plus she’s nice and I learned a ton, both in Paducah and in her class up here.  THANKS, Jan!  Her website is here–I can heartily recommend classes with her.

Cheers, Sarah

PS–late additions:

Photograph all your equipment—every cable, remote, everything.  In Photoshop or printed out add the item name and product number, along with the 800 number of the company (both manufacturer or place where you can order re-supplies).   Keep this photo at home, and another in your travel bag.  Make sure the 800 number for the company is on it so if a piece breaks (like heaven forfend the lightbulb) you can order replacement parts ASAP/overnight delivery.  I order much of my photo stuff from B&H Photo Video in NYC, and have their phone number too.

Numbering stuff is good, too.  Then you can do a quick count:  if I have four items in the bag, I need to look for one more thing–that idea.

I also made a “cheat sheet” on setting up the projector and laptop.  I need to plug in the projector, turn it on, link up the laptop with the USB cable, THEN start up the laptop.  Otherwise the projector has “issues” finding the laptop which leads to needing to re-start the laptop.  Since I don’t use the set-up all the time, I keep a page with instructions to myself inside a page protector in my bag to remind myself of those little things.  Those friendly quilters asking to help sometimes distract me and I get confused with all the cables, etc.