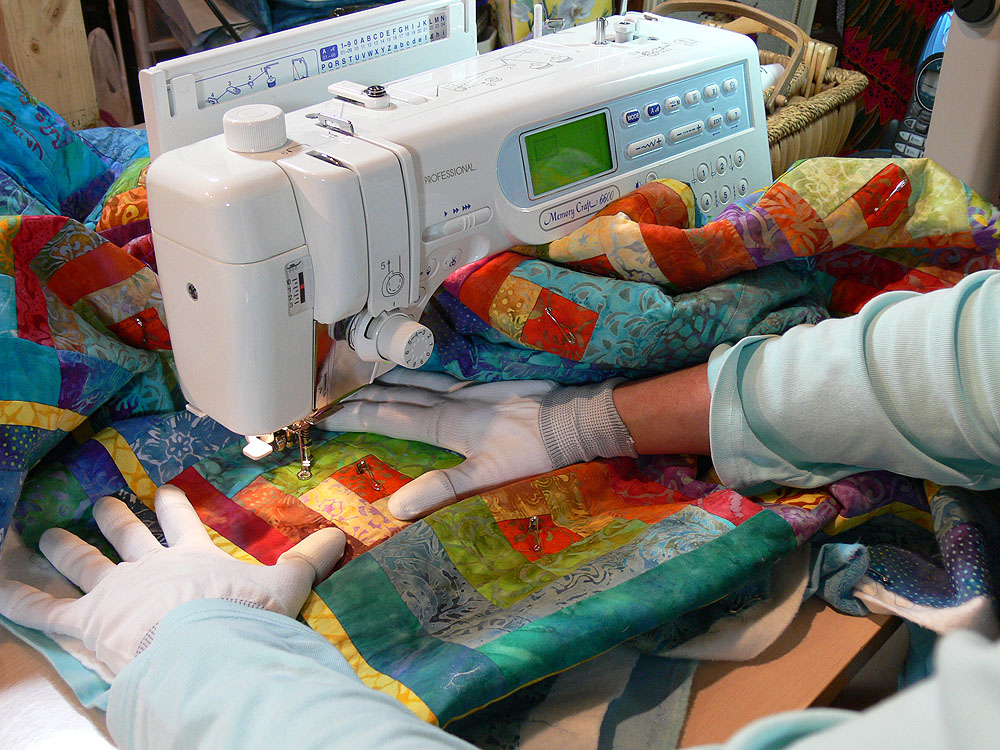
Wow have I been busy, and I’ve woefully neglected my blog! I’m sorry! The good news is that a flurry of activity is nearly over. In the past 8 weeks I have made a quilt for inclusion in a book due out next year, flown from Maine to Colorado to tape a Quilting Arts DVD workshop (more on that here), written and submitted two articles to two different magazines (more on those when they come out), and written a third but still have step-outs and photography to do on that one. BUT–I am thrilled to share with you that Listen to the Song in The Night has been juried into the this year’s Dinner@8 exhibit, An Exquisite Moment.
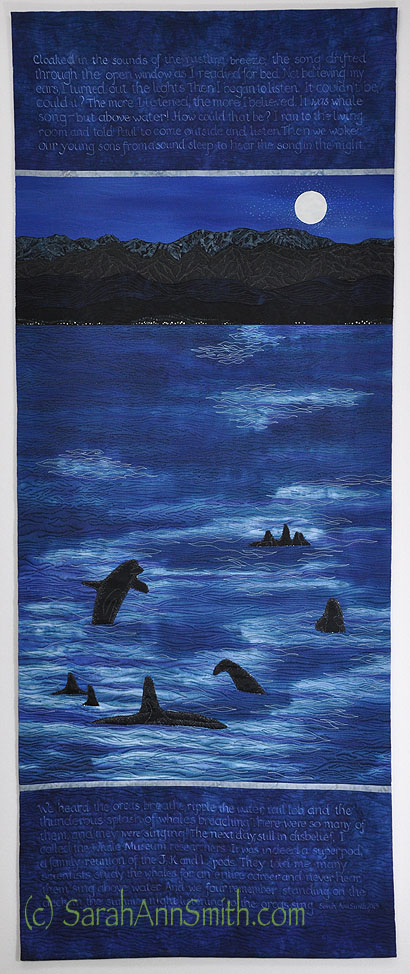
Listen to the Song in the Night by Sarah Ann Smith (c) 2013. 24 x 60 inches. Artist dyed silk and cotton, a few commercial batiks (mountains). Free motion quilted, ink with dip-pen, paint.
You can read more about the exhibit, here. Last year I was really stumped. This year it was a matter of which quilt to make: childbirth (done discreetly–the mom’s view looking over the sheet over your knees at your newly hatched child in the doctor’s hands), Eli as a 2 year old under the blueberry bush grinning as he munched blueberries, or any of a number of other moments. But then I remembered the whalesong. Best of all, not only did hubby Paul, but so did the boys who were about 5 and 9 (or maybe even 4 and 8). We lived on San Juan Island in Washington state at the time. Our house was about 1/3 mile up from the water and faced the Straits of Juan de Fuca with the Olympic mountains on the other side, 17 miles away. We could see and hear the orcas from our house. The writing on the quilt tells the story:
Cloaked in the sounds of the rustling breeze, the song drifted through the open window as I readied for bed. Not believing my ears, I turned out the lights. Then I began to listen. It couldn’t be, could it? The more I listened, the more I believed. It was the whale song–but above water! How could that be? I ran to the living room and told Paul to come outside and listen. Then we woke our young sons from a sound sleep to hear the song in the night.
We heard the orcas breathe, ripple the water, tail lob, and the thunderous splash of whales breaching. There were so many of them, and they were singing! The next day, still in disbelief, I called the Whale Museum researchers. It was indeed a superpod, a family reunion of the J, K and L pods. They told me many scientists study the whales for an entire career and never hear them sing above water. And we four remember standing on the deck in the summer night listening to the orcas sing.
I knew that I wanted to dye some silk for the water because of the sheen of the sandwashed satin, and found some silk I had dyed for the San Domenico Tableau quilt (here) for Mary’s dress. I used the matte side for the sky–it’s at the top in this picture.
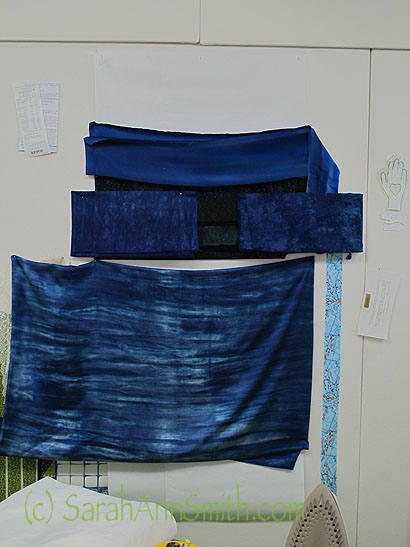
First round with the dye bath. The big piece on the bottom is silk. The others are cottons except for the very top piece which is a silk I dyed earlier.
Then
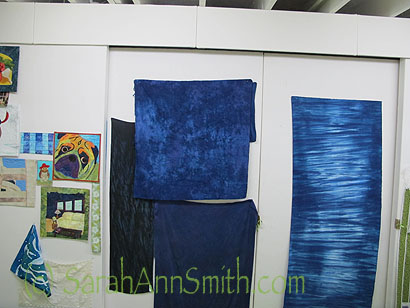
More fabrics dyed for the project. The cotton on the right is what I used for the back.
I used the blue on the top left in the photo immediately above, but had overdyed it to be darker and more solid, for the top and bottom panels where I would write the story. After all, it is hard to make a picture of something you heard but didn’t really see so I though I’d best add some words! I took some artistic license and added a full moon and lightened the scene just enough to actually make a picture not a large blotch of dark! First, however, I needed to figure out how I was going to write on the cloth.
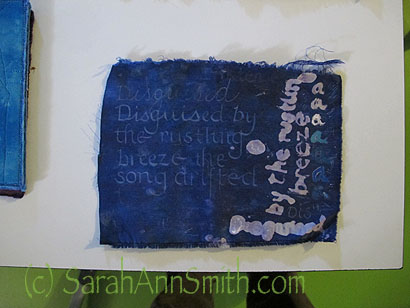
I knew I wanted to write on the top and bottom panels of blue cotton that I had dyed, but wasn’t sure what method to use.
On the right, you can see assorted lower case “a’s” written with DeColourant (some colored) and assorted tools to apply. I thinned the thick liquid, but then it ran. Not the look I wanted. It’s a great product, but not the right one for this purpose. The top “Disguised” is done in an archivally safe Sakura Jelly Roll pen, but it looks much brighter in the real than in the photo. It was OK, but the Liquitex Ink! (acrylic ink) in white with the “crow quill” dip pen was perfect. The variations in pressure as I wrote gave an almost italic look, so that was my choice.
Next I printed out the text at full size to make sure it would fit and to use as a guide. I was afraid that I would get the word order wrong or space out and misspell something, so I folded the printouts and set them just above the line I was writing, covering up the previous line so I didn’t confuse myself! You’ll see my chalk-lines in the photo; I used SewLine by Moda with ceramic chalk lead which erased like a dream when I was done.
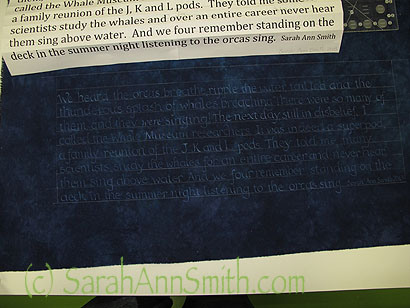
Above you can see how I folded the printed paper so I could follow along, line by line.
Next step was to over-paint some batiks for the mountains. I had a few that worked as is, but most needed to have the batik design muted.
Batik fabric for the mountains. The cloth was over-painted with dark (not sure if I used black, blue or a combination). In the lower part of the photo you can see how I have already cut some of the mountains. I wanted the foothills and coast to be even darker than higher up, where the moonlight hit the tops of the Olympics.
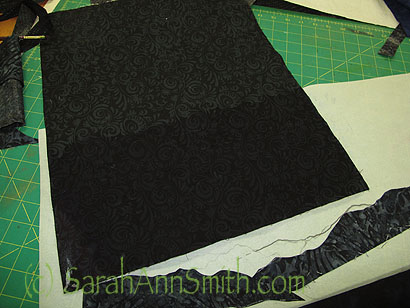
Next I auditioned various fabrics, two blacks for the whales, a gray (which needed darkening) for the thin strips separating the top and bottom panels from the center. I free-motion stitched on the black sateen I selected for the whales with just a stabilizer underneath, then cut a slit in the silk (BIG gulp and holding of breath), then tucked the whale into the opening and hand-appliqued them down.
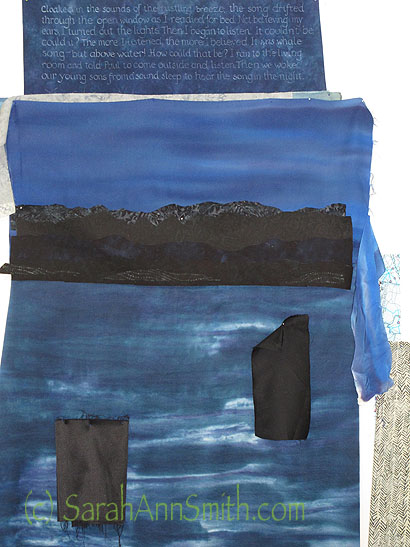
Test-driving fabrics for this and that.
And finally, the quilting. It went fairly quickly, as it was all blues from palest (which appears white but is actually a pale silvery blue) to nearly black on most of the quilt, with just some gray and deep charcoal for the mountains.
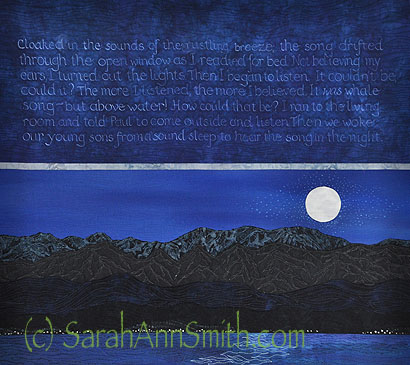
Detail shot showing quilting, moon, and white ink dots for the moon glow.
The exhibit will debut at the International Quilt Festival in Long Beach this coming July. I’m thrilled to be a part of the Dinner@8 exhibit once again, and would like to thank our various sponsors over the years, especially Moore’s Sewing Centers, Havel’s Scissors and Mistyfuse (which I use a lot)!