email Youtube

Home
Galleries
Blog
Workshops & Calendar
Store
Resources
About
Contact

Archive for the ‘Machine Quilting’ Category

Getting ready for Houston

Wednesday, November 3rd, 2010

So, you might ask, what have I been doing?  OK, no, you probably haven’t been asking.  But it has been insane here.  We are hoping to buy a new house and move in January, so there have been MANY (way too many hours) doing real estate related stuff.  The good news is that our house got a contract on it in 12 days, in this economy!  The bad news …well…. I’ll share when all is said and done (you won’t believe the story when I can finally tell it).  Let’s just say EVERYTHING is on track, and we do expect to move (so much for January as making quilts time!) in January—yeah!

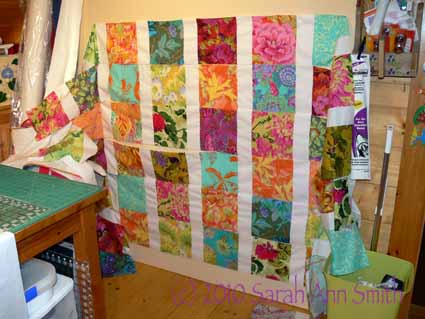
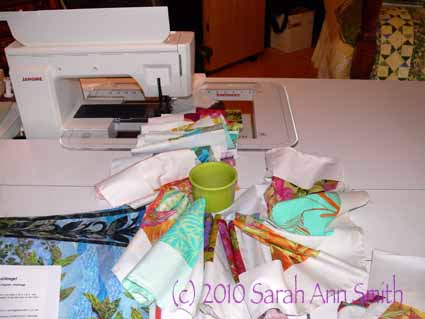
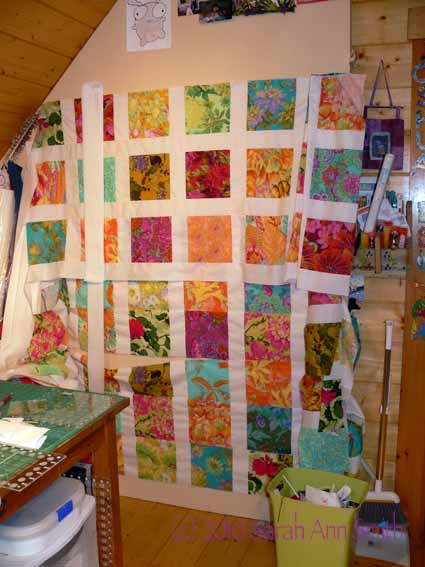
In the meantime, I’ve not been able to concentrate a lot on art quilts.  But I liked that use-a-big-print sampler I made for my free-motion class  so much that I decided to make a bed quilt, possibly as a project piece for a future book (yeah, shoot me again please!). Here are the squares pieced with the sashing into rows:

Big prints with white sashing (vertical pieces)

Adding the horizontal sashing....it has been a LONG time since I've done precision piecing!

And the first of the rows with the horizontal sashing added..I am going to LOVE this quilt.  But it’s a good thing I am probably buying an HQ16 sit-down machine early next year as I will need the space:  this quilt will finish at about 100 inches on each side!!!!

The top three rows now have the horizontal sashing....

And I’m getting ready to head out on Nov. 2 for the International Quilt Festival in Houston.  I will have four quilts and two photos on display!

Cookie? PLEEEZE Cookie! is in Art Quilts-Miniatures in the juried show

Joshua is in the Beneath the Surface Exhibit

Koi and A Sense of Place:  The Wall are in the 500 Art Quilts exhibit, where the quilts are from the Lark Books book of the same name.

and in the Eye of the Quilter Exhibit, I will have two photos!  I’ll post those photos in a post in a few days!

But here is the pile of “getting ready to take” stuff, including some in progress postcards for a swap. I’m going to take some of this round’s swap cards for my demo in the MistyFuse booth!

Intro to Machine Quilting

Tuesday, October 26th, 2010

Last weekend I taught my intro to Machine Quilting at Maine-ly Sewing in Nobleboro, Maine.  The class was the first one in Maine where I’ve used the digital projector and “slide” (digital) presentation that I use for the national travel-teaching classes, and it worked as well here as on the road.  I believe fervently that new quilters need to understand that you must have the proper foundation to quilt well—it is more than just doing the machine quilting!  I use a painting analogy:  if you don’t sand off the cracking paint, spackle and prime the window frame, then it doesn’t matter if you have the best paint, painter and paintbrush in the world.  The paint job won’t be well done.  Similarly, you need to understand your fabric, batting, needle, thread, basting, and machine set-up if you are to achieve good results.

I used the new floral sampler in class (which I shared here and here), and several of the students gave it a whirl.  As usual, the class went by in flash–before I remembered to take pictures.  Students came from far and wide…as far as Bangor and Farmington, plus one visitor from Ohio, so I really appreciate the effort the ladies made to come take a class with me.  Distances here in Maine are longer than the miles because the roads are 2-lane country roads!

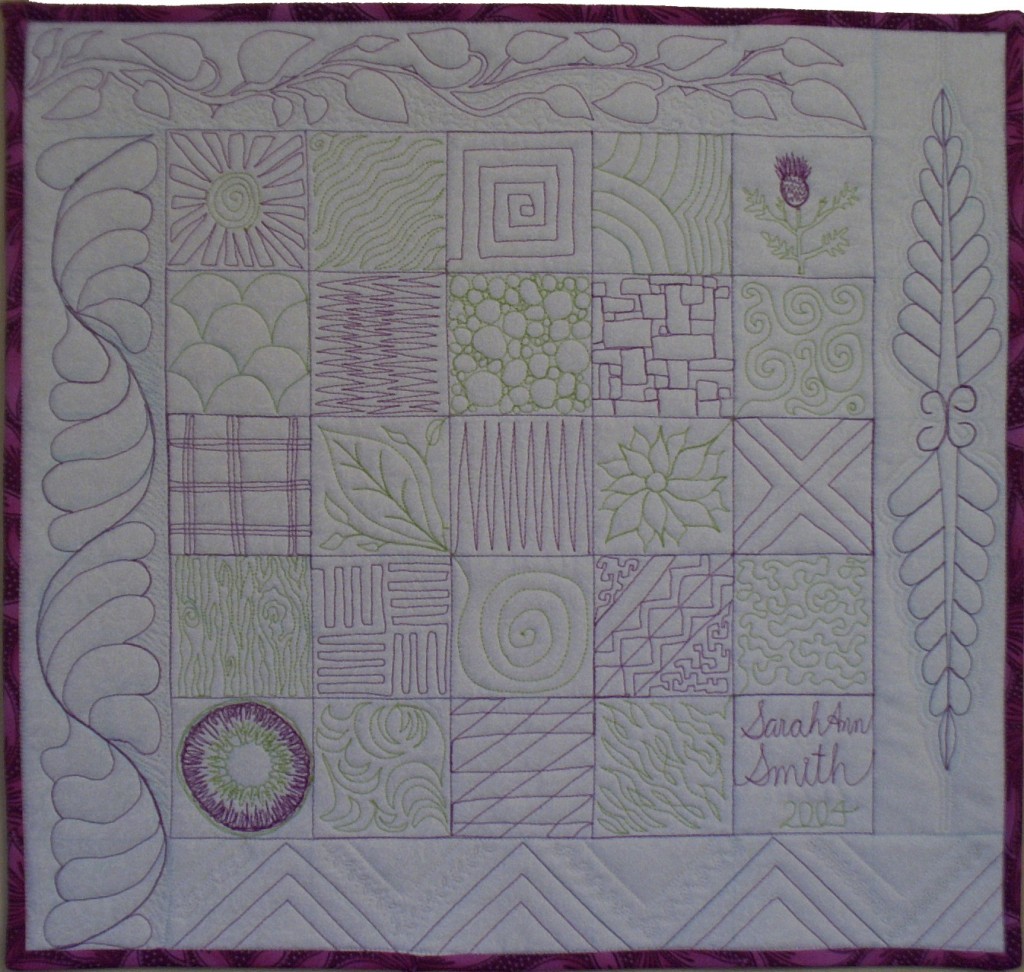
This student was following the grid sampler for free-motion patterns that I have taught the past six years (click to view larger) and is included in my book:


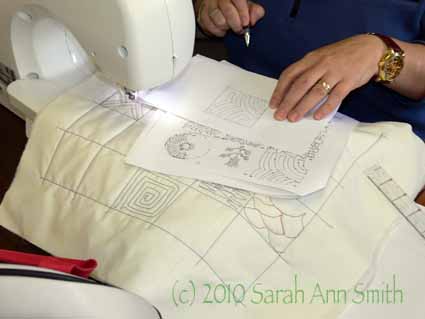
She is doing the perfect thing….tracing the design with her pen prior to sewing to get the feel of the design and how her hands will move:

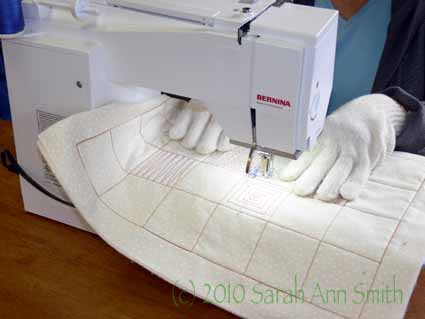
Then, the actual quilting process:

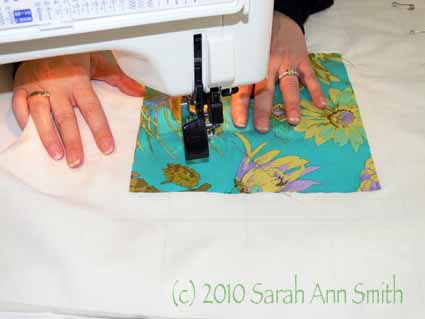
And trying out the flower/big print process (I liked the fabric she bought so much I went up and bought some, too!):

I’ve decided I like the way my sampler turned out so well I’m going to make a BIG bed quilt using these colorful fabrics and white sashing.  I think the piecing will be easy, it will be colorful and pretty, and would be a perfect project for a future book…heh heh…..just don’t hold your breaths, there is WAY too much life happening here for me to get to writing a book soon.  Sigh!

Free-Motion Quilting, revisited

Sunday, October 3rd, 2010

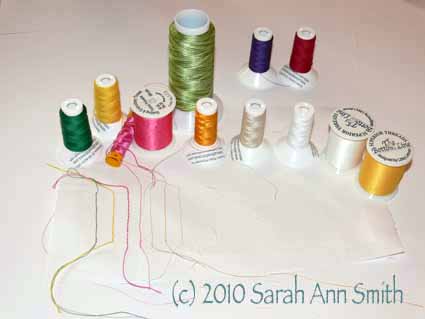
A post or several ago, I shared my new class sampler for my Intro to Free-Motion Quilting and mentioned I had received some threads from Gilbreath Threads to try out.  I used the sampler as a way to test the threads:

From left to right:

  • Gilbreath  Emerald green, cotton 30-wt, #253
  • Gilbreath Yellow wool 12-wt
  • Gilbreath hot pink silk (lying down) Seta Bozzolo 24-wt., #196
  • Superior Threads 40-wt. poly, hot pink #820
  • Superior Threads 40-wt poly, rainbows, green variegated #820
  • Gilbreath orange/mango 40-wt Palio poly
  • Gilbreath 40-wt ecru cotton, 2-ply, #025
  • Gilbreath 50-wt white cotton, 2 ply, #000
  • Superior 60-wt white poly (used in the bobbin), # 621
  • Superior 60-wt  yellow poly (used to sew down the binding), #641
  • in the back, two Gilbreath threads not used because the colors didn’t work for this piece: 60-wt purple cotton, 12-wt deep red cotton

I don’t think I’ve ever used that many different types and weights of thread in one piece, but I’m thinking this could be something to add to my arsenal of techniques! At the top you can see the completed, washed piece before the final line of stitching in the ditch on the binding.

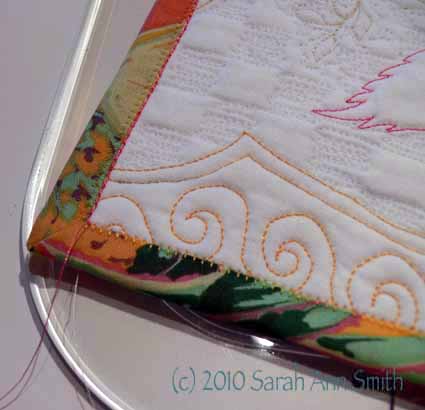
I applied the binding to the back, wrapped it to the front (the front side is 1/8″ wider than the back, so the stitching to apply it is on the back of the quilt, not the binding), and stitched it down using a buttonhole stitch and Superior Threads’ Bottom Line thread, a very fine polyester that blends in and is unobtrusive:

The last step is to use the triple-stretch stitch (a bold straight stitch) in the ditch to outline and accent the binding with the hot pink poly from Superior.  See how it crisps up the edge in this photo which shows with and without the outline stitching?  It’s a design choice; both ways are good, just pick the version you like.

Here are close-ups of the quilting in this big-print class sample, which uses motifs from the Free-Motion Sampler (the magenta and lime quilted grid that is in the book) and my “More Machine Quilting” sampler which is featured on the cover of the book, the peach quilt:

It has been a LONG time since I’ve washed a quilt after quilting it, and was very happy to see how the fabric holes closed up around the stitches.  In this last photo, you can see where I added some stippling (ugh, but sometimes useful) around the ecru leaves after it had been washed.  The needle holes in the checkerboard have disappeared, but you can (faintly) see them around the leaves. The quilt is now dampened and back in the dryer to remove those needle-holes too.  Hmm…good learning piece:  Use thick threads in the bobbin!  Rinse and fluff in the dryer…. will have to try that with a very fused and densely quilted sampler and see what happens to the edges of the raw edge applique…. guess what my next class sample will be?

Hope you’ve enjoyed! Cheers, Sarah

Free-Motion Quilting and life…

Sunday, September 26th, 2010

Yes, it has been a while.  As usual, that means there has been more than the usual chaos around here.  We happened on to a house for sale ad in August, which started a ball rolling that we hadn’t anticipated.  We found a different house just a couple miles away (same school district, next town over), made an offer on it, and have been maniacally (sp?  that looks weird but not getting a spelling error notice) sprucing up our house.  That means little art and quilting have happened.  Until this week.

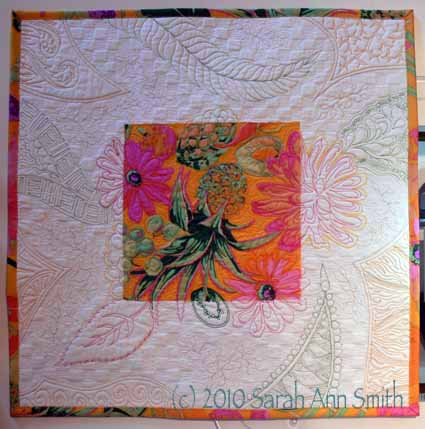
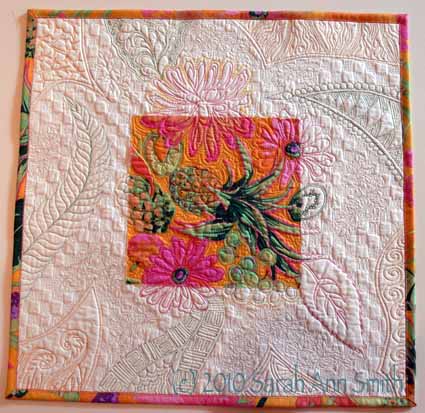
In the midst of getting the house onto MLS, I started a new sample piece for my Intro to Machine Quilting Class which I’ll be teaching again on Sunday at Maine-ly Sewing in Nobleboro.  I was prompted by two things:  this post over on Jenny Bowker’s blog and the fact that some students find free-motioning into the vastness of empty space –i.e. the 18 inch square quilt sandwich I have them bring– is intimidating.   I use this sampler as my basic teaching tool (it’s also patterned in my book–click on picture to see it larger):
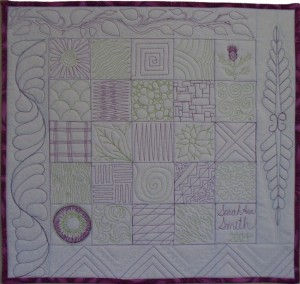
Some students like to make it just as is, sewing the grid, then filling in the squares, since a small square is less intimidating that a large one!  Others feel too confined in the squares, so I tell them to just go for it on the sandwich without creating a grid framework.  I’ve also long counseled them to use a large print as a guide for learning.  You can put the print on the back of the quilt and use that as your design, or just in the borders but repeat the shapes and motifs in the center of the quilt.

If you haven’t yet visited Jenny Bowker’s blog, DO!  She is one of my all time favorite quilt artists.  Her work is always inspiring and amazing.  While you are there, be sure to click on the link to her website and view her quilts.   Jenny has combined the two methods I use into one piece…take a square of big-print fabric in the center of the sandwich.  Jenny has her students piece the top, I think, but I’ll try fusing instead…faster for a class room setting?  Then use various motifs from the print fabric plus fill patterns for the rest.  In looking at hers again, I think I need to make MORE of these little pieces; I also am thinking a bed quilt of assorted big print squares with wide, solid-fabric sashings quilted all over like this would be GORGEOUS!

So, I decided to adapt her idea by fusing an 8 inch square into the center of an 18 inch square of white.  I also received some spools of thread from Gilbreath Threads, fairly new to the quilt thread market I think–their stuff is available here.  They found my website, asked if I’d like to try their threads (the cottons are made at the same factory in Italy as the Aurifil cotton that is so luscious Correction!!!!  Gilbreath claims the cottons are as good as Aurifil…see my clarification posting dated October 11, 2010).  I said sure, and they sent me a variety.  In the next post, I’ll share more about them, but I think I am in LOVE with the 12-wt wool and the 12-wt silk.  I am re-thinking my aversion to bobbin work…these are too wonderful NOT to use!

I began by quilting on the print square, then spilling over onto the white.  Next, I continued with the variegated green (a Rainbows thread from Superior Threads), with relatively easy quilting (requires less precision than many designs) for the four different “waves” coming in from the sides.  I then decided to repeat the yellow color of the heavy wool used to outline the flowers, but using Gilbreath’s 40-wt. Poly.  The latter handles and looks much like Superior’s 40-wt poly threads, which are my favorites.
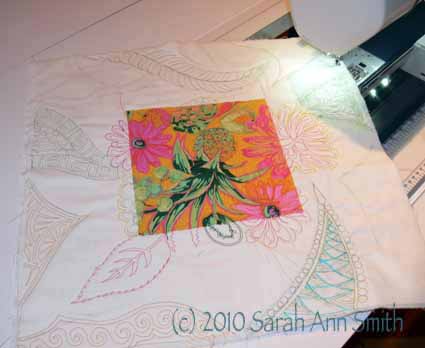
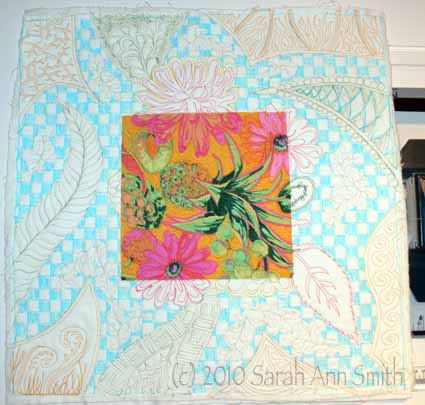
Once the colorful stitching was done, I decided to try the two cotton threads Gilbreath send:  a 40-wt ecru and a 50-wt white 2-ply.  I used the ecru to stitch a small leaf design in the center of the remaining open areas:
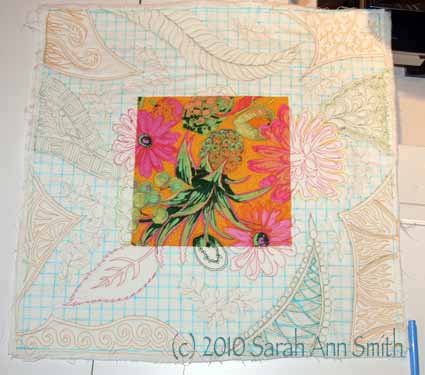
Finally, I used the fine white thread, which appears to be similar to Superior’s MasterPiece thread, for some background quilting.  I like to contrast curvy with linear in quilting, so I chose a checkerboard fill patter.  I got out my ruler (who me?) and drew a grid with wash-out blue pen (see above).  Then, because I am easily confused, I colored in the alternate squares so I wouldn’t go off-track, and stitched on top of the blue (yes, this is the picture from the top, repeated….):

Here’s the back:
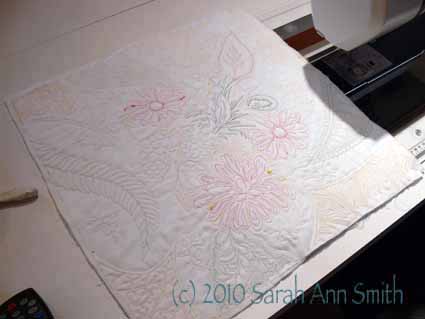
You’ll notice some thread blobs…I left those on purpose since this is educational.  The point on this one is read the thread description FIRST.  I tried using the 12-wt silk and the 12-wt wool through a topstitch needle (both size 14,90 and 16/100), with limited success.  I then read that it is intended for use in the bobbin or by hand.  I simply cannot describe how heavenly that heavy silk is….. I can see doing handwork just so I can use it.  The sheen, the thickness….GLORIOUS.  I think I will take a very close up of that spool for the next post….drool!   Anyway, that’s for next time.  And you’ll see it with the blue washed out…mo bettah!

Bins for your pins are good, too

Wednesday, September 8th, 2010

In addition to the new table and drawer unit, I added one other small but wonderful detail:  a portable caddy for my tools!

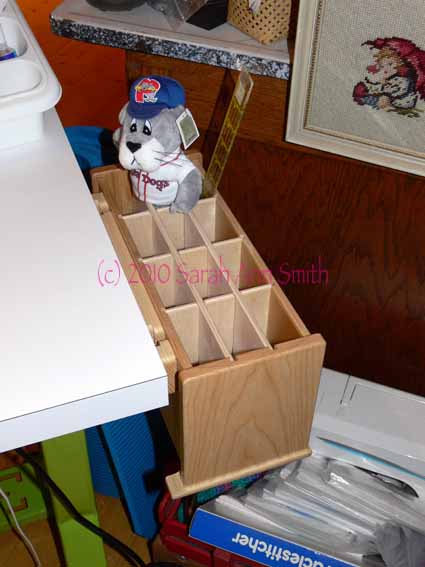
Slugger the Sea Dog (local minor league team mascot) keeps watch over the tool bin

If you don’t “do” the drop-down flaps on your Perfect Caddy, there are options for a number of bins that you can attach to the outside of your caddy.  Now, I have been using a 99-cent white plastic cutlery caddy from the local drug store to hold things like my seam ripper, brush (for cleaning lint), ruler, skewer, etc.  You can see the corner of the caddy on the top left corner of the photo above.  I knock it off the table WAY too often, spilling the contents that then roll hither and yon, leading to much swearing on my part while crawling on the dusty floor looking for errant sharp things.  Ahem.

When I saw the Large Portable bin, I realized I had a solution, and one that looks really nice!  I called up The Perfect Caddy folks to add the bin, and yes, they could indeed sell me a second mounting strip:

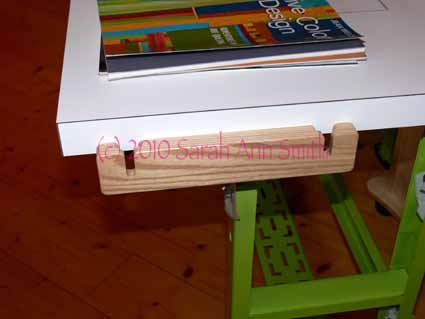
To the right of where I sit at my new tables, I used some “L” brackets to secure this wood mounting strip to the edge of my table.  Notice those two “U” shaped things?  That’s  where these well-designed, secure pegs go; they stick out from the back of the portable bin (also with customizable inserts, just like the drawers) and fit snugly into the slots.  I can then MOVE the caddy depending on where I am sitting/which machine I use!   I can take the caddy over to the other machine (the one that I’ll buy next year), or set the caddy on my work table or by my spot on the sofa.  Perfect!

Well…almost perfect.  The Small Portable bin is too shallow to hold pencils, the large is so deep that they go down to be almost hidden.  I’m going to make inserts for some of the compartments for shorter items like the seam ripper so that they are above the surface, not down in the hole.  I’ve asked if they will make a “medium” bin which is a height between the two currently available.  They are thinking about it, but no plans.  Yet.  When they DO make a medium portable bin, I’ll buy one, re-assign the large one to paintbrush duty, and use the medium with the machine tools.  NICE!