email Youtube

Home
Galleries
Blog
Workshops & Calendar
Store
Resources
About
Contact

Archive for the ‘Machine Quilting’ Category

Friend-to-Friend Janome Challenge

Tuesday, January 3rd, 2012

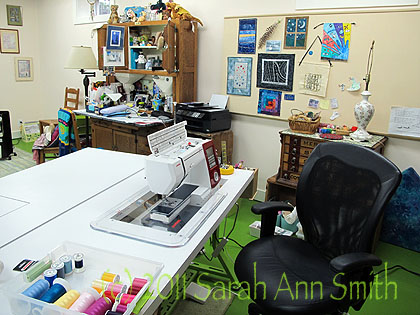
My beloved Janome 7700 in the "sewing zone" of my studio!

Hi all!  Janome-America is hosting a challenge:  to reach 20,000 “Likes” on Facebook!  To reach that goal, they are giving away some machines and featuring some folks (including me!) on their blog!   I’m thrilled…to be included and to be able to use the phenomenal Horizon 7700 for my machine work.

You can reach the blogpost about me here — it is dated Friday, December 30, 2011, if you end up on the website homepage and need to scroll.  That post in turn has links to the three articles I did for Janome on free-motion quilting…hope you enjoy! As always, thanks to Janome for their support and encouragement.  If you are surfing in from outside of the US, click here (at the global site: http://www.janome.co.jp/e1.htm)  and then select USA from the site locator to access Janome-America’s blog.

Still, Still, Still

Saturday, December 24th, 2011

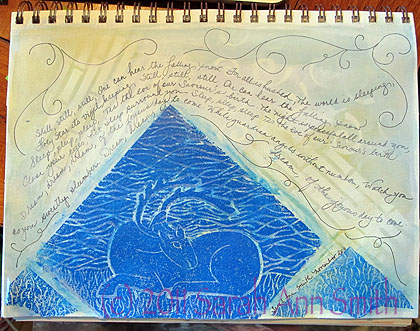
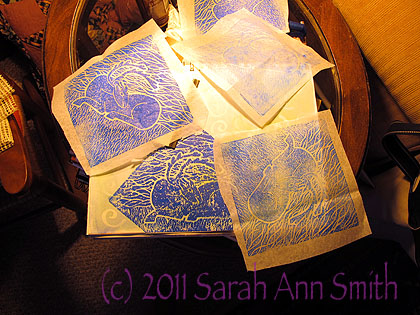
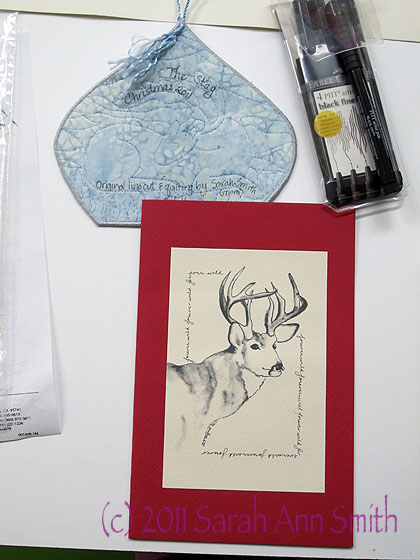
Still, Still, Still is a carol the middle school chorus sang last year. I journaled the lyrics around this print of the stag. I first printed the reindeer directly on the page, but the print didn't work so well. So I printed onto tissue, then glued the tissue over the somewhat not-crisp original print onto the page. This made a sort of "echo" in the image. The background was done in Jane LaFazio's Mixed Media journals online class at Joggles.com.

For once, I actually thought ahead a bit.  Last spring, I did a presentation for my local quilt group, the Coastal Quilters, because they had been kind enough to award me a $50 scholarship to help pay for a class.  I took two online classes, one of which was lino-cutting with Dijanne Cevaal.  Last Christmas I had gotten this idea to make an ornament for my Frayed Edges friends for this year, so I noodled around Google Images to find pictures of stags and reindeer and prepared a drawing to use for a new lino-cut that is really a hybrid of about 20 pictures.  Then I finished the carving as part of my demonstration.

The resting reindeer, on tissue, on cloth, and in my sketchbook

In Fall, I finally got around to printing what I needed to make some ornaments.  At Thanksgiving time, I decided that I needed to make a few more, as it was time to give thanks, especially to some very special teachers at Camden-Rockport Middle School who have been wonderful to both of our kids.  Our younger son is in 8th grade, so this was our last chance to say a special thank you.

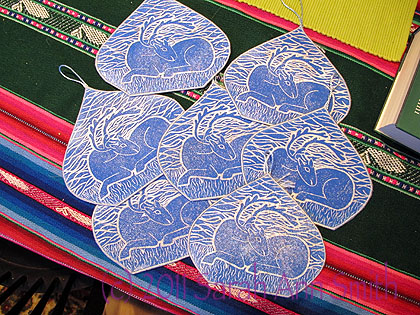
I made a run of 14 ornaments for family, friends and teachers.

The block is 6 inches, with the design carved on point.  I trimmed the prints on cloth to this “onion dome” (like you see in Russian churches) shape.  They are printed with Speedball Printing Ink, which I discovered the hard way last year is NOT water-fast.  Like a drop from the iron will make a blotch.  Erg.  So after printing these I sprayed with with Krylon Spray Fixative, which I hope will help.  The prints are fused to Peltex, a stiffener used in fabric postcards, and quilted with Superior Threads Glitter thread (the pearl color).  Unusually, I satin-stitched around the edge instead of using a yarn…nothing I had looked as good as a nice tight satin stitch.

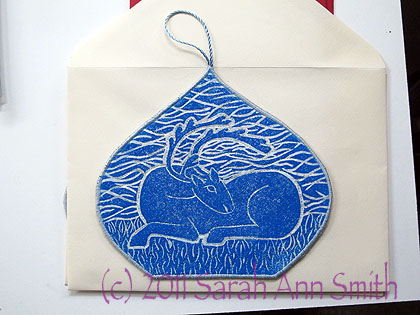
A closer view of one with a more dense coating of ink that some of the others... I like it both ways.

I decided the ornaments needed a special card, so I used the stag I drew (see my earlier post this month) and photocopied onto a heavy card stock and made the note cards. Finding big envelopes was a challenge! You can see the back of the ornament at the top left, so you can see the quilting.

May tomorrow find you with those you love, with a moment of calm and joy and art and beauty.

My free-motion quilting (FMQ) lessons at Janome.com!

Saturday, October 15th, 2011

Hi all!  For nearly 8 years now (whoosh…the sound of time whizzing by!) I have been privileged to work with Janome-America and use one of their fantabulous machines for my work, starting with the 6500, moving to the 6600, and now the delectable 7700.  Starting yesterday, they are featuring three blog lessons from me on machine quilting on the Janome-America website!

The beautiful ruby Horizon 7700 (mine is named Rubeus Hagrid, after the friendly half-giant in the Harry Potter series) with a project from my book. I used the First Frost pattern/instructions to make this gift for the host family in Australia when my son visited there this summer with a group of middle schoolers from central and upper Maine.

Go here to the Janome-America home page and follow the links (scroll down if you need to reach the October 14th post) to your free FMQ lesson number one.  Here’s a link directly to the lesson.  And here’s a link to the Horizon 7700, the machine I currently use and love!

I’m so happy to be able to share this information with you and through Janome.  They have been wonderful supporters, including me in the program before my first article or quilt was published.  I have done so much in the past 8 years that they have sponsored me, that it is hard to fathom–from complete unknown to exhibiting for the first time at Houston to being published in a magazine, then a series of articles for Machine Quilting Unlimited, to articles in Quilting Arts, to teaching in national venues like IQA Houston, AQS Paducah and Knoxville, NQA in Ohio, and guilds across the nation, writing my first (but I hope not last) book, and even winning an award in Houston.  It is sometimes hard to believe this has all happened to me.  And I am so thankful to Janome for their support and their machines, which have helped me do all of this.

So please, surf on over to the Janome site and feel free to download a copy of my lessons for your personal use! Wooohooo!

Conversations, Part 3: the smaller pieces and fixing it…

Friday, August 12th, 2011

By the time I got to making the two small pieces, I had ONE week left, and lots of other stuff to do during that week.  Can you say work fast?  Under pressure?  SHeesh!  I really hope life slows down, because I can’t take too much more of this!
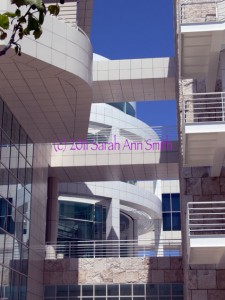
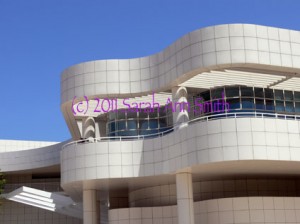
One of the architetural photos I took and used for the small pieces
The other of the architetural photos I took and used for the small pieces

These two photos were the ones whose lines shadows most inspired me.  I love the interplay between straight lines and the curved, the grid of stone and the undulating shapes, the blue sky and the white stone, and the shadows.  I love how the architect used bands/lines of (metal?) whatever to create de facto louvers to shield the galleries and interior spaces from the bright sunlight, and how those bands create striped shadows on the pillars and walls.
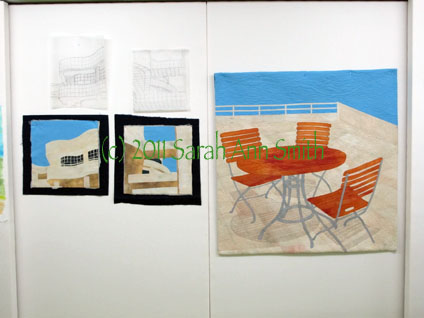
Here are the two smaller pieces, with batting and backing sticking out, and their sketches/tracings above.

Due to lack of time, I quilted both small pieces at once… I’d thread up on say ivory, quilt those areas, switch to cream and repeat, then to tan, etc. on both quilts, working my way to the dark of the windows and the sky and, finally the facings!

But I still wasn’t happy with the shadows from the table and chairs, so I went back to the now not-quite-done central piece.  In the next photo you can see the two pencils plus the paintbrush.
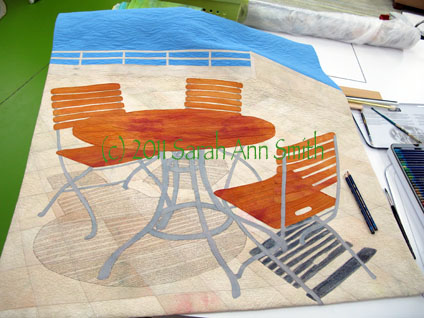
I still wasn't happy with the shadows (or lack thereof) on the main piece, which was ostensibly finished. Guess not. So I took out my Inktense by Derwent pencils (the Payne's Gray and a neutral gray) and took a deep breath
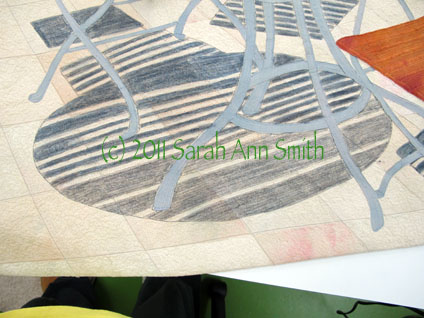
This picture shows the table shadows partially done....
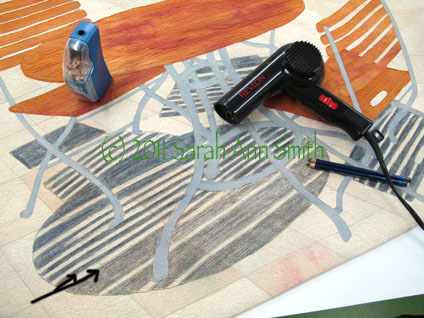
Using the pencils was a bit of a "thriller" moment: I used two colors of gray to get the shade I wanted. The lighter gray on the bottom is where I have colored over the gray quilting threads with the pencil (see black arrow marks on the photo). You can then dampen the pencil marks to create an ink and intensify the color. However, I didn't want the color to bleed into the sunny stripes that came through the slats of the table. So I took out the hair dryer! I used a damp paintbrush in my right hand to moisten the ink, and the hair dryer in my left hand to dry as I painted/wet the pencil-ink. I had very little bleeding into the sunny stripe as a result, and what I did have doesn't really impact the image much at all. PHEW...time for a nice glass of wine after that... I could have totally ruined the whole, finished thing...with just days to go before hanging the show!

The quilt was getting better and I was disliking it less.  But it still wasn’t quite right to me.  There was too much blue at the top.  So for the show I “cropped” it by folding the top to the back… I’ll decide how much to trim off the top and re-do the facing and hanging sleeve after the show comes down.  So here is a question for those of you who have slogged through these blogposts:  how much should I remove from the top?  Here are three VERY similar versions:
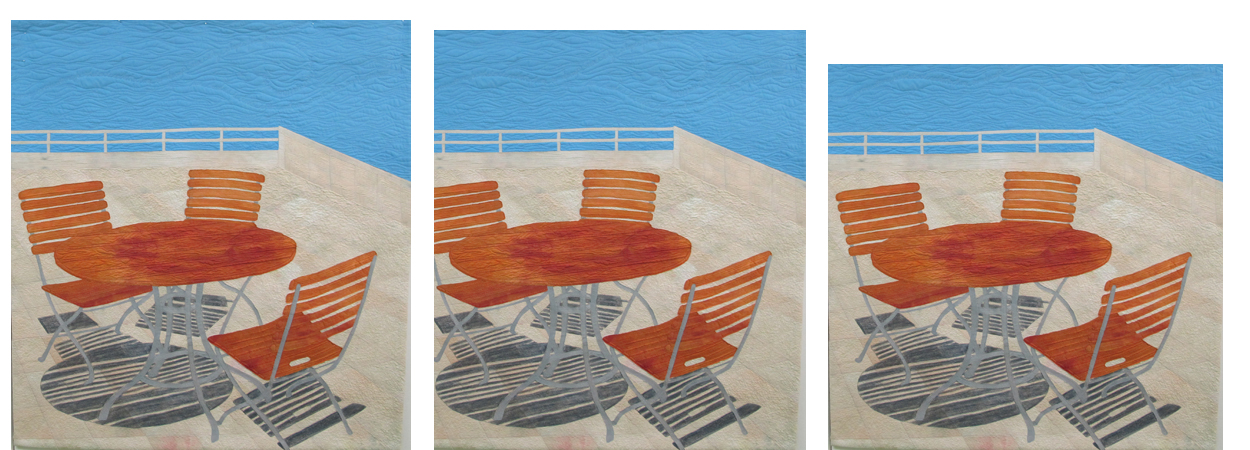
So I do I leave it alone (far left), crop a little (center) or crop a bit more (right)? Photo is clickable to see it larger...

So do I leave it alone with lots of blue, crop a tiny bit, or crop a little bit more?  The photo on the far left is as made.  The way it is hanging is about where I photoshopped it in the center photo, and the one on the right is close to square (think symmetry with the proportions of the two small pieces).  So do I crop?  How much?

And just to remind you…here are the three pieces done and in the show:
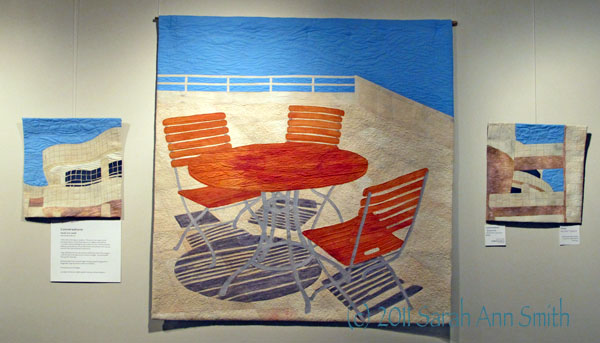
Conversations by Sarah Ann Smith -- click to see larger

And yes….I might maybe do another quilt or two… I mean, look at this water-maze-garden-hedge…  how cool is that?  and the cropped version below?
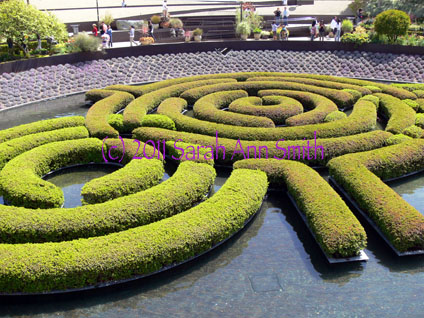
the green is hedge, the dark in between is water!, and beyond are plants on the "bowl" shaped slope in the gardens that surround this water feature.
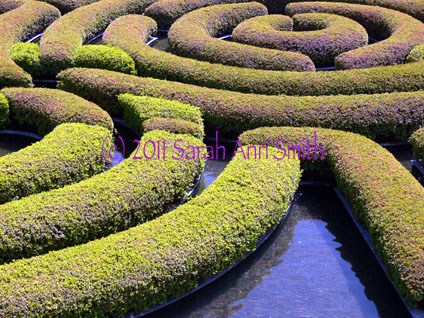
I just LOVE this rhythm and repetition....

Leaf Table Runner

Wednesday, August 3rd, 2011

This summer our younger son was invited to be a part of People to People’s trip for middle school kids to Australia!  The kids are apparently nominated by teachers, school staff, even other “alumni” of the program.  We don’t know who nominated Eli, but are thrilled he was able to go.  As part of the trip, the kids stay with a family for two nights and typically take a gift from their home state.  Eli took some Maine honey and Maine maple syrup, but we thought we’d add a special something:  a quilted piece made by Eli and me.

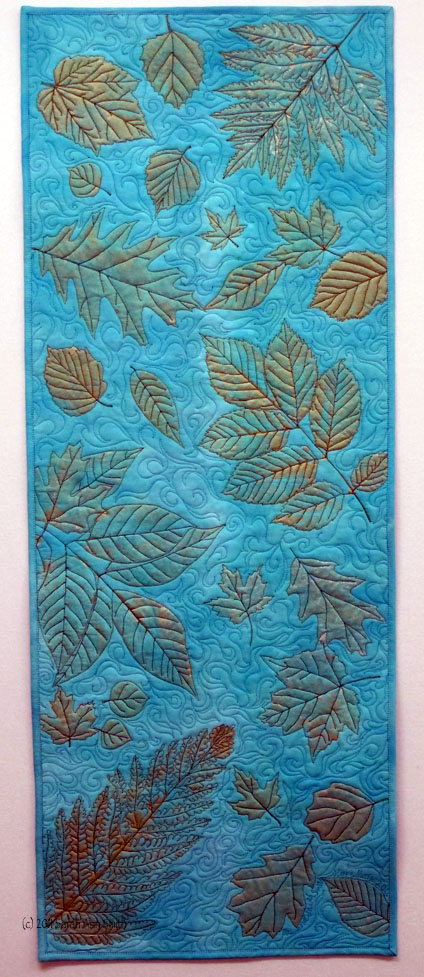
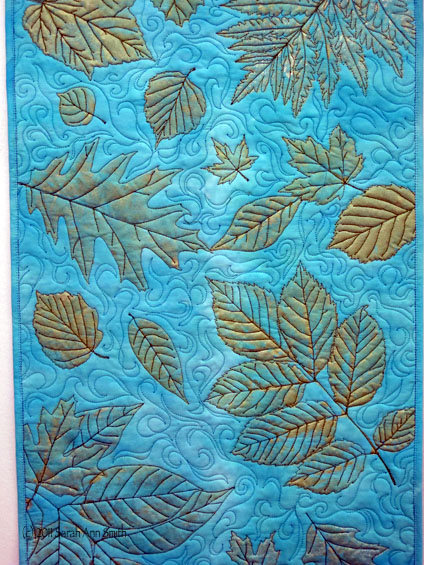
The finished piece. Aqua hand-dyed fabric by me, gold/green leaf prints by Eli and me, quilting in green by me (mom)

Eli picked the leaves from our land in Hope, we printed the fabric together, then I quilted the piece.

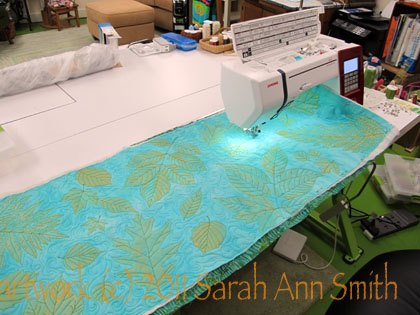
The wall-hanging/table-runner while being quilted

Originally, I thought this could be a table runner, but despite heat-setting the Jacquard Lumiere paint when I did a test rinse and dry (I like to wash to-be-used gifts so folks aren’t upset by the change from never-washed to the way a quilt looks after washing), some of the paint came off.  Wonder if I didn’t heat-set enough?  Anyway, it still looked nice….and in looking at the before and after washing pictures, maybe it didn’t lose as much paint as I initially thought.

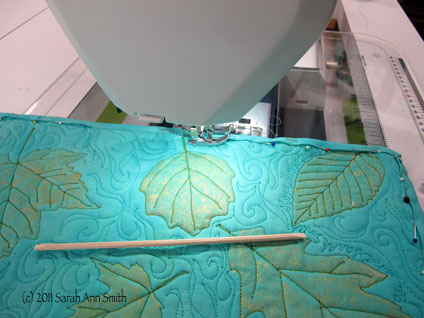
Sewing down the binding by machine; I first stitch the binding to the back, then turn to the front. The wooden thingy is (I think) a cuticle stick; it was included to help piece a John Flynn miniatures kit, and it works even better than a skewer in some instances because of the blunt tip. I will now be recommending this tool along with the skewer to my students.

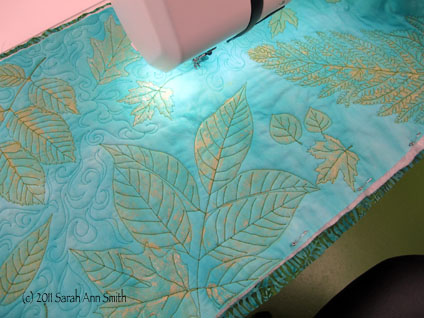
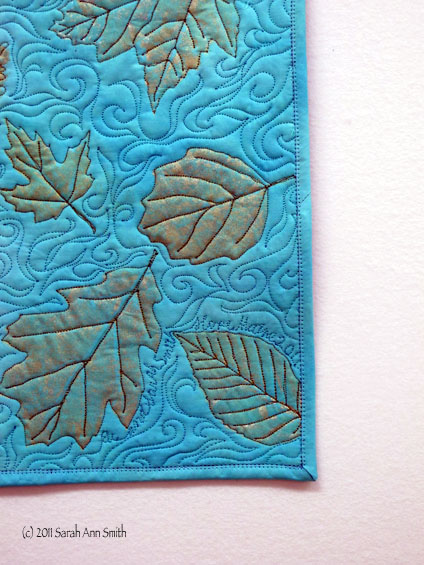
A close up of the bottom right corner; for some reason, the thread looks red in this photo...it is actually green!

Close-up, center left