email Youtube

Home
Galleries
Blog
Workshops & Calendar
Store
Resources
About
Contact

Archive for the ‘Machine Quilting’ Category

Teaching at Quilt Festival in Houston, 2012!

Wednesday, September 12th, 2012

Just wanted to dash off a quick note to tell you how happy I am to be teaching again at International Quilt Festival in Houston this coming fall!  I hope to see some of you there…perhaps in my classes!  To learn more about the classes, click here to go to the Quilts, Inc. website.  From there you can download the PDF class catalog, register (online–easy peasy) for classes and/or events.

I’ll be very busy; my schedule begins on the Monday of Quilt Market (a to-the-trade only wholesale show) and continues through the week of Festival!

October 29-November 2, 2012 – International Quilt Festival, Houston, Texas (click on images to view larger):
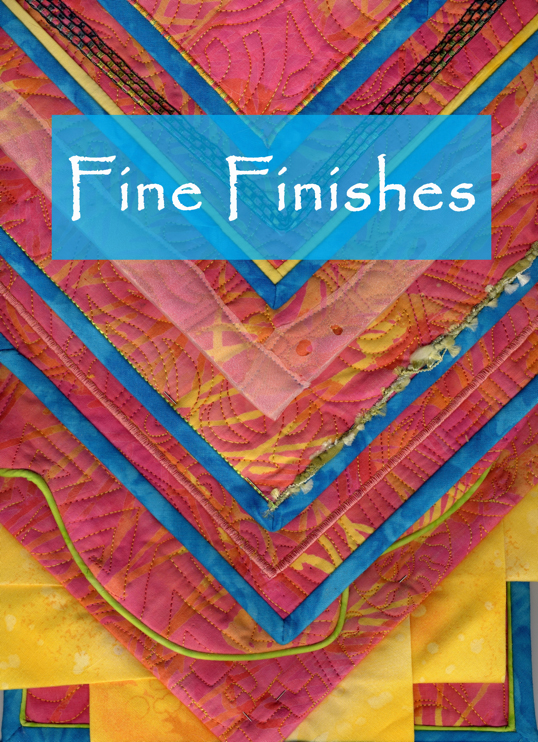
  • Monday: Fine Finishes(edge finishes including perfect mitered corners!)
    • Learn to make a perfect mitered binding straight grain bindings, double-fold bias bindings, piping, and couched yarns.  Time permitting Sarah will share how-to’s for  fabric accents, curved bindings, fused bindings, wacky raw-edge squares, and couched-yarn finishes! By the end of this class you’ll have a “swatchbook” of samples and notes including a wide assortment of styles and techniques to finish your quilts and quilted garments.  See a previous blogpost about this class here.
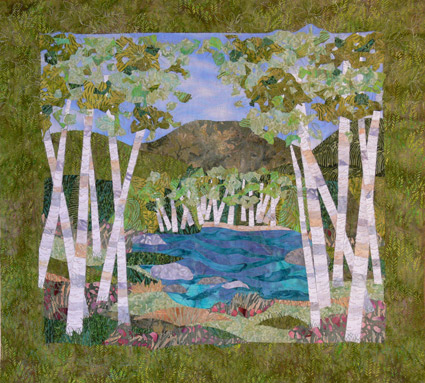
     

  • TuesdayBirch Pond Seasons(fusible applique)
    • Learn fusible applique, several techniques for “piecing” with fused fabrics, and how to make your own Birch Pond art quilt.  I’ll also cover facings as an edge finish and a range of fun ideas that will let you branch out on your own after class.  Kit fee ($20) covers the cost of the pattern and one package of white MistyFuse (except when taught in stores; then, please purchase these items from the store). See a previous blogpost about this class here.
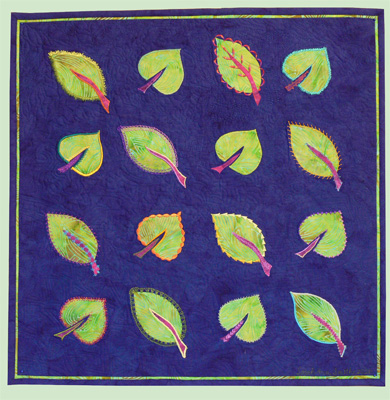
     

  • WednesdayDecorative Stitch Applique(use those fancy stitches on your machine!)
    • Make a small wallhanging or a selection of small blocks which take full advantage of all those decorative stitches on your sewing machine. Using fusible appliqué and an assortment of as many threads as you care to bring and use, you’ll see how versatile a single leaf pattern can be! The embroidery / decorative stitches you use in this class can be adapted to your choice of other appliqué methods; we will use fusibles in class so that you can make a wide selection of appliquéd leaves during the class. The project samples can be used for a quilt, a garment or home dec items. See a previous blogpost about this class here.
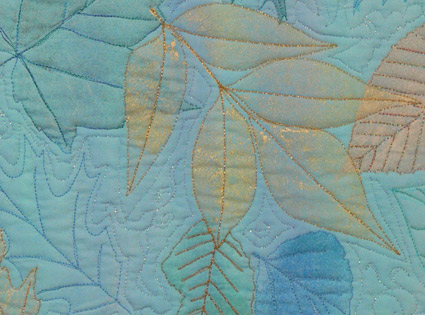
     

  • Thursday Morning Machine Quilting ForumFun with Fancy Threads
    • I’ll share some tips about using fussy, fiddly threads and how to master them with the right needle, the right bobbin thread, and a fun little project/demonstration.  This Forum starts with an overview and introduction to six machine quilting experts.  Each of us will give a 9 minutes (not one second longer!) presentation. Then we break out into 6 stations…think of it as speed-dating for machine quilters!  We’ll do a 20 minute presentation, then the bell rings and off you go to the next station/teacher.  A great way to see if you want to learn more or book a teacher for your group.
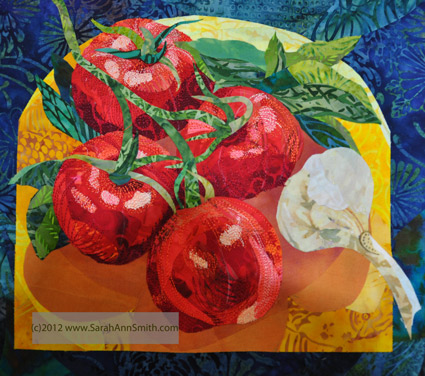
     

  • Thursday AfternoonMeet the Teacher,a free 30 minute demo on the show floor:  Collaged and Fused Art Quilts
    • I’ll show you my process for creating fuse-collaged quilts, with step-by-step examples of this small tomato-garlic-and-basil quiltlet.
 

  • Friday Morning: Friday Sampler–QuiltColoring with Thread
    • Think of your sewing machine and thread as a big box of crayons… more colors than you’ve ever had in a box of crayons!  Then learn to use your machine and thread to color your art quilts and bring them to life.  This Sampler is a ginormous room with 20 or more teachers giving quick demos.  Participants can move from station to station as they choose.  It’s a great way to see if you’d like to take a class with a teacher or even book them for your guild.
  • Saturday:  Sarah gets to relax and play today… I’m going on the bus tour to the Texas Quilt Museum in LaGrange.  Anyone want to go on the same bus?
  • Sunday:  I’ll be visiting the booths and quilts today…including one of mine that has been juried into the show (more on that later, after the judging is done and it’s safe to post pictures to the internet).

I’m so looking forward to Houston this year…hope you get to come play, too!

Artistic by Janome

Tuesday, September 4th, 2012

Janome has introduced a new longarm line/suite of products, the Artistic Creative Suite.  One of the items is a longarm (well,  a couple actually).  You can read more about them here.  Since Janome has been kind enough to include me in the artist/teacher program lo these many years, I in return make projects or write brief articles they can use on their website, blog or wherever they need.  In late spring I lent them several free-motion quilting samples for possible use in print media, and I decided one of this year’s projects I would make and just GIVE to them in return for their years of support:  a 17″ x 42″ banner with the Artistic logo (albeit made on my/their Janome 7700)!

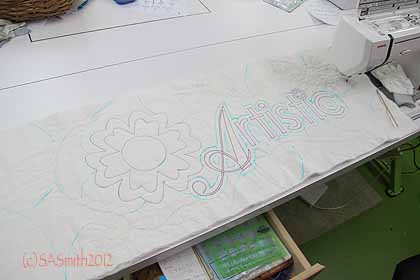
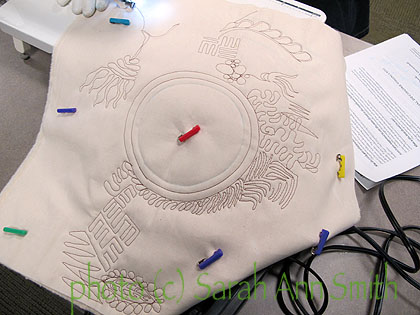
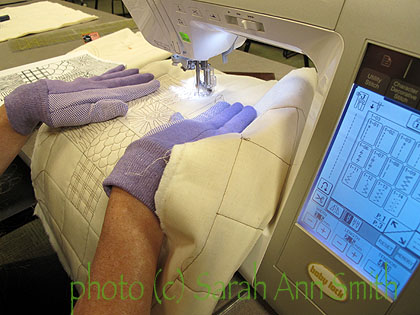
Here’s the banner while being quilted. You can see that I used blue washaway pen to mark the logo and segment the background for quilting into different filler patterns.

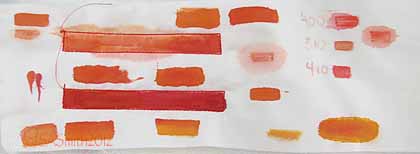
The logo is red, so initially I thought I would paint inside the lines to re-create the flower and lettering.  This was a test of various paints on the white cloth:

Testing the red color and paint for shade and for bleeding using acrilyc ink, inktense pencils, and textile paint. Ick. Some were too orange. The ones that weren’t looked like fresh blood spots. Ick. So I opted to outline with red thread only!

Here’s a close up view:

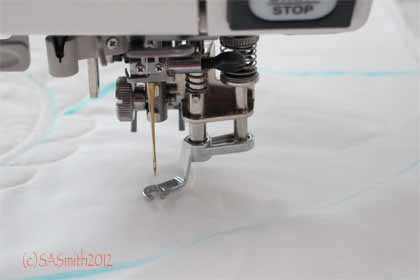
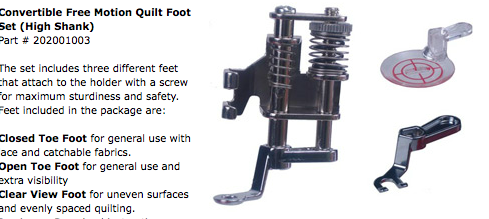
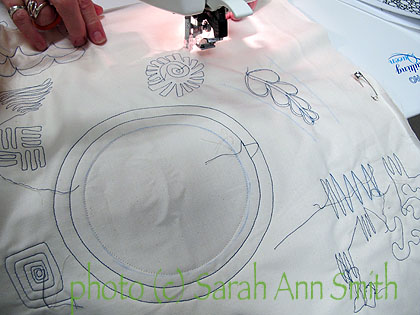
A close up of the quilting in-progress. I modified the convertible free-motion foot. It is a closed metal circle, which is perfect for some uses. But I wanted an OPEN circle (not a U shape, which is another of the convertible options, not a large clear plastic disc which is the third alternative). So I bought a second presser foot set, took out my trusty dremel and removed a small portion of the circle to improve visibility!

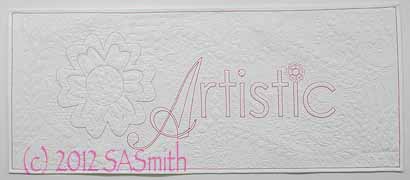
Here is the finished banner–I’ll do another post with close up pictures of the free-motion quilting!

Artistic logo banner made by Saran Ann Smith for Janome-America, with thanks for their ongoing support!

The perfect free-motion foot and a WIP

Tuesday, June 12th, 2012

Whatsa WIP you ask?  A Work-In-Progress!    In this case, one for Janome-America.  I have been incredibly fortunate to be associated with Janome since late 1983.  Usually as part of the artist/teacher program, you lend Janome things, but this time I decided I would make something to give them:  a quilted banner for their new Artistic line (longarms, software, embroidery, etc…..see all about it here).  I enlarged the logo from their brochure, then transferred that to some white fabric and have begun quilting.

In preparation for this project, I bought a second “convertible free-motion presser foot set” for the Janome 7700 I use for my quilting (one of these lovelies is included with the machine–since Janome owns the one I’m using I didn’t want to cut apart *their* presser foot!). 

The set comes with three interchangeable “feet”:  the disc (for echo quilting), the closed circle (shown attached to  the presser foot deely-bob on the left), and the U-shaped open-toe.  The two metal feet are my favorite, but when I videotaped myself quilting recently (in hopes of having a “why do I need this? how would I use these?” video on here before too long that I can share here), I tried the disc for the first time and think that I will definitely use it now!

Anyway, the two metal feet are close but not quite perfect–what I wanted was a round circle with a small opening so I could see where I’m going (as with the U-shaped foot) but that would *also* let me echo quilt without having to change the end.   So I took my trusty Dremel tool to the front of the circle and removed a scant 1/8″ segment!

My new and improved free-motion quilting foot

I LOVE IT!  It did just what I want… I can see where I am going, but I can also echo-quilt around those feathers you see in the photo above with ease.  YEAH!

And a teaser…here is what I’ve done so far… I used red thread and a triple-straight stretch stitch (and the open-toe accufeed foot) to machine quilt/outline the lettering.  I then free-motion quilted the flowers using a single line of red thread.  I want the background quilting to be subtle, but seen, so I quilted some feathers using a soft peach color.  For the feathers, I marked the spine with blue pen, then stitched the spine followed by the feathers.

W.I.P. made for Janome-America, with thanks for their support these past 8-plus years!

Next, using a wash-out blue pen, I marked curved lines randomly but with thought and an eye to design and the shapes created.  I like to separate areas of the background into smaller, more manageable “chunks” and alternate linear and curved designs from one to the next.  I also marked an outline around the lettering.  I began the background quilting using a fine 50-wt So Fine matte-finish polyester thread in white and a very small stipple around the lettering to make the letters “pop.”  Then I did one or two small sections, one with a cross-hatch/plaid, another with a sinuous vine.

The next question is:  do I paint inside the lines of the letters and at the appropriate spots on the flower?  The thing is…. the color on the logo is a slightly orange-ish red.

To paint or not to paint????

I like the orange colors just fine, but they don’t match the logo.  The Inktense pencil (on the right, numbered) didn’t work so well for what I want to do.  That means the acrylic inks (used for all the other color) are the way to do.  BUT, the red looks kinda like blood on cloth.  ERK.  The large upper rectangle and the two smaller blotches in the center are the most accurate for color-matching, but look most like blood.  The “really red” long rectangle on the bottom looks OK, but is the “Janome” logo color, not the color of the Artistic logo.  So do I color it in?  or leave it be?  If I color it, do I take creative license and use an orange?  Think I’ll run this one by my contact BEFORE I add paint…. I’d hate to spend umpteen hours quilting and then have it not work because of a wrong color choice!   Stay tuned… I’ll share again when the blue is washed down the drain and it is all finished and pretty!

QUEST Little Rock, Arkansas

Thursday, April 12th, 2012

Quilters are just so much fun… even when you travel nearly 1700 miles, go to a state you’ve never visited before, and meet total strangers, you instantly feel at home!   This week I’m in Arkansas, and on Monday and Tuesday lectured and taught for the QUEST quilters of Little Rock…boy did we have FUN!

At the end of the day in my Tame Fussy, Fiddly Threads class

I flew down to Arkansas on Sunday, connecting in Boston, Mass. and Charlotte, N.C.  As things go it was uneventful, but I must say I loathe air travel any more!  I swear the thing that will eventually convince me to stop  teaching is airports and schlepping of stuff!   That said, it was wonderful once I arrived!  I was met by Sherri D., a friend from a small internet group.  When I booked the job, neither she nor I realized I was coming to HER guild!   So I got to meet her hubby, son, and spend time with her having a couple of happy meals there.  They even sang their Renaissance Faire Celtic songs for me!

On Monday, I gave “The Decorated Quilt” lecture to a full room (always more fun!), and in the afternoon I taught an intro to machine quilting class.

Because this was only a half-day workshop, we didn't do as much with the walking foot on, but I did have them stitch a circle and learn how to make parallel lines without marking. Then we dove into free-motion designs.

Lookit the heart-feathers on the right... I showed them how to mark a spine and guidelines, then wing it to make feathers... I just love that she was willing to give it a go and not be intimidated!!!!

I can't believe this student got so much done in such a short class! There were a couple ladies that, I can tell, are really going to take off with this!

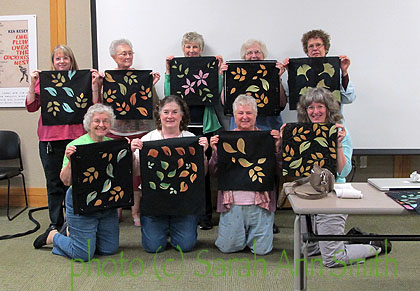
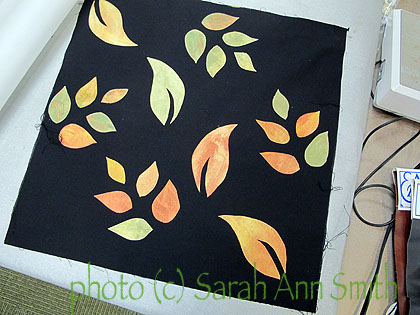
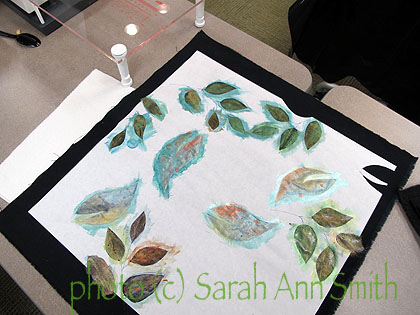
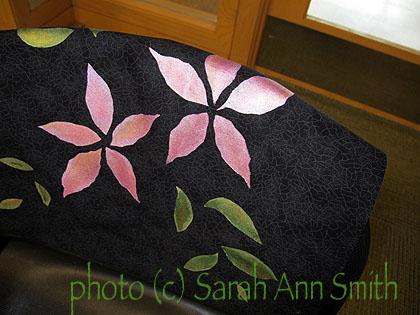
The next day was the full-day class about threads that some think of as cranky threads!  As usual for my classes, I begin with a “slide”/digital presentation that covers the “must know before you start” stuff, and also keeps me on point and not wandering off into fun but time-consuming stories!  After all, I want them to SEW!  Because using fused fabrics to do things in all my classes would be hopelessly dull, I introduce some new stuff in some of the classes instead.  Here, as an alternative to sewn or fused leaves, we stencilled these leaves with Jacquard Lumiere textile paints (you can buy them at craft stores sometimes and from www.dickblick.com always).  I encourage students to use my patterns but re-design the layout or branch out completely on their own. I was thrilled with the results!

Aren't those colors amazing? I love how she varied the tones within sprigs of leaves

Here's how we begin: cutting a stencil out of freezer paper, then ironing it to black fabric. It looks so-so at this stage, but when they start peeling the paper off they are SO excited!

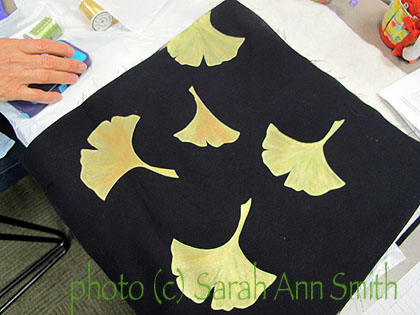
I WISH my photo were a tad more in focus! This lady used my gingko leaf pattern to make her leaf shapes, and I love how she streaked the gold onto the green...fabulous!

The subtle tone on tone black this student brought for the class is awesome for this project. She placed leaf shapes into a starburst pattern and decided they looked like flowers...isn't this gorgeous?

Luckily, program chair and absolute HOOT Evelyn C. suggested photos, so we all got together (including me in the photo…I’m kneeling on the right) and actually got photos of what everyone did! That’s the photo at the top of this post….. Can you tell we had fun?  After class, three of the ladies took me out to dinner at a local BBQ joint, Lindsey’s….OH MY!  I had chopped pork bbq, greens and potato salad, and was introduced to my first (but I hope not my last) fried pie.  It’s like a turnover…. think pie crust, dollop of (in my case) peach pie filling made from scratch, crust folded over to make a half-circle and crimped together and fried.   YUMMM!

Next:  a day with Sherri and Hot Springs Village Quilt Guild.  The HSV day is today, so I had best get my suitcases…we hit the road in about 20 minutes!

Welsh Quilting, Part 1 of 3

Wednesday, January 25th, 2012

OK…so most of you know me as an art quilter.  And some of you know that I adore Hawaiian style quilts, which are definitely on the traditional side.  You may not know that I am also a great fan of Welsh quilts and the quilting from Northern England!

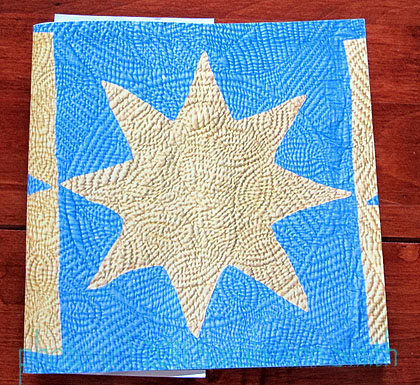
Cover of the Catalog for the 2011 antique quilt show at the Jen Jones Welsh Quilt Centre.

This catalog is for the 2011 show, “Oh that Summer Would Last Forever,” and is about 8 x 8 inches and (if I counted correctly) 28 pages.  The quilts range from pieced, to the wholecloth (which I utterly adore), to applique, and date from the late 1800s to about 1930.

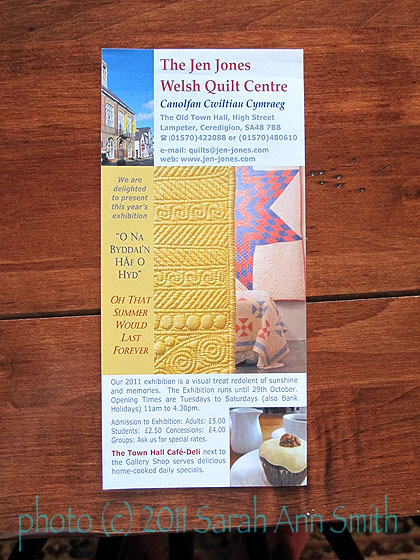
Let’s face it… if it is quilting, I love it!  Not long ago I discovered that there was an exhibit of quilts with a published booklet at the Jen Jones Welsh Quilt Centre in Lampeter, Ceredigion, Wales.  Thanks to the wonder of the internet, I googled them up, wrote and asked how much it would cost to send a copy of the show catalog to Maine.  Luckily they had just gotten a new and final shipment of the catalogs, and the cost wasn’t much (under $20 including postage); in a rare example of speedy governmental service on both sides of the Atlantic, I got the envelope in about a week despite the onslaught of holiday mail. Here’s a snapshot of the flyer for the show:

Jen Jones Welsh Quilt Centre flyer

It looks as though this was the third consecutive year for a show, so I hope I can figure out a way to get to the Festival of Quilts, with side trips now including Lampeter, Wales!

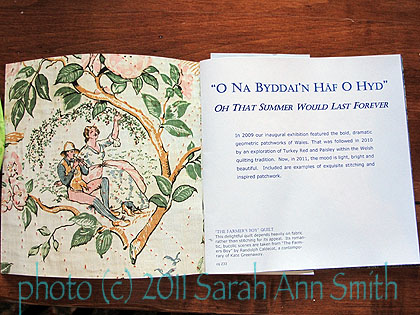
Inside cover and front page of the show catalog

and

One of the stunning quilts... just LOOK at that beautiful quilting!

A few years ago before my quilty career took off and funds were more scarce than hen’s teeth, Thelma S. kindly sent me some handdyeds from her stash.  One huge piece (like king size bed quilt huge) was dyed this glorious peach-yellow-rose; I keep thinking of it as a sunrise.  Immediately I wanted to use it as a wholecloth.  That evolved into wanting to dye a wholecloth top the same colors, but in cotton sateen like the English north country style, with Thelma’s piece as the makes-me-happy back.  I still harbor that desire, and am slowly working my free-motion skills up to the demands of the precision of a traditional wholecloth quilt.  I’m definitely a more flow-y, free-form kinda quilter!

After reading the catalog, I went to write Hazel, the kind lady at Jen Jones’ centre who took my order (they don’t have Paypal or online ordering, so I ended up sending my credit card in separate emails, you can also fax or call her) to say how much I loved the catalog, and ended up looking at the site again.  Turns out they had three more books on Welsh quilts.  One, the big one by Jen Jones written in both French and English, would have cost a fortune to mail (so I am trying to get a copy through my local quilt shop and the US distributor for that book), but ordered up two additional books:  Welsh Quilts by Jen Jones, A Towy Guide and Marjorie Horton’s Welsh Quilting Pattern and Design Handbook.  I thought I’d share those, then decided I should also share a couple other books I have on Welsh and English north country quilts.  Since the posts would be waaaaayyyyy too long, I’ve decided to parse it out into three blogposts.

The first book I bought on Welsh quilts is actually a Threads magazine book made up of articles from the magazine, one of which was on Welsh quilts and is called Great Quilting Techniques.  But there’s not a ton of information in there… it left me wanting more, much more.  A few years ago at Quilt Festival in Houston I found

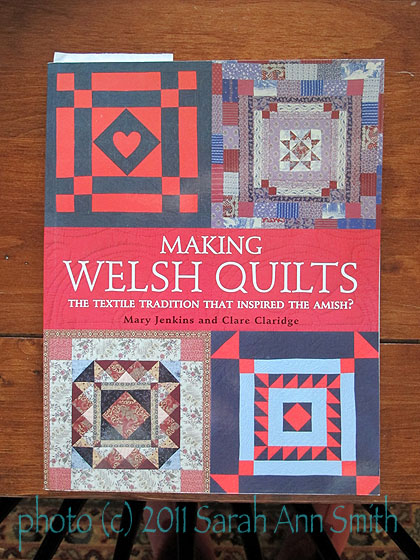
Making Welsh Quilts

Making Welsh Quilts:  The Textile Tradition That Inspired the Amish?,  by Mary Jenkins and Clare Claridge.

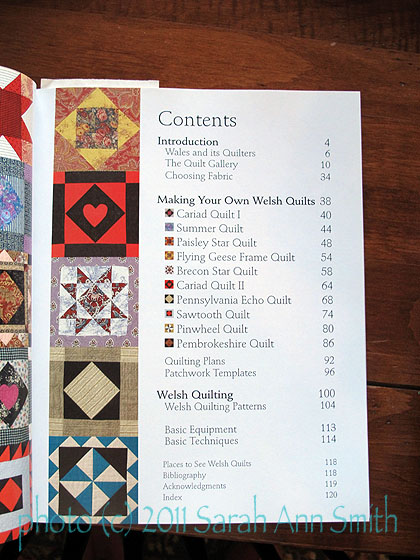
Making Welsh Quilts table of contents

As with so many of our quilt books, the shorter front half of the book is the back-story, the information, then there are lots of patterns for projects.  This is wonderful when you want a project book–alas, I always want more of the “not project” stuff!   That said, there is a LOT of great information here, as well as inspiring projects.  Best of all (for me) is the interesting section toward the end called “Welsh Quilting,” with designs –lots of pictures of lots of types of designs– that are typical of the actual quilting part of Welsh Quilts, including hearts, paisleys or Welsh pear, Leaves, Flowers, Spirals, Fans and Circles, Borders, and Infills.  The book would be worth it alone just for this section!

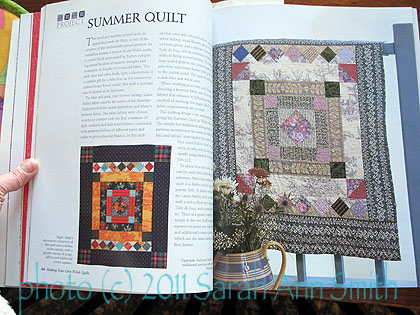
One of the pieced quilt projects

As you can see, the photography is good.  Best of all, the book is still available on Amazon if this type of quilting interests you!

I’ll be back with more of my book stash on Welsh and English quilting soon!