email Youtube

Home
Galleries
Blog
Workshops & Calendar
Store
Resources
About
Contact

Archive for the ‘art quilting’ Category

How do you spell Joy? T-I-T-A-N-I-U-M

Thursday, November 6th, 2008

Yes, I am waxing rhapsodic about an IRON!  And the cherry on the sundae…it is lime green!

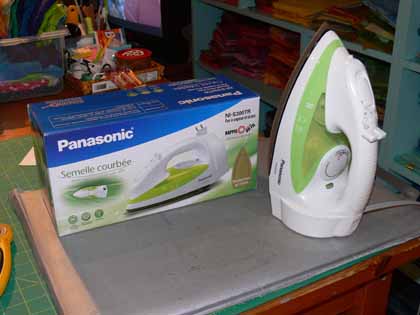
Panasonic Titanium soleplate iron

I had an iron by Panasonic with the Titanium soleplate for about 3 1/2 years before it died… I think the thermostat went haywire.  Alas, calls to Panasonic said they couldn’t repair it…it was “too old.”  Talk about a use-and-toss wasteful society!  Snarl… anyway, I couldn’t figure out a way to open it up without breaking the plastic housing, meaning even if I could find a handyman and the parts, or figure it out myself, I wouldn’t be able to re-assemble it.  Internet searches turned up the iron I wanted… In MALAYSIA!  Well, that wouldn’t work…

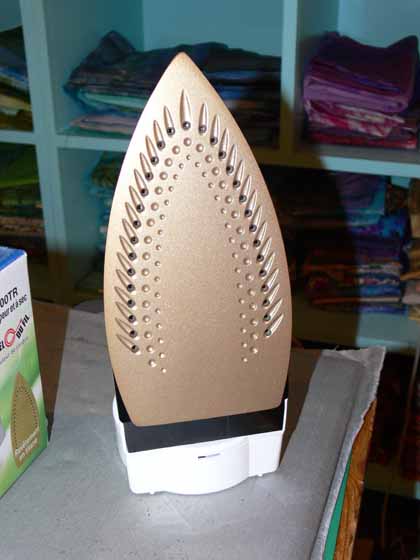
See, the problem is that MY definition of non-stick is different from most people, and different from iron manufacturers. To the companies that make irons, “non-stick” means doesn’t stick to fabric (well DUH) or to starch or spray sizing.   To ME, non-stick means you can get fusible adhesive web (Misty Fuse being my favorite, order here, or Wonder Under in a pinch) on the iron and wipe it off.  Other “non-stick” irons just didn’t cut it…only the golden-colored titanium soleplate seemed to make the critical difference.  The specifics:

Panasonic NI-S300 TR 1200-Watt Steam Iron with Curved Titanium-Coated Soleplate, white/green

Titanium soleplate iron

YES… it is TRUE!  You can put this iron down on top of fusible web, melt it all over the place onto the iron, then WIPE IT OFF with a paper towel!   No gunky mess, no “Iron-Off” brand hot iron cleaner with its seemingly-toxic fumes (that set off the smoke alarms!), no smelly dryer sheets to try to clean the iron, no scratchy salt-on-washcloth to try to clean the stuff off…. just wipe and go!

And where can you get this lime green beauty… AMAZON.com of course!  Here’s the link:

LINK TO Fuser’s Joy IRON by Panasonic

I can share this link now that I have mine…and my back-up iron is on order!  Yes, I have ordered a second, brand new iron as a back up for when this one dies…that’s how much I love these irons.

The only caveats I would add is that the soleplate can get scratched from pins, and after being dropped several times mine died after 3 1/2 years.  For $30, I can live with that.  I used to spend that much just on Iron Off or Faultless Hot Iron cleaner, and now I don’t have to breathe those nasty fumes from the cleaning products.

OK, I will now STOP raving about this wonderful iron…..

Hawaiian quilting with the Backroads Quilters

Monday, November 3rd, 2008

On Saturday, October 18th, I was fortunate to be able to teach Hawaiian Quilting by Machine to the Backroads Quilters in Gardiner, Maine.  The Backroads Quilters are a wonderful, active and experienced group of quilters.  Similar to my local chapter, the Coastal Quilters, Backroads is a chapter of the Pine Tree Quilt Guild, Maine’s state-wide guild (which rocks!).

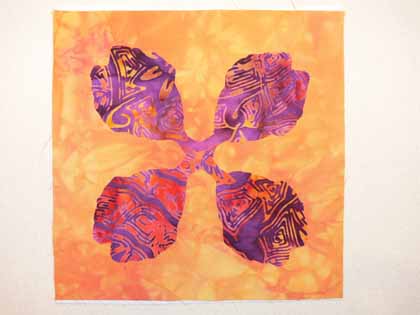
Taro, 6 inch block

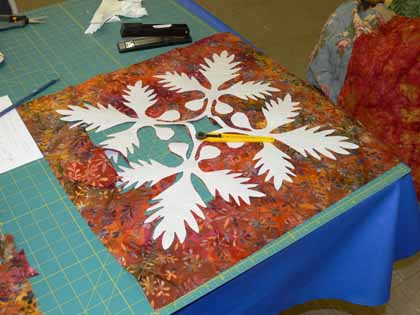
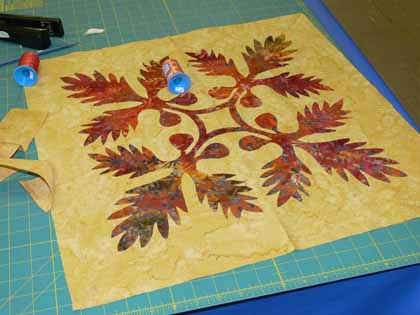
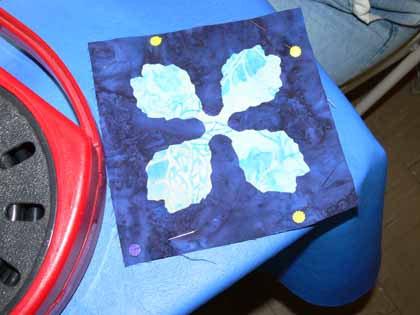
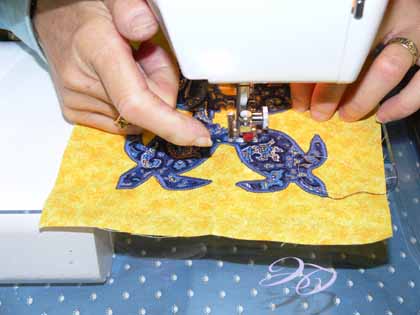
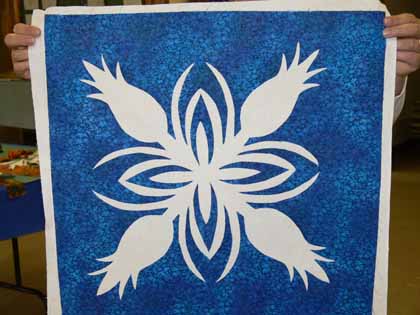
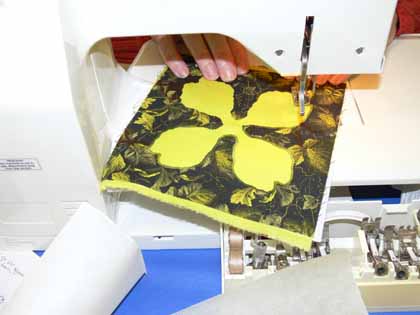
I taught my paper-snowflake variation on the theme of Hawaiian quilting.  It is easier on the hands when cutting, lets you get stems and narrow bits that are equal (or nearly) in size (if you do the traditional fold the cloth into eighths the stems can range from narrow to blobby), and–if you do fusible applique and satin stitch–gives you two blocks from one fused-up square of cloth.  For this class, I did up a new 6-inch block.  Students get two choices of small blocks, turtle or taro plant, plus they can also select one of the five designs from Nourish the Body, Nourish the Soul–you can see that quilt here. Here is the taro block with two colors of satin stitching and assorted outlining stiches:

I always love to see students take my patterns then reinterpret them in their own color choices.  The small blocks are offered because it allows a student to apply the adhesive web, cut the pattern, cut out the motifs, fuse and sew a block in one class.  Other students prefer to dive right in with a full size block, but often don’t get a lot of the satin stitching done during class because the larger blocks take more time to  pre

pare and cut.  Here is a lot of eye candy!

Ann’s block being cut out:

Ann’s block, being cut

and fused and ready for checking out thread choices:

Ann’s Ulu / Breadfruit block

Nena used a contrasting lavender thread for a nice bold outline on her taro block:

Nena’s 6 inch taro block

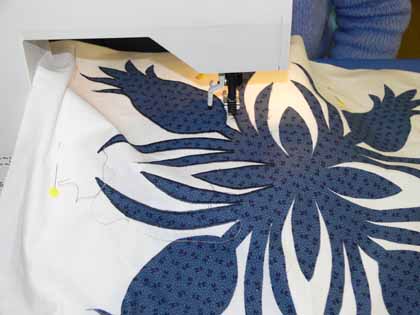
At first, this student wanted to use orange thread, but after doing several stitchouts, decided she liked the soft look of the navy.  By using the navy thread, she “popped” the small sprigged flowers in her print fabric and still gave a subtle framing to the edges of the pattern.  I LOVE this one! (OK..I love ALL of them….)

Pineapple…the subtle navy stitching is PERFECT

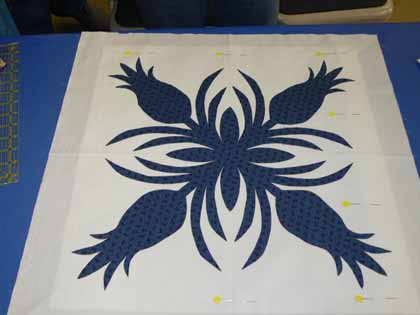
Here’s how that block looks straight on, before stitching–compare with the upper left pineapple in the photo above:

Pineapple–the one with navy

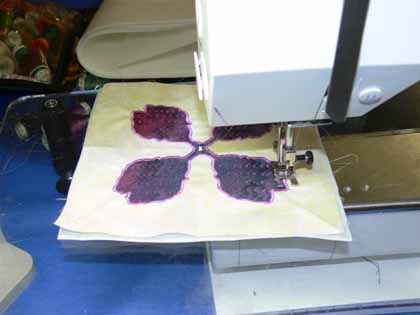
Another small taro block ready to be stitched…this is reverse applique.  I like to fuse dark on top of light so the lighter fabrics keep their light, clear tones.  Her other block has a navy taro leaf on the aqua print.

Another small taro

Sometimes busy prints can be challenging in Hawaiian quilts, but this one works so well… the Wedgwood  blue  thread picks up the lighter color in the print, yet provides a solid line to separate the print from the background.  AND she managed a few PERFECTLY mitered points!

A great paisley turtle, a 6 inch block

Another pineapple block…this is the reverse applique…the bright blue is fused onto the white:

Blue-white pineapple

Often variegated thread doesn’t work so well for satin stitching unless you WANT a really striped look.  But this thread, Blendables by YLI, is a heavy cotton with longer, and more gradually blended, color changes.  I really like how it stitched out:

Taro with variegated thread

I hope you enjoyed the class as much as I did!  Thanks to the ladies of Backroads Quilters, and to Ann and Nena who invited me up to teach and made all the arrangements.

Printing with Leaves

Friday, October 31st, 2008

A while back, I blogged about preserving leaves with glycerin and freezing for later printing (as in during winter when there are no leaves on the trees), here.  I was fortunate to be able to demonstrate leaf printing at Open Studios, part of the Make It University section of the International Quilt Festival in Houston, on Wednesday evening.  I’d like to share here what I did, and include some written directions for those who were able to stop by my table and who surf in to my blog.

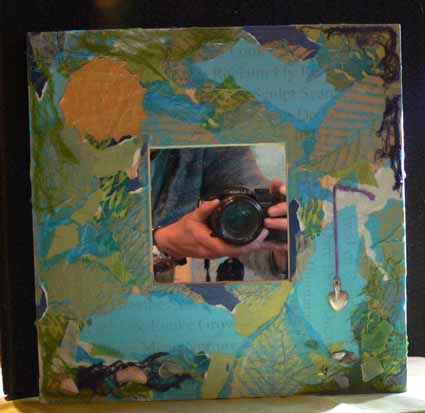
Mixed Media Mirror with leaf print tissue

Since the MIU is about mixed media, I decided I had best do something mixed media, even though that is SO not me….   When Deborah flew up to Maine and we all got together (see the post here), Hannah gave us all Ikea mirrors–the cool square ones with the wide wooden frames.  I decided I’d do a mixed media thing, since that is what Hannah loves, and do some leaf printing on paper as well as cloth.  I then used some papers from a journal kit Deborah made and gave us all one Christmas, then added a milagro Kate brought back from a trip to the southwest a couple of years ago.  Finally, I asked Kathy for some of her dyed cheesecloth–I wanted to add something that was from each of the five of us. The result is above! I LOVE IT!

Late note:  after writing this post but before taking the picture, I remembered the sea glass and shells we collected this summer with Hannah down at a beach / cove not too far from her house.  I decided to add some to the bottom of the mirror and love the addition (I used K6000 glue…the stuff that I think could hold up a roof).  I also like the reflection of my camera and hands!

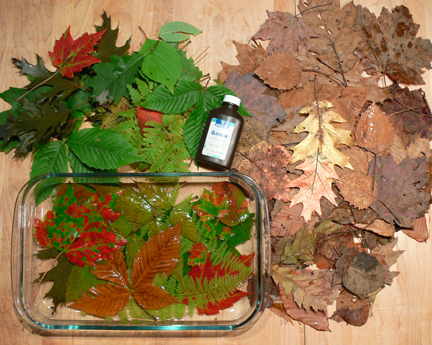
Here is what the leaves look like soaking in glycerin… I use about a one part glycerin to four parts water solution, but I’m really slapdash about it… I pour the glycerin into the lasagna pan,  add enough water that I’ll fit all the leaves.  If the water feels watery and not slippery like glycerin, I add more of the latter.  Very scientific.  Ahem.  The green leaves are fresh; the brown ones were collected brown about 4 years ago…they’ve been in the freezer all this time and still work for printing!

Glycerin leaves

To do your own leaf printing, first you need your supplies:

•    Textile paints
•    Fabric or paper for printing
•    Sponge roller
•    Soft rubber brayer
•    8×10 glass, edges taped or plastic page protector as a palette
•    Sponge paintbrush
•    Leaves, clean and dry
•    Paper towels, parchment or other paper
•    Plastic to cover surface
•    Lightly padded surface/worktable

The last time I dyed fabric, I used paper towels to mop up some of the mess.  They were so lovely I couldn’t toss them.  Then it occured to me to use them in my leaf printing and get a two-fer!

How-to:
•    Squeeze or pour paint onto glass

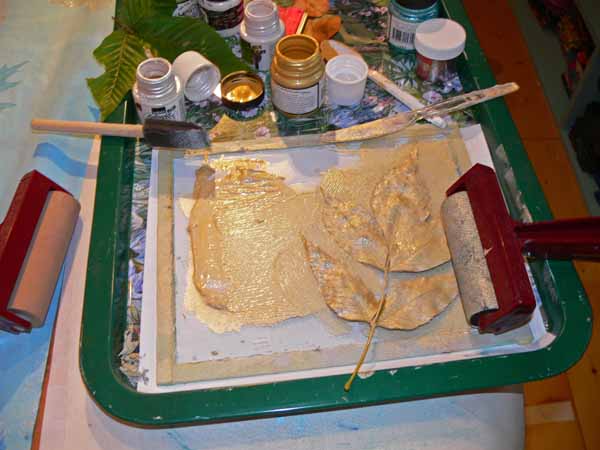
roll the paint onto the leaf

•    Roll sponge roller to create an even coating
•    Place leaf bottom-side-up on clean / dry plastic and coat with paint; use sponge roller or paintbrush (as you can see, I didn’t do that…I just squished everything onto the glass)
•    Lift leaf and place paint-side-down onto cloth or paper

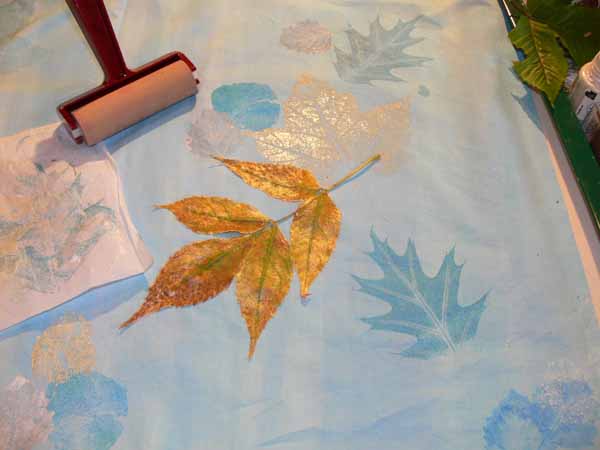
leaf on cloth

•    Cover with parchment or other paper–I used the dye-soaked paper towels!
•    Roll over leaf with soft rubber brayer (seen at left in photo above) OR press with hands
•    Remove cover sheet and carefully lift up leaf (the gold thing is the leaf with paint on it)
•    Allow paint to dry and heat-set or cure according to paint manufacturer’s instructionsThe amount of pressure applied with a roller versus your hands differs.  A brayer will produce a finer, lighter print.  If the contrast between paint and cloth/paper is too subtle, add more paint or try pressing the leaf onto the surface with your hands.

Hope you like!  Thanks to Barbara Delaney and Pokey Bolton at Quilting Arts for  the opportunity to participate in Open Studios, and to Cate Prato for inviting me to submit some ideas for the Embellishments newsletter. Click here to sign up for the free newsletter.

Moo Cards

Sunday, October 26th, 2008

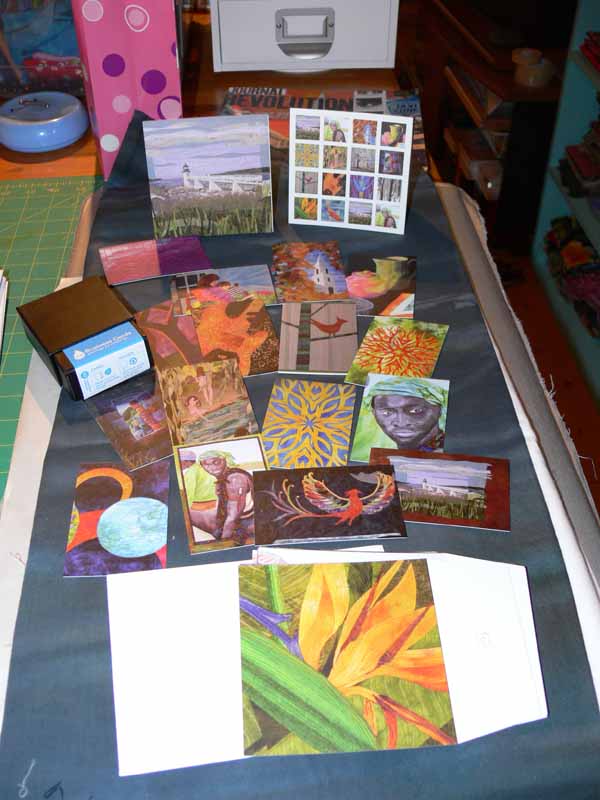
Oh what FUN!  I’ve been hearing about these Moo Cards for a while now on the QuiltArt list.  When I got the opportunity to participate in the Open Studios (blogpost here), I decided it was time for something a bit fancier than business cards made on my printer at home.

If you stop by my table at Open Studios on Wednesday, October 29th, I’ll have them there for the taking!  Also when I demo in the Misty Fuse booth on Thursday and Saturday mornings, somewhere around 11 or 11:30 ish……. See you there I hope!

Wide angle of Moo Cards

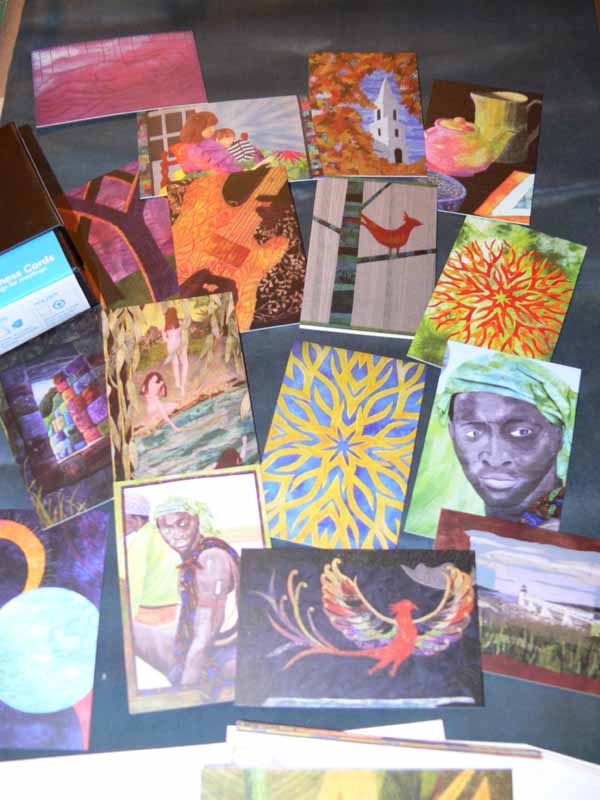
I had not realized the cards were printed in England, but even at that the cost for 200 2-sided (color both sides) business cards and sixteen easel notecards was only $120 including shipping!   The quality of the cards is astounding…. in the photo above, you can see the selection of cards (I had 24 different images, could have had more but decided just to go with these).  One side of the heavy, glossy cardstock is one of my quilts.  The reverse (and of course forgot to include that in the photo) has another photo… I used the yellow-blue Hawaiian quilt since it is also the background for my website and blog plus all my contact info in a coordinating turquoise ink.  They also include a nice black card holder box (on the left toward the back).

The notecards, seen at the back, have a square photo and a trapezoid-shaped white “wing” that bends back, allowing the card to stand up on a desk.  The sixteen cards plus envelopes cost about $25….(that was included in the amount above).  Anyway, I am thrilled with the quality, and will order from them again.  Here’s a closer view of the business cards:

Moo cards, business cards only

Here’s to hoping the cards will, eventually, lead to some contacts that might lead to some teaching jobs!

Quilts at Quarry Hill

Friday, October 24th, 2008

Wild Goose Chase at Quarry Hill

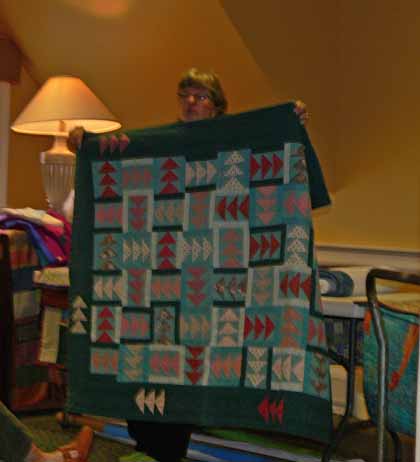
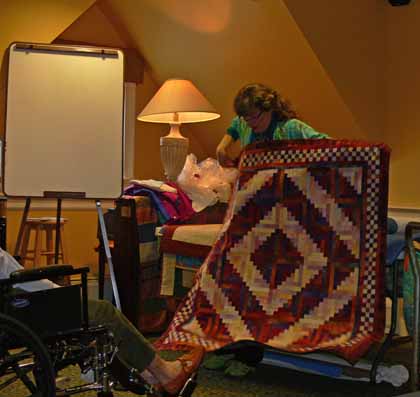
A few months ago, I did a trunk show for the Assisted Living unit at Quarry Hill, the retirement community near me and where my mom now lives.  It went so well, they invited me back already!   Patty took pictures this time, so I have a few to share of me in action.

I began with my very first quilt (photo above), from Quilts! Quilts!! Quilts!!! by McClun and Knownes, which is still one of my favorite beginners’ quilting books.   The quilt is a Wild Goose Chase variation…for those not familiar with traditional quilting, the triangles are thought to look like geese in flight.  This quilt was made TWENTY (shriek!) years ago, and is still in regular use in our living room.  It has a few rips and wear spots, some fabrics are more noticeably faded than others, but it’s still a good quilt.

I progressed through my journey as a quilter, sharing a 51×51 inch log  cabin I made for an exhibit (it didn’t get in!).  This quilt used four EXPENSIVE (but glorious) yards of Judy Robertson’s hand dyed fabrics (click here to visit her website, Just Imagination)

SAS with From Sea to Shining Sea

This fabric is why I decided to learn to dye my own fabric!  Tho, as Judy says, dyers are some of her best customers…they understand what it is that she does that is so special, and why it costs so much!

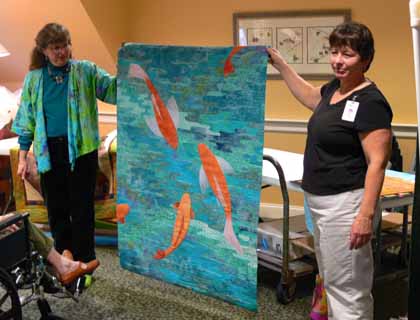
I also shared my two-sided quilt Koi:

Koi

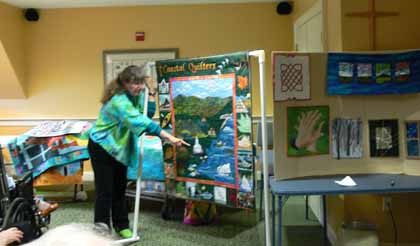
The Coastal Quilters Chapter Banner, which I designed, our group made (I did the top border, a fair part of the center and the quilting), is a perennial favorite, with folks identifying various local landmarks…the person who spots Beech Hill preserve’s blueberry barrens wins brownie points!

Coastal Quilters Chapter Banner at QHill

Like my rudimentary PVC pipe quilt rack?  Very easy… two 90 degree elbows, three long pieces of pipe, two “T” Connectors and two more small bits of pipe (four would be better) for the feet….   It was fun to go and share…now, to get ready for Houston!!!! Festival starts next week!