email Youtube

Home
Galleries
Blog
Workshops & Calendar
Store
Resources
About
Contact

Archive for the ‘art quilting’ Category

Quilt Storage, continued…

Saturday, January 24th, 2009

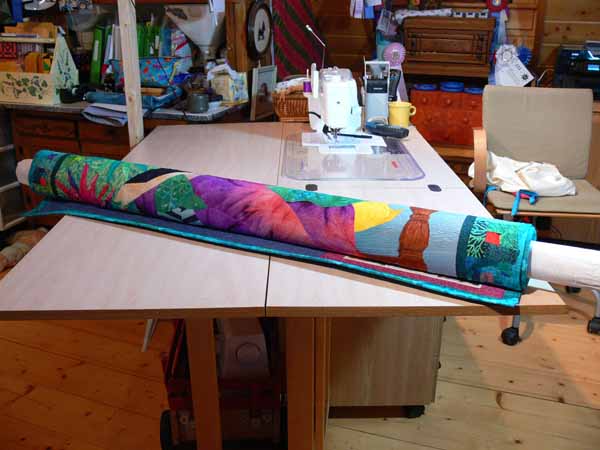
Before life ran away from me (again), I said I’d add more pics of my new quilt storage.   Previously, the quilts had been flat on the bed, which was great for the quilts but not so good if you wanted to use the bed (which meant moving about 30+ quilts I think…I really ought to count how many I’ve made, shouldn’t I?).  Anyway, remember the tubes which I covered with batting and muslin?  Next, you roll your quilt on the tube; For most of my rolls, I have two or three quilts per tube:

Quilt rolled on tube

Quilt rolled on tube

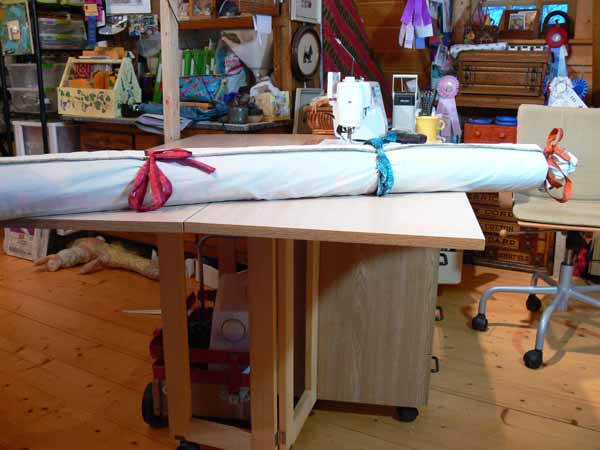
Next I made a muslin tube/sleeve  (I just used the serger, left the seams on the outside).  I cut 1 1/2″ wide strips of pretty fabrics (or rather, the “why did I buy these 14 years ago? fabrics”), folded them wrong sides together and serged to make ties.  I placed a tie about 4 inches down from either end of the tube/sleeve, and spaced about 14-16 inches apart down the center.

Quilt in musling sleeve, tied

Quilt in musling sleeve, tied

Slide your rolled quilt inside the sleeve; it is easier if you place a plastic bag over the end of the tube that goes in first.  Since both ends of the tube are open, you can just slip the plastic bag off the end once the quilt is inside.   I cut the muslin the length of my tubes (54″) plus about 2-4 extra inches (for gathering at the ends) by about 22 inches wide.  If you have 40-44 inch muslin, just cut down the center to whatever length.  The completed tube is large enough to accomodate several quilts rolled on one tube.  Once inside, make a tuck at the long seamline to fold excess muslin neatly and tie.  For the moment, I have safety-pinned a post-it-note with the contents of each roll to the end of the muslin tube so I can identify what is where…I’ll do something nicer eventually.

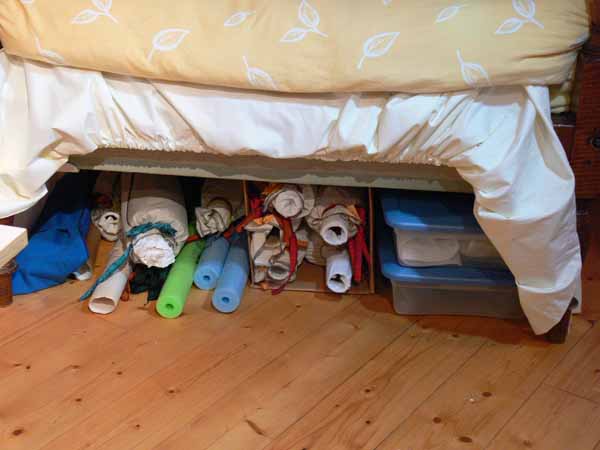
Under the bed, I have two tall-lamp-moving boxes (only one in this picture, added the second one later), plus some under-bed storage boxes from Target.  The quilts that are rolled on the tubes are in the lamp-boxes (in this picture, just to the right of center) and over on the far left.  The second lamp-box went on the far left.

Rolled quilts and boxes under the bed

Rolled quilts and boxes under the bed

You can see swimming pool noodles, which are great for shipping quilts rolled–lightweight, soft, cheap if they are lost.  The blue thing on the far left is a long-skinny bag I made from canvas to carry my make-shift PVC-pipe quilt display stand (too heavy for air travel, but was cheap and works great for anywhere I drive to teach or lecture).

On the right you can see two storage boxes; there are two even larger ones in back.  I bought these for about $15-18 each (ouch!) at Target.  The largest boxes (in the back, not visible) are 42 inches long on the inside, meaning that some of my quilts that need to be carefully folded and not rolled (the Bijagos Warrior quilt, for example, is padded and thick, so doesn’t roll well, and the Autumn on the Village Green has cut copper leaves on it!) can fit inside with only horizontal folds.

My teaching samples are on the small side–26 wide or narrower.  I made several carrying gizzies (I’ll do a post on them some day….) and roll my class samples on them.  They are all in one box for easy access when packing to teach.  Finally, small quilts like my journal quilts (both the smaller 8 1/2 x 11 inch ones and the larger 17 x 22 inch ones) also fit inside these boxes.  I asked the conservators and textile specialists on the quiltart list, and the consensus was that as long as the actual quilt doesn’t touch the plastic…line with acid-free tissue or cloth…and you open the boxes periodically to refresh the air… that it is fine to store in boxes (which will also protect them from smoke damage should there be a smoke incident).  And when the bedskirt is down (not tucked up under the duvet), I don’t see the stuff!

Some day I’ll have my dream studio with a massive wall-long closet.  The doors will be design walls, I’ll have storage rods on the back for the quilts, and all sorts of cool things. And I’m going to make laminated tags using business card software with a picture of each quilt to replace the safety-pinned post-it note with the roll contents.  In the meantime this works quite well for me.  I’ve been under the weather (number one son brought home evil germs and shared…), and yesterday I luxuriated in lolling on the bed in my sunny studio with a book…for about 20 minutes. Sigh.  It was nice while it lasted.  Then I got to play mom-taxi.  Several times.

Storing Quilts

Friday, January 9th, 2009

Once again, I have not fallen off the face of the earth…instead, I’m FINISHING UP the manuscript.  There is a ton of tedious paperwork and such, so I’m liable to be scarce for a few more weeks, but I’m here.   So, I thought I would share what I did to store my quilts.  They used to be stored in a fabulous place:  on top of the guest bed in my studio, under the duvet.  This meant they were flat, accessible, safe (sorta) from cat hair (it migrates EVERYwhere).  But, it also meant that no one could so much as sit on the bed, let alone come hang out in my studio and rest on the bed.  And Joyce came to visit in December and needed to SLEEP in the bed.  That meant the quilts needed to move.

Umpteen years ago I took a class with Heather Waldron Tewell, co-author of one of my favorite books on quilting line and design, A Fine Line (written with Melody Crust).  She described her storage:  upstairs, under the eaves / in the kneewall…. you know on second floors how you get a sloping roof that comes down to the floor, so builders will drop a short wall that is maybe 3-5 feet tall, then there is a space behind it?  Well, she put in doors instead of drywall and made a device similar to those used to display home dec fabric, which is sold on tubes (not bolts like quilting fabrics).  She stored her quilts rolled on tubes, covered in a sleeve, then the tube slides on a rod (like a closet rod) that sets into “U” shapes cut into some 1×3’s at either end of the closet. I’ve wanted something like that ever since.

Of course, I don’t HAVE a closet to make such a lovely storage space.  So I improvised, but first I made the rolls.  I’ll share the second part of this info in the next post….  Anyway, the rolls.  About five to six years ago, I worked for an interior designer doing high-end home dec sewing.  I was able to snag about a half dozen sturdy cardboard tubes.  So I FINALLY got around to making them suitable for rolling quilts for storage.  The cardboard in the tubes is very acidic, which of course isn’t great for quilts, so you need to cover them.

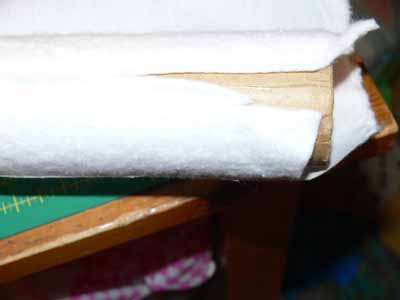
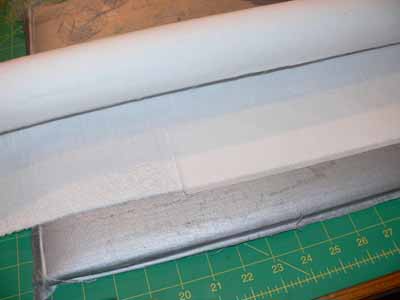
To cover the tubes, I wrapped them first in a round of batting, then used an inexpensive cream cloth (some was muslin, some was an inexpensive but nice cream cotton).  For the first few, I used hot-glue to glue the batting to the tubes, but had forgotten that hot glue leaves a hard line.  For later ones, I simply used a basic glue stick!

Addendum:  Carol Ann Sinnreich told me that she learned from others to wrap the tubes first in aluminum foil, then do the batting and muslin.  This prevents outgassing from the yucky stuff in the cardboard tubes.  I’ll do that on any future ones, and may think about peeling these apart and adding the foil at some point…just not too soon! Too much to do….

Batting on tube

I cut the cloth about 5-6 inches longer than the tube, and the circumference of the tube plus about two inches.

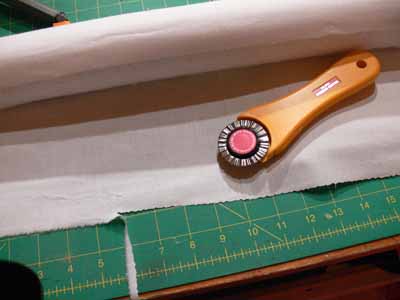
Fusing Misty Fuse to the edge of the tube-wrap-cloth

Fusing Misty Fuse to the edge of the tube-wrap-cloth

On one long edge, I applied Misty Fuse, a heat-activated fusible web (and my favorite fusing product by FAR), then trimmed the edge with a zigzag cut.

Trim the edge

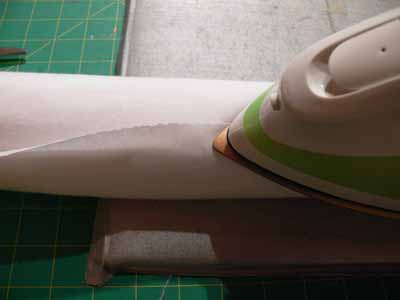
I wrapped the cloth over the batting, then fused it closed with the iron.

Iron fabric around tube

In a couple days I’ll show you the finished tube, the muslin dust-sleeve, and where I’ve got them stashed until I win the lottery and build that dream studio!

PS—please excuse any weird formatting.  My webhost has changed the WordPress software, and it isn’t cooperating very well.  The photo loading stuff is different, I can’t find instructions anywhere, and formatting is all goofed up…sorry!

Taking the Tension out of Tension, MQU Winter 2008

Tuesday, December 30th, 2008

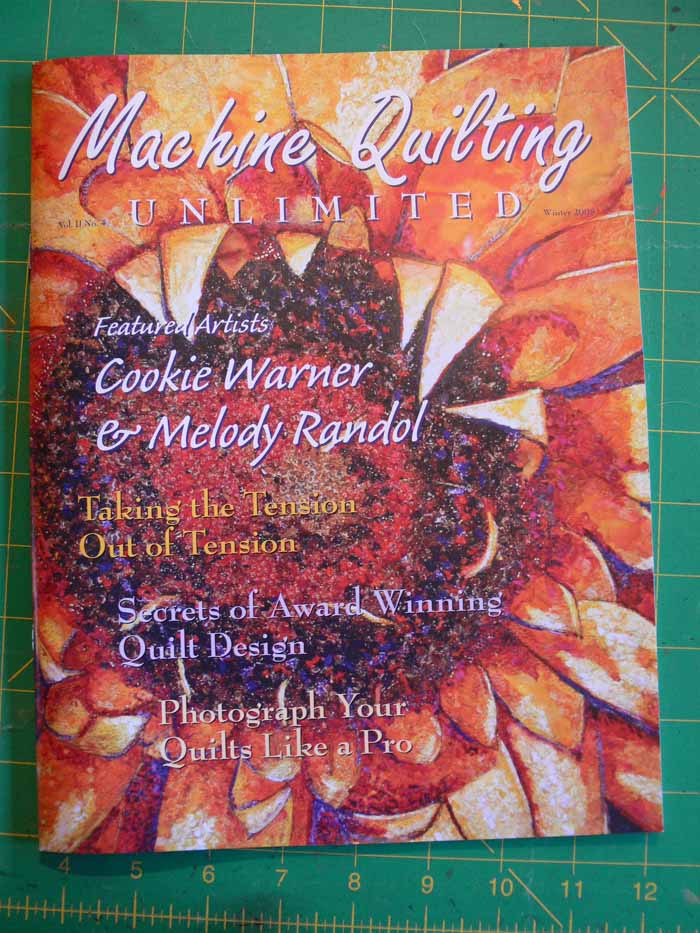
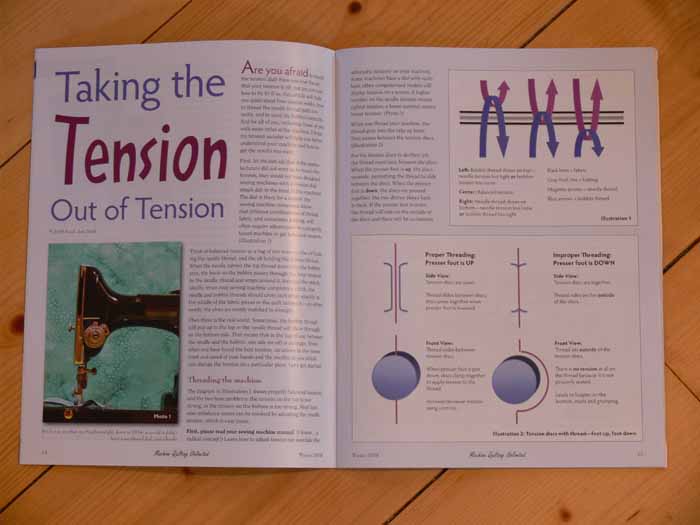
My second article for Machine Quilting Unlimited magazine is now out, and I’m really thrilled that I’ve been able to help folks.  Rayna Gillman (blog and website) was so kind in sharing on the QuiltArt list that I’d helped solve a tension problem she’d been having, and Gloria (my /designer and art quilter extraordinaire) actually said she made a copy to tuck into her sewing machine manual…Wowie Zowie!  Here’s the cover of this issue:

MQU Winter 08 cover

My article made the cover:  Taking the Tension out of Tension (I can’t take credit for the title, but I love it! thanks Kit and Vicki)

Here’s the opening pages (clickable for a larger view):

Beginning of article on tension

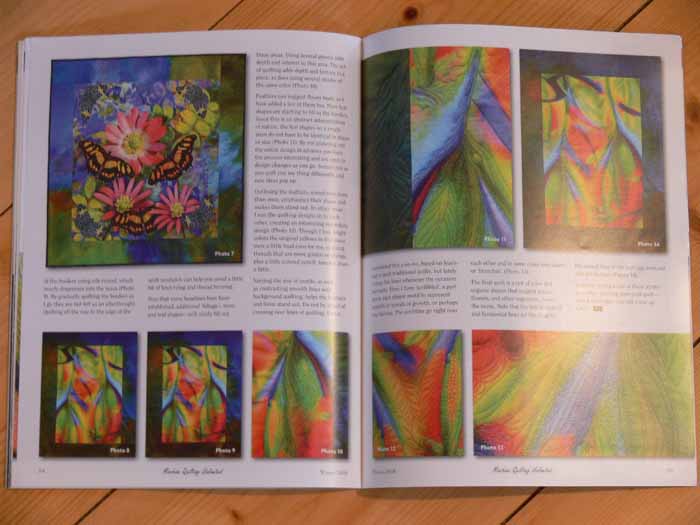
There were a number of good articles, including two on Colorado art quilters, both of whom were awesome… Here is the opening to one of those two articles:

*****oooops…I can’t share the pictures of these articles…sorry….. due to copyright laws

Oh how those quilts make me want to get into the studio and play and create!   There are lots more pics in the magazine (hint hint).

And Diane Doran from the QuiltArt list (among other places) did a great article on design, specifically how she develops a design.  I really liked the sequence of photos in her article showing how she begins with a digital image, then builds on it one step at a time:

Diane Doran

*****Photo included with Diane Doran’s permission

For subscription information go to www.mqumag.com.

I just finished the draft of my next article for them, on the use of contrast in line.  I’m going to do a series of articles on how various elements and principles of design apply to machine quilting.   I’m on a mission I think to convince folks that art isn’t impossible to learn, and that it’s really actually easy and fun to learn and apply.   So the article for the next issue talks summarizes the elements and principles, then talks about line (since of course machine quilting is about creating lines) and how contrast helps lines stand out (or not).  What fun… getting to write about quilting!  Now…kids on vacation, time for quilting evaporated…ditto for time for blogging!  Talk to ya later!

Book Review: How to Photograph Your Life

Sunday, December 28th, 2008

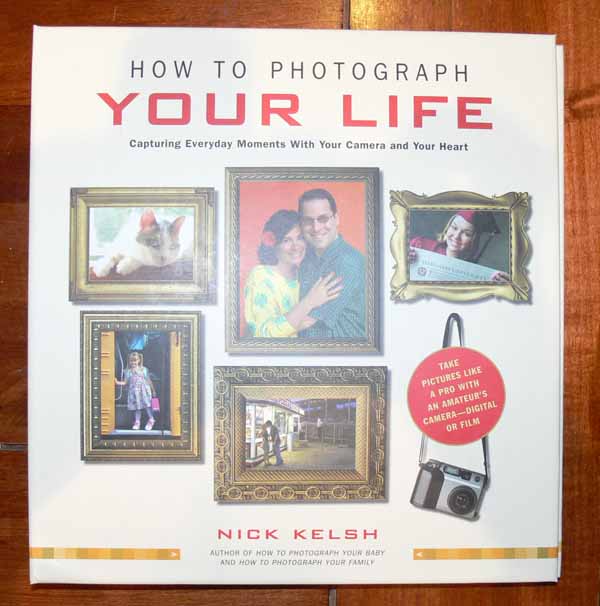
Bk cover

Quilting teacher extraordinaire Jan Krentz recommended this book to me back in April; I bought it not too long after that, and re-sized the photos for blogging back in September… give you an idea how swamped I’ve been? Anyway, Nick Kelsh has written numerous books; after getting how to Photograph your Family from interlibrary loan (this book wasn’t available), I decided to order this one from Amazon since the price was modest (and it’s a business expense!  self-education for teaching composition and design!; alas, I just checked and something crazy has happened to the price…like over $50 each!  Look for it in a library or used book store, or give it a wait and see if they re-print it and it is once again about $16.

Well, the book applies to quilting as well as photography, and in a nutshell his recommendations are:

–don’t use the flash if you can possibly avoid it, and

–crop!

The latter, of course, is the part that best applies to quilting, but the book in itself is about composition and design, albeit in an oblique way.  Kelsh is a professional photographer, but he set himself a challenge:  to use his wife’s pocket digital camera to shoot ALL the photos in this book, thereby proving that even with a decent but not exorbitantly expensive camera one can, with a trained eye (including self-taught) and practice, take great pictures.

Note:  all photos are clickable for a larger view!

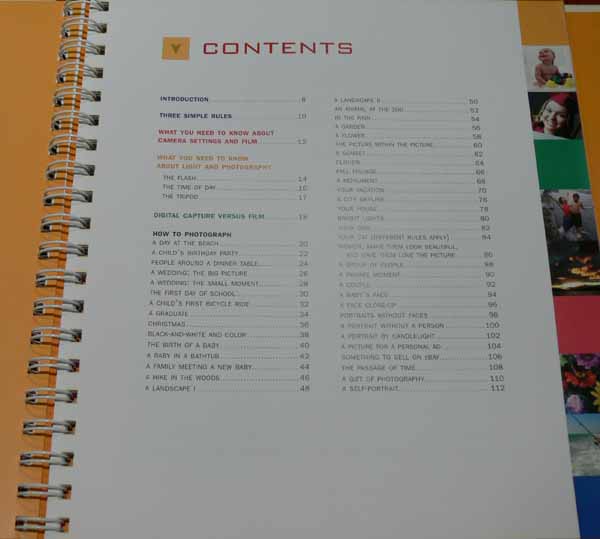
Table of contents page, Kelsh

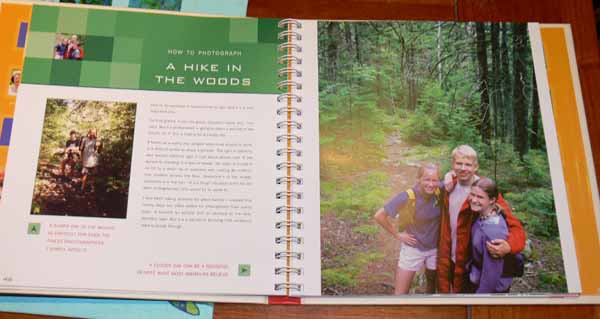
Kelsh shows a wide range of typical sorts of photos, using what the average Jane might snap, and then how to improve the photo (remember the mantra:  CROP!):

example 1, kelsh

In this picture, on the left you have the typical shot taken from just up the path, with the subjects hard to see due to the dappled light from the shadows.  In the photo at right, Kelsh moved the subjects to where they are all in the same light (not dappled) and radically changed his position (up a rock or a tree I think) so he is shooting down on them.  Better!

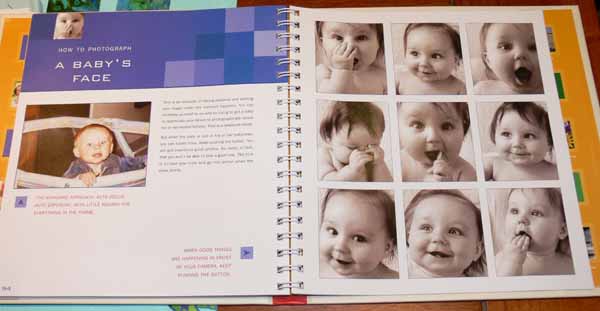
example 2, kelsh baby

This page shows another lesson I learned at least 25 years ago:  take LOTS of pictures, and you’ll end up with a gem or two (or nine).  In this example, the photo on the left has a small bit of sweet baby’s face, and lots of playpen and wall.  In the many photos on the right, you have almost ALL face… and a wide range of a sweet baby being a sweet baby in all their goofiness.  With digitals, we are blessed… it used to be financial agony deciding whether or not to snap the shutter, using up expensive film and more expensive developing.  Now if the shot is lousy, just delete!  So get yourself a large capacity card, and snap at will!

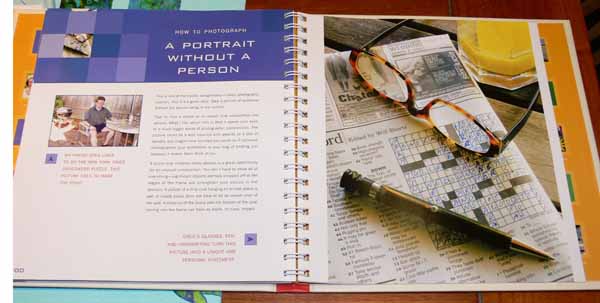
example 3, kelsh portain minus the person

In this example, he shows us how to take someone’s portrait…without them in it.  If you changed the glasses on this one, and the pen, it could have been my dad!

The book is easy to read, and it doesn’t delve into serious discussions of design, composition and whatnot, but it still manages to convey the essentials of composition and design.   If you can get a hold of a copy for a reasonable price, it is worth it, or check your library or interlibrary loan options.

Count your blessings instead of sheep….

Wednesday, December 24th, 2008

If you’re like me, you’ll hear Bing Crosby’s voice as he sings to Rosemary Clooney on that one…. For those of you who don’t love the old movie White Christmas, Bing and Rosemary are the older of a pair of war buddies (that would be Bing, to Danny Kaye’s younger corporal) and sisters (with actress Vera Ellen of the impossibly tiny waist and very fast dancing feet).   Theirs is a somewhat rocky courtship, aided and abetted by Danny and Vera’s characters.   Rosemary goes to get a sandwich at the inn, and Bing shows up to make her a liverwurst sandwich with buttermilk (BLEAH…how could anyone think that tastes good?????).  She says she can’t sleep, so of course Bing breaks into song about counting your besslings instead of sheep, and the refrain ends “you’ll fall asleep counting your bleeeeeeesssssss-iiiiiinnnnnnngggggggggs”.

So I decided I should count some of my blessings:

1.  My family is alive and well, and we are blessed to be together.

2.  Mom agreed to move to Maine, and now lives 5 minutes instead of a continent (or more as it has been in years past) away.  Best of all, she has become nice again, and I have my mommy back.  The dementia is getting worse, but she is much kinder,  she gets my sense of humor, and best of all she seems to be happier!

3.  Joshua is alive, well, fully recovered, and seems to have (we think/hope/pray) passed through some of the more tumultuous moments of the teen years.  He is a responsible employee at his job, and is bright and learning.

4.  Eli is a stupendous student, cool kid, devoted son and brother, and great dog-parent to Pigwidgeon.   He is (hooray!, we’ve bred two of them) an inveterate reader, curious, polite, kind, interesting… OK I’ll stop now.  I know I’m biased.  That’s my job.

5.  Paul and I celebrated 25 years of marriage, and we’re still bubbling along. As in all marriages that last, we are always there for each other, and he is my best friend and the first person I go to for most anything (well, except for quilting advice!).

6.  Pigwidgeon (the pug) and Thumper (the 26-toed calico cat) follow me around the house and bring furry love, joy and hair to my life.

7.  Pigwidgeon makes EVERYone, and I mean EVERYONE, smile.  Just last night, when I took him out for nighttime walkies, he had me laughing out loud as he cavorted and chased a snow clod!

8.  Joyce came to visit; my late half-brother’s wife, Joyce is like a sister to me.  I remember her from when my family and I returned to the US when I was six, and she has been a part of my life ever since.  T.J. gets major bonus points for bringing the best person in the family into it.

9.  The Frayed Edges:  Kathy, Kate, Deborah and Hannah make my life and Maine a better place to be (even tho Deborah  is currently in the wilds of Texas).  They are friends, artists, confidants, and just plain FUN and interesting and wonderful.

10.  Marie is one of those friends that will last through the ages… you know how maybe six or seven times in your life you meet someone and you know you will be friends forever, no matter where you are?  Well, Marie is one of those!   Even tho she is still in Washington State, and I am in Maine,  we are still close….and even tho we can sometimes only keep up by visiting each others’ blogs (hers is here), we are always in each other’s hearts.

11.  The Coastal Quilters:  my local quilt chapter is filled with wonderful, fun, diverse, interesting women (no men yet in the group).

12.  QuiltArt ( click here for the website) is the most wonderful online group (like an extended family spread ’round the world) of kindred (and not so kindred) souls, all of whom love art quilts.   QA was my door into art quilting, my master’s degree, my continuing education, the source of untold friendships and inspiration and ideas…. it’s a great place to be.  Thanks to List Mom Judy for creating such a home, to all who make it the best place in cyber-space….

13.  Kit Robinson, on both the QuiltArt and Janome 6500/6600 groups (the latter is a yahoo group), who invited me to write an article for Machine Quilting Unlimited magazine.  In talking over the proposed subject, tension, I mused that really I needed to write about needles first, because you need the correct needle to get the correct tension.  One article turned into two, then….

14.  Vicki Anderson, publisher of MQU and the sister-magazine for long-arm quilters, Unlimited Possibilities, asked me to be a regular columnist for them… WOOOOHOO!!!! For the first time since 1997, I have predictable income with each quarterly article.  Best of all, I get to write about quilting AND get paid for it… life is truly wonderful.

15.  Quilting Arts magazine accepted two of my ideas for short lessons in their e-Newsletter, Embellishments; not only was I paid a modest sum, but they put my name under theirs and in front of something like 50,000 subscribers!  WOW…. THANK YOU Pokey Bolton (top editor and big kahuna, even tho she is a tiny little thing!) and Cate Prato (editor) . For info on how to subscribe to the e-Newsletter, click here.

16.  Quilting Arts / Cloth Paper Scissors  invited folks to submit ideas to participate in Open Studio, where you get to demonstrate a technique, at the large Quilting Arts zone at quilt festival in Houston; they invited me to participate!!!!   I am thrilled at their confidence in me, and I had a blast.  I hope to be able to do it again.

17.  Festival in Houston:  I get to see great quilts, meet old and new friends, see folks I have originally “met” online mostly on the Quiltart list.   Thanks to Karey Bresenhan and her hard-working cast and crew for all they do for all quilters…. Karey is truly in the business of making dreams come true for so many of us!

18.  Iris Karp of Misty Fuse has been so kind and generous, and I had a ball demonstrating in her booth in Houston….. would LOVE to do it again!   Thanks Iris!

19.  SAQA, the Studio Art Quilt Association. Despite the somewhat steep annual dues, I decided a while back that I needed to join.  Boy was I right!  I’ve had at least one exhibit opportunity thanks to being on their site, and think that at least a couple of the work opportunities that have come my way have been due to being in SAQA (and on their website).  Then, last Christmas Marie (see #10) sent me a copy of Portfolio 14, a SAQA publication that is aimed at galleries, museums and collectors.  I knew within about 20 seconds of seeing it that I needed to upgrade to Professional Artist Member status (if they’d take me) and be in the next one.  Well…. I was accepted as a PAM, and got into Portfolio 15 (now available for sale here) and (drum roll) a thumbnail of my quilt even made the back cover!

20. As a result of adding some information to the SAQA wiki (an online information data base for members), I came to Lisa Chipetine’s attention, and she very kindly invited me to be the fifth person in an online Critique session with quiltartist Sandra Sider.  WOW!   I can’t believe how much I learned, perhaps even more so from listening to the comments and discussion about other quilts being critiqued.  If you’re interested in learning more about the upcoming critique sessions, click here.

21.  The manuscript is nearing completion!  More on that when I can!

22.  I was FLOORED when I pulled up Creative Quilting with Beads early this year on Amazon.com  looking for a publication date…as longtime readers know, I have two projects in the book, and Kate (1), Kathy (1) and Deborah (3!) also have projects.  The COVER was MY pomegranate notebook! Talk about a pipe dream come true!

23.  About this time last year, I wrote a quick note to Bonnie Browning, who is a big kahuna at the AQS quilt shows, related to a posting she had made on the QuiltArt list.  She must have clicked on my signature links and visited my website, and she invited me to apply to TEACH for AQS!  The kicker:  this was Sunday, and applications needed to be in her office Monday.  I quickly turned my brochure into a PDF and e-mailed her all the info.  The result:  Bonnie and AQS took a chance and hired me to teach in PADUCAH (Paducah and Houston are the two biggest, most prestigious quilt shows in the US and honestly, in the world!).  I had a ball, student reviews were good, and I did it….hoooray!

24.  Lowell Quilt Festival (Massachusetts) also hired me to teach, and I had a ball there, too.   That show is only about 4 hours from me, so I was able to take LOTS of extra goodies since I could drive.  I had the most amazing time, and they treated the teachers like royalty!  I learned so much from so many amazing teachers…. Nancy Prince and Joanie Zeier Poole were incredibly generous in sharing tips and tricks of teaching on the road…. all of us who ate dinner together… totally fantastic!

25.  Blogging and the internet and all of you!  One of the joys of my mornings is checking flags…. I use a couple of sitemeters, and I LOVE looking at where people are who visit my blog… the sitemeters don’t tell me your e-mail, but they do give a location (more or less… depending on the company, my address in Camden shows up as Camden, Rockland, Tenant’s Harbor….at least it is a general location).  I’ve now had visitors from over 129 nations and every state in the US and almost every province in Canada.  WAY COOL!   I love how the internet has brought us closer, how I can e-mail my friend Lisa in Sydney (literally almost halfway ’round the world), hear back a moment later, reply, and carry on an instant conversation.  I love how those of us who worked in isolated splendor can now share and learn, so THANK YOU for being out there and surfing in to here!

I could go on, but I will stop here, or I really will put all of you to sleep.

Thank you and blessings and peace to you and all of yours,

Sarah