email Youtube

Home
Galleries
Blog
Workshops & Calendar
Store
Resources
About
Contact

Archive for the ‘art quilting’ Category

Cookie? PLEEEZE cookie!

Wednesday, January 20th, 2010

Deborah Boschert, one of my Frayed Edges mini-group, is also part of a wonderful project called Twelve  x 12.  They have a blog here, and a website here, and even better…..well, not sure if I can tell you about it yet but there is something really cool coming in their future!   So hold on to that thought.  Anyway, Deborah now lives (sob we miss her) near Dallas, and the Dallas Quilt Guild is hosting a 12 x 12 challenge.  The rules:  anything goes as long as it is 12 by 12 inches.  Deborah invited us to participate and send quilts to hand in the show this March.  Well…..

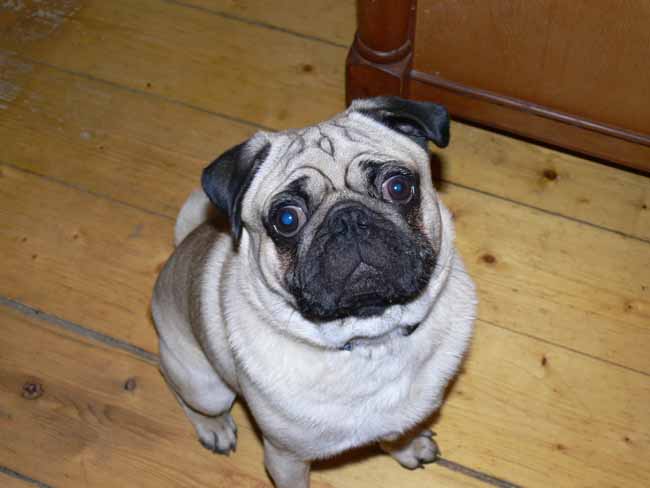
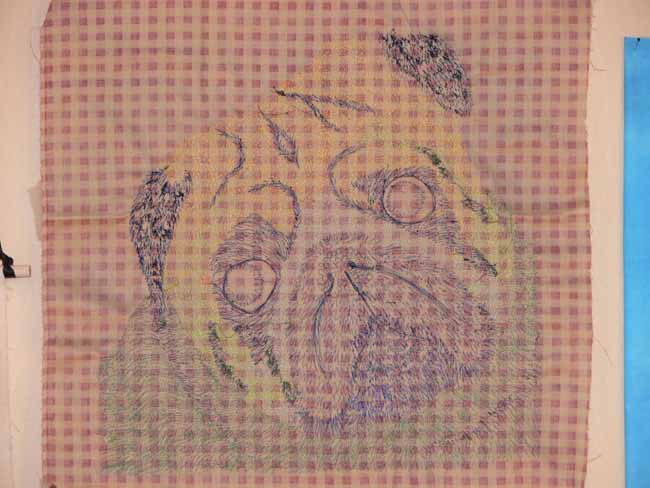
I was totally, utterly blocked.  I had NOT A CLUE.  Not a whiff of an idea.  Inside of brain darker than a cave in a coalmine with no lights.  Nada.  Nicht.  Zip.  Zilch.  Then I had to walk the dog.  This dog (note…there are fifteen photos in this post, and all are clickable for a larger view):

Isn’t he CUTE?  Even from the hind view with curly little tail and dog butt, he is CUTE.  Well, the good news is that the quilt is NOT of his hind end.  I figured the cuteness of a dog’s butt is not necessarily appreciated by all, but how could ANYONE not love a pug mug?   So, I scoured through the umpteen thousand (literally) photos on my hard drive, found the one above, and cropped the photo:

Then I decided to use value as my plan of attack for fusing up this puppy.  At first I selected beige, tan, charcoal, and went YUCK.  I wanna play with color.  Back in the fused fabric stash they went.  Out came the colored fused stash.  I started with medium values…some lovely turquoises.  Then lights, deep darks, and some transitional values.  Not suprisingly, the light lights were yellows, the deep darks were navy and purple.

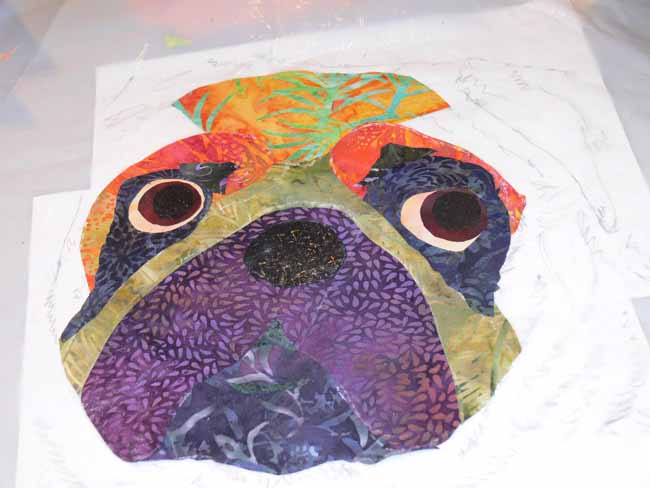
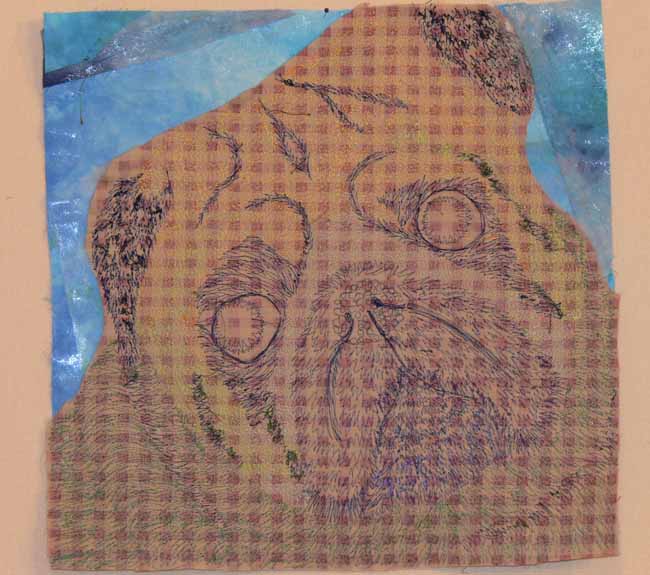
To get ready, I enlarged the photo to 12 inches on my computer, got out the large tracing paper, and traced his outlines.  This tracing was my pattern guide in cutting the pieces of fabric for his sweet face.  Here is the first bits:

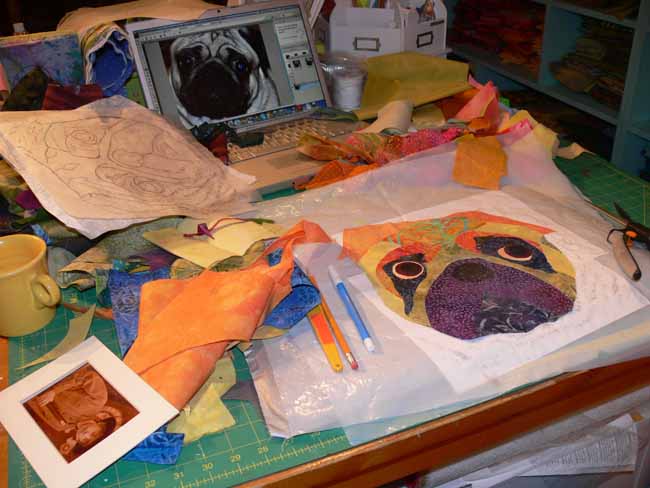
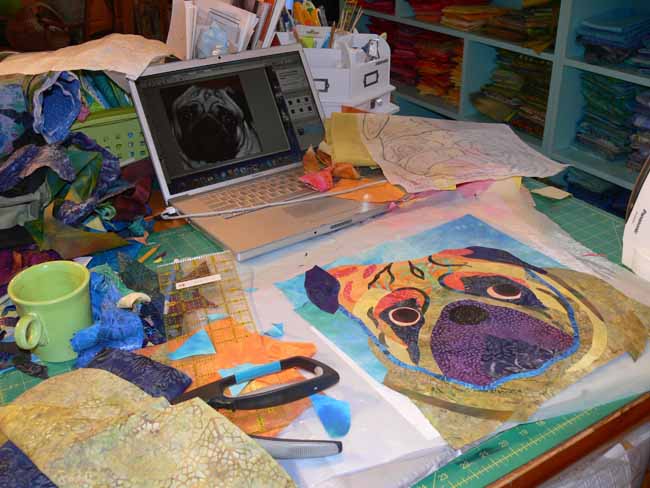
Then a bit more work–you can see the tracing in the top left, the laptop with the cropped photo for reference, and the scattered bits of pre-fused fabrics tossed about (and note the yellow mug…I LOVE the fiesta ware!):

Here’s a close-up of the pug at this stage:

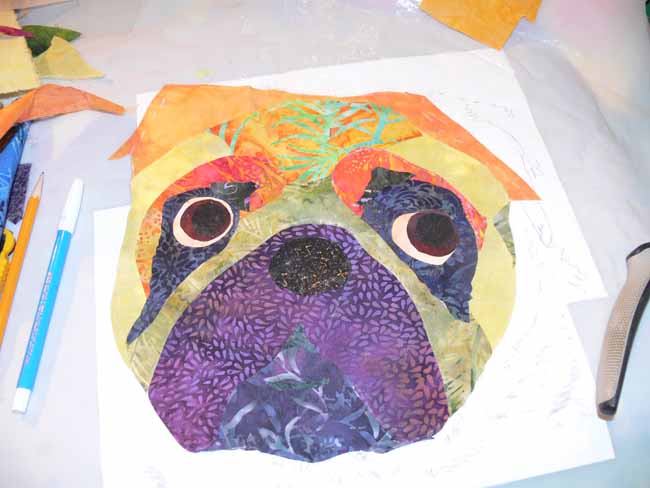
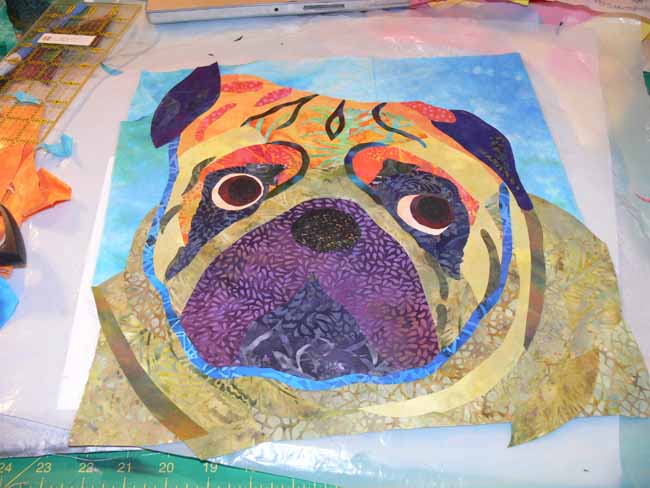
Then even more; I have added the background, but notice the face is kinda upright, not that cute cocked head, the quizzical look (note the green fiestaware mug):

Edges trimmed, but face is still upright…wrong!

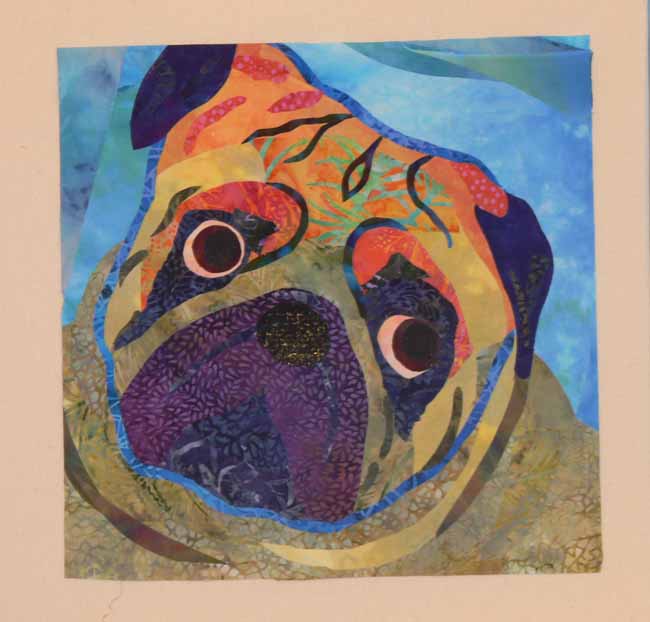
So after uttering a few cuss words at having not noticed I was trimming him with his head in the wrong position, I sliced things off and fused up some more background–and yes, there is an “issue” with the shape of his head on the left, but I knew that would be cropped off so I ignored it:

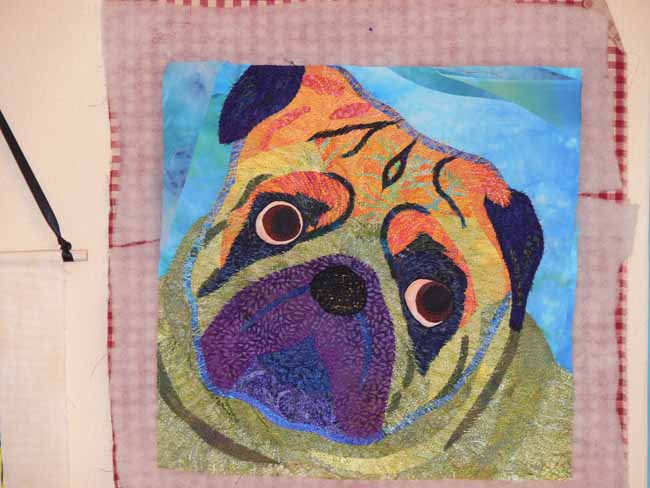
This shows ‘Widgeon quilted (tho not the background…more on that in a sec):

and a close-up:

Here’s what it looks like from the back:

Next, I trimmed away the “middle-backing” and the wool batt I was using from under the turquoise background:

I then added cotton batting and the “real” backing and quilted the background, plus some of the major creases in his pug mug:

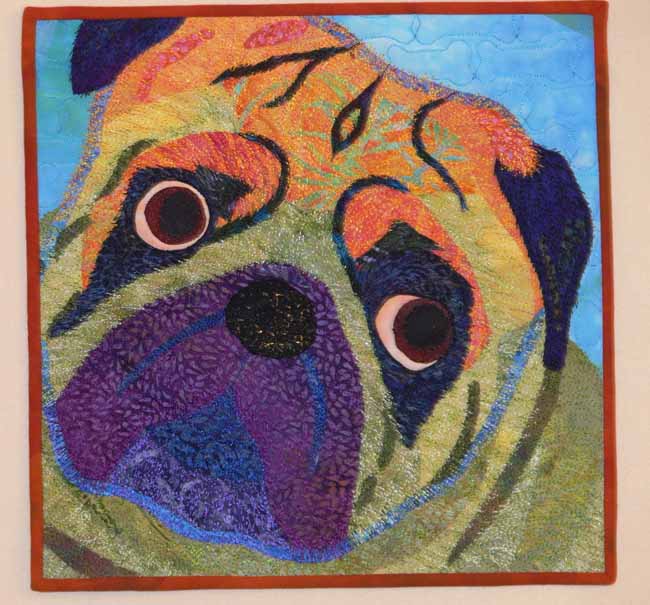
Finally, I had thought I would face the edges.  I used an old rust colored fabric on the back, and for the facings, and realized it looked MUCH better than the turned/faced edge.  So I found a better quality hand-dyed and made narrow bias bindings:
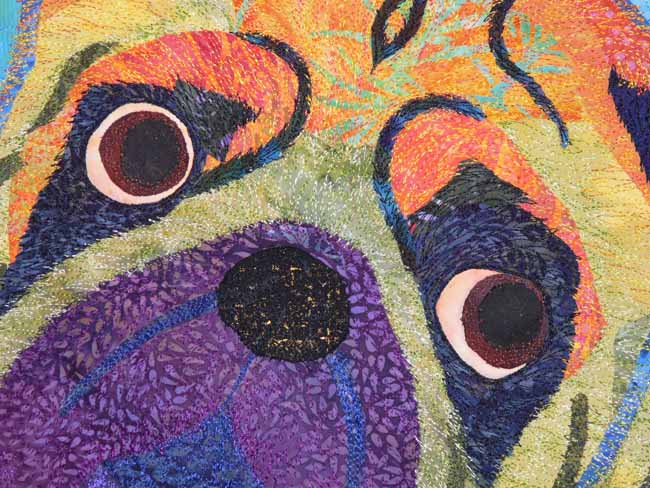
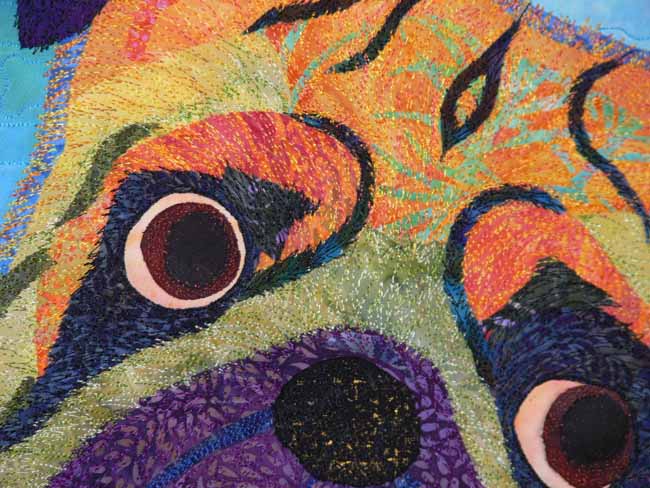
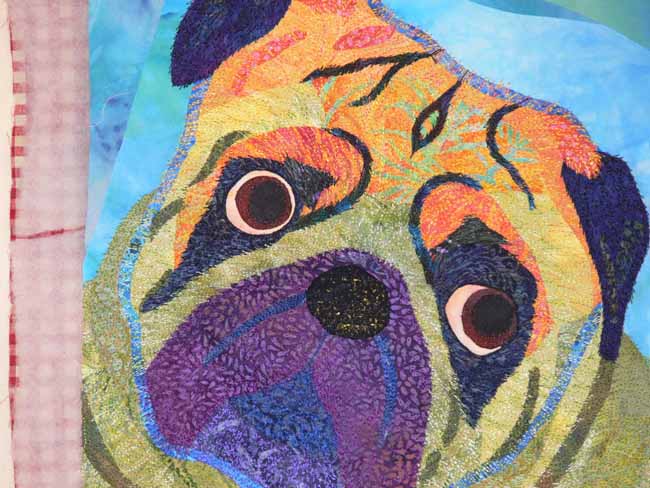
Last but not least…two close-ups.

Hope you liked the journey through the process. The quilt started out with a working title of “You want me to sit STILL?” (as in sit still so I can take a picture of you!), but that evolved into either “Walkies?  Puhleeze walkies!” or “Cookie???? PLEEEZE cookie!”  Eli (the dog is really his) and I both liked the Cookie version better, so that’s the title!

I absolutely ADORE this little 12 x 12 inch quilt… I think I did OK, because each time my sons see the quilt they start grinning, too!  Of course, we are biased and utterly in love with the little dog-beast!

Coastal Quilters, January 2010

Monday, January 18th, 2010

It has been a while since I blogged about Coastal Quilters, our wonderful local chapter of the Pine Tree Quilt Guild.  Maine is lucky to have a great statewide guild, with something like 73 local chapters.  Our group runs from traditional to art, beginner to experienced.  This month we had a fun show and tell, including my lap quilt.

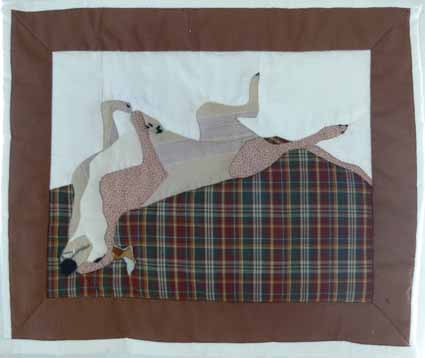
Eleanor Greenwood is relatively new to quilting, but clearly willing to try anything, and succeeds well.  She LOVES her grayhound, Louie, and is actively involved in rescue placements and supporting the organization.  She told us that he loves to sleep on his back; apparently this is quite common among the breed and is called “cockroaching” or “dead cockroach.”  I love it!  Anyway, she used a photo to hand PIECE (not applique!) this portrait of her pooch, “Jigsaw Louie”:

Great work!  If you’re interested in adopting one of these sweet dogs, visit www.greyhoundplacement.com, a 501c3 organization.

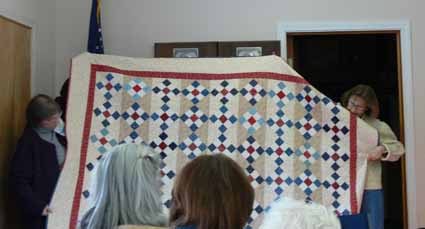
Joan Herrick is one of our traditional quilters (as well as an accomplished knitter).  Her work is meticulous…. I hope she never looks too closely at the pieced work I’ve done recently…my piecing is, well, let’s just say it’s nowhere NEAR as precise as I would like it to be, and even further away from hers!  In this photo, Joan is on the left, and another guild member (Patty C.) is on the right:

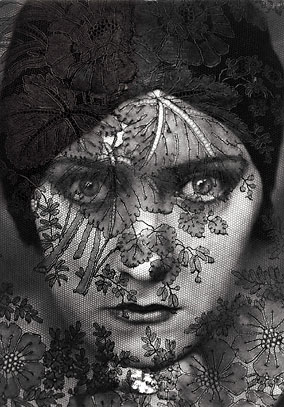
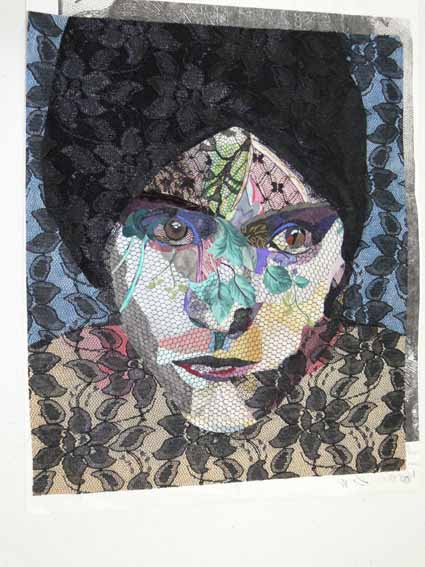
A new member, Paula Blanchard, shared some of her work with us.  In a class with Jude Spacks (an artist living in nearby Belfast, Maine) a while back, she did a fabric collage based on Edward Steichen’s photograph of Gloria Swanson, the silent film diva:

Here is her take in fabric…. I think Paula has a great future in art quilts!

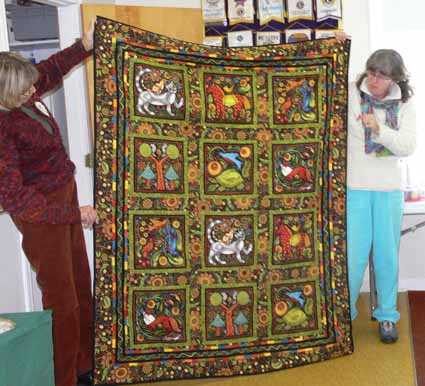
And finally, my lap quilt, done.  The photo isn’t too precise, so one of these days I’ll take one that is sharper and share, but you can see now how I put it together.  Think when I’m done with writing blogposts, I’ll go cuddle under it…the back is creamy yellow minkee!  I’m on the right and Barb M., our tallest member who is always so willing to help is holding it up on the left…thanks Barb!

Fight Cancer on Tote Tuesdays!

Friday, January 15th, 2010

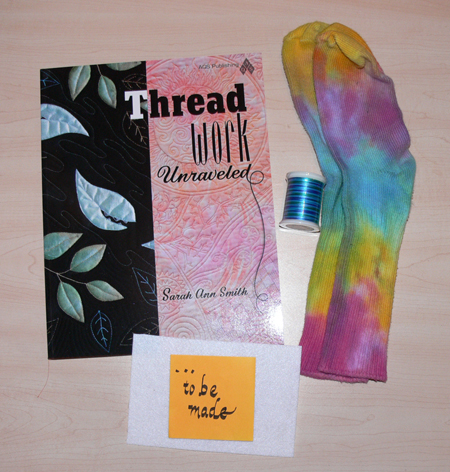
Several years back, the indefatigable Virginia Spiegel set out to raise funds for the American Cancer Society.  Her efforts have taken various forms, in which I’ve been able to participate as donor of both art quiltwork and cash:  fabric postcards and art quilt auctions.  This year, she’s got another great idea:  Totes filled with goodies from various fiber artists.  I’m thrilled to donate a copy of ThreadWork Unraveled, a spool of thread, and a fabric postcard (yet to be made!) as the contents of one of the bags.  The goal is to have bags with affordable-for-most donations as well as a few fancier ones.

Logo designed by Jeanelle McCall of http://www.fivespoongallery.com/

Here’s how it will work:

ToteTuesday, a Fiberart For A Cause fundraiser for the American Cancer Society, will open Tuesday, February 2 and continue through March.

ToteTuesday will feature themed totes filled with unique, beautiful, and inspiring items from the worlds of art quilting, fiber arts, knitting, beading, mixed media and surface design.

You can expect totes offering original artwork, autographed books, hand-dyed fabrics, gorgeous yarns, beads, handmade journals, fun and useful materials/tools for mixed-media and surface design, online classes, DVDs, and much, much more.

A list of the more than 20 themed totes now in progress is here:

http://www.virginiaspiegel.com/blog/archives/4265

100% of the proceeds will be donated directly to the American Cancer Society through Fiberart For A Cause. Fiberart For A Cause has already donated over $190,000 to the ACS:

http://www.virginiaspiegel.com/NewFiles/ACSFundraiser.html

Here’s what will be in “my” tote:

Please mark your calendar for Tuesday, February 2 and be prepared to be amazed!

To visit Jeanelle McCall’s site, click here.

Things to think about when teaching on the road….

Wednesday, January 13th, 2010

A question arose on the QuiltDesigners Yahoo group recently (many of the designers also are quilt teachers) about digital projectors.  That led  to a longwinded reply on my part, and it occurred to me that you folks might like to read some of what we need to think about when we travel, schlep mountains of stuff–HEAVY stuff–to teaching venues, and have to invest in the equipment.  Though teachers’ fees might seem high, when you spread the income out over the days you travel for which you are not paid, the prep for each class for which you are not paid, the cost of handouts and class supplies it’s not very much in the end (usually I don’t charge for routine stuff–only add a kit fee if the cost is something like $10 per student instead of $2–even in a class of 24, that’s $48 out of pocket for handouts etc).  My laptop bag probably has about close to $5000 in laptop, projector, videocam, cables, not even talking about the WORK that goes into the programs and whatnot.   So here goes…

The digital projector model I have (bought about 15 months ago) is probably not made any more but the best advice I got was:

  • buy the lightest weight one you can afford—they seem to gain an ounce with every step down every airport concourse!
  • buy the most lumens you can afford—many places that we teach and lecture there is a lot of ambient light. You need to be able to project a good image on the wall (or white flannel or foam core!) with light from windows, etc. I think mine is 2600 (the most in the under $1000 range when I purchased), and it did great in the well-lit classrooms in Houston. Use them for teaching, not just lectures….

I bought a very inexpensive, very small video camera and small tripod. I set them up on my table to project live demos on the wall, and students love it! I understand you can now get “wireless” communication between camera, laptop and projector in some instances/situations. That would be good. That snake’s nest of cables is a trip hazard! The tripod I bought is a mini…good for using directly between me and the sewing machine to get images of the needle/foot area. A taller one, set to the side to “beam down” on demos I do would also be useful, but don’t have it yet. There are also gooseneck cameras, so you can have this little bitty “eye” reach over from the side and look straight down on what you are doing. That might be a solution.

Jan Krentz has done up small “slide show demos” of things she demos in class. First she demonstrates the steps live, then she’ll put on the slide show on “loop” (endless repeat). The key instructions are written onto the slides that are projected. She can walk around the room and help while things are playing, students can look up and follow along at their own pace. This is my goal…to prepare mini-presentations that need this method for my classes. While I teach things that don’t always lend themselves to this approach, it’s fabulous when it does help you.

Also from Jan I learned about pre-class information/entertainment. Jan has her projector on before the class begins with instructions on what you need out and ready, and what can stay stashed under the table until later. Brilliant! As students filter in they can read and heed, while Jan gets to greet new students instead of endlessly repeating herself (well, she probably does that, too, but still….).

In a lecture Jan gave up here in Maine, she also told us a little about herself and San Diego (she lives near there) at the start. So I did up a “pre-show entertainment” for Houston, with slides of Camden, Maine through the seasons, our house, a not-close-up shot of the kids (they’re not identifiable really in it) and the dog…. and students really seemed to enjoy looking at the pictures. That meant *I* had time to get set up and prepped for class. So often I find students want to chat and be friendly–I do too, but I really MUST prep and have things ready to go the minute time starts!

From TSA (the US Transportation Security Agency): I bought a special laptop briefcase which means I don’t have to take the laptop out of it. It also holds the projector and all cables. HOWEVER, that is too much stuff for the scanners to cope with. It is faster if I leave the laptop in the case as it was designed to reveal the laptop, but remove the projector and baggies of cables/cords and put them in the gray bin.

I bag my stuff by product: all the projector stuff goes in one sturdy ziploc baggie, all the videocam stuff in another, the iPod and phone chargers and cords in a third. I just empty that compartment of the briefcase–four items (projector and three baggies) into a bin and I’m through easy peasy. Re-packing that section of the briefcase is fast then, too!  Mo’ bettah!

Another jem from Jan Krentz: Buy some of the day-glo/ bright colored Duct Tape and make “tags” for EVERY cord, cable, laser pointer, remote control, and put your name and contact info. With a glance around the room at the end of the day I can tell if one of my lime-green-tagged items is mixed in amongst the snarls of other black cables around the room. And if one gets left behind, folks can contact you and return it.  This saved me $80 for a remote control I left on a podium up in Augusta, Maine..phew!

Finally, take a small surge protector (mine is in the baggie with the projector stuff), but ask your hosting venue to have a long extension cord–they just weigh too much to haul around.

Thanks to Jan for sharing so much of her hard-earned knowledge with newbie teachers!  I took a traditional workshop with her up here in Maine because I wanted to watch her teach.  I had met her the year before when we were both teaching in Paducah at the big AQS show; we shared a 2-hour van ride to and from the airport, plus ran in to each other in the room where the teachers shipped-ahead boxes were stashed.  She was SO generous, plus she’s nice and I learned a ton, both in Paducah and in her class up here.  THANKS, Jan!  Her website is here–I can heartily recommend classes with her.

Cheers, Sarah

PS–late additions:

Photograph all your equipment—every cable, remote, everything.  In Photoshop or printed out add the item name and product number, along with the 800 number of the company (both manufacturer or place where you can order re-supplies).   Keep this photo at home, and another in your travel bag.  Make sure the 800 number for the company is on it so if a piece breaks (like heaven forfend the lightbulb) you can order replacement parts ASAP/overnight delivery.  I order much of my photo stuff from B&H Photo Video in NYC, and have their phone number too.

Numbering stuff is good, too.  Then you can do a quick count:  if I have four items in the bag, I need to look for one more thing–that idea.

I also made a “cheat sheet” on setting up the projector and laptop.  I need to plug in the projector, turn it on, link up the laptop with the USB cable, THEN start up the laptop.  Otherwise the projector has “issues” finding the laptop which leads to needing to re-start the laptop.  Since I don’t use the set-up all the time, I keep a page with instructions to myself inside a page protector in my bag to remind myself of those little things.  Those friendly quilters asking to help sometimes distract me and I get confused with all the cables, etc.

Art for the new year: Postcards

Friday, January 1st, 2010

Happy New Year Everyone!   May the good stuff from last year continue, may the icky stuff go away…as simple as that!


Someone on the QuiltArt list asked what our “word for the year 2010” would be.  I’ve not really done that before—I tend to be NOT introspective and don’t make specific long-term goals, and quit making resolutions years ago.   [I resolved that I would no longer make New Year’s Resolutions, but instead would make them when they needed making!  I’ve done that, and it is the first New Year’s resolution I’ve managed to keep for years!]

Anyway, after thinking, de-clutter, de-stress, and a few other similar concepts, I came up with

Simplify.

I need to simplify what I do, how I do it, and reserve more time to make art and allow myself to re-charge.  Since I got back from Houston in late October, I’ve been playing a catch up game, feeling that I’m in a fallow period for art.   I need time to restore myself, so I’ve been reading novels, spending time with family, and generally trying to not kill myself with work!

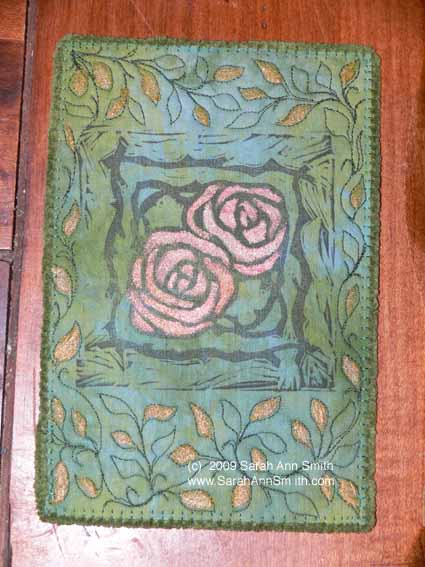
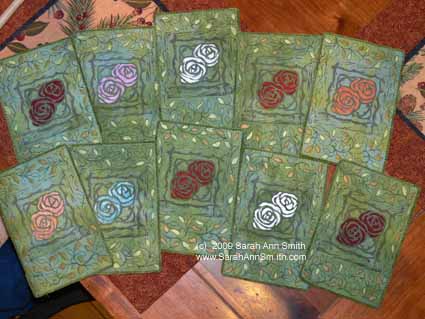
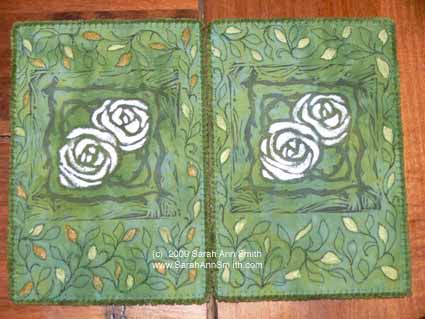
Along with the theme of simplify, I thought I’d share these fabric postcards, many of which I make for an online swap.  The theme was Art Nouveau/Art Deco, and I think the design is nice, straightforward, and fairly simplified!

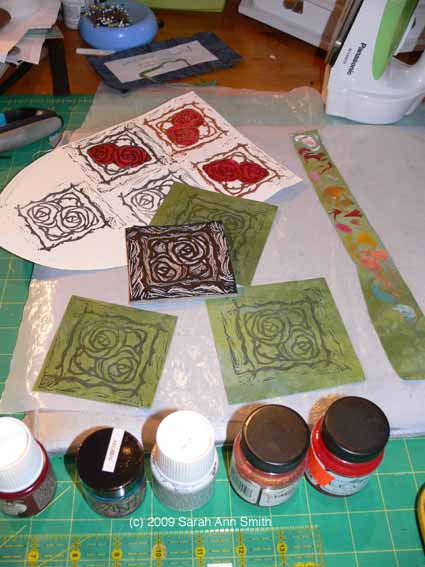
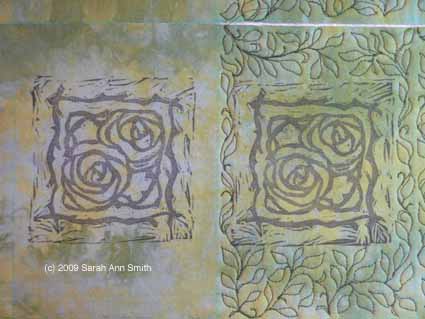
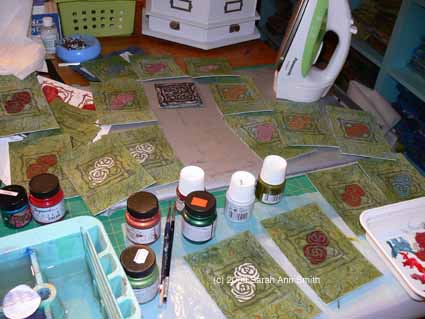
Here’s how I made them.  First I carved my own stamp, based on a design from a Dover book (copyright-use OK).  I simplified the design which was too intricate for carving in a stamp that is just under 3×3 inches, then added a frame of vine-branches. You can see some test-prints on paper, and some test-swatches of the paints…mostly Jacquard Lumiere and Setacolor Pearlescents.

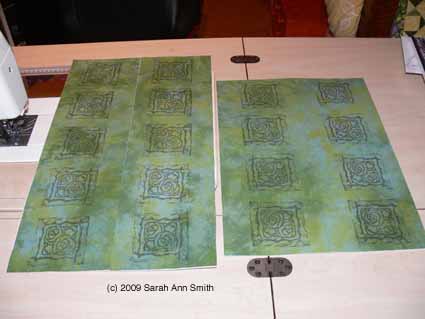
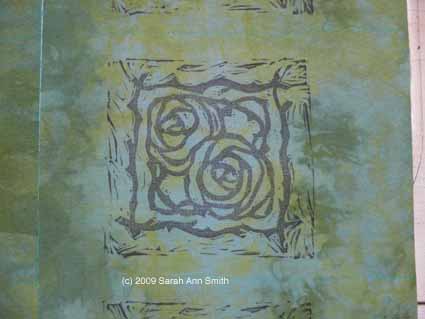
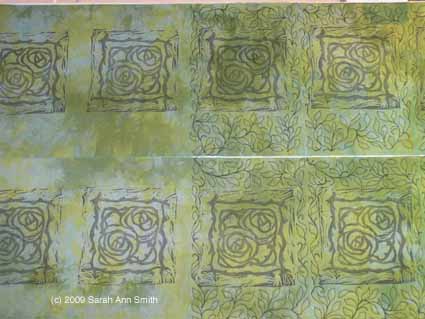
I printed onto my own hand-dyed cloth with Ancient Page archival ink:

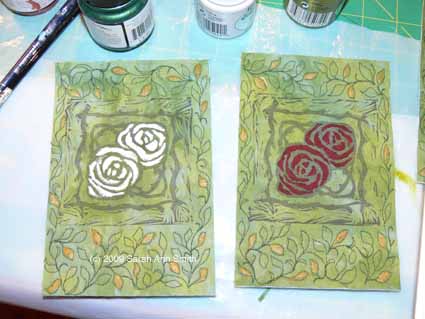
The cards were then quilted and painted:

Next, I painted some of those leaves.  It actually took longer to paint the leaves than to quilt the cards!

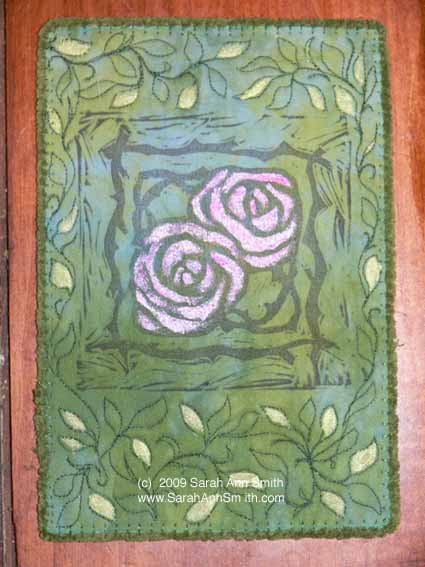
Finally, I added a couched yarn edge-finish:

Here’s a close-up of two of the silvery-white roses, one with just the pale green-gold leaves, the other with two-tone leaves:

I have mounted three of these cards and will be offering them for sale, but need to take pictures.  Hopefully I’ll get those posted soon…in the meantime, welcome to 2010, to the snow that is falling turning the view out the window into a white and grayscape wonderland, and to making art!