Lino-cut sunflower, part 1
Thursday, March 18th, 2010While watching the Winter Olympics one nippy Sunday, I decided to work on my lino-cutting class. Our lesson was textures. I thought and thought and didn’t want to do something like the teacher. A friend of my older son LOVES sunflowers, so I thought hmmm…. love the seed-pod texture 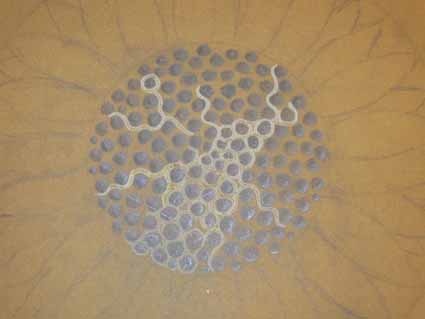
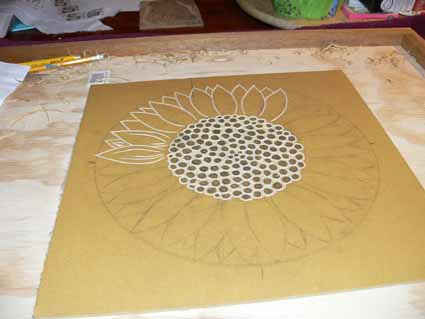
of the center, the silky smoothness of the petals, so I decided to do a jumbo life-sized sunflower. The linoleum square is 12 x 12 inches; i think the center measures about 6 inches or so across. In the photo above you can see my pencil marks and the beginnings of cutting away the spaces around the seeds/circles. I actually like this amorphous, amoeba-like shape so much I may make a few printing blocks that are similar to this one…like water seeping through the mud finding the path of least resistance.
And an angled view–by the way, I used a medium or small “U” shaped gouge for this part:
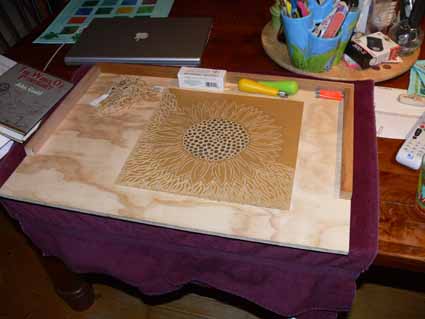
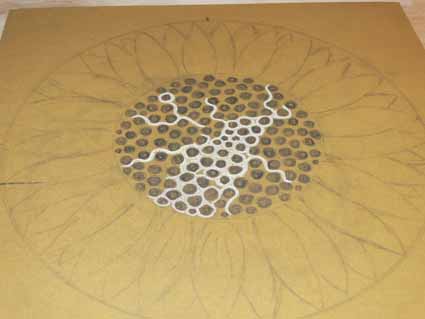 You can see in this photo the size of the block, and that I used some of my plastic quilting circle templates to mark the perimeters for the seeds and petals.
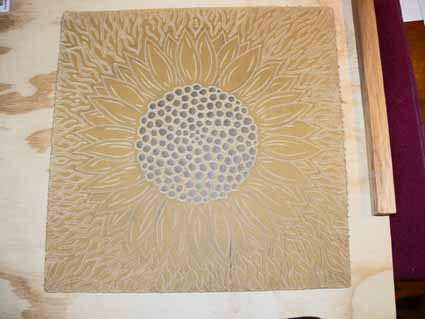
In this shot, I’ve begun carving the petals using a medium “V” shaped gouge for the outside, and a small “V” for the inner lines:
And again, an angled view (somehow the lighting shows up the carved bits better)–I just LOVE that center!:
In the next photo, you can see the carving jig I made. Woodblock carvers use something similar, with a lip on the close-to-the-body edge so it snugs against the table. My jig is larger (to accommodate the large lino blocks) and lacks the lip… I find I like to angle the block, so wanted to be able to turn the jig. Since doing this one, tho, I discovered I can take an extra strip of the molding I used to make the edge/frame and put it at an angle on the inside, so I may add a lip after all. Having cut myself on my first effort, I now have a wary respect for how sharp the carving tools are! The safety from using a well-made, well-designed jig are well worth the minimal cost (about $10 for the supplies, tho still need to buy some felt to glue to the bottom).
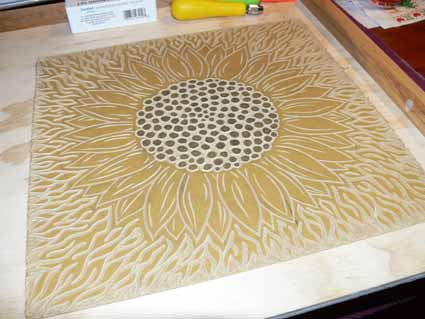
In the photo above, you can also see that I have begun carving away the outside in a flame-like pattern. By this time I’d been cutting for several hours, and my hands began to ache, so I took a break and finished it the next day (which was also Spring Break and more of the Olympics television marathon). Finally, carving DONE!
And the angle view:
Can you tell I’m having fun? Then I had to wait for an order with some Speedball ink to arrive. My textile paints aren’t working as I would like for the printing, so we’ll see if the Speedball water-soluble ink works any better. It can apparently be heat-set and made permanent….. time for more testing?
If you think you’d be interested in taking this class online, contact Dijanne Cevaal who is (I mentioned this earlier, forgive me for repeating it here) originally from the Netherlands, immigrated to Australia and lived there most of her adult life, travelled to the middle East and is currently living, at least for a while, back in Europe. Consequently, we have a glorious around-the-world group in our class. You can contact her by using the link in the sidebar (to the left) which will take you to her blog.


