email Youtube

Home
Galleries
Blog
Workshops & Calendar
Store
Resources
About
Contact

Archive for the ‘art quilting’ Category

Time for a little creativity even!

Wednesday, December 29th, 2010

Yes, while the turkey was roasting on Christmas day and the potatoes were boiling and the pie and stuffing were done, I took a little time for art!  About a thousand lifetimes ago (meaning last winter, maybe February-ish) I took an online class with Sharon Boggon (her site is here and is now called In a Minute Ago, here blog is  Pin Tangle)  about a “working” sketchbook.  Not a fancy, work-of-art-in-itself journal, but about using a journal as a way to flesh out ideas and stimulate creativity.  Here’s a link to the class description…I really enjoyed the class!  Alas, I have been abysmal at keeping up with it–simply too much life happening.  BUT…. I have the journal and the supplies and the desire.  So on Christmas I made the time!

I just LOVE how this turned out....it makes me happy. Being creative and noodling around just makes me content. I should do this more!

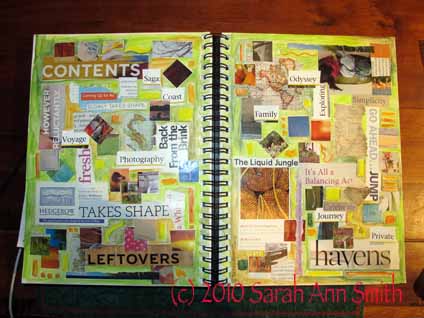
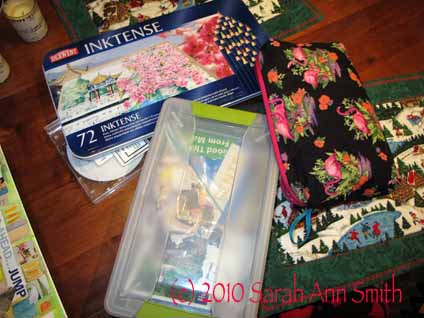
I took some of the squares I had cut from magazine pages, and some words and phrases, and started gluing them up.  One page became two…. then I took my WONDERFUL Christmas gift from hubby:  a set of 72 Derwent Inktense pencils

The Inktense pencils are in the upper left. My magazine snippings are in the box, and the bag on the right is my travel-art bag, with room for a set of 6 graphite pencils, a 12-travel-set of watercolor, a waterbrush, glue stick and a couple odd pens are inside in their custom-made pockets

and a waterbrush and, in the evening after supper while watching Starman with my family, colored in the background.  I LOVE IT!

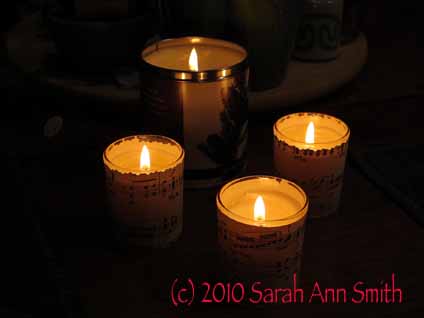
And I cannot let the last Christmas posting pass without Kate’s candles–I’ll blog about our Frayed Edges meeting in a few days, but I had to share these.  Kate found the votives in cylindrical glass cups then re-purposed old (tossed out) sheet music.  The large one is from Stonewall Kitchen (a Maine company) and smells of “Maine Forest.”

My new Canon G12 has a "candlelight" setting on the dial, and this was taken just holding the camera still, no tripod or bracing...love it!

Another Free-Motion class sample

Tuesday, December 14th, 2010

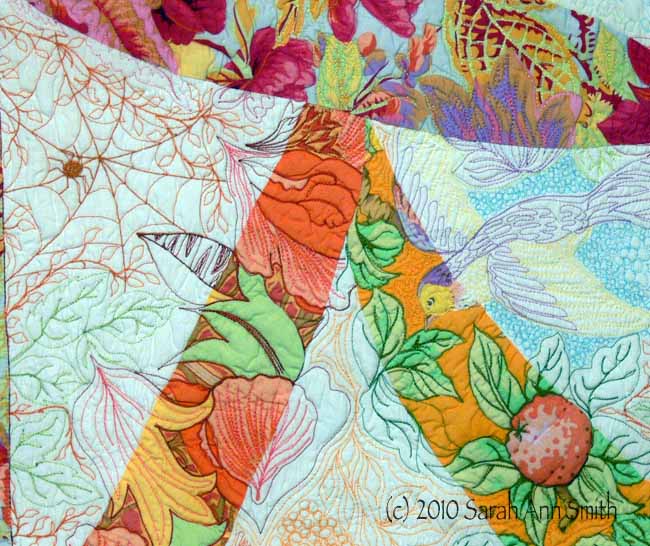
detail from the most recent free motion sampler--should be clickable for a larger view in most browsers

In my previous post, I shared The Ginormous Quilt (I may have to actually NAME it that!) inspired by Jenny Bowker’s quilt sampler and my variation on her theme.   I was able to see Jenny at Quilt Festival in Houston, have supper with her and Aussie friend Lisa Walton (of the gorgeous hand-dyed fabrics, here), and Jenny invited me up to her class one morning before the class began to see her other samples.  I thought I should try a few variations on the theme myself but, unlike Jenny’s samples in Houston, introduce some curves into the process.  Here’s my original variation on Jenny’s idea:
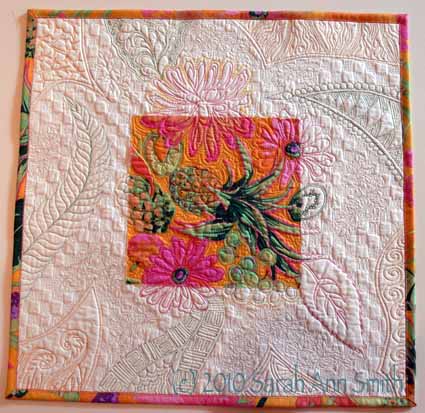
And here is the most recent one–and yes, *I* actually *pieced* that!  What’s become of me?
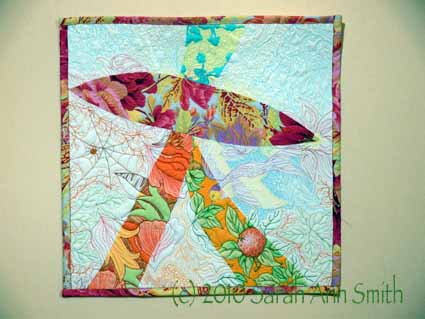
Free-motion sampler, before washing

Since I have the Ginormous thing, I wanted to test out various battings before spending a bundle to have it basted on a longarm.  The good news is that wool batting does not alter the whiteness of the sashing enough to be noticed, so if I want to I can use a wool or wool-blend batting. In this sample, I used Hobbs Heirloom Wool, which is quite puffy.  To use a Pamela Allen (if you’re not familiar with her work, click on her name to visit her website and prepare to spend a good long while being inspired!)  word, I like the “puffosity” of it.  The bad news is that you need to baste MORE with wool batting than with cotton or  you get some slippage and bubbling.  Ahem.  Basting is NOT my strong suit!

Since the Ginormous Quilt is to be a used bed quilt, with cats sleeping on top of it and getting it seriously hairy, I need something that will wash up nicely and easily without fuss.  So I tossed the sample into the washer and dryer with the regular washing.  As you might gather, I’m not a fusspot about some things.  This is what it looked like straight out of the dryer….gulp!
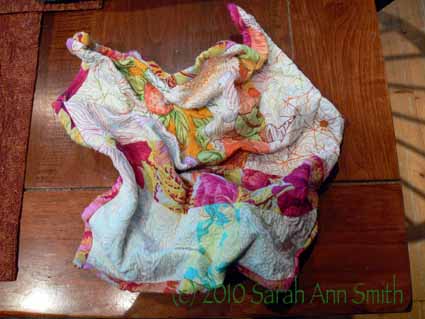
After machine washing and drying, wool batting (shrinkage expected!)

I took it upstairs, misted it with water and pulled it out a tad—here are back and front before ironing:
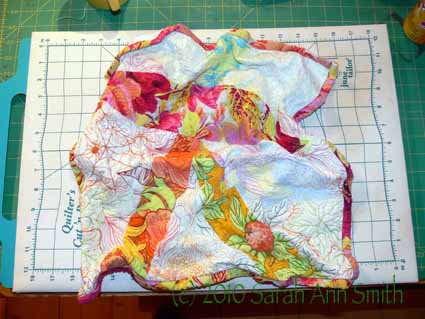
After machine wash and drying. Misted with water and pulled out a little.
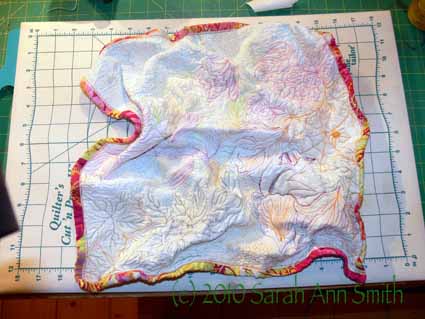
Back view, after washing, drying, and a light mist of water prior to ironing

After ironing, it is much better and an inch smaller than before washing/drying:
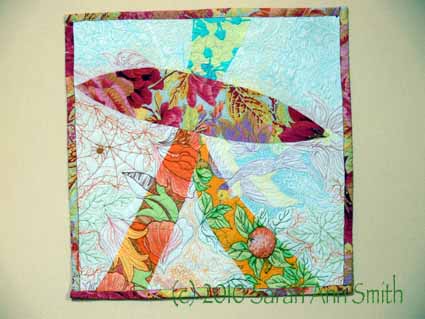
After washing, drying, misting and ironing. Notice the ripply straight grain bindings. This is why I ALWAYS make bias! This was as a sample of why I don't like straight grain....

I REALLY dislike straight grain bindings, but given how little of the fabric I had left, I decided to do a straight grain binding.  This sampler is a perfect example of why:  ripples.  UGH.  The teaching part of this section of the quilt is “why I don’t do it this way”.  Ahem.

The bottom line:  despite the apparently horrible crumpliness of the quilt straight out of the dryer, I think this soft, light, drapeable wool batting (Hobbs) could work.  I would simply tumble dry to “damp” instead of “dry”, then let it air dry the rest of the way.  Of course, there is the question of whether or not it would fit in a home dryer! My sample was just under 18 inches before quilting.  It was, after squaring up after quilting, 17 inches with binding.  After washing, it is 16 x 16  inches.  This shrinkage was expected and planned for in constructing the top, which I made oversized so that when hubby and the cats hog the covers I will still have enough quilt  left.  Smile!

I have at least one other wool batting sample, by Pellon, and plan on also making a comparable size  with the Quilters Dream Wool and another with their cotton batting, which is one of my favorite cottons.  All samples will be machine washed and dried…I am absolutely NOT going to fussy-wash a quilt that is nine square yards huge! When I get them all done (probably in about a year…sigh…) I’ll share the final comparisons.
Quilters’ Favorite Things

Saturday, December 11th, 2010

Maria Peagler, whose book on Color Mastery is designed to help you get over your fear of playing with color, has just published this video on her blog and facebook pages.  If you’d like to vote for your favorite and win a free (my book, her book, Inklingo or fabric), take a look at the video, the surf over to Maria’s place and vote (more on that below).  Here’s the video:

Maria profiles four must-haves for quilters, starting with my book, ThreadWork  Unraveled.  Most of you who visit here have heard plenty about the book, but just in case, there is more info here plus lots of very kind reviews of the book on Amazon (and if you’d like to add your own review, please do!). Maria’s Facebook fan page is http://www.facebook.com/colormaster .  You can visit the page even if you’re not a member on Facebook.

Maria also shares Linda Franz’s Inklingo, a system for  precise piecing using any size scrap.  Linda is the author of the FANTABULOUS Quilted Diamonds, which is a diamond-variation on the theme of the Jane Stickle (Dear Jane) quilt, liberally salted with Jane Austen quotes, and which has some of the BEST hand piecing and hand applique directions you’ll find.  I treasure this book–clear, precise directions, stupendous photos…a keeper! Linda’s website is here, and more about InkLingo is here.

Third on Maria’s list is a Clothworks kit with the fabulous Laurel Burch fabrics.  As many of you know, the talented artist died not too long ago, but she spent a lot of her last years making art which her children could then turn into prints and designs for the many facets of Laurel’s work which include not just fabric, but mugs, earrings, totes, socks…..lots of fun things! You can find the kit here.

Finally, there is Maria’s own award-winning book, Color Mastery.  To learn more about her book, check it out on Maria’s website, here (scroll down to the bottom for the link to purchase Maria’s book).

To vote and have a chance to win your favorite, click here.  First it appears you need to “like” the post.  Then click on the photo of each of the items;  you can leave a comment to enter to win.  It appears, however, that you may need to be a Facebook member to actually vote.  Give it a try and see if you can vote! Update:  Linda Franz posted really good, thorough instructions on how to vote here.   Thanks Linda!

And if you’re not the lucky winner but just HAVE to have one of these items they are (what a surprise…not!) available from the maker!  I hope  YOU win!

Windows Postcards

Tuesday, December 7th, 2010

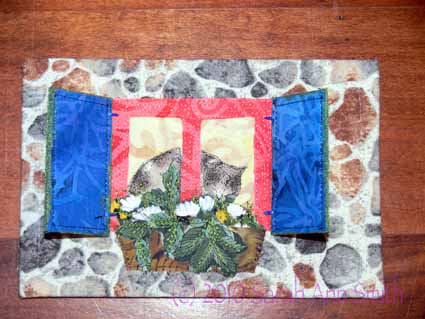
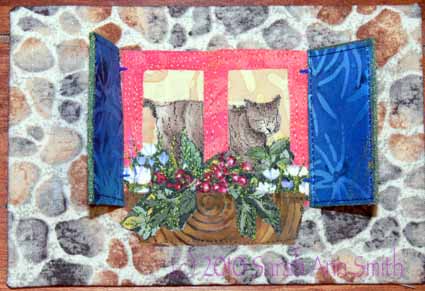
Just a short post today to share the second round of postcards I made for a recent swap.  The theme for this one was Windows!  I had made a postcard a couple of years ago with a swinging door… a second bit of Peltex (the stiffener that I use inside the postcard instead of batting..the stiffer middle makes it FAR easier to quilt on the machine) that was sewn to the top with yarn as strap hinges.  So I decided that for my windows, I would make shutters that move!

I found the stone print fabric in my stash, so thought I’d make English (or Irish or Scottish) stone country cottages with windowboxes and shutters.  Then of course every good cottage needs a cat (or several!).  I had a print fabric with kitties in green leaves, so I fused up a chunk, then fussy cut the kitties and some of the leaves.  In my stash of fused fabrics, I had some leftovers from previous projects, and used the prints to cut up more leaves and flowers for the window boxes and for the “wood” of the boxes themselves.  The coral windowframes are the same fabric I used to make the guitar in the portrait I did of my son, here.

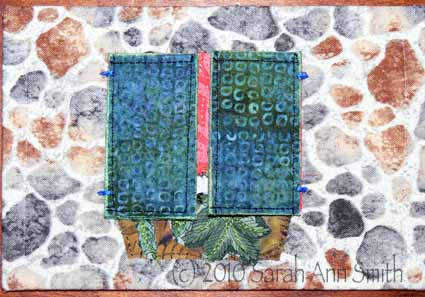
I used a VERY wide zigzag set to almost zero stitch length to make the “hinges” where one end of the stitch just caught the edge of the shutter.  This left enough wiggle room to swing the shutters open and closed. Here is one with closed shutters:

Because of the shutters, I mailed the postcards in those plastic slipcovers that you seen on fancy cards at the stationery store.  Enjoy!

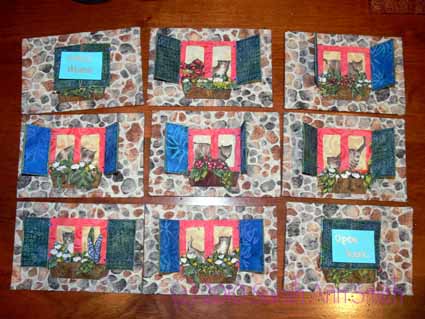
A shot of the batch, with a post-it note to tell the recipient to open the shutters:

And a different kitty-in-the-window:

For this round, I wrapped the stone fabric around to the back to finish the edges of the card and used printed cardstock on the back side.  The shutters are edge-finished with a metallic paint and a bit of stitching around the edge to secure the fabric (I never trust any fusible to hold forever!).

Photo EZ, an alternative to a Thermofax

Thursday, December 2nd, 2010

OH WOW am I in love with a new product and process! 

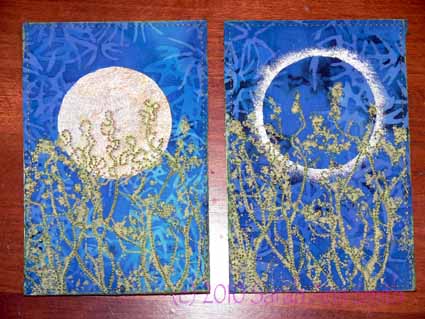
The product is called PhotoEZ and it allows you to make detailed screens for printing (on paper or fabric), such as the treetops in the fabric postcards in the picture above.   The best place to get PhotoEZ  is directly from art quilter Ginny Eckley at http://www.photoezsilkscreen.com/about.htm .  Wonder how many requests Santa is gonna get now……

Many quilt artists now use Thermofax machines to make their own highly detailed screens for surface design printing.  These machines were on their way to becoming dinosaurs and land fill when they were discovered by art quilters and tattoo artists.   In both cases, the artists involved create intricate designs which are then “burned” into an emulsion-coated screen (or for the tattoo guys spirit masters).  The process removes the image, leaving a screen to use for printing or, in the case of tattoo artists, for transferring the design to the skin to use as the guide for inking the tattoo.  As the machines become more and more scarce, the price has   gone through the roof:  reconditioned machines now cost nearly $1000.  Yes, one THOUSAND dollars.  Plus supplies! My budget doesn’t stretch that far.

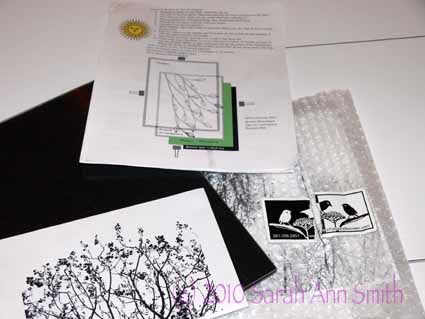
Well, a year ago at Quilt Festival in Houston, I visited Ginny Eckley’s booth where she sold (among other things) the PhotoEZ screen kits — a starter kit is $37 — and materials.  Here is a picture of my kit and the photo I used:

PhotoEZ kit, instructions and on the bottom left my image

Ginny told me she likes PhotoEZ so much she actually SOLD her Thermofax machines because she no longer used them.  Rather than carry the stuff home, I opted to order the supplies from Ginny (here) and have them shipped to my home.  One key thing:  You need to refrigerate the screen material to keep it fresh!  I have a flat baggie on the back wall of my fridge, behind the shelves, to keep mine fine.

After a year, I FINALLY got around to trying it out.  I was concerned because I don’t have strong sunlight up here in Maine most of the year the way Ginny does in Texas!  But I used my tulip-lights that I use for photography and they worked fine.  When I asked Ginny a couple of “how to” questions this year at Festival, she said she uses a light box most of the time, so this makes the process accessible for everyone (not just those of us in sunny spots).  In addition to the detailed info in the kit, you can find even more instruction on her website.

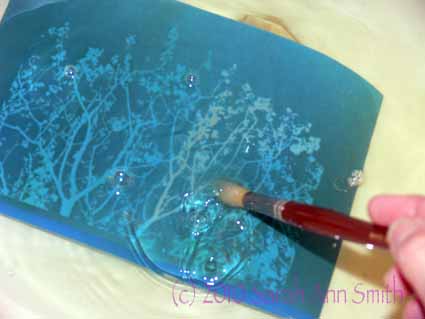
I had forgotten that the kit included an inkjet transparency sheet, so I fiddled with my photo of treetops in spring in Photoshop Elements (to turn it into a crisp black and white image) and printed it on paper.  The trick was to figure out the correct time under the lights to get the screen to burn.  I thought I had messed it up, but was elated when I did as instructed and popped the screen into the sink:

The image began to materialize; I used a soft paintbrush to swooosh away the area that had "burned" where the black ink reacted with the emulsion

Anyway, here’s another view:

Part of the burned emulsion removed (lighter area), the rest to be removed

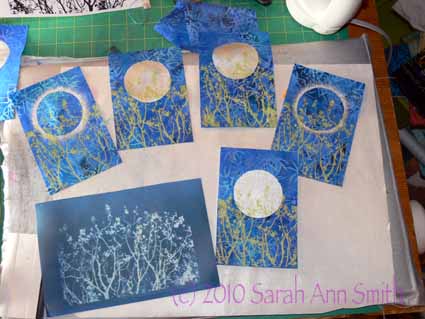
And here are the fabric postcards, for a “circles” swap I recently did, in process:

five of the postcards screened, with the full screen on the lower left

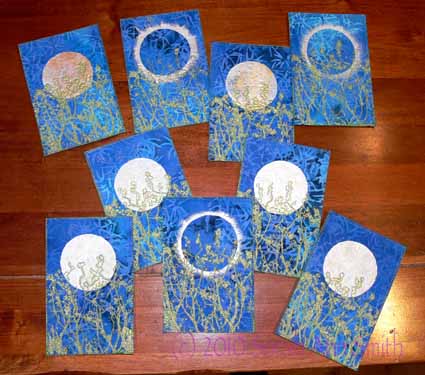
The moons and eclipse glow were done with freezer paper stencils using Lumiere paints, and the treetops were screened with Jacquard Lumiere Citrine (the lime green color).  I REALLY like the squeegee that comes with the kit…it was JUST the right balance between firm and soft for me.

What I learned:

  • I LOVE THIS PROCESS!
  • And it costs a fortune less than a Thermofax.  It isn’t, however, cheap per screen, but it will work and cost less per screen I think than a Thermofax.
  • Spring for the extra cost for transparencies for your images.  Then you don’t have to guesstimate the exposure time for your screen.  With a clear sheet, exposure time will be consistent.  If you print on paper you have to think about how heavy the paper is and how much it impedes the light working on the emulsion-ink reaction.
  • Play with your image and print it in black and white (to make sure you like how it turned out) before printing it onto the not-as-cheap-as-paper transparency.
  • Think about your images; in my case, I deliberately took the photo with only sky behind the treetops to make the photo editing process easier.
  • Clean your screens promptly so the paint doesn’t clog the screen permanently.
  • There is a learning curve about how much paint is enough but not too much; like most things, it takes a bit of practice and testing the various consistencies of paint
  • I’m gonna do more of this!

PS–I am not affiliated with Ginny in any way.  I just really liked the product and process!  I surfed around online and Ginny’s prices seem to be the best out there.  Plus she’s a quilter! While you’re at her site, check out her artwork, here.  Her newest work uses the screens and is amazing (click on the New Work button).

And a last look at all the “circles” postcards:

Spring Moonrise and Spring Eclipse postcards