email Youtube

Home
Galleries
Blog
Workshops & Calendar
Store
Resources
About
Contact

Archive for the ‘art quilting’ Category

Twelve by 12: The International Art Quilt Challenge

Tuesday, May 3rd, 2011

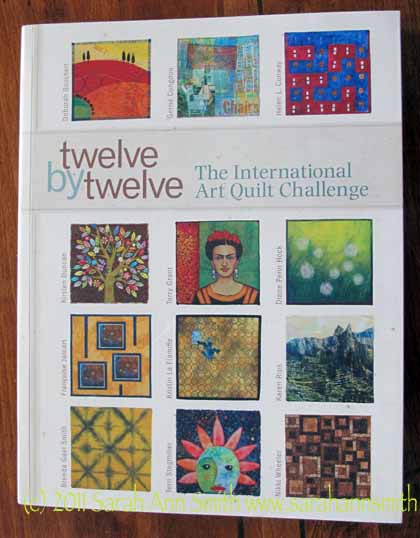
Twelve by Twelve: The international art quilt challenge

A while ago an early review of this book summed up their feelings in two words.  Ditto:

Buy it!

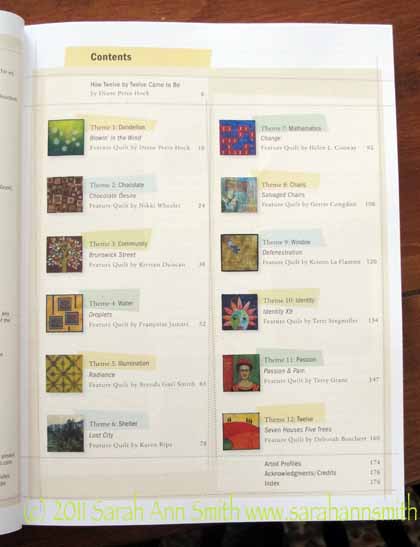
Table of contents: twelve chapters for twelve challenges

That said, here’s a few more details about this fascinating, informative book!  The project began with Diane Perin Hock, who invited quilt artists –newbies and experienced– into what became the Twelve by 12 challenge.  (You can see their website here and blog here.)  My friend and fellow Frayed Edges member Deborah Boschert (website here and blog here) is among the twelve, so I am especially thrilled to have followed this group from their beginnings, to thinking about a book and submitting a proposal, to published.  And how well they have done all along the way!

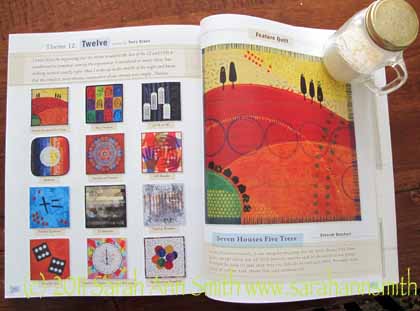
The book is arranged into twelve chapters, one for each of the two-month challenges.  The first chapter is written by Diane Perin Hock who is the featured artist for the first challenge, whose theme “Dandelion” she also selected.  Each chapter opens with all 12 of the 12×12 inch quiltlets on the left hand page and a large photo of the “featured” artist’s quilt on the right hand page.   In this chapter Diane explains how she came up with the idea for the challenge and got things rolling including  My Quilting Life, Choosing the Theme, Exploring the Theme, Creating My Piece, and Starting Your Own Challenge Group, a  how-to sidebar.  At the bottom of each page  the other 11 quiltlets are shown (larger than on the group page) with a  paragraph by each artist about her piece.

The subsequent chapters follow a similar pattern, though the person who selected the theme is not necessarily the featured artists for the theme.  The book ends with succinct artist profiles and links to their websites and/or blogs and—as every good book must have—an index. Of course I had to pick Deborah’s chapter to share:

Chapter 12, Deborah Boschert featured artist; I love Love LOVE the "thread wrap" Deborah has developed for her bindings. You get a clear "end" to a piece yet the picture continues in the thread stitched around the binding. Way cool! (PS--sorry about the salt shaker...needed something to hold the book open and it was nearby!)

As I read through the book, and yes I wanted to read every word, you  can see how the sense of community developed among this group.  It is amazing that each person managed to complete every challenge on time (or pretty much on time), and they share how they needed to make the bi-monthly “reveal” date stretch to accomodate the fact that members live in Belgium, the UK, the US and Australia and the dateline and time zones shift!  Each chapter has a  how-to section, and I think what I liked most was reading how each artist developed here quilt, sometimes rejected false starts, or re-working them, or admitting that “this was my least favorite.”  Not everything “works,” and it is refreshing to see something in print that acknowledges this necessary part of the learning and art experience.

To go back to where I began:  buy this book!  It is a treasure.  You’ll want to sit down and read it through.  Then browse.  Then soak in the art.  Consider inspiration.  Consider technique.  Ask yourself “what would I have done with this theme or problem?”  Then read it again…the book is available many places online including at Amazon.


Clothed in Color–more photos

Saturday, April 16th, 2011

As I promised on Friday, more pictures!   A while back, Kris C. asked in a comment for more detail photos in general…of  course we ALL want more pictures, so here you go–ask and it shall be given!  And I’ll try to include more close-ups in the future.

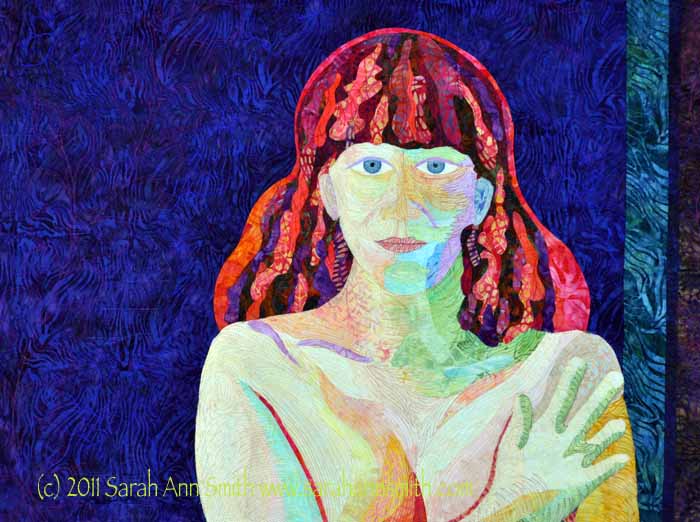
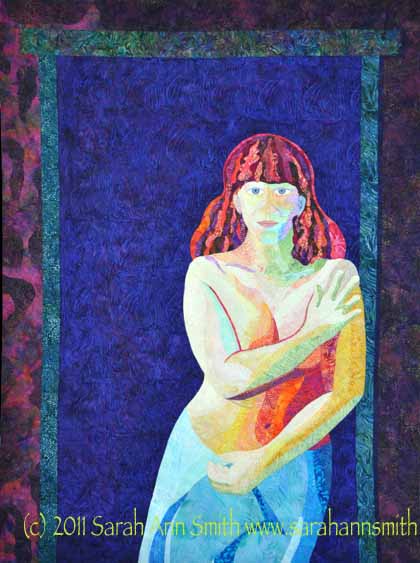
Here's the overall quilt

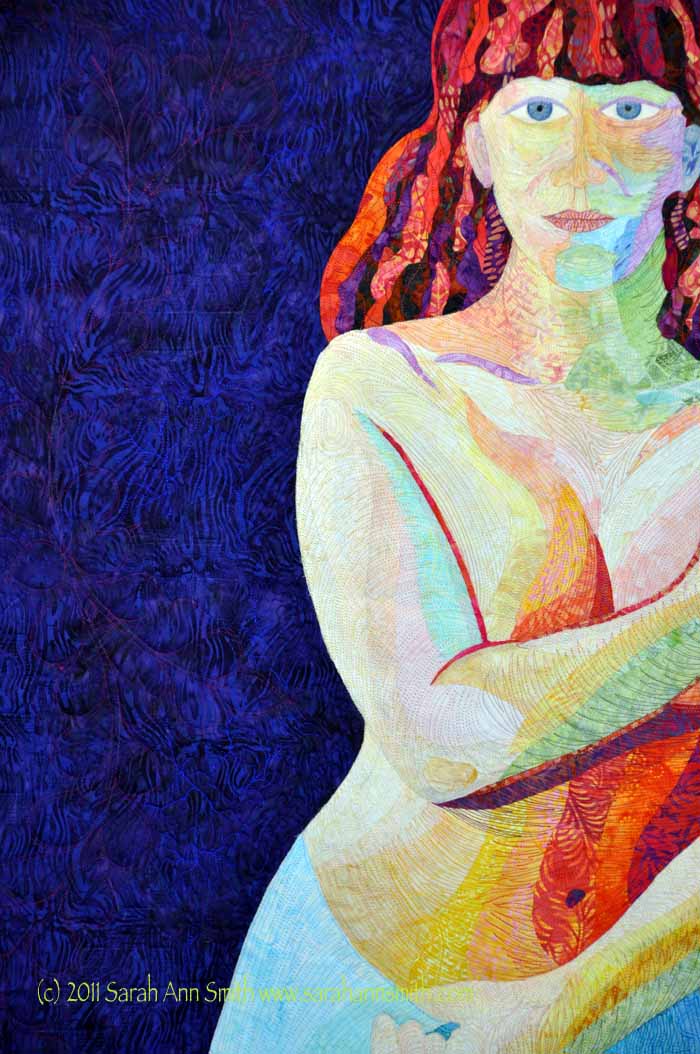
The detail photos are large–you should (in theory) be able to click on them to see them a bit larger and therefore see more of the quilting.  All of the color on this quilt comes from either the cloth or the thread–no paint or pencils on this one!

Clothed in Color, detail 1

and another:

Clothed in Color, Detail 2


And a few more…these are cropped sections so I’m not sure how well they will display on the internet at internet resolution….

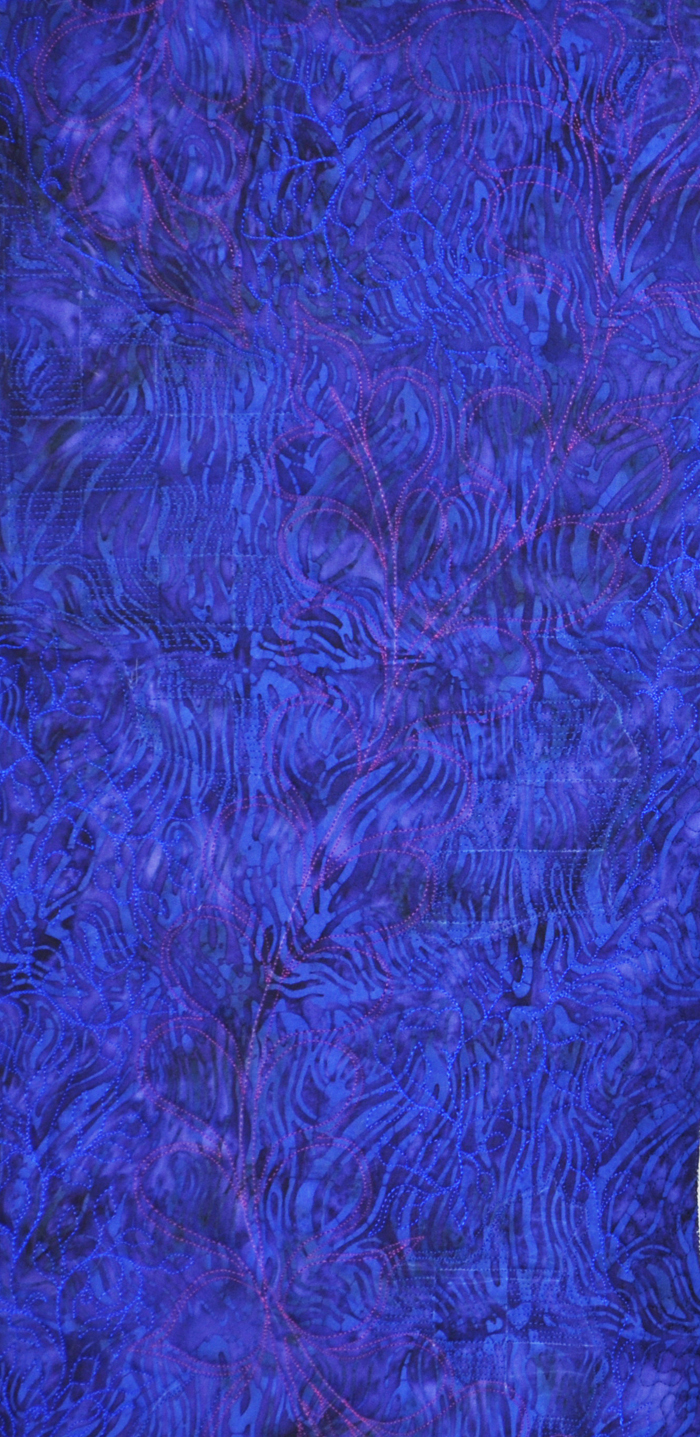
This feather is in the background to the left of the figure. Thanks to Photoshop Elements I lightened the color a bit so you can better (I hope) see the stitching. The background quilting is a checkerboard in some areas (you can still see the chalk mark guidelines) and freeform small vine in others.


Another feather in the border, along with words facing both forwards and backwards. The words include the things that are the good and the not so good that make me the one caught in the space between: mother, daughter, wife, quilter, tired, artist....

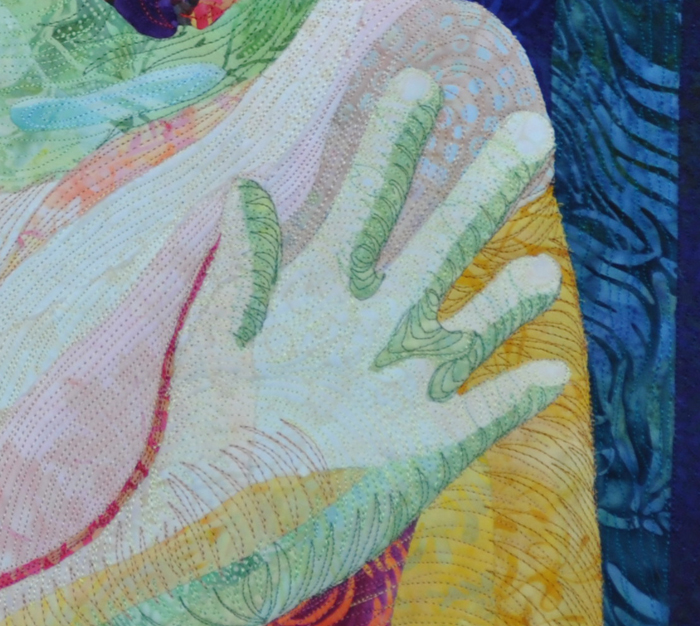
And a close up of the hand:

Hand by the shoulder in yellow, orange and green


Once again, great comments from my readers lead me to add a PS:

Kris…believe it or not, the “nested “V” is really easy…..  think of it as free-motion multi-stitch zigzags…..   I’ll do a row or two of nested Vs in one color on the edge of the arm (darkest), ditto on the opposite side in the next-to-lightest (or whatever color is suitable for the way the light falls).

For example, on the arm I’ll use maybe 4 or 5 colors….depends on the value (light-light medium-medium-medium dark-darkest tones) on that part of the arm.  The trick is learning to see what is there and then break it down into colors.

Sometimes, I use my thread stash as a guide.  If I have four colors that blend well but not five, then the color shift must be done in four colors.  You’d think with the gazillion threads I’ve got I’d have plenty, but when you really start sorting out tones, it’s amazing what you DON’T have LOL!  I’ll sometimes alternate a row or three of two colors to try to blend it, letting the eye “moosh” the colors into a seemingly smooth transition.

I can’t recommend “The New Drawing on the Right Side of the Brain” by Betty Edwards highly enough, or a drawing class in general.  Learning to actually SEE what is there, as opposed to what you think is there, is wonderful.  Also fiddling around with the filters in Photoshop Elements (just the cheapie version is unbelievably robust) can teach you to figure out where the lights, mediums, darks and deepest darks are.   I was surprised when in a drawing class 20 years ago someone said the darkest part of the face is the line between the lips.  It actually is, but I’d never noticed, and now I believe nostrils aren’t far behind!

Thanks to all who take the time to comment on my blog… I learn so much from all of you and your questions and comments!

The Space Between :: Dinner at 8 Artists

Friday, April 15th, 2011

Once again I have been fortunate to be invited to submit a piece for a show curated by Jamie Fingal and Leslie Tucker Jenison and even luckier to be included in “The Space Between.”  You can read more about the show itself here, at their Dinner at 8 blog.  I’m in some rather heady company, so thrilled that my quilt, Clothed in Color, made it in! The show will debut at the International Quilt Festival held this summer in Long Beach, then we hope it will travel to Houston as did its predecessor, Beneath the Surface.

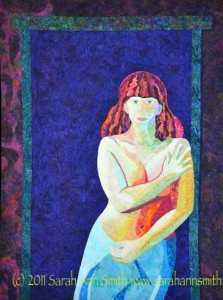
Clothed in Color, 36x48 inches

Jamie and Leslie have asked each of the participants to answer a set of questions, and I have LOVED reading the responses, here.  I encourage you to go visit the Dinner at 8 blog and see how our answers are similar and different—when I read my friend Susan Brubaker Knapp’s I had to write and tell her I had NOT read hers before I wrote and submitted mine!  We’re like twins separated by geography!  Anyway….here are  the questions and answers.

1.  What do you call yourself – art wise?

Quilter.  Art quilter.  Textile artist.  Interrupted by life!

2.  How do you jump start your creativity when you are in a slump?

Don’t know that I’ve had a slump per se.  Usually I am just too busy with life interfering with art or too tired.  That means I have a surplus of ideas and never enough time, so I just pick whatever quilt is hollering most loudly inside my head and let that one out next.

3.  If money wasn’t an issue, what would you do with your art?

Make more!   Give some of it away… I would love to do a “quilt mural” project for the local middle school (first panel is done), the continuation of “Be Inspired, No. 1” into a series of six quilts with people and places from around the world.

4.  Do you keep a sketchbook, journal, etc.?

Yes.  I’m not as diligent as I would like—it’s that lack of time thing.  But I have learned how useful they can be, am constantly inspired by my friend Kathy Daniels’ journals, so am trying to develop my own better “noodling around” habits.

5.  Where can people see your other work this year?  shows, books, magazines, etc

My book (ThreadWork Unraveled), my blog (www.sarahannsmith.com/weblog) and website, in my classes, the 2010-11 Quilting Arts Gifts issue, and whatever shows I get in (as long as I remember to apply in time).

6.  Do you teach?  where?

Have paycheck will travel–yes, I definitely teach!  I prefer to teach places where I don’t have to fly—detest airports–will gladly drive 2-3 days each way instead!  But I’ve been all over, and would love to go more places even if it involves an airplane.  Australia or Hawaii anyone?  My current bookings are on my website at https://www.sarahannsmith.com/schedule.php.

7.  Is there a particular artist who had influenced you in your art life? and why?

Vincent Van Gogh:  COLOR!
Henri Matisse:  exuberance and line
Auguste Rodin:  passion and form
The artisans of the Sutton Hoo burial grounds (UK–in the British Museum): design and ornament
Edward Steichen:  The Family of Man book/exhibit; grew up poring over the photographs and still do
The 8th grade neighbor girl who made the apron for my Barbie when I was 6–that got me started with sewing!

8. Where or what show do you hope your work will be in someday?

IQA-Houston, again I hope…
And if I ever make work I think suitable, Visions and Quilts=Art=Quilts, or if I can afford shipping the UK’s Festival of quilts and the Tokyo show.

9.  Describe your studio workspace

In progress.  We moved in February 2011, so at the moment most of the boxes are unpacked, but I still need to paint the floor (I have a large semi-unfinished space in the basement) and get some closet doors made before I can really settle in.  Despite only having four small windows near the ceiling joists (space is semi-finished, we spray painted the joists and under-floor white so it would look more ceiling-like), I installed good lights with daylight bulbs so it is bright and cheery.  I’ll have a 22 foot closet made by putting up design-wall-panels-as-sliding-doors on one wall for the detritus of art and teaching (file cabinet, teaching items, books for sale, art supplies and stored quilts  inside–don’t like working with too much visual clutter).  I hope to have a reading area, and my beloved Hoosier will be my desk.  I may even get to add a sit-down mid-arm machine this year….

10.  What 3 tools could you not live without?

MistyFuse.  Is MF a tool?
My Janome 7700 sewing machine.
Digital camera!
[and if they had allowed a fourth, my computer…my lifeline to the art quilty world and friends!]

11.  What drives you to make the work that you do?

I can’t NOT make my quilts–it would be like asking me to stop loving my kids and hubby or do without oxygen.  Just can’t be done!  I love to make things with my hands…to make something from inside my head become real.  There are so many things I want to learn how to do in terms of creating the image, both conceiving it and then physically making it.

12.  How do you balance your life?

Balance?  does *any*one have balance? (Picture Sarah ready to teeter off a rope while tossing a thousand items up in the air.)  I seem to lurch from one urgent thing to another, hoping I haven’t forgotten something important.  I know the insanity will slow down eventually, but right now I just try to make sure the family gets everything they need, and that I can still make enough art to keep myself sane!

I look forward to seeing all the quilts in the exhibit and reading all the artist interviews!  Well done, Jamie and Leslie and artists!

P.S.:  Since this post is long, I’ll do another tomorrow with some detail shots of the quilting.

A Black and White Tale (tail!)

Tuesday, April 12th, 2011

I have a treat for you today:

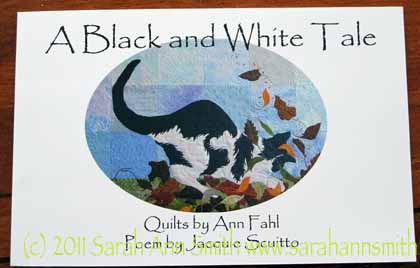
Oreo in the garden graces the cover and gives you an idea of the fun within the covers of this book.

This little gem of a book features Ann Fahl‘s Oreo quilts (Oreo being her cat whose colors are, you guessed it, the same as the favorite cookie) and a poem written by my friend Jacquie Scuitto to accompany the quilts. There is also a visual “index” at the back with smaller shots of the quilts that includes their size, date, blurb about each quilt, and the page on which that quilt can be found.

Those of us on the QuiltArt and Janome6500 lists are familiar with Jacquie’s wonderful poems (one of which about thread –thank you Jacquie!– graces the dedication page of my book) which are heartwarming and wise.  This little book is a chance for many more to get to know her.

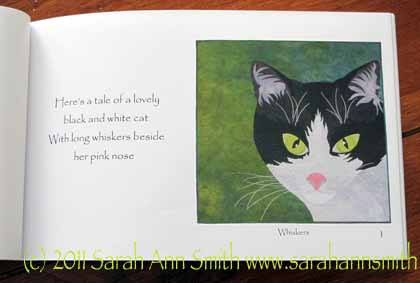
The book begins with a peek at Oreo.

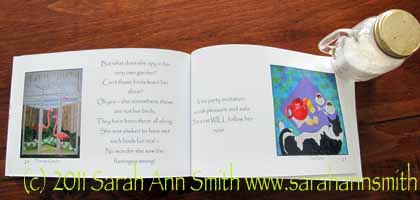
The poem and the quilts take you through Oreo’s days and things to do (bathe, eat, nap, be curious) and visit some of Ann’s other quilts (like the coneflower and iris where Oreo pokes about).

This book is perfect if you love quilts, love cats, love ditties, or all of the above!  The modest price also means that it makes a great gift for anyone who might enjoy cats, quilts or both!  You can purchase the book from Jacquie via an e-mail from her blog www.quiltmuse.blogspot.com (this method uses PayPal—you don’t need a PayPal account, just a credit card for secure online purchasing–scroll to the post dated April 1, 2011) or from Ann via her website .

Sample pages from A Black and White Tale

Just sitting with this little gem makes my stress levels go down—sort of like patting a cat but with less shedding hair!  It’s a wonderful poem to pick up and read and enjoy the quilts again and again!
I’m SO PROUD of Jacquie (and of course I’m biased, she’s my friend!)—congrats to both Jacquie and Ann on a well-conceived, well-done book!

Clothed in Color: how I did it….

Thursday, March 24th, 2011

I’m always fascinated by the creative process, especially seeing how someone else did something.  So I figure I’m not the only one with these voyeuristic traits and thought I’d share a bit of “how I did that.”  That, in this case, is my quilt Clothed in Color, which is an entry for “The Space Between” juried exhibit.  I wrote about it here.
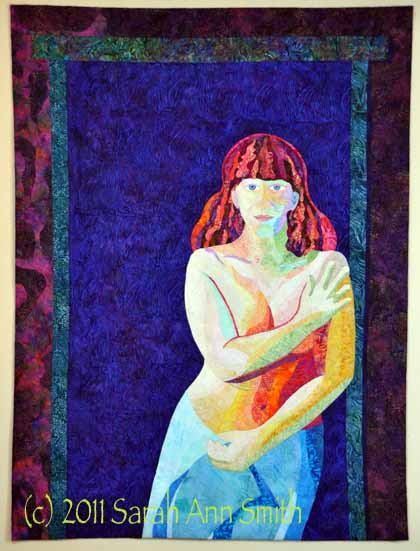
Clothed in Color; 36x48 inches (not quite one metre wide). Made with batiks, hand-dyes and thread.

Over the past few years I’ve been teaching myself about and playing with color, both in the dyepots and commercial cloth.  When I decided to do a portrait of our older son, I wanted to work with value only, the relative lightness or darkness of color, ignoring the actual hue (color).  As I mentioned before, though, I wasn’t too sure he would appreciate his skin being green, blue, pink, whatever.  As a test-run, I tried the process in the portrait of our pug, and it worked, so I set to work on the Joshua quilt (put Joshua quilt in the search box and it will take you to posts from mid 2010 with the process on that one) except that I used realistic skin tones.  Not so for this quilt!

For this quilt, I began by selecting pale batiks and dark batiks in anything other than a tan-brown-skin tone.  OK, an honesty moment.  I began by depositing a large sum of money (with glee, abandon and NO regrets) at Batiks Etcetera last summer.  As I drove to my teaching job at the AQS Knoxville show, I made certain to stop at Batiks, Etc. in Wytheville, Virginia. The shop is even more wonderful than their booths at shows and the service just as wonderful.  It is hard to find the light-light and dark-dark fabrics, so I went hog wild.  True confession:  I have never, EVER spent this much for fabric in one place at one time in my life.  It pretty much used up my fabric budget for the last 7 months of the year.  And it was worth every penny!  (PS…I blogged about it earlier, too, here.)   And I’m planning on doing it again this coming June when I drive past that shop on the way to teaching this year (WHEEEE!  Get ready Carol, make the bag a big one!).  Now here’s the photo of lights and darks:
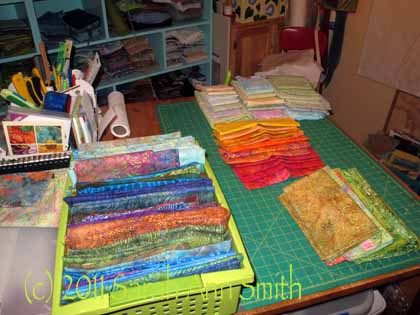
Sorting fabrics by value...light to medium on the table, darker ones and some extra lights in the green bin.

To get the correct pose, I set up my camera on the tripod and used the timer to trip the shutter (and cover myself strategically before anything too revealing got on digital memory card!).  I took a lot of photos until I had the right tilt of the head, expression, curve to my side, placement of arms and hands.  Then I set up the digital projector (which I bought to use in lectures and classes, and now have this use for it, too!) to project the photo onto paper folded/cut to 36×48.
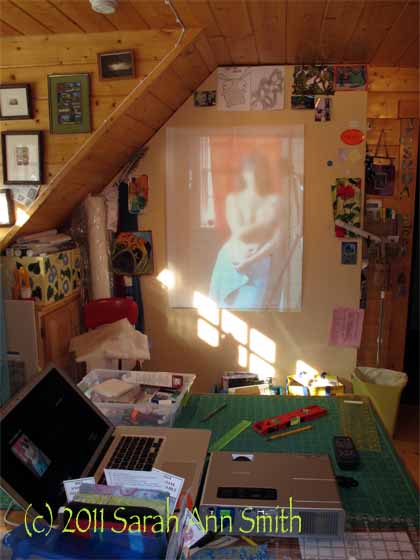
Me, in blurry living color, on the design wall in the old house; you can see the laptop and projector on the work table. PS--notice in the photo I am in our bathroom with a cloth covering the window behind me, not in a doorway at all. That's the camera and tripod on the right reflected in the mirror (which I was using to see how things looked).

Somehow, a photo is much more “revealing” than the same thing in batiks, so while I’m not too uncomfortable with a semi-nude quilt of myself, I decided I had best blur the photo.  Ahem.  And I’m glad I lost that 25 pounds a couple summers ago!   Having carted the weight around since my last pregnancy (the kid is now 13) it was time for it to go!

Anyway, back to quilting.  Or drawing.  Rather than use photoshop to define shapes, contours, etc. I prefer to take a drawing pencil and outline the edges and make my own decisions about where I want shapes and colors to merge and blend and overlap.  I will draw these “interior” lines, too, and often add notes like “medium-dark” on the drawing.

I decided to tackle the hardest part first:  my face.  In the end, the eyes ended up about 1/4″ too close together, and I may be able to adjust that, and they are a smidge too large.  Other than that, things turned out OK.  Once the face was done, I could move to the torso (using larger chunks of fabric), the towel, and the hair.
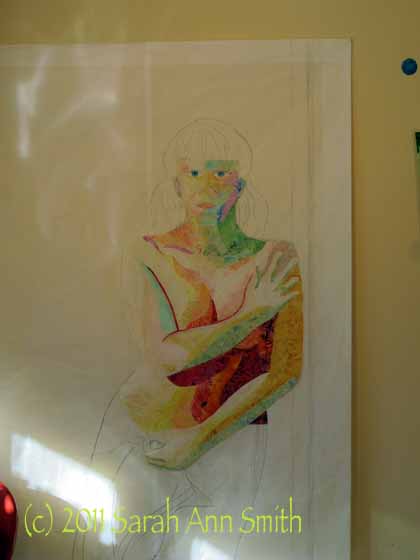
I began with the most difficult parts (face and torso). I ended up removing much of the dark fabric for the strong shadow under my arm..tho the photo was that dark, it just looked weird in cloth, so I reduced the fabric and later added lots of dark thread to create the shadow.

Thelma Smith made some awesome quilts of the Sonoran Desert, and in them used a technique she learned from a painter and then shared with me.  The painter used Cadmium Red Light paint to outline / highlight some figures.  It really makes them pop out from the background, especially when values are similar.  It doesn’t shriek at  you like black would, and despite being a color totally not there in real life, the technique works.  I’ve wanted to try it for quite some time, so I did for the hair, and used a deeper red for the shadows to the right and top of my right arm.  I decided since I selected a deep-dark fabric for the background, there was plenty of “pop” on the body, and didn’t continue the “red halo”, but think I’ll have to do another portrait of someone and give it a try on the entire figure.

Anyway, here is the hair in progress:
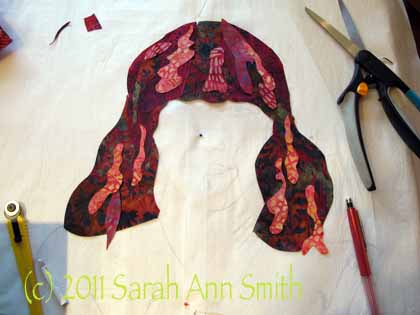
Hair, in progress (early stages)

In this photo, I decided to work on the table, not the wall.  I placed my sketch UNDER some parchment paper; I can still see the lines, and can cut and MistyFuse directly onto the parchment.  As with Joshua’s hair, I cut large, darker chunks to create the overall shape of the hair.  Then I cut highlights (magenta, orange, rust, green!) in wobbles and waves and wiggles, adding until it was “just right.”  Here’s a closer view of the hair when done:
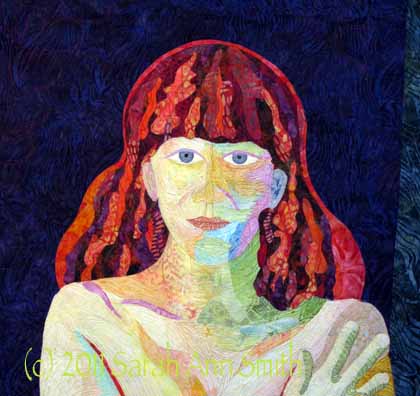
Detail showing finished hair

When I first envisioned the quilt, I thought I would fuse assorted bits of dark fabrics to make the background, as I really liked how the stark, dark contrast worked in the quilt of Joshua.  To get an idea of how it would look, I took one large chunk of blue batik and put it up on the wall, then pinned the fused “me” to it.  I liked it…a lot!  And decided that if I made the background into “boards” like our walls in that house, it would actually detract from the quilt.   So I made my life easier and used one single dark blue batik for the “wall behind the doorway,”  a doorway that doesn’t actually exist.  Then I used other bits to create the door frame and wall around it, preserving the angle of the light / shadows—the light was strongly coming in from windows on the left (and lamps set up to cast strong shadows to make getting the planes and shapes of my body easier in the drawing phase).

I’ll add that the entire quilt is done ONLY with thread, cloth and MistyFuse (my totally favorite fusible web).  There is no paint.  No pens or pencils.  Just cloth and thread.

So that’s how I did it!  Hope you’ve enjoyed the view,

Cheers, Sarah