email Youtube

Home
Galleries
Blog
Workshops & Calendar
Store
Resources
About
Contact

Archive for the ‘art quilting’ Category

Tune in to Creative Mojo Weds. March 6th!

Tuesday, March 5th, 2013

and you’ll need to not “blink” with your ears or you might miss me!  I’ll be on at about 3:20 Eastern (US) time.

Creative Mojo radio with Mark Lipinski

Creative Mojo radio with Mark Lipinski

But I’m happy to report I’ll have my two minutes (literally…that’s all:  two minutes, but much appreciated)  of fame tomorrow, live on Creative Mojo with the irrepressible Mark Lipinski.  You can tune in here, on Toginet.   Or if you are someplace you can’t log on and tune in (or perhaps like me get so involved in stuff you forget what time it is and miss stuff), you can always catch the Creative Mojo podcast, here.   The website tells us:

CREATIVE MOJO WITH MARK LIPINSKI is a live, two-hour entertainment program broadcast on the Internet. It’s fun, entertaining, informative, inspirational and illuminating.

and

  • Just log onto www.toginet.com for a brand-new,
  • LIVE, 2-hour
  • Creative Mojo with Mark Lipinski!
  • 3 pm -5 pm EST    2 pm – 4 pm CST 1 pm – 3 pm MST    12 pm – 2 pm PST
  • Call in anytime during the live show with your questions or comments for my guests
  • (877) 864-4869

AND I just discovered you can go to iTunes and subscribe to his podcast! WOOT!

As for what I’ve been up to since I last posted, I had a *really* long commute to work last week:  flew from Maine to Florida and back so I could spend two wonderful days teaching for and lecturing at the meeting of the Venice Area Quilt Guild.  Many thanks to my host and program chair Betty Jordt and the folks of the guild AND some folks who know me who actually came to the lecture!   I’ll blog soon!

Since returning on Thursday afternoon, I left within 16 hours to head south to Rhode Island to support two of the members of Eli’s high school wrestling team who made it into the VERY competitive New England Regional Wrestling Championships:  to get IN you have to be a State Champion from Maine, New Hampshire, Vermont, Massachusetts, Rhode Island or Connecticut.  Talk about stiff competition!   Both boys did well and one even placed!   It was a great trip but I’m REALLY glad to return home on Sunday.  Yesterday was lots of bookkeeping and paperwork stuff, and today was spent researching patents!  I have an idea for a quilting tool, and may be dashing off a provisional patent application in the next week before a new law goes into effect on the 16th of this month (ERK).   So I’m going to be scarce while scrambling to do something that should take me months and consultation with a lawyer (not to mention a patent search that goes back 120 years), but I’m gonna try anyway.  Stay tuned—maybe in a year I’ll have some good news if the provisional application goes through and I can find a manufacturer and funding!  (Can you say Kickstarter campaign?)

But in the meantime, I’m looking forward to a couple minutes on the phone and radio tomorrow with the ever-funny Mark Lipinski!

Off to Venice, Florida!

Sunday, February 24th, 2013

Hi all!  I’ll be teaching and lecturing this week in Venice, Florida!  My departure was scheduled for today, but due to snow I’m leaving Monday but will be there in time for teaching on Tuesday and Wednesday, and the Wednesday evening lecture.   Here is some info from the Venice Area Quilt Guild website:

February 27, 2013 regular meeting at 7:00 pm at the Venice Community Center, 326 So. Nokomis Avenue, Venice, FL 34285.

Our regular February 27, 2013 meeting will begin after the special meeting with guest speaker quilt artist Sarah Ann Smith.  Sarah’s talk will be “How did she do that?”.  There will be a $5 admission fee for non-members.   The doors open at 6:15 for socializing and guild business.  The meetings will begin at 7:00 pm.

I’m teaching one of my favorite courses to teach:  Quilting Design!  The one-day class will be held on both days.  There are still a few openings, so if you’d like to attend, contact the guild!

If you’d like to read more about the class, go to my classes page and scroll down to “Quilting Design.”  The class supply list is also available as a pdf in that description, just click the link.   And if you’d like to book me to teach the class, I’d love to do so!   The class is best as a 1 1/2 or 2 day class, but can be squeezed into a day with Some exercises you can take to do at home instead of in class (where you get feedback).  Hope to blog pictures later in the week!

in eQuilter VidCast!

Tuesday, November 20th, 2012

Well, my quilt is!  I’m so thrilled…thank you to Luana Rubin of eQuilter for including my quilt, Conversations 1, among those featured in her vidcast of the art quilts at International Quilt Festival Houston, 2012!   Here’s the video or look for it in Luana’s videos on YouTube.

I’ve clearly been distracted by re-entry at home… I have tons of photos of teaching and the show in Houston to share, but have been busy with family birthdays, appointments, readying for Thanksgiving, and so on.  I hope to get you all some blogposts soon.  In the meantime, hope you enjoy this video!

First Glimpses, IQA / Houston Market and Festival 2012

Wednesday, November 7th, 2012

I left Owl’s Head airport in Rockland at Sunrise:

Sunrise from the Cape Air plane to Boston

And departed Boston’s lights at 6:30 pm,

Taking off from Boston-Logan airport, Monday night, en route home

Arriving back home in Owl’s Head at about 7:35 pm:

Yes, it is that dark here! The long string of lights you see are actually the runway!

I really like the lights of home.  Or more precisely, the lack of lights!

In between I had the most fun I’ve ever had in Houston:  I taught Monday, Tuesday, Wednesday, Thursday (with demos on the show floor), and Friday morning.  Saturday I got to visit the Texas Quilt Museum in LaGrange, Texas (about 90 minutes by coach bus each way), and Sunday got to see the show.  Then home on Monday…nothing better than coming  home to hugs with my guys and slurps from the critters.

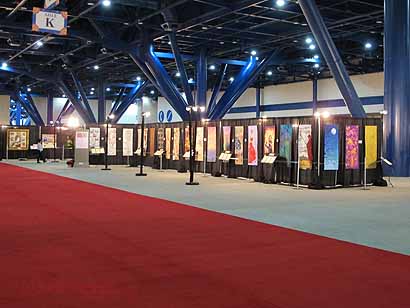
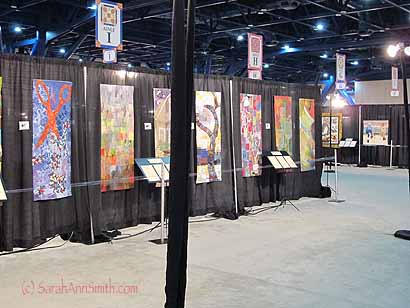
The Rituals exhibit during Market. I’m so glad I took this picture, because I thought I was losing my mind! During Market, my quilt was facing the aisle. When I returned on Wednesday night when Festival opened they had swapped the quilts from front to back and end to end! So glad I’m not crazy and that I really did remember this correctly! My quilt is Strength and Calm, a standing figure on a yellow-to-gold-to-plum background (just to the right of the lady in the red dress).

And part of the other side of the “Rituals” exhibit. Thanks to Havel‘s for sponsoring this exhibit! We, the artists, truly appreciate your generosity.

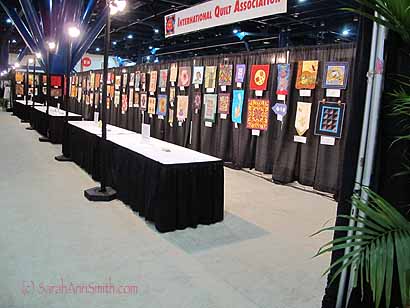
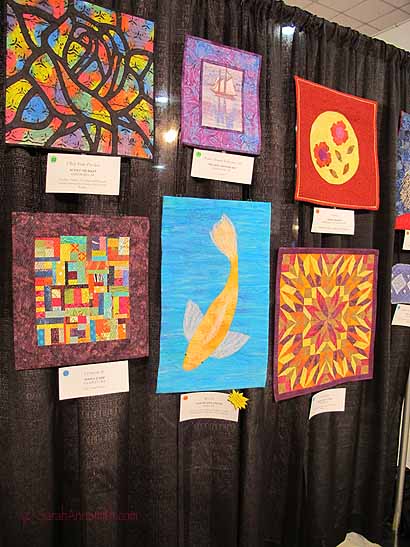
This year I was able to donate again to the IQA Silent Auction. Here are the donations from award winners, teachers and authors on display.

My donation was the Koi, which is a first cousin to the Koi quilt I made 8 years ago. He has now swum off to his new home! Enjoy, and thank you to whoever bid on him. I appreciate your support of the International Quilt Association!

I’ll be back in the coming days with pictures from my classes, trip to LaGrange, and the show floor.  As always, I am blown away and inspired by what I was able to see!


Quilting the Egg

Friday, November 2nd, 2012

Eggs on White…an exercise in learning to SEE.

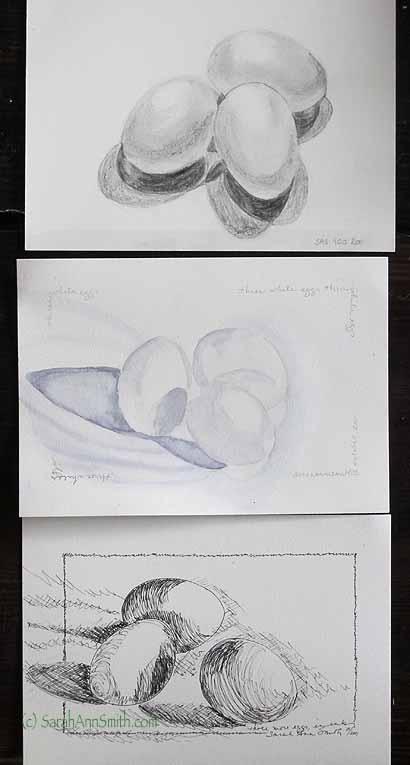
A few years ago, one of our younger son’s karate teachers told me about a drawing exercise he learned from Jaime Wyeth (!!!!).  Place a white egg on a piece of white paper and then draw it.  By eliminating all color, the exercise helps you REALLY focus on where the shadows are, reflected light, shape.  So last year about this time, I tried it in my sketchbook.  First I used pencil, but then wondered what it would be like in watercolors (over which I do not have expert control, ahem), pen, and so on.  I tried the pen because before the advent of photography, pictures in newspapers and books were often engravings, rendered by using lines, dots, cross-hatching to create light, dark, shading and shape.  Finally (duh, Sarah) it occurred to me that the same exercise would be well applied to thread and cloth.

  • And a note:  by the time you get to the end of this post (which is long…sorry!), I can just hear many of you saying “I could NEVER draw like that.”  Well, neither could I when I began.  I’ve learned, and so can you, you just need to try.  I’ve learned to teach myself drawing, learned to SEE.  I recommend Betty Edwards’ The New Drawing on the Right Side of the Brain very highly.

A whole lot of our thread-coloring, quilting with thread, thread-sketching–whatever you want to call it, is achieved the same way artists used pen and ink in the days of yore. You use the direction of the stitching to create a contour, like on a hiker’s contour map of the terrain.  And you can use different colors or use the same color applied more densely to create variations in value–the range of color from light to dark.

One of my first efforts at eggs, using a water-soluble gray ink pen.

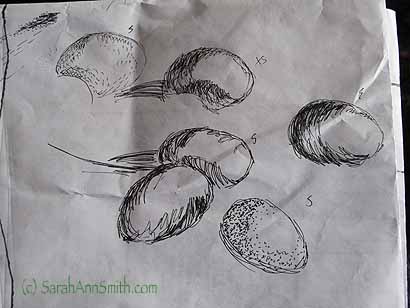
When I started playing around, of course I didn’t want to muck up the expensive watercolor paper, so I did a few test-sketches on copy paper:

Practicing directions and types of line to create shading for the eggs. The S and XS are reminders about the size tip on the pen I used, a Pitt permanent black ink similar to the Pigma Microns.  I have found that my Pigma pens just dry out too quickly, and that the Pitt pens work as well on cloth and seem to last longer for me.

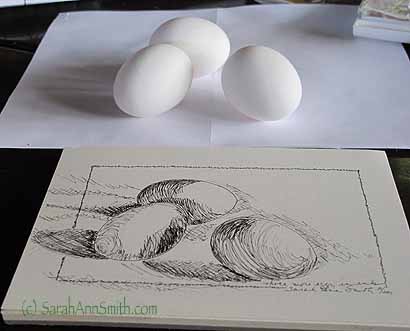
Then I tried by drawing in pencil first.  In this photo, I’ve included the eggs on white paper in the background and my ink sketch in the foreground:

The eggs and the ink drawing, which I did to simulate on paper what I might do in cloth.  This sketch was done relatively quickly, so I’m pleased that it gives a decent rendition without taking eons to do it.  If you look carefully at the egg on the right, look at the  left side.  There is a triangular wedge of shadow BUT at the bottom, *under* the edge of the egg, it actually becomes a brighter / lighter gray from light being reflected and bounced up off the white paper!  Whooda thunk it?  And just in front of the tip of that egg…notice that glow of white *under* the egg?   It’s amazing what you can see when you really start LOOKING at something!

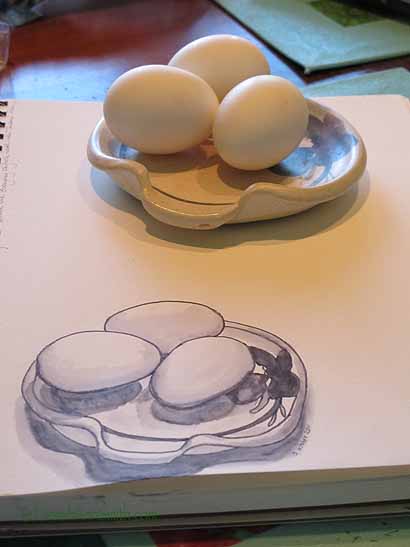
Next, a comparison using three different media:

From top to bottom, the eggs done in pencil, watercolor and ink.

Then this year I signed up to teach at Friday Sampler in Houston; think of this as speed dating for quilters!  About 20 teachers are in a ginormous room at the Houston convention center, each with their own Station (one or two tables).  The teacher does brief (5-10 minute) presentations…same one over and over.  The students/participants can come into the room and move from station to station at will to see what each teacher has to offer.  I’ll be talking about Thread-Coloring, so I thought it would be the ideal time to do up some new samples to teach how to see light and dark, light and shade.

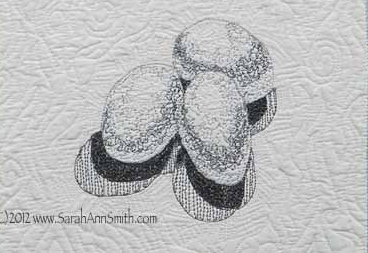
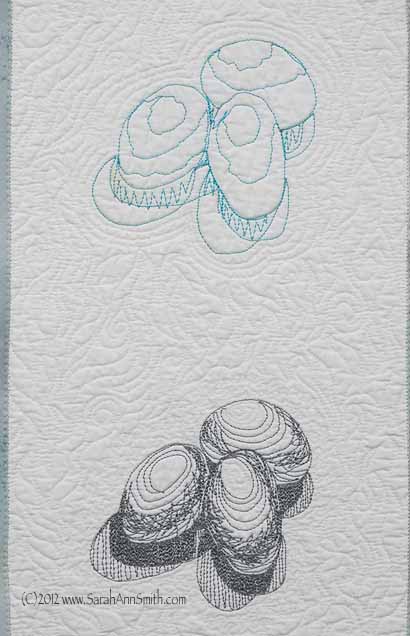
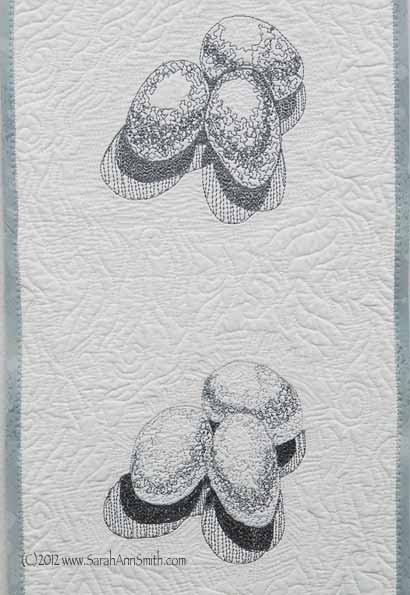
This sample shows the lines I drew in blue pen (quilted in a similar blue since over time those blue pens can fade out with humidity!), followed by three variations in quilting them.  The top two quilted ones are stitched with ONE color of gray thread (the new Magnifico poly from Superior Threads, and it is magnifico!).  The bottom set of eggs is quilted with white and three shades of gray (light, medium, dark). You’ll notice two sets of cast shadows…that is because there was light coming from two directions:  the electric light and the window.

All four versions in thread: the blue is to represent the markings I put on the quilt. The second set of eggs is quilted with cross-hatching of sorts using one color of gray thread. The third set of eggs is quilted with a scribble using one color of gray thread, and the bottom/fourth set of eggs is quilted with the same scribble but using three shades of gray. For all three of the quilted sets I kept the way I stitched the shadows consistent to make comparisons easier.

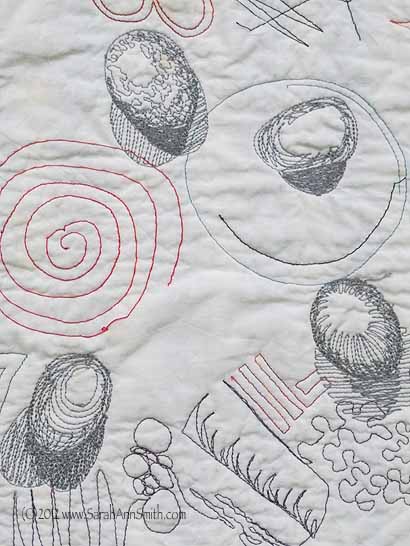
Just as I did with my paper sketches, I did some practice runs on an old warm-up quilting sandwich:

It’s good to try out various options on a scrap quilt sandwich before working on the real thing.

I’m not thrilled with the cross-hatch stitching I did on the final sample…those ovals on the top just don’t do it for me.  I would not use this quilting on an actual art quilt…that’s the benefit of test-driving quilt designs on scraps and samples.  I really liked the way the scribble versions turned out, though!  Here are some close-up photos so you can see better:

The “marked” (blue) design and the first of the quilted eggs.

The bottom two quilted sets of eggs.