email Youtube

Home
Galleries
Blog
Workshops & Calendar
Store
Resources
About
Contact

Archive for the ‘art quilting’ Category

Photoshop–Finding the Stamp Tool, Thermofax screens

Tuesday, March 28th, 2017

WAHOOOO!   I’ve discovered something almost as cool as the holy grail!  At least if you want to make thermofax screens…..and yes, you may liberally share the link to this blogpost so that others may learn and play with paint.

If you want to find out how to do this the easy way, keep reading!

So I was on a quest for my next project:  creating thermofax screens using my new (to me) thermofax machine.  I remembered a tool I loved in Photoshop Elements (PSE), but it wasn’t in Photoshop (PS–full thing).  How could that be?  So I opened up my 2010 PSE software and discovered the tools I liked were called Stamp and Photocopy, in Sketches under Filters.   So I googled around to find out how to create actions in full PS to do what those tools did.  Turned out I didn’t need to–Adobe included those tools but then HID THEM.   So here is how to find and use these awesome tools.

Note:  I realize this will sound like gibberish unless you are into PSE or PS….if you aren’t, just skip!  But this is SO AWESOMELY COOL AND USEFUL for those of us who want to make Thermofax screens and use Photoshop! So if you are interested, read on!

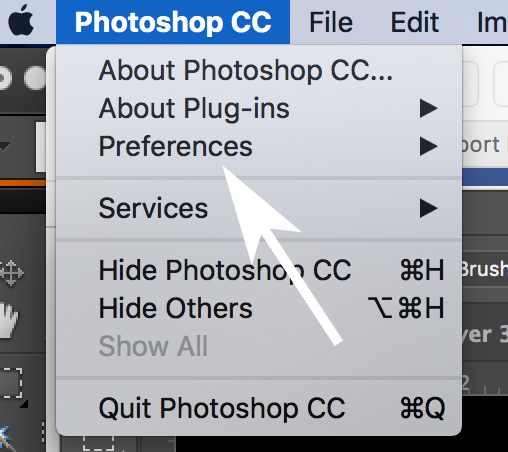
First, you need to install all of the Filters in the Filter Gallery.  Yeah right.  Not as hard as it sounds.  Under Photoshop, find and click on Preferences.

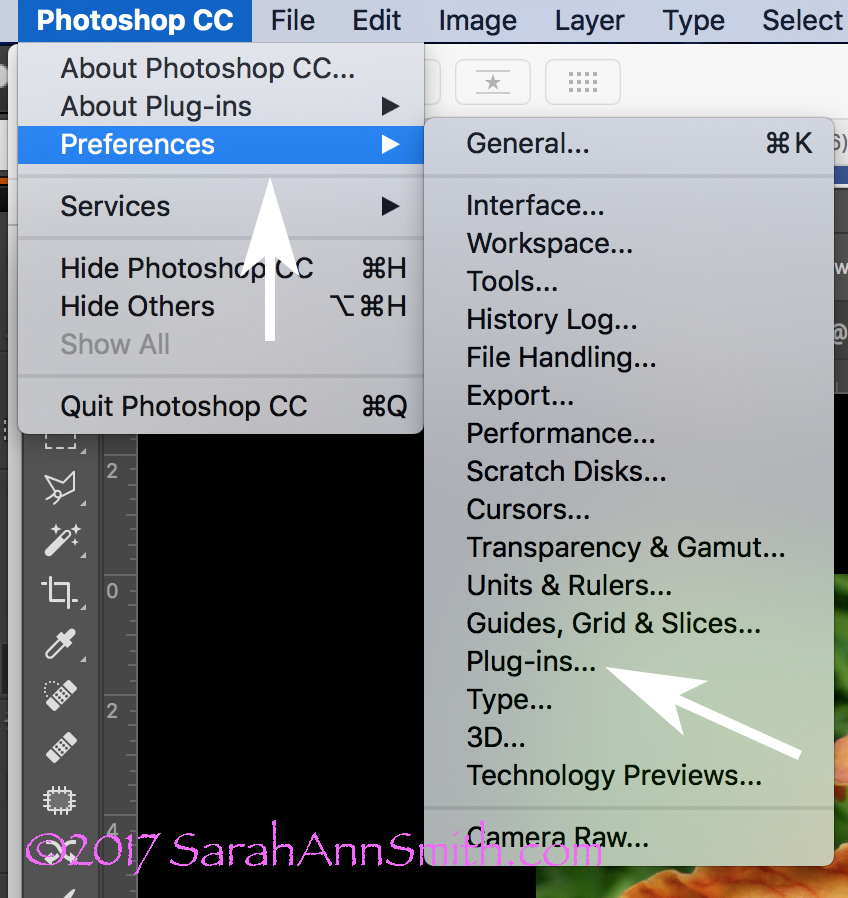
First you need to find Plug-Ins and load the Sketching filters.

That will cause a pop-out to appear; look for and click on Plug-Ins:

The flip-out widow reveals Plug-Ins. Click on it.

When you click on Plug Ins this window opens up.  Check the box to show ALL Filter Gallery Groups and names.  Sheesh….why was this not the default?????
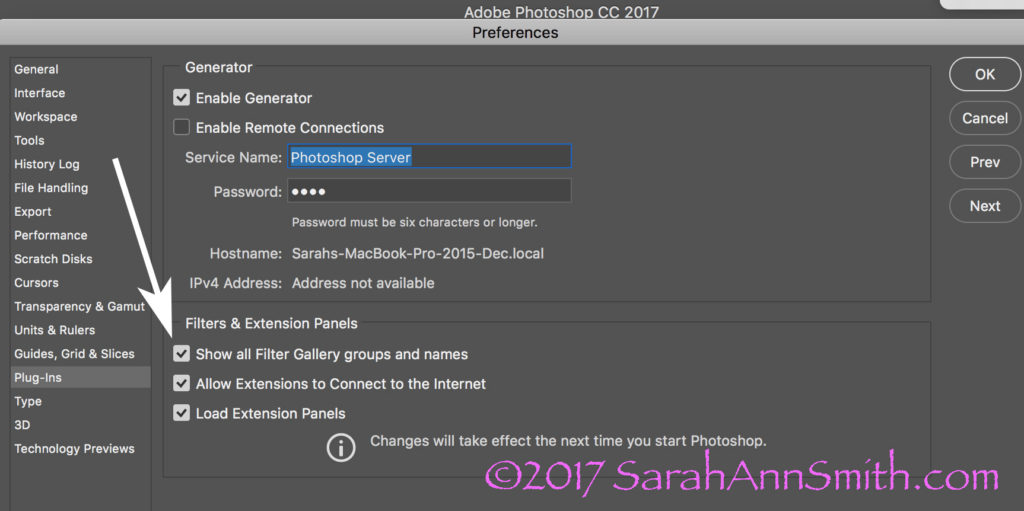
This window will pop up. The box at the bottom of the arrow will be blank. WHY Adobe? WHY? Check it and the wonder and joy of more filters will appear in your PS workspace.

Here’s a colorful photo I use in my Quilting the Garden workshops.  NOTICE the COLORS in the Foreground and Background boxes on the bottom left corner.
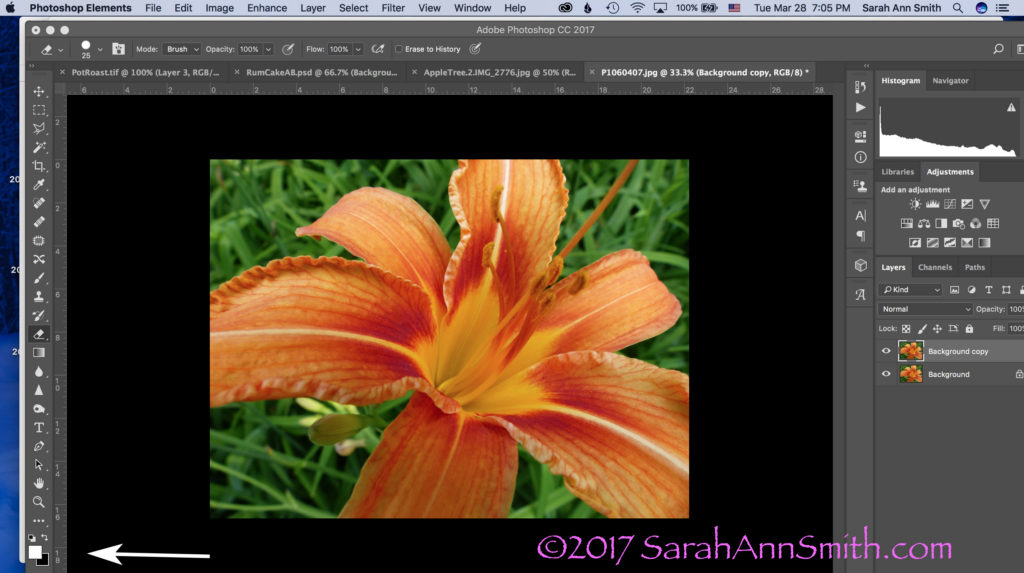
Let’s pretend I want to convert this image to black and white to create a Thermofax screen.  Take note of the little Foreground/Background boxes at the bottom left.  They are important.

Boxes are important!   The next step is to USE the Stamp tool.  Look across the top of your PS window.  Click on Filter, then Sketch, then Stamp.
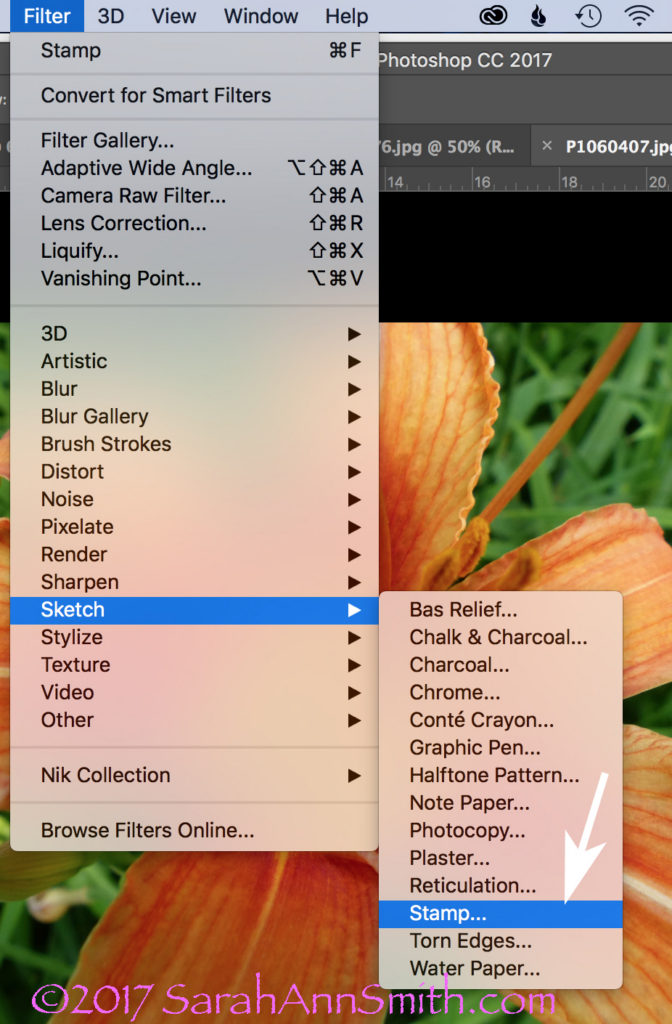
To use the Stamp tool, go to Filters (on the menu across the top), select Sketch, Then Stamp (see arrow).

When you click on Stamp, the following window opens.  But I ended up with Grey and Black.  WHY?  It used to be black and WHITE, right?  So what was I messing up?
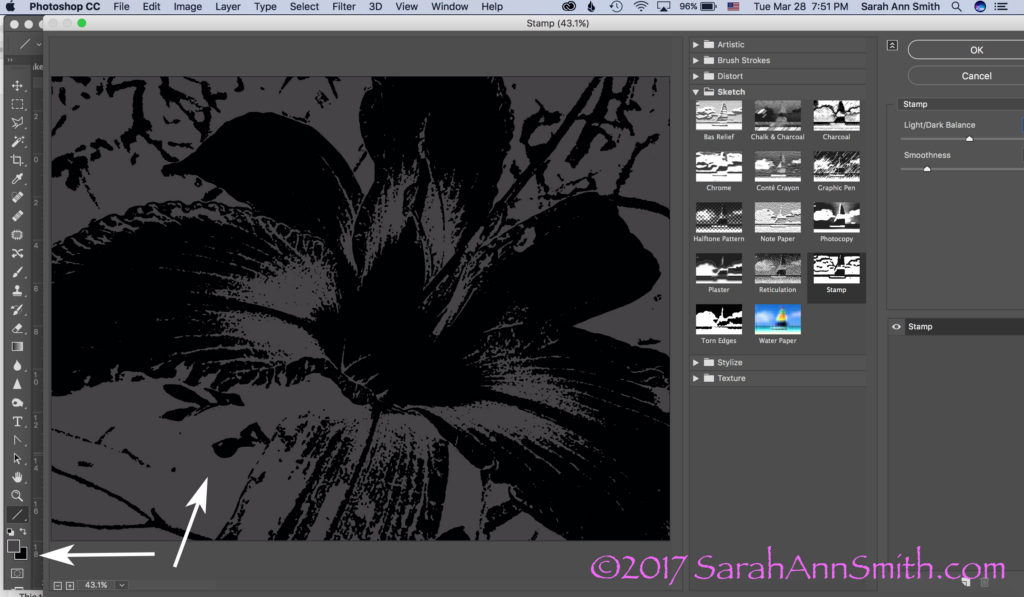
This was not what I had in mind. Then I had a lightbulb moment (who me? I know, rare, but it does happen sometimes). Remember those BOXES?

YEP…..the Foreground color, due to something I’d done not so long ago, was dark grey, not white.  Aha!  A glimmer of light (pun totally intended).  Groan.  Remember, Boxes are Important!  I switched the foreground color from dark gray (above) to WHITE.  And lookit what I got!
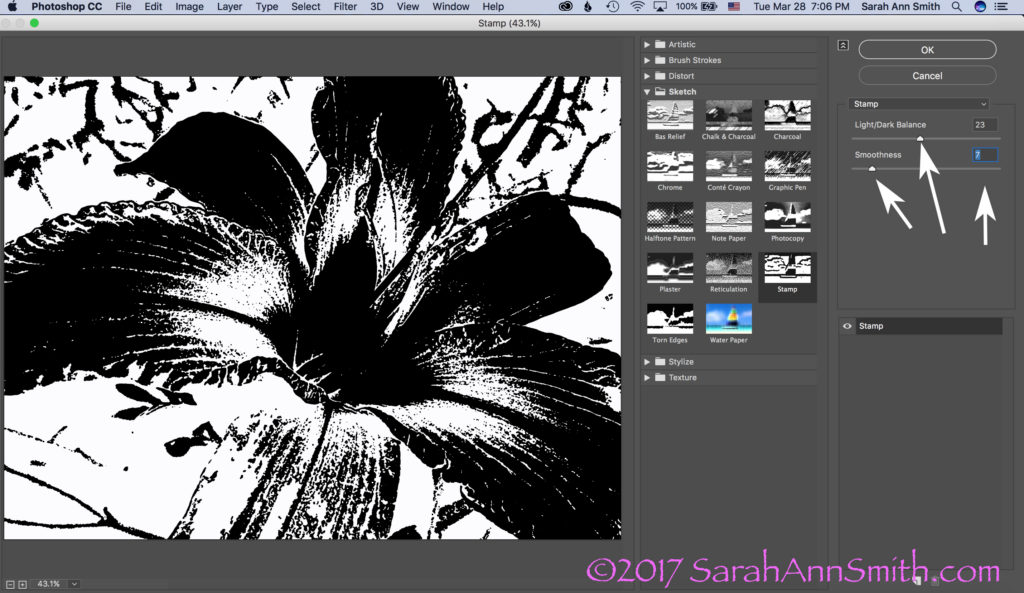
Drum roll……stamp is once again black and white!  Notice the arrows on the right:  use the sliders or the number boxes to adjust the level of black/white and the degree of detail.  Now isn’t it a whole lot easier to get to this point in a hurry, THEN fine tune with the eraser tool to clear out extraneous yuck?

Those arrows on the right point to fun things to play with to adjust the amount of black, white, detail, etc.  But the realization that the foreground/background colors could make a mess make me think….hmmmm……COLOR!  What would happen if….

BUT, one more tidbit about what you see in the window.  The one below looks like a lot of nothin’, right?  That’s because is it at 100 percent, which doesn’t fit.
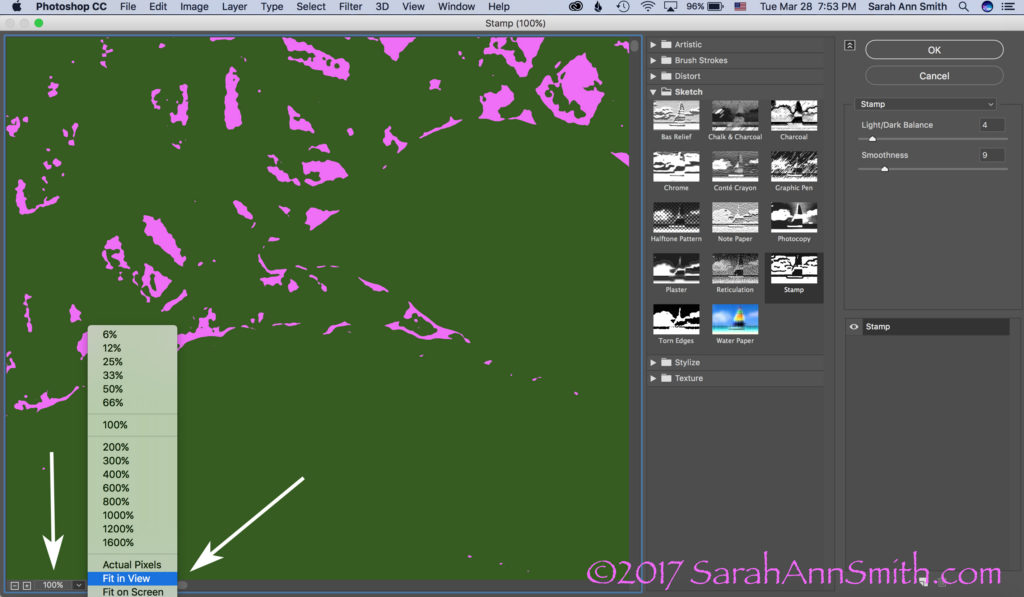
Then I realized I could play with COLOR. When you open this window, however, it opens at 100 percent. I prefer the “Fit In View” option, so check out the arrow once again.

If you click on the little down arrow to the right of 100%, you can switch it to Fit In View or whatever you like to use.  For my pea-brain, it’s a whole lot easier to figure out what I’m doing when I can see the entire picture, like this:
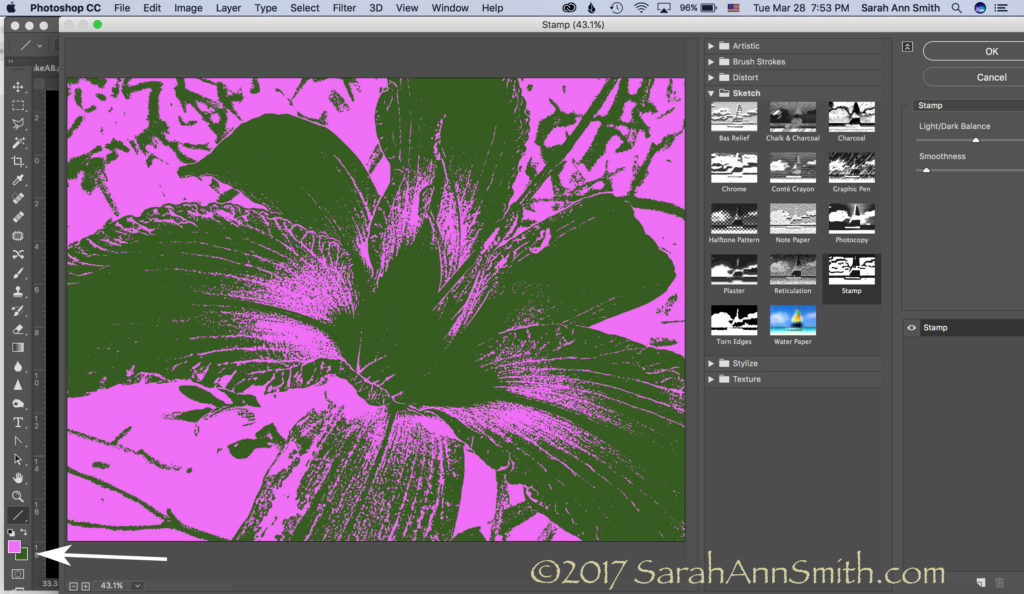
Then you can create a really bizarre two-tone hot pink and green image. Just what you always wanted, right? Not! But you can see the potential, right?

Let’s just say I am ridiculously happy.   I asked for help on FB today and got it…THANK YOU Lynn Krawczyk, Lyric Kinard and Leslie Tucker Jenison among others.   Then I — having learned this lesson before — googled around for online information, including the forum at Adobe, which is where I found the clue that the Sketch filters WERE in full PS.   But I didn’t know the terminology (like where to find the Line tool to create an arrow to illustrate these screen shots), so YouTube search box to the rescue.

SQUEEEEE!     I don’t need to use my antique PSE, I can use full PS and not have to move between the two, AND (best of all) I have my easy-peasy Stamp tool back!   Time to CELEBRATE!  Lynn, I may just have to fling some paint!  And now that I have written this up to share ASAP in thanks, I am going to celebrate, perhaps with chocolate! Or maybe Talenti.  Or some culinary Venn diagram that involves the intersection of Talenti, banana and chocolate.  SQUEEE!

And a PS, thanks Whiskers for asking the questions:  Hi Whiskers!  Yes, I will do a blogpost eventually on thermofax screens.   Not sure when, so the quick response is the Thermofax machine is the predecessor to today’s photocopier.  They were used in the 50s/60s in the office to copy stuff.  They are no longer made (consequently they cost a fortune, it has taken me a decade to save up and make the purchase, $1350! If you buy one be sure you get one that works with the mesh, not just the purple ditto masters!)…but folks have figured out if you use an image with carbon in the ink (laser printer, some inkjet printers, carbon ink, lead pencil) and you run it through the machine with a plastic-backed mesh, the plastic melts where there is carbon.  When you separate the two sheets (paper and plastic mesh) you end up with a screen.  Tape up the edges, then push the paint through.  I actually just taped a segment for Quilting Arts TV on this!


Surf

Monday, February 13th, 2017

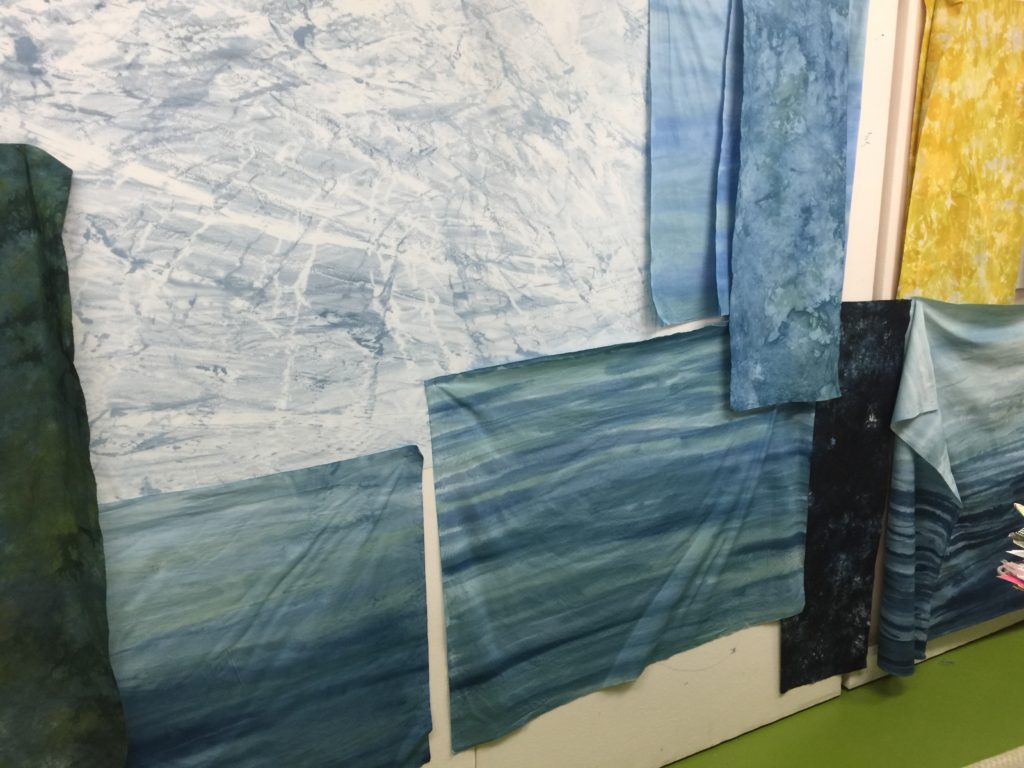
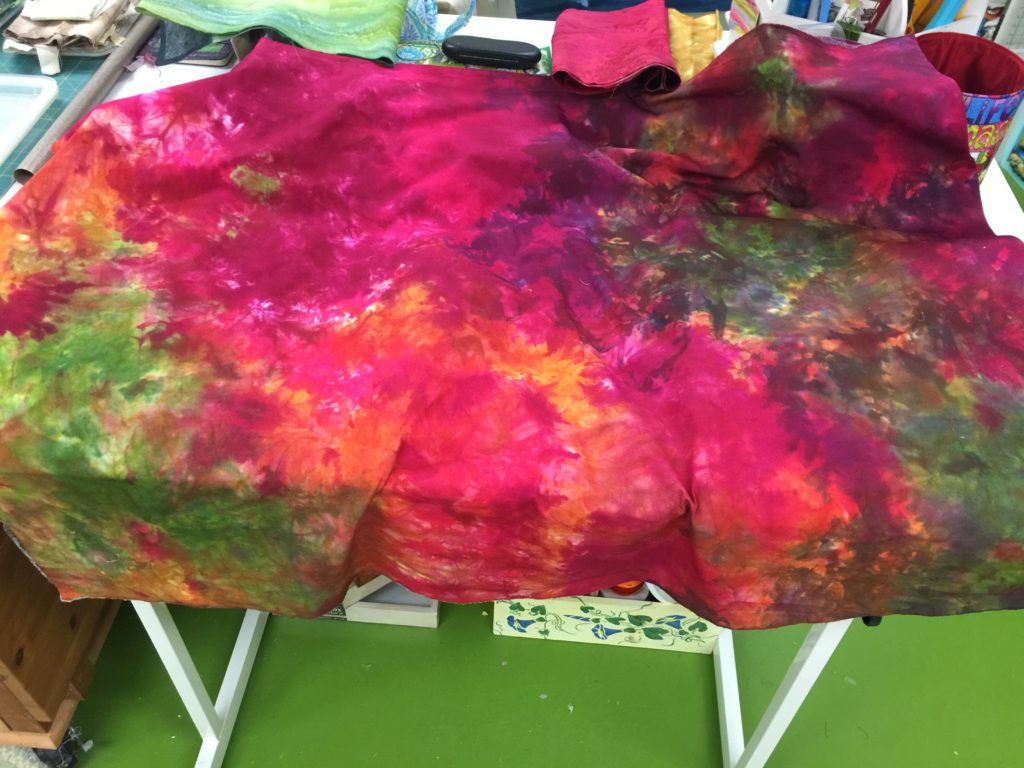
If you wonder what I’ve been up to, I dyed a bunch of fabric a while ago.  Now I am in the throes of turning it into a quilt.  A Very Large Art Quilt.   The blueberry barrens quilt was a sprint.  This one is a marathon.  Perhaps an ultra-marathon.   If anyone has some clever titles for the Pacific ocean crashing up on a rocky shore, let me know. I stink at titles and names.   My teddy bears are named Papa Bear, Momma Bear, and Baby Bear.  My childhood lion is, get this for originality, Leo.   Suggestions welcome!

Hand-dyed fabrics I made in January for a surf/ocean quilt.Oh…that bright green on the top right, not part of the quilt.

This quilt has a due date / needs to be in a box and getting shipped of mid-March, so I’m going down to the studio.  I will emerge.  I hope.

Autumn on Blueberry Lane

Saturday, February 11th, 2017

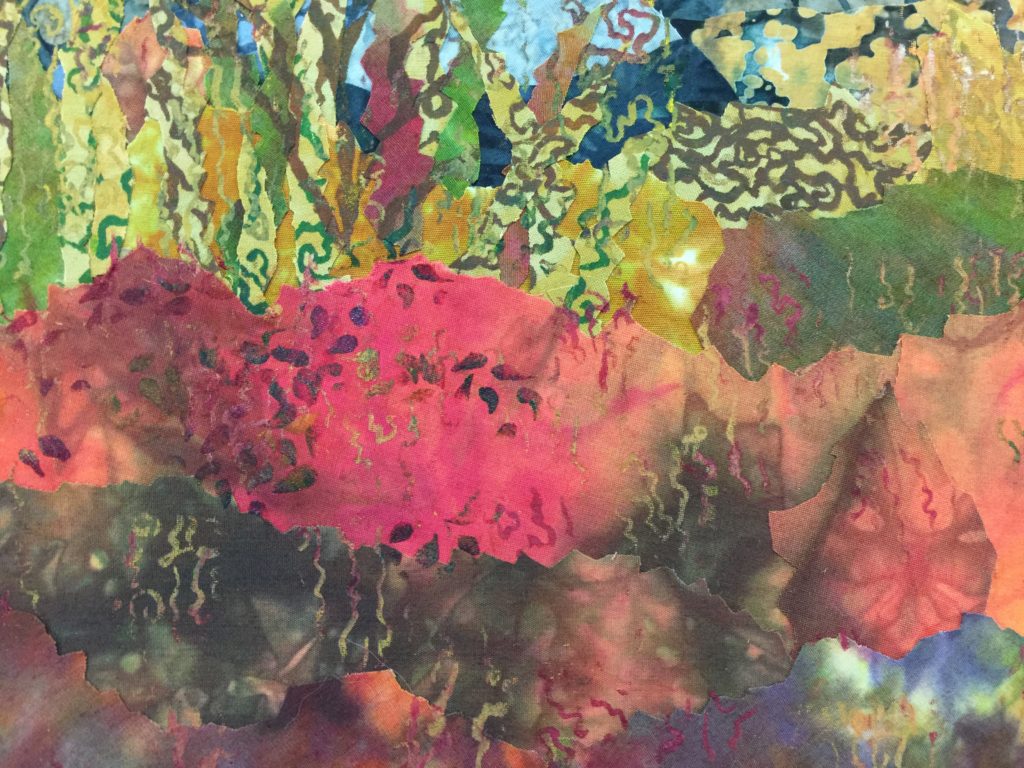
This quilt was inevitable.    Right click to view larger.  That thing in the middle is the needle bar of my Bernina Q20.  Notice the difference as I lay in the grasses along the edge of the driveway:  done on the far left, upper grass done on the near left, upper and lower grasses done on the near right (but not the tall grass which will happen in the final pass back to the right), and no stitching at all.

This photo is not the full quilt, but the quilt is a strong horizontal, and this shows more of it than I’ve shared to date on Facebook.  I’ll share the full quilt in mid March when I tape my Quilting Arts TV episode on one of the techniques I’ve developed and used in this quilt.

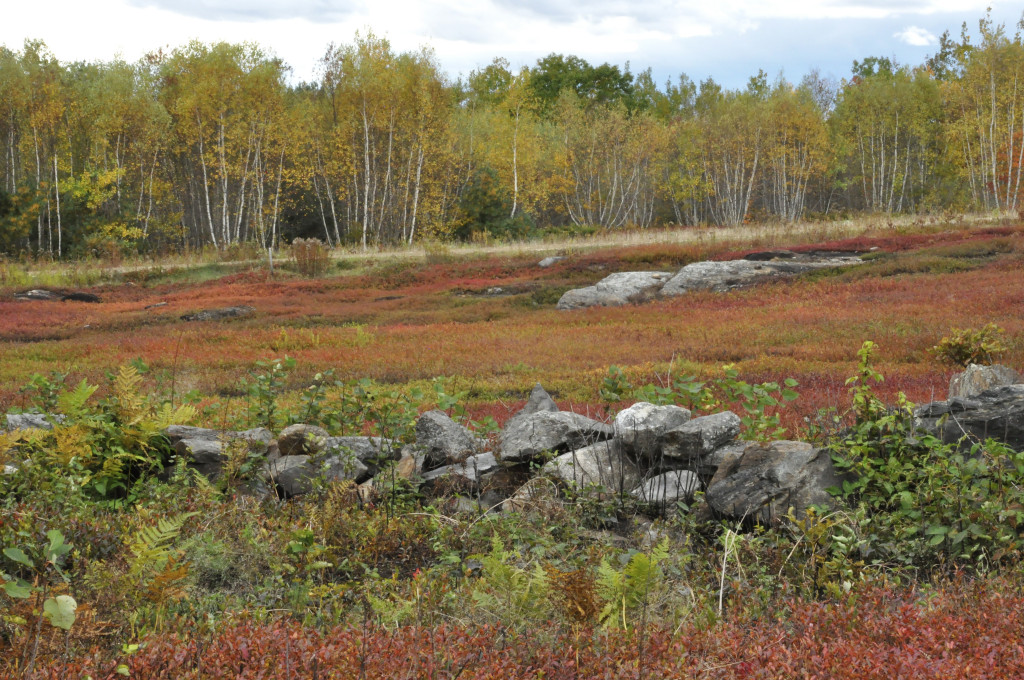
The photo below, taken in October 2015, was my inspiration, along with every autumn blueberry barrens I have ever seen.  The colors in the wild blueberry bushes are just beyond belief.  So I dyed a lot of fabric and went to town!

More autumn decay with blueberry barrens, decaying stone wall and birches in autumn in Maine.
The usual edits: smart sharpen, tiny bit of vibrance, crunching levels.

Hand dyeing fabric inspired by the blueberry barrens Maine (they look the same in Nova Scotia, too)

Same colors, different technique, scrunch

Scrunch and done. I used just about every single bit of this piece of fabric except for the more pink bits.   The blueberries are more of a russet and burgundy…this needs a touch more yellow in the red to get to that color.  

I’m still doing the facings and hanging sleeve…I’ll share the finished quilt in March, unless I change my mind and do it sooner!


Blueberries and Apricot Cookies/Bars

Sunday, February 5th, 2017

Well, sort of on both counts.   As usual, when I get really busy I neglect the blog (but you know that already, don’t you?  Thank you for coming back even when I’m a bit absent)!  I’ve been working on a smallish art quilt, 18 x 33, and have posted tidbits of progress on Facebook.   Because we all like pretty things, here’s a sneak peek:

A wicked tease. I’ll tell you about this quilt and what I’m doing eventually …probably in March. The tidbit for reading my blog… Quilting Arts TV tapes in March….

I also mentioned that for family dinner last night, I made some new cookies and posted about that over on FB also.

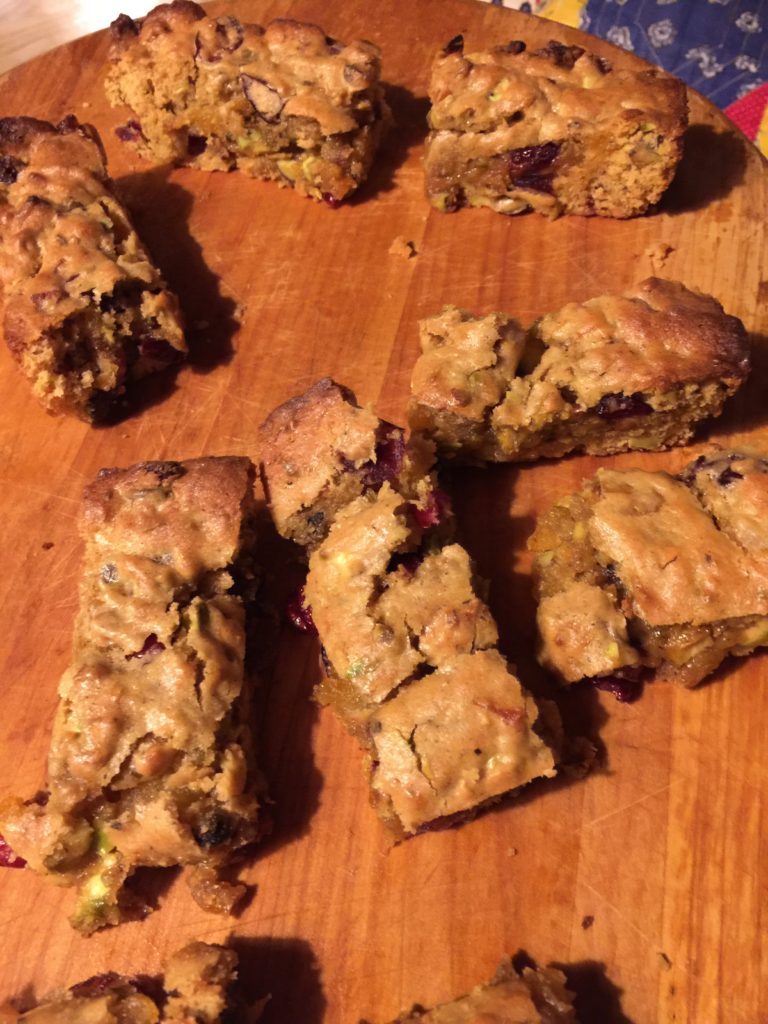
Apricot, Pistachio and Cranberry bars…YUM! Add decaf tea in winter, lemonade or something citrusy and sprightly in warmer weather.

A couple of you asked for the recipe, so I’m sharing right here.  I looked at my cookbooks and decided that for once I wouldn’t fix something chocolate, and I didn’t want to trek into town, so I had to be able to use what I had on hand.  I ended up using a recipe for Peach Bars from one of my favorite small cookbooks, Country Cookies:  An Old-Fashioned Collection by Lisa Yockelson.  Yockelson used to write about food and do recipes in The Washington Post when we lived there.   The brilliant news is that this 1990 cookbook is available for a penny at Amazon!  I also have her Country Pies, but didn’t get the one on cakes because really, is there a cake (other than perhaps coconut) other than chocolate?

Peach Squares (page 104) uses (duh) dried peaches, peach preserves, golden raisins and pecans.   None of which I had.  However, I had a lot of leftover dried apricots that I took with me for the Women’s March on Washington and apricot jam in the pantry.  I had dried cranberries (great on a salad with Balsamic vinaigrette and walnut bits).  And I had some  hazelnuts and some walnuts, though not enough of each.  THEN I spotted pistachios–bingo!   Atlantic Bakery in Rockland makes an awesome oatmeal cookie with apricot and pistachio.  So here is my variation,

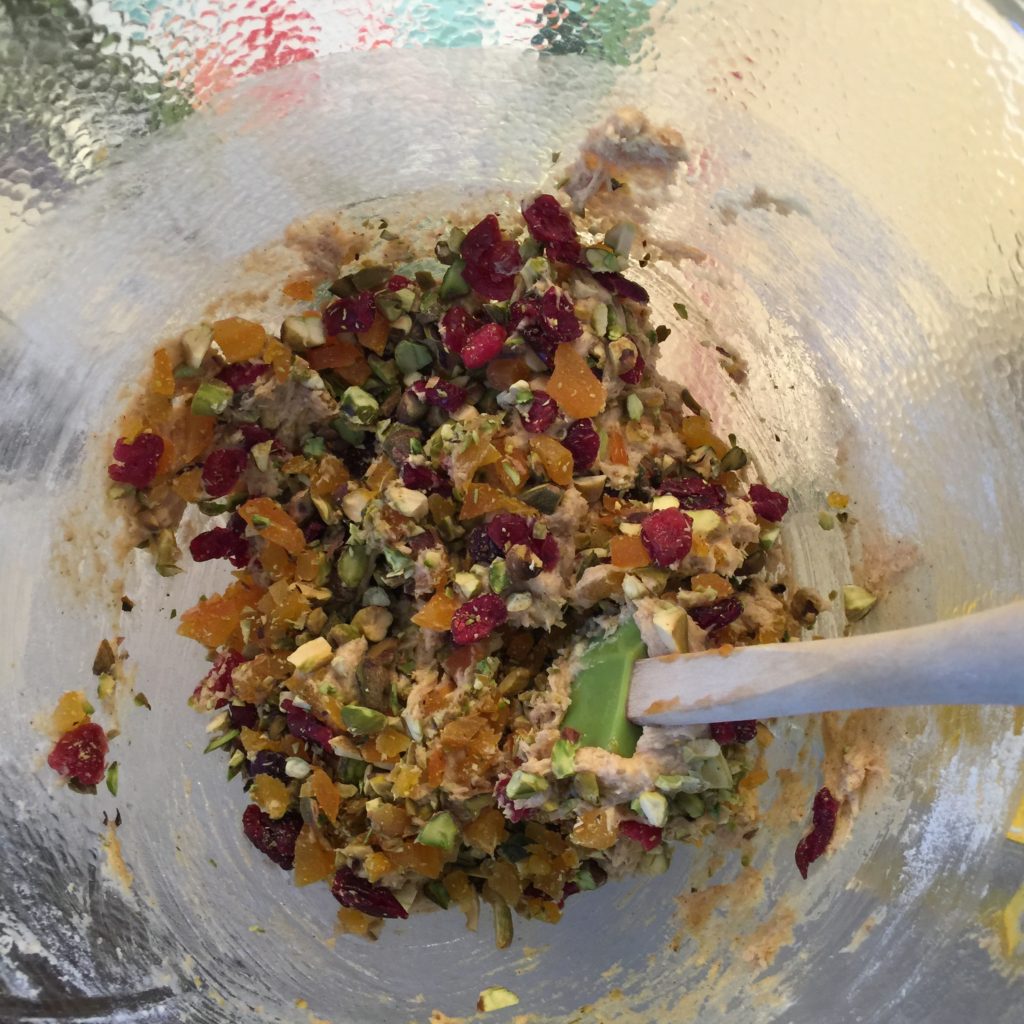
Apricot Squares (with pistachio and cranberries) batter

Apricot Bars

  • 1 1/4 c. unsifted all purpose flour
  • 1/4 c. unsifted cake flour (which I didn’t have so I used regular)
  • 1/4 tsp baking soda
  • 1/4 tsp baking powder
  • 1/2 tsp salt
  • 1 tsp cinnamon
  • 3/4 tsp freshly grated nutmeg
  • 1/s tsp ground ginger
  • 1/s tsp allspice
  • 1/4 tsp ground cloves (scant)
  • 1/2 tsp ground cardamom (optional but I love it)
  • 8 T (1 stick) unsalted butter, softened to room temp.
  • 1/2 c. firmly packed light brown sugar
  • 1/4 c. granulated sugar
  • 1 extra-large egg, at room temp (mine was cold)
  • 2 extra-large egg yolks at room temp (mine were cold)
  • 1/2 c. apricot preserves, (Lisa’s recipe calls for blending with 1 tsp vanilla extract, which I totally missed, I’d do that next time)
  • 1 c. chopped dried apricots
  • 3/4 c. dried cranberries
  • 3/4 c. chopped pecans

Makes 24 squares.

I actually made a half recipe–getting half an egg was a challenge but I managed!   I used a small glass pyrex dish which made timing iffy…smaller recipe, but pan doesn’t heat/brown as well as metal.  I ended up cooking longer than the recipe specifies because my apricots were quite moist.

  1. Lightly butter and flour a 13 x 9 x 2 baking pan (I used baking spray); set aside.  Preheat oven to 350.
  2. Sift the flours, baking soda, baking powder, salt, cinnamon, nutmeg, ginger, allspice, cloves and cardamom.
  3. Cream the butter in the large bowl of an electric mixer on moderate speed for 2 minutes.
  4. Add the brown sugar and beat for 2 minutes.
  5. add the granulated sugar and beat for 1 minute longer.
  6. Beat in the egg and egg yolks, one at a time, blending well after each addition.
  7. Blend in the preserves.
  8. On low speed or by hand beat in the sifted mixture in 2 additions, beating just until the particles of flour have been absorbed.
  9. By hand, stir in the dried apricots, cranberries and pistachios.
  10. Spoon the batter into the prepared pan, spreading it into an even layer with a spatula or flexible palette knife.
  11. Bake the squares on the middle-level rack of the over for 25 minutes, or until set and firm to the touch.  (The cake will begin to pull away from the sides of the baking pan when done.)
  12. Cool the cake in the pan on a rack until it reaches room temperature.  Cut into squares or long “fingers” and store in an airtight container.

There!  We agreed this was definitely a make-it-again recipe.  Feel free to copy this recipe into a document to print and try on your own.  If you come up with some great variations, do SHARE with us all in the comments!


Productive procrastination

Sunday, January 15th, 2017

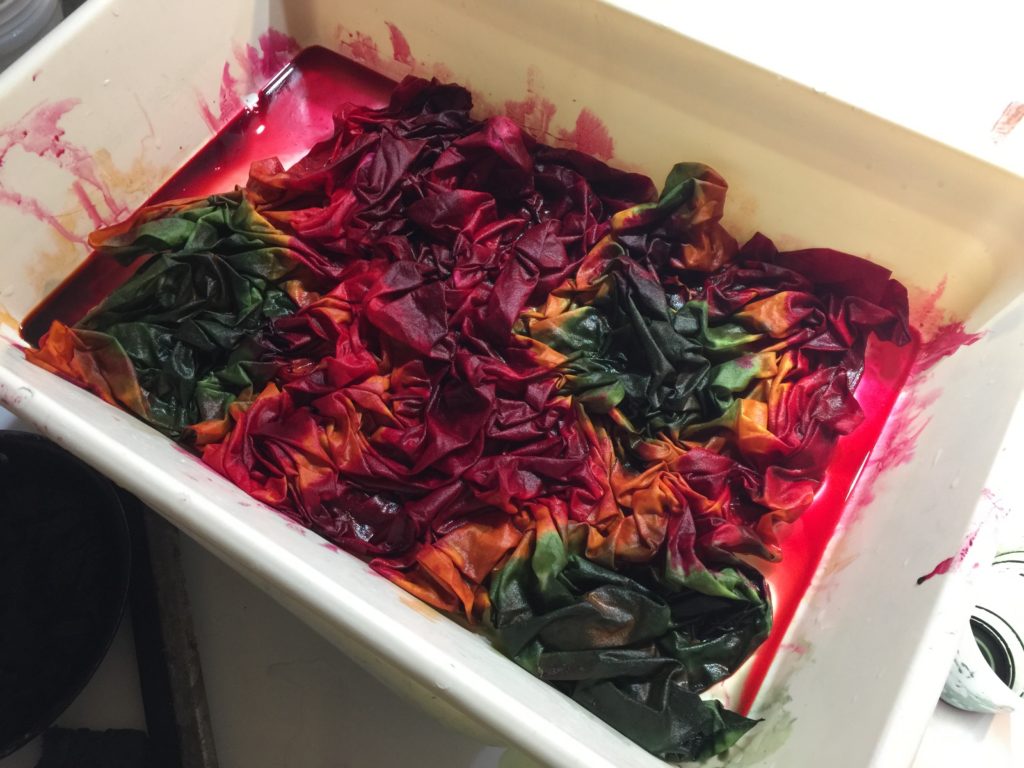
So, I am supposed to be working on something that has a FIRM due-date of mid-to-early-ish March.  I have dyed the fabric and know what I’m going to do, but got sidetracked for a few days doing something I’ve wanted to do for eons:  paint the basement room that has the furnace, water heater, fuel oil tank, and water pump in it.  WHY?  Well, it’s where I do my fabric dyeing.   Since fabric is a lot more attractive than cement, here’s my last two batches of fabric.  Remember them, you’ll see them transformed at some point this year.

My time at the dye pots was FUN! And more interesting than a basement utility room which is what this post is really about.

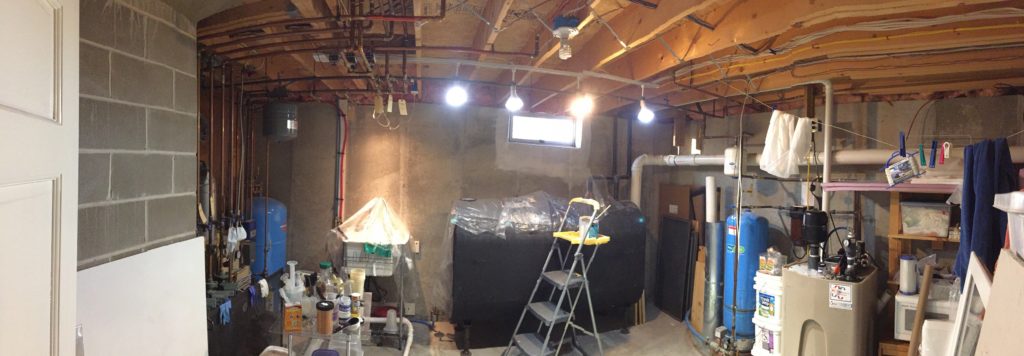
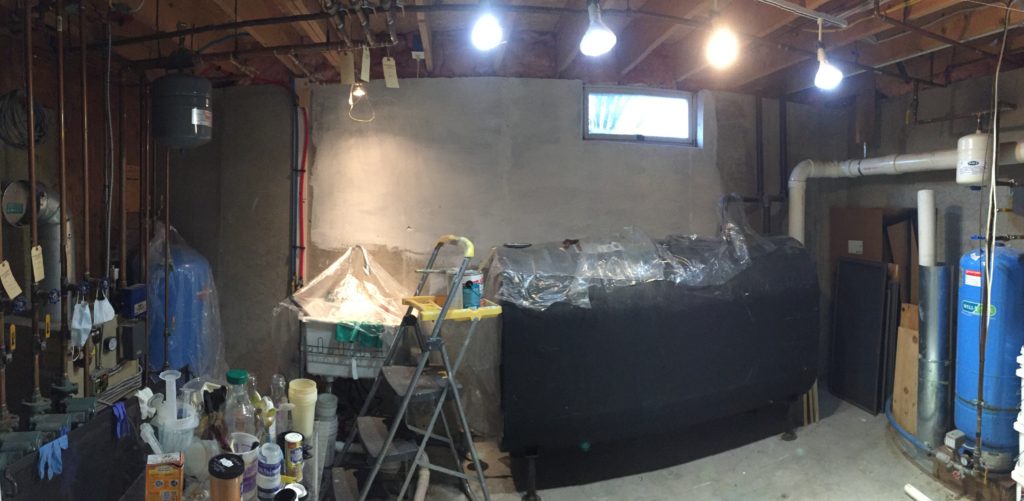
What provoked this flurry of activity?  The Elfa sale at the Container Store, where good quality closet storage stuff goes on an annual 30 percent off sale.  Decided after much research it would be the best option for getting some shallow shelves above my “not a legal sink but a a basin” in my dye room because it would require the fewest screws going into the cement foundation walls and those few could be above grade (important for when the ground and snow melt in spring).    Here’s the before:


Panorama shot of the basement in the before stage…which I remembered to take only after I had started putting the DryLock paint around the window.  Click to make larger.  

I decided that I couldn’t stand putting the Elfa stuff in without finally painting the walls white (which will help with light and visibility in the room), so I started painting.  Four days ago!

First coat of DryLock paint partly on.  Better already!

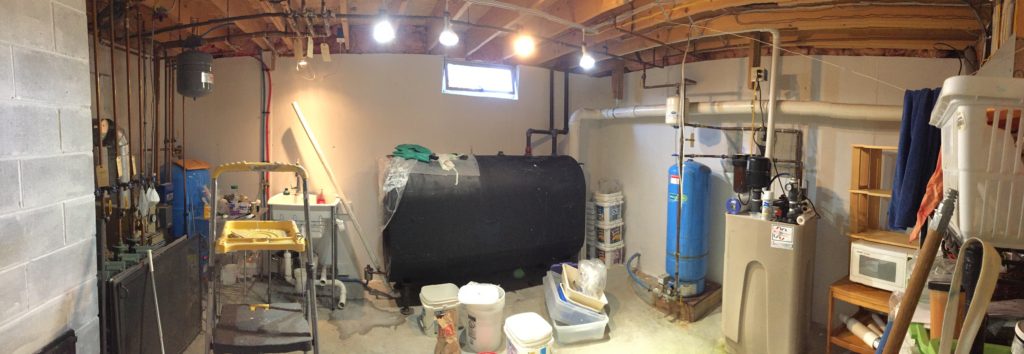
Just about done except for the cleaning and moving stuff back in place and waiting for the shelf stuff to arrive.  A vast improvement (did another coat of primer on the wall at the far left).  Now, if I could just convince Paul to let me paint our dark living room……

I finished the last of the painting/priming today.  I used DryLock which helps keep water out on the cement walls.  It is like trying to paint with sludge/mud/thick paste.   ICK.   Primer on the base of the chimney/stone fireplace, and semi-gloss on the wall behind the sink as well.    I’ll post pics of the shelf stuff once it arrives and is installed.   It will require a masonry drill bit and Advil for the arthritis in my hands that will be aggravated from drilling the holes!