email Youtube

Home
Galleries
Blog
Workshops & Calendar
Store
Resources
About
Contact

Archive for the ‘Studio pics’ Category

Foto/Fiber, a fundraiser for the American Cancer Society

Friday, January 20th, 2012

Hi all!   Welcome to those of you who have surfed in from Virginia Spiegel’s blogpost which featured my studio.  And for my regular readers, please do go visit Virginia’s blog…. here’s what it is all about:  Over the past several years, Virginia has singlehandedly—with help from a whole BUNCH of people–raised over $200,000 to benefit the American Cancer Society.  It began with FFAC–Fiberart For A Cause challenge–fabric postcards at $30 each donated by many, many, many talented art quilters.  After a respite, Virginia has launched the Foto/Fiber fundraiser for this year.  Learn more about it here and for how it works and to participate click here.  You can also click on the button in the left sidebar to visit this cause.

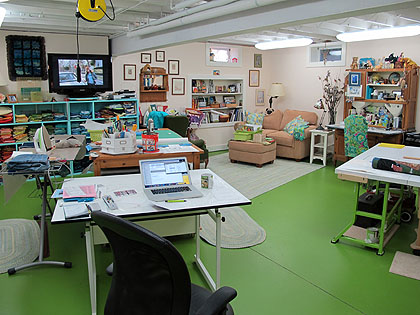
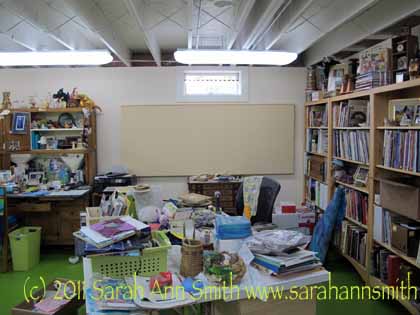
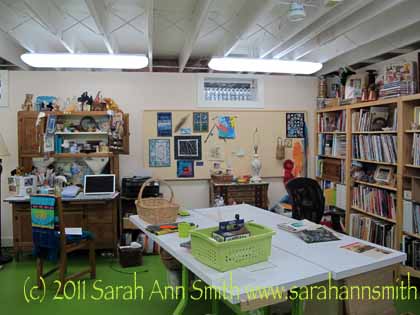
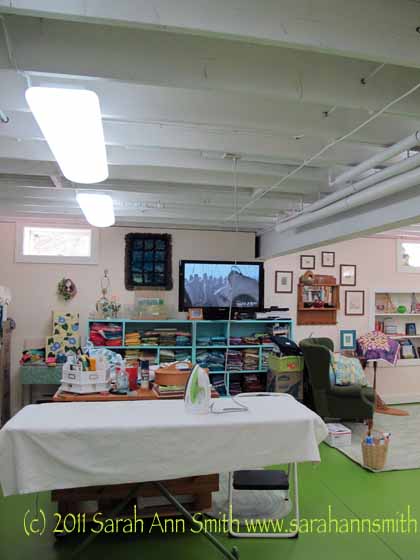
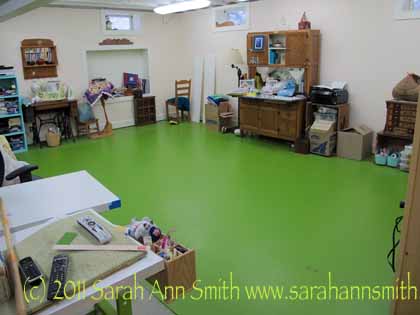
Welcome to my studio...this is what I see when I walk through the door.

Long-time readers may recall from my previous participation that I have a very special place in my heart for this cancer research fundraiser project:  my father was diagnosed with throat cancer (having smoked cigars for 65 years) at age 82; his treatment was successful and he lived another 14 years.  My half-brother Charlie, a many-packs-a-day cigarette smoker, died of cancer of a whole lot of organs due to his smoking, and my dear friend Linda Wauchope died of liver cancer–if good attitude could save you, she would be with us here today!  I miss them all, and it is a privelege to be able to remember them and do something to help support research to cure the many nefarious varieties of cancer.

One of my gifties for Foto/Fiber is the postcard (fitting, don’t you think, considering it all began with postcards) seen (a detail anyway) on Virginia’s blog.  Another part is about a yard’s worth of my hand-dyed fabrics–a decidedly eclectic (odd?) assortment:

Hand-dyed cottons are the other part of my "bonus" donation

This was “in the beginning” for this studio:
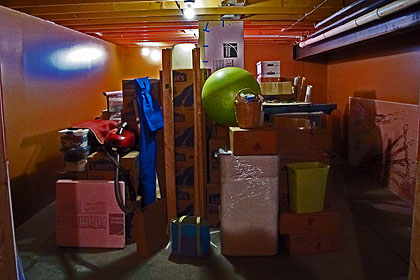
This is what it looked like in the beginning. I don't have anything against brown walls, but in a basement room with one tiny window and two bare bulbs???? This was what my studio looked like before we began the work!

Most of last year’s teaching income went to fixing up the studio just right and some goodies for the house…like a new sofa and replacing the “vintage” (ahem) mattress!  I’m happy to say I no longer wake up with aching bones.

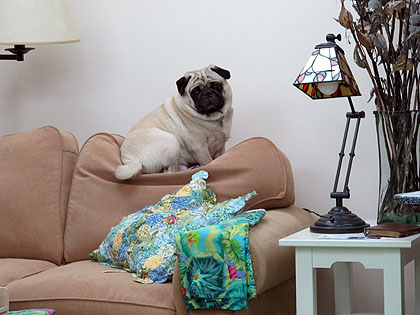
One of the best parts of my studio is mobile…he follows me where I go and often sleeps by my feet.  The painted cement floor, however, is too cold in winter so Pigwidgeon is on a mission to squash the new loveseat cushions.  How can I get upset with someone SO CUTE?
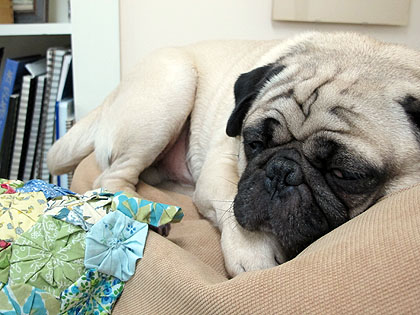
The pug who acts like a cat and sleeps on the back of the sofa. Oh how I love the dog-beast! Here he's wondering WHY I am snapping pictures when it is oh-so-hard to keep the eyes above half-mast.

Sometimes, however, a dog needs to move. In this case, about 22 inches to the next cushion over!

I blogged about the transformation of the space as it happened.  You can see those posts here:

  • First mention of the studio here with two pictures (one of them is the one above).
  • Then the transformation begins here.
  • More work, including painting the cement floor here.
  • More on the floor and small progress here.
  • A bulletin board/display wall here.
  • Adding the really LONG closet here.

If you are thinking about working on your studio and have any questions, just leave a comment!

Thanks so much for visiting.  I hope you’ll visit Foto/Fiber and make a donation on February 15 and 16!  One more time, here’s the link to how Foto/Fiber works!

The State of the Studio: A Closet!

Sunday, June 19th, 2011

Some of you may recall (from the dim past) that I was fixing up a space in the basement of our new house (we moved in early February…four months already!) to use as a studio.  I blogged about it here in February and here in late March and here also in March and here about the display walls.  Well…. we are nearing the end of the fixing up of stuff.  The last major project was installing sliding design wall-closet doors along one side wall which conveniently had NO windows, doors or whatnot in it.   Since the room is large (about 22×22 feet….honestly larger than I need but that’s what size it turned out to be when two weird smaller rooms were combined), losing 2 1/2 feet on one side wasn’t a big deal.

The wall on the left is the space that became the closet....

The closet is loosely organized into three zones:  teaching, art supplies and quilt storage (from near to far corner).

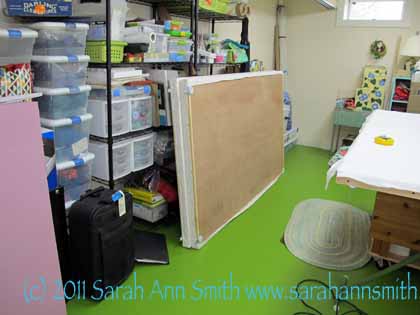
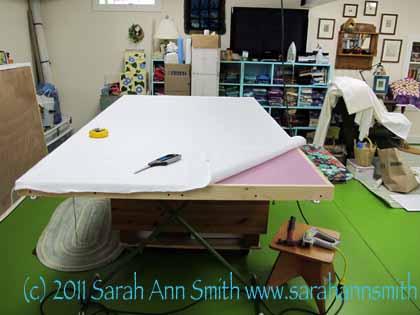
When I proposed this to our contractor, I had thought something like the rigid foam insulation boards (which I’ve used successfully in the past as a design wall–used the last ones nearly 7 years and they are still doing fine) mounted on plywood panels (both 4×8 feet).  John realized that the plywood would warp, so  he did some research into a more stable but not-costly alternative.  He found some 24″ wide hollowcore doors and figured the cost for glueing two together on a long side to create 48 x 90 inch panels, mount the foam core onto that, and then I covered them and he hung them from sliding tracks.

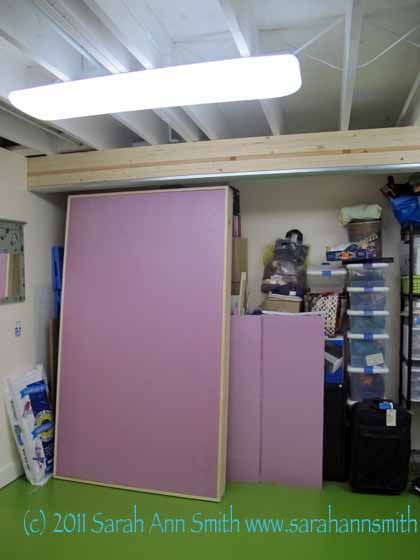
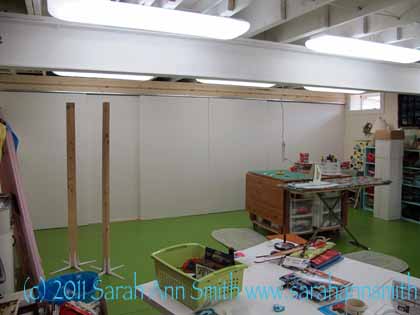
Some of the doors plus the leftover pink bits from the panels behind. Notice the wood above: John nailed boards to create a strong "top" from which to hang the doors.

The back side of the first two doors that I "upholstered" to show the two (looks like one) hollow core doors used

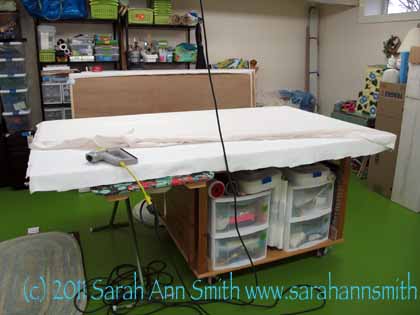
One of the closet doors on my work table to be upholstered. John framed out the doors with 1x trim to contain the pink insulation board and keep the edges crisp. Here I am layering up batting over the front, sides and top of the door. Notice the electric (!) staple gun...yes, electric....it is my best friend forever!

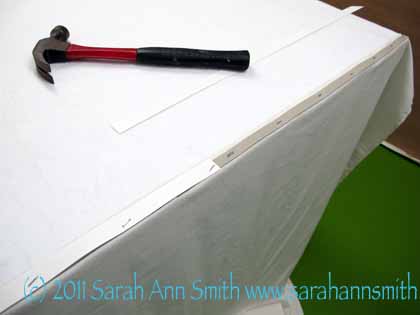
At the bottom, I didn't want the flannel covering etc to drag or make the doors balky, so I used an upholstering trick. I used strips of cardboard to staple the flannel to the bottom edge. When turned up the edge is crisp and doesn't pucker or ride up.

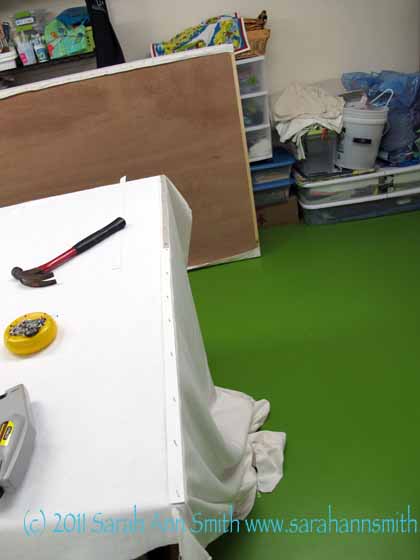
Covering up the gray cardboard with white posterboard. Wasn't gonna do that at first, but after doing the first one I hated the shadow effect, so I took out the staples and added the poster board (which is white and hides the gray shadow line). On the left there is white batting; the cream flannel I used (sheets from Lands End) is to the right. The flannel will be lifted up over the cardboard strip and stapled in place.

Flannel pulled up over the door to the top, stapling and trimming

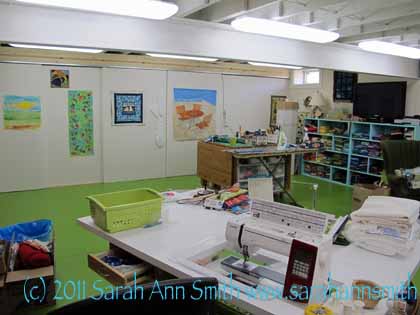
The doors....in place! Hallelujah all that ugly distracting clutter is HIDDEN!

With the first stuff uip on the wall. From left to right, the table runner version of my Balinese Garden pattern (STILL waiting to be quilted), a piece for the Coastal Quilters Challenge, and my Frayed Edges challenge piece for our library show in July. More about the latter two items coming --soon I hope!

What I find appalling is that the closet is FULL!!!!!! I even had to store a few things (like the photography light stands seen in the photo where the doors are up but don’t have anything on them) elsewhere.  My excuse is that about 14 feet of the closet is used for either business (storing teaching materials and supplies, books and patterns for sale) or quilt storage.  For the latter, I’ve got an idea and hopefully that storage method will be a blogpost by the end of July…….depends on (the lack of) available time!  That’s it for now…. just a few more things left to make this my quilty home!

The State of the Studio, a display wall

Saturday, April 30th, 2011

When I moved out of the old house, I removed the design wall from my old studio.  Since the corners were cut off the 2-feet wide rigid foam insulation, they couldn’t be re-used well in the new studio as the new design wall.  BUT, as I was hanging some artwork, I decided a ginormous “bulletin board” would be just the thing to display smaller pieces by sons, friends, inspiration, and so on.

The display wall installed, but without stuff...yet.....

With stuff...quilts and art on the left are by Betty Johnson, Jacquie Scuitto, my son Eli, some calligraphy from Lunnette (a christmas card) and a fabric postcard of hers, and on the right a photo that was on display at IQA-Houston, a leftover Koi from that quilt that will be made into something eventually, my very first (but I hope not my last) Houston ribbon, and a basket

Here’s how I did it, so you can try also.

  1. I took the largest piece of rigid foam insulation which was 2 feet wide by 91 inches long as my “big piece.”
  2. The second piece, with a corner cut off, would yield another 91 inch piece that was 12 inches wide.  I  cut the pink 2″ thick insulation with a new blade in the box cutter (extended to a scary distance) and managed to get a nice clean edge.
  3. I used clear packing tape on both sides at the join so it wouldn’t buckle, then wrapped the flannel from the previous design wall (a sheet from Lands End) around the 36×91 inch piece (that’s just under one metre tall by about 2.5 metres long for my metric readers).
  4. Next, I used “L” shaped brackets spaced about every 20 inches so there were 5 brackets on the bottom edge.  I bought some wood lattice (a thin strip of wood about 3/8″ thick by 91 inches long) which I screwed with very short screws to the brackets.  This gave me a long, flat, firm bottom edge on which to rest the display wall.
  5. Placing the display wall on the strip, I marked the top edge just about above the five “L” brackets on the bottom.  I added another five brackets to the top edge, moving them down about 1/16″ or 1-2mm. below the marked top edge.   This way I can just slightly squish the rigid insulation and it is held in place by friction…no need to use glue or otherwise muck up the wall (well, any more than putting the screws in).

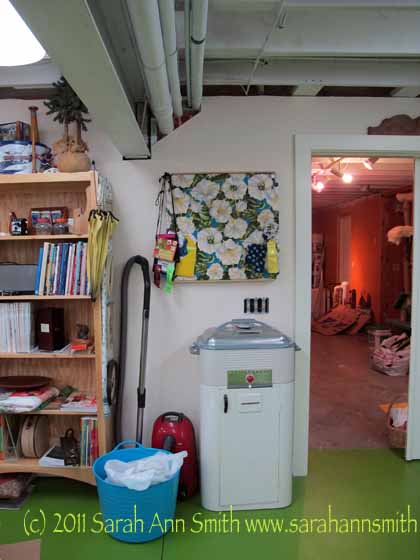
I made a smaller “bulletin board” with a 24×24 piece of insulation leftover from another project and covered it with this beautiful fabric.  It’s by the door the center part of the basement (which WILL get a different color of paint…sky blue, with green on the floor….but not soon….maybe in August or September after the year’s travel teaching is mostly done). I had to underline this one with batting because the pink insulation changed the color of the fabric–an effect I did not want.

The bulleting board next to the door is made the same way as the large wall, but I added batting because the pink of the insulation distorted the crisp white in the flowers, so I added batting to prevent that.

And when the closet is done, that vacuum had better fit inside!  Don’t like the look!   The blue bucket is my large new garbage can…5.99 from Target!  I think it was intended as a beach tote or bucket for filling with ice and sodas in summer.  Nope.  With the flexible shape and two handles it’ll be easy to tote upstairs to the outside garbage can. That’s it for now!

The State of the Studio, more on the floor

Wednesday, April 27th, 2011

Hoooray…the floor is done Done DONE!  And here’s the last bits and pics….

This is how it looked the last time I shared...cluttered!

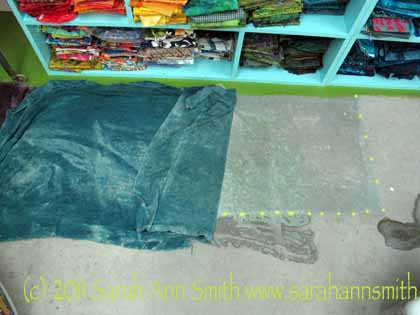
Then I moved all the “stuff” to the already-painted half of the room and proceeded to get rid of the old washing-off dark greenish paint (latex?).

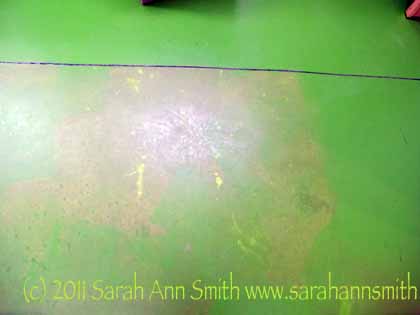
I've folded back the damp towel. You can see the damp spot on the cement and outlined in bright green Photoshop dots the old icky paint than needed to be removed. This was all over the second half of the room. I am glad that is done...my bones ached after sitting on that cold cement floor!

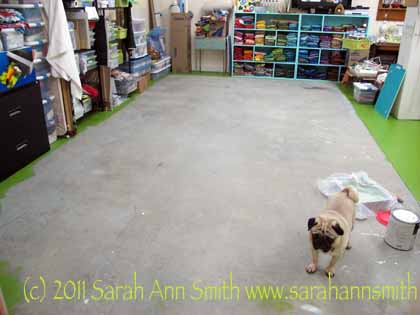
Here’s the floor with almost all of the paint removed.

As you can see my helper is inspecting my work in the foreground....

The remaining bits refused to come up, so the floor will have a slightly “leopard spot” look when done.  Oh well.  Nothing much to be done–do NOT want to rent an industrial sander and create a dust mess just to remove them.

And compare the 3-coats on the top of the photo (the first part of the floor completed) and the single coat on the bare floor on the second half:

The top and right of the floor are done with 3 coats. The left side shows what it looks like with just one coat. Had two more to do after this picture was taken.

In progress….

In progress

DONE!!!!!!!

The second half of the room painted....floors done!

Well…the floors are done.  There was still more work…design walls, display space, closet doors (in a couple of weeks)…..stay tuned!


The state of the studio, late March

Friday, April 22nd, 2011

Remember this grim view of my new studio, upon moving in to the new house?

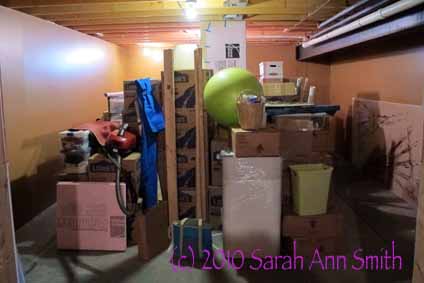
In the beginning, it was dark and yucky. At least the wall separating the (!!!! in a basement?) dark brown room from the white room is down in this photo.

It was at least an improvement from this, before the wall went down:

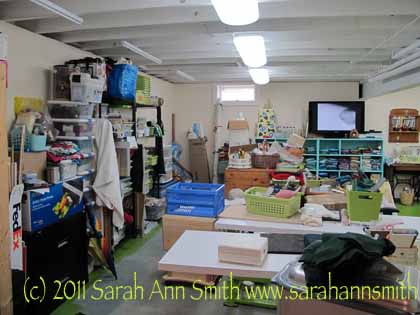
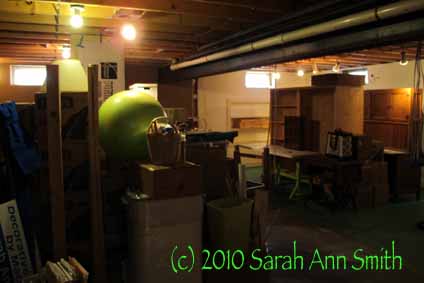
My studio. Ahem. Clearly, this is the "before" picture. The camera flash makes the room appear much brighter than it actually was. Erg.

By late March, things were improving.  The wall was down, the lights were IN…nine 2-bulb fixtures with maximum lumens (the amount of light—-aging eyes  always want MORE) with daylight colored bulbs.

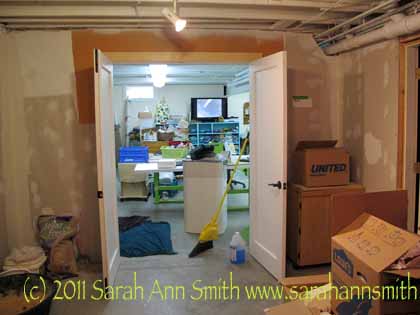
French doors went in... this is before they were painted so the primer is covering up the plastic that is covering up the glass in the center of the doors. Not only do the doors keep the cats for shedding and urping on stuff -- and the dog from leaving "presents"--but closing the doors helps funnel the heat from the woodstove in the center of the basement up the stairs to the main part of the house.

Those towels you see are wet — to help lift the HORRID paint on the old floors.  I think the previous owners used some leftover wall latex on the floor, and clearly you needed a different paint formula for it to adhere to the floor.  If you got water on it, it turned to paint-mush-muck-mud-soup.  Mostly.  Then there were the stuck on bits that would mostly (but not all) come up if you got down on your knees (on the COLD cement floor) and scraped with a metal flat-edged scraper.  Oh whee.  Having fun are we?

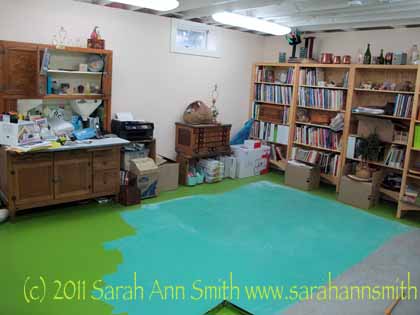
This is painting the part of the room that had been white and was the previous owner's son's painting studio. WIth that jade/aqua on the floor--with many assorted drips and drops of other colors of unkown paints..

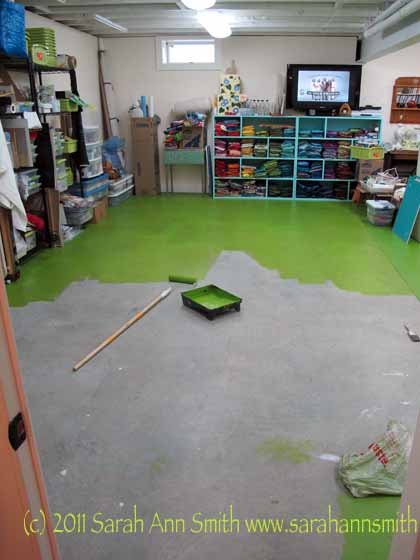
And painted:

one half done....waiting for the paint to cure up hard so I can move the furniture to the other side and paint the second half.

You’ll notice the number of boxes is down, the amount of stuff hither and yon is up……

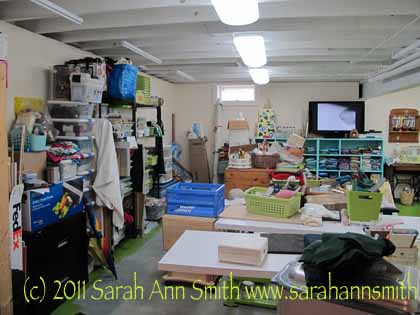
The other half of the room while the first half is painted. That wall on the left will end up being a closet. We will have hanging doors upholstered into design walls to cover up all that visual clutter. And notice...the TV works--the DirecTV is hooked up!