email Youtube

Home
Galleries
Blog
Workshops & Calendar
Store
Resources
About
Contact

Archive for the ‘Dyeing’ Category

Refining the t-shirt–how to take a boring t-shirt to fitted and fine!

Friday, November 14th, 2008

Quite a long time ago, about a year in fact, I took my second dyeing workshop with Carol Soderlund (wonderful! highly recommended!  go here to find out more!).  I tried again to get my dream-colored t-shirt, and this time succeeded! Here’s a picture Beth P. took of me (weighing, sigh, less than I do now):

SAS at Workshop in t-shirt

I knew back then that I wanted to re-make the shirt into a nicer top, but ProChem only had t-shirts in stock, plain old T’s.  Here is what the shirt looked like before I took to it with pins, sewing machine and scissors in late October:

T-shirt, before

I used fuchsia dye, the other red that is MX R4 (Fuchsia is 8R), a warm yellow and a cool yellow… it was pleated on the diagonal with the lines running from upper left shoulder to right hip.  The dye was then poured – squirted – painted on in the opposite diagonal.

First, I pinned out what I thought I wanted to take in on the sides and underarm, then went into the bathroom (which has a low enough mirror) to see how long I wanted the shirt to be.  I ended up cutting 5 1/2 inches off the bottom, then taking a 1 1/2″ hem.  I used a twin needle, which gives the double-straight stitch on the top, a zigzag on the bottom, and stretches just a little bit.

Second, I took in the sides (alas, I am not blessed with a generous bustline, tho in summer I actually am grateful), leaving the extra room at the bottom my hips need.  I also took in the sleeves a bit.  This photo shows the taper…from about 3/4″ at the hem of the sleeves, to a smidge over an inch at the torso, tapering to a point like a dart. I used the stretch stitch on my machine…basically it looks like three stitches on top of each other.

Side seam

For those of you with a larger bustline, you can also take vertical darts in the waist area underneath the bust for a more tailored fit…just put the shirt on inside out and pin.  Carefully.  Then REALLY carefully remove the shirt, try it on right side out and if it looks good, take it off even more carefully and stitch.

At first I wasn’t going to trim and finish the edges, but the amount taken in was enough that the underarm seam pulled unattractively, so I trimmed to 1/4″ seam allowance,  and zigzagged the edges.  Serging would also work, but I don’t have matching thread and didn’t feel like setting up the serger!

Square neckline mocked up

You might (?) be able to see the blue washout pen markings on the top in the photo above.  I look good in square necklines, so had planned to trim off the neckline edging and sew a facing using the cut-off fabric from the bottom.  However, I wanted this to be a simple tutorial, and–on a whim while checking out the fit after stitching the sides –turned the collar ribbing inside.  I liked the look!  So, I simply stretched the ribbing so that it would instead function as a facing, and topstitched it in place with the twin needle.  Here t is without the blue pen!

with blue stuff washed out, neckline

And here is a so-so picture of me (with no make-up and messy hair… what am I thinking putting a picture like this on the internet?????) in the shirt–sorry about the partial lobotomy…that’s what happens when you set the camera on timer to take a photo of yourself:

Sarah in shirt, angled view

And an even less flattering photo (I decided to decapitate myself with photoshop…the fat sloping chin was just too awful LOL!), but straight on so you can better see (?) the final result:

SAS in shirt, straight on

Remember the original look of the shirt?

T-shirt, before

Here’s the finished outline:

Finished shirt on design wall

All in all, I think it is a vast improvement over the baggy shirt.  Even with trying it on about four times, it took easily less than two hours to do everything.

Twilight Pond

Saturday, October 4th, 2008

I swear it has taken longer to get around to writing the blogpost and take the pics than it did to quilt this little piece!  Well, not counting the nearly two years it has taken me to get around to quilting it either!  Only REALLY long-time readers will remember that in 2006 I did my first dyeing workshop with Carol Soderlund, which I blogged about here — there are actually three posts, late August and September 2006 I had this tiny bit of fabric… 9 x 22 inches or so… leftover, so one day at the end I grabbed a plastic cup, squished the fabric into the bottom and added some yellow dye or something (?).  Then I squished in more fabric and poured on blue dye.  My tablemate Debby Harwell took one look at it when it came out and said “OH, it looks like trees and a pond!”

Twilight Pond

(Note:  pics in this post are clickable to make them a bit larger.)

Of course I could never see the piece as anything else SINCE then!   Finally, I told myself I abso-positively HAD to get around to quilting something to take in to sell at Ducktrap Trading company, the gallery where I sell some of my work here in Camden, Maine.

My thought was to keep this a wholecloth.  However, when it was done, it kinda lacked OOMPH–the colored quilting helped, but not quite enough.

Twilight Pond, before most of the NeoColor pastels

So what does any self-respecting art quilter do?  Add paint! I had just begun in the photo above, when it occurred to me that I really ought to get a before photo (and should have gotten a before quilting, too, but too late now!)… here’s a detail:

Before, detail, adding paint

Then I went to town and colored all the smaller trees, the trunk and the boughs of the Maine state tree, the White Pine.  The branches reach out like arms, hands turned up to the sun….. here’s another detail to show what a difference a bit of color makes…MUCH better!

Painted….

Since I’m not too sure how water-soluble these babies are (very I think) I sprayed the painted area with spray fixative to keep it from running in case of accidental moisture.  I couched yarn to the edges (one of my favorite edge finishes for art quilts that are on the small side), then thought some wind-fall branches from the yard would be perfect.  Making the hanging loops and sewing them by hand was a bit fiddly, but it worked.  Now, to go in and do the miserable color editing behind the quilt so it merges with the background of my website, get it posted on to the site, listed for sale, then do an invoice for $250 and take it down to the gallery and pray someone in this sad economy is still buying art!

Dream dyeing studio

Wednesday, August 6th, 2008

A visitor to my website (and I’m guessing also this blog) asked me recently what would be in my ideal wet / dyeing studio….. she has the pleasure of being able to convert a greenhouse to a dye studio….heaven!   Here’s my list… I’d love suggestions from those that have “been there, done that.”  Let me know what worked, what you’d wish you’d done…..

  • An absolute must for me is a sink with hot water!   My dream sink would be deep, but not so deep that I have to stoop to reach the bottom (thereby avoiding aching back).  I would actually love two sinks….one huge and deep for soaking large quantities, another not so deep for easier reach.  A pull-out spray/regular faucet (the kind for sinks) would be good too…..  OK, so what I really want is a restaurant sink with counter with overhead spray hose/nozzle/whatever it is called.
  • A mixing counter with shallow shelves above for holding the dyes and the beakers/mixing paraphernalia.   Needs to have enough space to lay out dye-binders and recipes next to the actual mixing zone.  If it were next to the sink for easy wiping-down that would be a bonus (remember the old integrated drainboards?  that would be ideal!).  And maybe a bulletin board for pinning the current recipe or basic ones up right in front of my nose.
  • Deep shelving nearby for bulky/heavy stuff like Urea and Soda Ash (on the bottom) and buckets/basins.
  • Since I like to paint the fabric, not do LWI “scrunch and dump” dyeing for the most part, a LARGE FLAT surface…. like 4×8 feet!  And maybe something like a carpenter’s “crib”…  places where I could store 4×8 sheets (would need help moving them) stacked horizontally one above another for batching.  Think of those cookie cooling towers in Costco or wherever where you can stack up 20 cookie sheets at a time…. like that but maybe for 4 sheets, not 20, and of course way huger for my purposes! I’d love for the sheets to have a rim (just like a cookie sheet), but that might be hard to finagle.  My friend Lisa Walton of Dyed and Gone to Heaven (who sells her hand dyeds worldwide I might add!) uses pond liner in the back yard, but Sydney, Australia, is a more hospitable climate for outdoor dyeing than Camden, Maine! Still, using the heavy plastic and pinching up the corners (setting it on a table of course) could work well.
  • Washer and dryer in the studio or nearby so as not the require hauling wet, just-batched fabric long distances.
  • Wipe-down-easily walls and floor (well, for me maybe the ceiling too!)
  • A couple places to suspend rods from the ceiling if I want to hang yardage and drip-dye (pour it on and watch it flow down).  A plastic sled or window box makes a good drip catches…line with scrunched fabric and you have a coordinated piece of cloth…
  • LIGHT….lots of good light (shouldn’t be an issue in a greenhouse, except at night)
  • Warmth….I live in Maine, so hope to be able to afford an electric blanket to set over things for batching so I can dye in winter……
  • A small space to write notes, keep my dye-binders and reference books that is far enough away from water to give them a little protection
  • A stool on which to perch, and maybe one of those chef’s mats for when standing to ease the foot-pain!
  • Entertainment…radio, tv, something….and maybe access to the outside.
  • BATHROOM nearby!

What’s on your list?

50 Ways You Know that Dyeing Has Taken Over Your Life

Thursday, July 24th, 2008

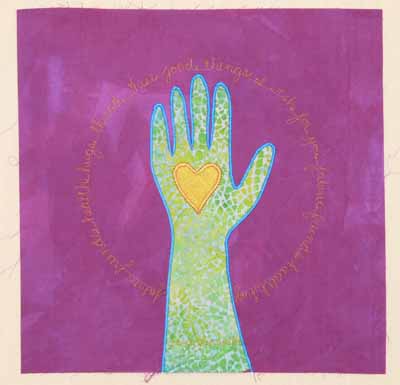
Elizabeth Brandkamp posted this list to the DyersList; it was so much fun I asked for and received her OK to share with you…and added a couple of my own signs… If you’d like, visit her blog here.

Here’s her list:

Hope you don’t mind the long post but wanted to interject some hopeful humor!  I was posting this to my blog but thought many of you might enjoy this and maybe add to it!

1.  You look forward to days when the temp is in the 90’s and the humidity is at least 80%.

2.  You have to plan your showers ahead as you frequently run the hot water tank out of hot water!

3.  You only buy clothing that is white.  In fact you buy one of everything, take it home, see how well it dyes.  If it passes, you go to every store in the area buying up your size and one size smaller and larger.

4.  People avert their eyes when they see  you in public with large bruises (really just that purple dye that got away from you).

5.  All your pillowcases are tie – dyed.

6.  You always spell out “d – y – e” or “d- y – e – i – n – g” when speaking in public.

7.  You can recite from memory all the Procion MX pure dye colors and their numbers.  You even know what the numbers and letters mean.

8.  You know what every MX color discharges to.

9.  You analyze every piece of commercial batik trying to figure out “how did they do that?” and then try to duplicate it.

10.  You own salt in 20 different sizes.

11.  You own a rainbow colored microwave which lives in your basement.

12.  You know the weight in grams of every pfd fabric on the market and you own some of each.

12b (from Sarah):  You’ve tried every PFD on the market, but are a snob and will only use a select few (Hoffman Lawn 1377, Testfabrics 419M, and that heavenly Kaufman sateen).

13.  You never have met a color you didn’t like (and want to duplicate).

14.  Your husband has to schedule when he will do his whites as there may be no hot water in the tank.

15.  You contemplate dyeing that white streak in your hair green or purple or better yet multi-color.

16.  You regularly check out thrift stores and ebay for old white linens and silks.

17.  You wonder why everyone doesn’t know the difference between dyes and paints.

18.  You own pvc pipe in every diameter that is made.

19.  You stalk construction sites to see if you can get 6 inch pvc pipe for your shibori.

20.  You covet your neighbor’s six gallon buckets as they would be perfect for your next dyeing session.

20b (from Sarah):  You buy kitty litter based on the buckets:  white is good.  Tall and square idea for Shibori poles.  Squat and white good for bucket dyeing….

21.  You try to buy all products in large plastic containers.  Your husband just thinks you are being frugal.

22.  You don’t make homemade frosting anymore as the container that the store-bought stuff comes in is perfect for your dye solutions.

23.  You can’t imagine buying your dyes in anything less than 1 lb containers.

24.  You seek out pool stores in winter in the cold Northeast and then buy the largest containers of pH+ they have.  (They never fail to offer you a small container first for your “hot tub”.)  Corollary:  you go around to all seasonal displays in supermarkets, Walmarts and home stores to find half priced pH+ in September.  You check the label to make sure it is indeed sodium carbonate and not bicarbonate.

25.  You buy a heated mattress pad to use in your dye studio.

26. appears to have gone awol….

27.  You do your chores in the hour it takes for your low water immersion fabrics to batch.

28.    You have to caution family members not to get too close to the edge of all your laundry sinks as they might stain their clothes.

29.  If there was ever a fire in your house, you would take out your  3 1/2 inch  thick dye book first as one of your treasured possessions.

30.  You own every dye book ever written but never look at any of them (except for your treasured dye book).

31.   You frequent home stores on a regular basis with your husband as there may always be a new brush or sponge or leftover  pieces of plexiglas.

32.  Your children and husband roll their eyes when they see what socks and tshirts you are wearing in public.

33.  You  now own a lot of black clothing as it does not show any dye stains!

33b (from Sarah): the Marian Reid corrolary:  once a year you do a black vat-dye to rejuvenate (as in dye over) your black clothes.

34.  You buy fabric 100 yards at a time.  You never let the supply in your basement get below 100 yards.

35.  You no longer have to look up any formulas for soda ash or urea water!

36.  You have given the MSDS sheets of every color of MX dyes plus the auxiliaries  to your engineer husband so he no longer believes your are trying to poison your family.

37.  You treasure your dye dogs (note from Sarah:  a really ugly piece of fabric) as they are just the beginning of a more interesting piece!

38.  You get  most of your daily exercise by running up and down the steps to check on the progress of things in the dye pots.

39.  You always find something you can use in your dyeing in the dollar stores.

40.  You still take classes on dyeing on the outside chance that you will learn a new or better way to do something.

41.  You finally have a use for all that old pantyhose from your work days in the corporate world.  (It works wonderfully for staining dyes or for scrunching fabric.)

42. Your friends and family nod politely when you start talking about your dyeing experiments.

43.  You have absolutely NO problem cutting into hand dyed fabric!

44.  You have been known to sit in bed and fold and refold newly dyed fabric.

45.  You save all your priority mail envelopes as the Tyvek doesn’t take dye and washes wonderfully so you can label all your experiments without losing the information on a heavily dyed piece.

46.  You get Tyvek from all your friends as well!
46b (from Sarah): You know that “permanent” Pigma pens RUN if used on tyvek, so have a black Sharpie to use on it instead.

47.  Your local fabric store has your number on speed dial and gives it  out to anyone who wants something dyed.  (It should be noted that you don’t do commission dyeing.)

48.  You can recognize fabric you have dyed in any of the local quilt shows (or see people walking around in something you have dyed).

48b (from Sarah):  you can recognize the work of other hand-dyers (like Judy Robertson’s fabrics).

49.  You are invited to new groups (so people can be the first to pick out fabrics they want).

50.  You read Dyerslist and Complex Cloth each day without fail in case there is something new you can experiment with.

and from Sarah:

51.  You buy quarter yard cuts of commercial batiks so you have a ready-reference for color combinations you want to try.

52.  You have a folder of photos and pages torn out of magazines with color inspiration.

53.  You have another folder with ideas for your dream “wet” (dyeing) studio.

54.  You are well-versed in the types of large/deep laundry sinks, how high they need to be to save your back during wash-out, and your preferred goose-neck faucets for said dream dyeing studio.

55.  From a soul on the dyers’ list, you purchase a dorm fridge to use in the wet studio area to store mixed dye so it’s not in your food fridge.

56.  You  salvage someone’s old microwave to use in the dye studio to heat up the blues when dyeing in winter.

57.  You look at batiks and hand-dyeds and immediately try to figure out “how’d they do that?”

Last one for now:  Stained clothes aren’t a problem… you over-dye them!  Those pale pool blue pants with the stain from a permanent pen?  No problem… work at the stain with OxyClean to lighten as much as possible, and dye turquoise!

And that’s enough for now…. this is Maine Quilts week!  I delivered some quilts yesterday, helped hang part of the show, and took a few photos, so hopefully in a couple days I’ll have “before the show” pics here, to be followed by Show pics!  Stay tuned…

and still no word yet on the fate of my hard drive… it is in the “Clean Room” at the lab in New Jersey.  They needed to order something special to get at the data (ominous).  I am determinedly optimistic.  I really am…..

More of what I’ve been doing…

Thursday, May 29th, 2008

One of the members on one of my e-lists is going through a rough year, recently diagnosed with not one but TWO serious illnesses at the same time. So, another group member is going to put together a snuggly quilt for her, and I made this block. The stitching around it reads: fabric, friends, health, hugs, thread, these things I wish for you, fabric, friends, health, hugs:

Heart in hand

Then I FINALLY, after five months, got the squares cut from my BlauViolett dyed cottons and silks so I can do some tests for lightfastness (as in, will it fade a lot or not?) for this dye, procion MX-RX-7 known as BlauViolett. You may (dimly, in your distant memory) recall reading this blogpost about my December dyeing adventures. Well, I didn’t want glue to be a factor in any lightfastness testing, so I cut sorta-square pieces about 3 1/2 inches on a side and stitched them to some stabilizer (a sewing product used to prevent fabric from behaving badly when doing dense stitchery). Here is what the fabrics looked like in December up on my work table:

Blauviolett.. all of them folded

Here are the stitched up groups. There is a VERY wiggly sheer silk at the top, followed by the cotton (the dye is reputed to be very unstable on cotton exposed to light), silk dupioni, a silk jacquard (with a mystery fiber that is clearly neither silk nor cellulose fiber as it stayed white), and the delectable, want to roll naked in it wear it next to my body sandwashed silk . One source has told me that on silk, the dye is stable and retains its GLORIOUS color, but that on cotton it fades horribly. The two vertical strips on the left are going into the dark. The far left one is inside a manila envelope inside a cupboard, the short strip is on top of the envelope in the cupboard (which is opened fairly regularly but not subject to intense light exposure).

On the design wall

The other four strips are dated with the date they went up on the window. I will, I hope

In the window

remember to take them down at one-month intervals. This window faces east-southeast, and gets some of the best sunlight / exposure in our house. We don’t have any windows without the sashings, so this is the best testing spot I can find (the only other option would be pinned to the screen on the back porch, subject to the elements…nah!). At the end of summer we’ll compare the six strips side by side!