email Youtube

Home
Galleries
Blog
Workshops & Calendar
Store
Resources
About
Contact

Archive for the ‘Techniques’ Category

ABCs for Coastal Quilters

Sunday, January 13th, 2008

Class in progress

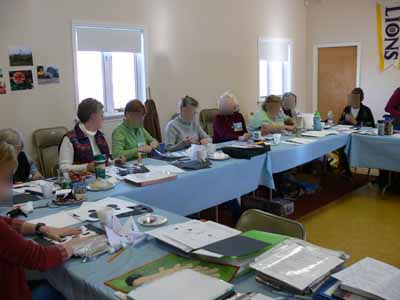
In three short months, I’ll be packing to head to my first MAJOR teaching venue: the AQS show in Paducah, Kentucky (it is amazing how quilters instantly know what you mean when you say Paducah, but mention it to the average soul on the street and you have to tell them it’s in Kentucky!). I will be teaching a whole bunch of things, including a class I had –until yesterday– never taught! EEEK! So the Coastal Quilters, my local guild chapter, came to the rescue. I offered to teach the class for free if they would be my guinea pigs…er…. ummm…. test-run for the class (picture above…but I blurred the faces because I forgot to ask each one for the OK to share pics)!

The class members were WONDERFUL, and I came away with several outstanding suggestions for improvements, learned that I needed to show how-to-steps on one project, and also decided I need to add one more exercise (meaning I have to delete something else) that pulls together everything we did in the class (and thanks to mulling it over with Roxanne by e-mail afterwards, have figured out how to do that!). All this is complicated by the fact that I function/teach better in a six hour format, and AQS prefers to offer 3 hour classes!

With “The New Drawing on the Right Side of the Brain”

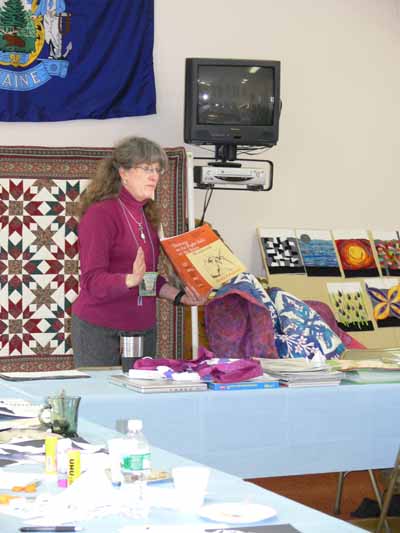
I started the class with a plug for a book that I consider nothing short of being able to work near miracles: The New Drawing on the Right Hand Side of the Brain and its companion workbook (in the picture), both by Betty Edwards–the two together cost less than US$ 24. I worked my way through the book with two friends, Linda C. and Lunnette H-H., when I lived on San Juan Island (before moving to Maine). We were all “OK” at drawing when we started (Lunnette was better than that, tho), but my gosh did I ever learn. Our before and after self-portraits showed dramatic improvement. I figure if *I* can learn on my own like that, anyone can. As a matter of fact, it was so useful I think I’ll do it again later this year. The titles above are hotlinked to the books at Amazon.com.

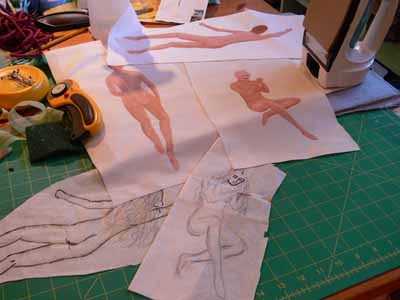
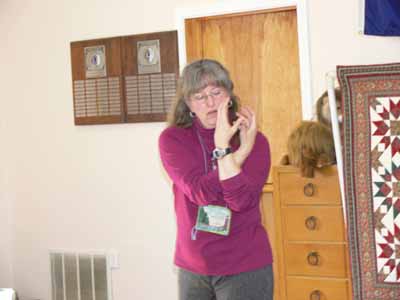
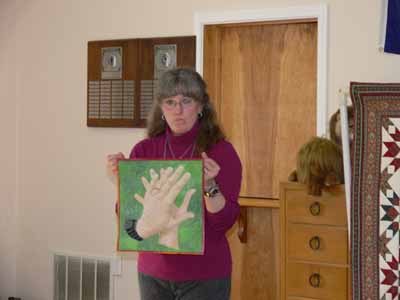
The class is called “If you can write your ABCs, You can draw”, and I started with a slide show… I need to improve the technical side of things, but as I showed more and more photos, all of a sudden I could see folks engage and start to “See.” As I told them, learning to draw is really about learning to SEE, then reproducing what you actually see (as opposed to what you think you see!). But, you don’t have to be Rembrandt…. you can use “aids.” some of these are the computer and your camera. To create “With These Hands,” I had my friend Marie take a few snaps of my hands…. I held them something like this:

Modelling how I held my hands while Marie took the picture

Then I enlarged the photo on my computer, taped tracing paper to the screen (moving it as necessary) and traced the outlines and major contour lines (light, medium and dark areas). THEN I could transfer those lines to my cloth and create this:

Showing With These Hands…tracing off the computer

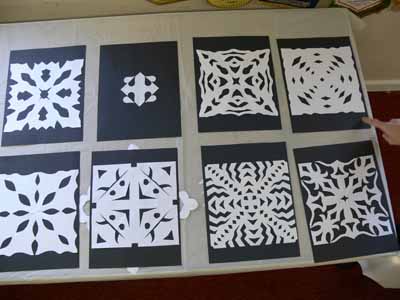
One of the most fun exercises (and alas one which will be eliminated due to time constraints, at least from the 3 hour version of this class), was making paper snowflakes to learn to “draw” with scissors, and to look at the concept of negative space:

Snowflakes

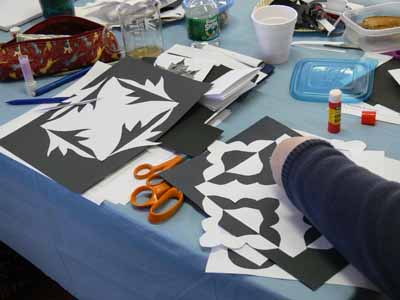
Then, a real keeper of an exercise is the “Expanded Square” from the book Notan: The Dark-Light Principle of Design by Marlys Mayfield and Dorr Bothwell (click on the title to see the book listed on Amazon–where it costs mere pennies…way worth it!). This exercise teaches you not only about negative space, but also about balance, rhythm, and possibilities of simple changes. In the book, the authors want you to use spendy black art paper to cut the shapes and glue it to white. Being thrifty (aka cheap) I had folks cut out of common white copy paper and glue it to black construction paper…it works! Here are Betty’s and Prudy’s being-glued examples:

Betty and Prudy’s in-progress Notan exercises
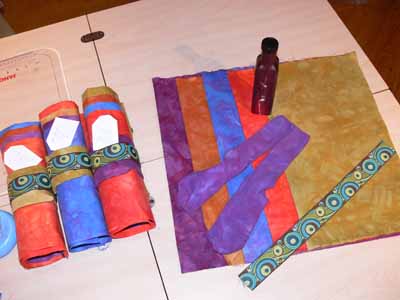
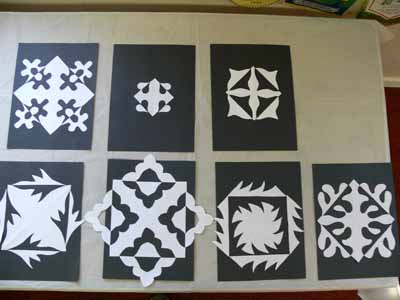
And here are some of the class pieces:

Notan

I learned this week that a crafts center in Ripley, West Virginia, wants to hire me (?!!!!! WOOOOHOOO) to teach a 4-day workshop, so I think I’ll combine this class, my quilting design, a bit of machine quilting, and edge-finish classes into a “The top is done…what next?” class! Zippedy do DAH! In a couple days I’ll post my upcoming schedule of classes…. stay tuned! Cheers, Sarah the swamped

A sampler of background quilting

Wednesday, January 9th, 2008

At long, LONG last, I’ve been able to make some headway on completing the last section of the manuscript for my book. Over the last few days of the boys’ vacation, I was able to complete a sampler quilt showing the effects of using different threads and different background quilting. I used the same wreath pattern on all eight “blocks”:

Full… coral Background QUilting sampler

I used a matching 40-wt. trilobal polyester thread (shiny and beautiful like rayon, but stronger and more lightfast), Superior Threads Living Colors # , for the top row. I used a darker 40-wt. polyester thread for the wreaths in the second row, Superior Threads Nature Colors # . For the background I used Mettler 60-wt. “embroidery” cotton in a matching color, and in the bobbin I used Superior Threads The Bottom Line. If you click the photo above, it will open and enlarge.

As you can see from the overall shot, from a distance the matching color-thread quilting nearly disappears. The dark color stands out a lot, though, especially with the “pearl” circle in the center. If I were quilting a real quilt, I personally would choose something in the middle of these two colors. I think the reddish color is too strong, but the matching color doesn’t stand out (so why do all that hard work if no one can see it?!).

Here’s a picture of the quilt “in progress” under the sewing machine. As you can see, I used the easy-on-the-eyes blue marking pen (the thick one). If I had had the fine-point blue pen, I would have used it. The line on the Dritz wash-out pens is so thick (nearly 1/16th of an inch) you have to choose whether to quilt on one side of it, the other side of it, or aim for the middle!

Coral Background Quilting Sampler while being stitched

The next part of the experiment was to illustrate how different background quilting blends in with or causes the main motif to pop out. From left to right (in both rows) I used:

  • no background quilting
  • cross-hatching (a grid) in a size similar to the large end of each feather in the wreath
  • cross-hatching in a smaller scale
  • stippling; on this one, I varied the size of the stippling. On the top row I used a fairly large stipple; on the bottom row I used a very small stipple to help the wreath stand out.

Between thee and me, I detest stippling most of the time. It has become SO overdone with the advent of machine quilting. There are lots more interesting ways to compress the background, but it does have its place (though infrequently!), and in this instance using a simple background quilting gets the point across better than something more creative.

Here’s a close-up of the no-background quilting blocks in the close up below…on the left. Boring and I think the background ripples some. I don’t personally care for this look, but certainly understand why some folks choose it, especially when hand quilting a big quilt!

Background sampler, left side

On the right you see the cross-hatching in a similar scale as the wreath. By using contrasting lines (curved and straight), you get some differentiation between the motif and the background. Especially when looking at the block quilting in dark thread, it works.

When you reduce the scale of the cross-hatching, you get further contrast of scale as well as line. This really helps accentuate the motifs. In antique quilts, this is how they got those beautiful wreaths and feathers to stand out and be noticeable, even though they were usually using white thread on muslin. This photo will enlarge if you right-click and open it in a new window or tab.

Coral Background Sampler, left side

In the stippling examples, boooorrrrriiiinnnngggggg, the larger stipple doesn’t do much AT ALL for me. The scale is too similar to the curves in the wreath. No significant contrast in line or scale. In the second block, the small scale of the stippling really helps “pop” the motif, as well as the small-scale cross-hatching. However, I still think there are lots more creative ways to deal with the background than boring old stippling. You can see the nearly-no-mark sampler I teach in my intro machine quilting classes here or here. That sort of background quilting is a LOT more fun (and visually interesting, at least to me!).

Finally, here’s a picture of the back. I used three fabrics on purpose to illustrate how the back looks when you have

  • a solid (ish) fabric that matches the front
  • a busy print
  • a solid fabric that contrasts with the front

Coral Background Sampler, backIf you right click on this image, you can open it up larger to see more detail (I hope!).

I prefer to use a bobbin thread that matches the needle thread so that small variations in stitch tension and balance aren’t noticeable. Some quilters REALLY don’t like it when the bobbin thread contrasts with the backing. Personally, I really like the line-drawing appearance. As you can see from these photos, the bobbin thread is visible (but not very) on the matching solid, disappears completely on the busy circle print fabric in the center, and makes a nice picture (to me anyway) on the blue:
When I finish my Hawaiian-style jumbo 9-patch quilt, Nourish the Body, Nourish the Soul, I’ll share the background quilting on that and on a couple of my pattern quilts.

Dyeing, December 2007

Monday, December 31st, 2007

Gifts for the Frayed Edges were home-made and recycled this year… the best kind! I had found some gorgeous ribbon at Rock Paper Scissors, a store in Wiscasset. Deborah always loved to stop at Smitten, owned by the same person, and I had never been despite the fact that I drive through Wiscasset at least twice a month on my way to and from Frayed Edges meetings. So one time, on the way home, I finally stopped. And bought YARDS of this gorgeous ribbon, with the idea of making a gift for my fellow Frayeds. As Christmas approached, I thought…do they really need ANOTHER bag with this ribbon on it? Why not let them make something they like/want instead? That led to the decision to dye fabric.

Frayed and Marie fabrics

I got home from Mom’s in California on Dec. 11th. Over the next couple of days I dyed about 16 yards of fabric! I did two yards each of five colors (one for each of the other Frayed Edges and one for Marie. Each person received a half yard of “their” color plus a fat quarter yard of the other four colors. While I was at it, I decided to also dye some wonderful PFD (prepared for dyeing) fabrics Marie gave me for Christmas last year: silk organdy, gauze, lawn… plus some cheesecloth and also some silks. Oh MY!

Dyeing set up

I moved my “table” (two old cabinets plus styrofoam insulation and a 4×4 piece of scratched up shower board) over by the basement windows. A vast improvement to being on the other side of the basement. Still no sink downstairs (I had a plumber give an estimate….$1200 not including sink, counter, faucet…to install….not gonna happen), so am hauling water, but at least it is space and I don’t need to worry about dye or soda ash splattering on the cement walls and floor. The shelving on the left is new and wonderful! All my dyes, auxiliaries and pots and beakers and whatnot in ONE place!

Batching and just rinsed fabrics look so wonderful (too see larger, click on the photo):
Batching–blue potsRinse out…oranges in washer

Then…. I took some raspberry syrup jars and painted them with glass paint. I used Pebeo Vitrea 160 (available here at Dick Blick) . I picked colors and a motif for each person….green for Marie, sea blues for Kathy, purple for Deborah, green for Kate, and deep coral for Hannah. The purple one for Deborah, for example, has the stalk with buds on it which she has used so often in her work, Kath’s has waves for the sea. I used contact paper cut into shapes and stuck on the bottles, then painted, allowed paint to dry. Paint is supposed to cure 24 hours (I cut it a little close on a few! as usual ran late on time) before baking. You put the glass in a cold oven, turn on the temp to 325. When the oven reaches 325 you “bake” for 40 minutes, then allow to cool inside the oven. It worked! Wouldn’t these look great in a window? I think we need to have more raspberry syrup on our waffles so I can make some for us!

Glass painted bottles

Finally, I wrapped everything up…. the bottle got wrapped with a pair of hand-dyed socks, which got wrapped with the 1 1/2 yards of hand-dyed , which got rolled with that ribbon from Rock Paper Scissors!

Frayed and Marie gifts…. rolled and ready to wrap

In the interest of having good materials to work with for my art quilting, I dyed a lot of fabric… I’ll have more to share over the next week or two.

Naiads is Done!

Saturday, December 8th, 2007

Well…. it’s tough not being able to share my latest art quilt! But it is done (except for the label, of course!). It is 18×45 inches by ab out 1 1/2 inches deep (you’ll have to wait to find out the why and how until March!). But I have been working, and will share this wicket little tease…the last part quilted. It is of the riverbank area, with reeds made of yarns twisted and combined in various ways to make the reeds:

Naiads riverbank

The narrowest of the reeds is one of my favorite embellishing yarns, Lion Suede (from Lion Brands…an inexpensive acrylic yarn that is round…many of the chenilles are fluffy but flat) twisted with a tufted decorative yarn. The thicker reeds are three strands of Lion Suede or a similar variegated Plymouth yarn) wrapped in a ribbon/tape yarn that is like a checkerboard. Finally, the shorter grasses are made from a single yarn—that one ball cost about $12! But if I could find more of it (I tried in vain a few years ago and it is long gone), but no luck, so I hoard it and enjoy the wonderful color and texture.

Naiads, or it’s good to be green….

Sunday, November 25th, 2007

I’m not that great at drawing the human figure, but I guess I’m getting better. A while ago I bought some artists figurines (here, at Dick Blick). I posed the female into the positions I wanted for the naiads and sketched them. I then outlined the sketches with dark pen, taped them to a work surface, placed plastic over (acetate sheet), placed PFD (prepared for dyeing) white cloth over that and painted them, minus hair (which I’ll do with free-motion threadwork).

painted figures

My first attempt, using Tsukinenko inks, was a bust. Somehow I can never get the blending I want with those inks, whether using the sticks or a brush. So I tried So Soft paints, from a kit put together by Bonnie McCaffery. They WORKED! The paints are very creamy and soft, leaving a fairly nice hand to the fabric afterwards–not stiff and board-like! I ended up appliquéing the figures to the quilt by hand, and it looks good! In the interest of keeping things sorta secret, I’ll only show you part of one of the ladies, appliquéd and with thread-lace-hair:

Naiad cropped