An Embroidered Tote for Janome
Friday, April 3rd, 2015As many of my loyal readers know, I sew on a Janome. I have been incredibly fortunate to be a part of their artists and teachers loan program for an embarrassingly, blissfully long time. THANK YOU, JANOME AMERICA (and yes, I’m shouting!) As part of this program, I gladly and happily make things which they can use, whether it is a banner for their booth (and also used in their adverts!), a project used online, asking to teach in Janome classrooms at big shows, you name it. This season, I have been using a (gasp, gulp!) top of the line 15000 embroidery and quilting machine. Links for a free tutorial on this caddy are at the end of this post.
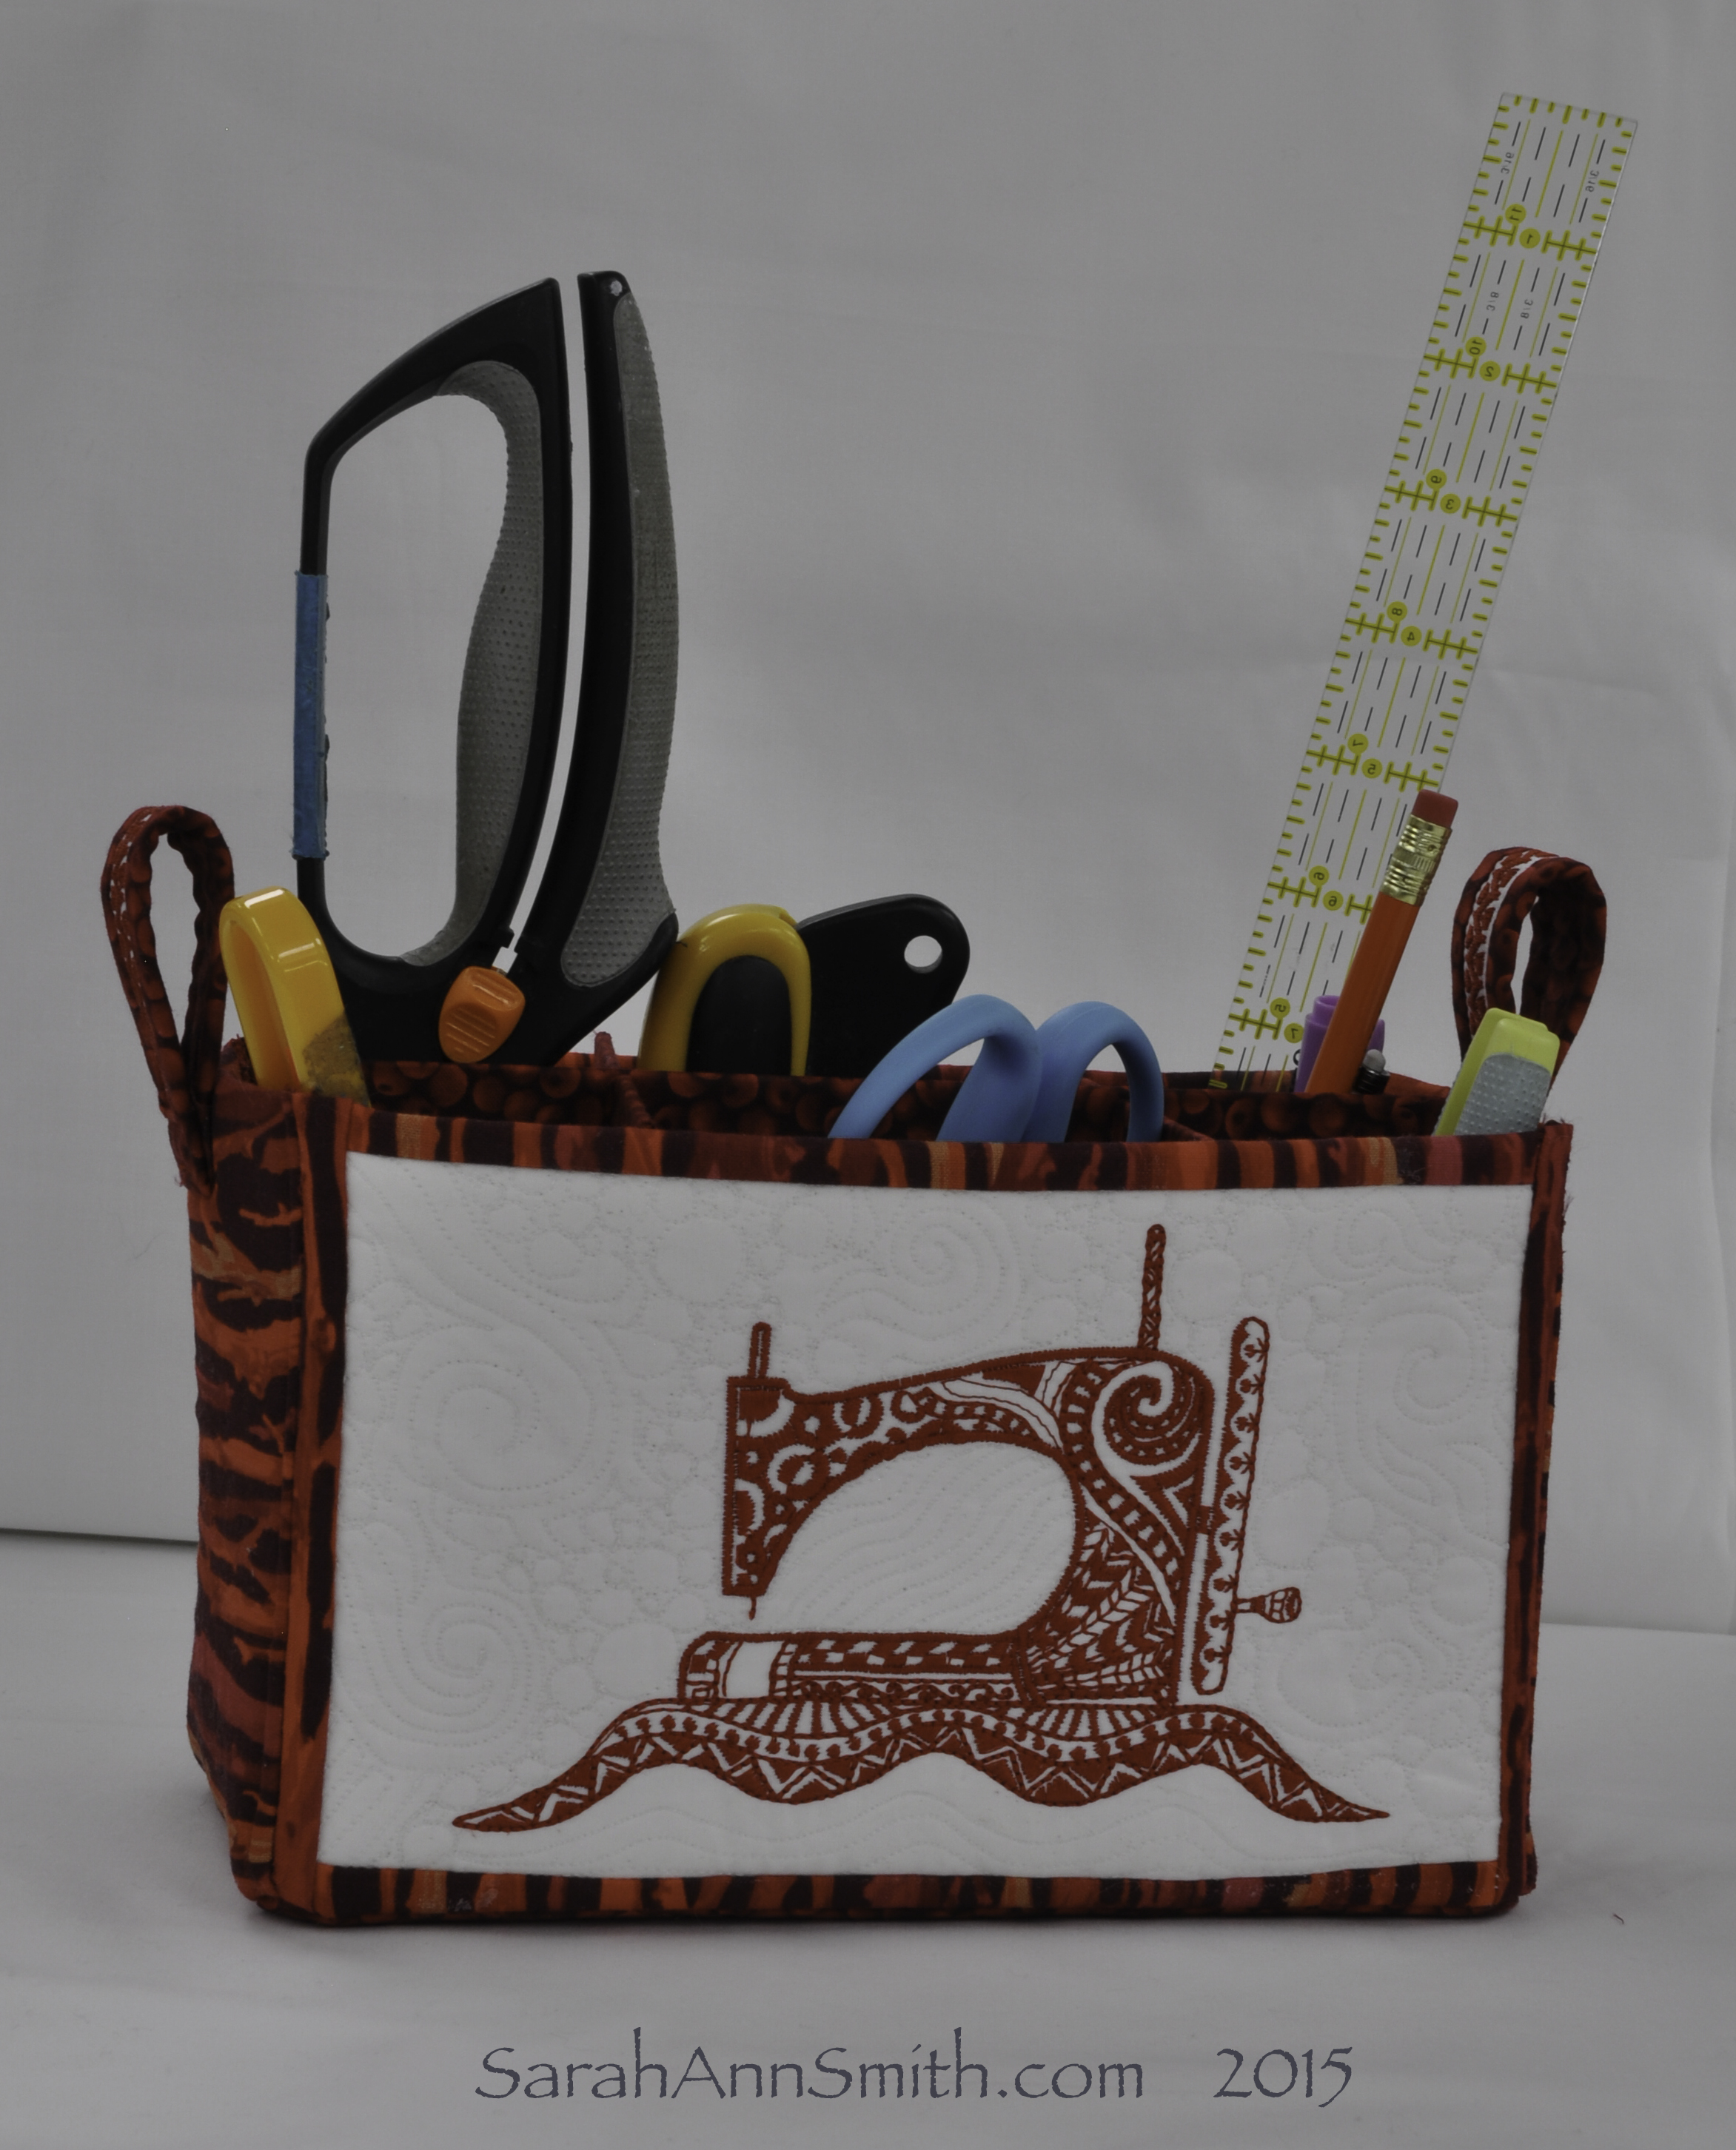
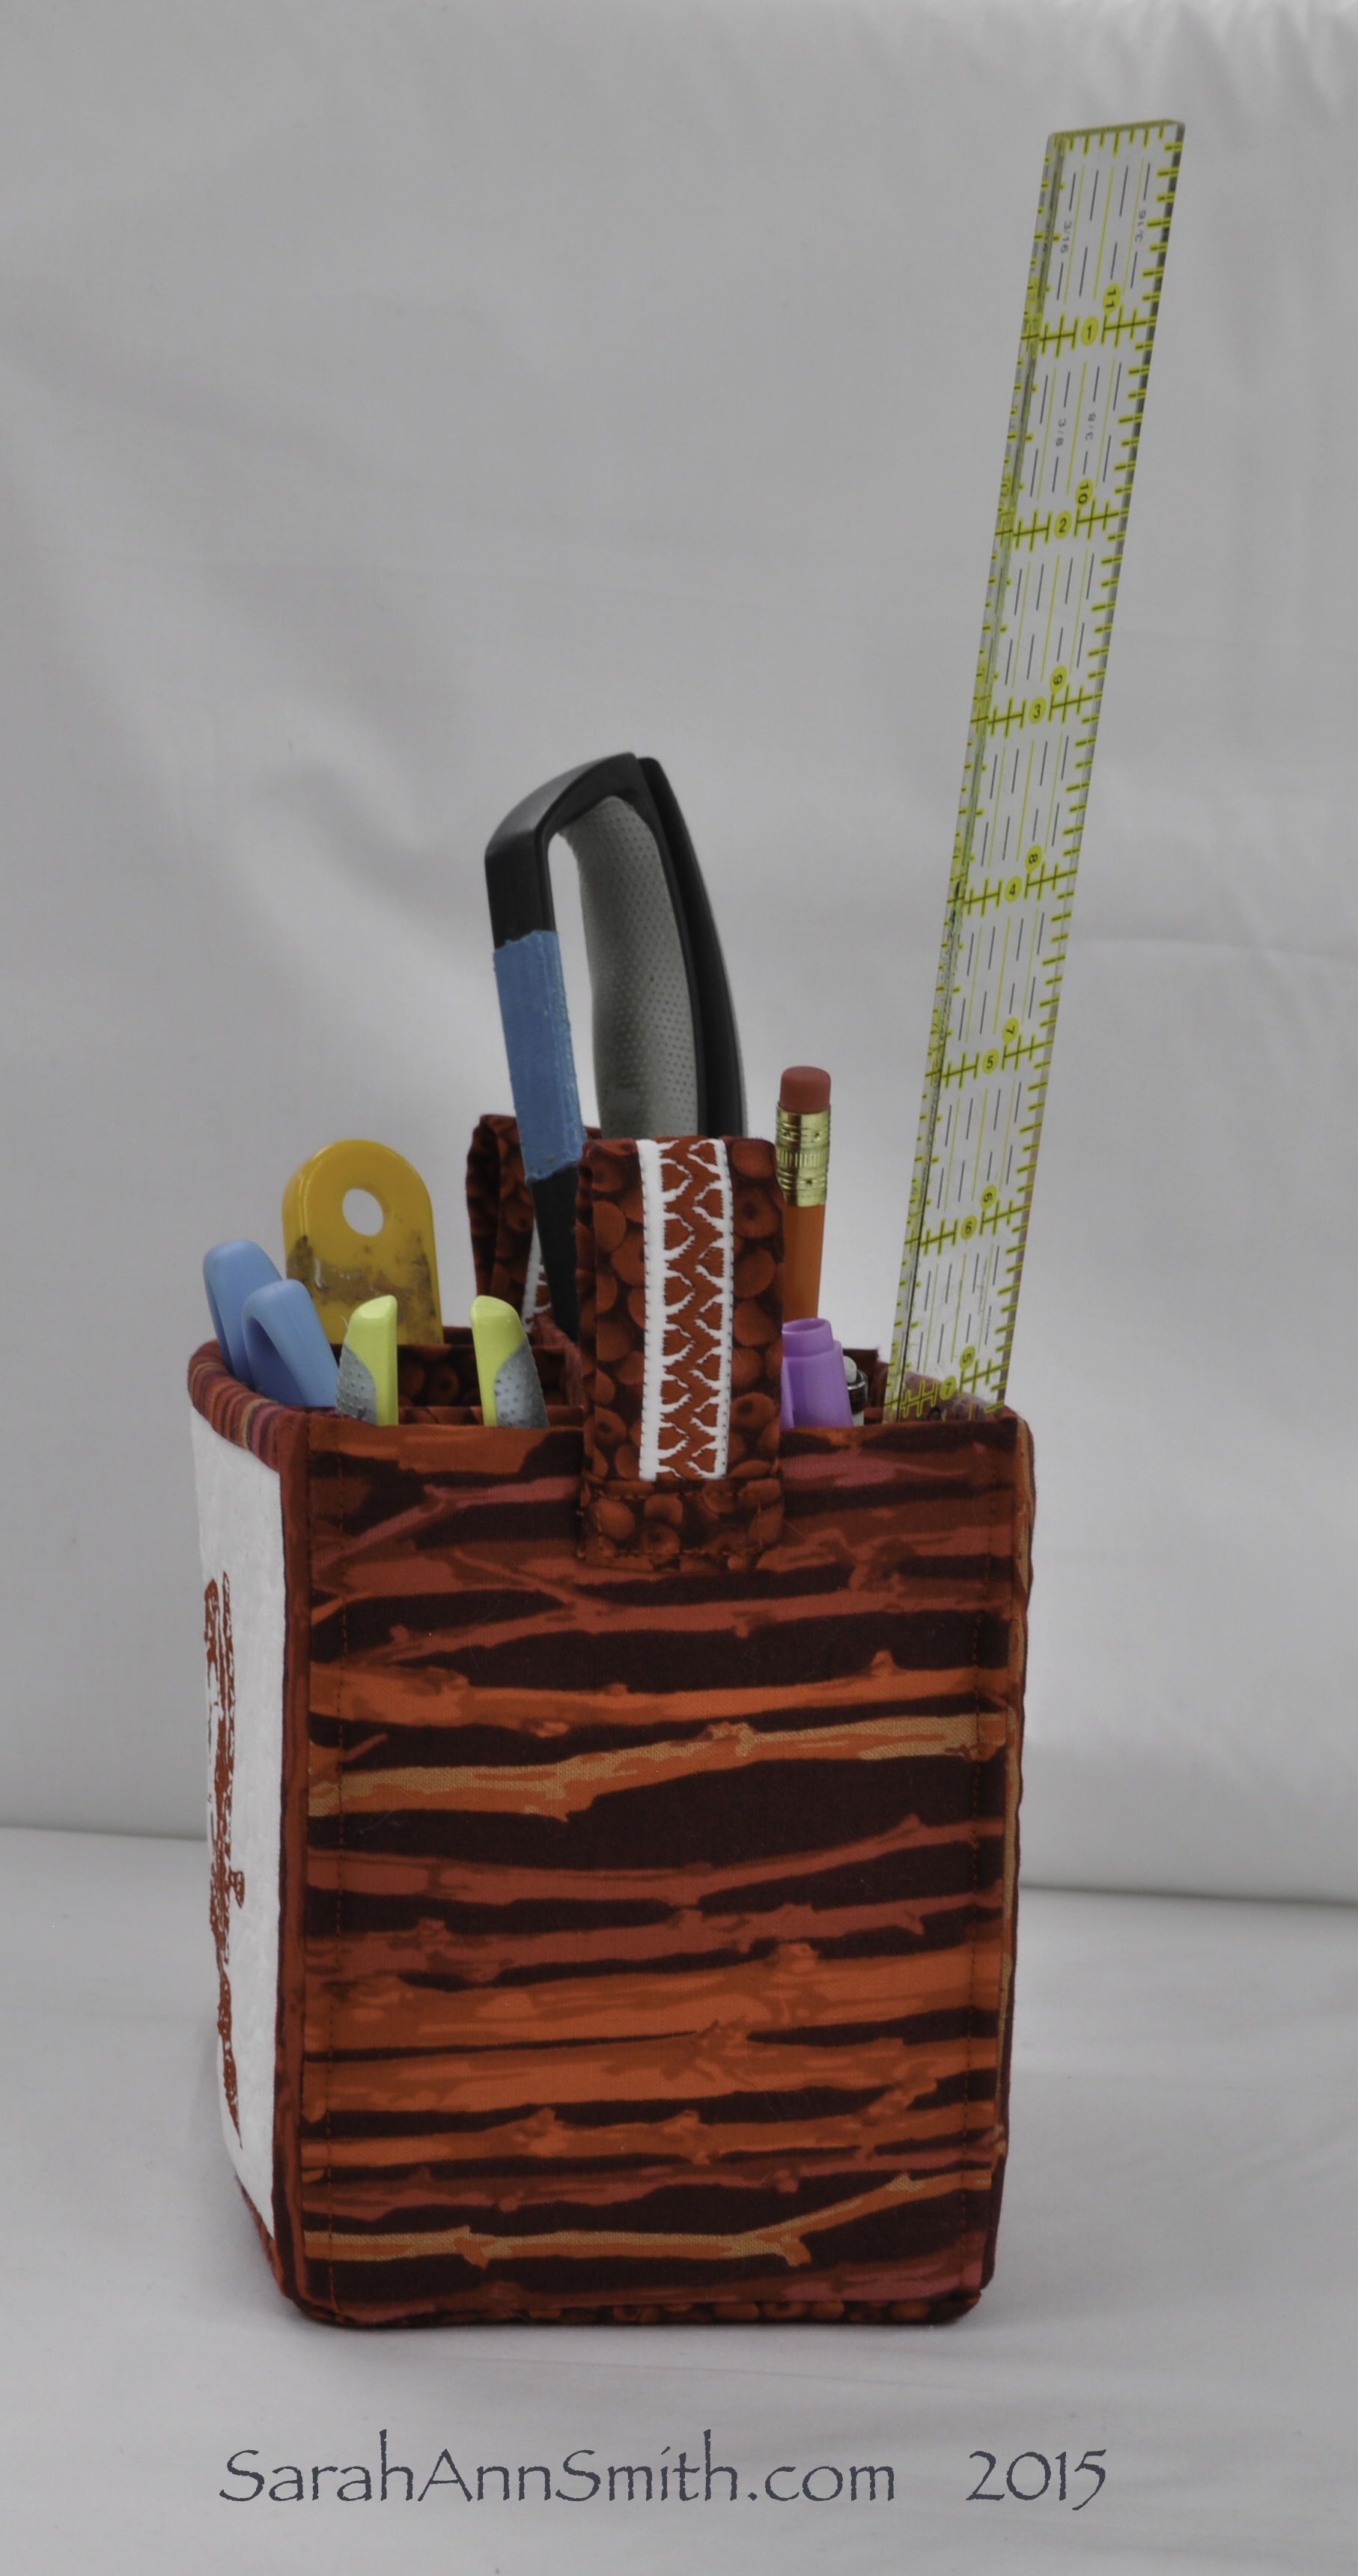
Embroidered Caddy for Janome America. The sewing machine is a built-in design on the top of the line Janome 15000. Right Click to see larger. Thanks to Jean S. I know now this design was created by Jill Buckley, who has fun stuff on her blog here. Nice to meet you Jill!
Embroidery you say? Well, I never would have thought that *I* would fall in love with machine embroidery–the pre-programmed kind, but I have. I’ve got a project for fall that will be awesome using one of Lonni Rossi’s designs built into the machine. But for spring, I have made that lovely little tote! It is 4×8 inches (footprint), 5 inches tall. I used two embroidery designs that are included on the machine along with the initials that are one of several included alphabets (see photo below for the other side).
One of the things that most surprised me is how easy the interface is with the software. I’m not very patient with that sort of computer-ish stuff (and after all, these machines are really computers that sew). This was SO EASY to size, position, all of it. Even *I* could do it using the manual–no classes needed! And utterly cool: there is an iPad app that allows you to do stuff elsewhere in the house. With the iPad and your 15000 sharing your wifi network, you can view the progress of the stitch-out so you know if you need to go to your sewing machine and change thread colors or insert a full bobbin. Totally cool!
FREE TUTORIAL!
Best of all, this project has just been featured on Janome’s blog where you can find a link to free instructions! Today you can see my project here as a featured project. Scroll down their blog to April 1 for a blogpost on it. Or go straight to the project, here. At the bottom of that post is a link to download a PDF of my full instructions.
Here’s a view of the other side and the end:
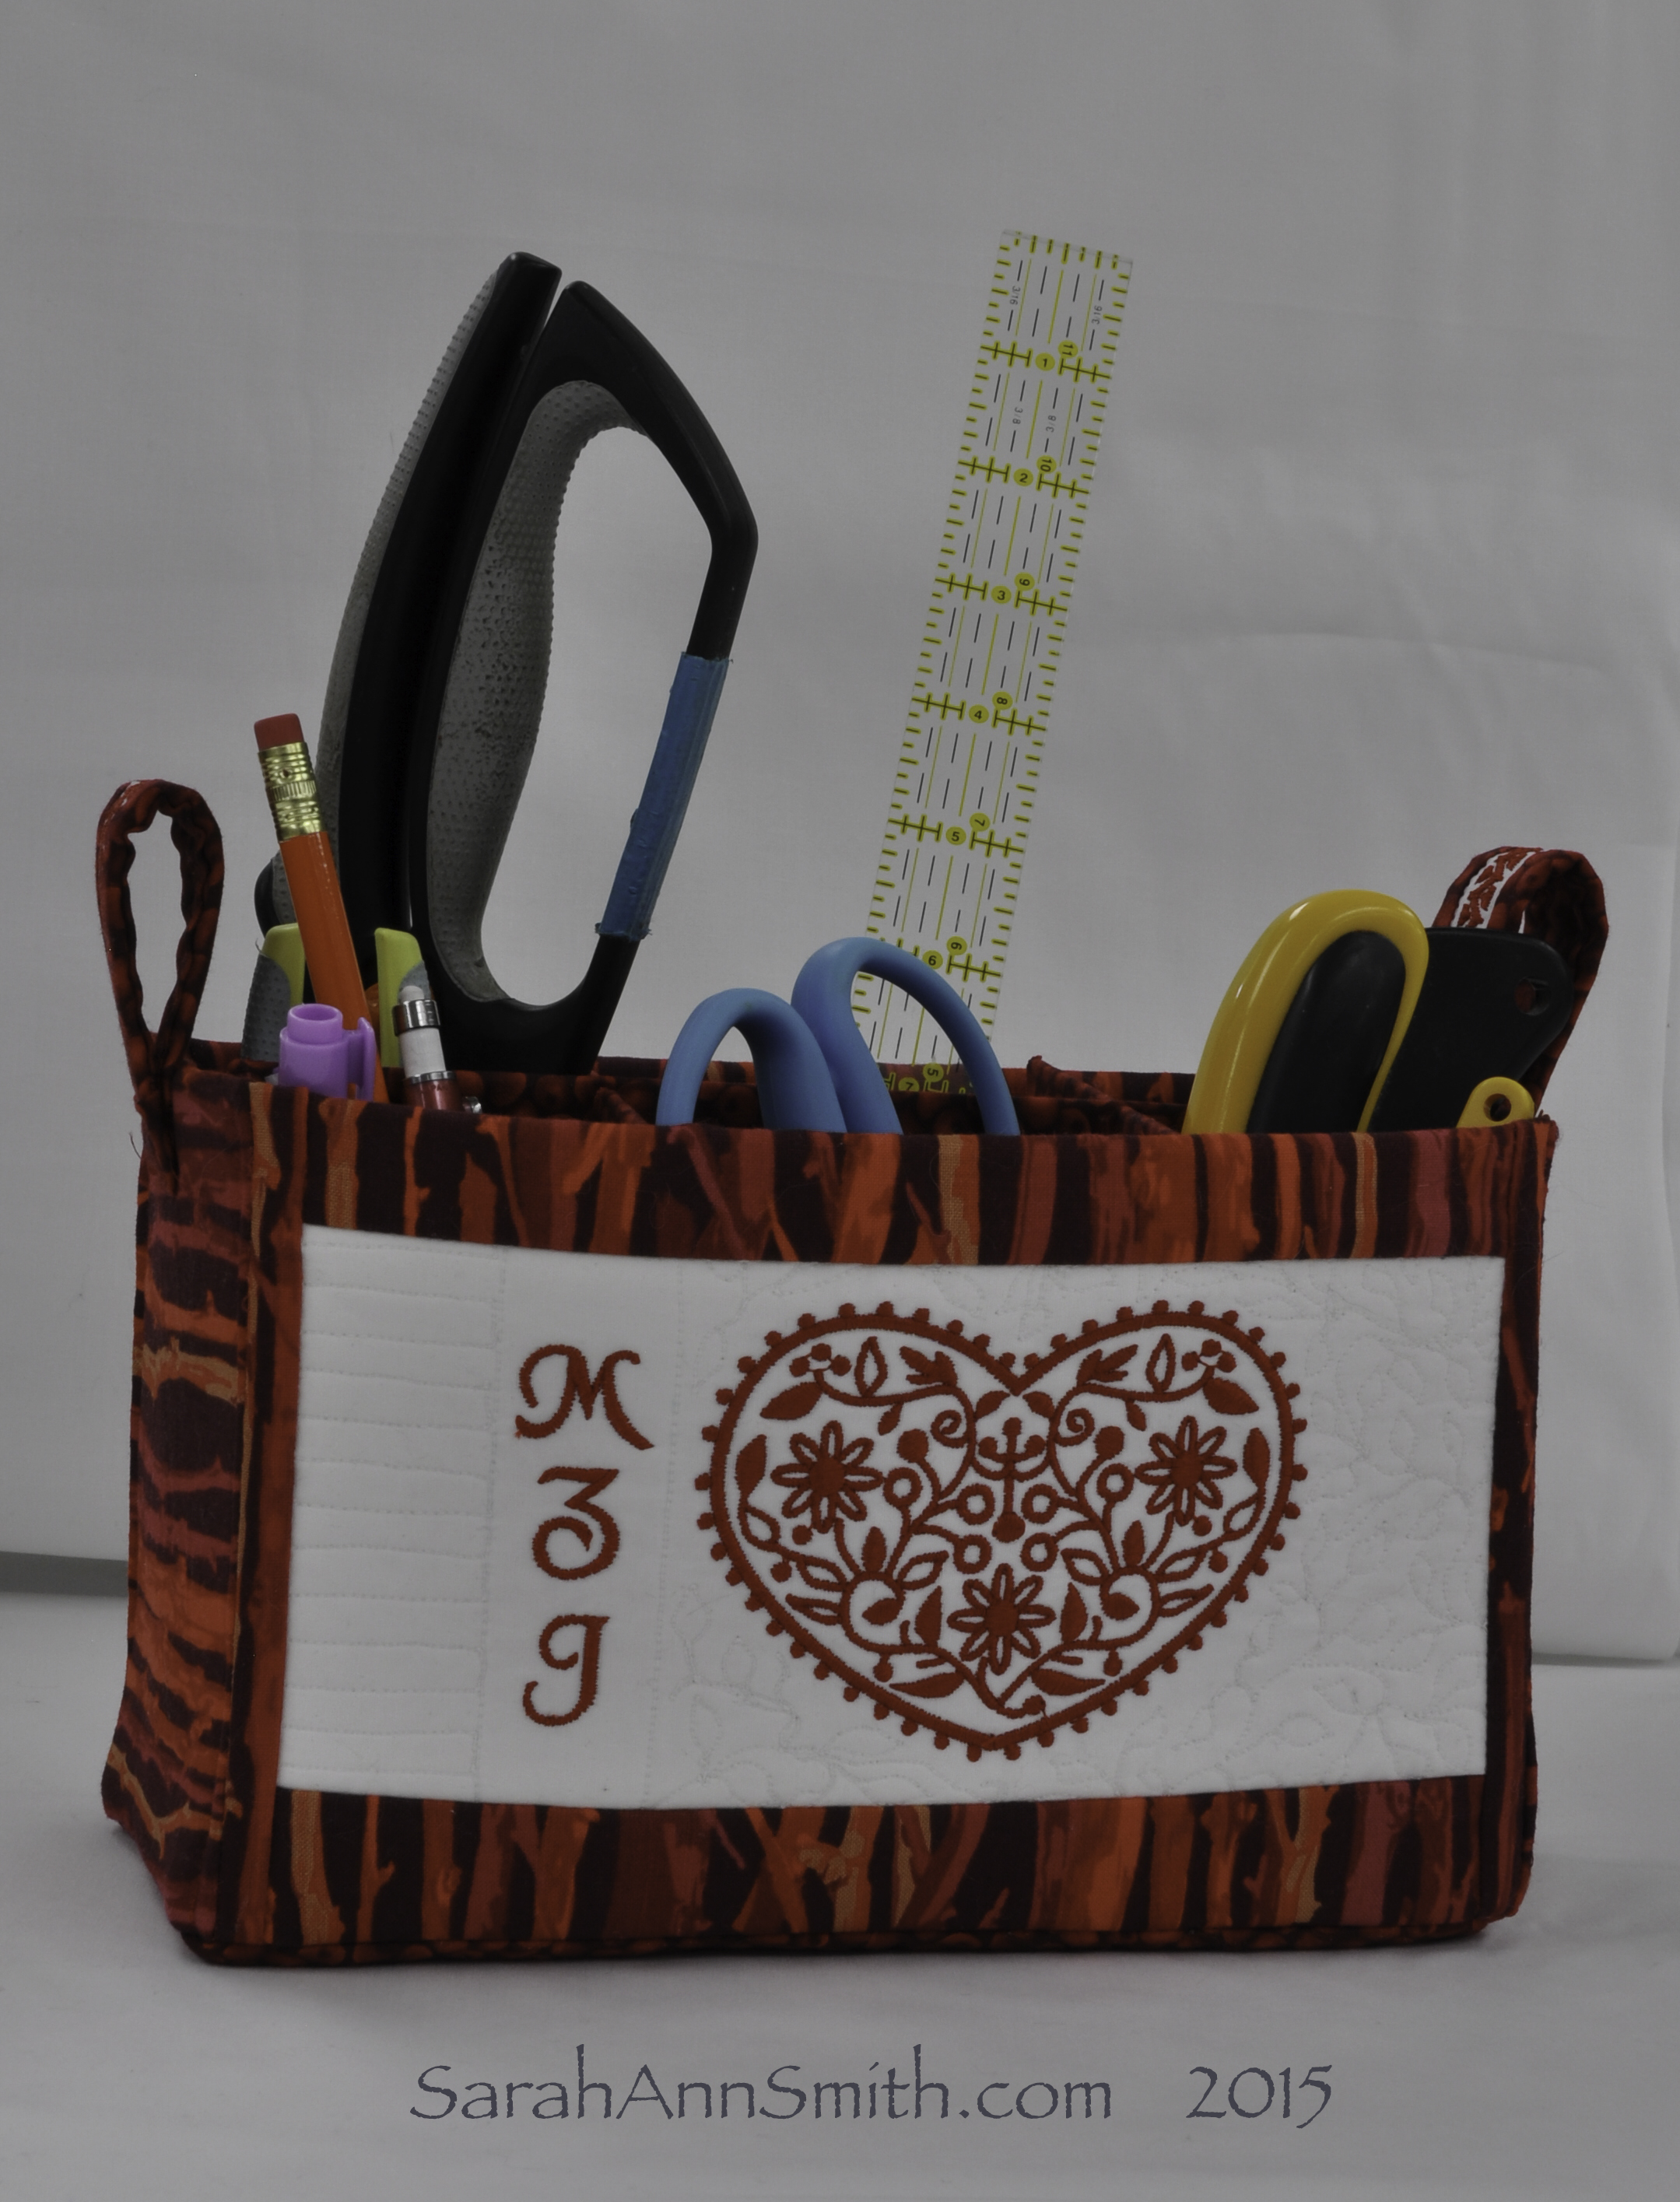
Side two: the Heart is also an included design, the font is called “Galant” and is also included on the machine. It was surprisingly easy to create the design on the machine. And if you happen to be my BFF living on SJI with the initials MZJ, yep–this is a sneak peek at part of your birthday present! Red is the theme this year…..Right click to see larger.
End view of the caddy. I used one of the built-in decorative stitches on the handle.
Thank you again, Janome, for years of support. Your fabulous machines make it possible for me to do what I do!