email Youtube

Home
Galleries
Blog
Workshops & Calendar
Store
Resources
About
Contact

Archive for the ‘Techniques’ Category

a video of me quilting and progress on the Peony
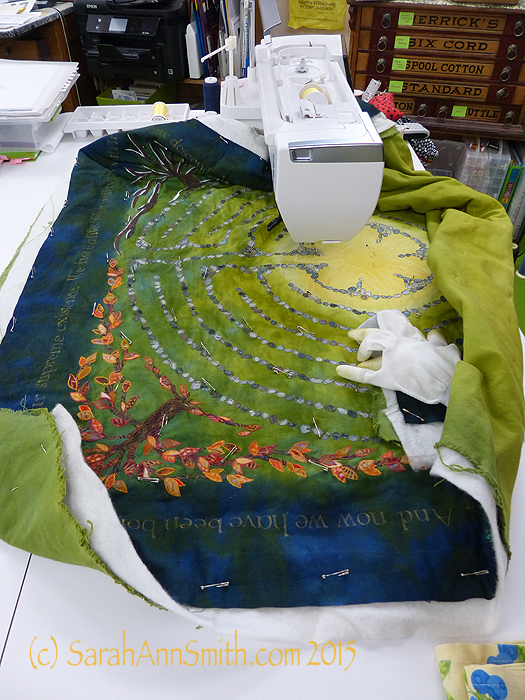
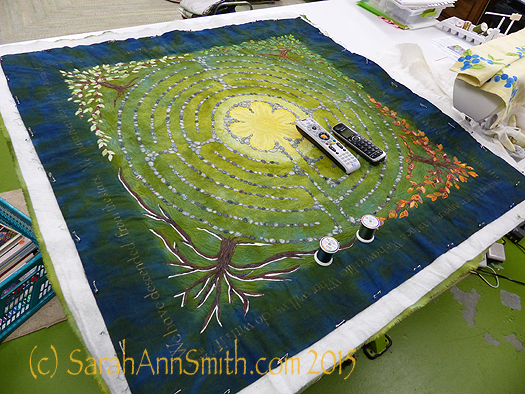
Monday, August 29th, 2016

So over on Facebook I’ve posted some  photos of my current project, a hugely oversized peony…well, part of a peony.  I decided I’d try a quick video posted via youtube so show me actually quilting.   Along the way, I added a quick visit to my studio.   The studio is sort of “midway messy,” true to life.  I have a couple things piled on the floor that are: find time to sort and put away, try to get rid of in some way, and prepping for teaching in Houston piles.  When I’ve found time (usually after just barely meeting a deadline), I have a tidy attack.  Mid project it is utter chaos.  This is in the middle. And apologies for the overly loud and enthusiastic hello at the start.  Learning.  I’m learning…..ps:  if the video doesn’t display at first, hit refresh on your browser. Update:   thanks to Donna for some good questions, so I’ve added info at the end of the post about holding your thread tails and my appliqué press sheets.
On the video, I mentioned how I select threads in a value range.  The reason the light ones are in the box and the dark ones to the side is that I have used the dark ones.  When done, I put them aside so I know what I’ve used.  I keep them in the order in which I used them, which helps if I need to go back and do more in a certain shade.

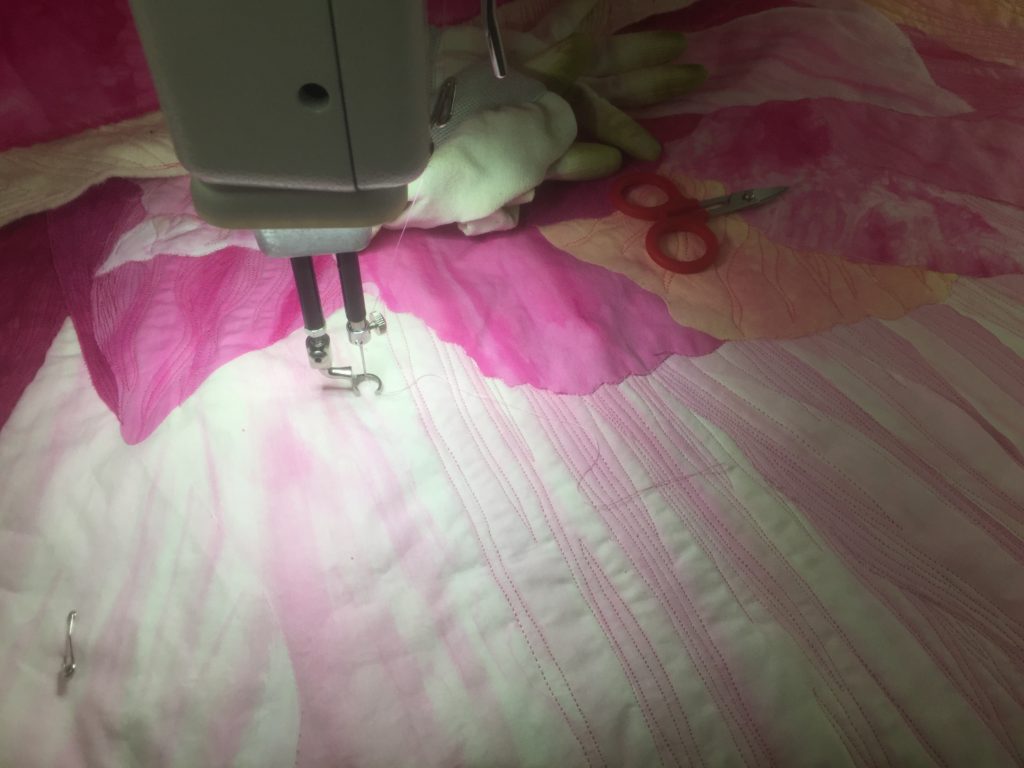
I had clamps by my Janome for working on larger projects, but hadn’t set up hooks from the floor joists (my ceiling) near the Sweet Sixteen until yesterday.  WHAT an improvement!!!!!!! I’ve been using dyed-by-me cotton duck on the backs, and let me tell you the quilts have been HEAVY.   So that’s why there is a blue-handled clamp visible.  I didn’t use the one on the right because of where I had the phone set up to film.

If you like this, let me know and maybe I can do some more videos of me just quilting.  And yes, I sound like a dolt when I try to narrate while quilting–I can’t concentrate on the quilting and manage to talk in a normal rhythm at the same time.

Working on the lighter petals on the big peony quilt. It will finish about 45x55 I think.....depends on how much I trim off and/or turn to the back.

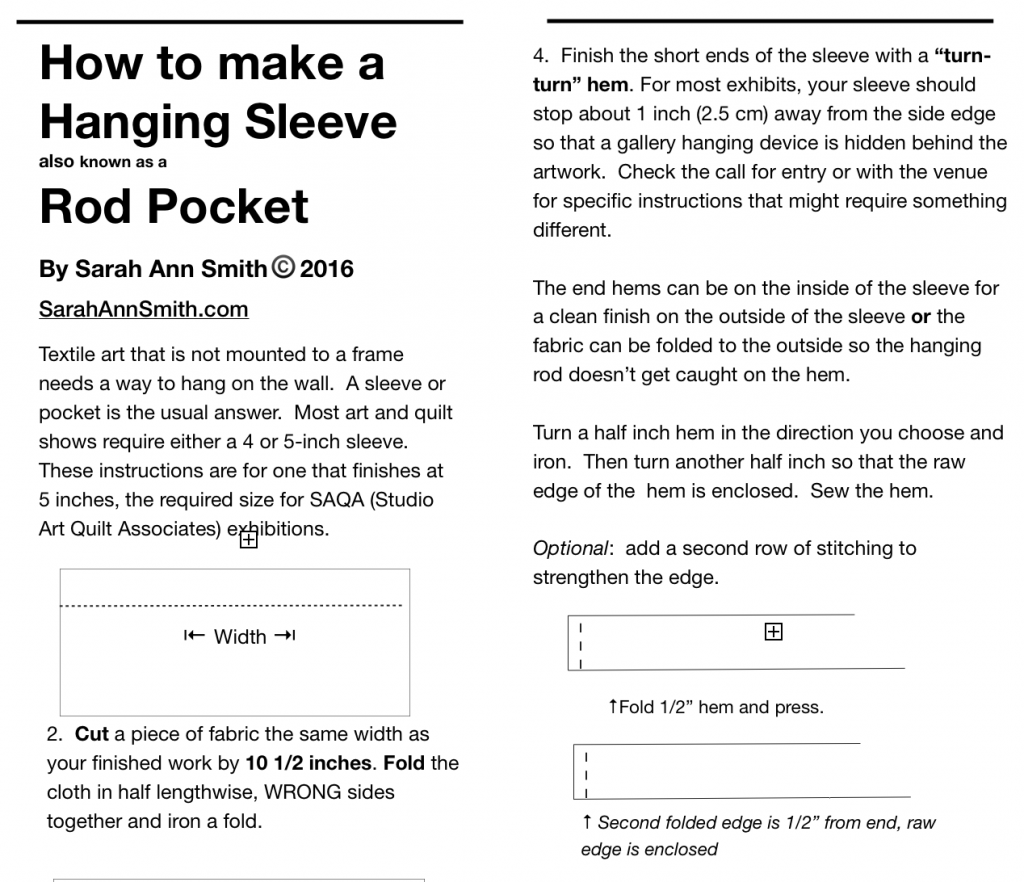
Working on the lighter petals on the big peony quilt. It will finish about 45×55 I think…..depends on how much I trim off and/or turn to the back. You can see both of the hanging clamps in this photo, as well as the photo of the peony clipped to the left side of the thread stand on the machine.

IMG_0009

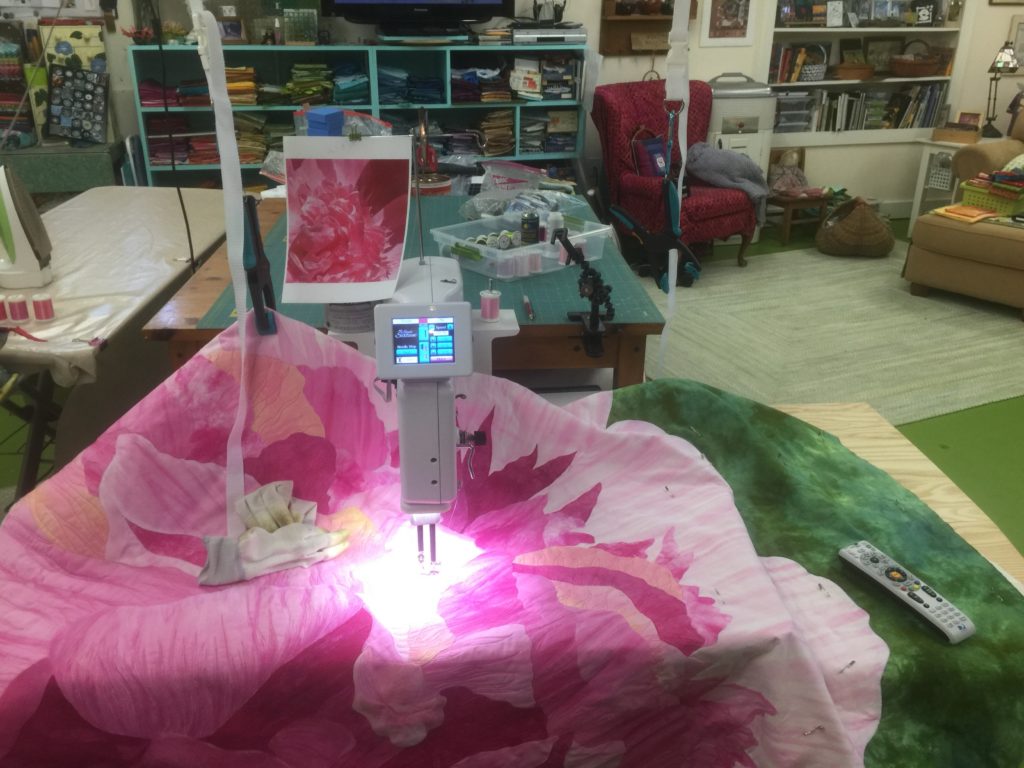
Detail of laying in the darkest-on-this-petal pink.


Showing the clamp on the right in use

Showing the clamp on the right in use.  Some folks have started using those dog-grooming things that you clamp onto the table and attach the dog with a short leash for grooming, but substitute a clamp.   That idea became common AFTER I set things up over at the Janome; since I have bare (primed) joists and sub-flooring for a ceiling, I opted for the much less expensive hook in the joist!


UPDATE/Addition:    About the move to another bit, be sure to press down on the threads (top and bobbin) when you begin stitching, even if they are still attached.  If the pulled out part is longer than the “jump” (which it sometimes is for me because I need tails long enough to bury), you can still get a snarl if you don’t hold the tails firm to the machine for the first stitch or few.

Non stick sheet on the wall:   same as on the ironing table, just hold the iron vertically.   I tend to make smaller components flat on the ironing board, then move to the wall.   Sometimes I don’t use the wall…just depends.   If I have draw a full cartoon/sketch, it goes UNDER the non stick sheet that is on the big board, so I just work there.   On the rare occasions where I am working improvisationally or something seems amiss, up on the wall it goes.

I ordered my sheets from Valerie Hearder in Canada…the exchange rate is very favorable at the moment.  She sells 24 and 36 in wide, by the foot.  So I got two that are 72 inches long.   They should hold me for a couple decades.  Misty fuse now has the Holy Cow, which is 36×48.   Had that been available when I got mine I might have done that instead. However, I REALLY like having my Big Board totally covered, and it is about 22×60 inches.

Thanks for writing!   The peony is done and I am revelling in having the Peony DONE and HUNG!

Binding and other cool things

Saturday, August 27th, 2016

Well that’s a nice way to start the day:  checking out the Quilting Daily (Quilting Arts/Interweave) email, and there is MY little quilt and a link to their free e-book featuring my article and those of several other quilters!

From this morning's email:  my little quilt shows all sorts of binding challenges:  sh

From this morning’s email: my little quilt shows all sorts of binding challenges:  regular corners, sharp corners, inside and outside curves, inside corner (on the top edge).   

So here’s a question for all of you:  I have wanted for YEARS to write a book called Fine Finishes with my way to do bindings, edge finishes (including facings and all sorts of funky things), and how to display quilts (hanging sleeves, alternative ways to hang and display).   Is anyone interested?   I may or may not go the traditional submit-to-publisher route, or I might self-publish, even though I am awful about promoting stuff and selling it…..   So tell me:  should I take the time to write this book?  I’ve got most of the samples made since I teach this as a class, would include work by others that I find inspiring in ways to display, and so on…….

And don’t forget to click on the link and get your free e-book!

The Nest: a new approach to surface design

Saturday, July 30th, 2016

For most folks who are in to surface design, the surface design is the goal.  For me, the surface design is to create cloth to use in my collaged artwork.  Rather than hunt (and hunt and hunt) for fabric that works, I make my own, using both my own hand-dyed fabrics and commercial fabrics, especially batiks.  In my new class, The Nest, I teach this project as a way to learn several surface design techniques and get you started.  I’ll be teaching this class for the first time (officially) at International Quilt Festival, Houston (class link here) on Thursday afternoon, Class 496.

The main class project for my class The Nest:  a new approach to surface design.

The main class project for my class The Nest: a new approach to surface design.  Right click photo to view a bit larger.

I provide a kit (with a fee) with paint, brush; hand-dyed floss, perle cotton and cheesecloth; Sarah’s custom thermofax screen (yours to keep) and more.  You provide the fabric and willingness to play!  The class can be either half or full day; in Houston, it is a half day class.
Since Houston is THE big quilting event in the world, it pays to prepare, so thanks to my local peeps, I did a “test run” on the class to work out timing and make sure everything was clear.   THANK YOU to my Coastal Quilters for helping me out…you were great, and the class helped me immensely (like I can only fit two projects, not 3, in a 3-hour class!).

aside

A detail of the project, and some intermediate steps

Step one in the class is to get your paint!

Step one in the class is to get your paint!  You can see a thermofax screen soaking in the basin.

Step one is to print your plain cloth with my custom Queen Anne's Lace screen.

Step one is to print your plain cloth with my custom Queen Anne’s Lace screen.

You can go wild and make this project totally your own

You can go wild and make this project totally your own

Or you can follow the project.  This student is on her second layer, starting to create her nest.

Or you can follow the project. This student is on her second layer, starting to create her nest.

While the paint dries on the Nest, you work on a “free play” exercise, then switch back and forth as the layers dry.  You can make your own stamps (supplies provided), use materials I bring to share, or bring your own from home.

Student stamps.  I think I need to make a flying geese stamp!

Student stamps. I think I need to make a flying geese stamp!

I LOVE this student piece.  It would work perfectly as a background or cut and used in a naturescape.

I LOVE this student piece. It would work perfectly as a background or cut and used in a naturescape.

And another layer.  You can go as simple or as busy as you like.

And another layer. You can go as simple or as busy as you like.

Jim Vander Noot is an experienced art quilter and I LOVE this layered piece.  He began with writing, then added the thermofax screen of keys (from Lyric Kinard, LyricKinard.com, she also makes custom screens)

Jim Vander Noot is an experienced art quilter and I LOVE this layered piece. He began with writing, then added the thermofax screen of keys (from Lyric Kinard, LyricKinard.com, she also makes custom screens)

Jim added more layering, and here's the last time I saw this.  LOVE IT.

Jim added more layering, and 

here's the last time I saw this. LOVE IT.

here’s the last time I saw this. LOVE IT.

My thermofax screen designs are available at Fiber on a Whim, I’ll have some for sale in class, and Jan Girod and Kristin Rodriguez (who are Fiber on a Whim) will be vending in a booth on the show floor at Houston.  Artists have my complete permission to use my screens in their artwork, including works that will be sold or exhibited (but of course you can’t copy my designs and sell them…you know how it works!).

Student 1

Student 1, work in progress–if any of my CQ peeps remember whose work this is, please let me know so I can attribute it!

Student 2, work in progress

Student 2, work in progress

Student 3, Linda Satkowski finished her nest!

Student 3, Linda Satkowski finished her nest!I love the fluffy white wool bits that totally look like feathers.  One student even suggested you can BUY feathers–they are readily available at stores that supply fly fishermen.  COOL idea!  Thank you so much Linda for finishing this and letting me share it.  GREAT job!

So I hope you’ll be inspired by my local quilty friends–I sure am!   And I hope you’ll be able to join me in Houston (or have your guild hire me to come to teach YOU at home!).  See you in November!


Descended From the Stars, Part 3

Wednesday, July 20th, 2016
The sun in the center of Descended From the Stars

The sun in the center of Descended From the Stars

When I left on in my last post about this quilt, I had shared the dyeing process and the stones and lettering.   Next, I fused trees in the four seasons into the corners.  I distorted the shape so the tree canopy served as a frame.  I had thought initially I might need an inner border, perhaps couched yarn or stitching of some sort, but the shape of the tree worked so well I didn’t need anything extra.   As I did with the stones, I cut out leaves, LOTS of leaves, separating the colors into the ice cube tray so I could place them carefully.

Detail, upper left corner, Spring Tree of Life.

Detail, upper left corner, Spring Tree of Life.  Each of the leaves is free-motion stitched with several rounds of thread on each leaf.  The nice part about doing this at the top stage is that I could use the scissors on my Janome 15000.  I didn’t have to bury thread tails!

Detail, top right, Summer Tree of Life.

Detail, top right, Summer Tree of Life.

Detail of the lower right corner, showing the autumn tree of life.

Detail of the lower right corner, showing the autumn tree of life.

Detail of the lower left corner, with the winter tree kissed by snow.

Detail of the lower left corner, with the winter tree kissed by snow.

I did the stitching around the stones and on the trees, including the leaves, at the top stage with stabilizer underneath.  (See my post here to learn more about my current article for Machine Quilting Unlimited on the Fourth Layer–stabilizer– for densely thread painted quilts.)  I removed the stabilizer everywhere except for under the center because I knew I would want to quilt that area more densely than the rest of the quilt.

Here

Here I have begun quilting.  You can see the custom-dyed cotton duck on the back.  The use of heavier cloth helps keep the quilt flat and stable; it also helps minimize shrinkage.  The final piece had to be 40 x 40 inches, and I wanted to have a balanced amount of blue on both sides of the lettering, so I needed to control the shrinkage that happens with dense quilting.

Next,

asdfa

Superior Threads (Thank you Bob and Heather Purcell!) has come out with some tone-on-tone variegated threads.   I have been pestering Bob for YEARS to make threads like these as I prefer blendy to contrasty.  I ordered up all of the new earth-tone blendy variegateds in the Fantastico line and used them.  I began with a light green blend in the first row around the sun, switched to another in the next to rings, and then a third in the fourth ring that you see here.  If you look at the left, you can see how I snuck some of the current thread color into the next ring to get even more color blending.

Then, I had to decide what threads to use in the dark areas.  My sewing tables (two back to back) are each 24 inches, so I have a nice, HUGE flat surface to support the quilt as I work.

asdf

Choosing thread:  dark, pine-y green and deep blue.

With all the manipulation, I realized that some of the ink had rubbed off, despite being REALLY careful to heat set it according to directions.  I wrote immediately to friends Judy Coates Perez and Susan Brubaker Knapp to seek guidance.  Judy had only used the regular colors, not the metallics.  And Susan had an article in the just-out issue of Quilting Arts about lettering, including these inks!  She too discovered that the metallics seem to “shed” a bit.

After quiting, some of the bling had rubbed off my quilt, so I had to do it AGAIN!

After quiting, some of the bling had rubbed off my quilt, so I had to do it AGAIN!  You can see where I have inked over the letters and what is left to re-do.

After re-inking and heat setting, I tested on my scrap cloth several products to seal the ink including GAC 900 (a textile medium that one adds to paint), a UV Coating, matte gel medium, and Krylon Spray Fixative which says it is acid-free, archival and safe on fabric.  Only the Krylon didn’t leave tell-tale signs that it had been used.  So I carefully masked off the rest of the quilt, leaving only the lettering area exposed and sprayed the Krylon on it (stinky!) in hopes that will help prevent the mica flakes in the gold ink from coming off.

I was nearly done, except that I didn’t really care for the multiple layers of thread I had used stitching the sun.  Picking it out did NOT appeal to me.  So I trekked down to Clementine fabrics in Rockland and bought some perle cotton in the right color.

I wasn't happy with the way the stitching looked, so I couched perle cotton on top of the outline of the sun.  MUCH better!  You can see the difference in this half-way-through shot.

I wasn’t happy with the way the stitching looked, so I couched perle cotton on top of the outline of the sun. MUCH better! You can see the difference in this half-way-through shot.

At last, it was nearly DONE!  Time for facings, sleeve and label.

The back side of the quilt.  By dyeing the back to correspond with the front, the quilting design shows up on the back as it does on the front.

The back side of the quilt. By dyeing the back to correspond with the front, the quilting design shows up on the back as it does on the front.

And I couldn’t resist the temptation to place a moon behind the sun as my label.  One more time with the dip pen!

The End--the label is on, the sleeve is done, the facings are stitched!

The End–the label is on, the sleeve is done, the facings are stitched!

(c)Sarah Ann Smith 2015; quote (c) Mirza Khan, used with permission

(c)Sarah Ann Smith 2015; quote (c) Mirza Khan, used with permission

This quilt will be for sale–another reason I opted to not include a lot of personal details in the quilt.   As I said before, I am happy!

How to make a Hanging Sleeve, or a return from oblivion

Wednesday, January 13th, 2016

Well, in late November my laptop started acting bizarre.  That led to getting ridiculously behind in EVERYTHING.  Add in the holidays and the beginning of Eli’s wrestling season and, well, it has been weeks since I surfaced here.  The good news is I have been VERY busy and productive, so now it’s time to start sharing.  And since “enter shows” season begins, I have drafted up a new, freebie PDF on how to make a hanging sleeve properly.  You can download the Hanging Sleeve–PDF, and it is also listed in the “Tutorials” section of my Resources page which is here.

A quick peek at my new PDF on How to Make a Hanging Sleeve

A quick peek at my new PDF on How to Make a Hanging Sleeve–click on the link above to download the complete instructions.

Guilds, shows and shops have my permission to download and reproduce this handout as long as it is downloaded in its entirety, nothing is changed, and credit is given to me with a link to my website.  In other words, something like “How to Make a Hanging Sleeve by Sarah Ann Smith, www.SarahAnnSmith.com.”    And I’m pretty sure it will in the not distant future be available on the SAQA website, as well.   I’ll update this post if/when that happens.

Given the way my life goes, I can’t promise I’ll be back soon, but I sure hope to try!