email Youtube

Home
Galleries
Blog
Workshops & Calendar
Store
Resources
About
Contact

Archive for the ‘Reviews’ Category

Plaid Top Tutorial: Lesson 1-Choosing a pattern and starting tips

Friday, February 17th, 2023
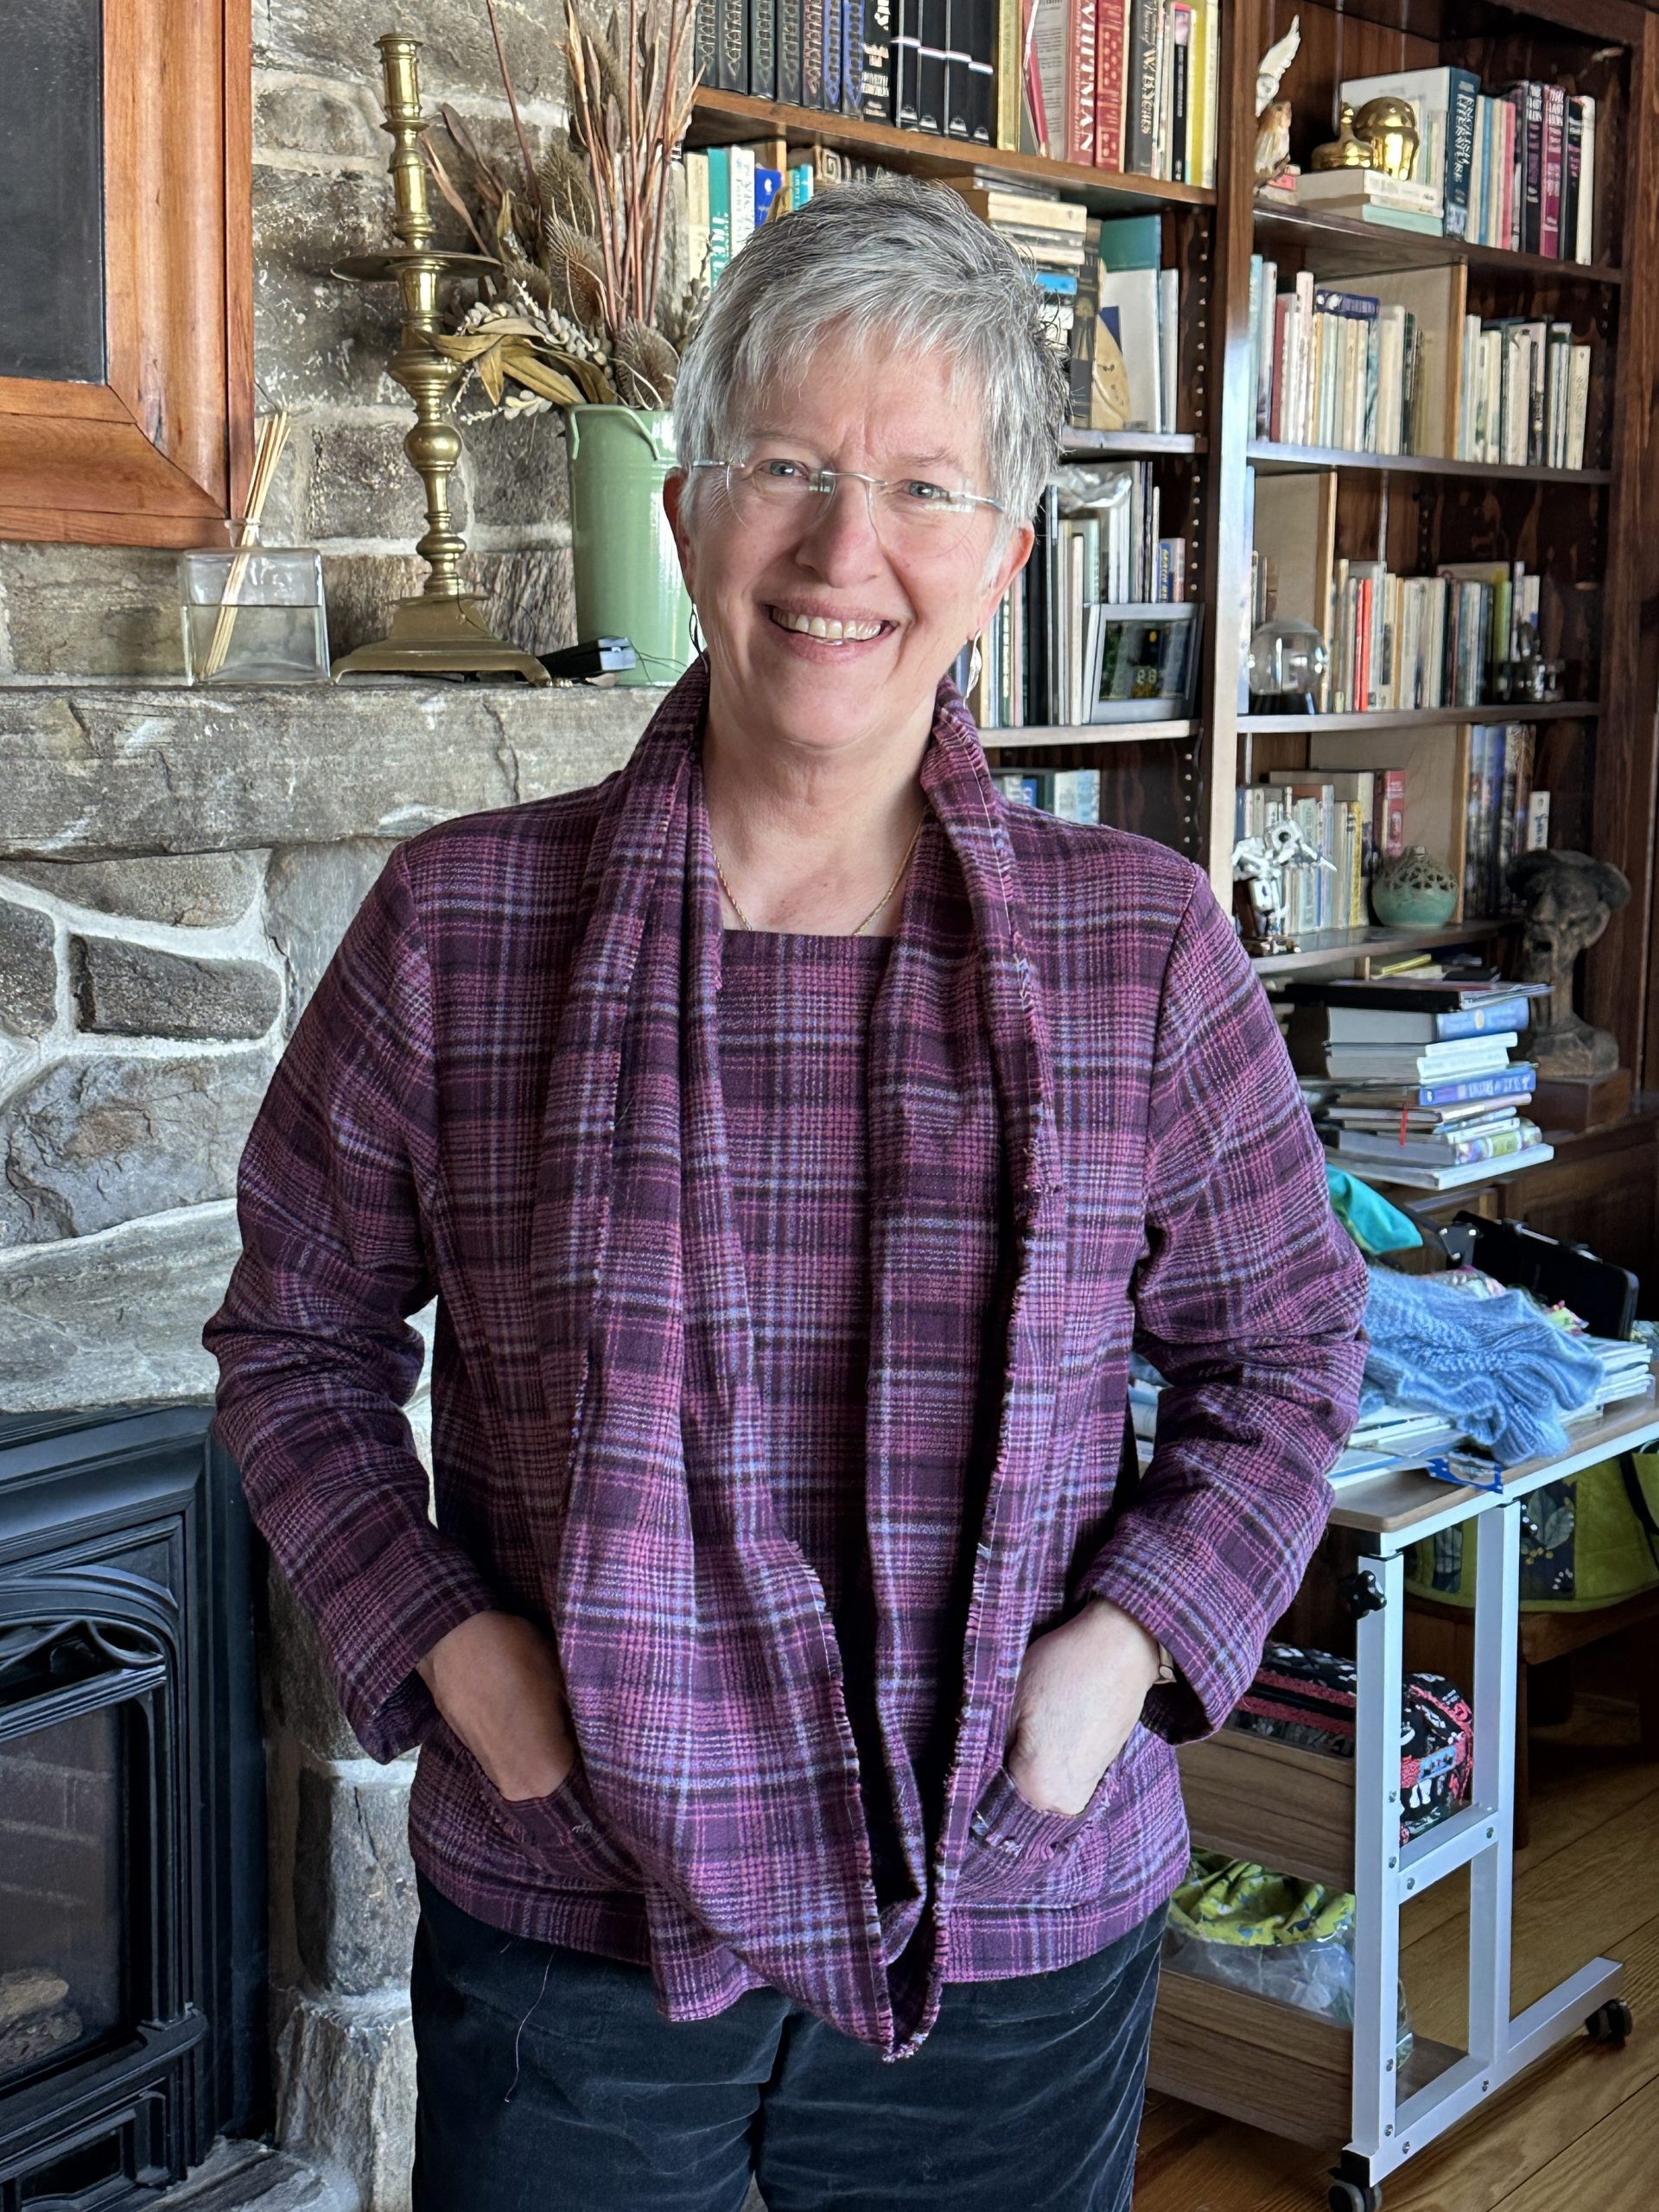
Flannel Plaid top and scarf

I thought it would be fun to teach some basic garment sewing techniques using a simple “T” top in woven fabric as the platform, tossing in a few special lessons along the way. This isn’t a class in how to make a blouse–rather it is a way to teach several techniques that are useful in garment making and home dec across the board.  There will be 9 posts total that will publish on Tuesday and Friday through March 21. As they go live, I will update a list at the bottom of each post that has links to all the other lessons. Today, I’ll cover:

1. What to look for in a pattern
2. Figuring out what fits you by looking in your closet
3. Wearing Ease
4. Pre-shrinking!
and a tease….be sure to look at the photos at the very end!

Future posts will touch on

–alterations including length, shoulders and bust adjustments (full and small)

–Matching plaids when cutting
–fine seam finishes including
     *Overcast
     *French seams
     *Flat-felled and lapped
     *Hong Kong finish–not used on the top but good to know
and a bit on when to use each


–Lined Patch Pockets, getting a smooth curve, presser foot tricks

–a bonus Infinity Scarf and wrap up

Please note:  I am affiliated with Janome as a Janome Artisan and am compensated.  However, my reviews are honest and I would say what I say whether affiliated or not.  I’ve also chosen to be affiliated with Janome since 2003 (!!!) because their machines are so good and they are so responsive to the interests and needs of their customers.  
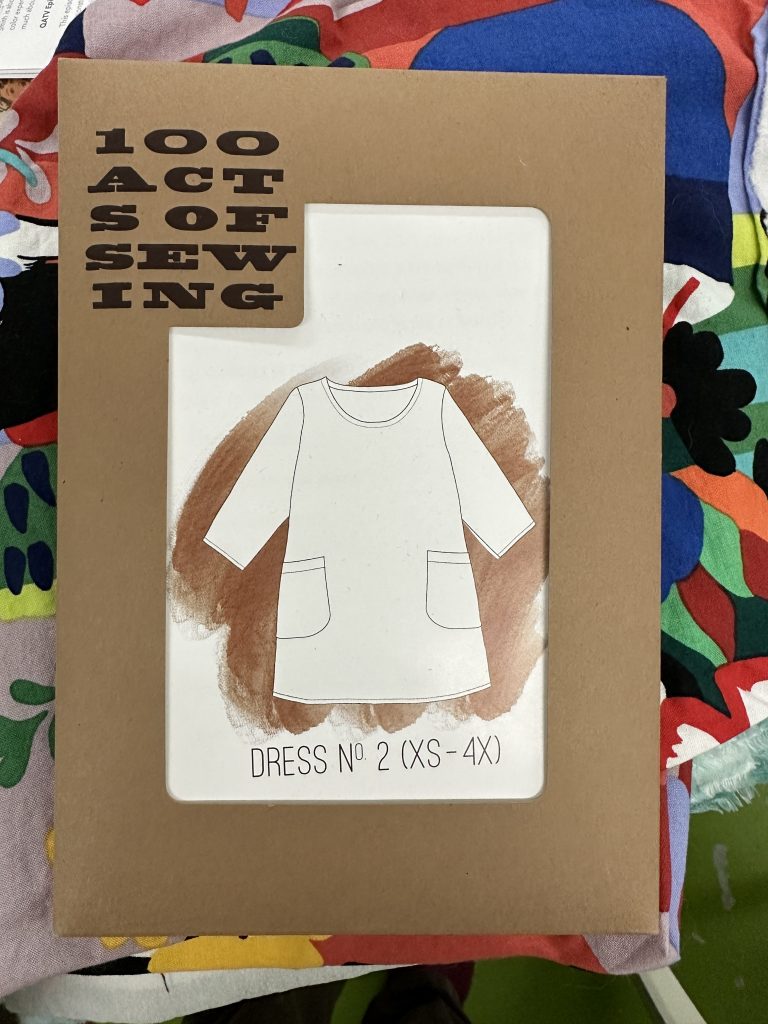
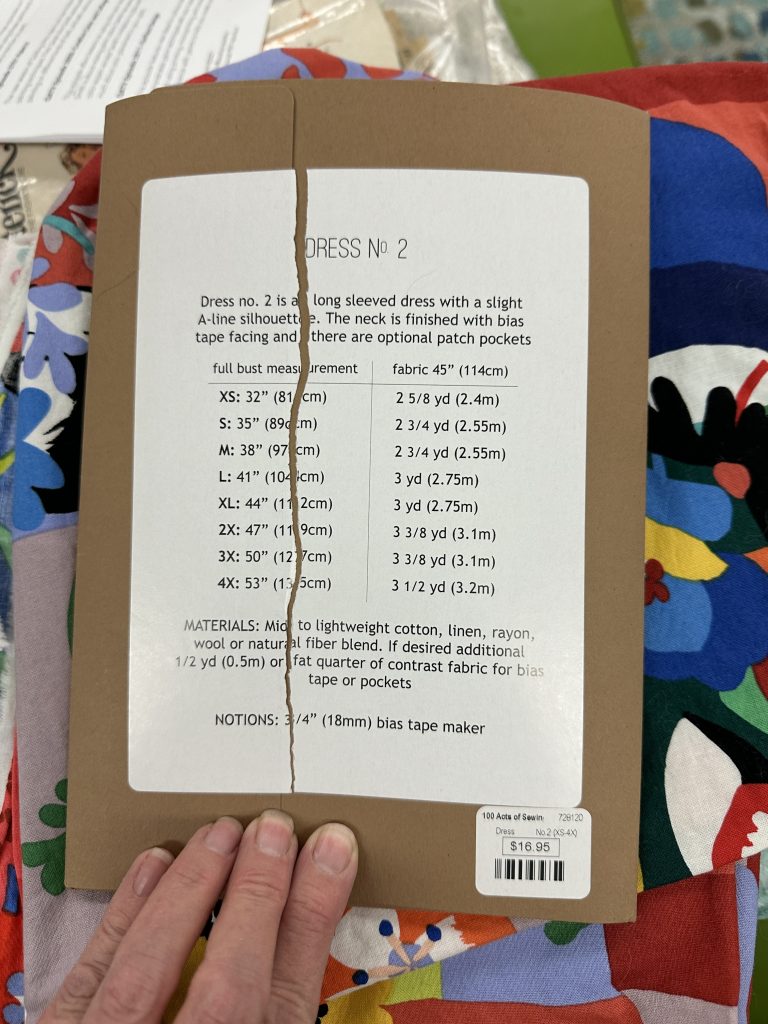
100 Acts of Sewing, Dress No. 2
Pattern back

A dear friend loves this very popular pattern and has made it many times. It is a simple “T” shape and is supposed to be geared to beginners with simple shaping and few pieces. By making it shorter, you can have a top or a dress from one pattern, and the size range is good for almost all bodies. Or so it would appear. All I can say is that I am so sorry I cannot recommend it. At ALL. I’ll show you why.
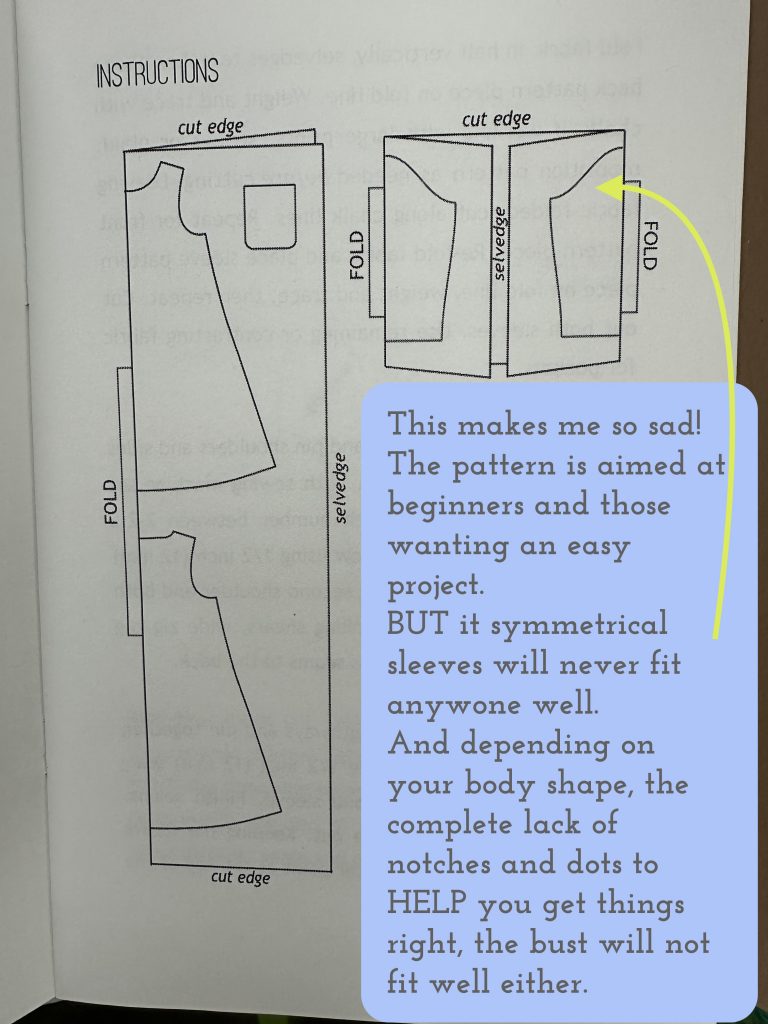
Pattern layout. I knew there was a problem as soon as I saw the sleeves were cut on a fold with no shaping of the sleeve cap. It got worse when I discovered the front and back of the dress are exactly the same shape, with no allowance for a bust, even a small one!

As you can see from the cutting diagram on the left, it has a simple flared silhouette with a front, a back, a pocket and two sleeves. Easy peasy, right? WRONG. Here’s why: Registration marks are found on most patterns–I had thought they were on all but I was mistaken because there are none on this one. You see, notches make it EASIER for you to match what goes where and properly align your pieces. Registration dots do the same thing–there is usually a dot somewhere at the top of the sleeve cap which you align with the shoulder seam to position the sleeve so it will fit the body. Lengthen/shorten lines tell you where to do just that, because after all we aren’t all the same: some folks have long torsos, others are short-waisted, and arms–our arms are all sorts of different proportions. AND, there are NO DARTS. Can you imagine an A-cup and a DD-cup trying to fit into the same tent shape? Yeah. As someone I once heard say, one-size-fits-all means looks good on no one.

I am guessing the reason the designer had for omitting these essential marks was to not intimidate the beginner. Unfortunately, all that will happen is the newbie will make something that doesn’t fit any which way and will think they are the problem, when in fact the pattern is doing them a disservice. Like I said, I really wanted to love this pattern and use it as one that you could buy. Don’t. Please keep reading!
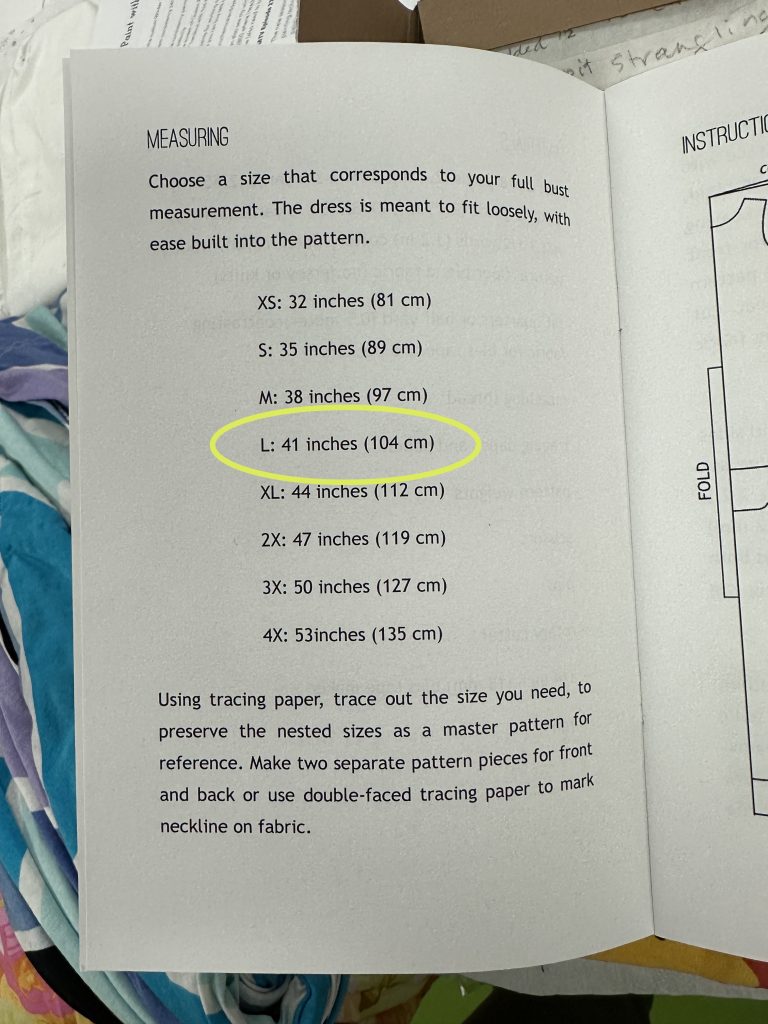
 

Since my bust measures 39″ the Size Medium is too small. I figured with my broad shoulders, the Large, to fit a 41″ bust would be good. WRONG.

You’ll want to measure your full bust, around the widest point of your bust line; wear a snug camisole so that you are measuring your body not bulky clothes as well . Then you want to measure the high bust, which is around the torso above the bust, kind of up under the armpits. If you have a large cup size, you will want to choose a pattern that will fit your shoulders, then do a full bust adjustment. Luckily, many of the independent designers now design for full bust–I have to skip those lines or down-scale the fronts so they don’t look concave and sag on me. The major companies tend to design for a B-cup, but some have started offering patterns for various cup sizes–smart!

Make a drawing! + photo of measuring a blouse

Then there are sizes. In this pattern, I opted for size Large since my bust measures 39″ and I have broad shoulders. The Medium would have been too small. a Many patterns from the traditional Big-4 companies, Simplicity, McCall’s, Butterick and Vogue, are based on sizes that DO NOT correspond to off the shelf. I am usually two sizes larger in one of these patterns than in ready to wear. Not to mention that my ready to wear, depending on the company, ranges in size from Small to Extra Large. I’m not exaggerating…we all know sizes are all over the place.

The key is to measure yourself AND measure a garment you have that fits you comfortably and looks good. Then compare those measurements to the information on the pattern. You can usually find two measurements: the size of the body and the size of the finished garment. The difference is wearing ease (see below). 
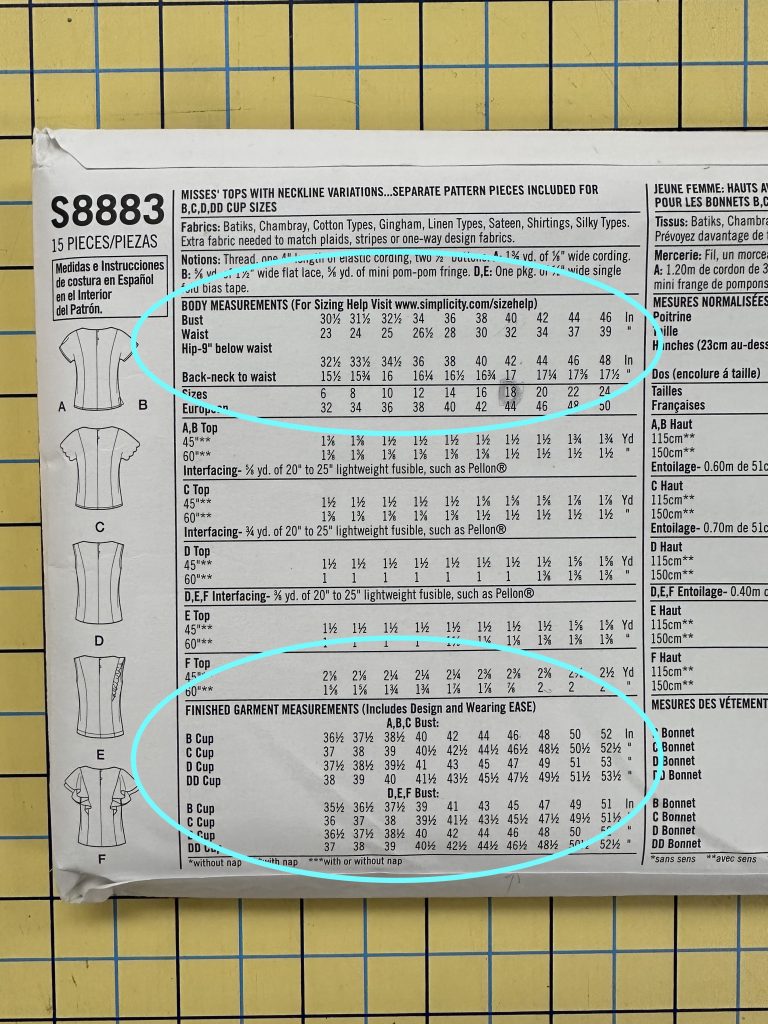
This is the back of Simplicity S8883. I was elated to discover it had cutting lines for various cup sizes. I still had to decrease to an A cup, but with the various cutting lines it was easy to see what I needed to alter. It shows, for a 40″ bust, a B Cup top would measure 46″, which is fairly roomy.
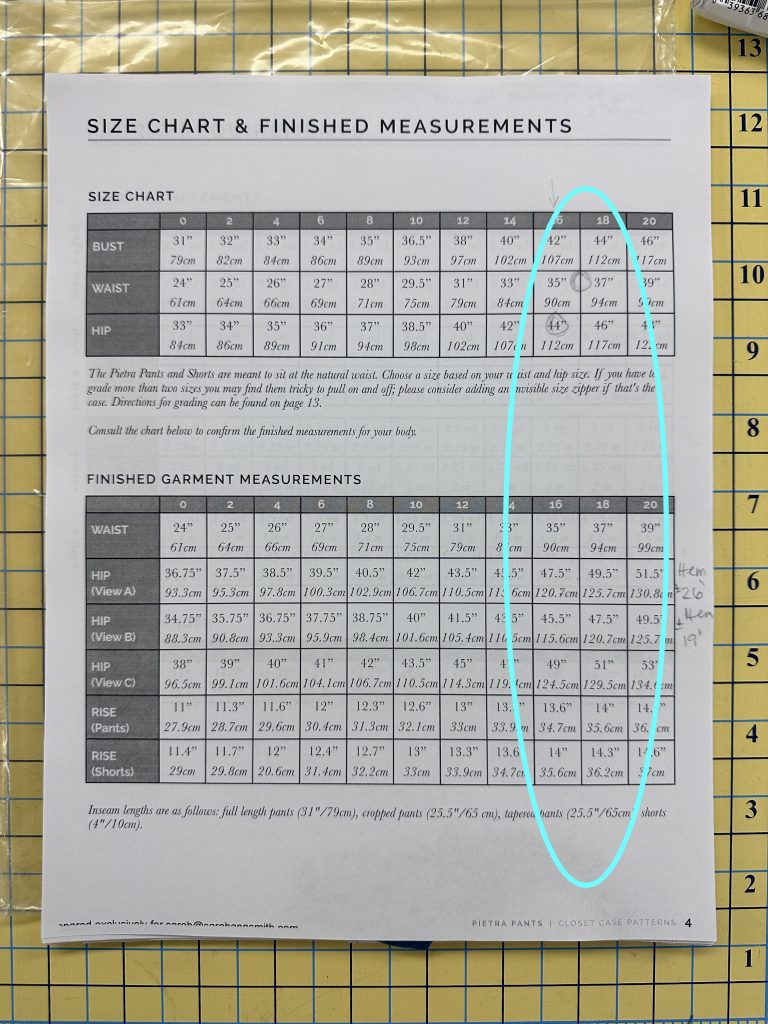
The Pietra Pants pattern is an Indy pattern design, and as with many of them, comes with lots of detailed information. I am between a size 16 and 18.  All that ice cream has made my waist a bit bigger.  It is also WONDERFUL that it includes the rise–the measurement of the crotch seam from front to back.  No more camel toe (those pants that pull and and cut into you in a very unattractive way)!  It also reveals the difference in wearing ease in the 3 views of the pants/shorts.  This helps you compare to something you have that fits (or doesn’t), so you can adjust accordingly.

Then, measure across a blouse (make sure you compare like items, so if you are making something with woven cloth, measure a garment with woven, not knit, fabric) at the bust line. That will have anywhere from zero to 4 or more inches extra. This is called wearing ease. Some of us like very fitted, body skimming clothes, while others (like me) prefer things a bit looser or even very loose. Fitted garments tend to have 0-2″ ease, while semi-fitted are 2-4″, and roomy is even larger. If you have a flowy top that measures 52″ over a 44″ full bust, that is 8 full inches difference. Knowing that amount of easy will help you choose a pattern that will you give you the results you want! There is also something called negative ease, found in knit garments.  If you want a form-fitting garment, it will be cut 0-2 inches smaller than the finished size, then the stretch in the fabric will make it fit you snugly and show off your beautiful curves.  

Pre-shrinking fabric: This is always a debate among quilters, but for garments there is no question. If you intend to wash or clean your garment, you MUST pre-shrink! Don’t do all that work, finish the garment, love it, then have it turn one or two sizes too small after you clean it. Even woolens that will be dry cleaned need a bit of a steam press! Since most of us wear things we wash and dry (hang dry or in the dryer) at home, treat the fabric you have purchased the way you will the finished garment. If working with tricky fabrics like rayon or silk, do some self–education on the internet about how to handle them. For now I’m going to talk only about this cotton flannel top.

I’ll explain the what and why in my next post, but for now, just LOOK at this! The Dress No. 2 was made for a 41″ bust. There is indeed enough room for a bust larger than my 39″, but the shoulders were TWO FULL INCHES TOO NARROW!
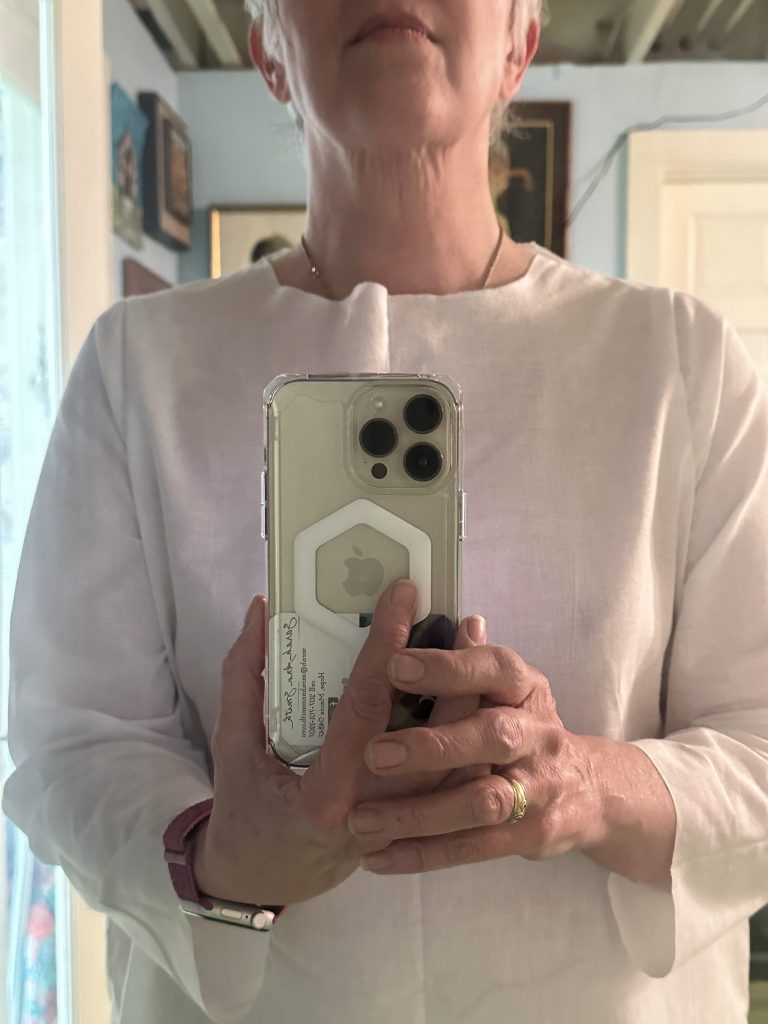
The muslin doesn’t fit any which way. And those sleeves are supposed to be LONG sleeves. On whom? They stop 2 inches above my wrists, and that is unhemmed!

Remember what I said about size, and picking Large for this top. Thankfully I made a muslin, above–
Above, the top as made per the pattern in a practice muslin to gauge the fit; I used super-cheap white cotton whose purchase price was, I think, $1 a yard which tells you how cheap it is. The shoulder seams are WAY in from the actual shoulder point, causing the shirt to pull up and strangle my armpits (yes, I DO have broad shoulders but this is crazy), which then causes the center front to ripple, not to mention feels uncomfortable. The way to figure out what needs to be done is to slice open where it is too tight. I marked the spots with a pen, took off the muslin, sliced, and put it back on. The next photo shows a gap of just one an INCH on just one shoulder!

If I had measured the pattern piece before I started cutting (smacking self upside the head) and compared it to an existing top that fits, I would have realized the problem and been able to take remedial action. But no matter what, doing a practice muslin saves money and effort in the long run. More in the next post on how I fixed it.
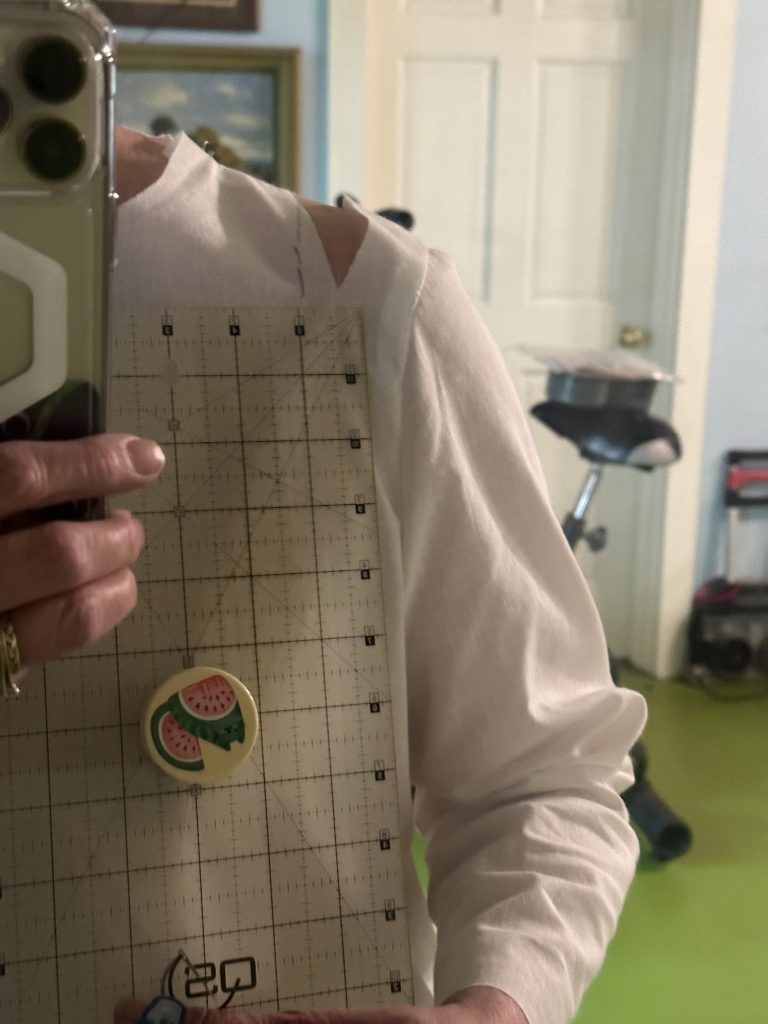
By slicing the too-tight top, I can see how much needs to be added to the pattern.  And how did I learn to make these miraculous adjustments?  …read the next paragraph! 

I will share fitting in the next post (on Tuesday, February 21, 2023), but they key is this:  In late 2021, I signed up for a fabulous set of 12 monthly lessons from Philippa Naylor, who is known for her prize winning quilts with immaculate construction and her wardrobe.  With significant experience working in professional garment making and patterning, she offers Garment Makers Question Time (GMQT) an online workshop with new lessons that build upon the previous ones.  The value for price, $15 a month, is simply phenomenal–I’m not affiliated in any way other than being a very pleased student.  Participants range from people who have never made a single garment to some of us who have been sewing for 50 years.  The amazing thing is that we are ALL happy and learning.  In my series of lessons here, I am sharing things I have learned over the years, not replicating what she has taught.  But I can heartily recommend GMQT–if you want to make garments that fit and are well made, this is the workshop that finally helped the alteration process click for me.  One key is to get someone (pay someone who does alterations if need be) to measure your body accurately–that’s what I did at a local fabric shop that has a teacher who gives semi-private lessons.  Again, that is Garment Makers Question Time.  Truly, I can’t say enough good things about the whole series! Look for more garments this year once my travel teaching is done!

Here are the links to all the posts in this series of lessons, techniques that can be applied to virtually any garment and many home dec projects.   Let me know what you’d like to learn and see here on the blog.  Cheers and thanks, Sarah

Lesson 1:   Choosing a Pattern and Starting Tips

Lesson 2:   Making a Muslin, Fitting and Sleeves

Lesson 3:   Matching Plaids, Cutting out Your Garment Pieces

Lesson 4:  Overcast Seams, just like Serged Seams

Lesson 5:   French Seams

Lesson 6:  Lapped and Flat-felled Seams

Lesson 7:  Hong Kong Finish for Seams

Lesson 8:  Lined Patch Pocket Tutorial

Lesson 9:  Hems and Scarf


Start Your Art Bloghop

Friday, November 16th, 2018

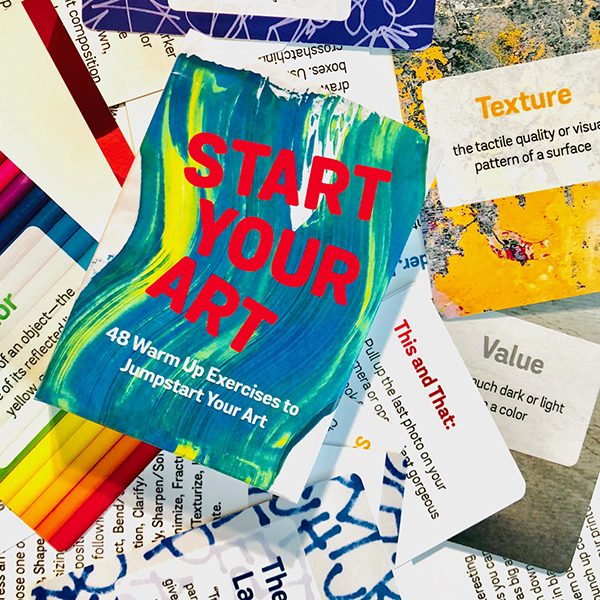
Hot off the press, Lyric Kinard’s Start Your Art deck of cards / prompts is available as an actual deck or a digital download. You can get it here

Art and quilt teacher and friend Lyric Kinard (website and Facebook and Instagram) delighted me recently when she asked if I’d like to be part of a bloghop to launch her new prompts deck of cards “Start Your Art: 48 Warm Up Exercises to Jumpstart Your Art”…of course!  I shared a sneak preview two weeks ago, here; In that post I shared an exercise done waiting for an appointment on my iPhone. This time it is the official bloghop and giveaway.  Read on to find out how to win a copy of the deck for your favorite art teacher and a digital copy for you!

Update:  Entry period is over and comment number 4 won!  Judy Tucker, get in touch!

The random number generator picked 4!

One of the great and cool things is that Lyric asks you to “Make Bad Art.”  Yup, it is OK to make bad art.  In fact, it is really useful!   There is a story that has been around for eons (and likely true many times over):  A college art teacher divided the class in half.  One half of the students only had to make ONE big project, but it had to be really, really good.  They could spend ALL their time making it their best.  The other half of the class had to make many, Many, MANY things.  Guess who made the best pieces?  The ones that had to make a lot of art.  As one woman I remember from an online chat group said years ago, “make crap (pardon the language). Then make more crap.”  Throw it away.  Keep making.  Then eventually you realize you’re doing better!

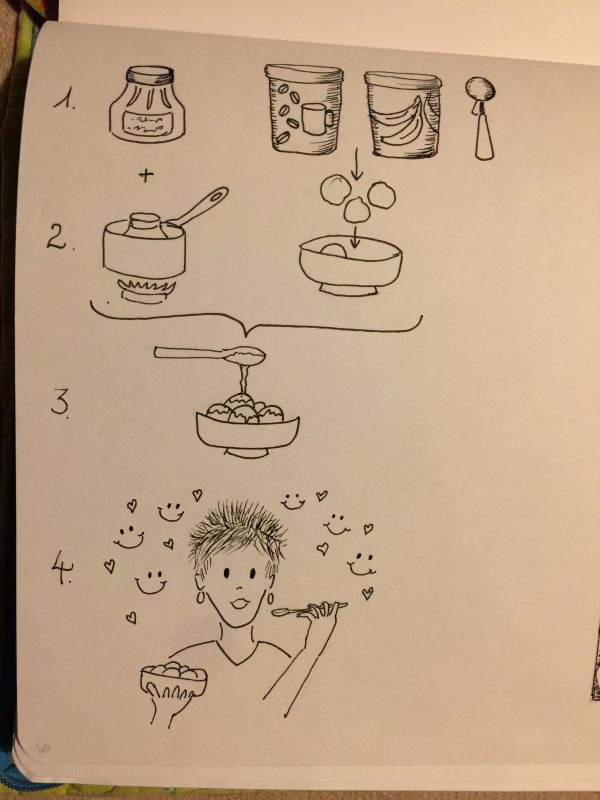
Since I have the digital version of the deck of cards, I just randomly clicked on several cards, selecting ones I could do from the comfort of my living room chair–after Houston I’m ready for some random creativity and fun that doesn’t require a lot of scrambling around.  What better than zero-calorie ice cream?  The prompt on p. 60 asks you to tell how to make a sandwich or other food, with no words.  This would be improved with color, but that would require going downstairs to my studio for pencils or watercolor so pen and ink it is!

One prompt is to draw how to make a sandwich or other food with no words. Why have a sandwich when you can have an ice cream sundae?  Notice the happy me?

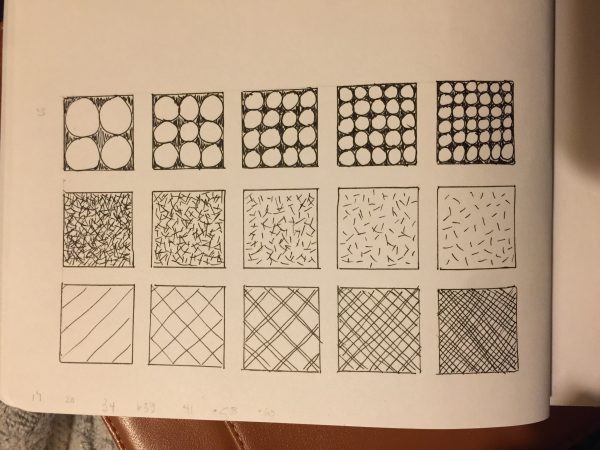
Another exercise is a variation on the theme of doing a value scale..how many types of marks and ways to create boxes of different value (light to dark) can you create?   Think of doing this with thread on the top of a quilt…..ways to change the color of the cloth underneath!

How to make a value scale….p. 39

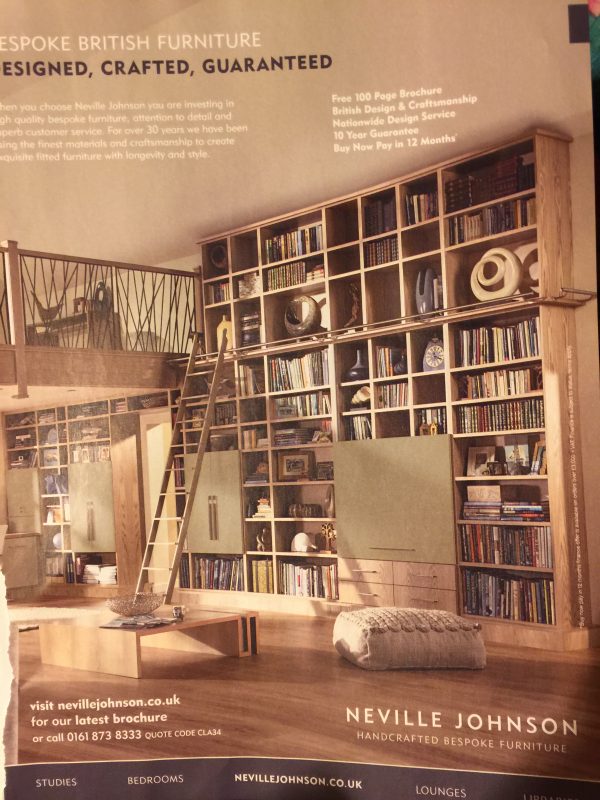
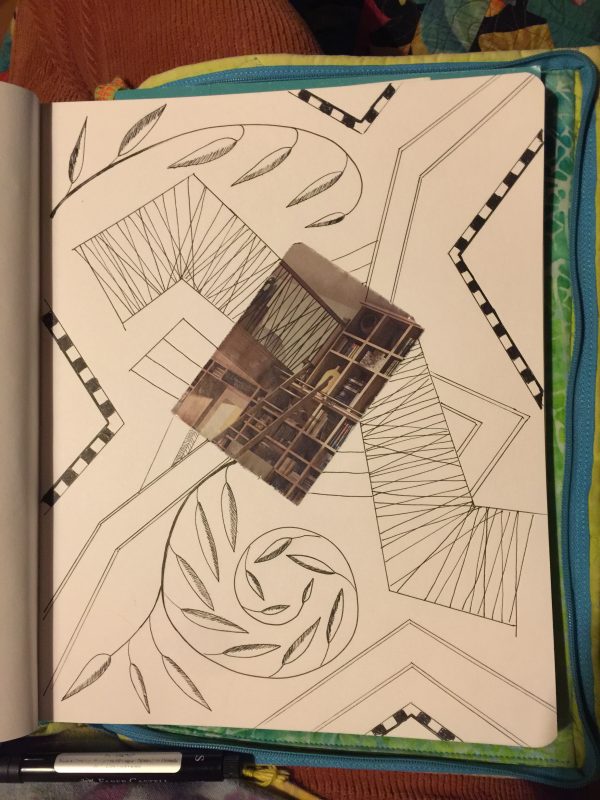
And one of my favorite exercises–start with a snippet of something and make it different.  Lyric asks you to start with a copy of a favorite piece of art, but I used the version I teach in my design class:  take a magazine page and select a portion of it.

The original advertisement page from British Country Living.

And here’s a portion of it and my Bad Art.  I was doing OK until I put in one of those checkerboard things on the left side.  Ugh.  Too heavy.  So I had to add some more to balance it out…..

A fun ramble and play in front of the TV last night!  Most of it I don’t like, but I do like the way I did the leaves and love that “dropped spaghetti” railing from the photo that I extended on both sides.  Fun motif–either as a thermofax screen to put paint on cloth or as a quilting or hand stitching motif, or just improv piecing!   See….you make bad art, the brain starts pinging, and you get more and more ideas!


Lyric is offering a real-life deck of Start Your Art Cards to be given to your favorite Art teacher.  To enter to win this deck on behalf of your favorite teacher and a digital copy of the deck for you, leave a comment below sharing memories of your favorite art teacher.  On November 21 Lyric will randomly select a winner and work with you to ship the real-life deck to your favorite art teacher. Please be sure to leave a CORRECT email address so we can reach you if you win!

And if you’d like to play and support an artist (namely Lyric) go HERE to order them directly from her!

Perhaps most fun of all, SHARE your art from Start Your Art here on the Start Your Art Facebook page right here.  

Janome’s new Skyline S7 Sewing Machine

Monday, October 26th, 2015

Janome never ceases to amaze me with the quality of its machines.  The Janome Skyline S7 is a more modestly priced machine than what I have used for the past decade, but it has features straight from the top of the line 15000 (click on the link to open a new tab to Janome’s page with all the features).   If your budget or preferences don’t run to expensive machines, this machine may have all the versatility and dependability that you need with the right sticker price.  I am, quite bluntly, surprised and pleased at the wide array of features and outstanding performance of the S7.

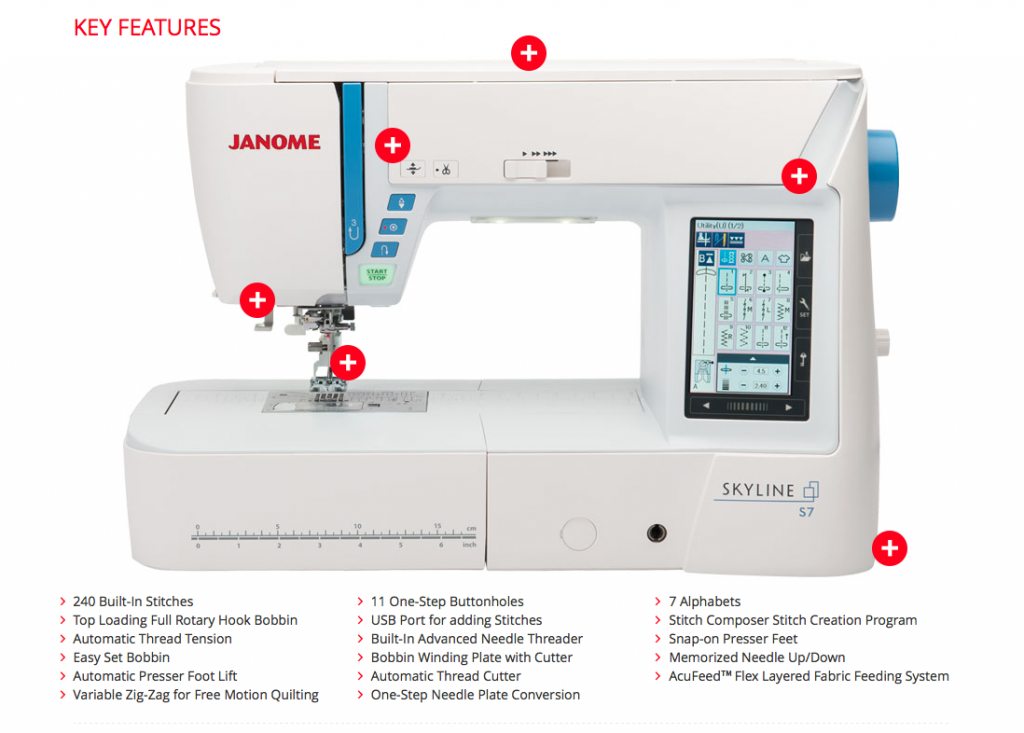
Here’s the nice photo of the S7 from Janome’s site (NOTE:  photos are mostly clickable to view larger):

A screen capture from the Janome America website. To link to the site, go here.

A screen capture from the Janome America website. To link to the site, go S7 and scroll down.

Also from the Janome site, the included parts. Pretty much everything you need for routine sewing.

Also from the Janome site, the included parts. Pretty much everything you need for routine sewing.

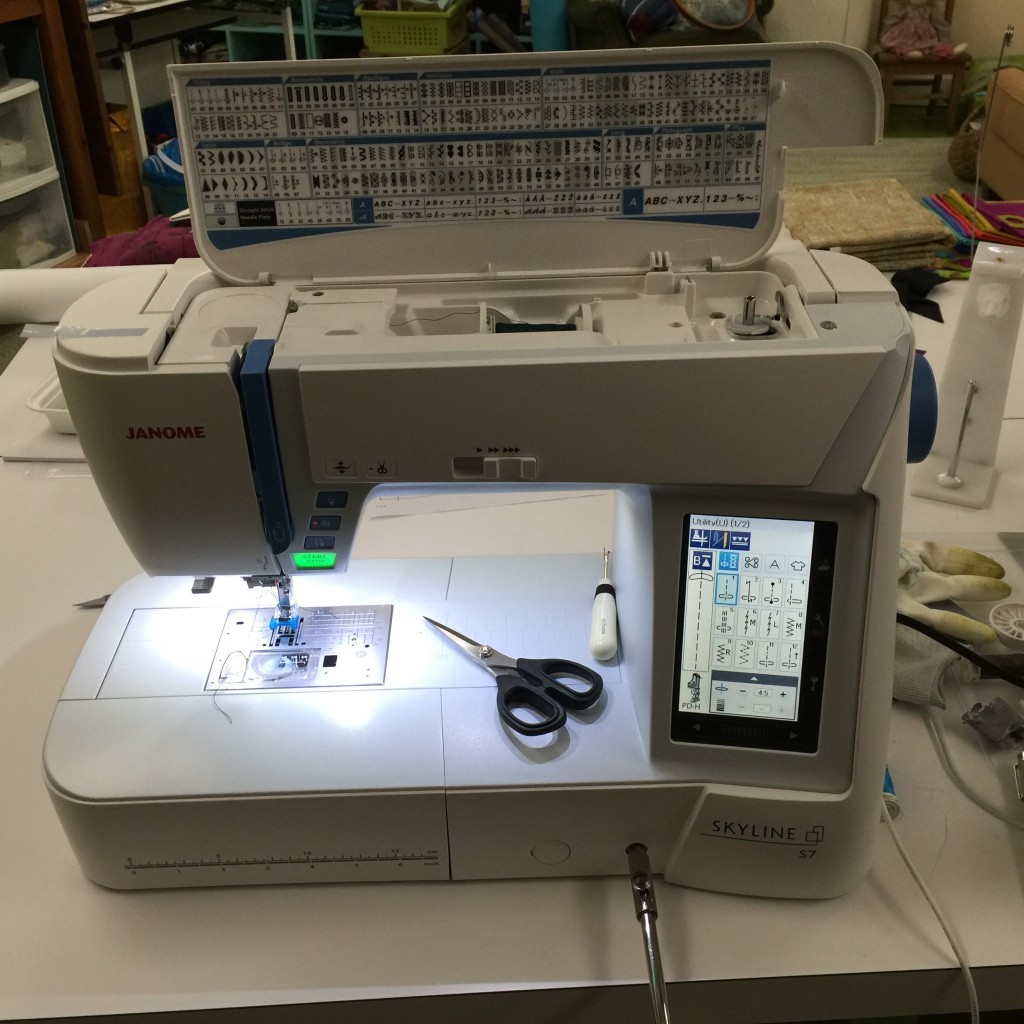
And much less fancy shot of the S7 in my studio:

The Janome Skyline S7 in my studio.

The Janome Skyline S7 in my studio.  Notice the wonderful knee-lift in place!

I prepared a variety of projects to work on during my brief loan period for the Skyline S7, which Janome introduced/debuted at Janome Institute late this August and is now arriving at Janome dealers.   I had piecing for quilting, mending and repairs, sewing a new top, free-motion quilting, and decorative stitching.  The machine handled every task like a champ.  Here’s a teaser…keep reading to find out more about this block:

IMG_6042

For free instructions on how to use the built-in stitches to create this block, see below. This block will work with Janome’s ongoing 100 blocks in 50 days project; read more about the 100-Blocks Janome 100 Blocks.

Now…back to the regular review (I just wanted to tuck the pretty block up top!)

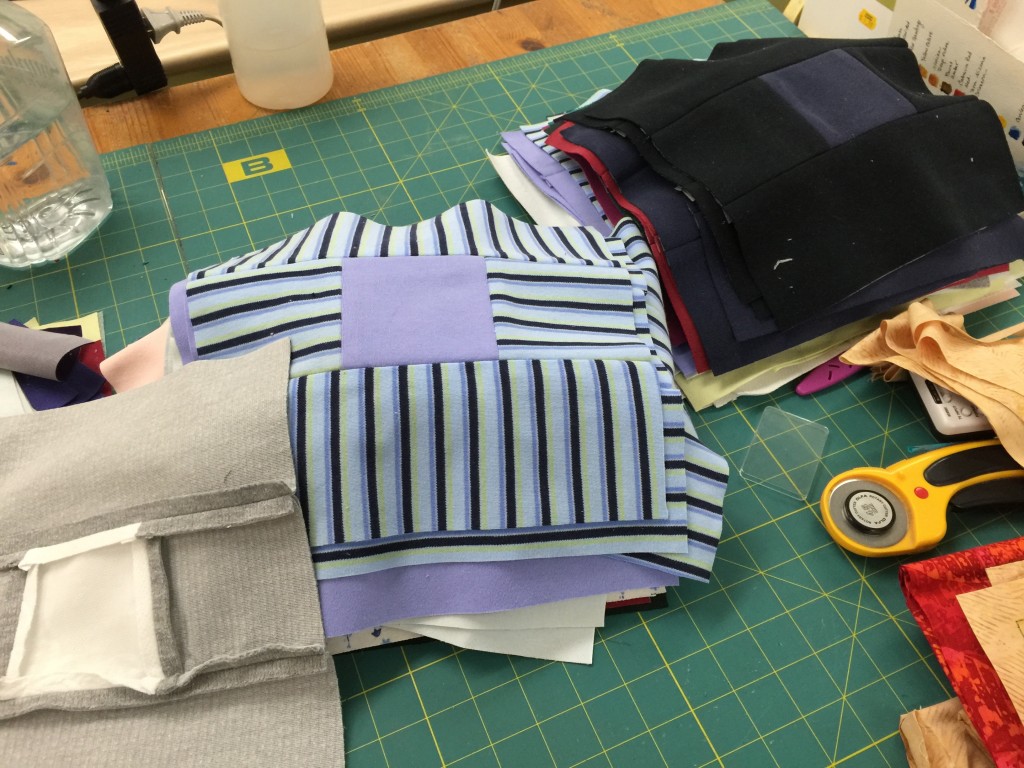
I've been piecing some blocks (who me?): made of turtleneck shirts. Eek! I had to stabilize all of them with interfacing (gray one in lower left corner). As expected, the machine breezed through without nary a burp.

I’ve been piecing some blocks (who me?): made of turtleneck shirts. Eek! I had to stabilize all of them with interfacing (gray one in lower left corner). As expected, the machine breezed through without nary a burp.  Because of the thickness of the fabric, I did find using a leader/ender so the stretchy fabric didn’t get pushed into the opening was a good thing.  Of course, I could have (and should have) used the straight stitch plate instead!

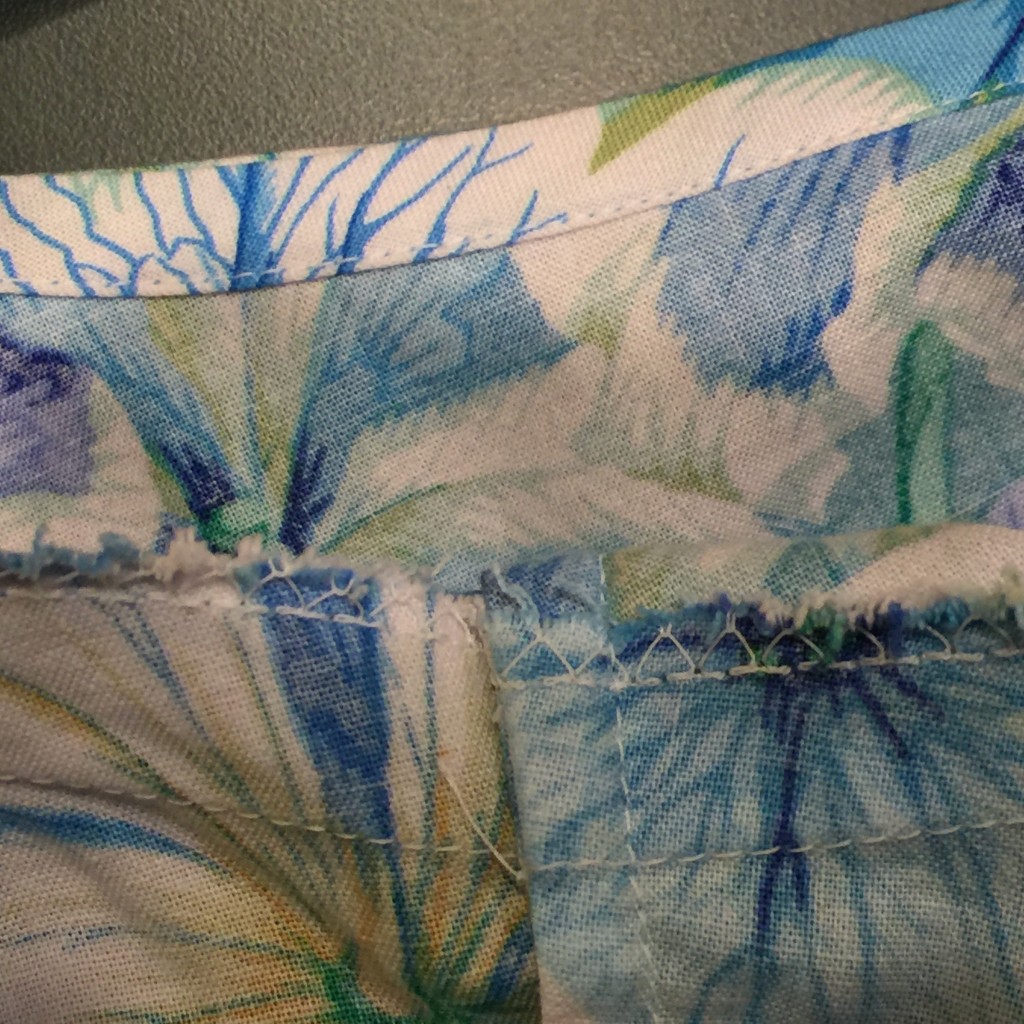
I had a tunic top cut out to make on this machine (see blogpost here or just scroll down two posts–and take a look at the review of the Janome15000 App while on your way).  I like a nice, clean finish.  So I used French seams (center vertical), overcast (using one of the utility stitches), and a bias edge as you can see in the next photo.

Seam finishes in my tunic: bias facing, on the top, overcast edge at the armscye (set in sleeve seam) and French seam (enclosed raw edges) on the side seam.

Seam finishes in my tunic: bias facing, on the top, overcast edge at the armscye (set in sleeve seam) and French seam (enclosed raw edges) on the side seam.

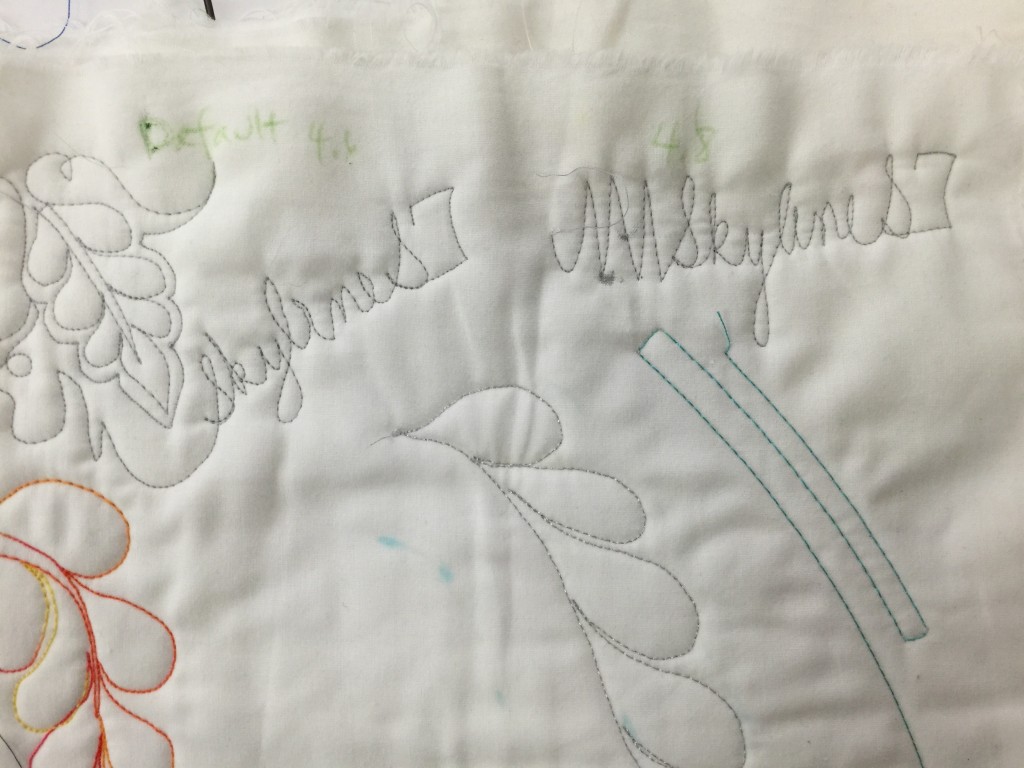
I did a quick free-motion quilting practice using the open toe foot skimming foot.  The default setting with my preferred threads, a 40-wt shiny poly in the needle and a 60-wt fine poly in the bobbin, wasn’t quite perfectly balanced for that thread combination, so I adjusted the balance by one notch and it looks excellent.  This is a common adjustment when using threads that are not identical.  Why do I use a thinner thread in the bobbin?  For art quilts, durability for wear and washing isn’t an issue.  And with the density of my stitching, the finer bobbin thread means less thread-build up, not as stiff, and more miles of thread to the bobbin!  ALWAYS test a potential new machine with the fabrics, batting and thread combinations that are your favorites–not whatever the sewing machine store has on hand!

Test free-motion stitching on the S7.

Test free-motion stitching on the S7.  You can see my note that says “Default 4.6” and “4.8.”  After looking at the back having stitched the first feather and name, I decided I wanted to have the balance adjusted slightly.  I always test for stitch balance with two contrasting colors so I can see what is happening.

Reverse of FMQ.

Reverse of FMQ.  The stitching on the right is the default setting.  I was seeing a TINY bit too much of the needle thread on the back, so I loosened the top tension one notch.  The second stitch out, on the left in the photo above, is better.  The tiny bit of dark you see is the shadow inside the needle hole.  A bit of moisture/steam or just time will close up those needle holes.  (Click for larger view)

The drawbacks to the S7 were VERY few and minor:  the harp, the space between the needle and the housing on the right, is that of a standard sewing machine.  I’ve been sewing on the machines with a longer harp area for a decade now.   However, I have also quilted a king-sized quilt (carefully) on a machine with a smaller harp than this one.   If you want to quilt king-sized quilts at home you might want to consider a longer harp, otherwise, you’ll be fine with this machine.  Also, the machine does not come with an extension table included.  These are minor quibbles:  this is a great machine for someone doing garment and home dec work, and for someone who is newer to quilting and doesn’t want to spend the bigger bucks for the larger machine.

Note:  one commenter told me “a regular sewing machine has a harp area of 6″-7″ and the S7 has a harp area of 8.25″ That makes it even more of a real winner (I hope you correct this on your S7 evaluation.)”   OK, I don’t have a measuring tape or the time to check this out (plus the machine is back at Janome), but let’s just go with “the harp area is smaller rather than larger.”  You can still quilt on it!  <grin!>

Janome makes a “Quilting Kit” to go with it that includes an extension table and my most-favorite-in-the-world convertible free-motion quilting foot.   The Skyline quilting kit part number is (according my lovely Janome contact) 003863402005, and comes with an extension table, appliqué foot, clear view quilting foot, ditch quilting foot, open toe satin stitch foot and (drum roll please!) the convertible free motion quilting foot set that is my fave!

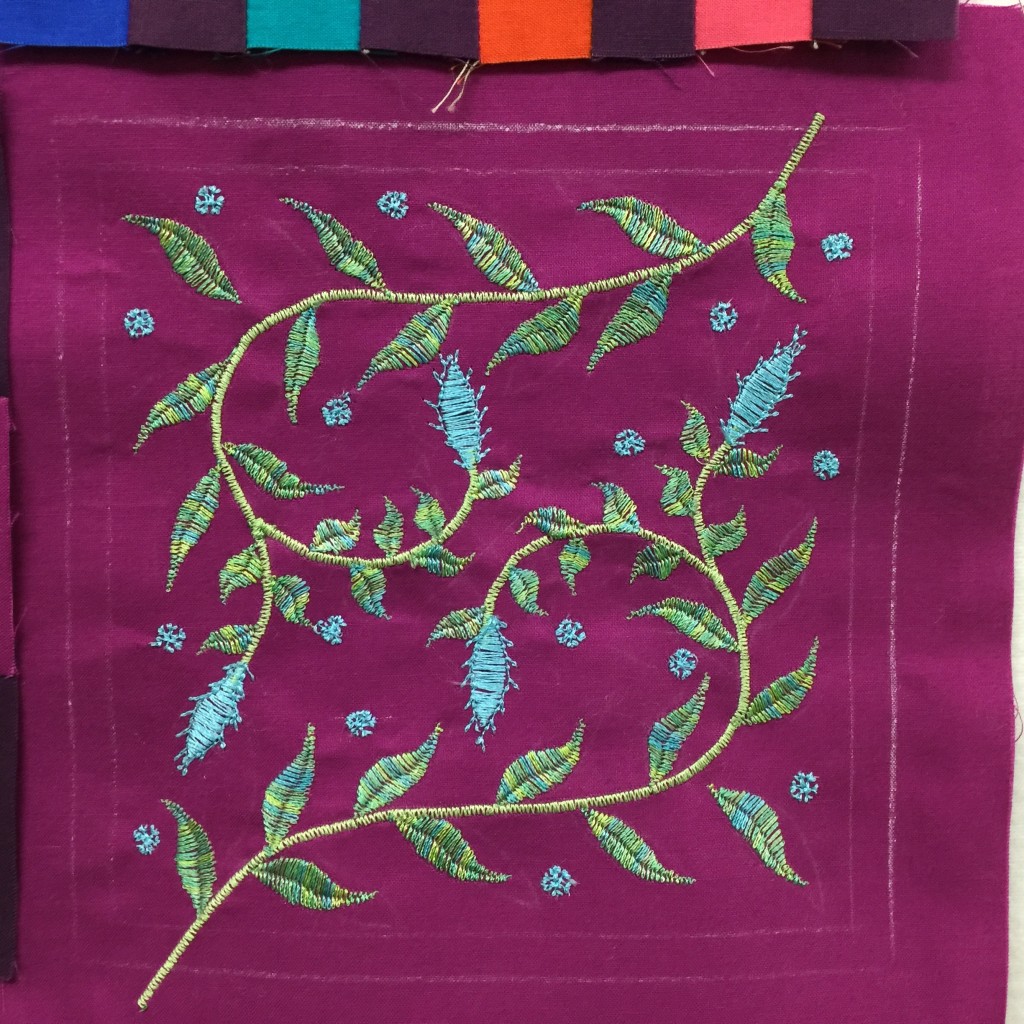
My final test was the decorative stitches.  I’ve been able to be a part of Janome’s 100 blocks in 50 days project (ongoing now, here).  I liked the Michael Miller Cotton Couture fabric SO MUCH (silky, soft, glorious) that I made extra blocks for myself, and designed this embroidered block to go with mine. Here is the PDF for my Janome Embroidered Block .  Basically, start with a 7 inch block and stabilizer suitable for the weight of your cloth; you want to cut large because stitching can shrink a block a bit.  Basically, cut it big and trim to exact size when done.  Use a satin stitch (a short length zigzag) to create two stems coming in from opposite corners of the block.  Use the Satin Stitch leaf (built in on the S7–similar stitches on other machines) and adjust the stitch length (doubled on some) following the instructions in the manual, width and stitch density (refer to the PDF) to stitch out the leaves using my block as a general guide for placement–you don’t have to be exact.   I outlined the leaves with an overcast stitch from the basic utility stitches menu.  Then use the snowflake stitch, reduced in size, to make the “dots” in the background.  When complete, trim to 6 1/2 inches to match your other “100 Blocks” project.

Notice that I chalk marked a 6 inch square and a 5 1/2 inch square inside it. I needed to know the edges of the finished block, and wanted to leave a bit of clearance around the design so none of the decorative stitching accidentally ended up in the seam allowance.

Notice that I chalk marked a 6 inch square and a 5 1/2 inch square inside it. I needed to know the edges of the finished block, and wanted to leave a bit of clearance around the design so none of the decorative stitching accidentally ended up in the seam allowance.