email Youtube

Home
Galleries
Blog
Workshops & Calendar
Store
Resources
About
Contact

Archive for the ‘Fusing’ Category

Teaching at IQF Houston 2018: Collage the Garden

Friday, August 3rd, 2018

Interested in trying your hand at art quilts? Not sure where to start? This class has proved a perennial favorite at IQF Houston (and elsewhere)–sign up soon!

Yes, registration is OPEN for classes for International Quilt Festival Houston 2018, including my four classes.  I’ll recap my four classes (well, three full day classes and the Machine Quilting Forum). My first class, Birch Pond Season,  is already covered here.  Today, I’ll share about Collage the Garden, one of my newest classes and proving to be one of the most popular.  I hope to see some of you in it!

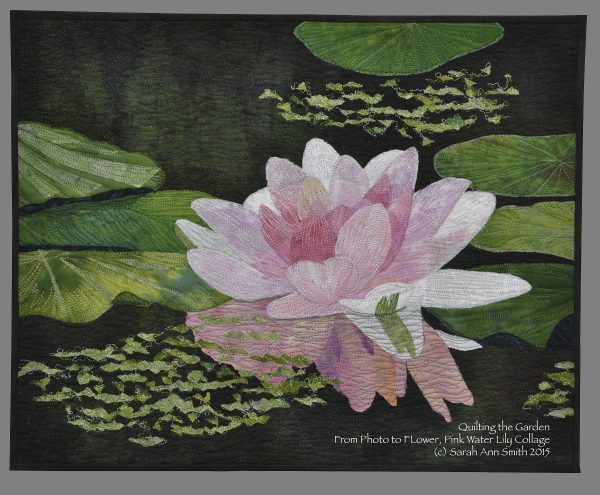
This workshop is all about how I –and now YOU– can create imagery from a photograph to create your own fused, collaged art quilt.  In Houston, this workshop is offered as a one-day class.  I’ll provide photos to teach you how to use a photo to map out your shapes and values, then you will start (and maybe finish?) creating the pink water lily or the orange tiger lily.  For this outing in Houston, you will be bringing and fusing up your own fabrics (or bring them pre-fused–I prefer Mistyfuse and will have it available in class–it has the lightest weight and softest hand of any of the fusibles).  This is a no-sewing class, but we will talk about how to quilt your fused artwork when you get home.

Collage the Garden: I’ll teach you “how did she do that” so that you can create your own art from your own photos

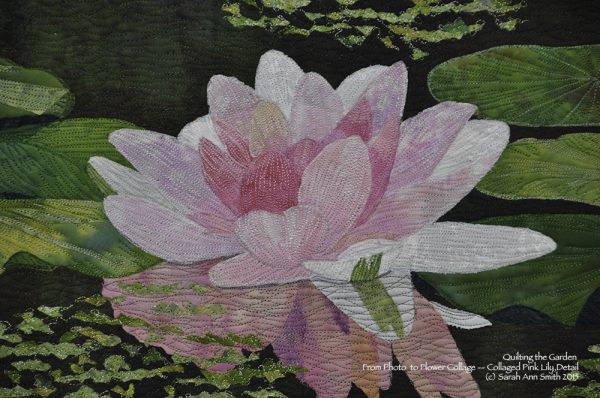
Detail of the Pink Water Lily

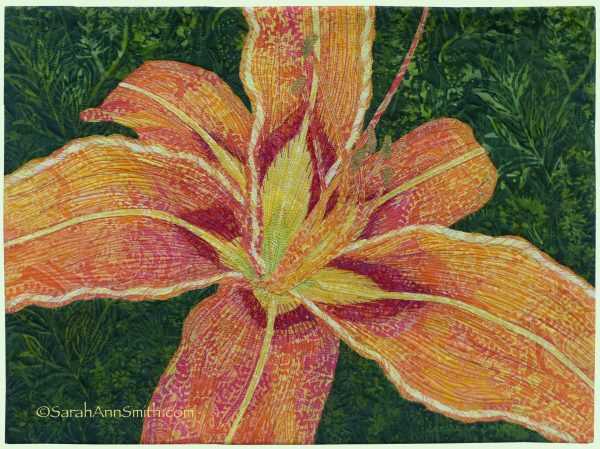
Here’s the Tiger Lily option fused in batiks

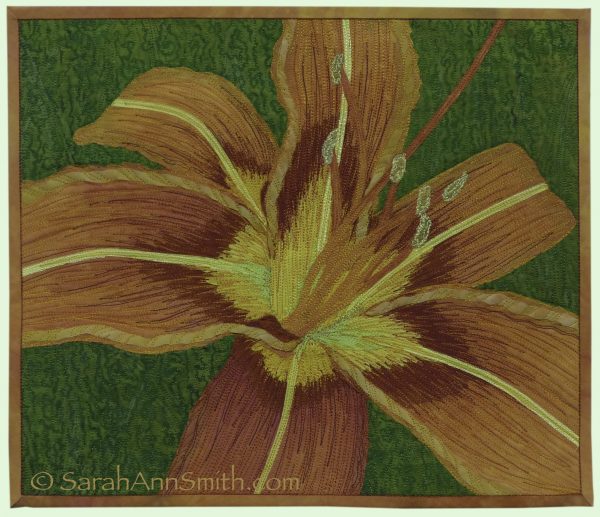
And the tiger lily done in hand-dyes….it’s the same but different. What fabrics will you choose?

You can see the supply list here.

Click on this link to sign up for Class 339 and spend Wednesday playing with me!   Class ends at five–just in time for IQA member preview opening at 5 (and general public preview at 7).

In other venues, a guild can book this workshop over to two or three days to allow students to bring in their own photographs and begin work on their own artwork with Sarah to help guide them.  The workshop can be booked in conjunction with Quilting the Garden:  Thread-Coloring the Flower to create a three-to-five day workshop.

SaveSave

SaveSave

SaveSave

SaveSave

Lupines: the quilting begins!

Sunday, July 22nd, 2018

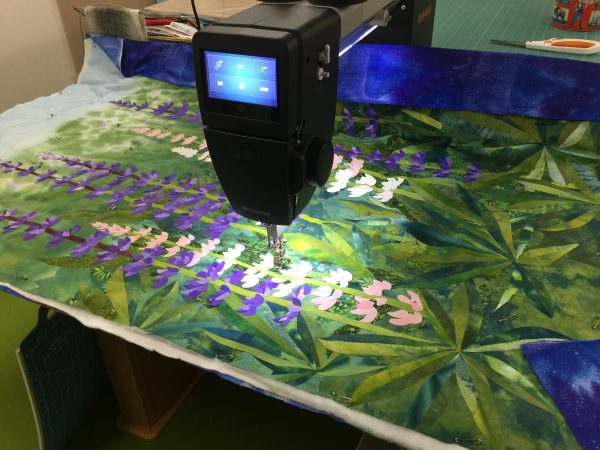
Ever so slightly ahead of schedule, I have begun quilting on the Lupines. Luckily (and one reason I chose this imagery) this will be easy quilting.  And yes, once again, I LOVE MY BERNINA Q20.  Crazy expensive and worth Every. Single. Penny.   Lots and LOTS of pennies.

This morning I finished basting the Lupines quilt.  I decided to try something I haven’t done before:  a double batt.   I definitely wanted to use wool, but I haven’t been able to find a source for my favorite Matilda’s Own Wool-poly blend batt in the US recently, and I’m hoarding my last batt.   So I used  Quilters’ Dream Wool which is much fluffier; I fused my top to that.

BUT I was concerned about distortion because of the fluffiness–it just didn’t feel like it would hang well and be stable.  Dreamy (pun intended) in a bed, lap or snuggle quilt, but by itself on a densely quilted wall quilt?  Not so much.  So I took the only cotton batting I had, Quilters Dream Select, and layered that underneath the wool.  If I had had Request, the thinnest, I would have used that instead.  Finally, spray basted the backing and safety pinned intermittently.  I am using up long lengths of print fabric in my stash when they suit the quilt–time to move them along.  Will have to dye something to match for facings and hanging sleeve.

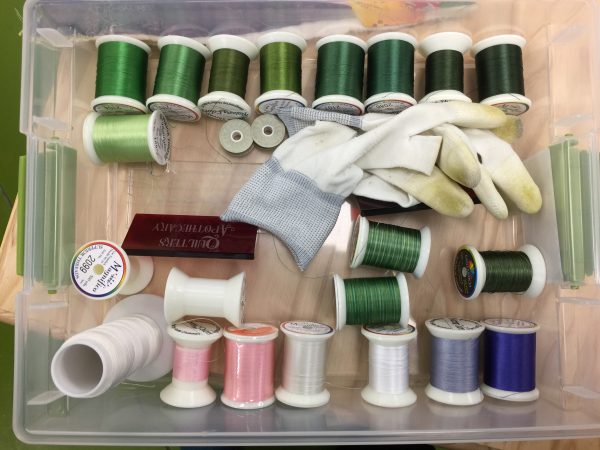
I also selected thread yesterday afternoon and this morning.

When I choose thread for a quilt, I “test drive” it by drizzling on the surface. If it works, it goes in the shallow box. I probably won’t use all of these, but will use most of them–about half the solid greens and almost all of the rest. And I added a medium purple this morning and will likely not use the dark purple in the box at all.

Things I have learned so far:

  • Painting a nonwoven is a good thing.  But if that nonwoven is Pellon 65 heavyweight interfacing, it is somewhat like using construction paper.  Will do the non woven thing again, but will look for something softer yet still dense (so no shadow through).
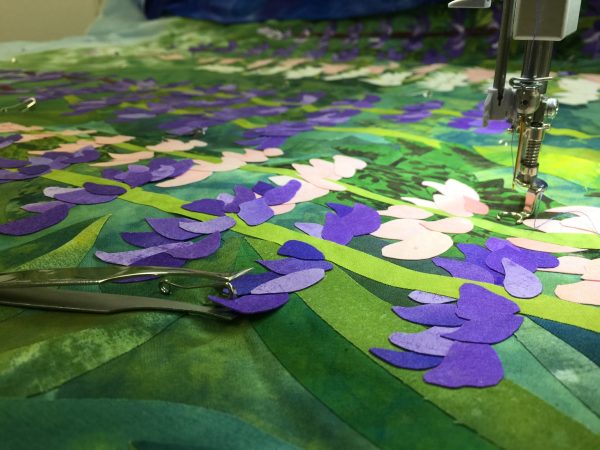
  • Mistyfuse is by far my fusible of choice.  But it behaves differently on the interfacing than it does on cloth.  If I fuse this particular interfacing again, I will use TWO layers of Mistyfuse–it is plenty fine and easy to stitch, and it will help this painted interfacing stick better–see photo.

Because of the difference (in porosity maybe?) between fabric and interfacing, my fusible isn’t sticking quite as well as usual. So I have re-fused various spots, and in a couple of cases tucked snippets of Mistyfuse under the stubborn lifting petals. I found, luckily, that if I am careful I can still quilt those lifting petals because the interfacing doesn’t wobble around like fabric.

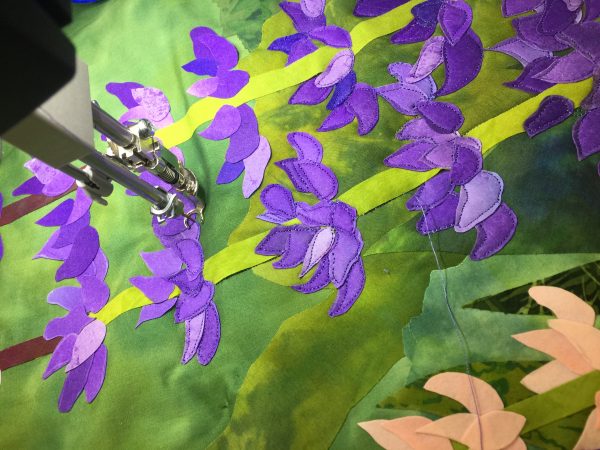
And to my astonishment, I quilted almost five of the six purple lupines today.  I have a couple of the tops where I will use pale lilac or cream unstitched as of this evening, but I am definitely farther along than I thought I would be.

Quilting in progress…done on the right, not done on the left. Using just one purple thread to stitch down the petals/quilt down the petals is working out OK despite the value changes from petal to petal.

That means the “after Eli goes back to college” period may be less frantic than I had feared. YIPPEE!  Barring catastrophe, I will be one and able to take photos and submit then ON TIME.  Stay tuned!


SaveSave

SaveSaveSaveSave

Getting ready for the next quilt….the herald of summer in Maine

Sunday, July 1st, 2018

Before I can start in on the fusing and collaging process, I find that I now need to dye fabric specifically for a project.   While working on my Lilies of the Valley Quilt, I used up most of my good “summer” greens.   My next piece is for Explorations at the New England Quilt Museum (in Lowell, Mass.), a regional SAQA (Studio Art Quilt Associates) show.  I’ve had several ideas I wanted to try for this piece, and really wanted to push myself to do something different and unexpected.  Unfortunately, those ideas are just not wanting to fit into the required vertical orientation and size required!   So I’m going to do a large piece on something I’ve been wanting to do for a while:  Maine’s lupines that bloom in late May and early June and herald the summer.

SAQA members from Massachusetts, Rhode Island, Maine, New Hampshire and Vermont were invited to submit a body of work.  If selected, artists would then make a 30×50″ art quilt featuring a specific technique.  We were advised to submit several techniques, so I suggested dyeing, fused collage and machine quilting/threadwork.   I am delighted that I am one of 24 artists selected!  There will be two exhibits of 12 artists each.  We won’t know whether we will be in the Oct-Dec 2018 exhibit or the Jan-April 2019 exhibit until the works are completed and submitted August 1.  That means I need to work FAST!

I was chosen to showcase fused collage.  The exhibit is about techniques, with in depth information and supplementary materials.  From the acceptance letter:

In the exhibit, your piece will be accompanied by a number of items, including your artist statement, a brief bio, a photo of you in your studio, and materials which explain your technique. Each artist has a 20″ x 50″ area that they can use to explain their process. You can use process photos, sample pieces, written materials, even video presentations if you can figure out how to make it work.

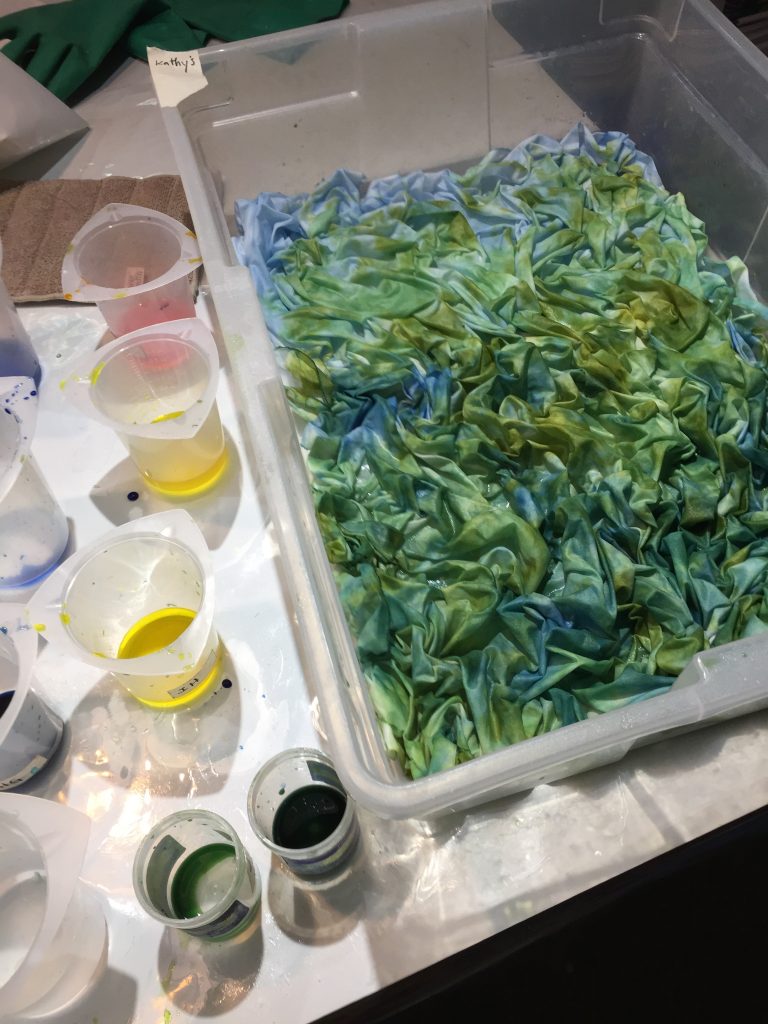
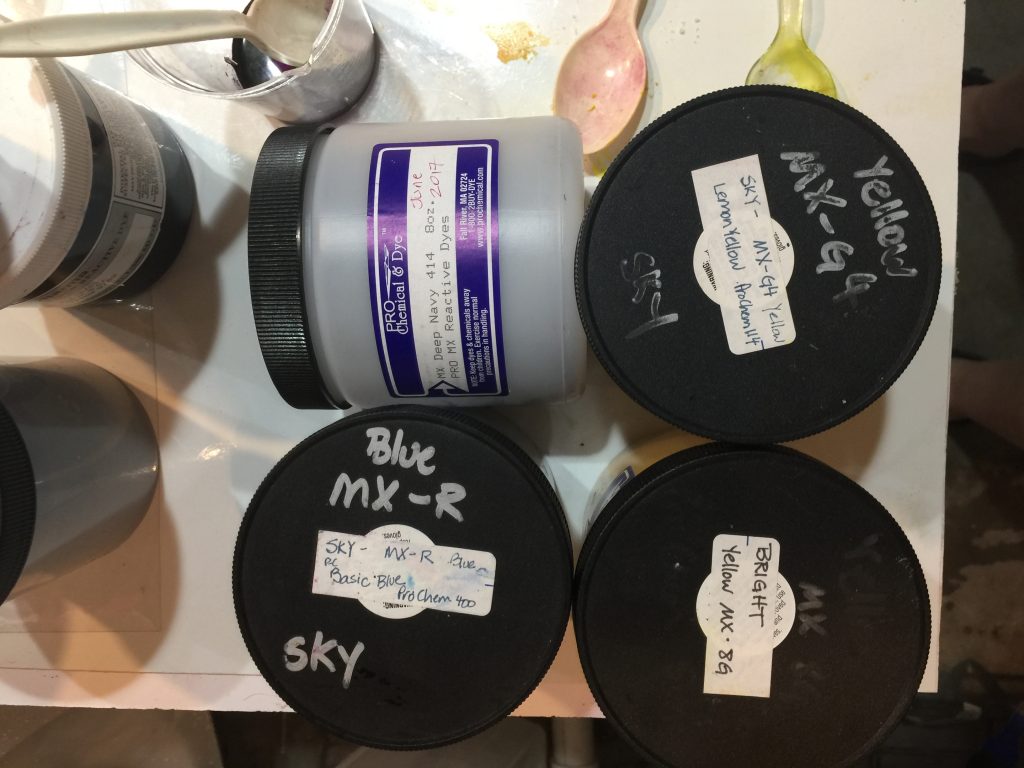
But before I can fuse, I need the right COLORS to fuse.   Some years ago I made some cloth that I gave to my friend Kathy, who used it is a fabulous portrait of her granddaughter.   I thankfully kept notes of which dyes I used, and I call this combination “Kathy’s fabric.”  This time, I decided to make it not as dark—summer meadow greens instead of piney woods greens.

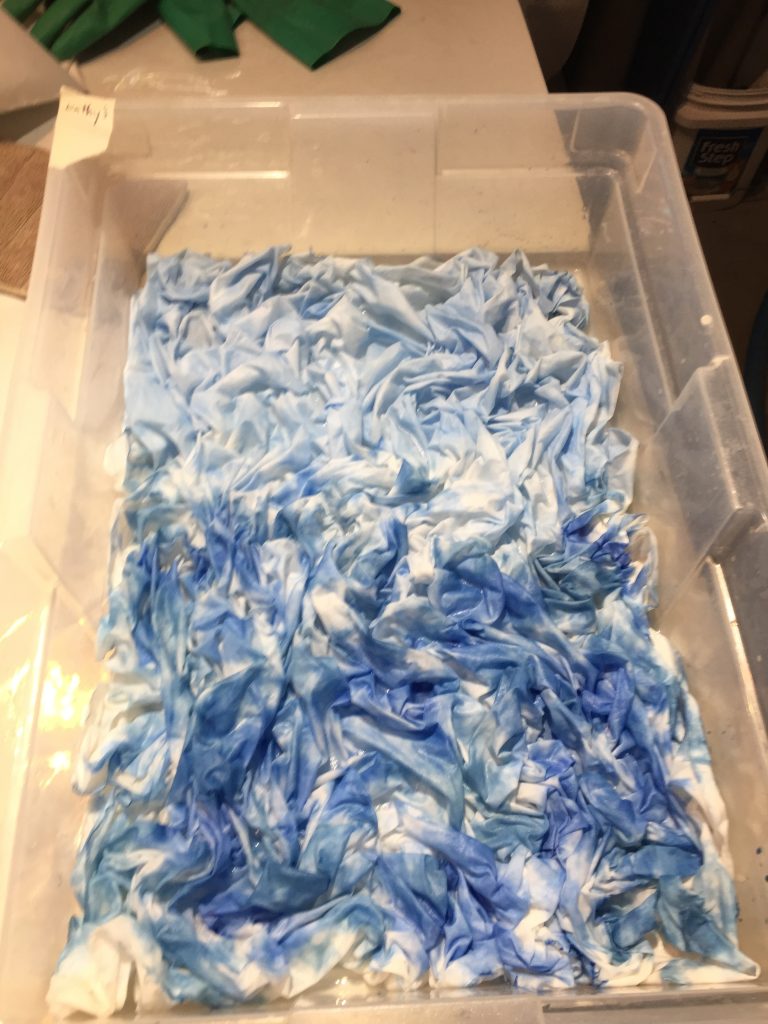
I start by dotting dye on, both navy and basic blue. I literally stick my latex-gloved fingers into the dye and daub it on. MANY classes with Carol Soderlund and many MANY yards of fabric and miles later, I can begin to predict what I will get because I tend to refer to my notes and books from the workshops, then go improv.

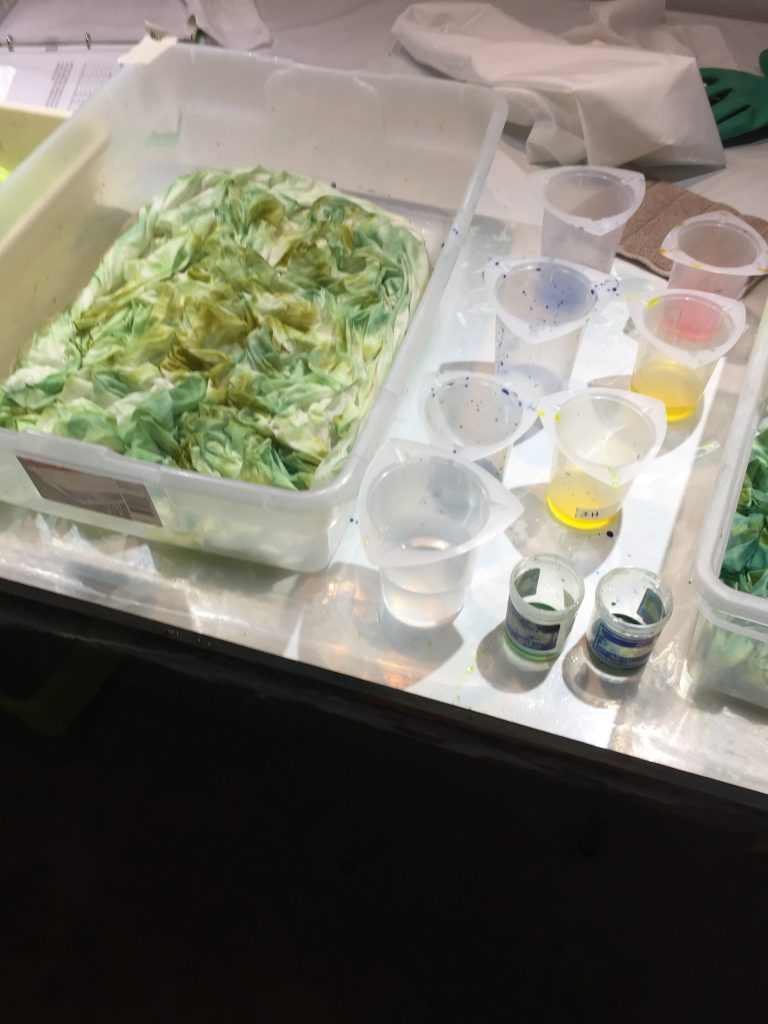
Then I add two or three yellows, because not just one will quite do what I want. Sometimes, I do a second cloth, as here, where I have actually mixed some greens instead of just doing yellow on blue.

For dye geeks, most of the time I prefer to paint dye onto cloth, then paint soda-ash/fixer solution on top, but this time I soda-soaked first, then daubed on the color.  When I want significant patterning, it’s soda-soak first.

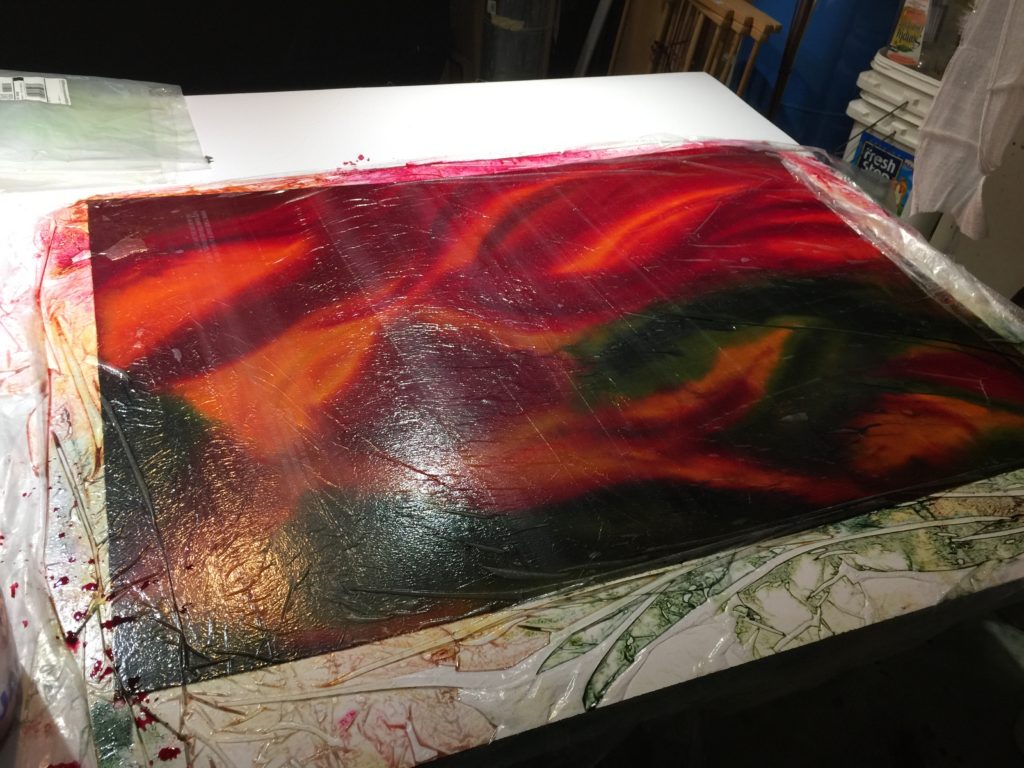
The photo at the top of this post is the one which began with blue dots, then yellow, then greens.

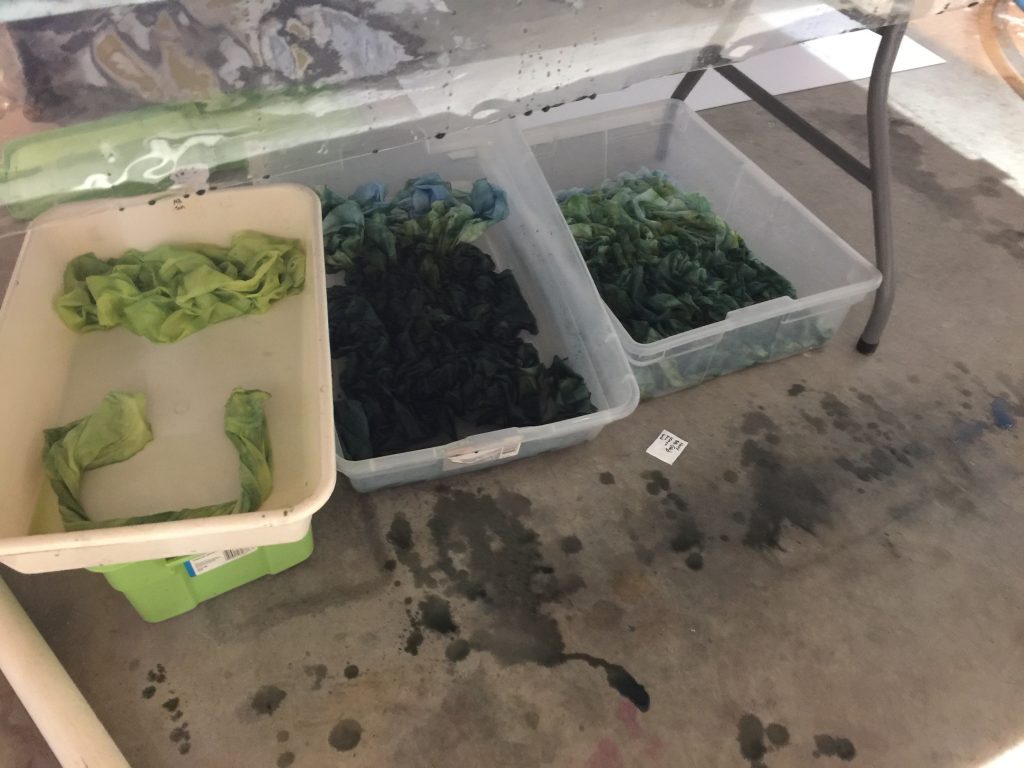
Once I’ve gotten the color on, the fabric needs to batch so it moves under the table for several hours before washout, sometimes (as this time) overnight. Had to make some of my bright spring greens, too.

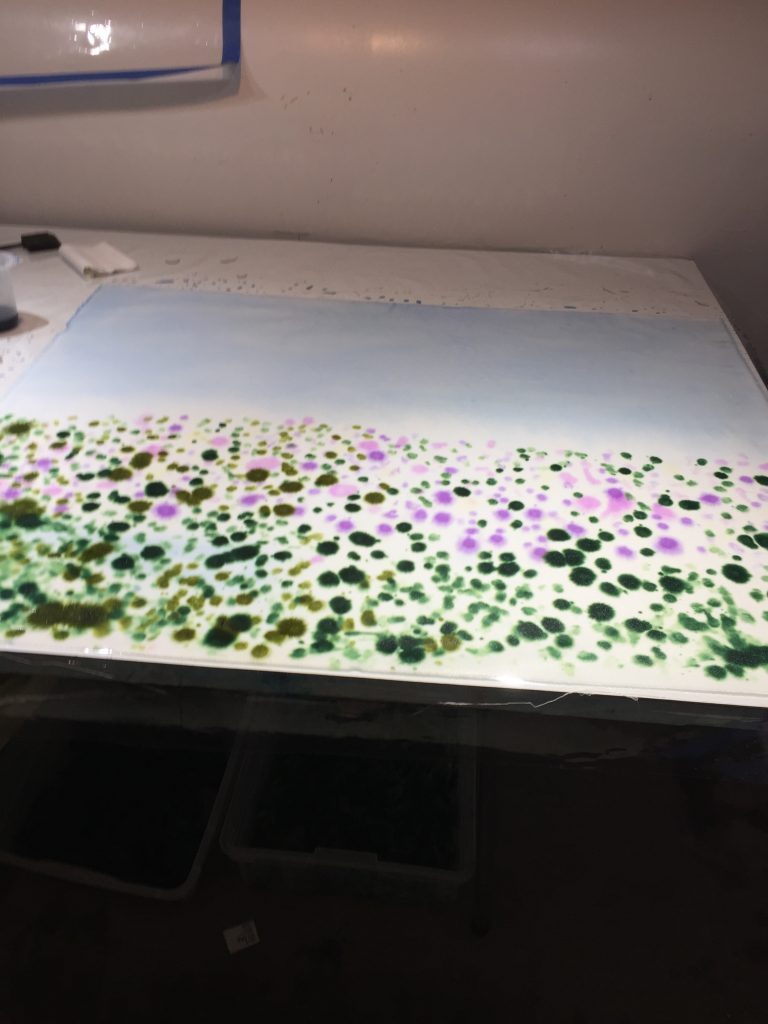
Then I decided to try to make a field with lupines in it, but blurry, to use as background at the top of the quilt.  I may have messed this one up…..

Sky at the top–good until I put some plastic over the top to batch it overnight. Apparently SOB there were stray dots of dye that didn’t get washed off properly last dyeing session. SOB.

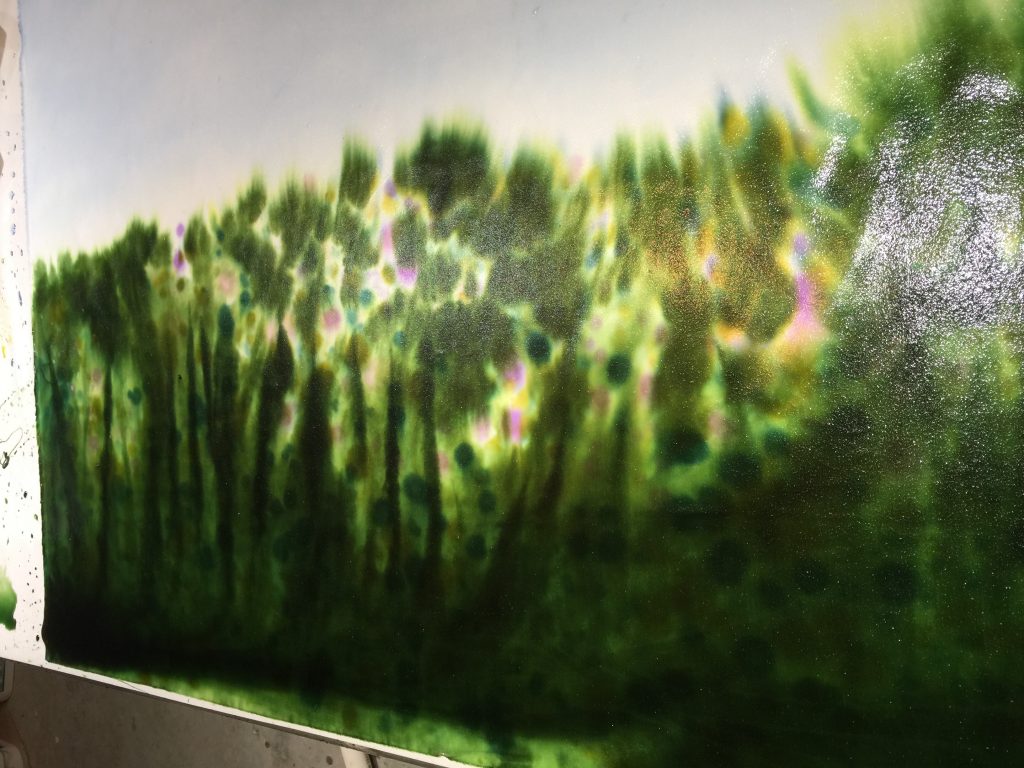
This is what it looked like about six hours later. I like the way the dye is seeping up into the sky. This is when I covered it. SOB.  And most of those dots got covered up. 

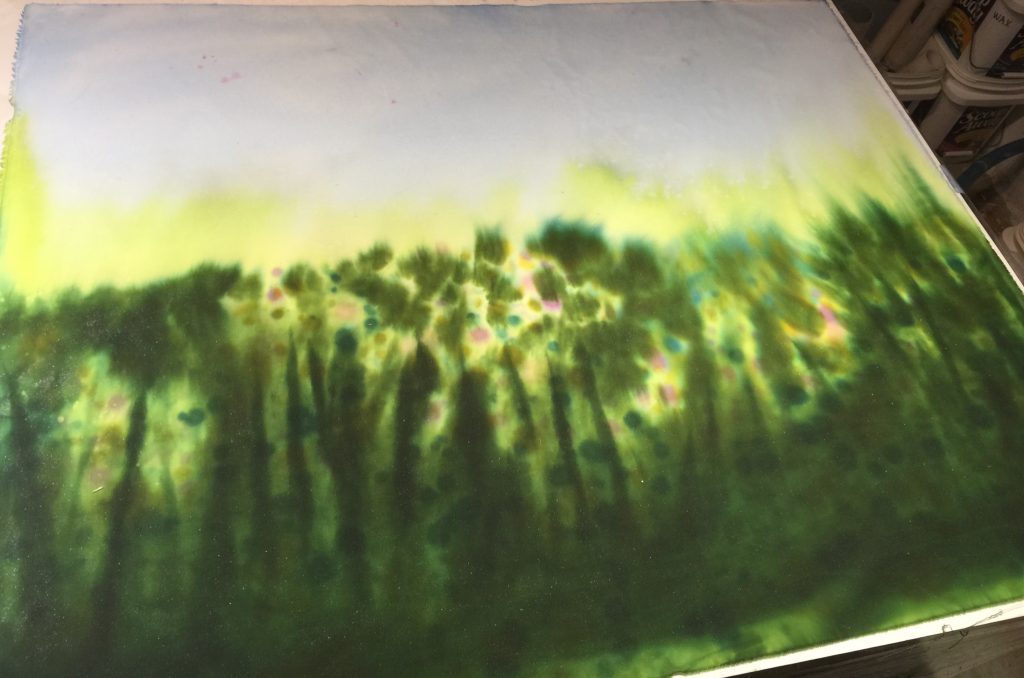
This morning when uncovered. SOB. Random specks of pink in the sky. SOB. Will have to see after washout what remains.  Cover it up with tall lupines perhaps.  SOB.

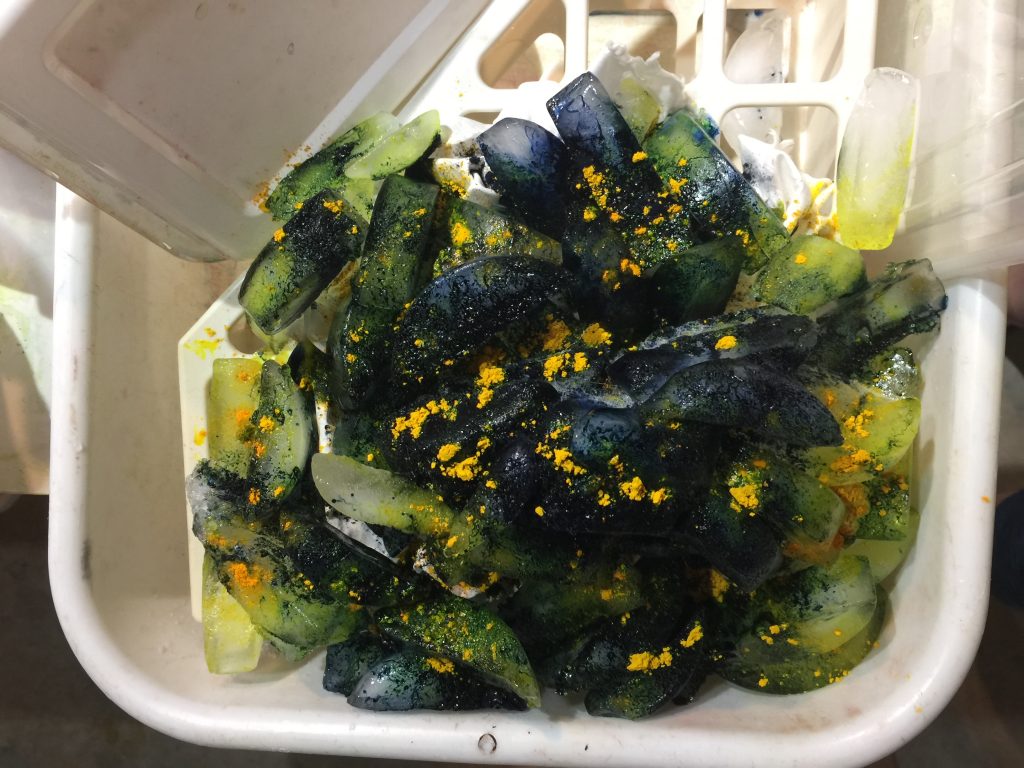
I also decided to try ice dyeing for the first time, inspired by my friend Jim Vander Noot. I used a magazine holder because it was available to keep the fabric up out of the pooling, dripping dye (instead of a screen). Put another piece of cloth in the bottom of the tub to soak up the drips. I use pure dyes, not mixes which is more typical for ice dyeing, so I kinda winged it on this one. I sprinkled the dyes in the picture below on, then dribbled some yellow dye solution I had already mixed up as well.

Dyes sprinkled on.

Today I washed out….stuff in the washer now.  OH MY I am SOOOOOOO gonna do more ice dyeing…totally hooked!   Hope they look as spectacular washed and dried as they did rinsed out!

Stay tuned for an update.

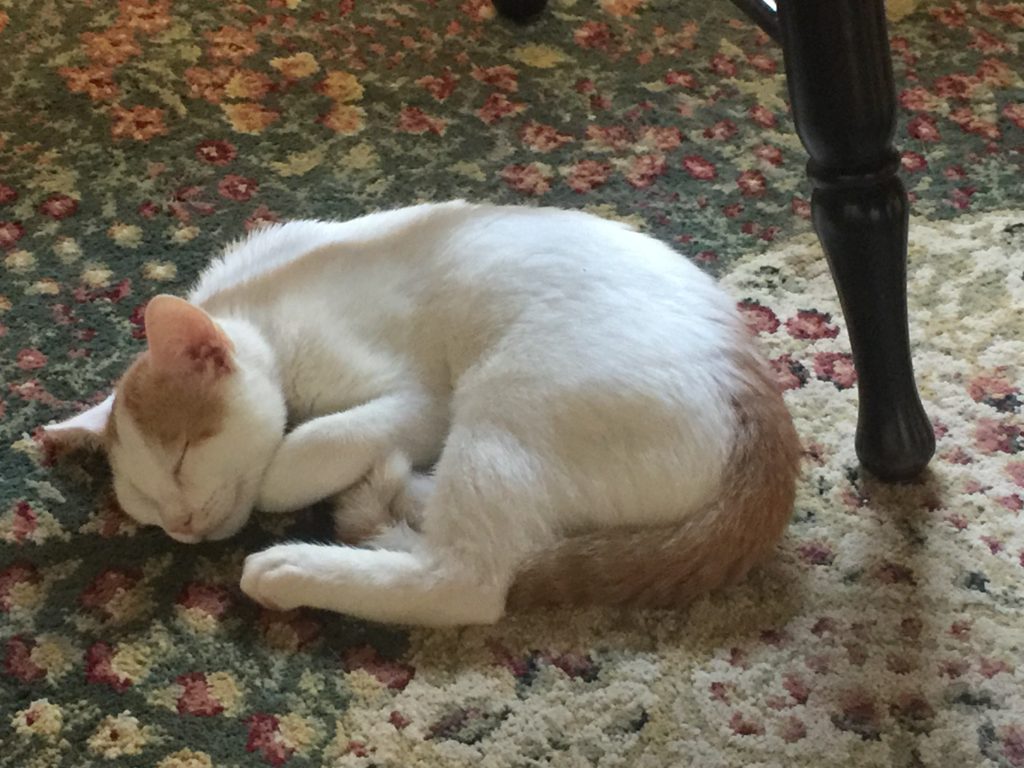
And…gratuitous cat pic of the new kitten, Zabu (named after the Leapin’ lemur on Zoboomafu which the boys watched when they were little)

Sweetness, to be followed when awake by zooming and cavorting and wreaking kitty havoc.

#saqa, #fabriccollage, #artquilt,#artistsoninstagram, #fusedfabric

#saqaexplorations, #neqmexplorations, #saqa, #neqm, #saqamari

SaveSave

Speak Up, Speak Out

Thursday, April 27th, 2017

Emerging briefly from the production tunnel to share my latest piece which, thankfully, I CAN share despite the fact I’ve entered it in the Threads of Resistance Call for Entries (Deadline in about 2-3 days)!  As many of you who have known me for a while know, I haven’t usually been politically involved or spoken out.  This is, in part, the legacy of being a federal employee, when you were not allowed to be political (there were ways you could do it, but it was such a fuss that it was easier just to NOT).   However, the last election cycle aggravated me so much I began making political posts and comments on Facebook and getting involved.   Even though I didn’t really have the time, when a group of art quilters got together with this exhibit concept and called for entries, I knew I wanted to try to make a piece.
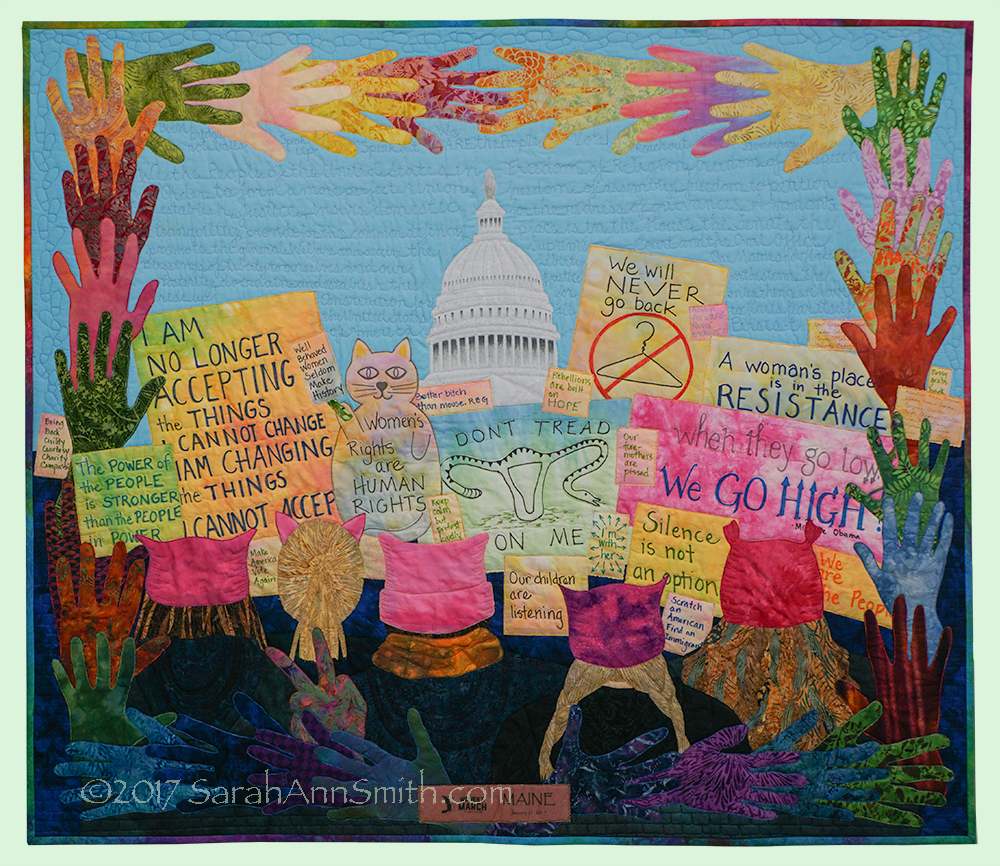
Speak Up, Speak Out © Sarah Ann Smith 2017. Although the Women’s March imagery has become ubiquitous since the March, I decided to proceed with my concept because it was my experience.

It began during one of the debates last autumn (2016).  The then-Republican-candidate (I *refuse* to use his name) kept saying “Make America Great Again,” as if it weren’t great already!   I will be the first to say that we are an imperfect union, this great nation of ours, but that is part of why we are a great nation….or were and must recover from the collective idiocy currently gripping the country.  I started sketching during the debate and came up with two ideas for art quilts, one about Maine, one about our nation.  The latter was to have a border of hands, holding hands, and phrases and words that represented the US, but the center wasn’t yet clear to me.

With my soon-to-be daughter-in-law Ashley G., I traveled to the Women’s March on Washington on an overnight bus (overnight going and returning…LONG nights sitting up!).   I bought a cheap spiral notebook and asked riders on the bus, if they wished, to trace their hands so I could use them as the border in this piece.  Every hand traced is here (one twice, because I needed one more hand to make things fit properly).

At the March, I took many many photos and as the day wore on I knew that being in this sea of humanity, most in some sort of pink hat or cat ears (reference to the-one-who-shall-not-be-named joking that he would grab a woman by the pussy–slimeball! that’s sexual assault you jerk!) I had found my image for the center of the quilt.  The images of women and men marching, protesting peacefully (not a single arrest!), has since become ubiquitous.  So much so that I considered NOT doing this view because it has been seen.  But I decided that since I conceived of the quilt before the march and finalized during the day of the March as the images had barely first been seen on the internet, I decided that since it was also “my” March, I would proceed.

This photo became my starting point–it is the only photo I didn’t take (since I’m in it..someone on the street offered to snap pics for us):
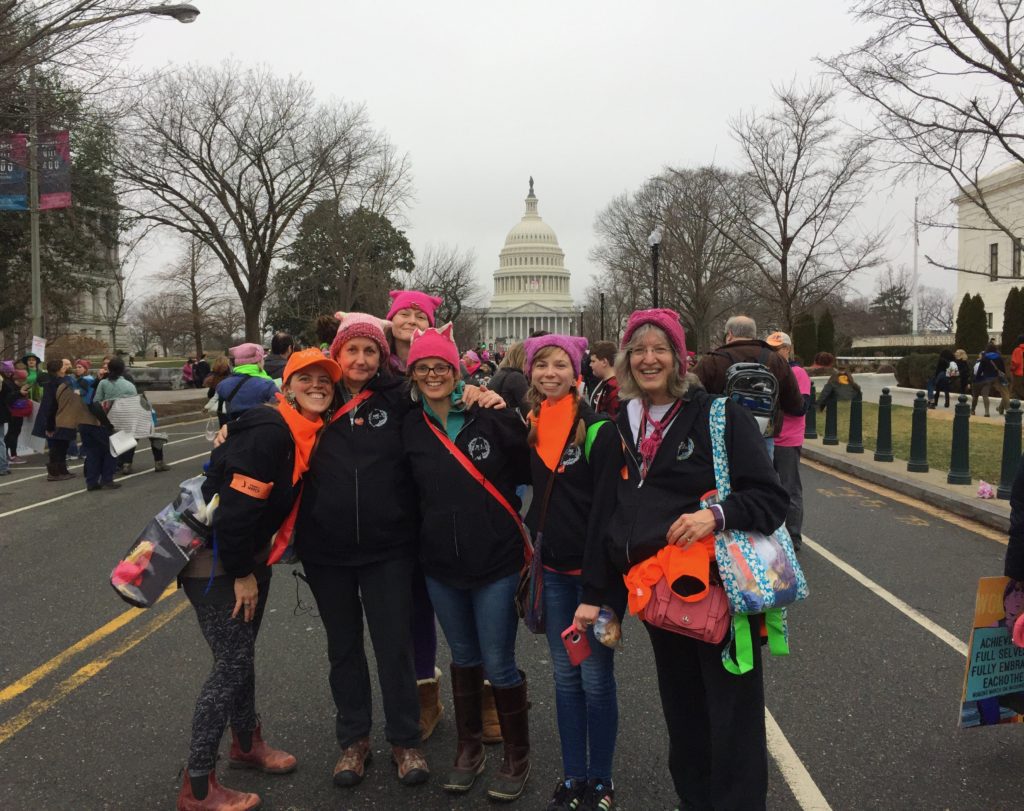
Some of the ladies from the bus. We are on East Capitol Street heading toward the Capitol. Mainers were to wear blaze / hunter’s orange. I’m on the far right standing next to Ashley, who has her orange scarf on, and we’re wearing the hats I made us.  There is an odd aberration in the photo, but so it goes.  I printed this photo on the label.

Usually when you see photos of protest marches, so many of the signs are manufactured, a printed graphic done by someone professional (ish).  What impressed me about this March is that almost all–upwards of 95 percent–of the signs were homemade and many were clever and/or inspiring.   I selected my favorite ones and used them.  One of the signs in the quilt is the actual sign that I made and wore on my jacket during the March.
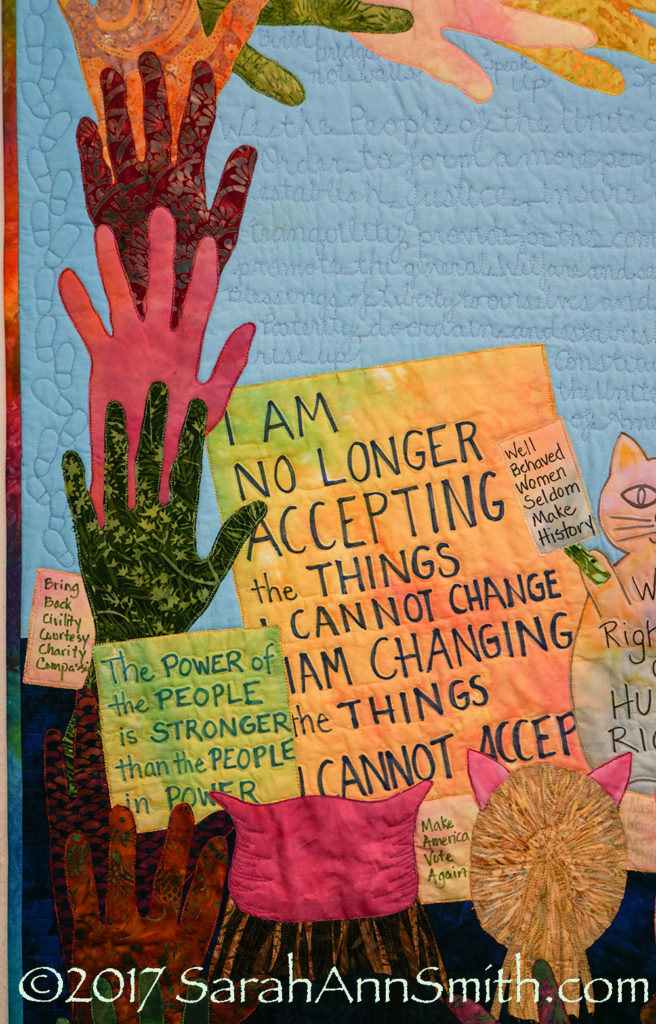
Left side of the quilt. I loved the sign calling for a return to civility, courtesy, charity and compassion.

In the sky above the marchers, surrounding the capitol dome, I quilted the Preamble to the US Constitution on the left.   Brief signs/slogans are under the hands at the top.  On the right I quilted the First Amendment’s four freedoms of speech, religion, assembly, and right to redress the government for grievances (which is what we were doing!  Democracy living and in action!), as well as more slogans and thoughts.

There were three huge signs in the shape of cats, maybe 4 feet tall, so I appropriated one of them to use.
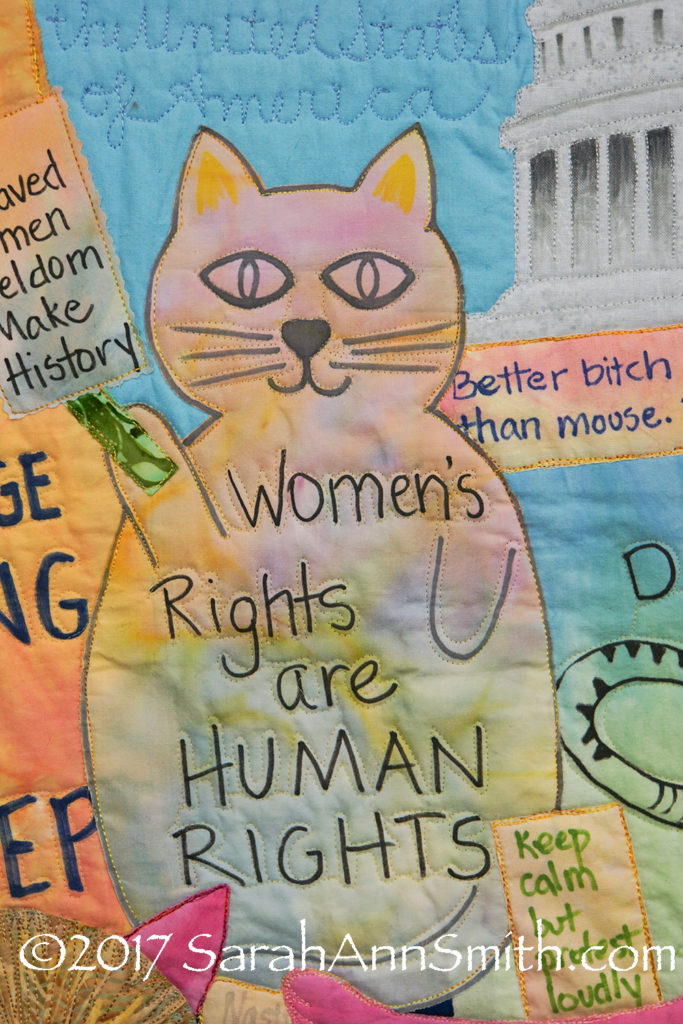
Center left. I LOVED the quote attributed to Supreme Court Justice Ruth Bader Ginsberg (I think I am falling in love with that woman!) and made sure she really did say it before including “Better bitch than mouse” as one of the signs.

By the way, I used Fabrico felt tip pens and Pitt Artist pens (brush and bullet tip) for the signs.

When I graduated from Georgetown University (in DC) in 1979, a t-shirt was popular that said “A woman’s place is in the House, and in the Senate.”  At the time, no woman had been elected (or maybe just one or two…I’m thinking Margaret Chase Smith and Nancy Landon) to the Senate that had not gotten there by taking her late husband’s seat.  It was still common to be told that a woman’s place was in the home and the kitchen, not the office.  Now I’ve said “A Woman’s place is in the House, the Senate, the Supreme Court and the Oval Office!”
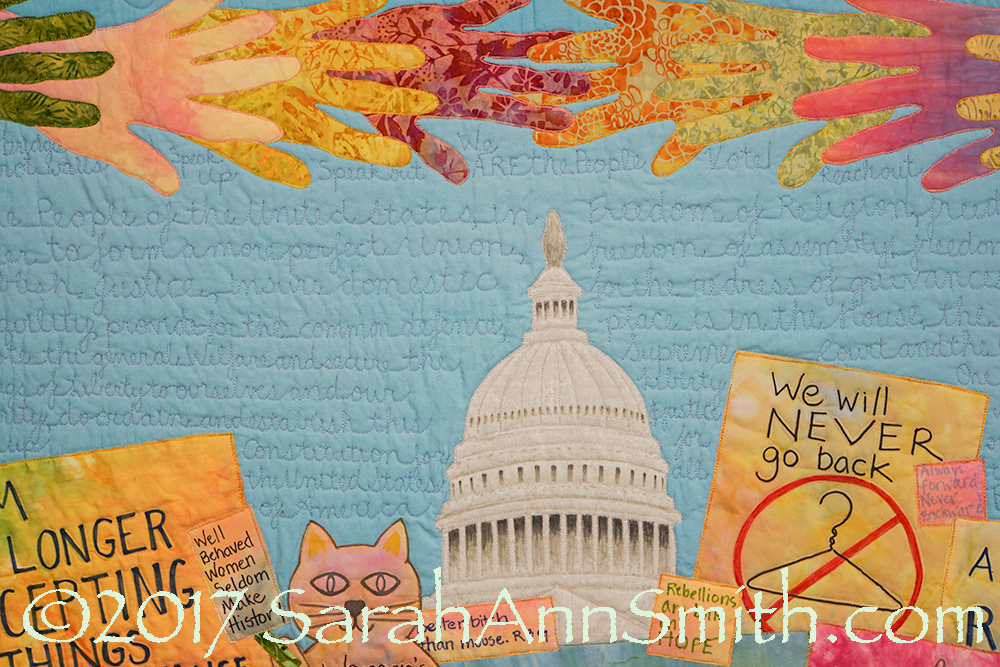
Center of the quilt. I was really pleased at how the dome turned out. I used my photo as my guide and sketched out the pattern, cut the shape (as usual I am using Mistyfuse on fabric and raw edge collage; the dome is a rare case of me using a print fabric instead of a batik. The peach-yellow hand on the left is my dyed fabric, the salmon-pink-purple on the right is Laura Wasilowski’s, from a fat quarter from a class I took with her.  The fabrics in the signs are mostly my hand-dyes.

The coat hanger sign is a combination of two such signs that I saw.   I loathe the idea of abortions. But when I was in my 20s, I was a US visa officer.   I was processing the paperwork for a British man’s visa based on his marriage to a US citizen.  When you do that, you need to establish that the marriage is legal and valid, so you need to see if there were any prior marriages and, if so, that they ended legally.  He was a widower.  To break the tedium, I used to look at cause of deaths when these cases came across my desk.  His first wife died of septicemia (blood poisoning) from a self-induced abortion (because it was illegal in the UK at that time). Ever since, I have stood for freedom of choice because there will ALWAYS be women who are that desperate, no matter how awful I or others believe abortion to be.  Moving on…back to the quilt.
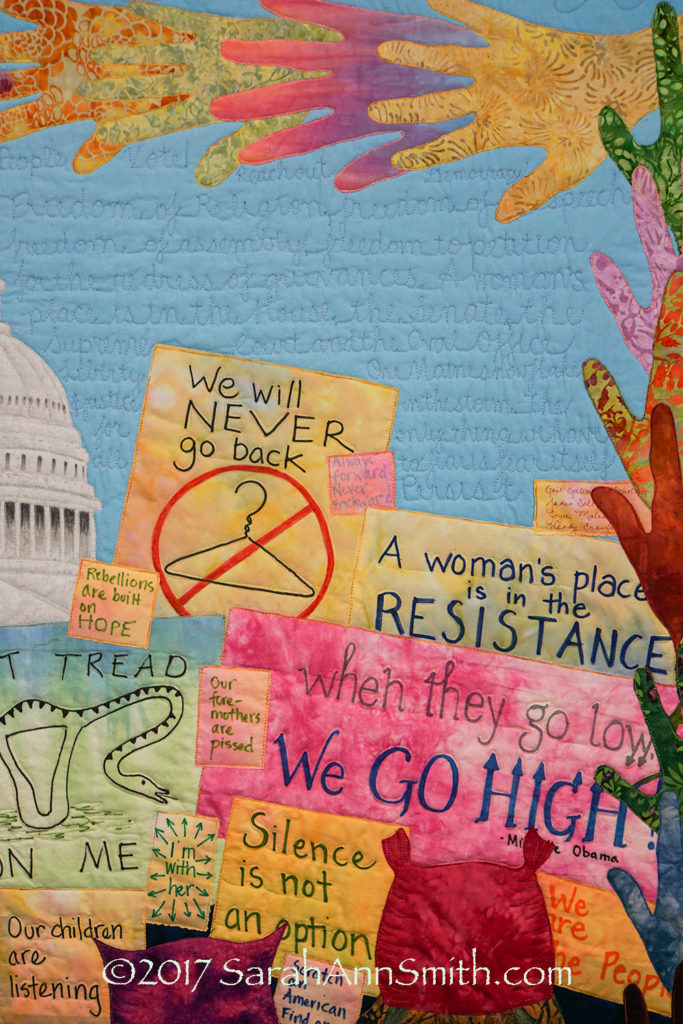
Center right. I loved the take on the Don’t Tread on Me flag from revolutionary war times that turned the snake into a uterus and says Don’t Tread On Me (on left, on Laura Wasilowski’s fabric).  The big pink sign with Michelle Obama’s mantra is what I wore at the January 21, 2017 March on Washington.  That’s my DIL Ashley on the left in this photo, me on the right. I modified a sign carried by a Vermonter to read (in the sky writing) One Maine snowflake in a storm.
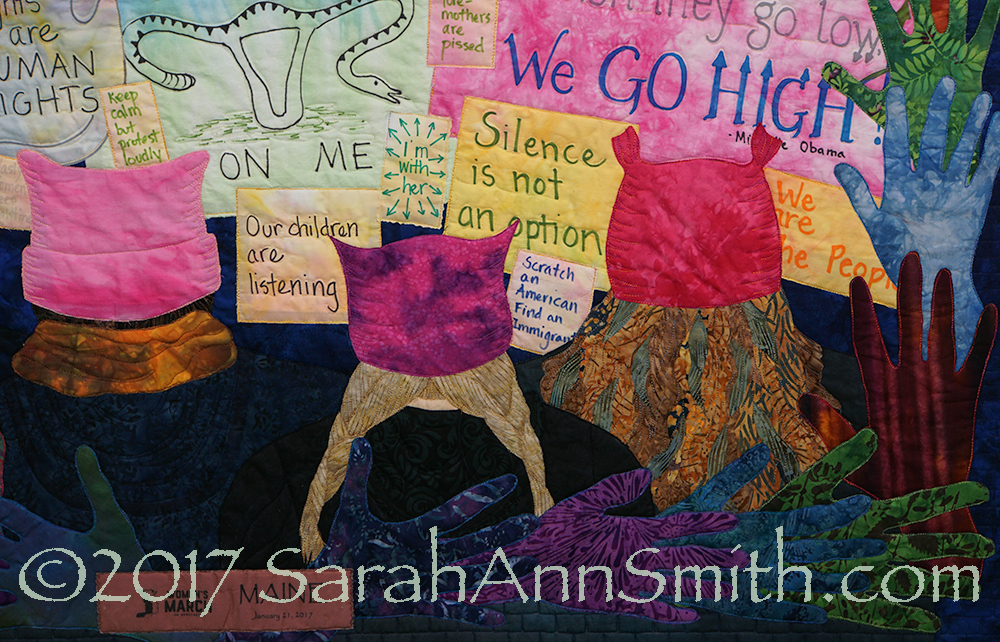
Center bottom right. A bit sharper photo.  In the bottom left, under the copyright, you can see a “ribbon.”  The center woman I think of as “Everywoman.”  Then there is Ashley (DIL) in braids, and me on the far right.  Ashley’s hand is the purple one at her right shoulder, mine is the blue one next to Ashley, one in from the corner.

Some generous unknown-to-me person who couldn’t go to DC made and gave away these ribbons to those from Maine who marched. It was done in the Mainer’s blaze/hunter orange. That was pretty bright for the front of my quilt, and I didn’t want it to distract from the imagery. So I scanned the ribbon into the computer, then in Photoshop darkened the color so that it would work visually on the front. THANK YOU whoever made these!
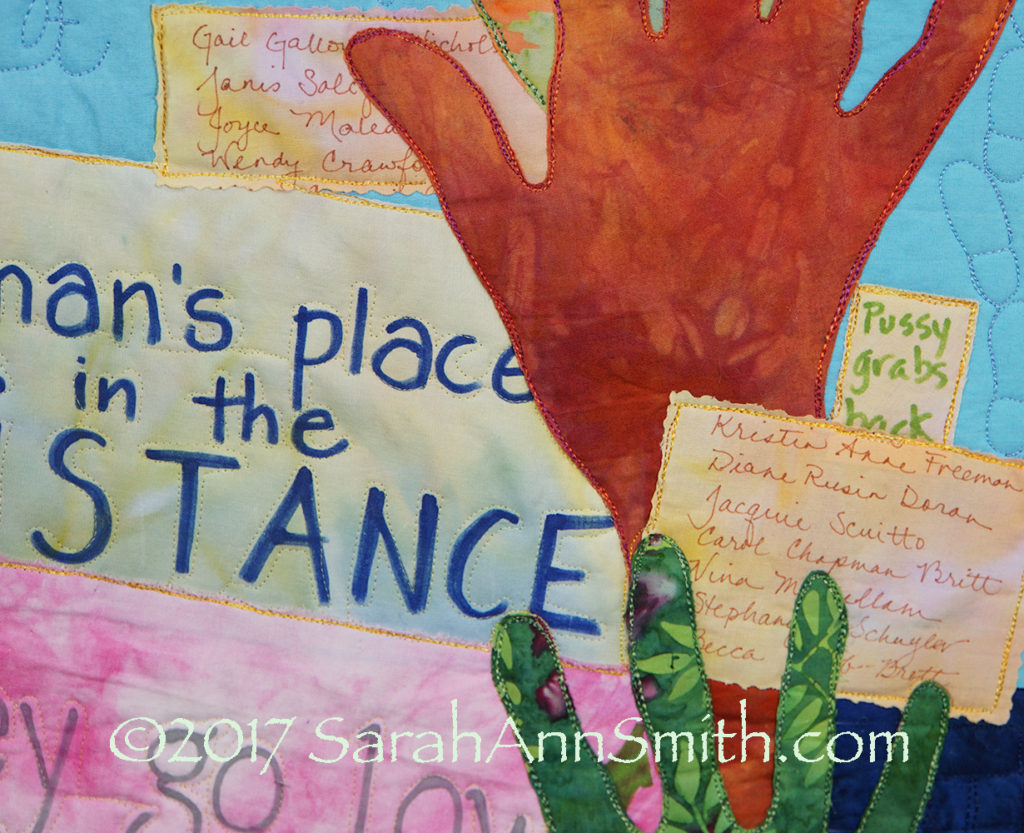
Far right. My friend Gail Galloway-Nicholson used to be the Curator for the Supreme Court so is as familiar with Capitol Hill as I am, if not more so from having worked there for a good bit of  her career..  I worked for a US Congressman for two years, and we also lived just two blocks behind the capitol (yes, I got to see our old house).  She asked me to carry her name in my pocket since she couldn’t go to the March. I did, and added the names of more friends (some I’ve only known via the internet and quilty stuff).  Thank you all for being there with me!   I love knowing you and that you wanted to be there in spirit and on the cloth!

So that is all the details, well, most of them, of what went into this quilt.  Don’t know if it will get juried in–I know there is some awesome art being made for this that doesn’t use the ubiquitous image–but I am glad I made it!

And I have decided to get involved volunteering for my Town of Hope, Maine.  I decided that one needs to put your time where your mouth is, and as the saying goes, all politics is local.   Here’s to giving back to my adopted-shoulda-been-born-here home state of Maine!


Autumn on Blueberry Lane

Saturday, February 11th, 2017

This quilt was inevitable.    Right click to view larger.  That thing in the middle is the needle bar of my Bernina Q20.  Notice the difference as I lay in the grasses along the edge of the driveway:  done on the far left, upper grass done on the near left, upper and lower grasses done on the near right (but not the tall grass which will happen in the final pass back to the right), and no stitching at all.

This photo is not the full quilt, but the quilt is a strong horizontal, and this shows more of it than I’ve shared to date on Facebook.  I’ll share the full quilt in mid March when I tape my Quilting Arts TV episode on one of the techniques I’ve developed and used in this quilt.

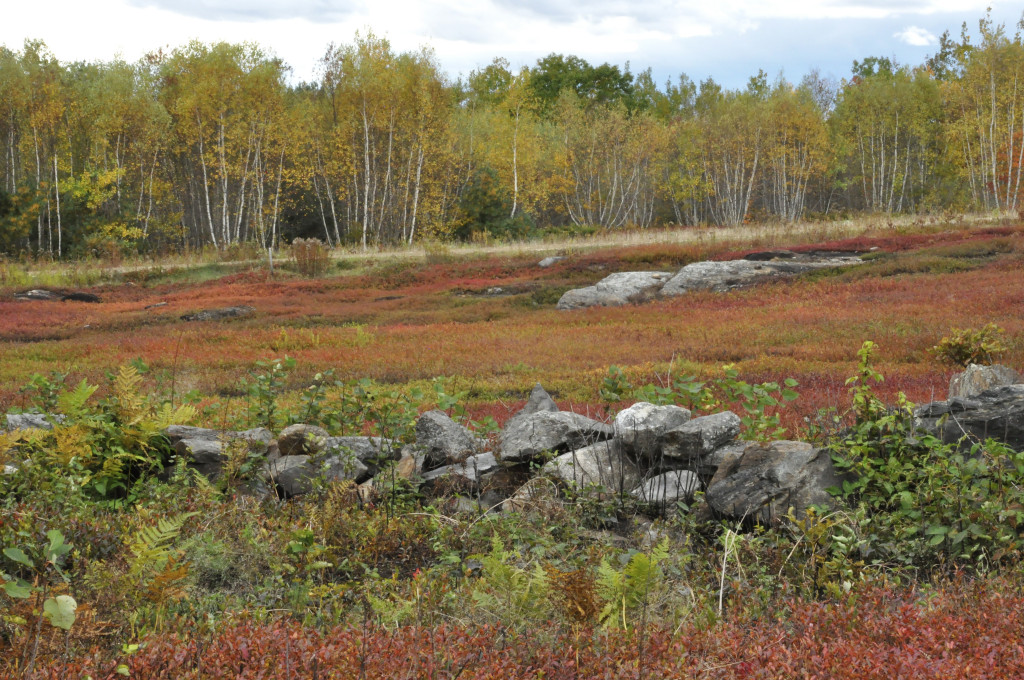
The photo below, taken in October 2015, was my inspiration, along with every autumn blueberry barrens I have ever seen.  The colors in the wild blueberry bushes are just beyond belief.  So I dyed a lot of fabric and went to town!

More autumn decay with blueberry barrens, decaying stone wall and birches in autumn in Maine.
The usual edits: smart sharpen, tiny bit of vibrance, crunching levels.

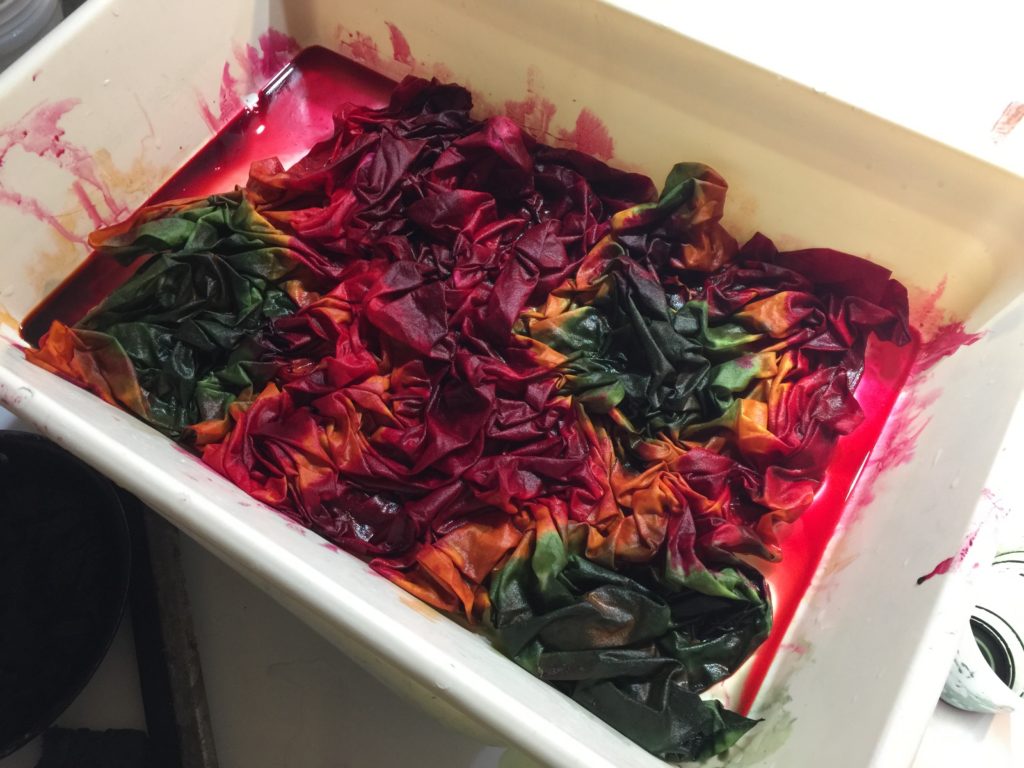
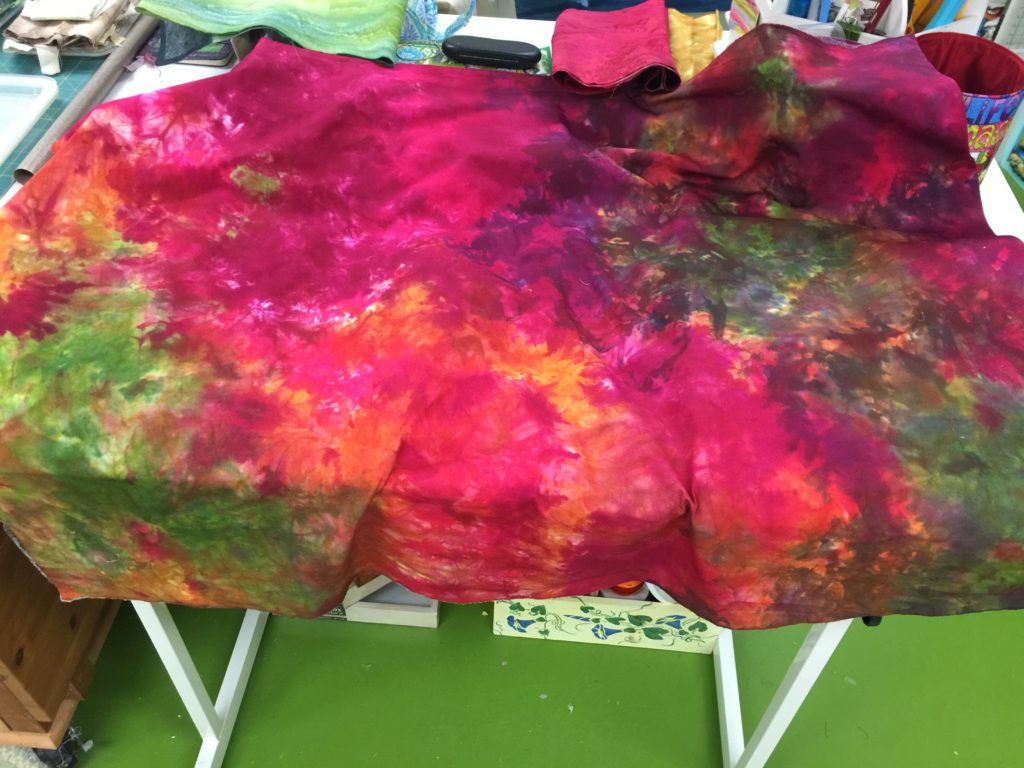
Hand dyeing fabric inspired by the blueberry barrens Maine (they look the same in Nova Scotia, too)

Same colors, different technique, scrunch

Scrunch and done. I used just about every single bit of this piece of fabric except for the more pink bits.   The blueberries are more of a russet and burgundy…this needs a touch more yellow in the red to get to that color.  

I’m still doing the facings and hanging sleeve…I’ll share the finished quilt in March, unless I change my mind and do it sooner!