Studio tour– a tidy attack happens!
Monday, June 11th, 2007It’s always fun to see where people “do their thing,”– in my case, that would be sew and create and (I hope!) make art. I recently shared my new fabric shelves, but thought you might like to see my “Bonus room.” Yep, I’m in the room over the garage. That means it has twice as much floor space as it has head room LOL! Since I got the big room, I got to share it with the guest (not that we ever get any!) bed–perfect! (The bed is an antique from my late FIL…dates to about 1780, which for the US is very old!) Quilts are stored under the comforter, nice and flat! Here’s what it looked like maybe 2 1/2 years ago, shortly after moving here..stuff already heaped and piled: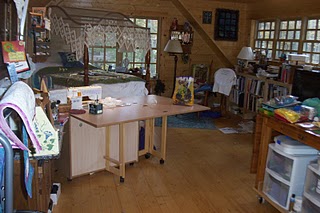
On the front side of the house are three narrow gables (the inside dimensions are less than 3 feet). There is a nice double window over the center of the garage doors, and there is a lllaaaarrrrggggeeee shed-roof dormer facing the backyard which lets in lots of light. The down side is that this means there is very little usable wall space! I have become adept at using the “low” areas where you can’t stand upright. The photo above (windows over the garage doors end) and these two are what the room looked like before I got started with my recent tidy attack–first is the design wall end (with box storage mess behind the entry door), 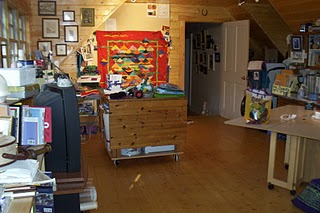
the second is the middle of the room showing my sewing table, hoosier (ideal storage!–for those not in the US, this style of “portable” kitchen cabinet was popular in the 1920s-40s, has a flour bin, sugar bin, spice shelves, pull out enameled top, the top closes up to conceal kitchen stuff, has a knife drawer–perfect for scissors and rotary cutters, bread bin–perfect size for patterns, etc),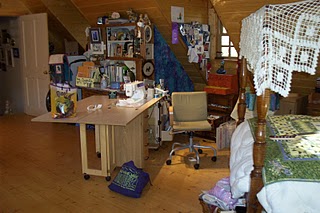
and the batting and home dec supplies storage behind the blue cloth and hoosier.
The only picture I could find with the fabric storage cupboards is this one, with a then-7 year old-Eli demonstrating the sleepability of his new pillowcase–cupboards in background: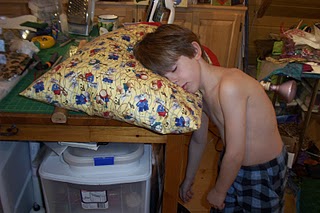
When I got the new fabric shelves, this is what the room looked like: utter chaos. In my defense, it never looks this bad! Please remember that I had to move everything to make room for the fabric shelves….
Bit by bit, I worked on it. A lot. I was tired. Here are the shelves, before. Please don’t look too closely at the paint job inside…. must have been the damp brush, as I did a totally awful job on the some of the insides for the second coat. And I actually DUSTED (and the world did not screech to a halt at the novelty of it!)!
Then midway, showing stuff cleaned out at far end, some books moved…
and DONE–at least with the fabric! The hand-dyes (which I plan to make more) are on the top shelf in (shudder…that Type A thing is happening…someone find a stick and beat it away!) Roy G. Biv order (Red, Orange, Yellow, Green, Blue/Aqua, Indigo, Violet) , followed by brown and white-gray-black. Below them are batiks and prints in roughly light-medium-dark piles. My conversational prints (animals, food and drinks, retro 50s, transportation/ ethnic/ world travel, and Hawaiian) are on the bottom left. Silks –slippery and messy when not corralled– are in a drawer under the work table, as are sheers — also disorderly in their behavior, PFDs (Prepared For Dyeing), and clunky stuff like rubber stamps, “glitz and glue” (heat gun, heat tool, foils and glues) and rovings/stuff for felting. Phew.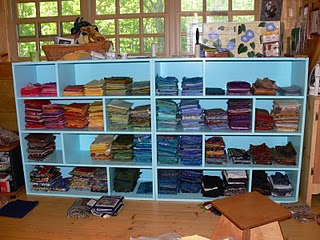
We won’t discuss the area behind the bed, which I will deal with after I get my book written and off to the publisher… maybe late August?
After two full LONG days of work, filling nearly half a garage garbage can (the big ones) with detritus, it looks better than it has since we moved in nearly 3 years ago. Here is a 360 degree tour, starting with the shipping zone (which also houses yarns and knitting and the *(&*^%^& exercise bike that is worthless!). Although it still looks kinda cluttery, trust me, this is VAST improvement! By the way, that green table in the foreground is Gramma’s toaster table, which is featured in my Flying Toast quilt (and I actually scanned the tabletop and printed fabric to use in the quilt!).
The area behind the table also still needs a little tidying–the antique thread spool chest (purchased when working full time and had a decent income) is, get this, actually used for storing thread! This area will get extra attention when I deal with the dumping ground behind the bed. The framed needlepoints on the end of the hoosier are from my late Aunt Mary M., the only person in my family who sewed; she lived on the other side of the country from me, but her fame as a skilled seamstress and tailor reached me easily! If it used a needle, she was a master!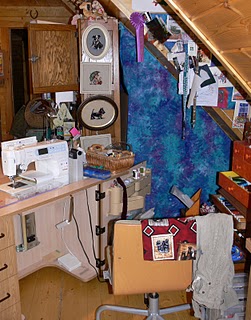
Then, here’s the bed / windows-over-garage doors end (bed doing temporary dual duty holding the koi quilt until Saturday’s guild meeting). The new “seating area” is to the right, where two of the former fabric cupboards have been pressed into duty to take the overflow of books (there is no such thing as too many books–in my next house the dining room will be a library with a table at which you can also eat!):
The worktable and fabric storage zone; the black cloth is up for taking photos. Usually I just have the beige-ish flannel over the whole thing.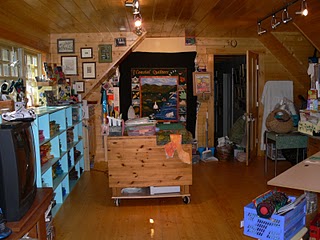
one of the former fabric cupboards got pushed to the right, next to the design wall, and has my Clementine boxes inside with the bits of fused fabrics ready for use. Good thing there is plenty of room… I found LOTS of little bits of fabric to fuse up and have ready during my tidy… the large plastic box on the floor next to the design wall is packed with those bits.
And here’s the last of the garbage to go down the stairs to the garage! If I had any white zin, I’d be having that now instead of tea. Hmmm… maybe a trip for ice cream is in order instead?
And to those who commented on the last post… for some reason the comments didn’t reach me the usual way through e-mail, so thanks for surfing in and taking the time to write! Hope you like these pics, too.
Cheers, Sarah

