As I was working on the first of my postcards, I had a flash: Mt. Fuji through the seasons. I’m honestly not sure where the idea came from…I was at the computer, the little TV next to it was on, and I think I was at my Webshots homepage…on either the TV or the computer screen there was a mountain (not Fuji), and the idea just materialized, fully-fledged, in my head. So here are what I think are the best of the bunch of postcards so far.
Winter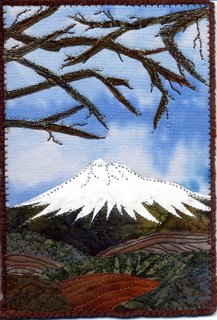
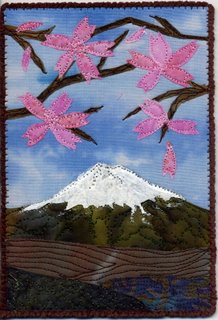
Spring
Summer
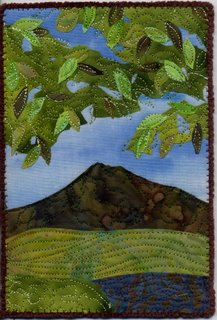
Fall
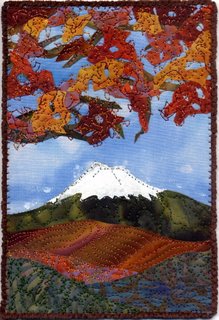
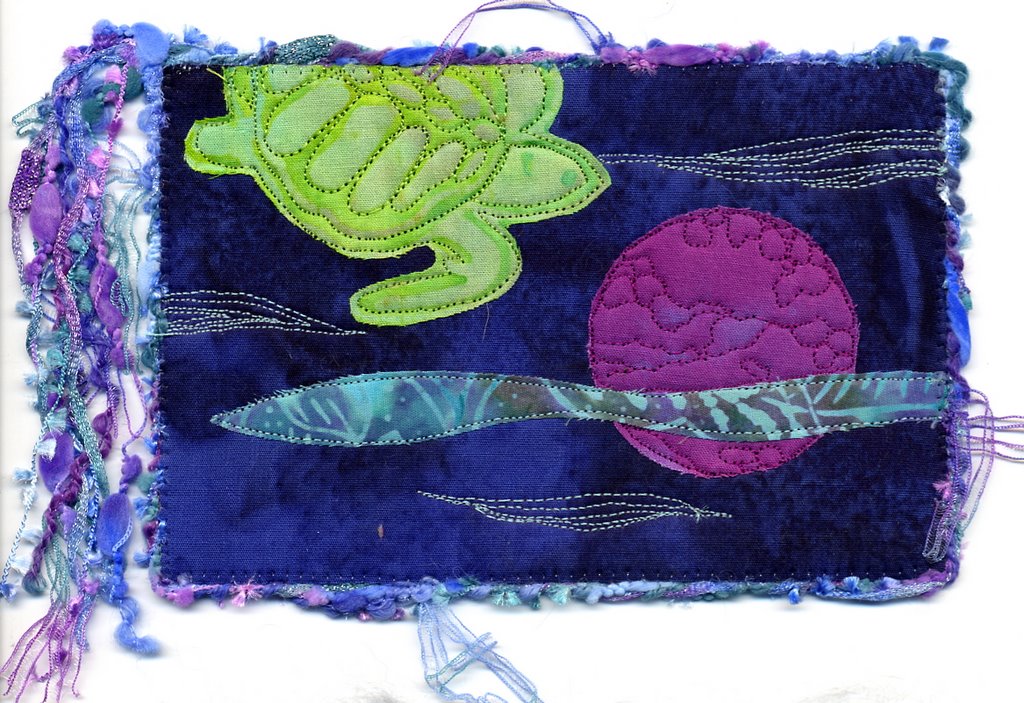
In addition to the verticals, which I have decided I will keep and mount on a quilted background (to enjoy and to use as a teaching example that will travel well), I also made two horizontals. Not sure if I will send one to FFAC or what…. I’m feeling particularly “partial” to these. I think I’ll send one, but which one??? Anyway, the only notable technique (fusing, of course, has gotten routine) is using paint for the snow on Fuji. Rather than fuss with tiny pointy, shred-y slivers of white cloth on top of dark (which would shadow through the white and make it look murky) I opted to use Jacquard opaque white textile paint with an overlay of Pebeo Pearl Setacolor Shimmer Opaque textile paint.
The easiest way to mask off an area and not get smudges in a use like this is to make a freezer paper stencil. Cut a piece of freezer paper that will give you a couple of inches all the way around the area to be stencilled. I then drew an outline of Mt. Fuji and two snow lines. Using my 18mm rotary cutter and small, sharp scissors (I used the Fiskars 6″ multi-purpose scissors) I cut out the snow portion of the mountaintop. Here’s a picture of it (laying on my notebook cover, since the inside of the scanner is white, which wouldn’t exactly provide good contrast!):
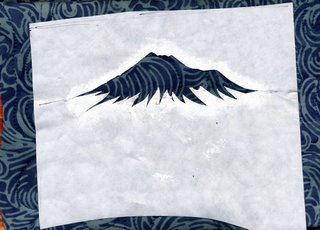
Position the stencil carefully to surround the area you want to paint. Iron in place. Using a sponge or stencil brush and a pouncing motion, or a flat paintbrush stroking from the paper to the open center, paint in the area to be stencilled. That “extra white” area around the mountain is where the stencil brush overlapped the cut edge, and what gives a nice crisp edge. You want to make sure the freezer paper is securely ironed along this edge, otherwise paint can leak underneath and make blobs and unsightly boo-boos.
Allow the paint to partially dry. If you pick it up too soon, you can get leaking / blobbing; see the vertical spring card above … I got a small blob, so daubed on a couple more bits of paint with the tip of a brush to make it look like small pockets of melting snow instead of a mistake. Ahem! If you leave the stencil on too long until the paint is completely dry, you may peel some of the paint off the fabric … not attractive! Here’s the spring horizontal of Fuji, which may be my most favorite of all the cards:

The Autumn Horizontal is the first card I quilted. I usually quilt stuff to death, but after quilting ridgelines in the snow, I decided in the other cards I would just outline the snow. Also, for this card, I pounced the lower edge of the snowline with the nearly-dry stencil brush to give it that “just-snowed” dusty look:
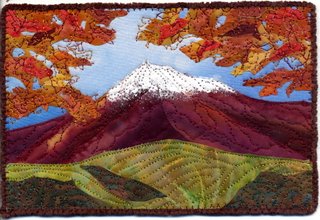
This card gave me the idea I should do the same composition but use Mount Kahtahdin here in Maine…..stay tuned (other priorities happening soon, but that’s an idea that will happen in due time!).
The painting is actually really easy….no skill required. And making the stencils is easy, too….just trace! I often take a photo, size it on my computer screen to the desired final size, then tape a piece of paper over the screen (even regular printer paper works…the screen is a virtual light table) and trace the outlines. If the final size of the picture is larger than my computer screen, I’ll just work on one section at a time. When that part is done, I scroll the image on the screen so that an inch or so of the first section appears, re-align the traced image, and keep going until done.
I’ve done the tracing technique for a couple of my 2006 journal quilts which I’ll be able to share at the beginning of November, once they have debuted in the Journal Quilt Project in Houston (and for more on that, visit here for the 2005 journals, for 2004, and for 2003). The Journal Project began in 2002, and a fantabulous new book documenting the Journal project, will be out by late October (and lucky me! I’ll have several pieces in it!), edited by IQA co-founder Karey Bresenhan (think of her as the fairy godmother and guardian angel of quilting, and major art quilting booster!) and published by Quilting Arts Magazine. Stay tuned for more on that one in about 6 weeks!