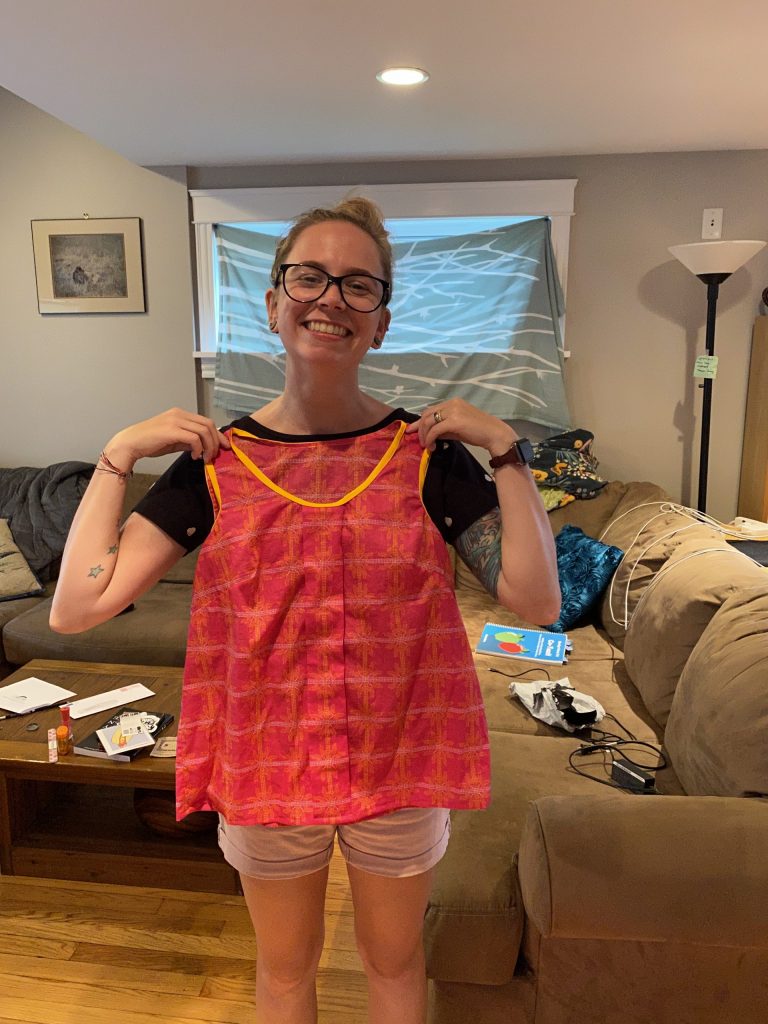
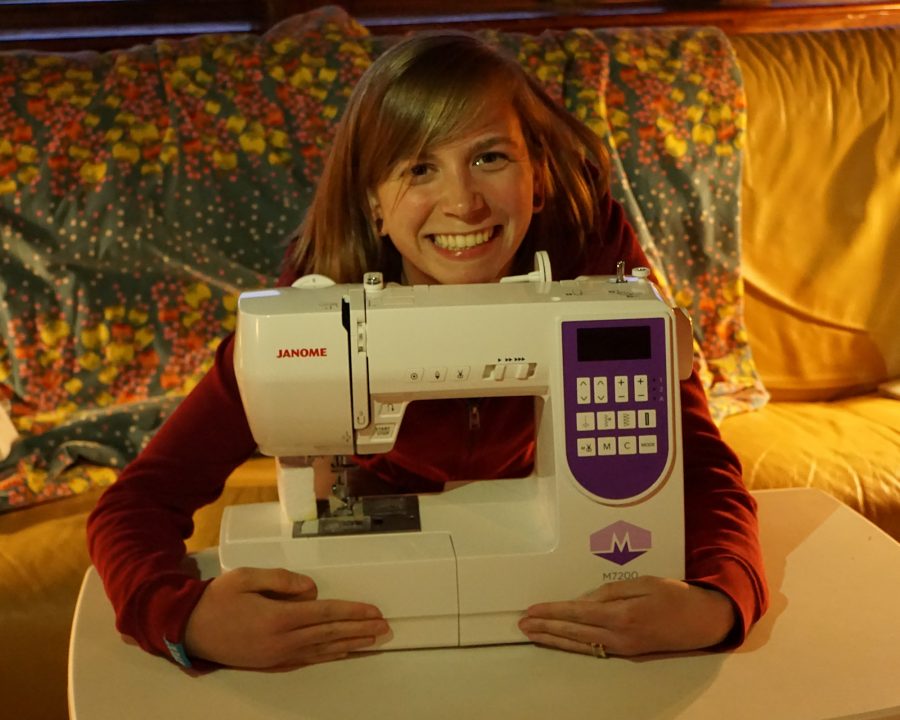
My daughter-in-law Ashley is my “daughter by another mother.” She is crafty and smart and nice and boy did I get lucky! (Well, my son Joshua was smart too….) Anyway, she was interested in sewing, so for a few years we worked on small projects together. She liked it so much we decided to SPLURGE two years ago and give her a combined Birthday and Graduation from College with Honors with a Teaching degree (yup, popping proud): her very first sewing machine, the Janome M7200. What with moving, starting her teaching career, lack of space in the first apartment in Portland, she just finished her first solo garment, the Sorbetto top, and I am SO impressed! She has every reason to be proud!
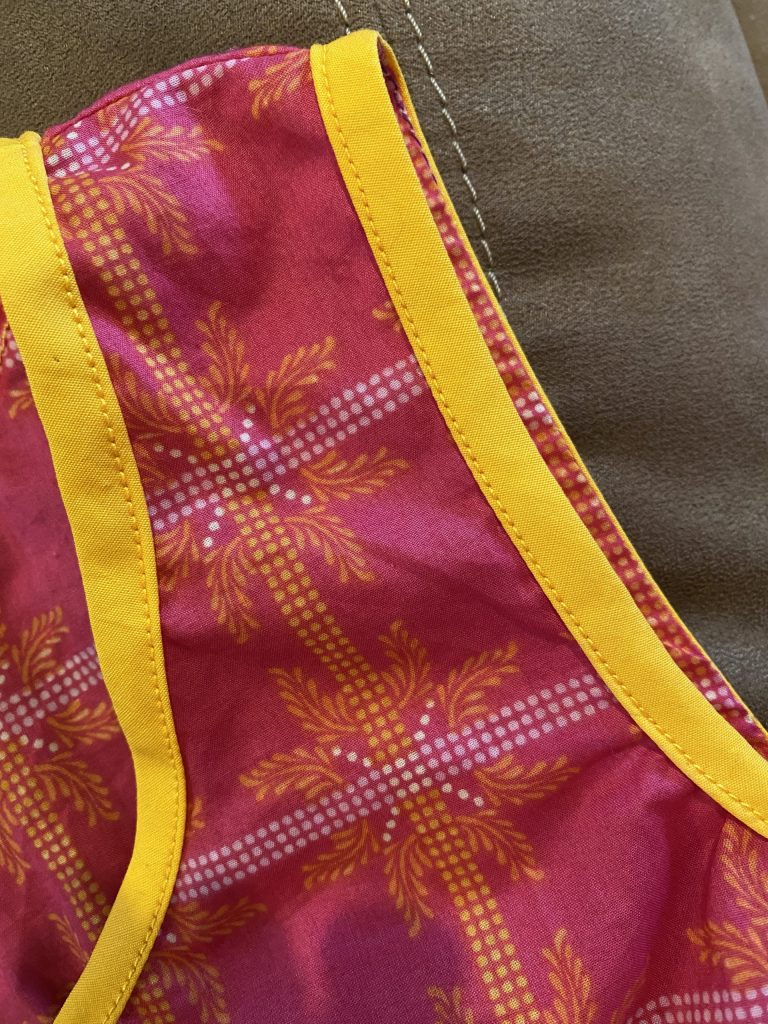
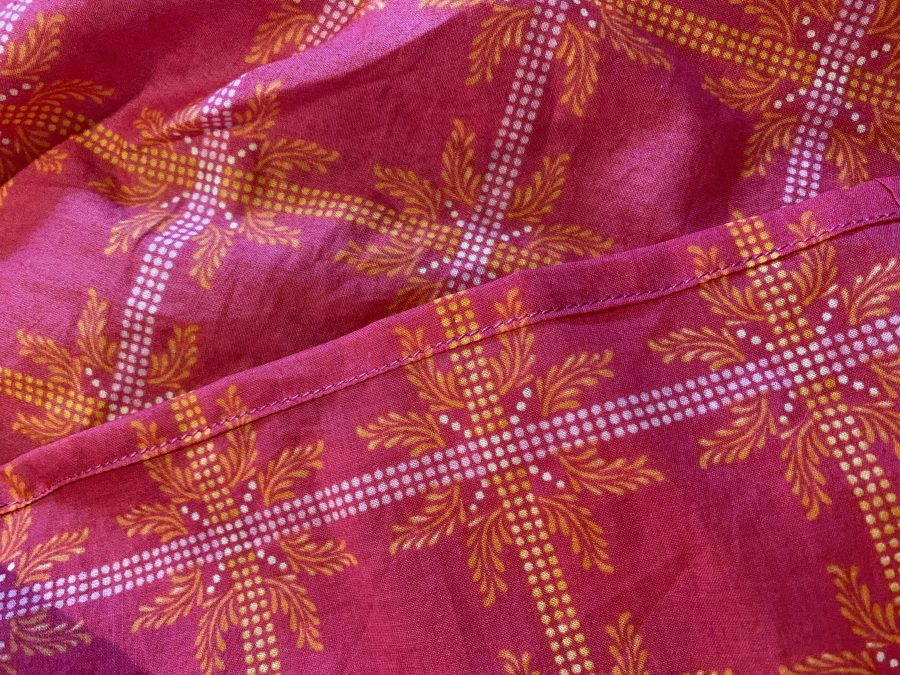
Here she is on a HOT summer’s day in Portland (Maine) showing her beautiful work, all done on her Janome M7200 (pic below, keep reading!). The pattern is free online at Collette patterns, https://www.seamwork.com/catalog/sorbetto. LOOK at that PERFECT edge stitching!!!!! I couldn’t have done better myself. There are many specialty feet, but I go old-school as I get best results that way: use a zipper foot, carefully position the needle in the “U” shape, and then keep the edge of the foot exactly on the edge of the fold. She ROCKED IT!And the hem….. without so much as a prompt or suggestion from me, she realized that it’s delightful to align the stripes on the inside and she did it! I’m “one of those people” sometimes, I think the backs and insides need to be just as lovely as the fronts/outsides!
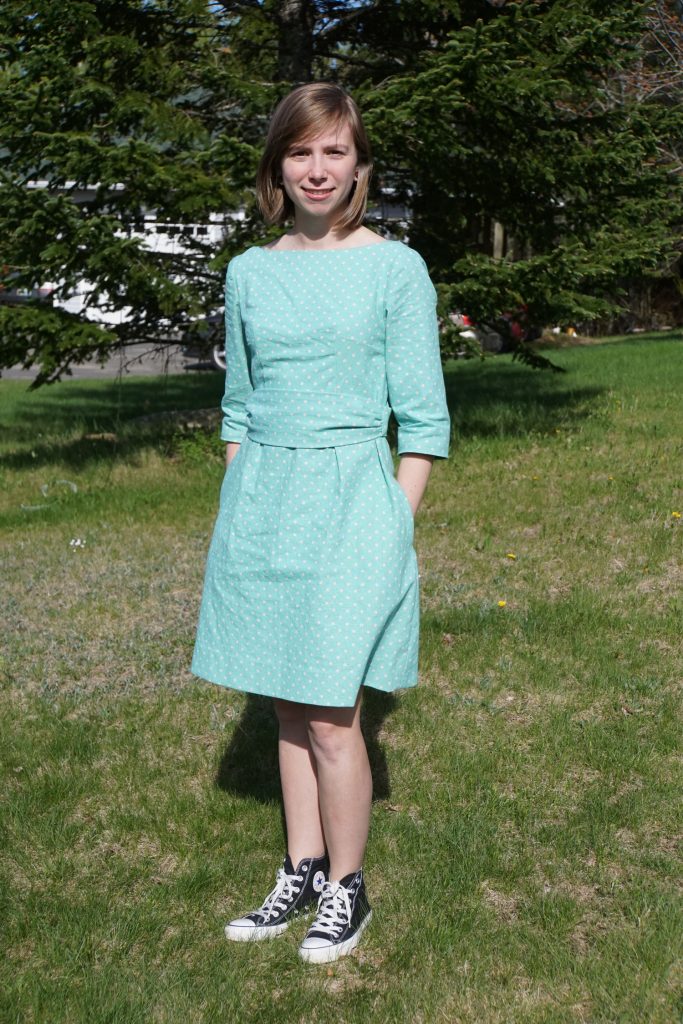
Our sewing garments journey began before graduation, when Ashley said she’d like to make her own dress for graduation. She picked a pattern with (!!!!) fitted bodice, set-in sleeves and an invisible zipper! We sewed in my studio on the Janome 9450 I was using at that time (I’m a Janome Artisan and have been on the loan program for 16 years now!). I’d do the first half of something to show her, then she’d do the second half, including a complete set-in sleeve perfectly done on her own! From the start, she showed an inclination to make my heart go thumpity-thump: do it WELL with care and attention to detail. Here’s Ashley modeling the dress in our yard just before and then at graduation:
Too cute for words!Graduation day 2018Back in May 2018…. The SPLURGE once-in-a-decade gift for combined birthday and college graduation: a Janome M7200. Thanks a bazillion to Dave LaValley at Bittersweet Fabrics in Boscawen, NH, for recommending this machine. I told him my budget, and that I wanted a machine that will do well by Ashley for a decade for garments, home dec, crafts and maybe someday even quilting. He steered me to this one, which I had thought was more than I could afford, because it is such a well made, sturdy and durable machine, AND made it fit our budget! Dave, we’ve got a budding lifelong sewist in the family! If any of you ever get to Vermont Quilt Festival, you MUST go to the awards ceremony. In honor of his mom, who opened the shop 50 or so years ago, he GIVES a small Janome to EVERY first-time-youth entrant in the show!!!!!! The kids get up on stage… I remember one 4-year old–the machine came up above her knees! Everyone goes armed with hankies! THANK YOU DAVE!
Thank you Joshua from bringing Ashley into our family. Thank you Ashley for being you! Thank you Sue for being my co-mother-in-law and raising such awesome girls! And thank you Ashley for letting me share and brag on you!
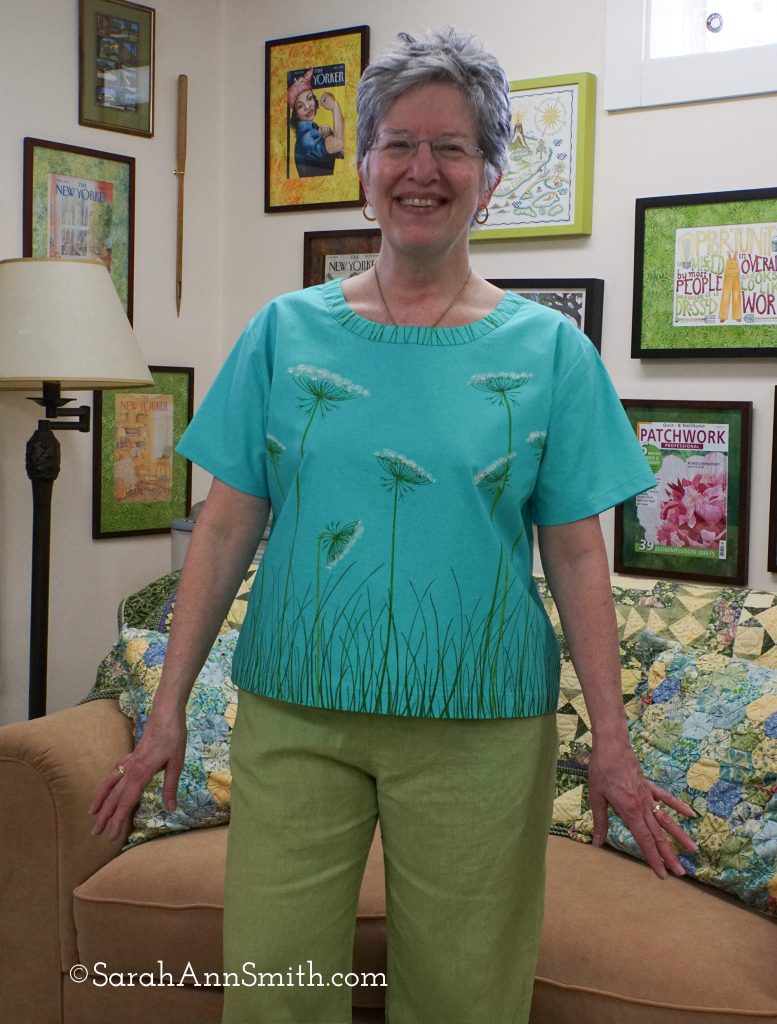
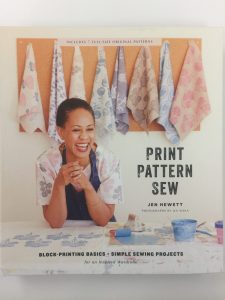
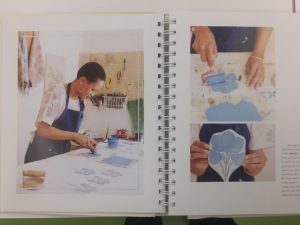
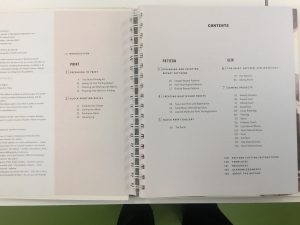
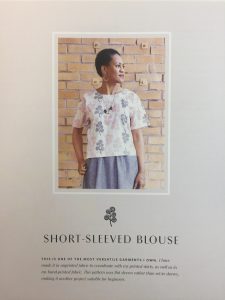
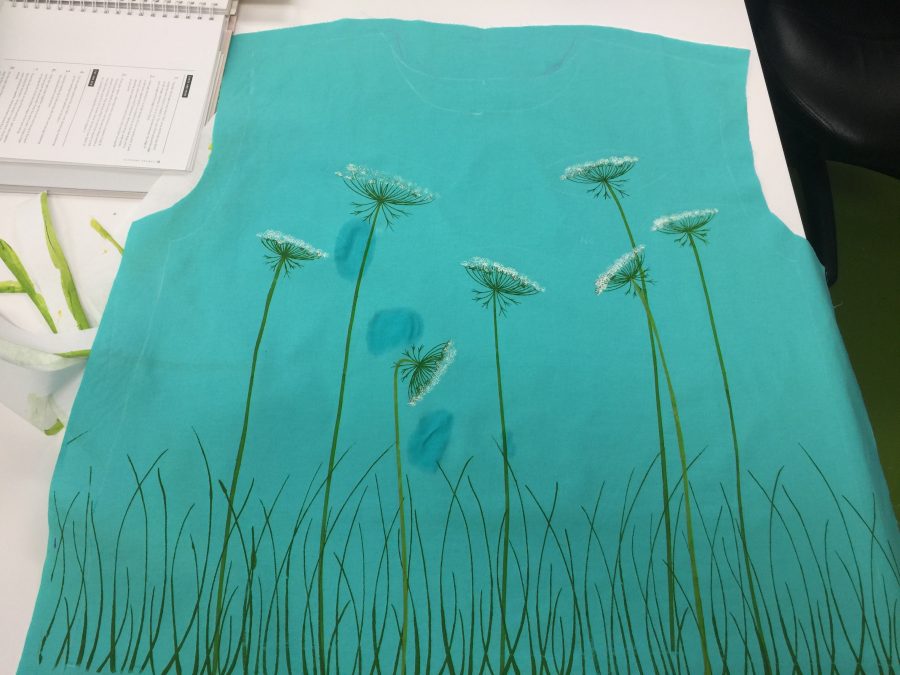
My new Queen Anne’s Lace top. I screen printed my custom designs onto Cotton Couture solids (courtesy of Michael Miller Fabrics), this color is “Luna.” In the summer of 2020 I saw Print Pattern Sew by Jen Hewitt somewhere online and ordered it immediately. It’s FAB! is available many places including Amazon . DO check out Jen’s site, here. Of course it took until April to start playing and until now to post. For the workshop and this post I wanted to use a pattern currently available that is similar to two vintage (circa mid 1980s) patterns that I still make over and over because I love them so much. There are LOTS of great photos and step outs in the book.Table of ContentsSince my favorite patterns are decades out of print, I selected this one for this project in case anyone wants to buy the book for further instruction. It comes with the pattern included.
I’ve been developing some new classes using paint on cloth and I thought as part of being a Michael Miller Brand Ambassador and a Janome Artisan what better thing to do than combine all these things I love in one! Some of you may remember this post from when I did a DIY improvement to my hall sconces; one of the lampshades was Queen Anne’s Lace screen printed on linen. I used the thermofax screens I made for that again for this top.
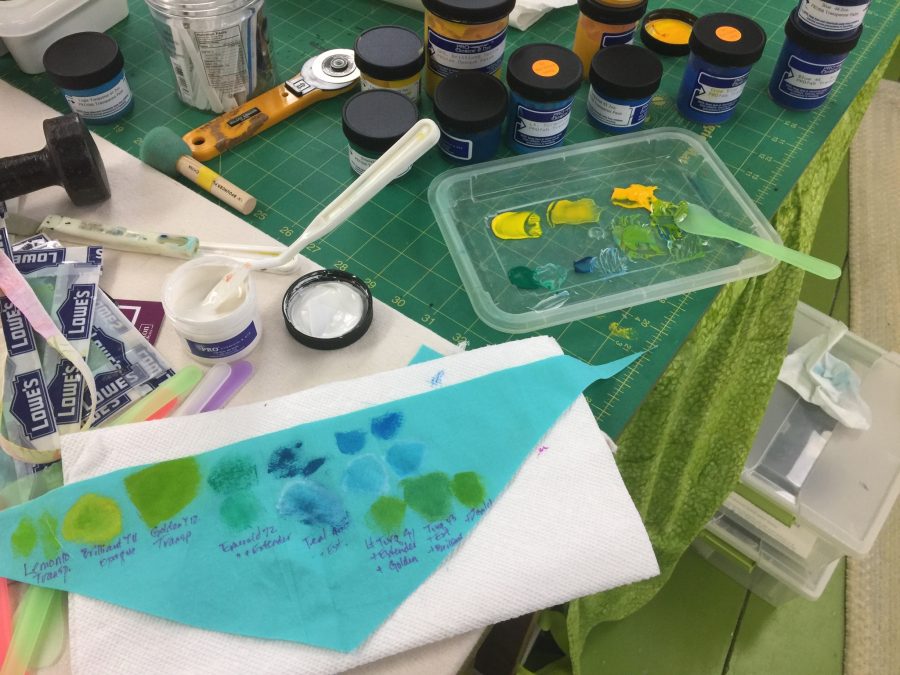
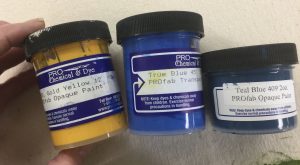
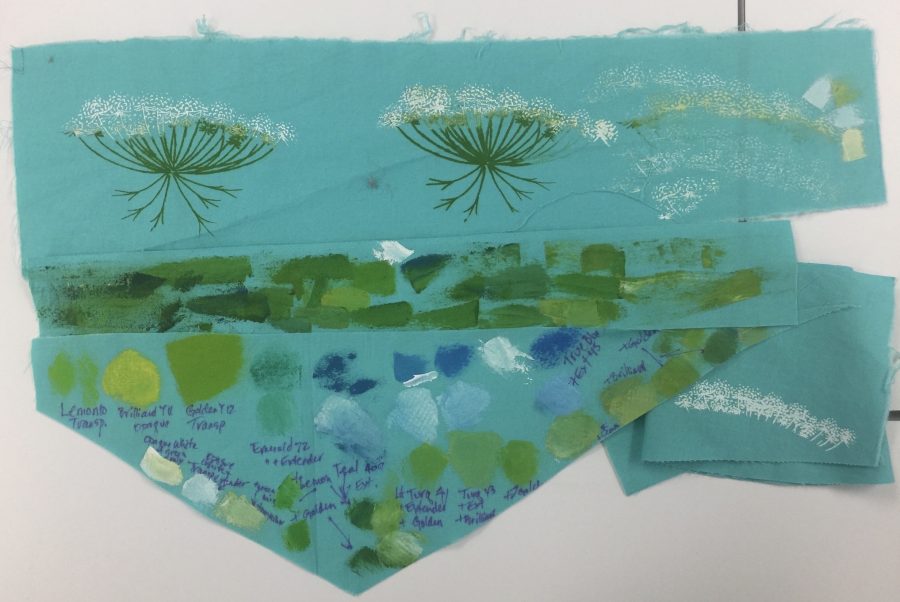
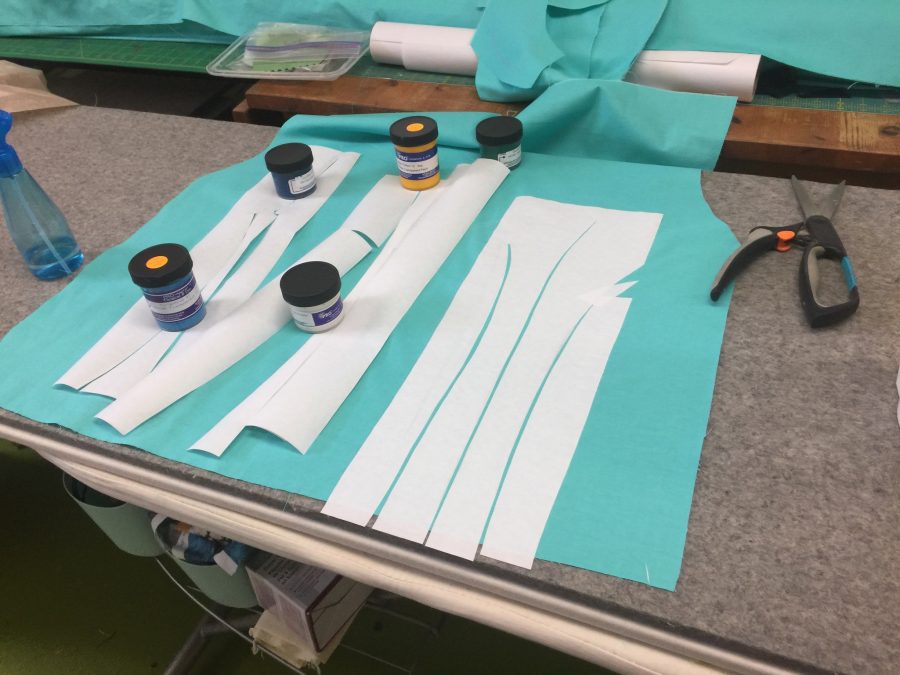
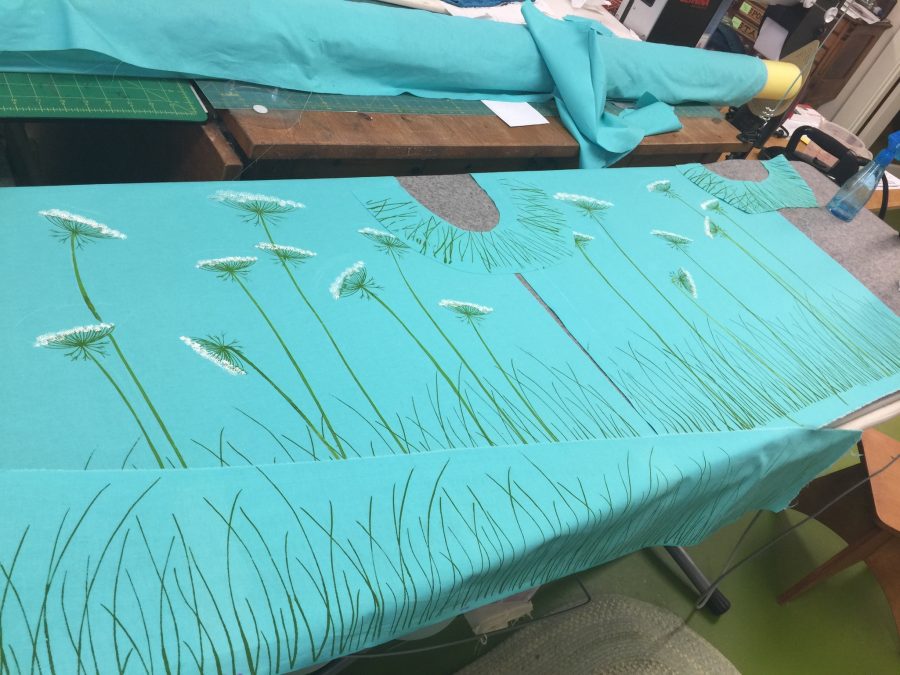
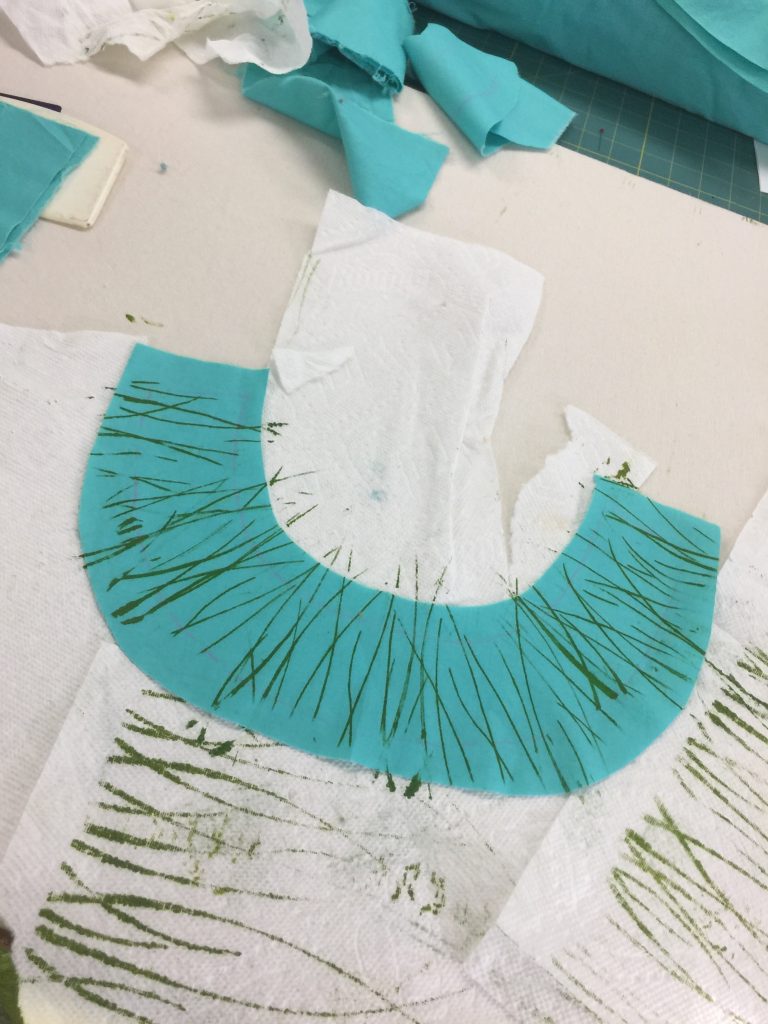
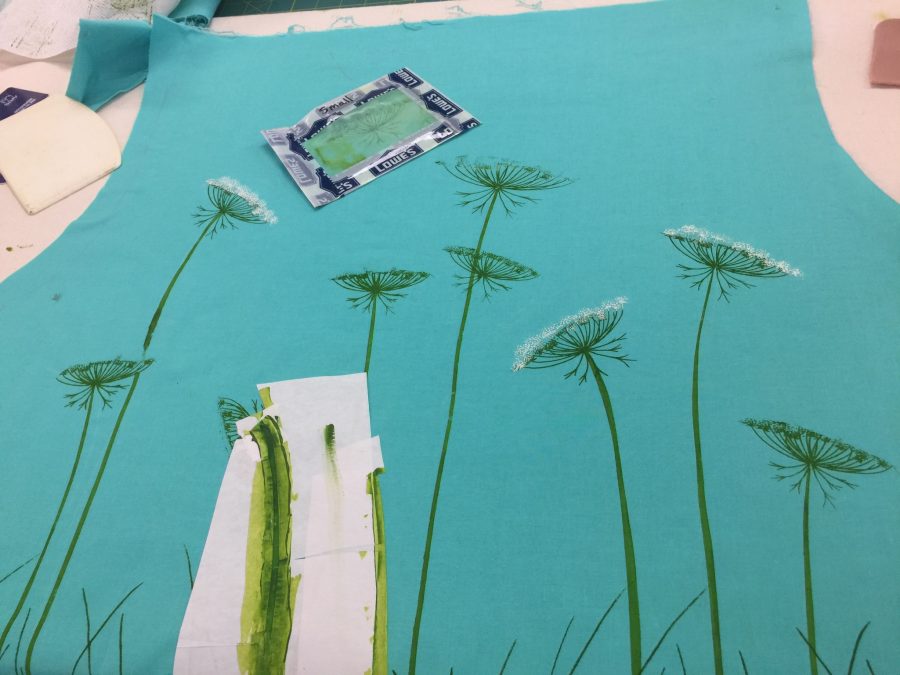
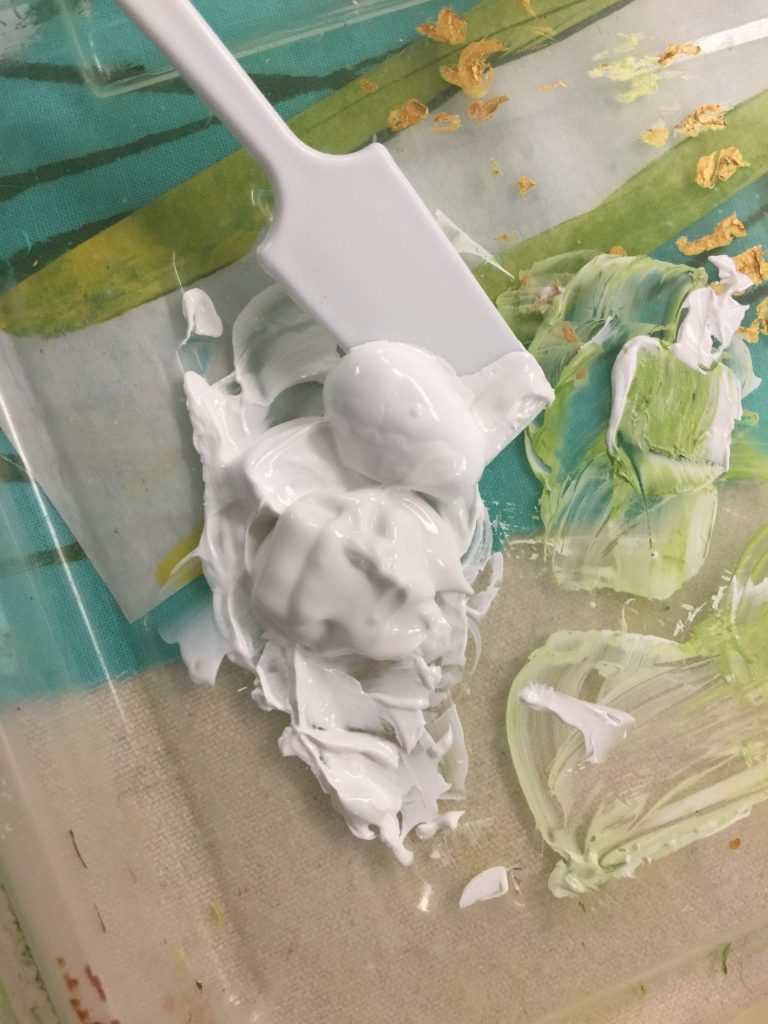
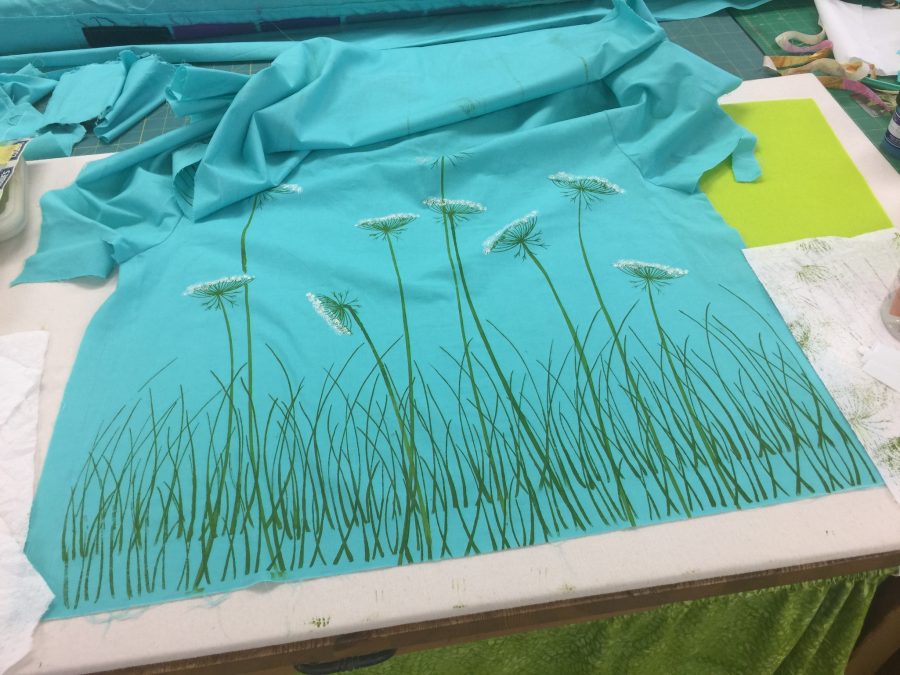
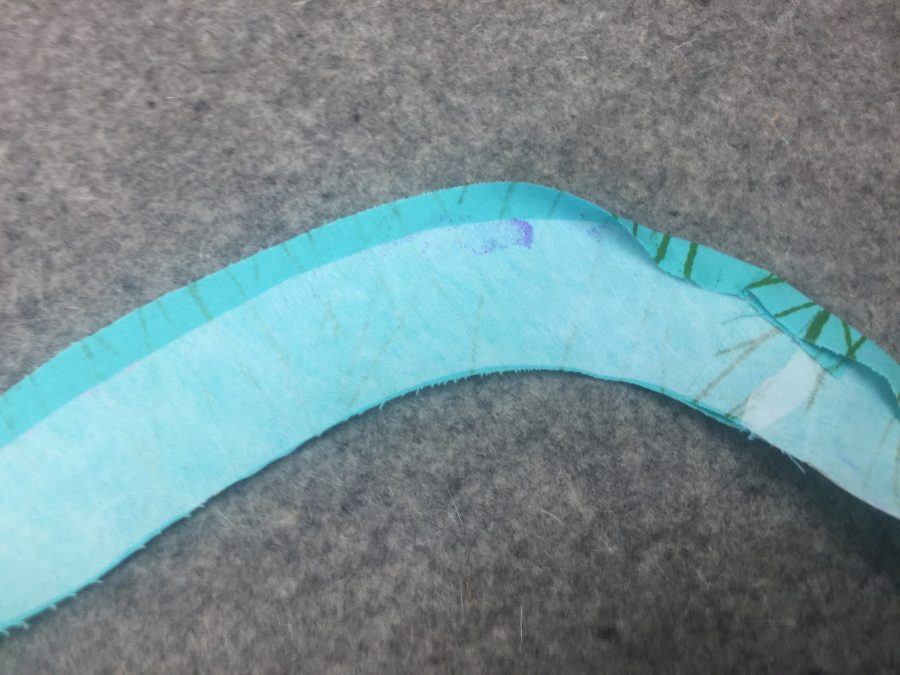
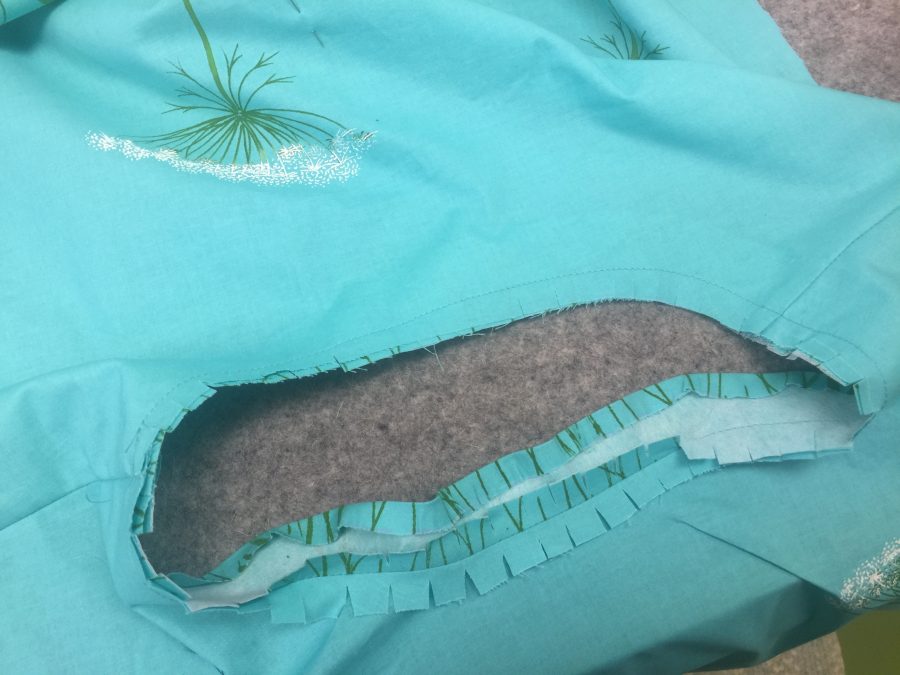
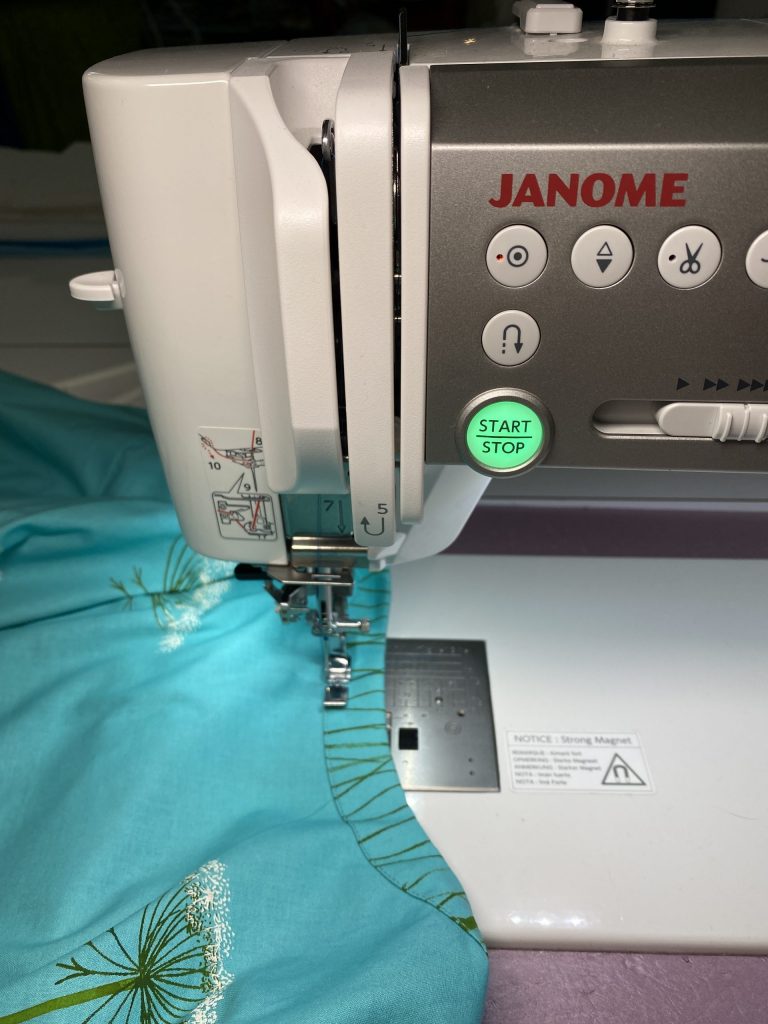
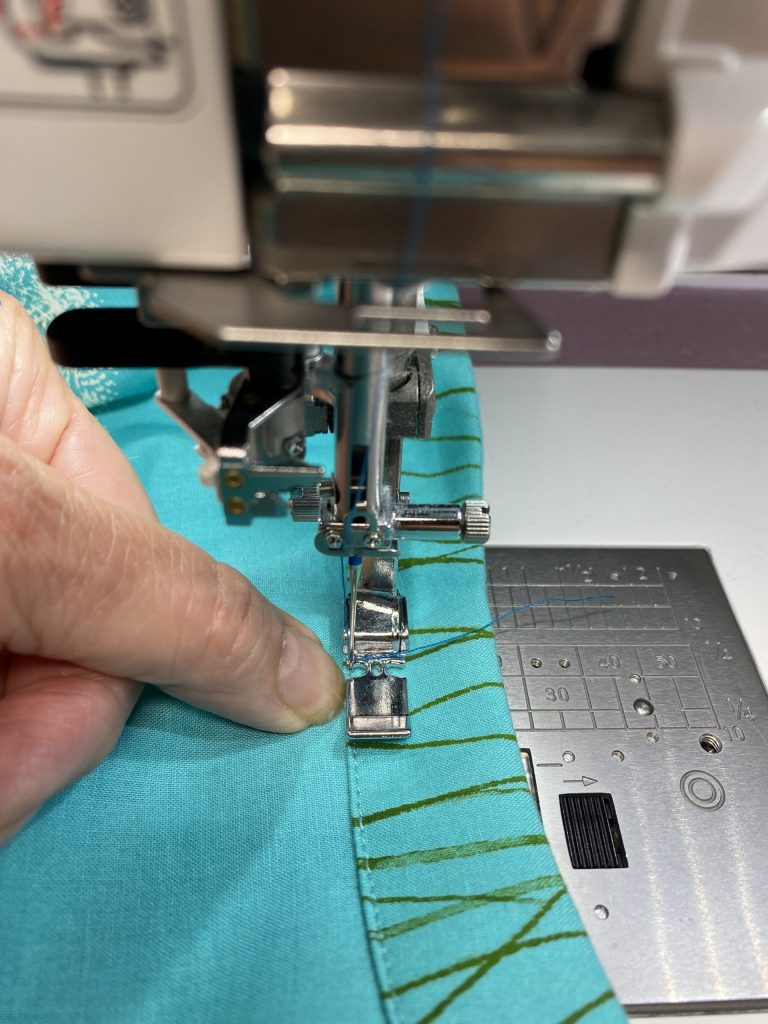
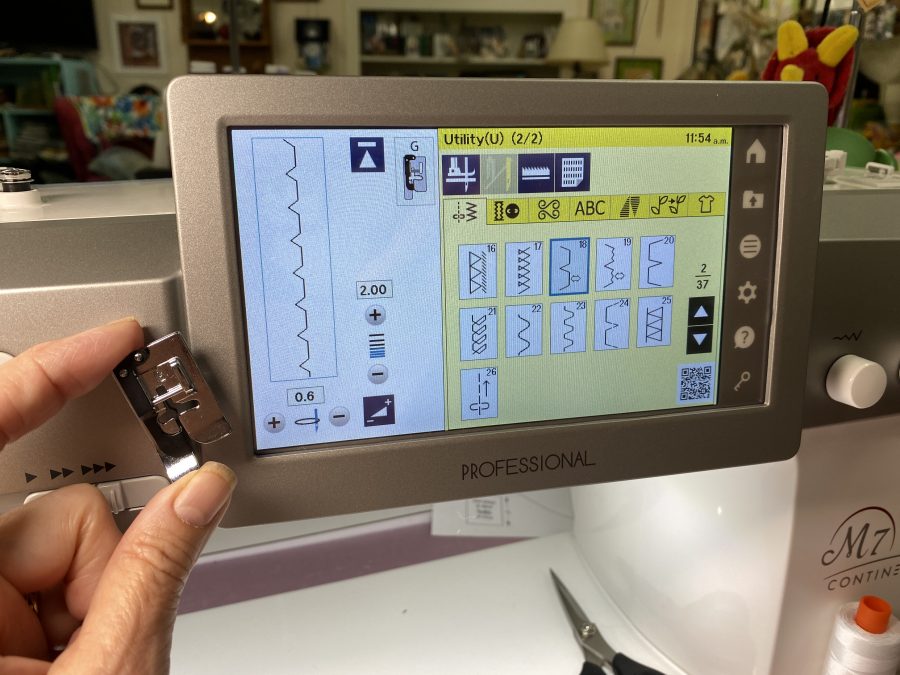
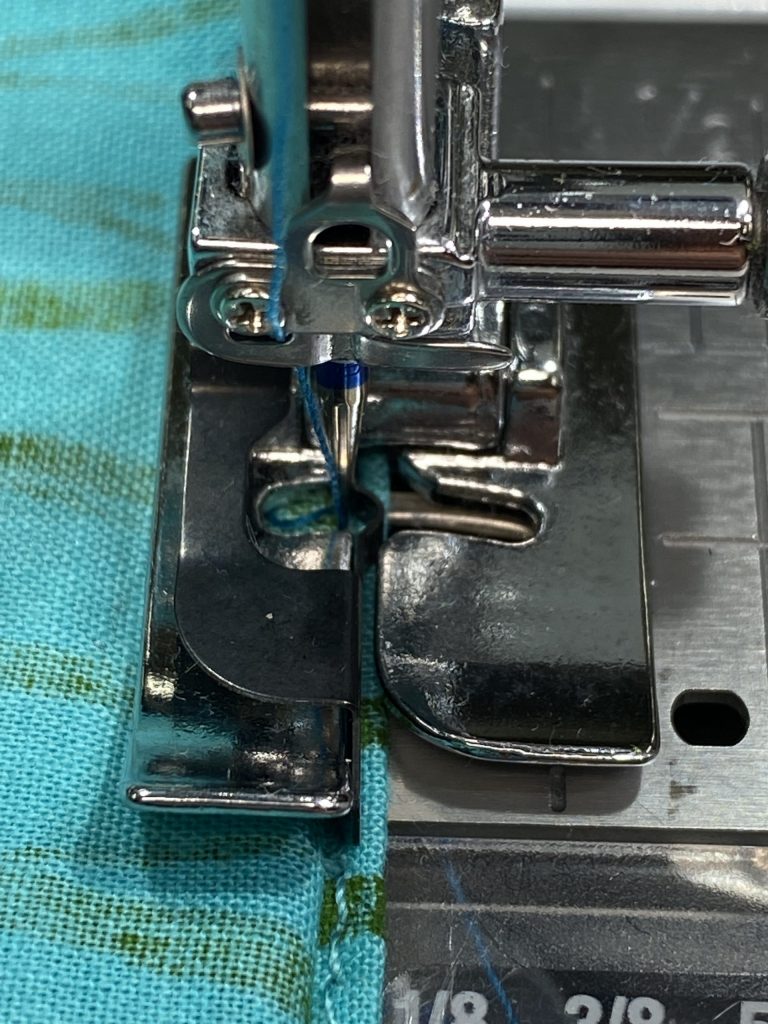
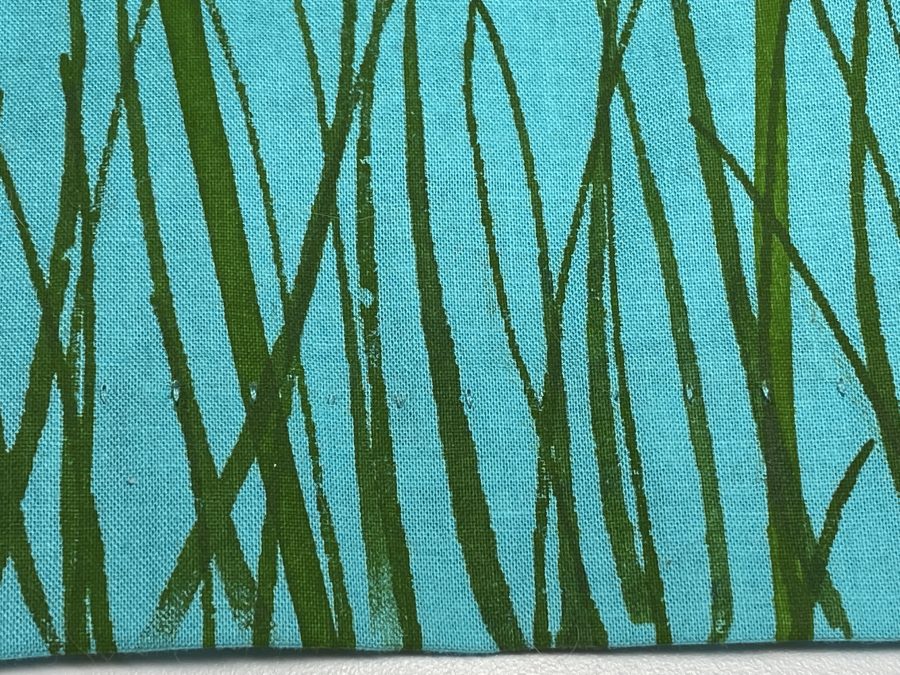
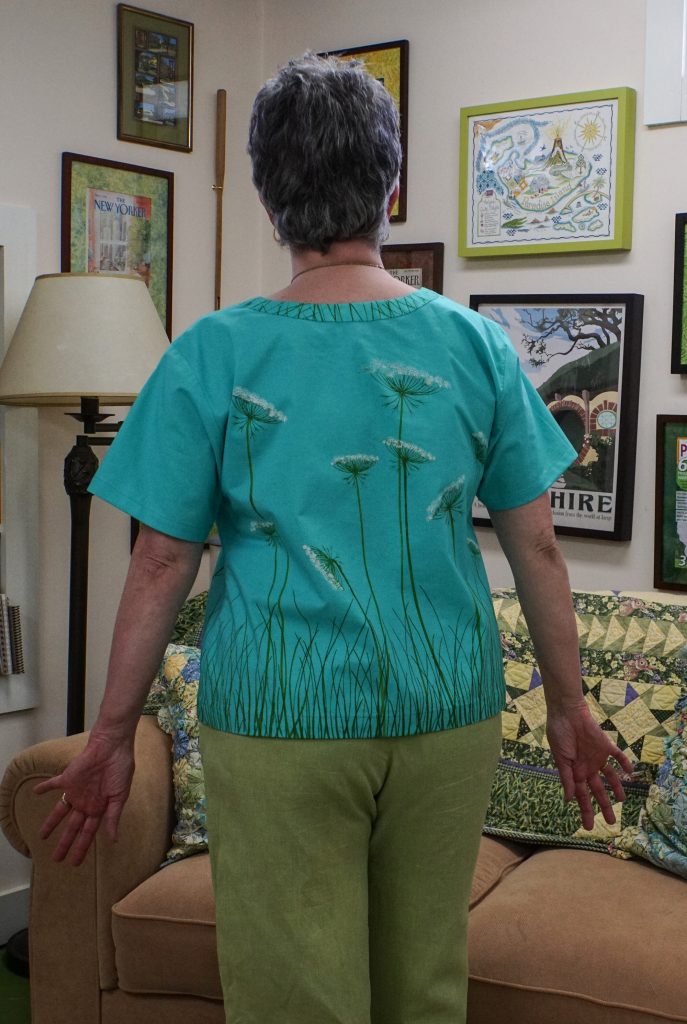
Step one is testing various mixes of color to get just what I wanted. You can see a colorful little plastic “flat not-a-spoon”–that is a make-up paddle, available in packages on Amazon for about $5 for 100 (more than a lifetime supply). They are great for getting into small paint jars. I used to use some Gelato spoons a shop gave me, but the flat paddles are better for scraping off (and not wasting) excess paint). The paints I used are ProFAB Transparent paints from ProChemical and Dye, but most textile paints will work. These have a particularly soft hand to them. Starter kits are a great and cost-effective way to try them out (I have a pair of kits available here; also available in just one or the other types of paint).LABEL what you use, what base paints are in the mix. I can promise you, with three yellows and three blues in 15 minutes I will forget which one is which! I keep these test-scraps for future reference. I used freezer paper to make stencils for the stems. I could have made a thermofax screen, but the mesh is expensive and Freezer Paper is cheap. I used a thermofax screen of grasses I had used for my lampshade for the bottom of the garment. I cut oversized pike for the front, back, and what I thought would be a trim for the sleeves. I later decided to leave the cuff/bottom of the sleeves plain. I used the grass screen to decorate the “facing” piece. Instead of putting the facing on the inside of the garment, I turned it to the outside as a decorative element. Ooops! Sometimes goobers happen. Any unwanted random little smudges of paint are quickly wet and scraped away. Or you just live with them.The printing was done in four steps: 1. Print stems over freezer paper stencil and let dry. I ended up adding another flower later on, so had to add another stem as seen here. 2. Print grass with thermofax screen. Let dry. 3. The thermofax screen for the Queen Anne’s Lace was made from my pen and ink drawing. My lampshades were all green on white linen. For this blouse, I wanted the flowers to be white, so I **carefully** screen printed the stems through the screen (seen above left) and let them dry. 4. Then I went back in with a creamy white (mixed from white with a dab of yellow) to do the flowers. This is the point where you pray you don’t mess up!When mixing light colors, start with a larger amount of the lightest color and put in just the TINY-est touch of color…it takes surprisingly little yellow to turn that glob of white into a softer white or barely-green. After purchasing the multicolored make up paddles, I discovered these square cornered white ones. They are great for applying small amounts of paint carefully through a thermofax screen and for getting into the bottom edges of the ProChem jars.Once I had the front and back printed, I pinned them together and tried them on. The grasses on the bottom looked sparse, wimpy. And I wanted the shirt a bit shorter. So I went back in with the same screen, offsetting it so the same shapes weren’t repeated too closely, and did a second layer higher up. I didn’t care if the printing didn’t follow all the way up what would become the hem on the inside. And that way I could just use the same screen instead of making another one.For the “facing” on the outside, I cut the outer edge of the interfacing very carefully so I could iron the seam allowance over it and create a lovely, smooth outside curve.If you are new to garment making, be SURE to clip your curves well so that the facing turns and lies nice and flat.My favorite way to get a perfect edge stitch is old school: using the zipper foot!Place the edge of the zipper foot against the edge where you want to stitch. In this case I need to use the left side of the foot. Move the needle so that it drops a few threads away from the folded edge. I use a fingernail or thumbnail as an edge guide and don’t sew too quickly. There are indeed “edge feet” for this purpose, but I find that the blades can bend or not be as precise as I want them to be (not to mention visibility isn’t as good as doing it this way). I’d already completed the top when I took this shot, so you can see how perfectly my Janome M7 stitched!For the hem, I decided I would use a blind hem stitch instead of hand-sewing it. The blind hem stitch I selected is for woven cloth, with straight stitches in between the zigs (#18…on the yellow part of the screen you can see that stitch 19 is a blind hem stitch for knits). Over on the white, it shows the settings and to use the G foot which I am holding up It has an “ice skating blade” (i.e. guide) in the middle.You can see the metal guide in the center of the foot. As above, I set up this photo after the garment is complete, which is why you see stitching at th bottom of the image. To prepare for blind hem stitching, you fold the hem up with the raw edge pressed to it will be inside the hem. You then fold back the outside of the garment so that the soon-to-be-hidden part of the hem is barely visible, about 1/8″. The body of the garment folds away to the left. The straight stitching on the hem is done with the needle in the curvy part of the “blade” where it stitches on the inside of the hem. The flat part of the blade snugs up against the folded back fabric, and the “Zig” part of the stitch takes a little nibble of the outside of the garment. My thread matched the Luna Cotton Couture perfectly. It is challenging to see those tiny hem stitches on the right side of the garment.Back viewSide view–I love how the design goes all the way around. I hope you’ve enjoyed this mini tutorial! Thanks again to Janome for their 16+ years of sponsorship and to Michael Miller for having me as a Brand Ambassador this year!
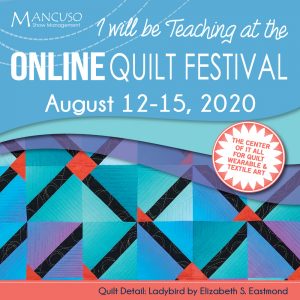
I’m thrilled to share that I will be teaching online again in mid August, and for the first time ever you can take my most popular class, Collage the Garden, LIVE ONLINE! Sign ups are open NOW and are here. One of the best things is you will be home, so you can get whatever it is you wish you had brought to class, because you are at home and sewing on your machine!
I’ll be offering: Wednesday, August 12, 2020: Collage the Garden: From Photo to Flower (6 hours) from 10-4 Eastern daylight (there will be a lunch break) Thursday, August 13, 2020: Mastering Metallics (3 hours) from 2-5 Eastern daylight. Kit is optional. Saturday, August 15, 2020: Easy-Peasy Inside-Out Bags and spin off projects from 2-5 Eastern daylight.
You can find complete class descriptions and PDF supply lists on my Workshops page (classes are listed in alphabetical order). When available, there are also hotlines to blogposts so you can see previous student work. If you have ANY questions, please don’t hesitate to write to me! I’ve done a recap of each of the workshops below as well.
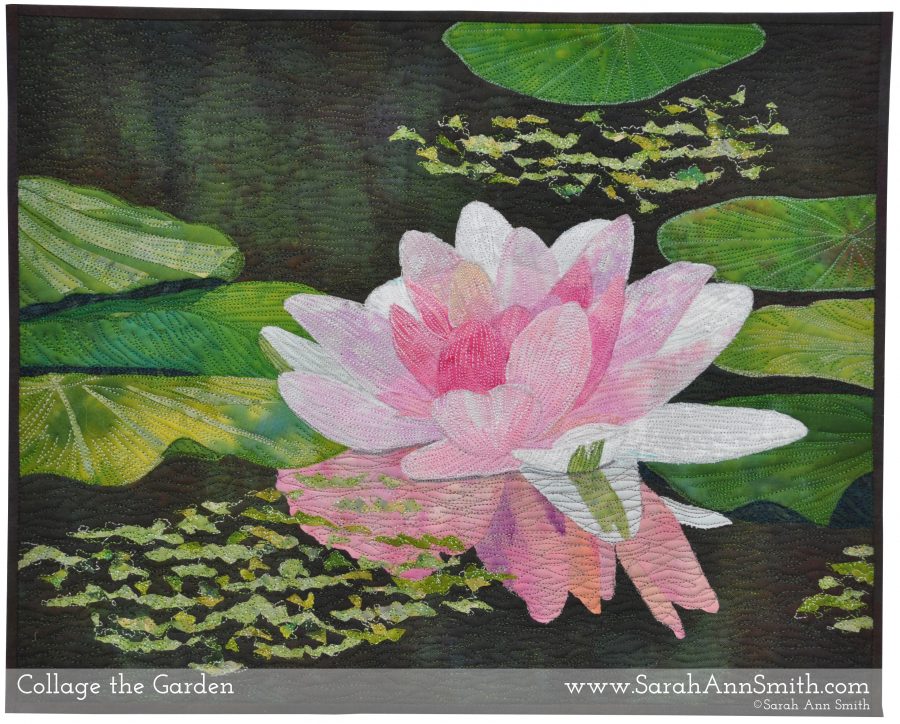
The two images are this orange lily which grows wild along the roadsides in Maine this time of year and the following small quilt.Pink water lily
Collage the Garden is all about my process. I teach you how to interpret a photo in class, then you will know how to use YOUR photos to create your own original artwork. We talk about selecting a good image, selecting fabric, fusing, tricks for working with cloth and, time permitting, introduce how to quilt (this is a who second follow-on workshop).
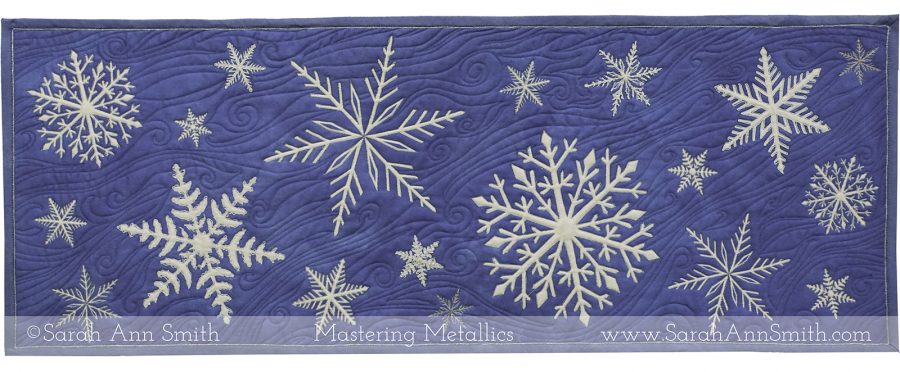
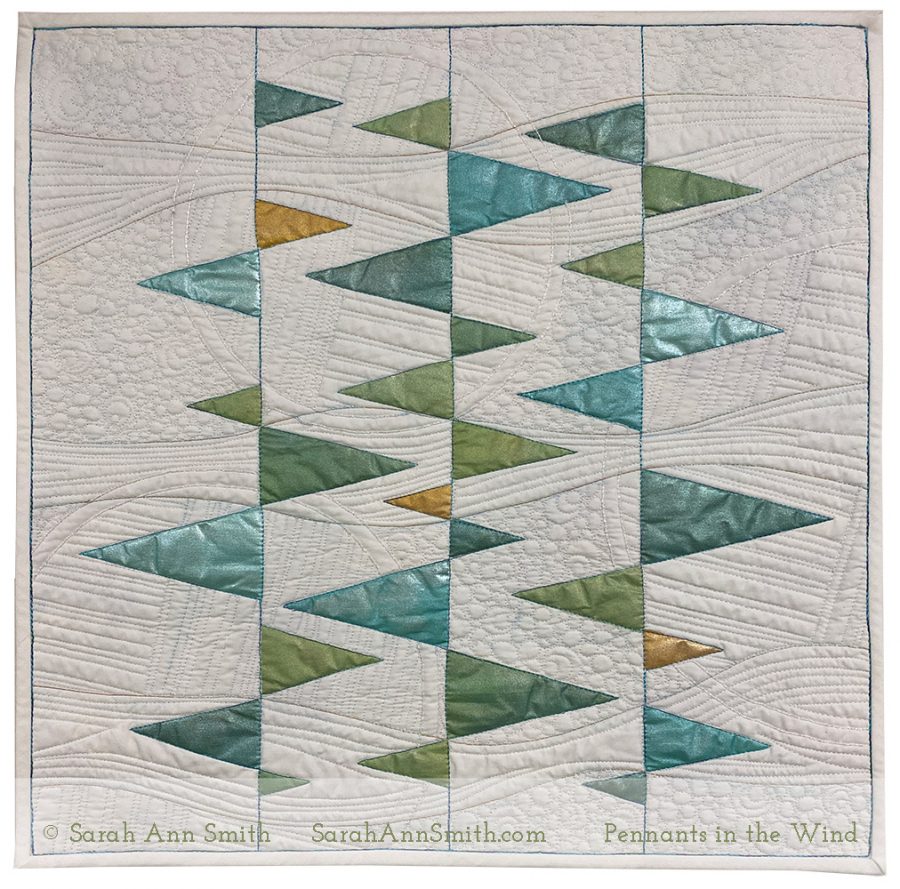
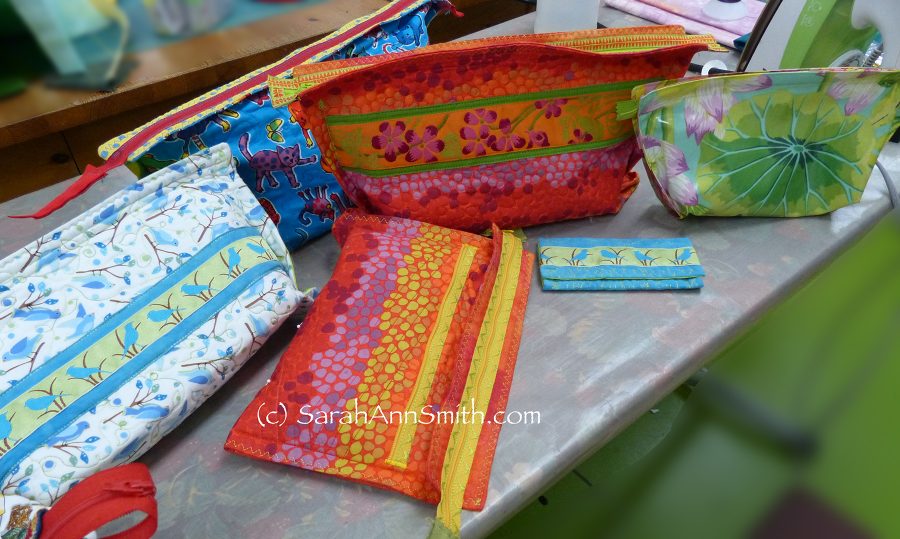
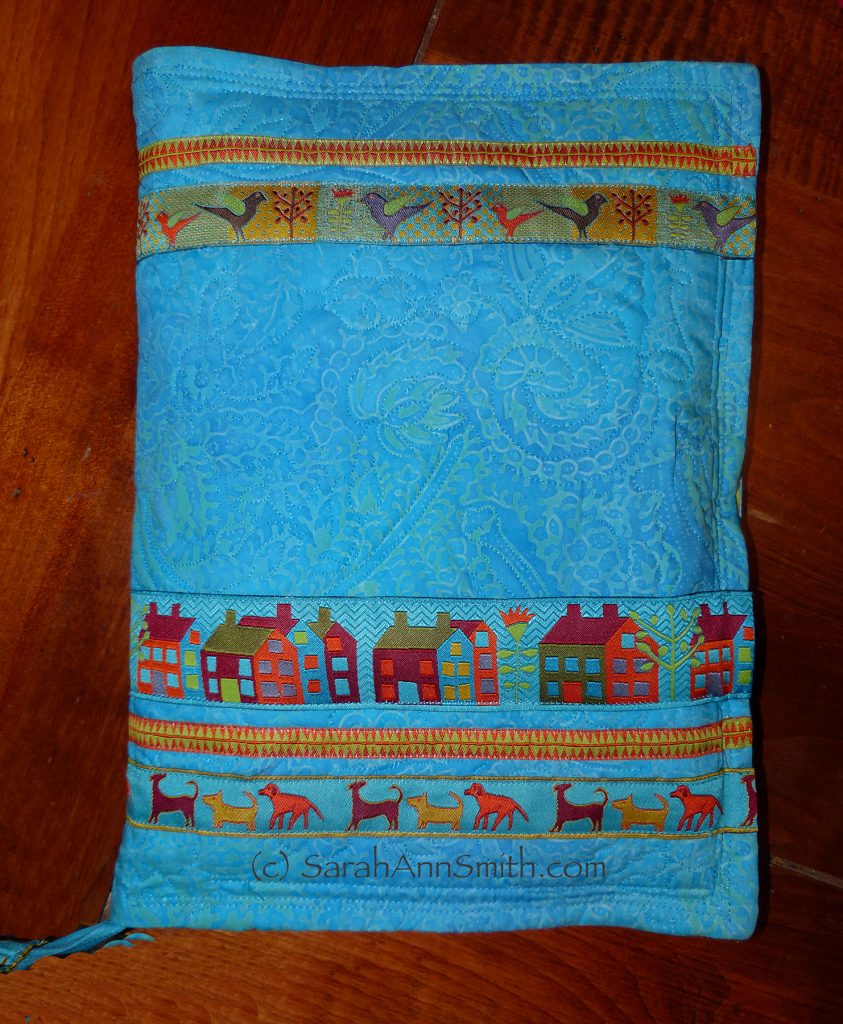
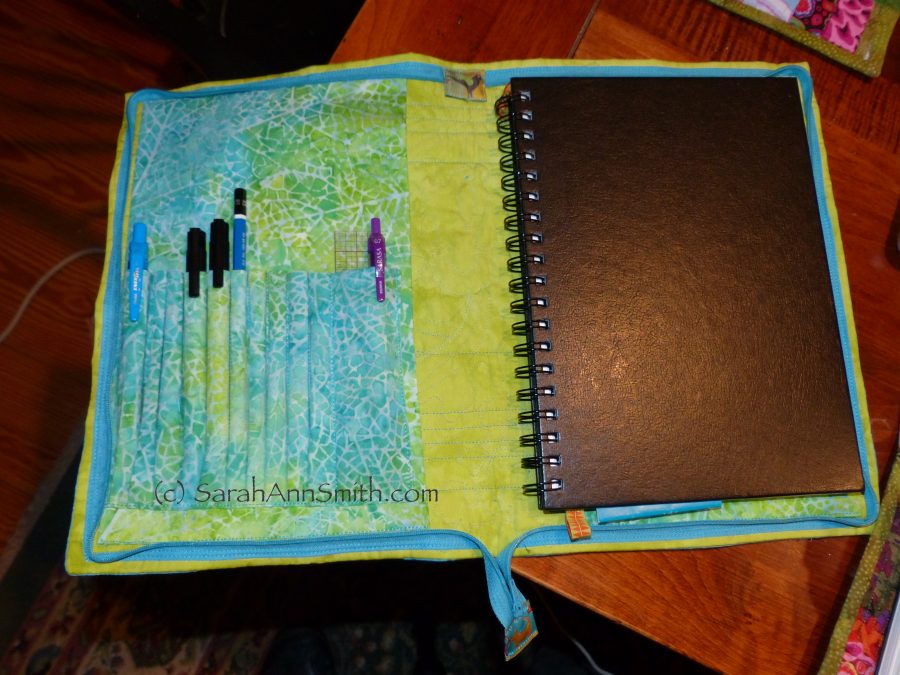
Mastering Metallics half day workshop will teach students to use metallic in both the needle and the bobbin. The workshop will debut at the Mancuso Online QuiltFest in August!, and is the half-day version of my Tame Fussy Fiddly Threads class. A kit with my original snowflake fabric, a 12×42 strip to make a table runner (custom printed at Spoonflower) and 2/3 yard coordinating blue for backing and binding is available when you sign up–only 15 kits available. BUT you don’t have to do this exact project if you prefer to do your own thing. (PS–if I have leftover kits they will be for sale on my website after August 15, or I’m making placemats to match my table runner!)Pennants in the wind is a new class sample. You can paint as I did, piece a similar sample (I’m thinking of doing a landscape…same idea, rotate 90 degrees, with one line of trees), or use solid or semi-solid and draw shapes and quilting zones on your cloth to practice and learn.Easy Peasy Inside Out bags is one of my favorite classes to teach…in a half day in person class students go home with a nearly-finished bag or even one or two finished bags depending on their experience. These are SO FAST and easy, and there are a ton of variations.I’ve used this notebook cover for years and just love it!You can customize many ways, and you’ll LOVE my rick for perfect pockets for pens and pencils. I’m going to make myself a double-pointed knitting needle holder using this process between now and the workshop. You can adapt the techniques to all sorts of goodies!
I’d love to have you in one of my workshops at the Mancuso Online Quiltfest here. If something you want to take isn’t offered, let me know what and I’d be happy to schedule an online class offered directly from me later in the year.
When I arrived in Maine 16 years ago today, to move into our house in Camden (we moved from there to neighboring hope in 2011), I did not know that after 46 years of wandering the globe and living on four continents, I had finally found what I always wanted: HOME!
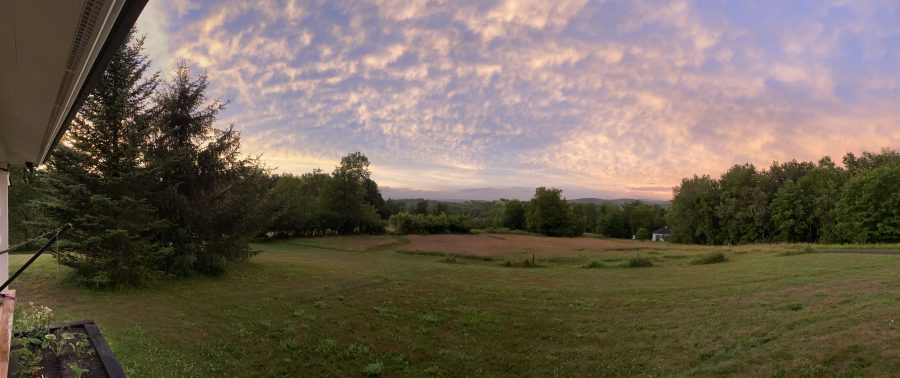
After the storm, just a couple of days ago, from our front porch
Maine has become my muse and my soul’s home. Within two years, I made this quilt which flowed out of me effortlessly. In such a short time, I had become Maine’s and Maine had become my heart’s true home.
A Sense of Place: The Wall
When I grew up on the West Coast, everyone said that the West Coast was friendly, open, welcoming, made up of newcomers. Yet as a 6 year old arriving from Argentina, it wasn’t. The leader of the Brownie troupe wouldn’t let me join because we hadn’t lived in California long enough. Children told me I wasn’t a Californian and never would be because I wasn’t born there. Quests for better schooling let my mother to move me from school to school: Bayside, Central, Grenada, Del Mar and finally San Domenico all in the time from January of First grade to the start of 7th grade. I didn’t belong and never did. From College until age 46, I moved. And moved. And moved. All work, but still. No place to feel HOME.
Yet when I moved to Maine, where there was supposedly the vaunted “Yankee reserve,” I was welcomed with open arms even though I am indeed “from away.” Long time Mainers and others from away welcomed me equally. Quilters welcomed me and gave me a home. I began my quilt art and teaching career here. And this year, I was honored, humbled and thrilled to learn that one of my quilts will hang at the Bicentennial Exhibit to celebrate Maine’s 200th anniversary of Statehood at the Maine State Museum in August as one of Maine’s contemporary quilts. Everything has, of course, been delayed by COVID, but there will also be a book and I’m in it, with thanks to Laurie LaBar, head of Textiles (and other things) at the Museum. Did you know where I live was part of two states (sort of)? The District Of Maine was part of the Massachusetts Bay Colony when the colonies became the first 13 states in the Union in 1776. In 1820, as part of the Missouri Compromise, Maine became a separate state.
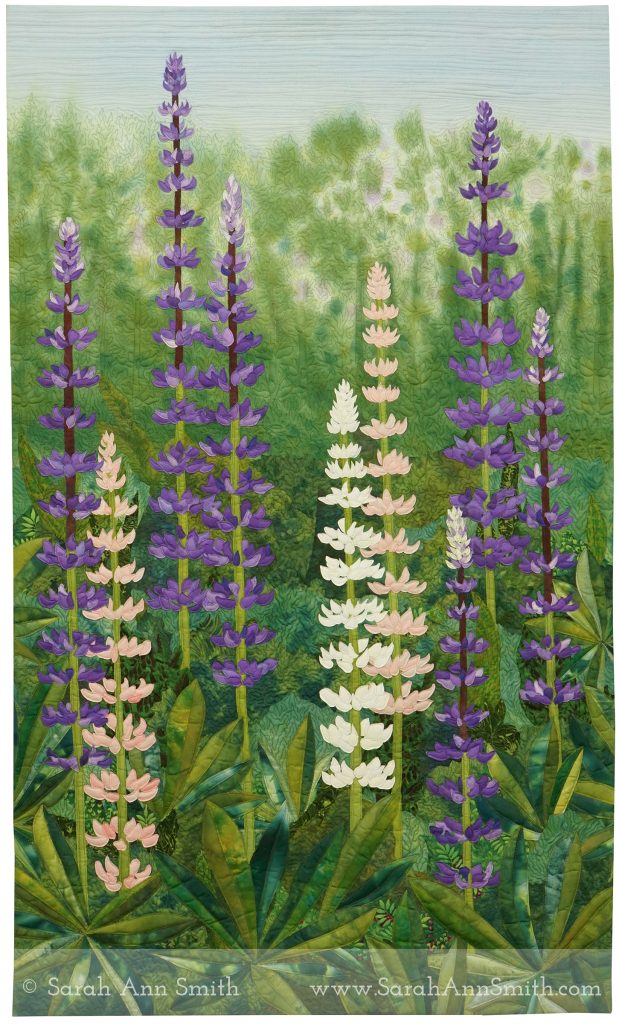
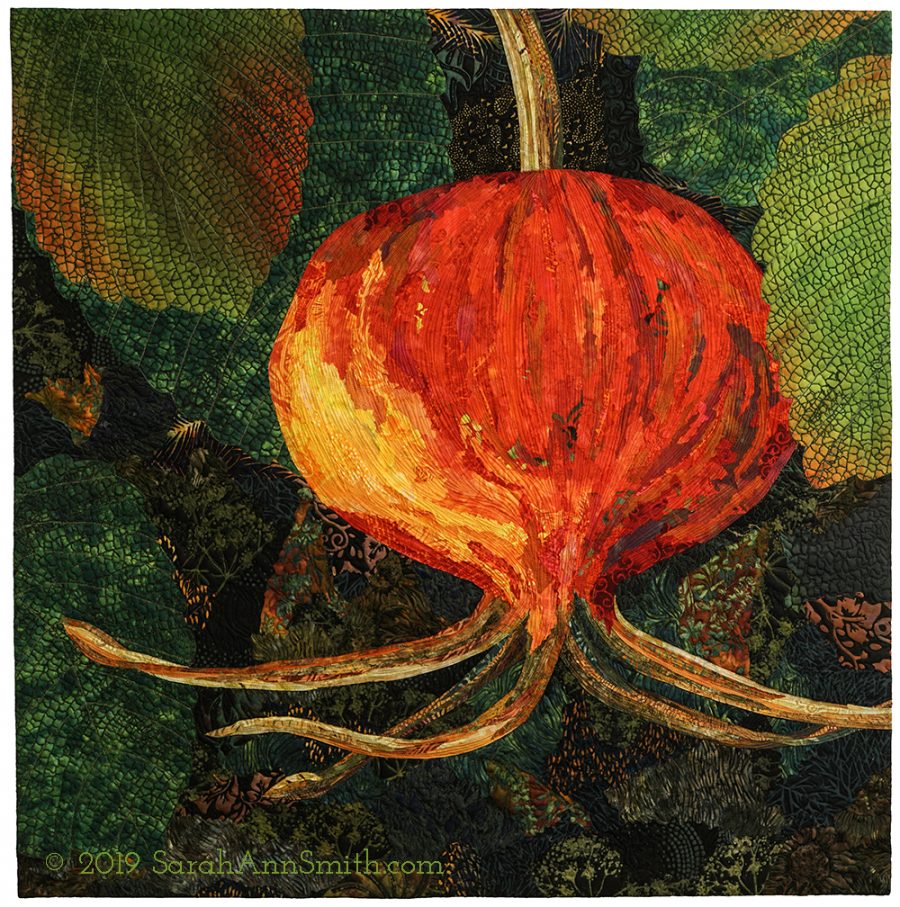
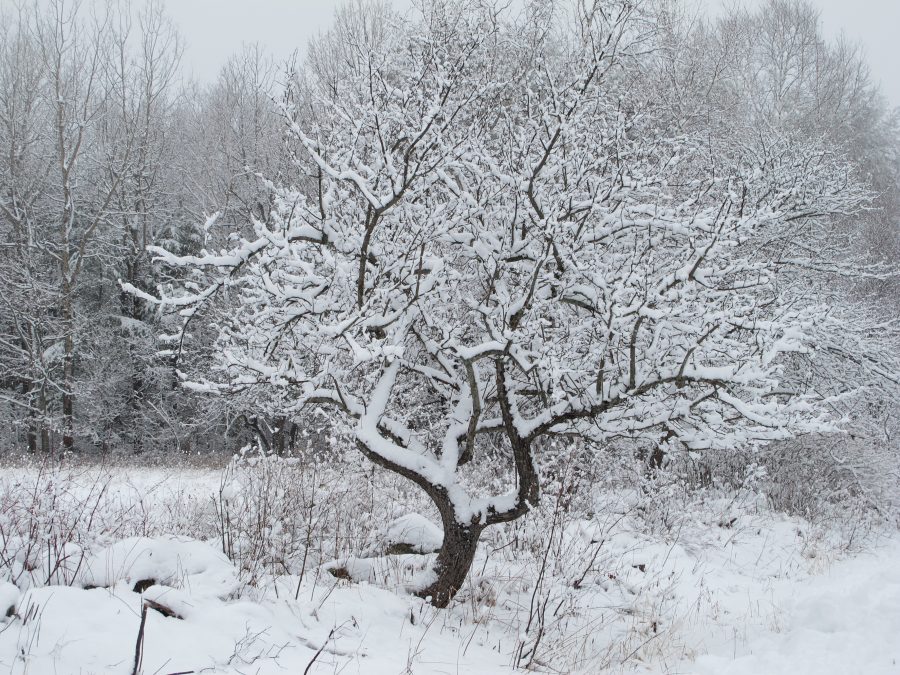
Over the past few years I have been making work inspired by the world around me, including Lupines.Rose Hip, by Sarah Ann Smith (c) 2019. 36″ square. One of my favorite quilts, in part because it is of my beloved Maine, but also because I’ve been able to meld my personal hand dyes, a hand dye by Lisa Walton, fabrics printed and over-painted by me, to create a cohesive image.My beloved apple tree, on the lower part of our driveway. This WILL become a quilt! A big one.
My goal is to make an exhibit’s worth of quilts celebrating the world around me. Guess I’d better stop blogging and get back to the studio. I am forever grateful to be here with my husband, two sons Joshua and Eli, my third-child-by-another-mother DIL Ashley, and all the various critters past and present and future that share our lives.
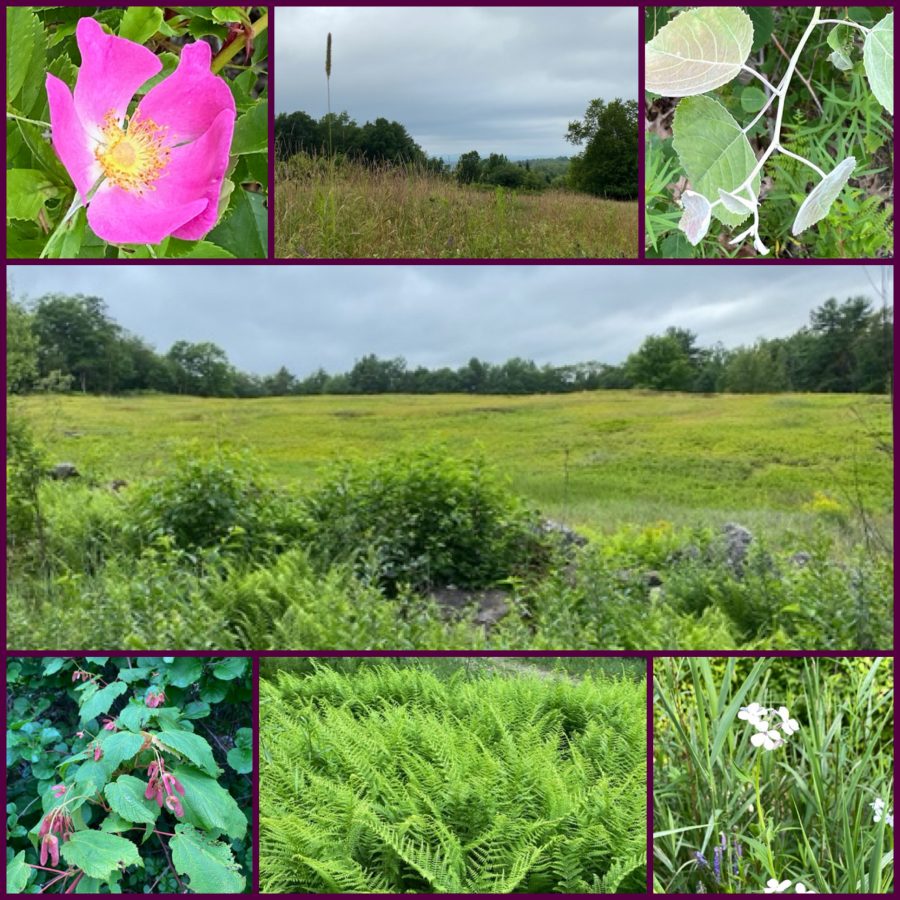
From dog walkies this week. Always the world changes and is the same. It inspires me, it fills me with joy and awe and hope.
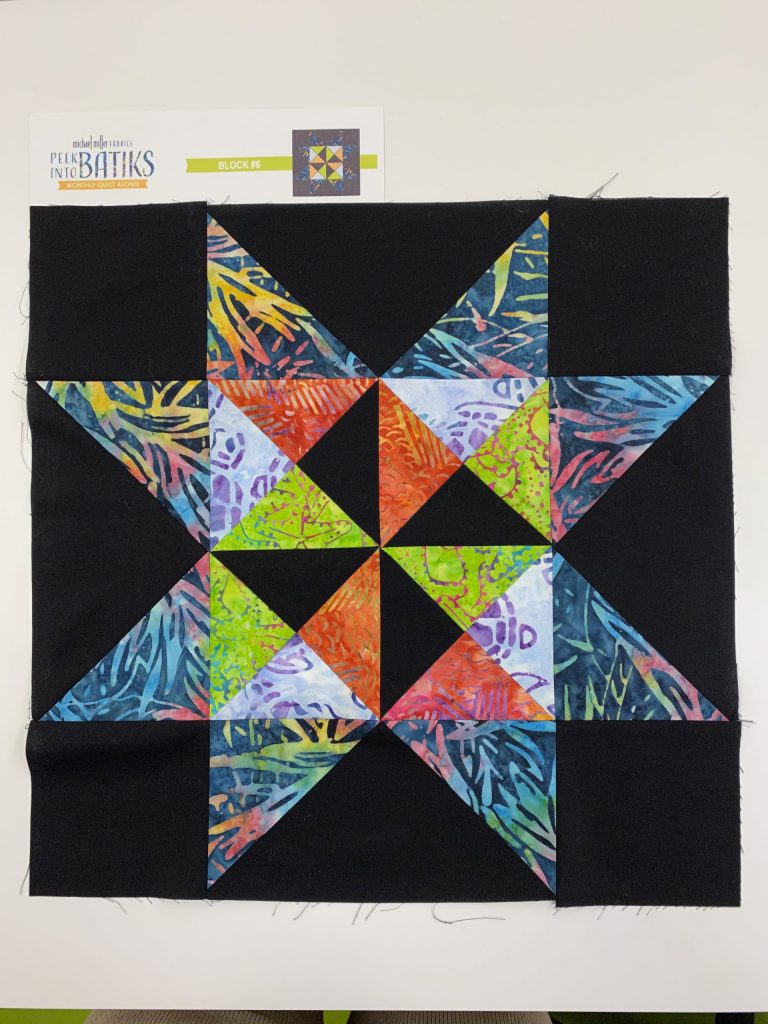
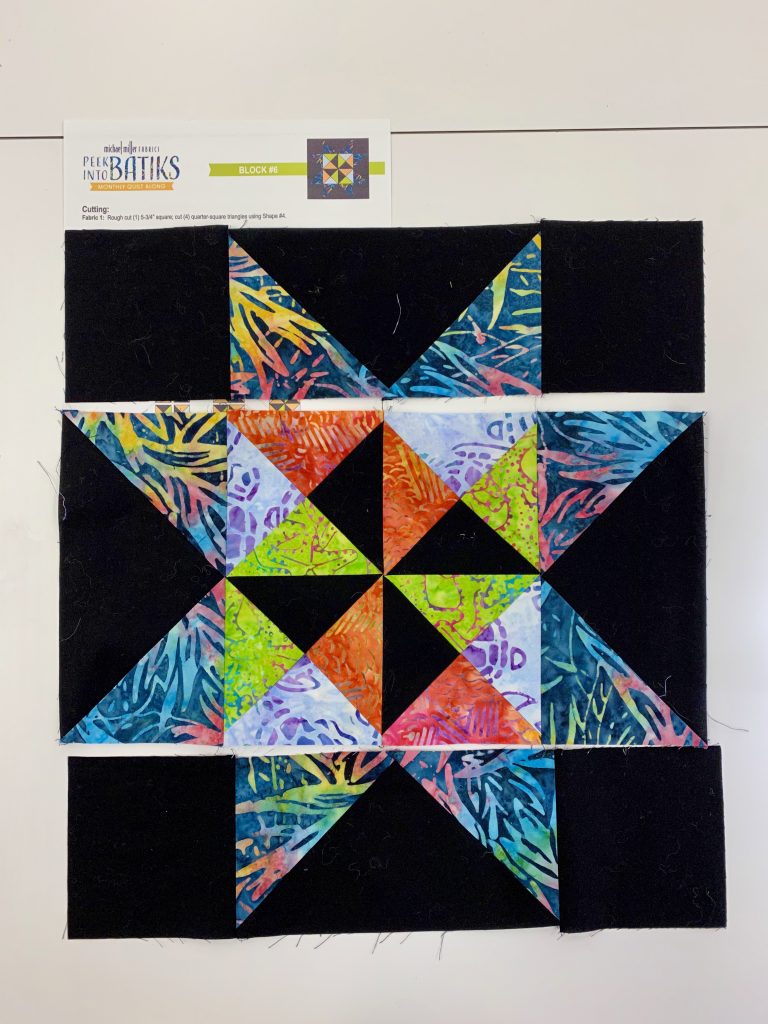
Earlier in the year I shared that Michael Miller Fabrics is doing a Block of the Month called Peek Into Batiks. It all began here. That post has links to each month as the new block goes live. Well, June is my turn! I’ve got still photos and (gasp) a video! And, drum roll here is the link to the JUNE Pattern and instructions.
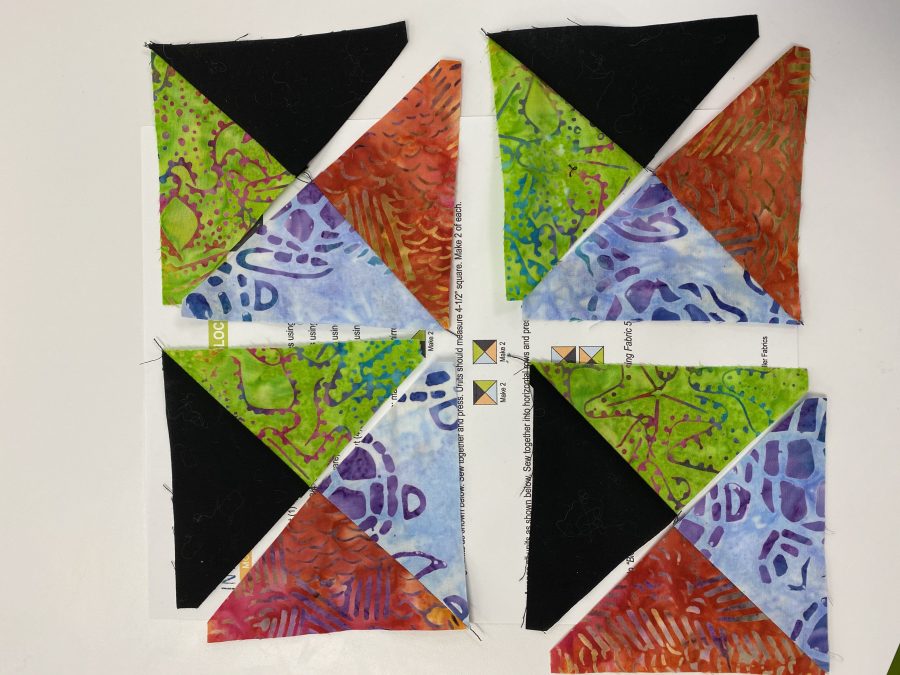
Here’s the finished block! Read on for step by step instructions.
First, of course, you need to cut your fabrics. I used a hybrid method using the AccuQuiltGo! for everything except the large black triangles on the border. First, let me show you how fast it went cutting the components on my AccuQuiltGO! in this video. The video isn’t perfect–I’m improving in my editing skills. I need to mark what is within camera view though! Next video will be even better…I’m learning! When I was playing, it stopped a couple times so just click play again to continue–keep an eye on where the progress bar is. Dunno what’s up with that…another learning curve LOL!
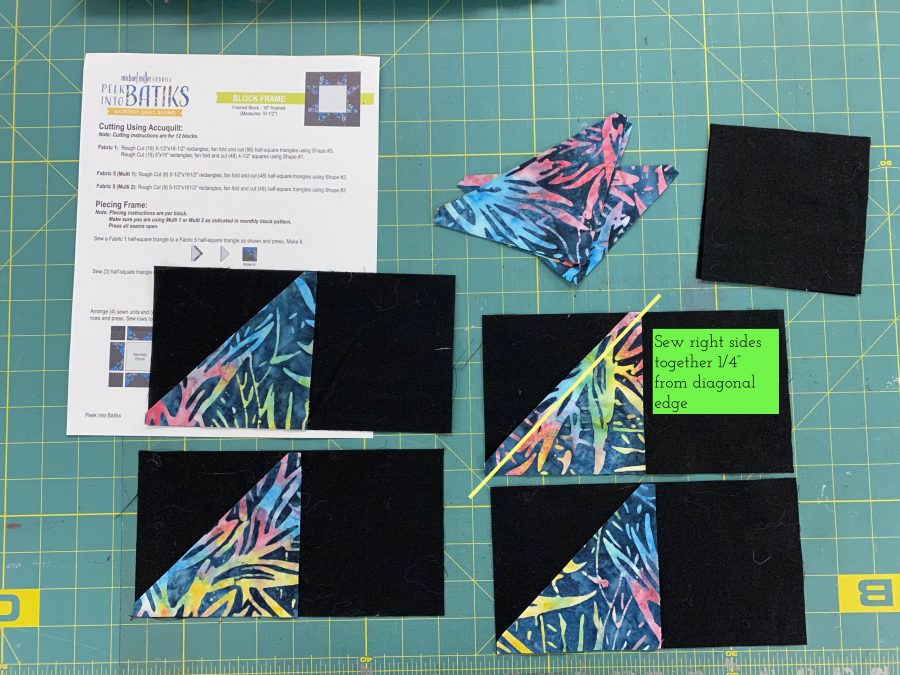
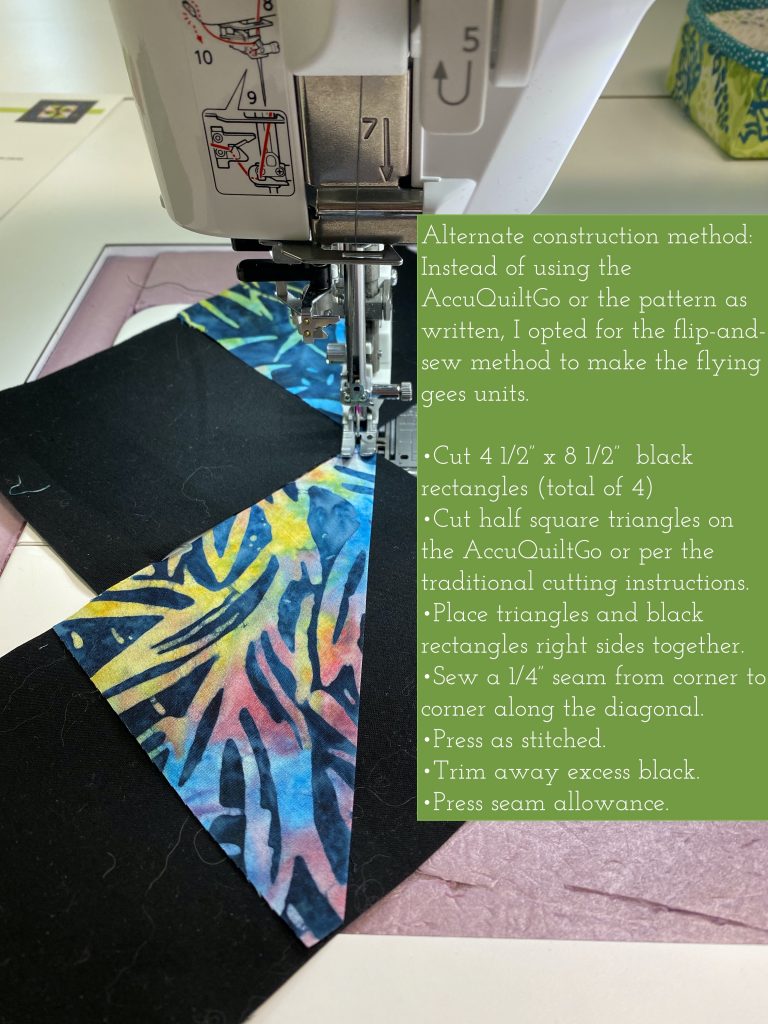
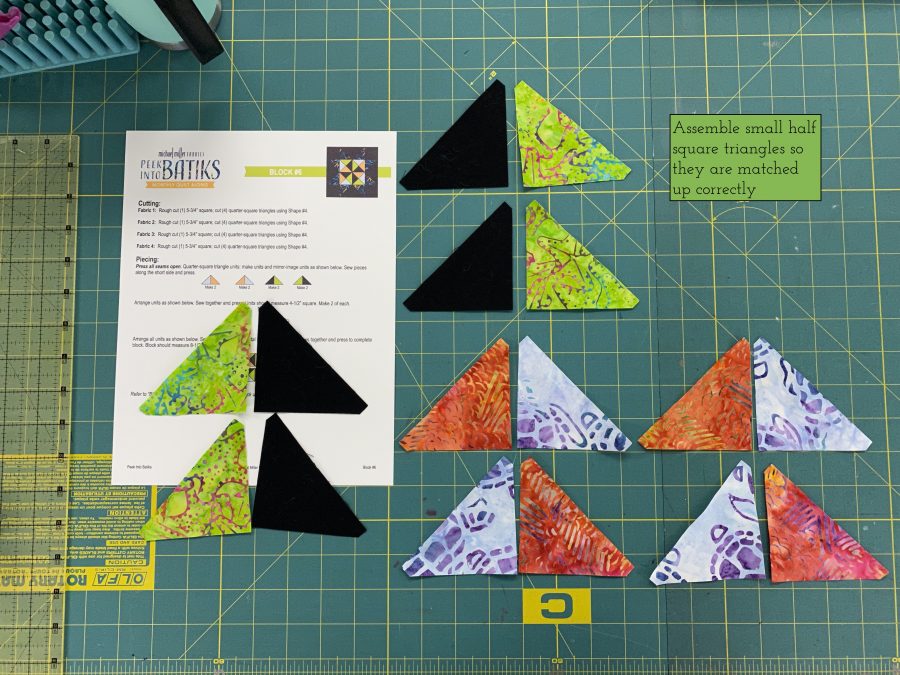
Wasn’t that amazing? Wait until you see the Winding Ways quilt I have in progress for later this year! For now, let’s stick to Peek Into Batiks! This step is where I veer from the instructions (of course, it’s me… who follows instructions EVER completely? Not me…) In the interest of fewer seams, I chose to use the flip-and-sew method for the Flying Geese Units.
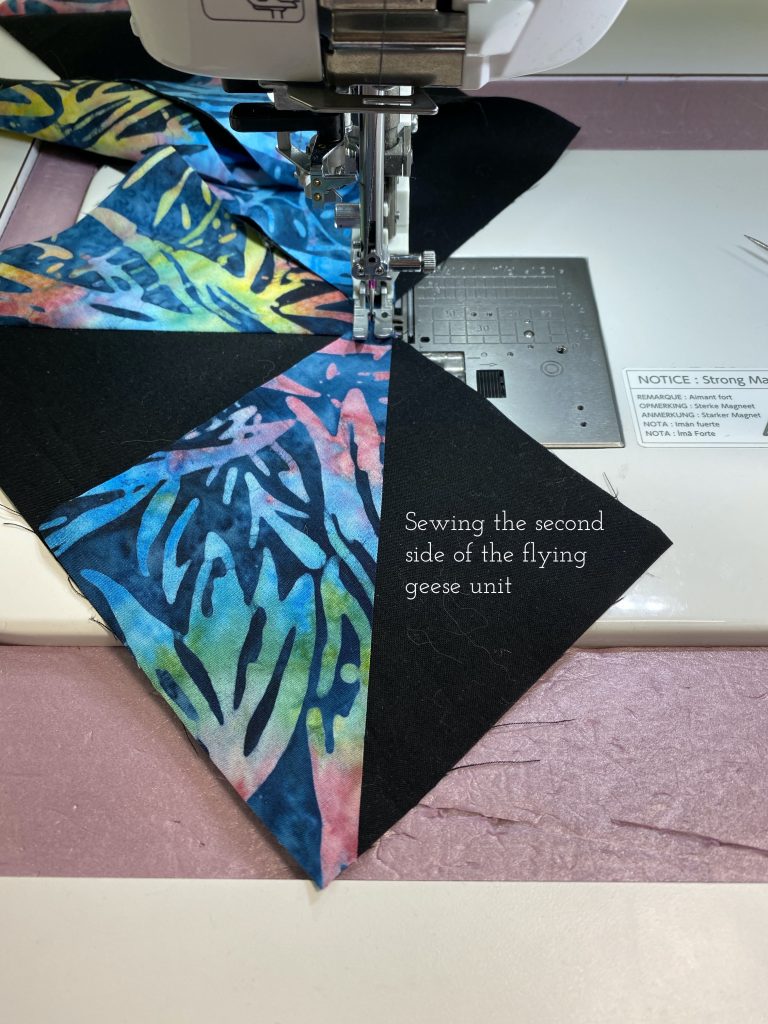
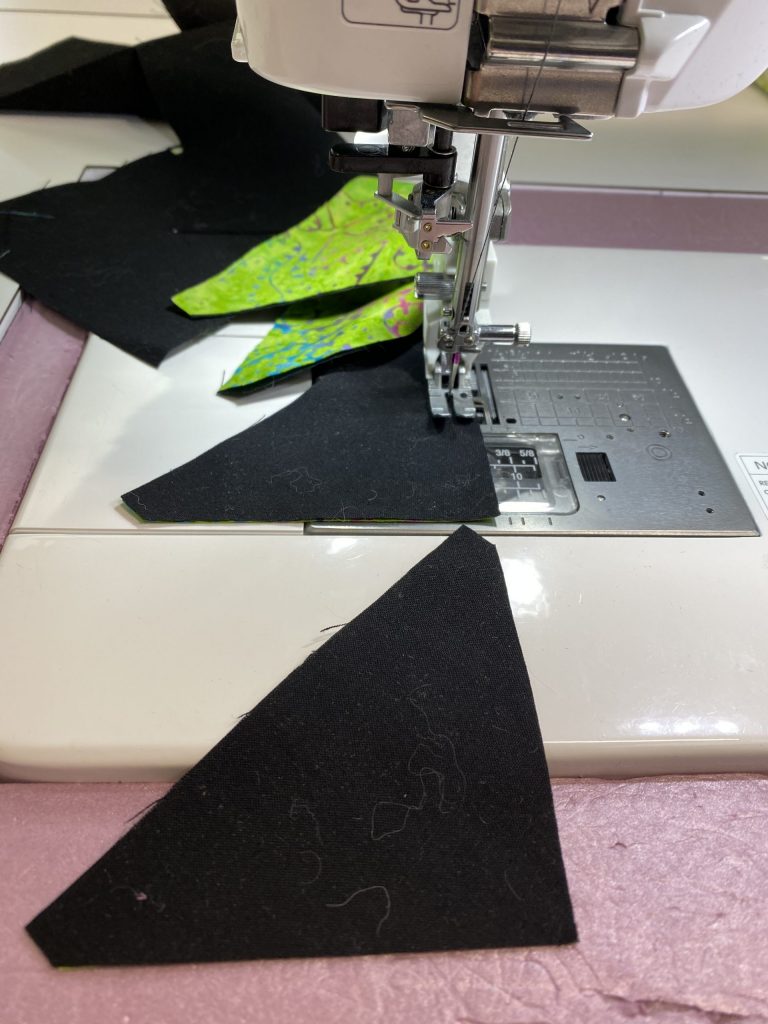
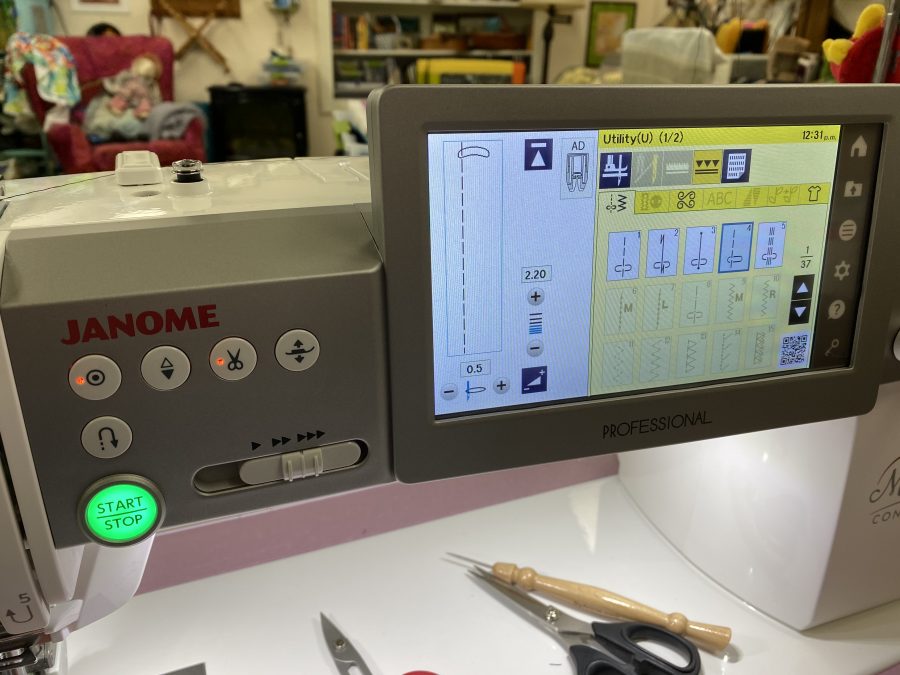
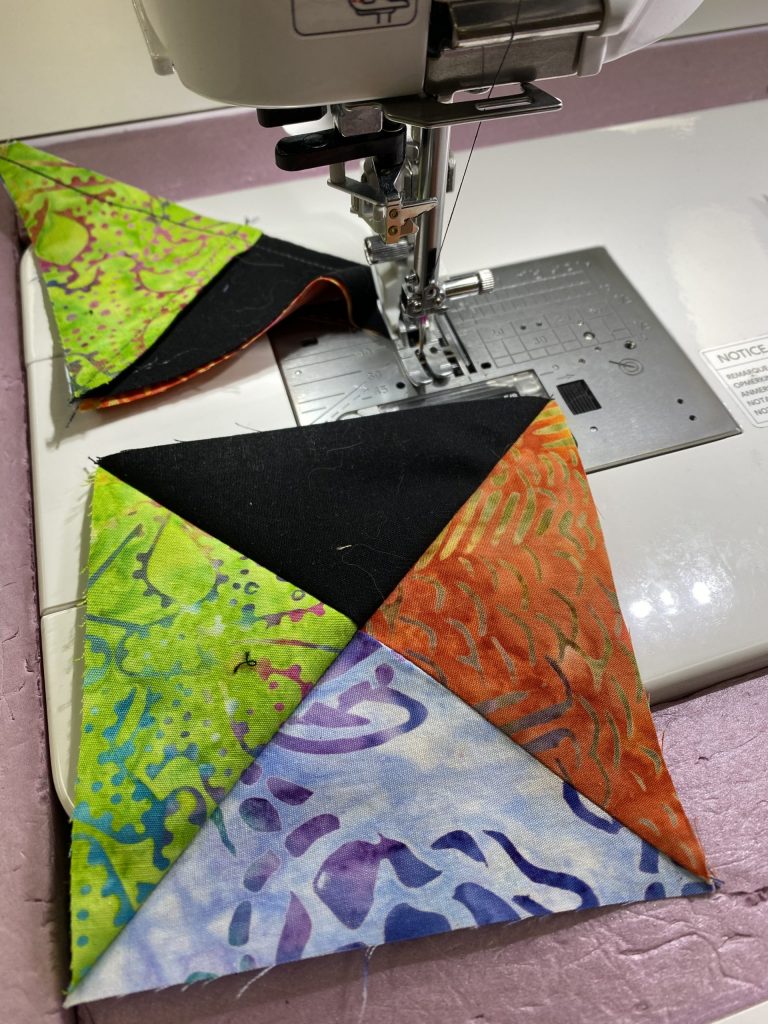
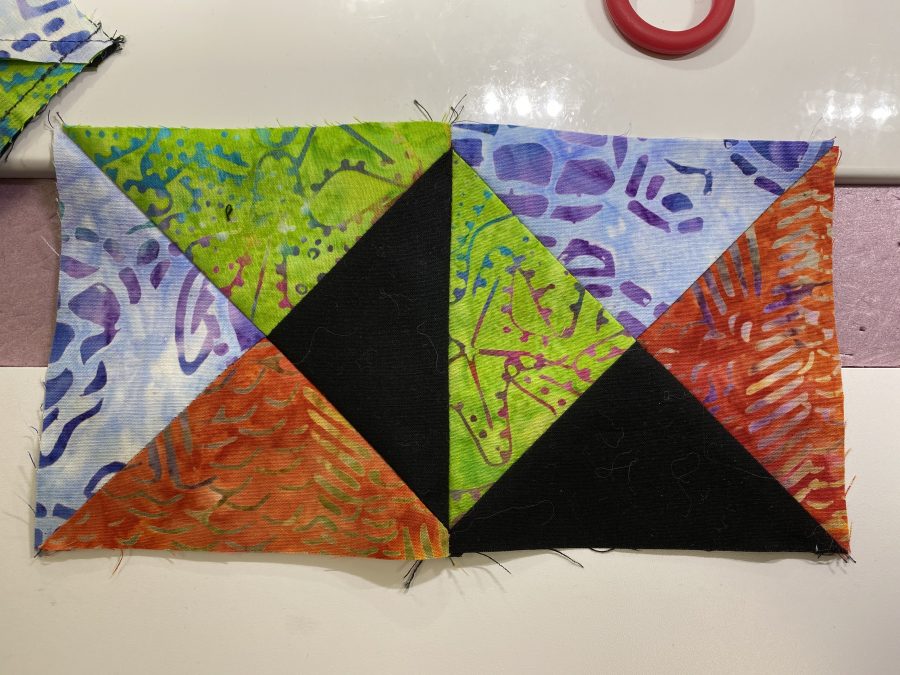
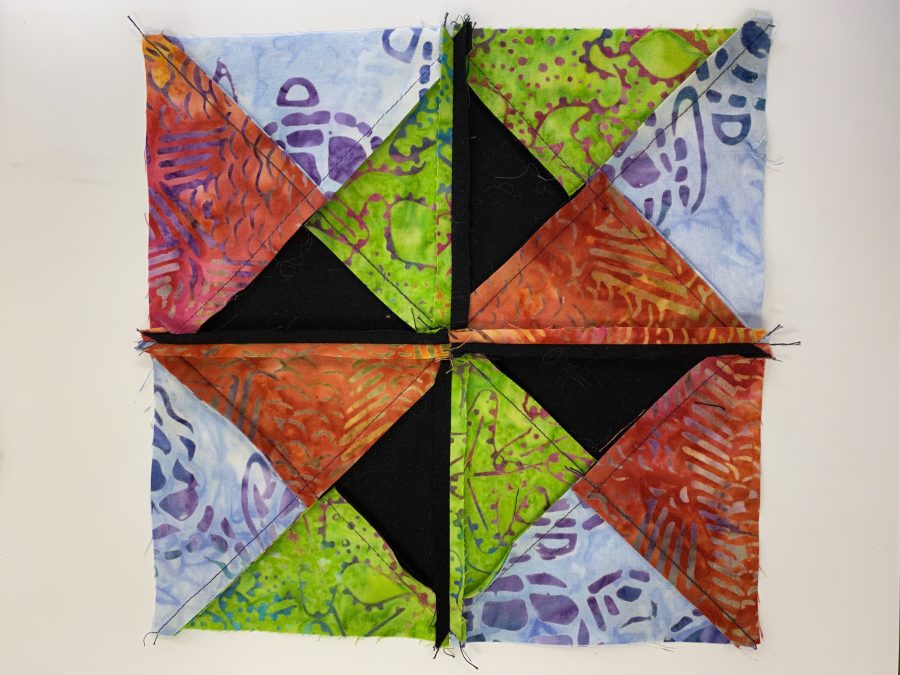
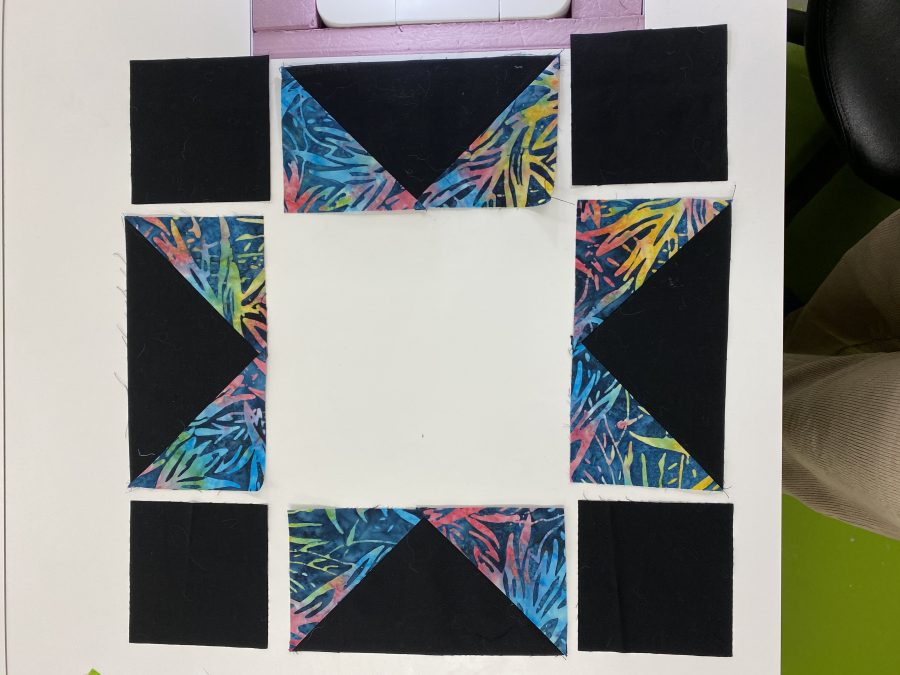
I’ve set out the large rectangles and half square triangles to make the frame for the block.Then I chain pieced the first side of the large Flying Geese.For the second side of the Flying Geese, same process, just make sure you get the triangles doing in the correct direction. Sew, trim, press.And the actual sewing bit…In the interest of not ripping out seams, it really helps to lay these out so you have theirs organized correctly.Next up, piecing the quarter-squares for the center. First, sew two triangles together. The Janome M7 Continental lets me piece SO accurately. Between the M7 and AccuQuilt, even *I* can be precise! I paired up the two-triangle units to make sure I didn’t mix them up while sewing.Then, sewing the pairs together. Using the M7’s HP foot and throat plate meant PERFECT piecing. See next pic!And two of the quarter-squares sewn together. I can’t believe I pieced that perfectly!Here’s the back of the block. Notice that some seams are pressed to one side, but the main seams joining the four squares are pressed open. This helped keep everything nice and tidy and perfect on the front.Once the center unit was ready, I set up the “frame” for the block.I sewed the sections together in three rows. Notice the only imperfection is down where *I* used rotary cutting…sigh……..Here’s the finished block again!
Remember, go here or HERE for all the links to the six blocks so far and to check in for the rest of the year. The finished quilt is beautiful!