I was absolutely delighted when Create Whimsy wrote to ask if I’d like to do a Spotlight interview with them–so many people I admire have interviews that you can still see and read. It was even more fun when the Editor, Chardel Blaine, realized that I had taught at a shop she worked at–Quiltworks Northwest in Bellevue, Washington–and we had met about 15 YEARS ago!
Here’s the link to my interview… I hope you enjoy reading the flotsam and jetsam of my life and mind. I opened up a half dozen interviews to review and prepare which led me to a new artist I admire, and I’m planning on opening another half dozen for lunchtime reading. Thank you Chardel and Create Whimsy!
This morning I was checking my spam folder, because the spam filter (I get at least a hundred spam messages most days) frequently leaves spam in the inbox and puts a few “good” messages in the spam folder. Today’s discovery is WHY I do check diligently….sometimes I’ve found inquiries from guilds asking me to teach, but this is even better.
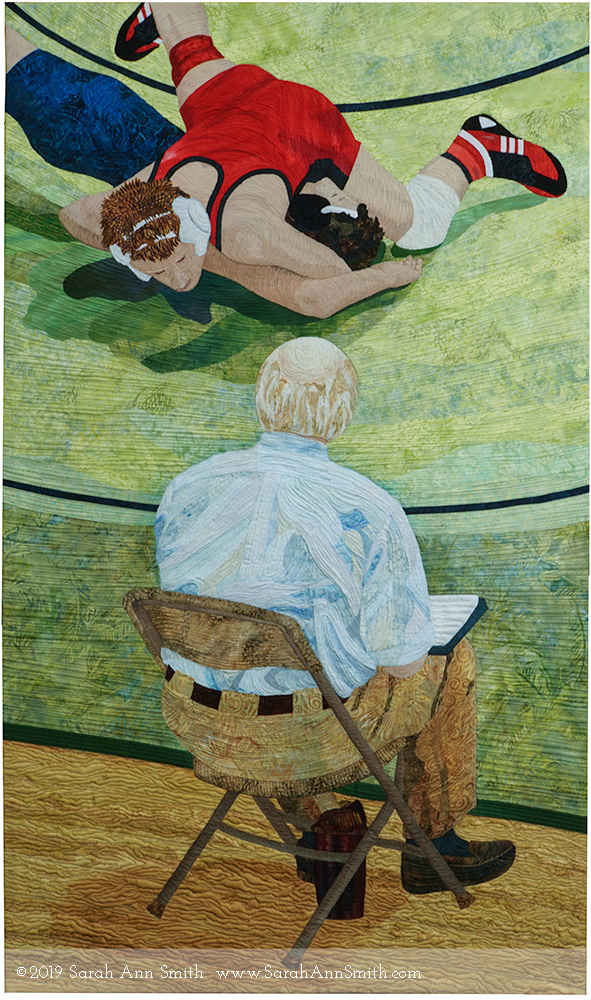
Coach’s Clipboard: Win by Fall, which was just on display in the Better World Exhibition at the Mancuso’s Mid Atlantic Quilt Festival. It shows my husband, the coach with the clipboard, and younger son Eli about to get a pin. It celebrates those adults around the world who give of themselves, their time, knowledge, wisdom, and example, to help young people grow into fine human beings through the avenue of athletics.
I’ve X’d out some of the details to protect the privacy of the person who wrote, but it brought tears to my eyes.
“I just saw your quilt “Coach’s Clipboard: Win by Fall” at the Mid Atlantic Quilt Show in Hampton, VA. I can not tell how much joy I felt when I rounded a corner and saw it. It was worth the xxx hour drive to Hampton and back just to see it!! I looked for wrestling themed fabric or patterns for ages and had given up. Wrestling was the best thing that ever happened to my socially awkward ADHD 5th grade son (now age 2x) and his first coach in particular was an inspiration and mentor to both kids and parents. Since graduation my son now referees for youth league and JV matches. I now especially enjoy watching all the girls who now wrestle, learning to be strong and fearless. Olympic wrestler xxxxx xxxxx, who originally attended my son’s high school, has inspired a lot of kids in the area. Thank you so much for sharing your wonderful work and thank your husband on behalf of all the moms out there whose children have benefitted from having another adult in their lives who care about them and help them be better people.”
THANK YOU, L.P. in the mid-Atlantic….you have no idea how much your comment means to me. Our older son was ADHD and is also in his 20s, and wrestling benefitted him. Our younger son, pictured in this quilt, has just finished is senior year in college, including four years on a D1 wrestling team. To his dismay, between lack of top training before college and three major injuries/surgeries/recoveries, his college career wasn’t what he had hoped. But he has learned and grown, and I know that every minute of his athletic career has helped make him the amazing young man that he is.
So THANK YOU AGAIN L.P.! You have given me something that I will remember for a very, very long time.
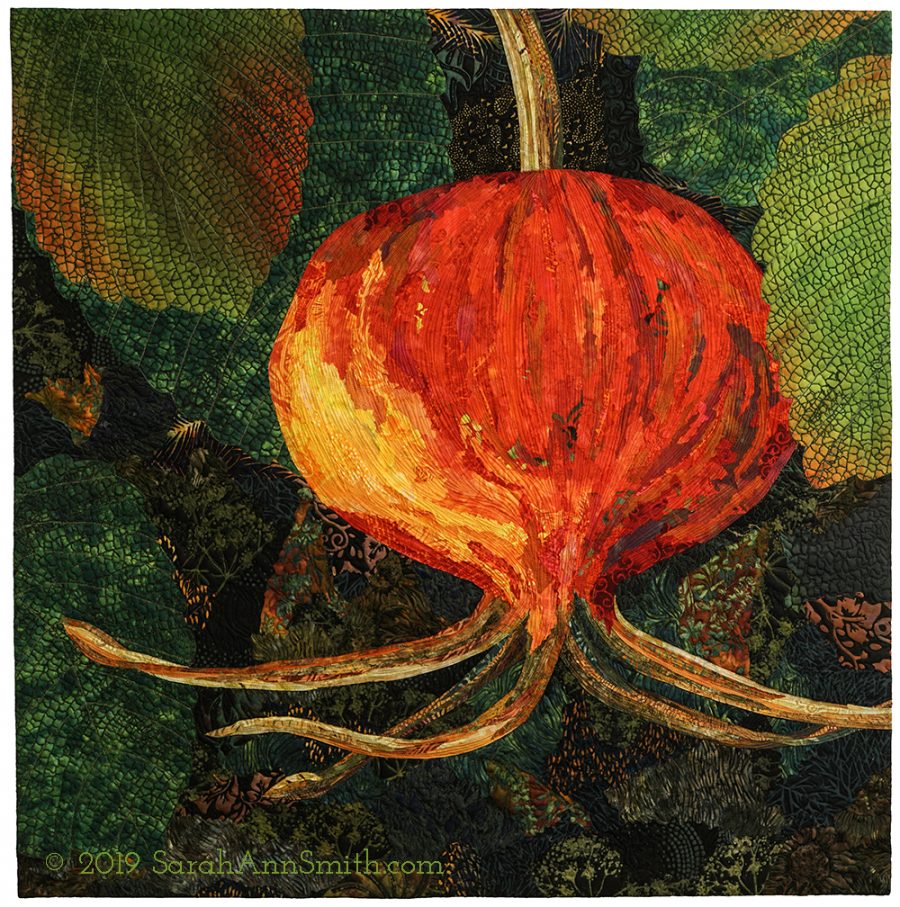
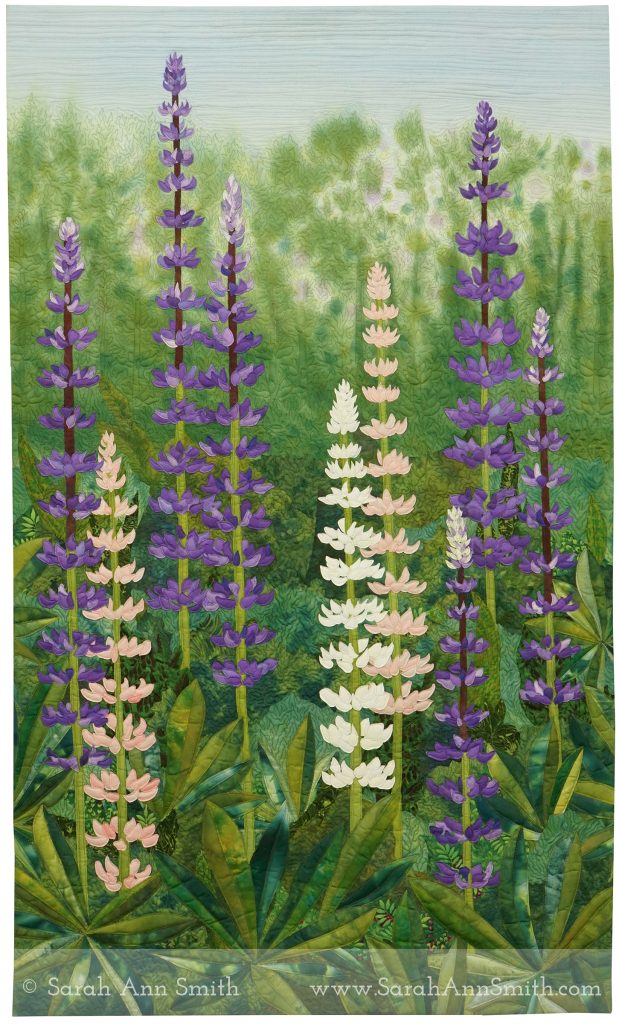
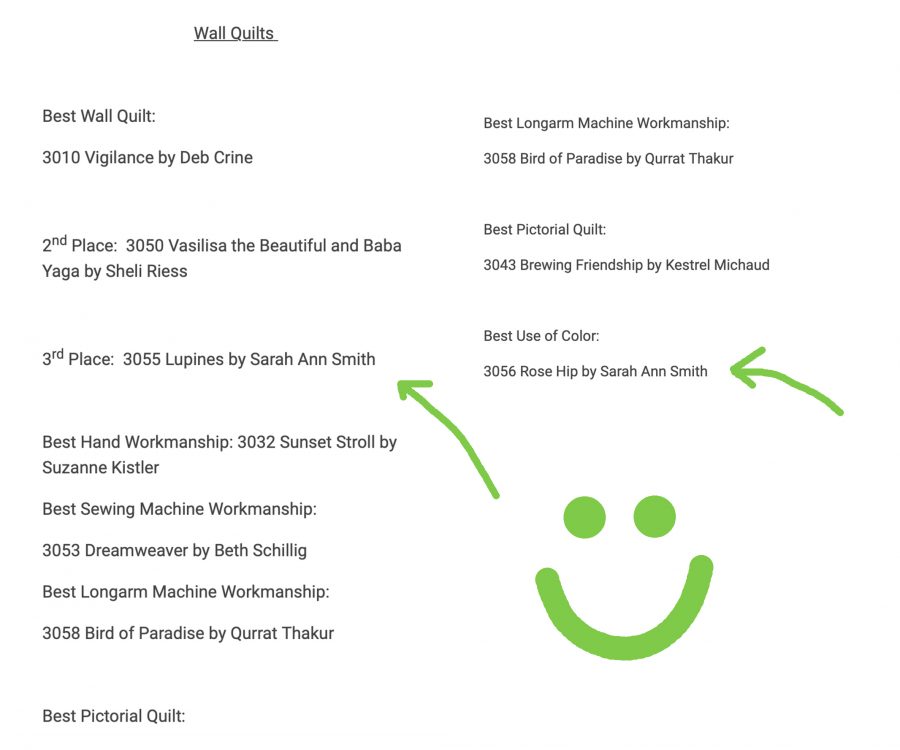
And yes, I meant every single one of those excessive exclamation points. Usually I’m lucky to get two out of two quilts juried in to a given show. This time, not only did both Lupines and Rose Hip get in to the Mancuso Brother’s Mid-Atlantic Quilt Festival, they BOTH RIBBONED!!!!!! That is a bucket list item that I never, ever, Ever, EVER expected to check off! Guess what…done! To the judges: THANK YOU for making a dream come true!
Rose Hip, by Sarah Ann Smith (c) 2019. 36″ square. This quilt won Best Use of Color in the Wall Quilts division at the show. One of my favorite quilts, in part because it is of my beloved Maine, but also because I’ve been able to meld my personal hand dyes, a hand dye by Lisa Walton, fabrics printed and over-painted by me, to create a cohesive image.
I’ve never won a prize such as Best Use of Color at a national level show, so I am particularly pleased–my work is about color, and then about the quilting. Next August 5-7 I’m going to be teaching a three-day workshop, Exploring Paint on Cloth, at ProChemical and Dye in Fall River, Massachusetts. I’ll be sharing the techniques I used in both of these quilts in that workshop and hope some of you can join me! Details in the hotlink. I’m deep in the planning for the specifics of what we can do in three days and getting so psyched for it!
Lupines won Third in Wall Quilts…given the quality of the quilts I am surprised, delighted, honored…. there are some mighty fine quilts in this show! And once again, to the judges: THANK YOU for making a dream come true!
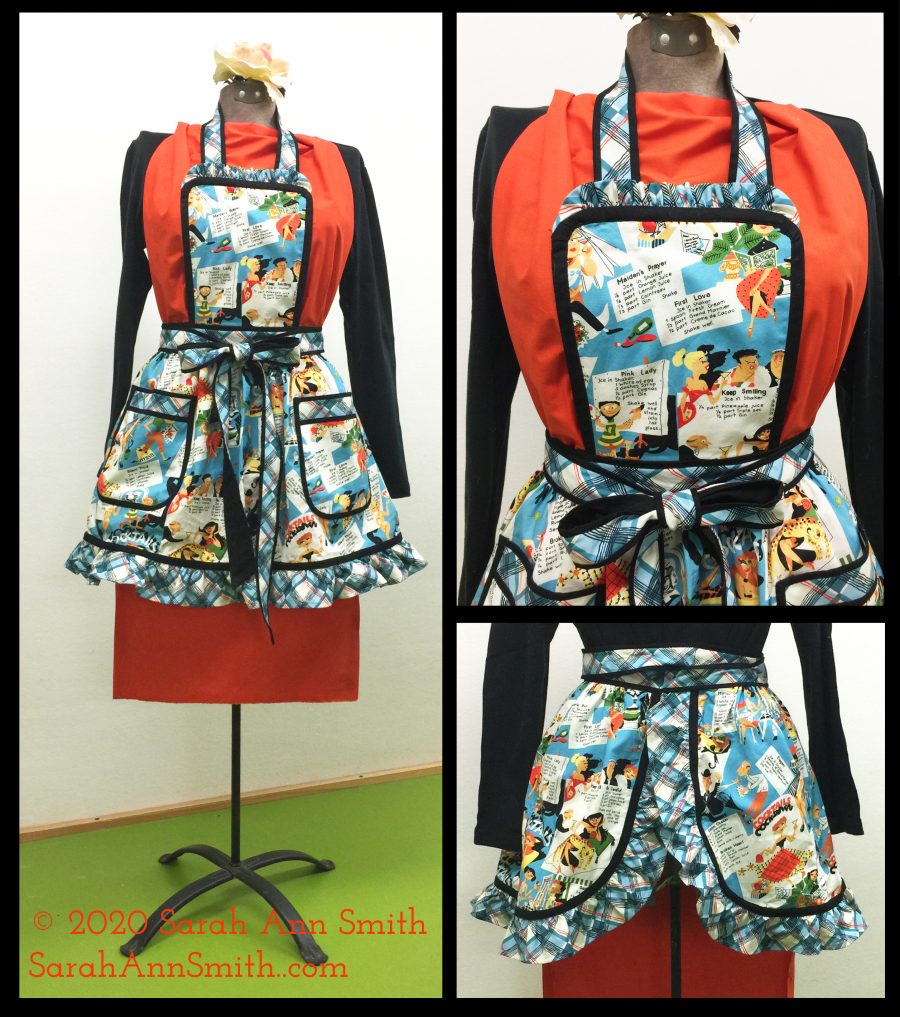
Today we’ll wrap up the last steps in this fun apron. Get ready to make a Kitschy Cocktail wearing the cutest apron ever to cover a frock. Enjoy a nice sip, preferably with a little paper umbrella! Make mine a pina colada, please! For the blogpost for Part 1 of this pattern, click here. For the blogpost for Part 2 of this pattern, click here. To download a Free-in-2020 PDF pattern with ALL the instructions and images, click here.
The Rockin’ Retro Apron in Kitschy Couture by #MichaelMiller Fabrics. The fabric was provided as part of the Michael Miller Brand Ambassador 2020 program, and my brilliant Janome M7 Continental is provided to me as a Janome Artisan. Thank you!
Sew the waistband and finish neckband
Administer chocolate or wine as needed—you’re near the end!
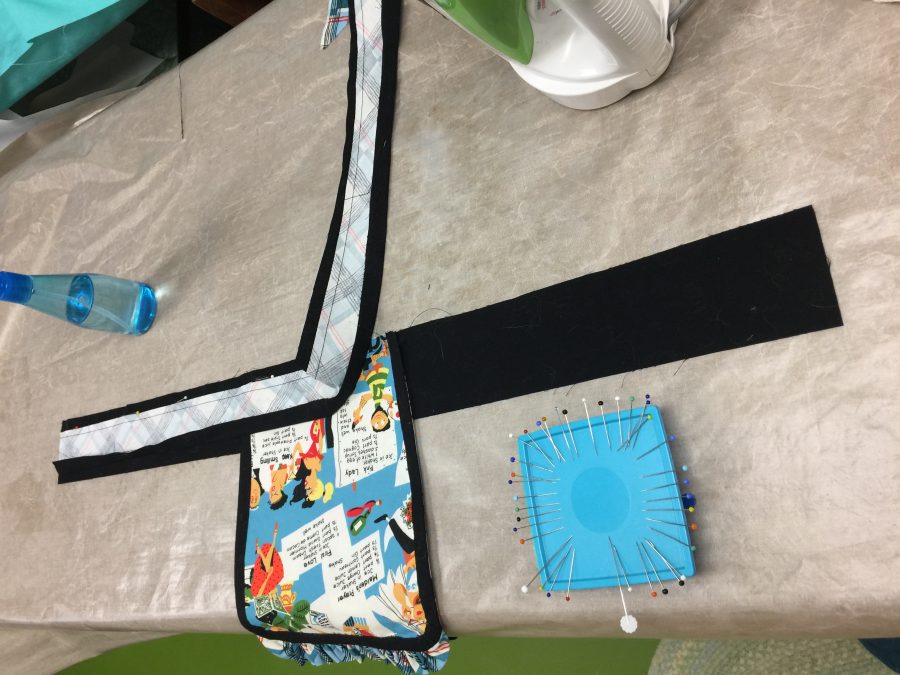
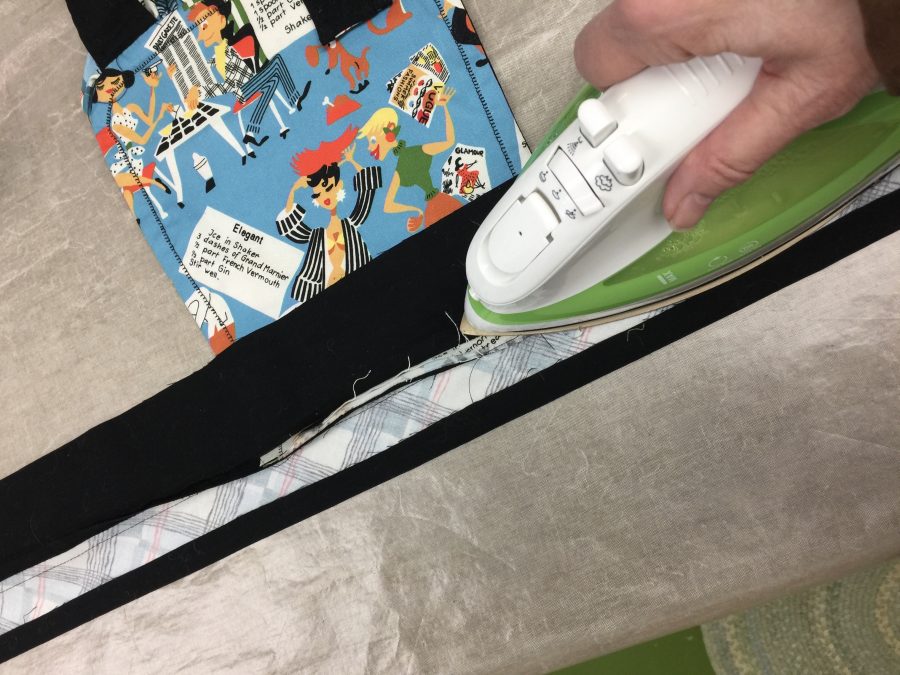
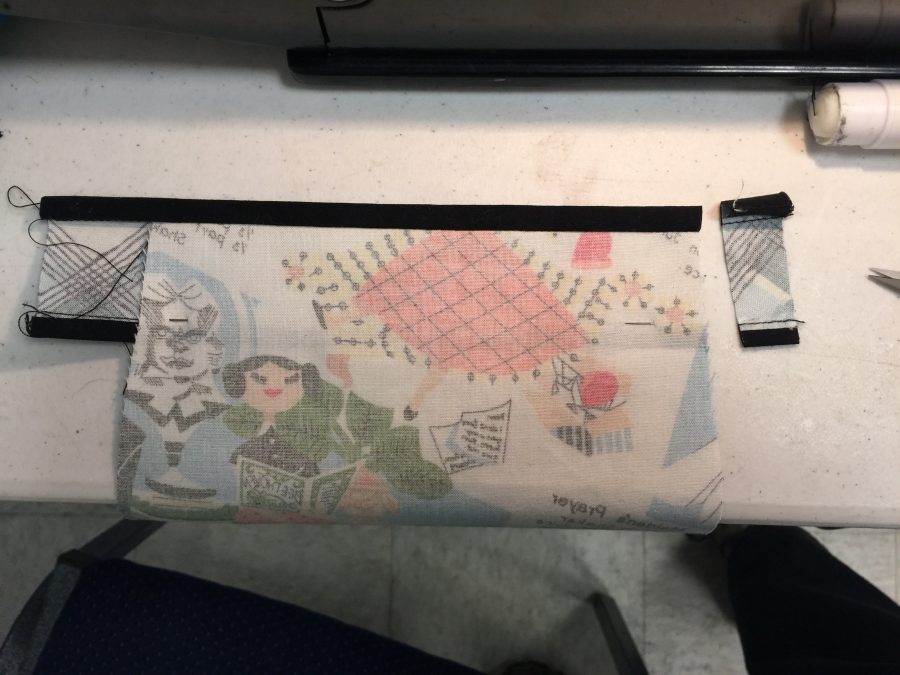
Sew 1” strips of black to each side of the starched plaid waistband piece. Press seam as stitched, then press seams away from plaid. On top edge, wrap fabric around to the back and press. See photos below.
FITTING NOTE: this is where you get to alter the size to fit you. I wanted my apron to come around my hips to the back. This is your apron, so make yours the way you like best! It can come just to your sides, be almost all on the front, or wrap well around you. I’m messy, so far around was my choice!
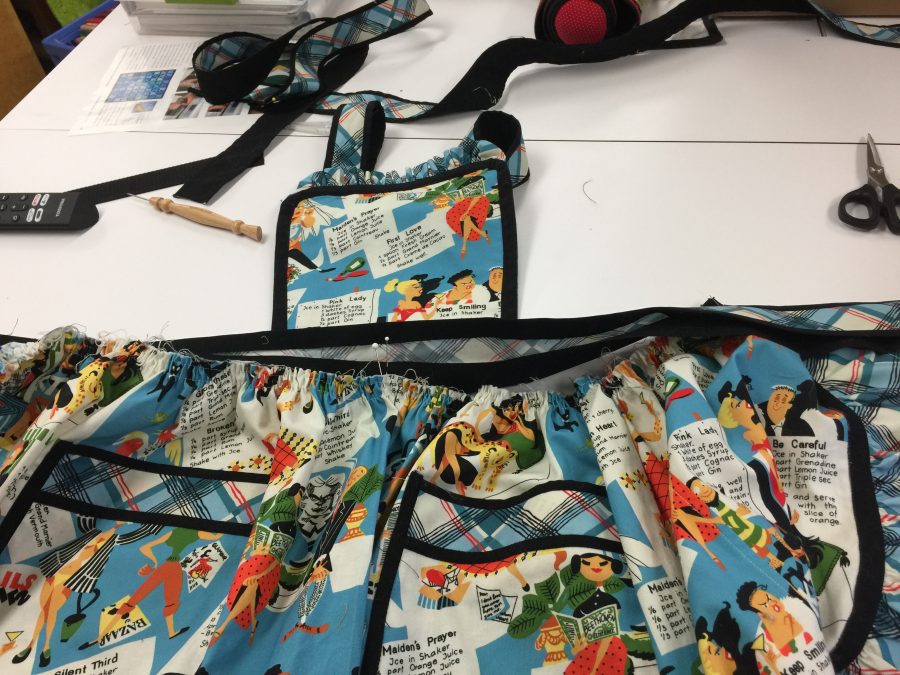
Sandwich the lower edge of the bib between the back and front of the waistbands. Optional: baste the bib to the center of the solid black waistband (back side). Photo below.
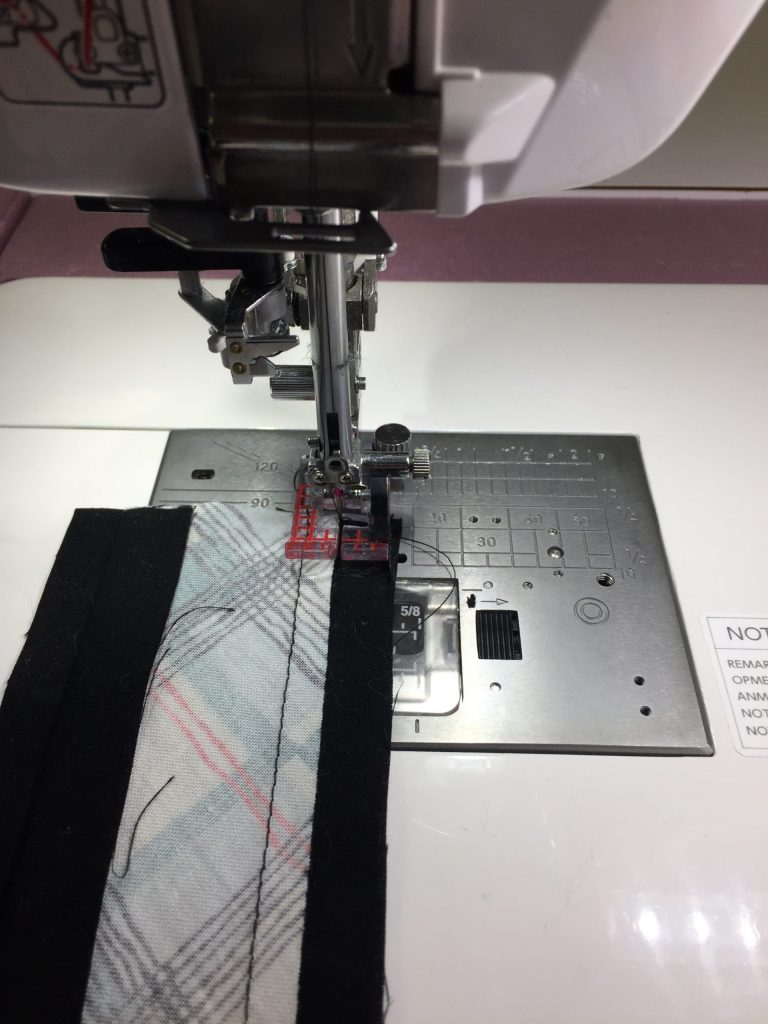
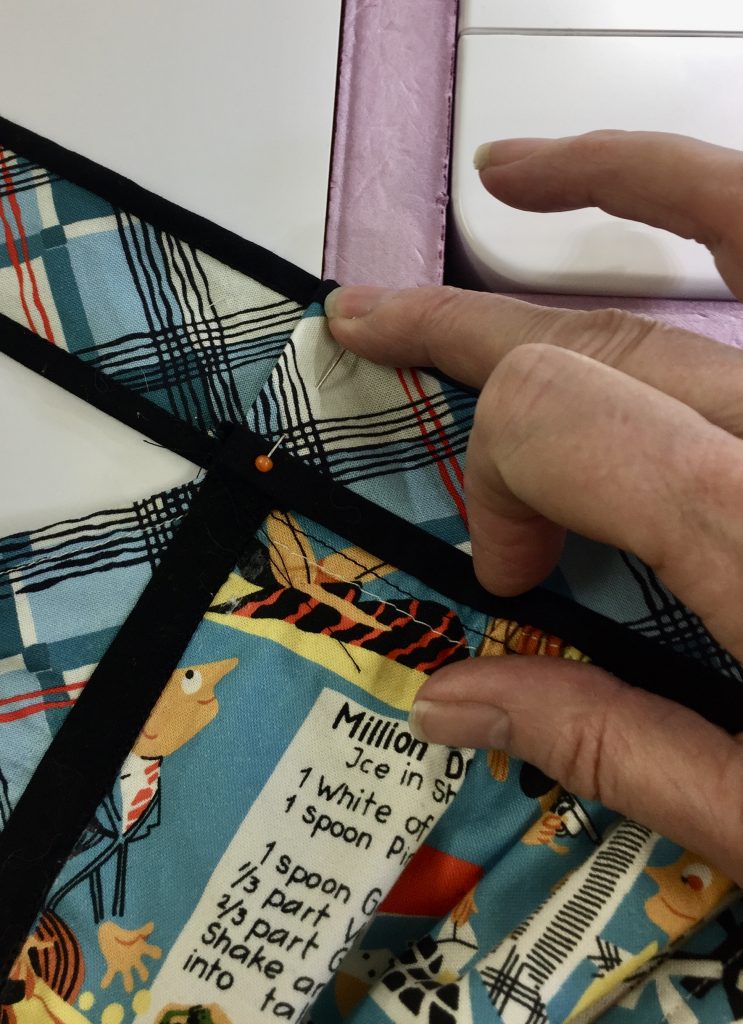
Pin the plaid waistband front and sew. In the third photo below, I aligned the right side of the presser foot with the edge of the seam and positioned my needle just below the seam edges.
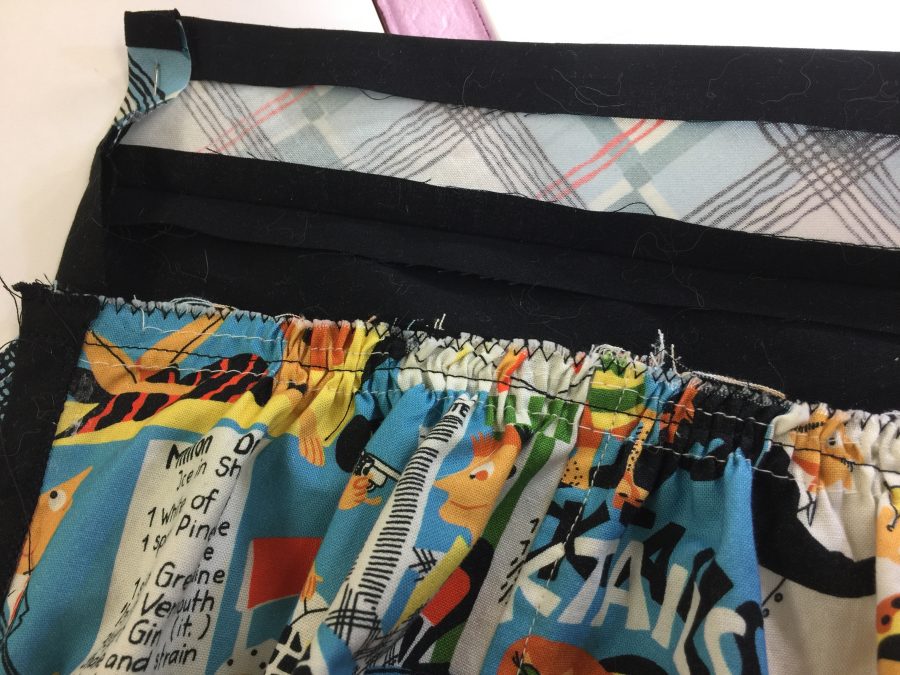
After making the center waistband (plaid edged on both long sides with black) sew the waistband front and waistband back together, sandwiching the bib in the center.Close up of waistband/bib.Use your presser foot and move the needle to get perfect placement for the seam. The Janome M7 Continental and many of their other fine machines give you a wide range of needle-drop positions which makes perfect alignment easy peasy!
Press seam as stitched, then press all fabrics away from the bib portion. Photo below.
Press seams as stitched, then press the front and back waistbands down.Next, you pin the black back waistband to the skirt and sew with a 3/8″ seam.
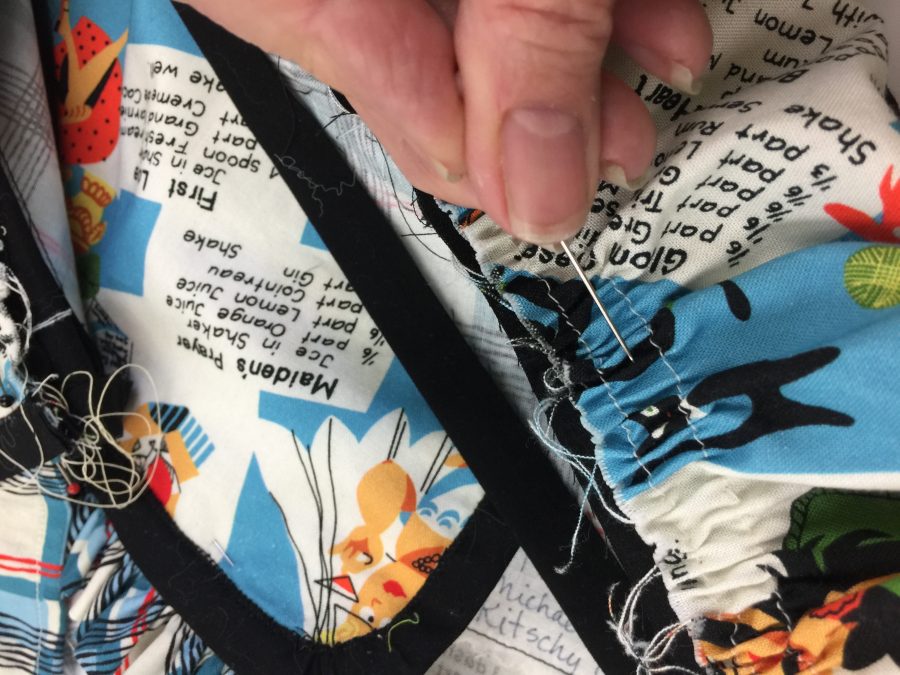
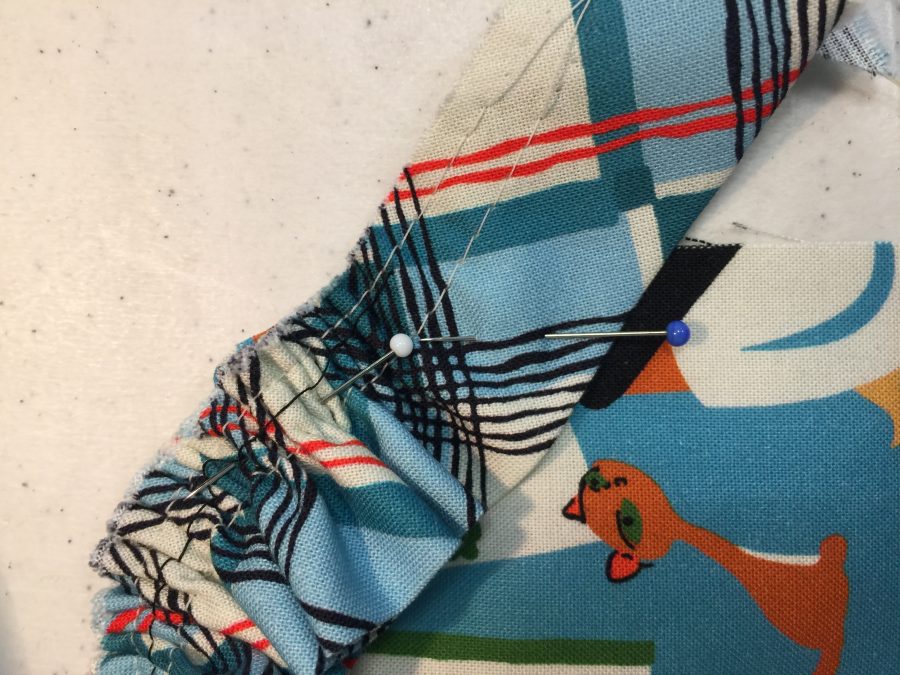
Pin apron skirt to black portion of waistband, wrong side of apron to the right side of the black leaving ½” extra on each end (see step 43). Distribute gathers as desired/evenly. You can use the tip of a pin to scrape the gathers into place, photo below right. Sew.
Use the tip of a strong pin to help adjust the positioning of the gathers. For me a pin works better than fingers or stiletto.
Sew apron skirt to black waistband back with a 3/8” seam. Use the pin to prevent tucks from forming as you stitch. You may wish to decrease the presser foot pressure so the bulk travels more smoothly under the presser foot. Remember to change it back when done.
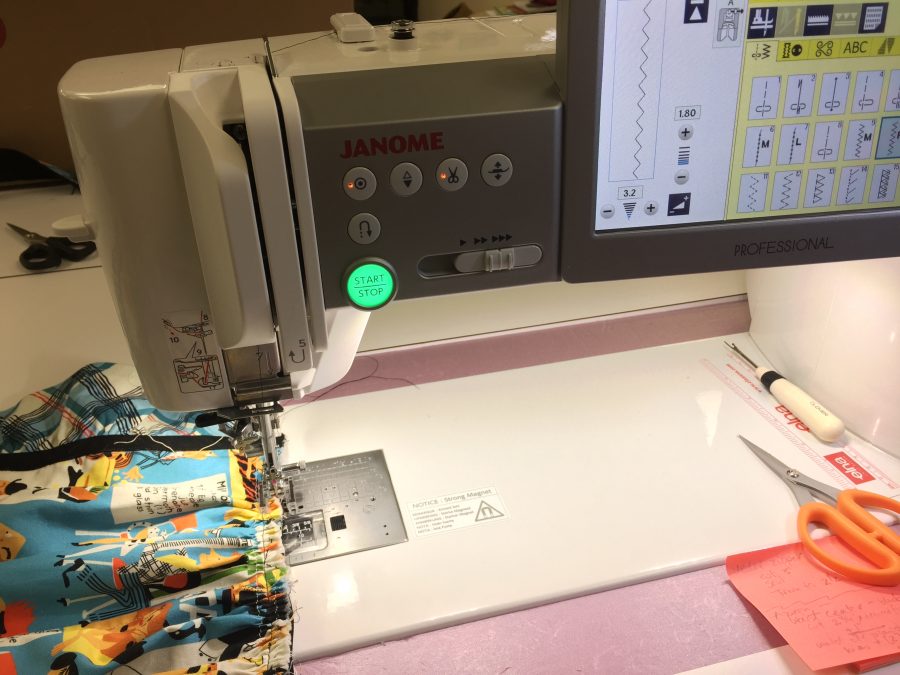
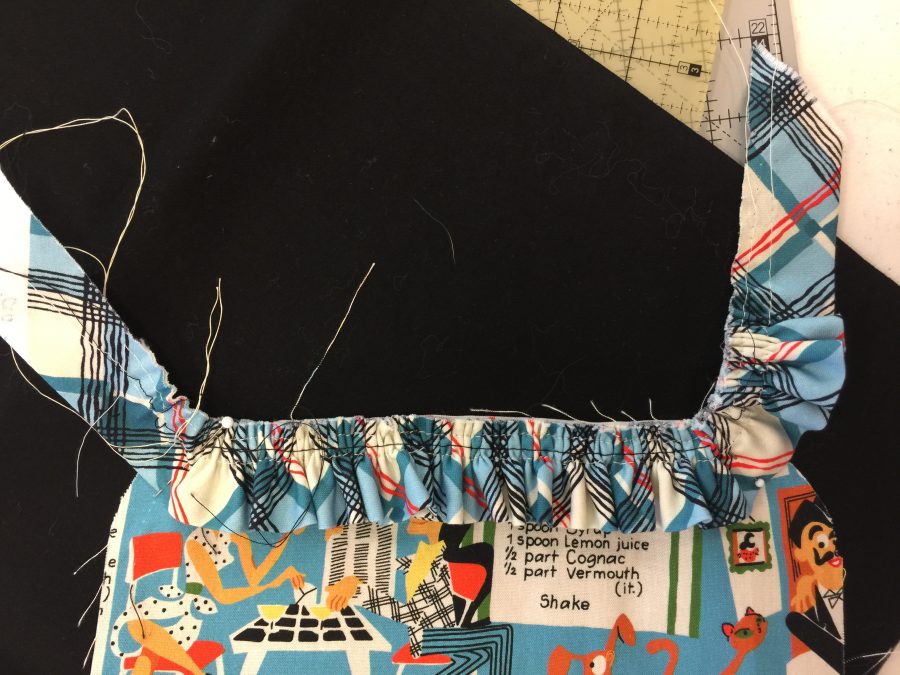
I cannot tell you HOW MUCH I LOVE THIS MACHINE. All the Janome machines I’ve sewn on have been really good, and I keep thinking they can’t get better but they do. But this M7 is just a whole ‘nother world. Color me in love! Here, I’m using a simple zigzag to seal the seam edge together. Even though it will be fully encased within the waistband, stitching like this controls the bulk and makes it look better once all is said and stitched.
Check to make sure you like the way it looks, then zigzag the edges, see right photo above. This will make the next two steps easier.
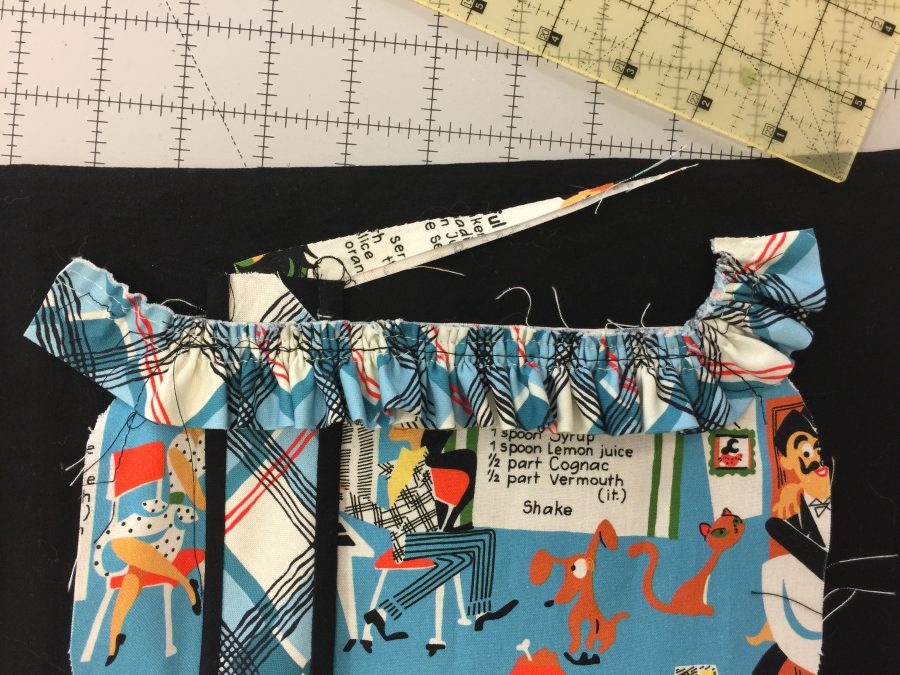
Fold under the extra 1/2″ on either end of the waistband.Tuck the tie inside the waistband, then line up the black edging as close to perfectly as you can.
Fold in the ½” extension on the waistband upper photo above. Tuck the square end of the waist band ties into either end of the waistband, lower photo above. Fold the waistband front over the seam you just stitched, being sure to cover the seam line. As best you can, get the skinny bits of black on the waistband and ties to line up.
Stitch on the edge of the black waistband front to secure the waistband to the top of the apron.
Stitch in the ditch or on the edge of the black of the waistband as well as along the ends where you tucked in the ties.
Tie the apron to your waist. With the unfinished end of the strap behind the bib, adjust the length of the neck strap to suit you. If it is long enough to pull over your head easily, trim with about an inch of extra length. Tuck the ends in and stitch closed. Pin the strap to the bib at the desired spot and machine stitch in the ditch next to the black trim near the top ruffle. If it’s awkward to pull on and off, use Velcro or snaps instead
HALLELUJAH you’re DONE! Put it on, wear it with gusto! Grab some bubbly or mix yourself a Kitschy Cocktail and celebrate a party apron made with the finest of details and finishing—not a raw edge to be seen anywhere. (And if need be, give it a wash or wipe to remove any visible glue stick—it’ll come out in the wash.)
THANK YOU for following along this intricate project. Yes, you could have overcast edges and make it faster, but this way you’ve learned some fine finishing techniques to apply to garment and home dec sewing AND made yourself a Rockin’ Retro Apron!
And of course, Thank you to Michael Miller Fabrics for selecting me as a 2020 Brand Ambassador and to Janome America for having me as a Janome Artisan since 2003. I am honored, humbled and grateful for your support.
Today we’ll continue constructing your fun and funky Rockin’ Retro Apron. Fabric requirements, layout/cutting instructions and making the apron skirt are all in Part 1, here. You can download a formatted and numbered pattern–free in 2020!–with ALL the instructions and requirements at Rockin’ Retro Apron in Kitschy Couture. The fabric was provided as part of the Michael Miller Brand Ambassador 2020 program, and my brilliant Janome M7 Continental is provided to me as a Janome Artisan. Thank you!
Make the Apron Ties and Neck Strap
Spray starch the bias-cut plaid for the ties and neck strap. Stiffening this fabric slightly will make the following steps less fiddly.
Sew an inch-wide strip of black to the short pointy end of each of the waist ties. Press as stitched, then press seam allowances toward the black.
Sew the plaid to the black apron ties and neck strap only. Do not sew the waist portion, which is handled differently.
Press as stitched. Press seam allowances toward the black. Turn straps/ties right side out. You can use a narrow pole/stick/curtain rod to make this easier: turn the first couple inches by hand, then slide onto the top of the curtain rod and gently coax the entire strap until it is all right side out.
Press, centering the plaid and coaxing the seam allowances toward the black. Because the black is cut wider than the plaid, it wraps to the front to create an accent edge. The seam allowances should be underneath this accent edge. Leave the square end open. On the pointy end, trim to 5/8” from where the short black piece is stitched to the plaid. Turn under about 3/8” and press. You can machine or hand stitch this opening.
Stitch on the edge of the black or in the ditch so the seam allowances stay where they are supposed to. This will help a lot once you start wearing and washing it—worth the extra effort.!
Make the Apron Bib
FITTING NOTE: Because of different body types, you will want to adjust the width of the bib and the length of the bib and strap to flatter your body. Cutting measurements are for my medium-sized build. I actually wish I had made the bib an inch shorter, so those with an average or larger bust size should be fine. Measure before you cut and before you sew.
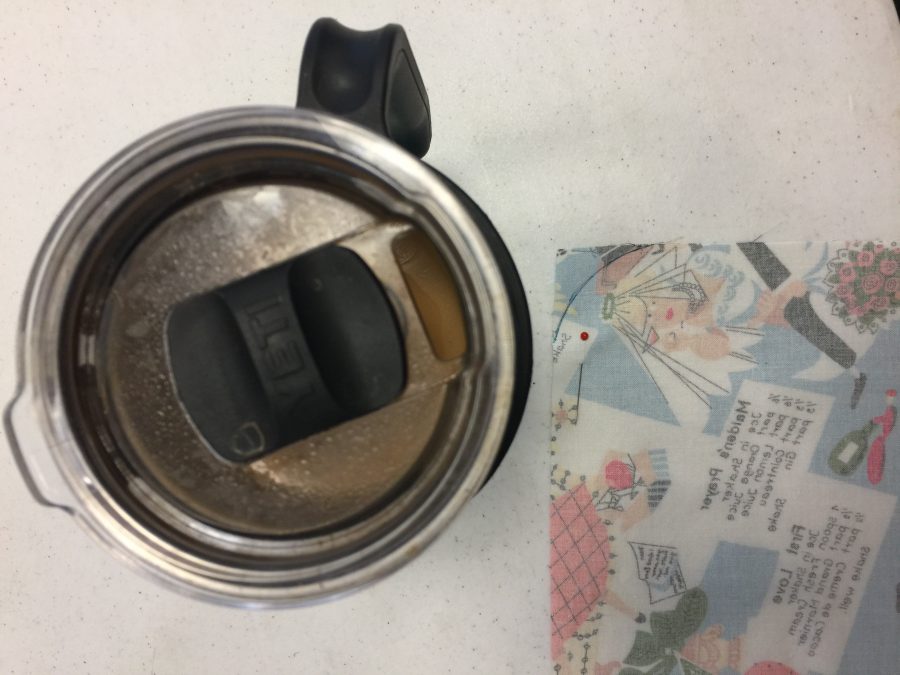
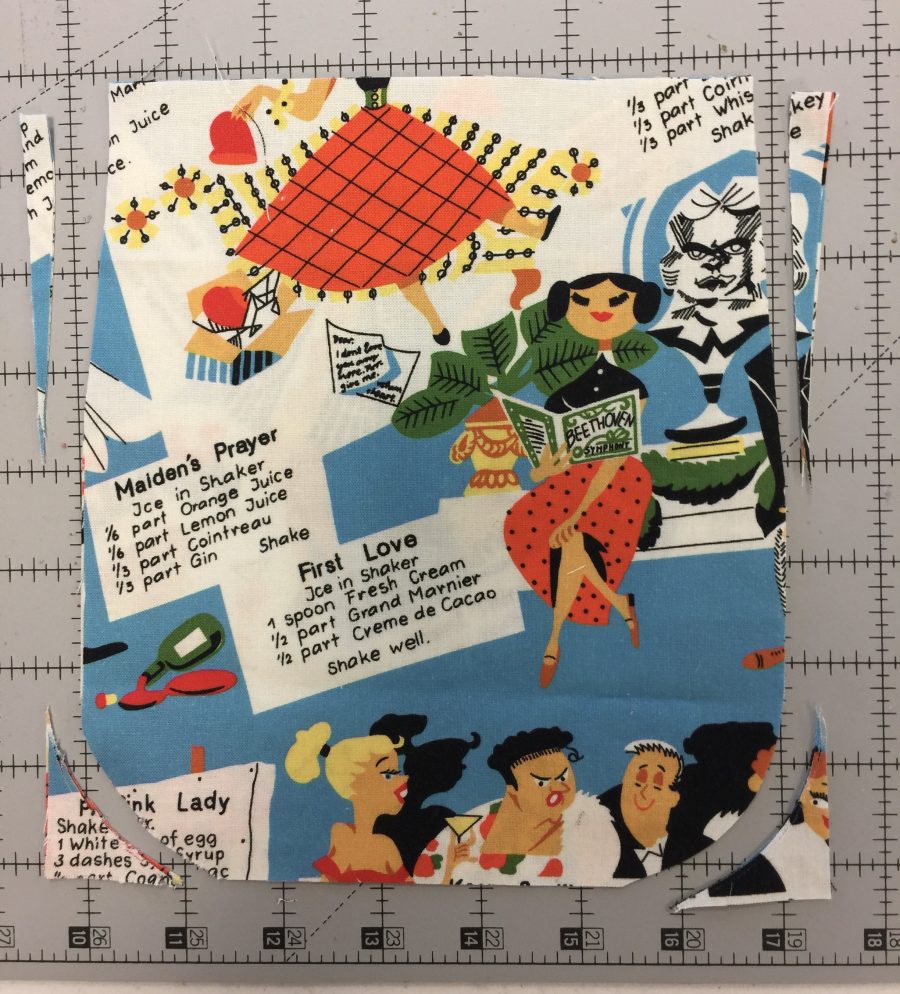
Use something like a mug lid to round the upper corners of the bib.Trim slivers off the bottom edge of the bib (optional). This photo is of the pocket, where you do the same thing.
Use something round to curve the top edges of the apron bib, see first photo above. I used the lid of my travel mug. Just draw a line around the curved edge, then trim off on both sides of the bib, second photo.
Optional: taper the lower edge of the bib by trimming two skinny triangles off the lower edges. Mine were about 3/8” wide by just under 6” tall, center and right photos.
Gather bib ruffle. Fold fabric in half, wrong sides together. Sew basting lines at ¼” and ½” and gather as before. This will be a very tight gather, which helps the ruffle stand upright. If yours is too long when gathered to your preference, trim as needed—see next steps.
Pin ruffle to the bib lining (inside piece). See photos below.
Curve the ends of the strip up, see second and third photos, below. Be careful (if this sort of thing bugs you) to make sure the curved ends are symmetrical. Ahem—guess which one I am.
Tuck one end of the neck strap between the ruffle and the bib lining, photo on right below. Be sure the plaid side of the strap is as pictured so that it will face the correct direction when the bib is completed.
BASTE by machine.
Turn up to make sure it looks good. Adjust if needed, especially on the ends.
Curve the end of the gathered bib ruffle up–see the overall photo at the start of the post to guide you.The top of the bib lining will look like this once you have basted the ruffle in place. Don’t be like me…remember to tuck in the neck strap so you don’t have to pick out some stitches. Ahem. See next photo.Insert the neck strap as pictured and baste along with the ruffle.
Prepare front of bib.
Cut black bias the length of the outside edge of the front bib plus 1” just in case.
Press ¼” under along one long edge.
Pin to the right side of the bib front with the fold edge turning under towards the center of the bib.
Baste on outside edge.
Press towards the center, easing excess in the rounded corners.
Applique/stitch the black trim to the bib. I used glue stick to “pin” the black in place and sewed used the edge-stitch foot/quarter inch foot with the flange and a straight stitch.
Pin bib front and bib lining right sides together. Sew 3/8” seam. You may wish to sew a basting stitch seam first to make sure everything at the top is correctly placed and the corners and ruffle turn nicely. If you do, adjust as necessary, then sew the final seam.
Prepare the Pockets
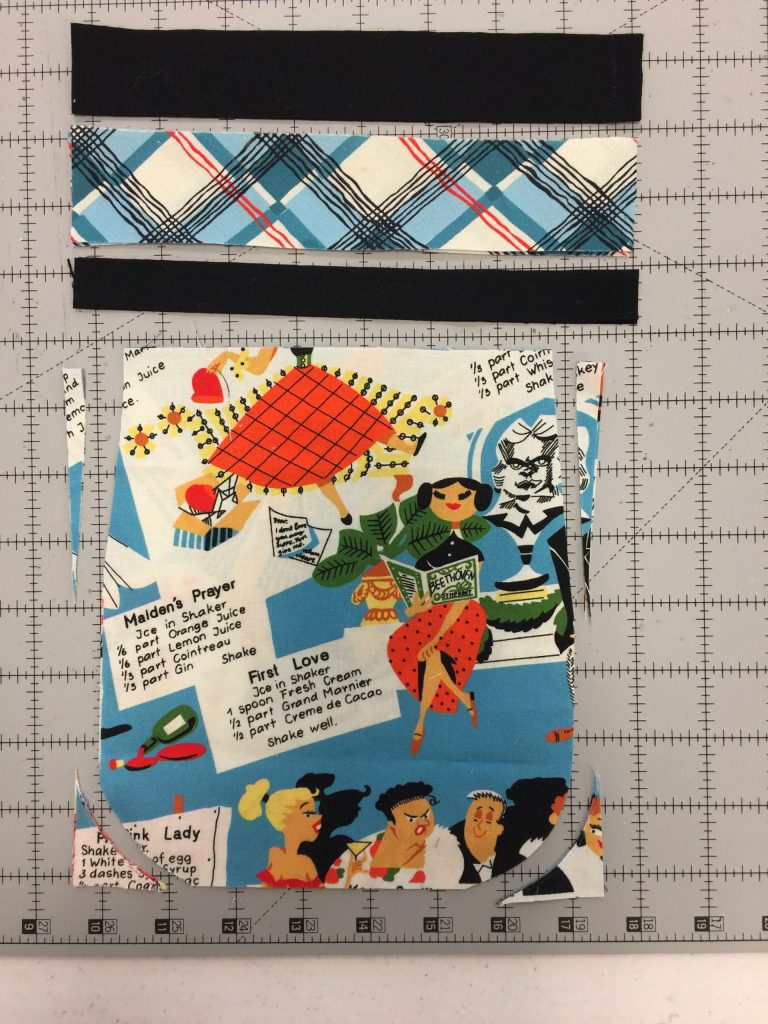
You’ll need a wider black band, the plaid strip, and a narrower black band. These strips are sewn together, then sew the right side of the strip to the wrong side of the pocket top. Press, then fold the strip to the front and topstitch in place.
Create plaid-and-black band for the pockets.
Sew a ¾” strip of black (straight of grain) to bottom edge of starched plaid strip. Upper photo.
Sew a 1 1/8” strip of black to the top of the pocket. Upper photo.
Sew wide black strip to the back of the pocket with a ¼” seam. Press as stitched, then wrap the strip around the seam allowance.
Wrap the strip to the front, trim, and stitch in place.
Wrap the bias unit to the front and applique in place. Stitch in the ditch or on the edge of the black. Photo above.
Pockets are positioned 6″ to either side of the center, but the black edging has not yet been applied.
Press under ¼” on long side of 1 1/8” bias black edging that is long enough to go around the pocket. and extend about ¼” beyond the top edge. If making two pockets, repeat. Turn under top edge of black trim even with top edge of plaid section.
And that’s it for today! In the final post we will manage the waistband–it took some mental gymnastics to figure out the easiest way to encase all raw edges, have long ties, and have it look good, but I figured it out. Stay tuned!
Remember, you can download the complete Rockin’ Retro Apron pattern here. It’s also listed under Tutorials (lotsa good free stuff on there) on my Resources page.