email Youtube

Home
Galleries
Blog
Workshops & Calendar
Store
Resources
About
Contact

Author Archive

Second Printing!

Monday, May 3rd, 2010

Well there is LOTS of news–with the best saved for last (yes, I’m evil…<GRIN>):

  • I’ve been to Arizona to teach, blogging to come
  • the family joined me and we visited Flagstaff (which is an awesome and friendly town!) and various points including Monument Valley, the Grand Canyon, Meteor Crater, the Wupatki ruins and Sunset Crater…and oh yeah, Sedona…more on that later, too
  • the laptop DIED—deceased, defunct, digitally toes-up—36 hours BEFORE I was supposed to give my slide lecture to the Arizona Quilt Guild.  We went to plan B, it worked, and everyone was gracious and understanding.  That morning I ordered the new laptop
  • I visited my beloved sister in law in LA for the first time in 27+ years, we went to the Getty and had a grand time, blogging on that to come too
  • I was home 3 days then went to Hingham, Mass., to teach at the Herring Run Guild, yes..blogging to come…and 90 minutes after I left for there my new laptop FINALLY arrived two weeks after I ordered it

and at long last….DRUM ROLL and unabashedly SNOOPY DANCING with wild ABANDON:

  • ThreadWork Unraveled has–in a mere six months–gone into a SECOND PRINTING!   I just can’t believe it… most books go into print once, are sold, and that’s it.  Thanks to phenomenal word of mouth starting with so many of you dear readers out there in cyberspace and good reviews hither and yon, the book has already gone into re-print!

So I invite you to join me in silly dancing, chocolate, a nice chilled glass of white zinfandel or your favorite sip-able (sp?), and CELEBRATE!

I’ll be back once I catch up on 2 1/2 weeks of work, student inquiries, teaching applications, quilt show applications, assorted mountains of paperwork etc. with lots of blogposts with lots of photos!

Cheers, Sarah the Elated (and really happy to be sleeping in my own bed with family close by!)

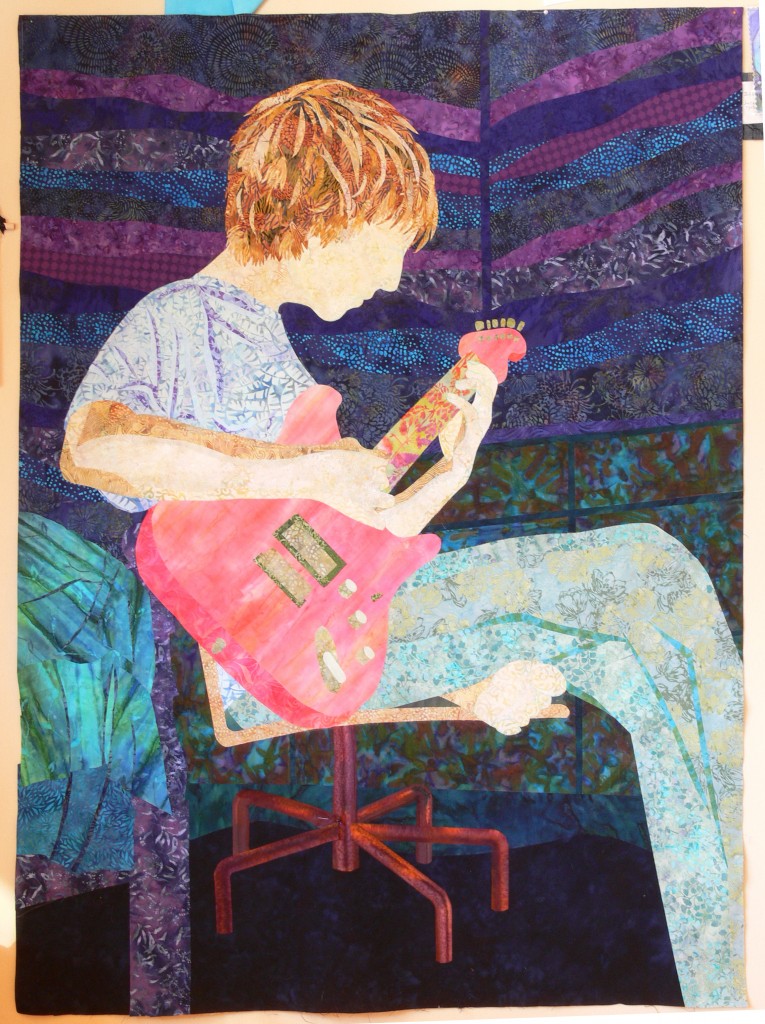
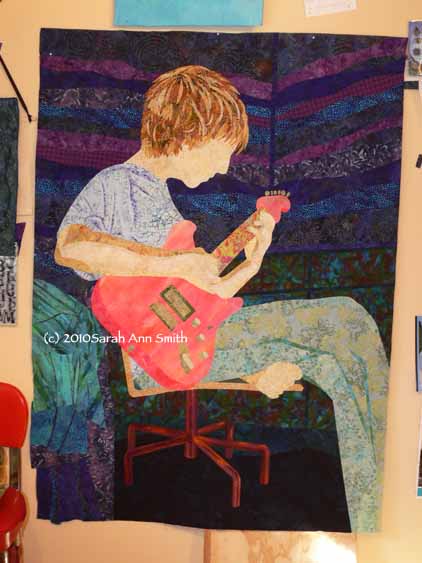
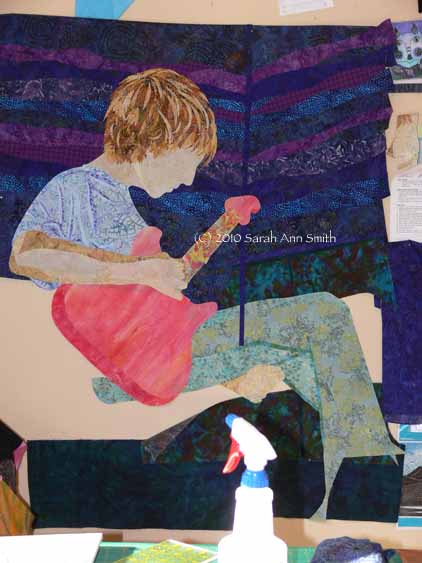
Joshua, the quilt in process, #5

Monday, April 26th, 2010

Some time ago (that great whooooshing and sucking sound is time roaring past us), I blogged about having my Naiads quilt critiqued at QuiltCritique.com.  A joint venture with Lisa Chipetine and Sandra Sider (who also happen to be the current president and vice President of SAQA–Studio Art Quilt Associates), this is an online process where you send in your jpegs to Sandra two weeks before an appointed date.  She ponders and comes up with suggestions to improve your quilt.  She has that great skill of asking questions that make you think, that are open-ended and help you learn as you talk about something.

(I promise…there are pictures below!)

Well, the process was SO educational–I think listening to the critiques of the others on that evening’s session were maybe even more informative because I wasn’t invested in the outcome, but an observer–that I really wanted to have Sandra look at this piece.  So I SLAMMED to get it done in time to have her review it and still have enough time to make changes (if needed) to the top and then get the quilting done by the deadline.    It was worth every penny of the modest fee and MORE!  Best of all, Sandra had only three relatively minor suggestions:

1.  Add details to the face; I told her the entire face would be added in the stitching… I left the face just as a single piece of cloth at the top stage.  Problem solved.

2.  There was a tiny bit of dark wall showing between Joshua’s hand and the neck of the guitar–it really bugged Sandra and pulled her eye, distracting her.  This was not a good thing, so even though it was true to life, it needed editing.  So I moved his hand a bit to be more closely curved around the guitar neck.  Problem solved.

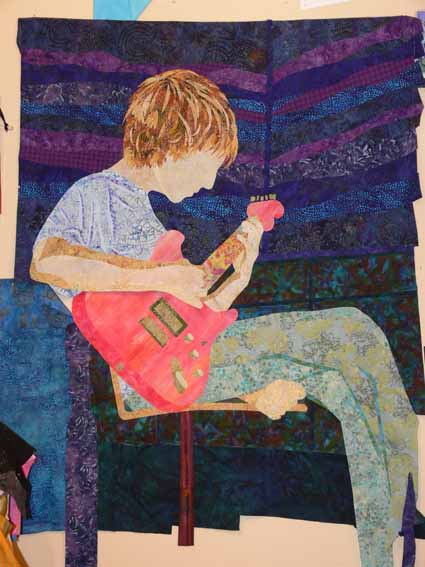
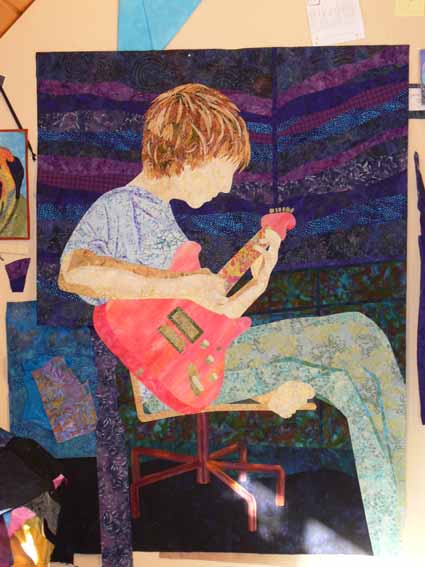
3.  The initial lines at the bottom of the dresser and the wood on the bed came together at accurate but odd-looking angles.  So I added a bedskirt and more bedding to change the lines and better lead the eye up to the focal point.  Problem solved.   Here’s the before, as I was testing out floor and chair base:

Then, with more in place (note, the purple vertical is the bedpost):

and after:

In the next post about this quilt, I’ll finish up the process with the quilting, sharing some of the background quilting and showing you the array of threads used in the entire piece.  See you soon!


Joshua, the quilt in progress #4

Friday, April 23rd, 2010

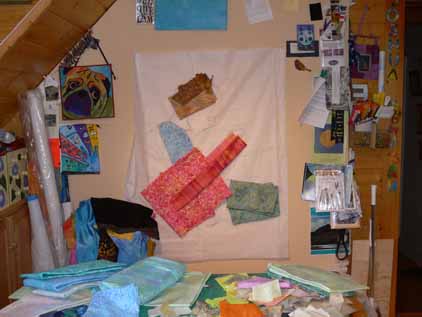
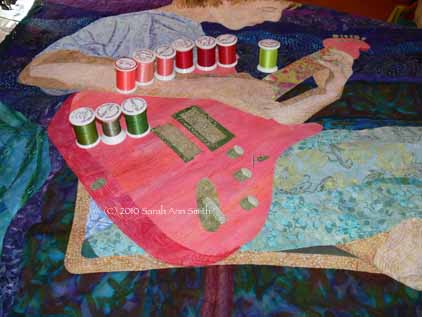
Once the torso was complete, PHEW!, it was time to tackle the guitar.  With the shirt and pants a medium-light value in cool colors, I wanted the guitar to be a medium-light warm, especially since both of Joshua’s guitars are red (he has this cool idea that he will keep all his guitars and have a gallery of them, and hopefully all red!).  I didn’t have quite the right colors–I tested out a couple of options.  Here you can see me “color-blocking” early on:

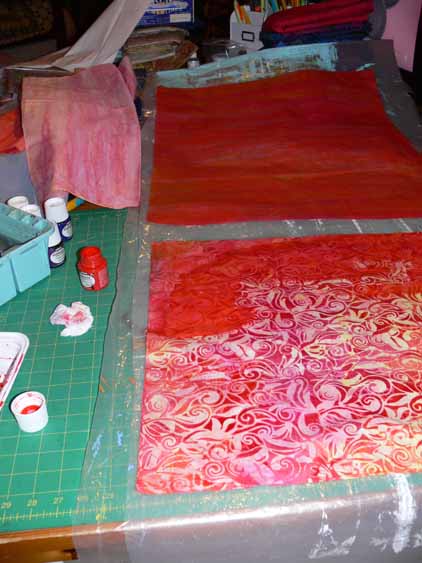
I found a couple fabrics that were close, but not quite.  A hand-dyed-look batik fabric was too pale, and a batik was too contrasty.  Solution?  Pull out the textile paints and fix them!

The fabric in the upper left corner is the “before”, the piece on the upper right is the “after” that became the main body of the guitar.  The contrasty swirly lovely batik on the bottom became the lower edge of the guitar.

The neck of the guitar proved to be one of the coolest moments of the construction process.  Initially I pulled some stripey batiks, thinking to use the stripes to simulate the frets on the guitar, but I just didn’t like how they looked.   Then I found this awesome batik (another one that I wish I had yards of…), a lime green with weedy flowers (or flowery weeds) in coral and pink.   I was a bit nervous about the color choices, but the neck was SO COOL in this fabric with a single stem running up the center!

The night I got the guitar fused, I showed Joshua the progress, more than a bit nervously.  His reaction: “that is SO COOL… if I could find a guitar like that I’d BUY it!”  WOW!   It doesn’t get any better than that!  And if I win the lottery (better buy a ticket, eh?), maybe I’ll just get him one custom made.

You can also see the wall in progress.  In real life the walls are a lovely celery green, but I needed a deep dark, so I raided my stash of blues and purples.  Although the walls are shiplap siding (wood, painted), I decided to be a bit more freeform and cut wavy-edged strips.  I like the sense of motion it gives to the entire piece…like the room is rockin’ with him!

Here is the quilted guitar, with the sounding board (or whatever that stuff is on the bottom) fused on, but the strings weren’t stitched until the very last.

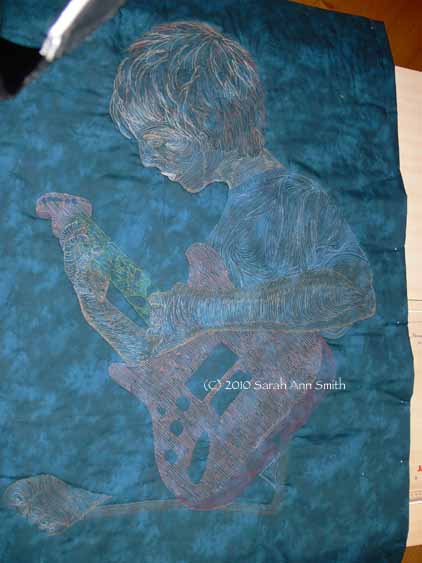
And of course, I have to share the back side with you.  I think the guitar is the most densely quilted part of the entire piece… about 1/16″ apart over the entire surface!  In the photo above, again you can see the colors of thread used for quilting.

Hope you’re enjoying the journey as much as I enjoyed making this piece,

Cheers, Sarah

Joshua, the quilt in process, #3–hair!

Tuesday, April 20th, 2010

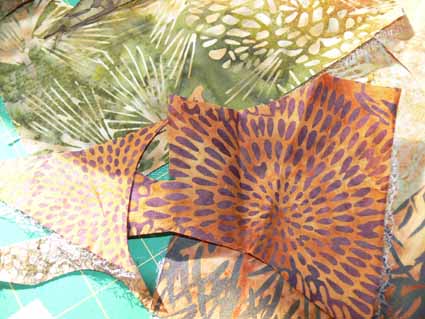
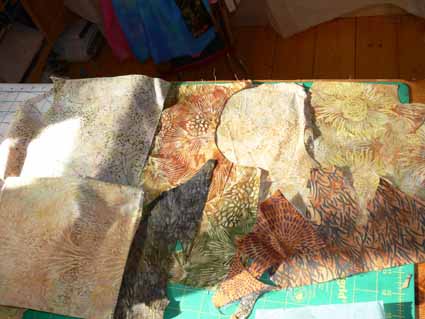
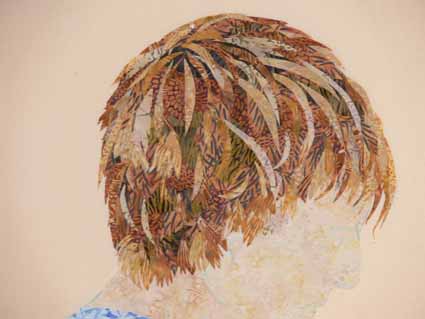
The feature that gets the most comments on this quilt is the hair.  Would you believe it is made from batik fabrics that are trees, shrubs, thickets, flowers and whatnot! Astonishingly, I actually remembered to take in progress photos, including of the fabrics (before I used them up)!  Here is some/most of the cloth:

And here is a bit more:

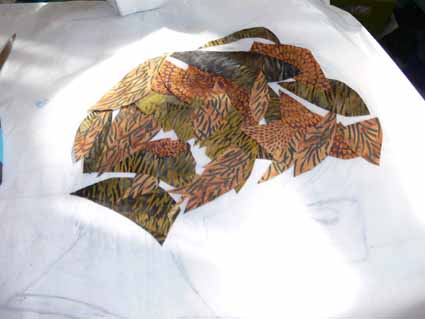
Then I started creating the base of the hair.  I slipped a pattern under an applique press cloth as a guide.  I cut larger chunks to begin:

Then I cut slivers, collaging them on to the surface–notice on some how I feathered the ends:

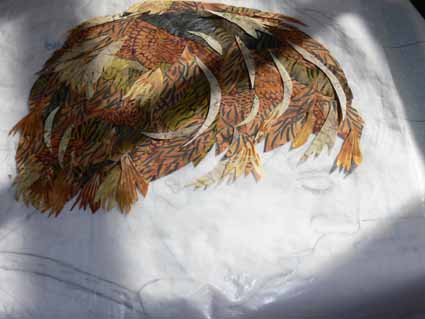
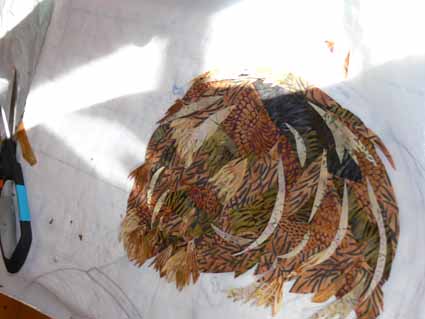
I kept adding:

And adding, until it was Joshua’s hair, and I fused the hair to the face:

I use one of those itty-bitty 18mm rotary cutters.  For years I delayed buying one…after all, why did I need another?  I had my trusty 45mm!  OH BOY do I love the little ones.  The jumbo that some folks use, the 60mm, is like a school bus:  large, does a lot, but cumbersome.  The 45 mm I use most of the time is the all-purpose mini-van.  The 18mm is the Mazda Miata, that nifty little sports car that corners and twists and turns in tiny spaces.  It pivots on a dime… it is great for freeform cutting (not so great with a ruler though).  So I set out a chunk of pre-fused (with MistyFuse of course) fabric, and slice up curves and slivers.  Even with the layering, this hair stayed pliable–not stiff at all!

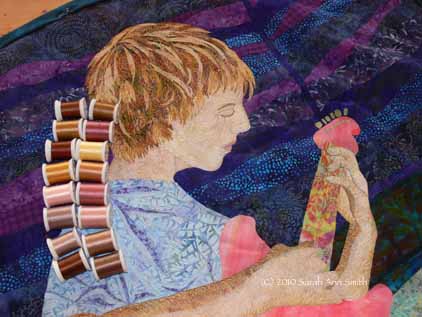
Finally, I quilted it.  The 16 threads on the surface are the ones used in his face, arms, foot (not seen in this shot) andhair:

In the first attempt picture, Joshua has a dark patch under his right eye and a too-pale bulb on his temple.  Those stitches got picked out and re-done alternating two colors of thread since of course, even with hundreds of spools and probably two dozen browns I still didn’t have enough of a smooth color range! But as you can tell, it turned out right in the end.

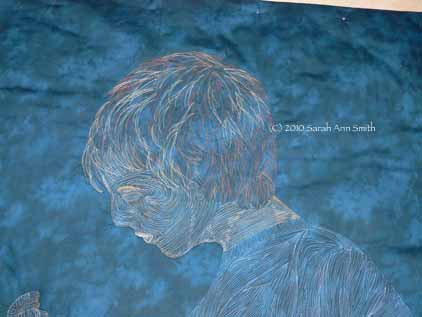
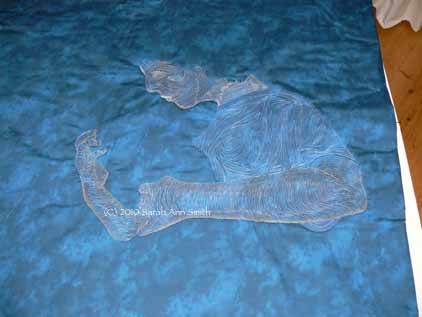
I always love the back side of my quilts, so I have to share this picture, also in progress:

And a bit more of the back:

I’ll have more soon…the guitar,the background, the furniture…..stay tuned!

Teacher makes a new vest

Saturday, April 17th, 2010

As this post goes live, I will be finishing up teaching for the Arizona Quilt Guild.  It’s pretty neat:  I fly in to Phoenix on Tuesday and teach at a shop in the greater Phoenix area on Wednesday.  On Thursday, my host/program chair drives me to San Manuel (north of Phoenix, south of Flagstaff) for teaching, then on to Flagstaff that night.  I discovered that our hotel there is literally right on the old Route 66!  I’ll be teaching there on Friday, and giving a lecture on Saturday.

As a traveling quilt teacher, you need several things…above all compact, lightweight clothes because most of one’s suitcase is filled with teaching stuff!   And it helps if the clothing is bright so folks can see you if you are lecturing in a large hall or teaching in a crowded classroom:

I hadn’t made a new vest in years, and needed something.  Because I am on my feet going around the classroom all day, I need something not-hot.  I picked this pattern, Cosmopolitan 337, from Lois Ericson of Design and Sew.  The pattern  also has instructions for making a vest:

I found the pattern online here…I’ve never shopped there, but at least they have it!  I bought mine at Quilt Festival last year….it says Lois has retired, so I guess I’d better stock up on her patterns that I love and don’t have yet!  Here’s a full shot of the front (please ignore the chin that is succumbing to age and gravity):

The vest, it turns out, was a bit large—which makes sense since jackets are supposed to be roomy.  So I did quite a bit of down-sizing (yeah!), and reduced the drop shoulder by nearly two inches.  I added the coral inserted stripes (love the effect), but next time  rather than try to reduce the panels on both sides of the princess seam, I would take the stripe out of the center pieces, which are a bit wide to my eye–definitely OK and wearable (and don’t you LOVE that print … wish I had even more of it…sounds like a trip to Alewives Fabrics is in order).  I opted for in-seam pockets (yeah!  Pockets!), but there are also some really cool patch pockets… next one!  Here’s the back, with my hair only slightly frowzy:

I used a nice batik for the lining and was careful, sorry I didn’t take a picture, and can use it reversed, too!  I also like that it covers the tuckus (aka posterior).  I still haven’t done a closing…not enough time before getting on the plane.  That can happen later!