email Youtube

Home
Galleries
Blog
Workshops & Calendar
Store
Resources
About
Contact

Author Archive

Intro to Machine Quilting

Tuesday, October 26th, 2010

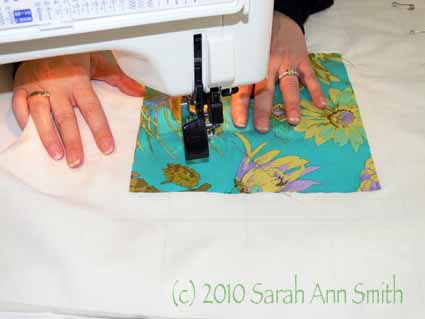
Last weekend I taught my intro to Machine Quilting at Maine-ly Sewing in Nobleboro, Maine.  The class was the first one in Maine where I’ve used the digital projector and “slide” (digital) presentation that I use for the national travel-teaching classes, and it worked as well here as on the road.  I believe fervently that new quilters need to understand that you must have the proper foundation to quilt well—it is more than just doing the machine quilting!  I use a painting analogy:  if you don’t sand off the cracking paint, spackle and prime the window frame, then it doesn’t matter if you have the best paint, painter and paintbrush in the world.  The paint job won’t be well done.  Similarly, you need to understand your fabric, batting, needle, thread, basting, and machine set-up if you are to achieve good results.

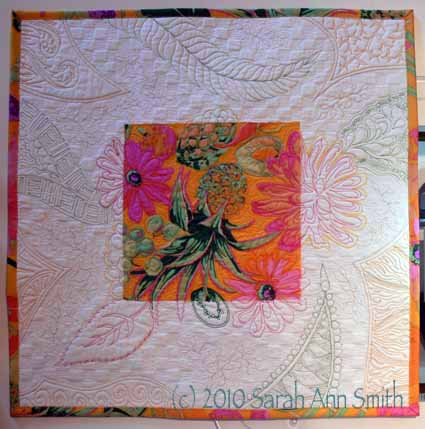
I used the new floral sampler in class (which I shared here and here), and several of the students gave it a whirl.  As usual, the class went by in flash–before I remembered to take pictures.  Students came from far and wide…as far as Bangor and Farmington, plus one visitor from Ohio, so I really appreciate the effort the ladies made to come take a class with me.  Distances here in Maine are longer than the miles because the roads are 2-lane country roads!

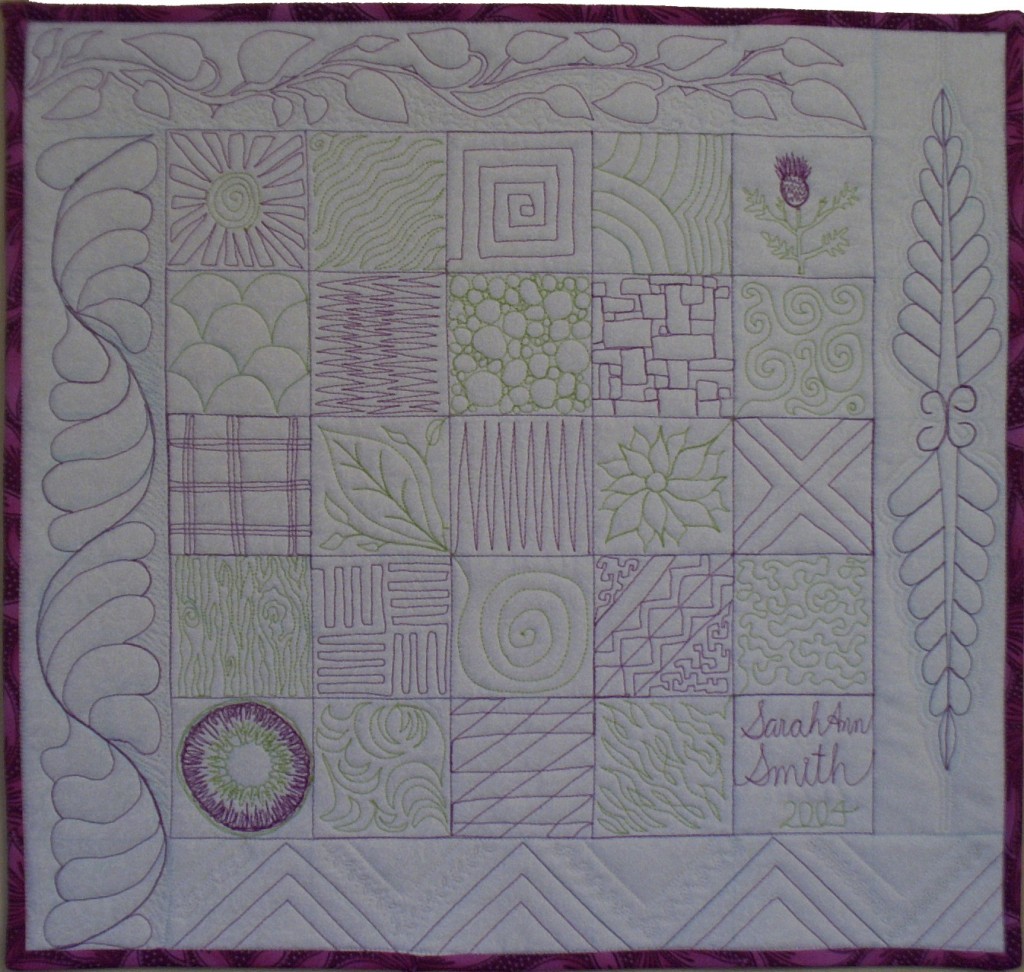
This student was following the grid sampler for free-motion patterns that I have taught the past six years (click to view larger) and is included in my book:


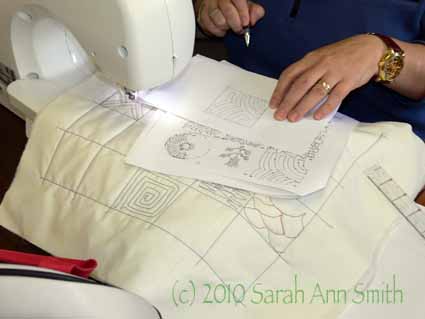
She is doing the perfect thing….tracing the design with her pen prior to sewing to get the feel of the design and how her hands will move:

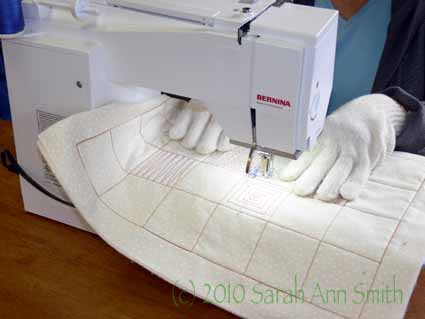
Then, the actual quilting process:

And trying out the flower/big print process (I liked the fabric she bought so much I went up and bought some, too!):

I’ve decided I like the way my sampler turned out so well I’m going to make a BIG bed quilt using these colorful fabrics and white sashing.  I think the piecing will be easy, it will be colorful and pretty, and would be a perfect project for a future book…heh heh…..just don’t hold your breaths, there is WAY too much life happening here for me to get to writing a book soon.  Sigh!

Blue Batik and Leaves….

Sunday, October 24th, 2010

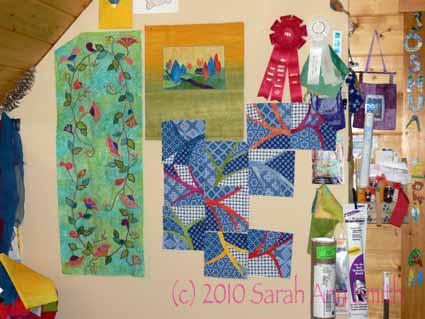
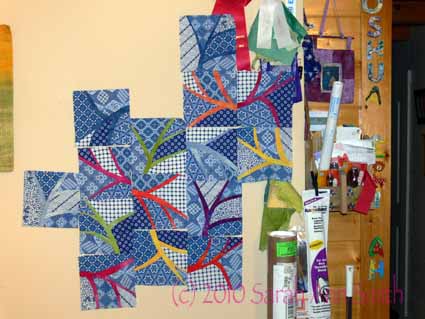
I seem to be congenitally incapable of making abstracts.  Using Kathy Schmidt’s Cell Block Blues pattern, from here Rule-Breaking Quilts book (see my post here reviewing the book), I started working on a quilt with a selection of ten blue and white fat quarters purchased at the AQS Tennessee show, where I was teaching. The picture above shows the beginnings…my first ten blocks, along with the recently returned (after a year away at shows) Field of Gold and the ribbon it won in Houston and a table-runner that needs to be quilted.

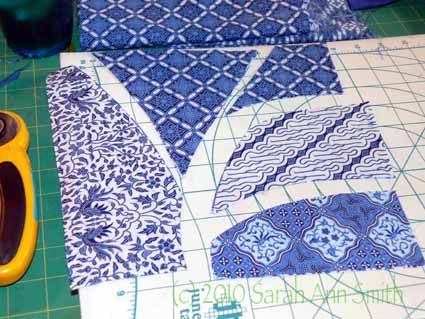
This AQS-Knoxville show was my last big away-teaching of the year, and I thought I’d treat myself to some fabric and totally unlike-me quilting, possibly as a project for another book.  I thought it would be fun to help support friend and fellow-author Kathryn Schmidt by using one of her  projects, and thought it would get a good stretch for me.  So what do I do with this fun, easy abstract?  I make it into more work (splicing in those bright colors) and into leaves—I just can’t seem to make something if I don’t relate it back to reality!  Anyway, I went to the Batiks by Design booth and made my own assortment of ten fat quarters and, amazingly enough, forgot to take a picture before I started slicing them up!   By the time I got the center of the quilt done, I was left with less than a fat eight total out of all ten!  Fortunately, I found them online and have ordered more for the borders and binding (that’s a wicked teaser!).  Most of the batik designs we see are from Bali, but these designs are from Java and are more like the old-time designs.

In Rule-Breaking Quilts, Kathy Schmidt teaches how to stack and slice, then swap, fabrics for an improvisationally pieced block. See my review of her book for more information and where to order!

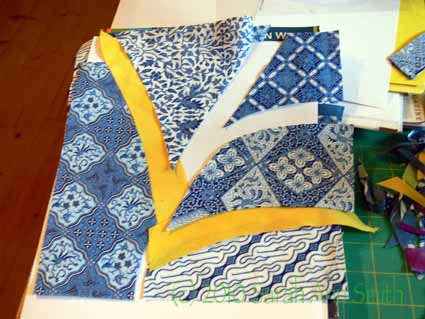
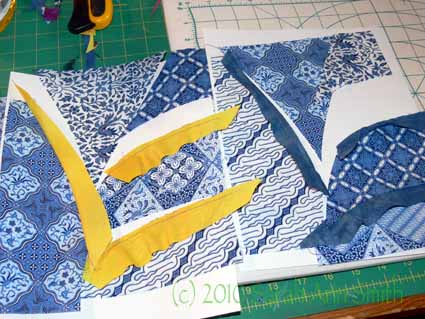
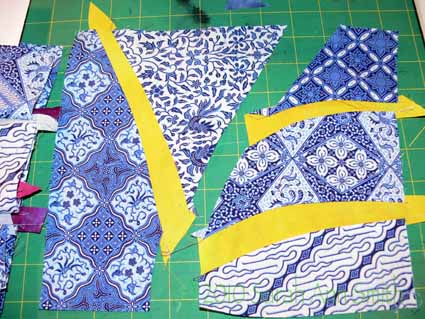
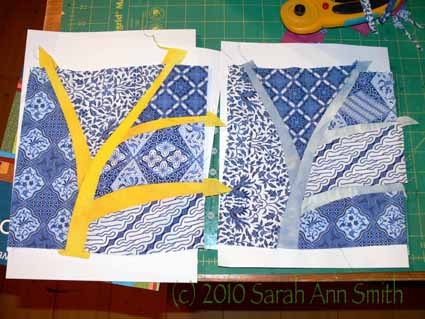
Here I'm auditioning a bright yellow-hand-dyed that I intend to splice into the seams

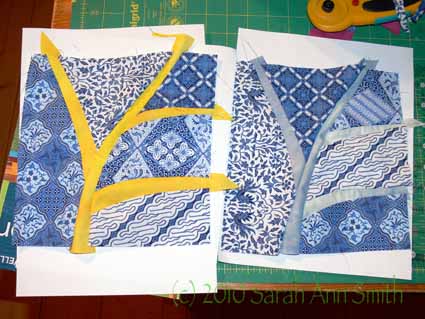
In this photo, you can see that I've stitched the first side of the inserts. On the left of each block, the piece is ironed, on the right the seams are as-stitched.

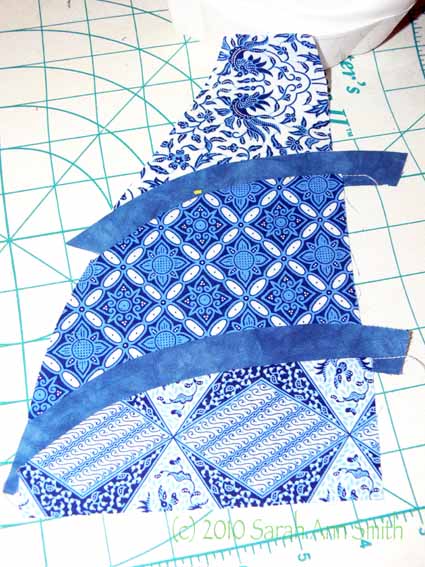
The right hand side of the blue block assembled and pressed

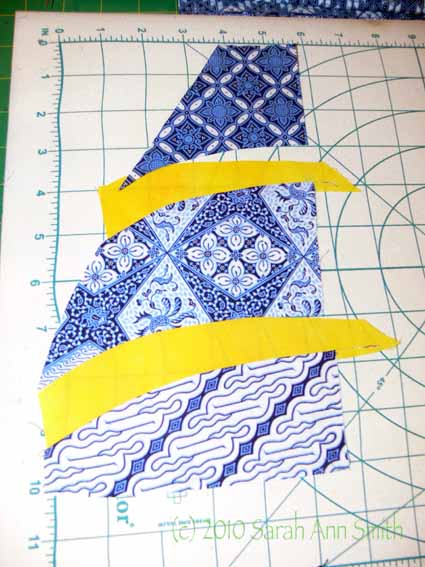
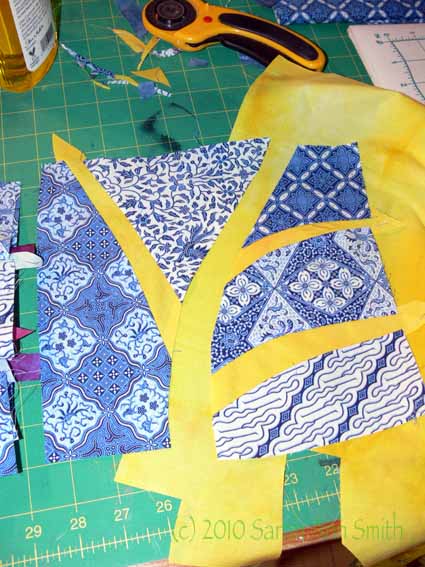
and the yellow block in process; you'll note that the edges are uneven and will require smoothing out with the rotary cutter

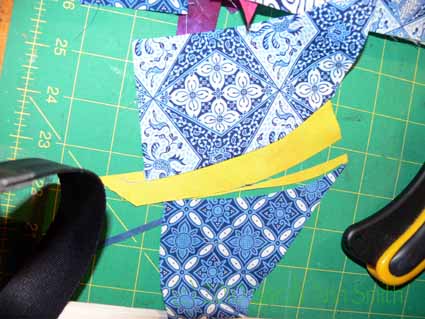
Sometimes (often!) after sewing the first seam, I like to fine-tune the shape of the spliced-in color to match the next bit of batik

The yellow block with the "leaf veins" sewn, but the center stemline needs to be refined and re-shaped

The stemline has been trimmed and smoothed, and now I'm getting ready to cut the yellow for that inset

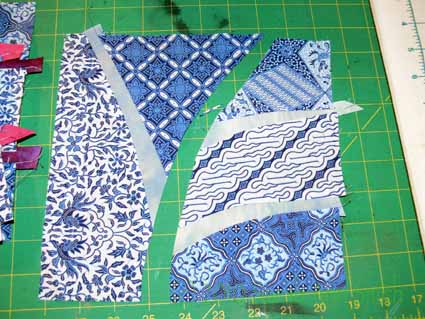
Same process, but for a light blue block; here I have already trimmed the wonky edges to create a smooth space for the center stemline

Blocks sewn but not yet pressed or squared up

Pressed blocks, looking a bit more presentable!

After I made my blocks I squared them up.  Most were able to come out to 8 inches cut, but a few were smaller.  As you’ll see when I get to showing you the way the quilt came together, this really didn’t matter as I filled in odd shaped rectangles with strips and rectangles of batik (talk about a LOT of partial-seaming…erg!  I NEVER seem to do anything easy, but I must say I’m pleased with the outcome so far….)

Rule-Breaking Quilts by Kathy Schmidt

Wednesday, October 20th, 2010

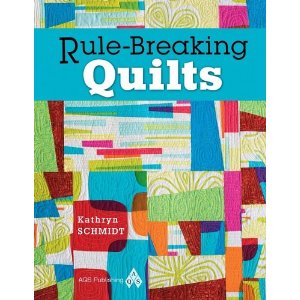
OH MY is my face red!  I thought I had reviewed Kathy Schmidt’s Rule-Breaking Quilts book EONS ago (available online from AQS here and from Amazon here), and I can’t find a trace of a review on my blog!  Hanging my head in embarrassment!   This is a great, fun book, with wonderful improvisational piecing techniques and a brilliant discussion of fabric choices, and somehow my insane teaching schedule and life ran away with me.  So, to do what I should have done about seven months ago when I think I was the very first person to order her hot-off-the-press book from her, let me give a ringing review of this book:

There are many books out there with various takes on how to do improvisational or contemporary piecing, but this one does it so well.  Kathy begins with laying the groundwork for her quilts, which are made with fat quarters and don’t take a ton of time or materials, discussing color, fabric choices, and design.

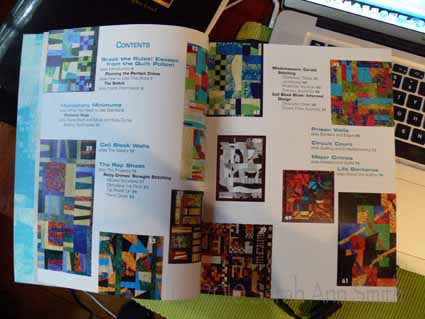
The first quilts use a stack-and-slash cutting technique and only straight seam piecing, which means they are accessible to true beginning quilters.  As you read through the book, the projects progress to intermediate level work.   Now…about the names:  this book is all about “escaping the quilt police,” you know—those people who say “you can only do it this way, precisely, exactly.”  Phhht!   As you know, I believe in understanding what rules are, WHY they are, and what will happen if you break them (for example, sewing a bias edge to a bias edge can lead to a stretched seam….if you can sew bias to straight grain, the seam will be more stable, but sometimes your fabric design doesn’t run the direction you’d like if you fussy cut a piece).  Here’s the colorful Table of Contents:

Sorry about the blurry photo…it was that or glare, so I chose slighty blurry.

Kathy’s projects throughout the book plays humorously with the theme with  titles like JayWalking, Disturbing the Piece, Moving Violations, The Frame Up, Organized Crime and so on. I’ve been thinking of a future book, and Janome America has been generous with me yet again and provided me with a Horizon 7700 sewing machine.  I thought as a real treat to myself, I would make my first new quilt (not just a class sample) on the new machine be one from Kathy’s book.  I’ve always liked improvisational curved piecing, so chose Cell-Block blues to try.

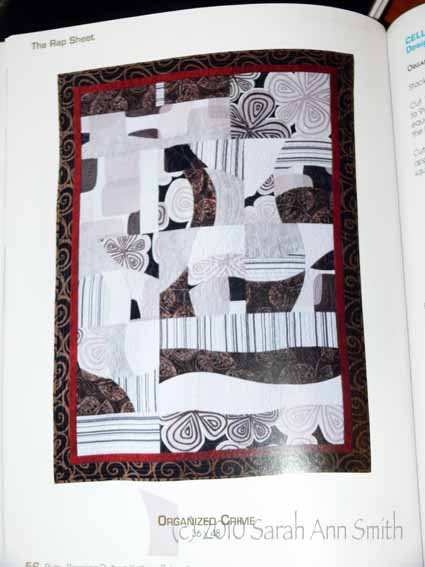
Here’s what the quilt looks like that Kathy made:

Cell Block Blues features improvisational curved piecing with gentle curves

In looking at the diagrams, I thought the cuts looked like the stem and veins of a leaf, so I decided I’d try splicing a color into the seams (sigh…I can NEVER do anything easy!). Believe it or not, the quilt above and the one pictured below are from the same general pattern, which gives you an idea of just how versatile this book is!  Here are the first few blocks I made:

I’ll do future posts on my process and the results, but I have to say I’m thrilled!

And I will admit it right here:  I am so proud of Kathy and how well her book is doing!  Back when I was working on writing my book, Kathy (who is on a Yahoo group for our Janome sewing machines that I’m on also) wrote to ask about how I approached AQS, what I was doing, and so on.  As I went along, I shared with her what was happening, she’d ask questions of me, and we are happily moving forward with a bestseller each!  So yes, I’m biased…. but I think there is good reason!  And even more fun, Kathy took a class from me at the NQA show in Ohio this summer and we got to eat dinner together and gab; here’s a link to the blogpost and a link to Kathy’s Blog.  I can’t wait to share more of my quilt; thank you Kathy for this wonderful book!

Cross country and autumn

Sunday, October 17th, 2010

When I first began blogging, I posted about my kids a lot, including bits and pieces of family life.  Then I got a bit leery…there are so many weirdos out there, and sometimes stalkers.   So I quit including stuff about the kids.  I miss that.  So I’m including just a little bit, and definitely blurring out the faces to protect the children!

Autumn is probably my favorite season!  I’m not wild about summer heat, and my birthday is in autumn.  I LOVE the crisp air as it returns, the smell of woodstoves burning, the crisp crackle of the leaves as they turn try on the branches and fall.  I love kicking my feet through the leaves lining the edges of our country roads (what’s a sidewalk?  I know they have them on all 2 1/2 blocks of down town, but really, sidewalks?).  Look at the screaming blue skies in this photo of the Camden boys at the starting line… you can tell from the bystanders wearing long sleeves that crisp air has arrived:

After my wonderful day with the Frayed Edges earlier this month, I drove from Bowdoinham (sorta southern-ish  to us…down south near Freeport, which is home to LL Bean and about 45 minutes north of Portland), I drove north to Searsport for a cross-country meet.  Our younger son is a born athlete as well as scholar…I swear there is not a sport on the face of the earth that he doesn’t want to try. And he is good…sometimes really good…at most of them!   After surprising us in spring with a request to try track, he wanted to do cross country this fall.

The cross country coach for the Camden-Rockport Middle School is Jim Morse, possibly one of the best of the best of teachers.  He teaches 6th grade social studies and, with his partner in excellence CRMS Librarian Kathy Foss, comes up with all sorts of amazing and wonderful ways to teach the kids. Last year Eli not only had Mr. Morse for Social Studies, but was lucky to be in home room with him.  Mr. Morse is also a jock, and on this day (you can see him in the next photo in the plaid shirt talking to the boys before the race beings) he was a bit achy as he had (WAY TO GO JIM!) just completed his first marathon the day before! WOW!  I could maybe bicycle 26 miles, but run it?  EEEEK!

And they’re off!

taken through the chain link fence...Eli took off so fast all you can see on the far right is his elbow!

Once again, the CRMS teams, boys and girls, trounced the competition.  Both teams have come in first in EVERY meet they have run this year!

SAQA-Maine, a September treat

Thursday, October 14th, 2010

Margaret Sheehan's coppery monoprinted sheer

SAQA is the Studio Art Quilt Associates, a non-profit group to promote art quilting with members around the world.    There are regional groups, including one for New England.  Those of us in sparsely populated Maine –the state population is about 1.3 million, the same as San Antonio, Texas or San Diego, California!–live far enough from the majority of the regional group members in Massachusetts and southern New Hampshire and Vermont, that we don’t often get to the meetings.  So Sarah Carpenter, Beth Berman and Wen Redmond had an idea an made it happen:  SAQA-Maine retreat weekend in Searsport, Maine the weekend of Sept. 18th!

Beth VERY generously hosted much of the meeting in her home and new studio.  Other meetings were at the hotel just a mile or two up the road and a nearby church (the evening show and tell…alas it was part of the event I couldn’t attend). I forgot to take pictures of the first part which was meeting, at Beth’s house, or when the workshops began.  Various regional members offered to do demos or mini-workshops, and oh was it fun!  Valerie Poitier’s talk on perspective (my right brain was confuddled but I did get it eventually!), as was Wen Redmond’s demo on making thermofax screens and printing with them.  At least  I finally remembered to take the camera out during my mono-printing session with Margaret Sheehan.  I sure hope she comes back and does a two-day workshop near enough for me to take…talk about utter playtime! You can visit Margaret’s blog here and see some of the sheers featured below in the photo at the top…wow!

Here are the pics from that session:

Valerie Poitier looks stunning in Margaret Sheehan's sheer artcloth (also seen in the first photo of this blogpost)

Margaret S's red sheer mono-printed cloth---I LOVE that bird's nest design

And holding the red sheer up with the light from the open doorway behind...

I think this falls into the category of “Be Still my beating heart” and “I wanna do that NOW!”

Margaret explains some of the techniques used on this cloth

This piece of Margaret's shows how she used freezer paper resists when mono-printing

Yet another heavenly sheer--the synthetic sheers come from JoAnns mostly, the prom dress section, and obviously are vastly improved with paint

A different red sheer with sunswirls

Margaret showed us how to use heavy mil plastic drop-cloth, textile paint and common tools for surface design; notice the whisk.....

Transferring the mono-print (paint on plastic) onto the cloth is a tactile experience

In the upper left corner, Margaret pulls away the plastic with spiral she has just printed onto the cloth

The table I worked at! My stuff is on the near side and in the center

A closer look...here on my blue/green I used too much paint and lost definition. It is a learning process!

Even my paint tray was pretty!

one of my classmate's circle design...ooooh! I'm pretty sure she used an Afro/Hair pick for those marks

Drat I wish I could remember how she told me she made those marks....you can see this is addicting!

Again..I forget how shemade those purple marks, but I love them!

As you might gather, for a 2-hour session that was about an hour of demo and an hour hands-on, we the students really were inspired and went to town with our scraps.  Thanks SO MUCH to Margaret for sharing her time, technique and paints!   Next year we REALLY need to chip in to cover expenses for supplies…. Margaret, if you see this send me your snail mail address and I’ll either send you a fiver or a bit of hand-dyed as thanks!