Hi all…. a review for you of a DVD and/or app for you i-Device (iPhone, iPad or iPod touch): the Footbook by Jim and Diane Stutsman available at their website Online Sewing. Jim is the buy behind the online group/learning mecca Club J, for Janome owners.
 This DVD/App is for Janome feet, but many of the tips on the app will apply to ANY brand of pintuck foot, zipper foot, whatever. For those of us who don’t have iPhones or iPads or an iPodTouch, they also have the info on a CD to use on a computer. I noticed that they didn’t have the price on the description (for the CD at least), and wrote the Contact Us person to mention it would be a helpful addition. Turned out it was none other that Jim Stutsman of Club J with his wife Diane writing the text and narrating the videos. Jim wrote back, said good point and thanks, and offered to send a free CD to me for alerting them and the suggestion. Nice!
I will note that this is a DVD / app that covers the uses of all the presser feet. If all you do is straight seams and free-motion quilting, it may have a lot more information about esoteric feet, like pintuck, beading, buttonhole, rolled edge, ultraglide, overcast and whatnot, that won’t apply to your sewing. If, however, you want to use those feet, do sewing other than straight seams and make garments and home dec items, there is a lot of great knowledge in this small package. The photos are really sharp and clear, like this one:
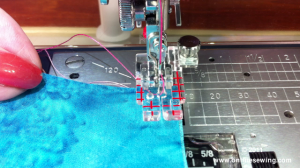
I figured I’d look up a foot I knew how to use and one I didn’t. I learned from the videos for BOTH feet! The one I (thought) I knew how to use is the pintuck foot. I do, but they had an added suggestion of taping a machine needle to help form the channel and guide the fabric. Great suggestion! I haven’t looked at all the feet/videos, but I’ve probably done about half, and have learned something with most all of the videos. That’s pretty amazing! (please note that, according to Jim, this video is smaller and lower quality from those on the DVD. The iPhone app uses 3 different quality videos depending on the type of data connection, with WiFi being the best.) Here’s the YouTube-quality sample of one of the videos:
The only negatives: when I pop the DVD into my laptop, a MacBook Pro, there isn’t something that opens automatically or that suggests which browsers to use. You don’t need a live internet connection, just the browser (don’t ask why…don’t know, something with how the DVD player reads the disc). According to the website, the DVD is compatible with Windows Explorer, Firefox, Google Chrome and Safari. On my laptop I usually use Firefox. I remembered the first time I opened the DVD it had nice videos. When I tried to play it today, no videos. Weird, I thought, where did they go? So I opened the DVD in Safari, and there they were.
The second time I put the DVD in the slot, I noticed the disk itself on the label tells you to click on the folder that says “Start.” (DUH Sarah…I shoulda read that to begin with!) Operator error (as in my goof). Anyway, I clicked on Start; since I had Firefox open, but not Safari, it told me I didn’t have Safari or Google Chrome which would play advanced features of the DVD. I opened Safari and pasted the browser address into the Safari window and it played like a dream. There is, apparently, a Plug-In that I could install on Firefox on my laptop to enable the necessary Whatever to play the videos. Since I had the work-around of using Safari, I declined to download the plugin and will just remember (I hope) to play it in Safari. (Note: for those of you not on Macs, Safari is an internet browser designed by Apple, similar to the way Microsoft created Explorer.)
In sum, I thought the information was well very written, the little video clips (which run 2 minutes or less) very helpful….Thanks to Jim and Diane for the DVD to review and try out. With 40 years of sewing in my checkered past I’ve learned a lot, but I learned a number of new things from this DVD. To me, that means it does quite a fine job! Cost is US$6.99 for the app or $24.95 for the DVD. You can order it from them here:
http://onlinesewing.squarespace.com/
Cheers, Sarah
OK…on this fun, very small, closed internet group that I’m on, I’ve gotten more than a tad silly. When wishing folks happy birthday, I used the Sandra Boynton birthday greeting (remember her fun greeting cards? wonder if she still makes them?) I wished folks “Hippo Birdie, Two Ewes” (imagine the cartoon-like drawings to accompany that phrase. Well, I morphed that into tunas in tutus dancing to celebrate birthdays. So today I am a thundering and twirling 54, and it has been a wonderful day.
(there is a picture for this post, by the way, but you’ll have to read a bit…it needs to be chronological according to my feeble brain)
Actually, it began a couple days ago. Hubby for years didn’t quite get that birthdays are important, but that it is the thought that goes into things that counts the most. Well, this year he got it right in oh so many ways! He thought about it ahead of time, went to a great of trouble to cross paths with our older son (who now lives on his own) and get h im and his girlfriend to sign my b-day card AND come over for dinner tonight! Yesterday, when hubby got home from the grocery with younger son, I went to help, and he said “since I can’t sneak these into the house with you here, happy birthday!” and gave me flowers, my favorite yellow (mums since daffodils aren’t in season by a long shot).
And today was good… I started out with a bazillion greetings via FaceBook.I had resisted FB for eons, but I’ve come to enjoy it, and as of today LOVE it. What fun to hear from so many internet friends!
Then, chores…one of the reasons I haven’t blogged is that I am at long last emptying the storage unit of mom’s stuff and liquidating the last of it. Have two pieces of furniture on Craig’s list. If they aren’t sold in 2 weeks, I’m donating them somewhere! The past two days I’ve gone through 31 boxes of books, we’ve (with Paul’s help and some from Eli) gotten 8 large boxes with China and crystal (I’ll deal with them later) to our house, and I’ve hauled 8 smaller boxes to the Salvation Army. The unit WILL be emptied!
And today I took a bit of time between cleaning the storage locker and picking up younger son after Cross Country Practice to sketch. A friend of his, a guy in his 30s who was a sensei of his in karate–Mark Johnson–who has multiple black belts in multiple martial arts, is also a fairly accomplished artist. Mark has met and studied with the current Wyeth (Jamie I think, as in N.C. Wyeth and Andrew Wyeth, yes, direct line of succession). Mark once told me that Wyeth has students do a tough exercise: draw a white egg (or eggs) on a white piece of paper. So I tried it! (click to see larger)
It was GREAT! The eggs are actually gray mostly, with a dark band around the center, because light reflects up at the under side from the paper. Who knew? Not me! And I loved how the lights cast those overlapping shadows, like a Venn diagram! Anyway, a really wonderful exercise in seeing. So good in fact that I want to try again. Today I used four pencils: HB, 5B, 6B and 8B. I’d like to try again, but instead of smudging and shading with different leads, I’d like to try it in both watercolor and in a single hardness of pencil (maybe a 2B) or even pen (once I get the outlines/contours roughed in with pencil).
Over the past six weeks I’ve done an online workshop with Jane LaFazio, in part because I wanted something to force me to sketch regularly. I want to blog about that but as usual am behind the curve–I promise I’ll share (soon I hope). Still need to get that storage unit cleared out, plus we’re having work done at the house tomorrow, then Thursday is Eli’s next Cross Country meet, then then then….. and I’m taking another class with Jane that starts Thursday too (obviously the first one was so good I’ve gone back for more). Stay tuned folks!
And thanks to one and all, starting with hubby!!!!, for a wonderful day.
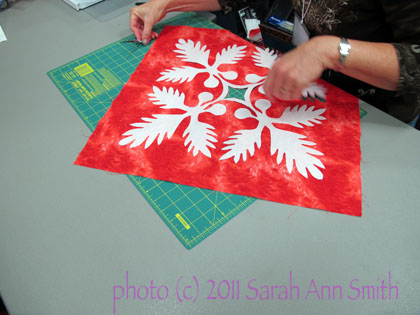
The white is the freezer paper pattern piece (the Ulu or breadfruit block), the red will be stunning!
Teaching Hawaiian style applique is always so much fun, waiting to see how the designs look in the different fabrics. I offer students a choice: dive in the deep end of the pool and begin with a block that finishes at 18-19 inches, like the one above, or give the technique a test-drive on a small 6 inch block before moving to a larger piece. Many students like the somewhat fiddly smaller pieces because they can practice on it in class, then work on their “special” full-size block at home where they are comfortable and have all their fabric stash and thread. As you can see… we had happy students…this is good!
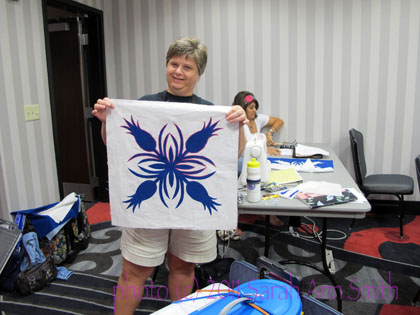
The pink thread (top half is stitched) really adds a nice dimension to the blue and white pineapple block...well done!
then
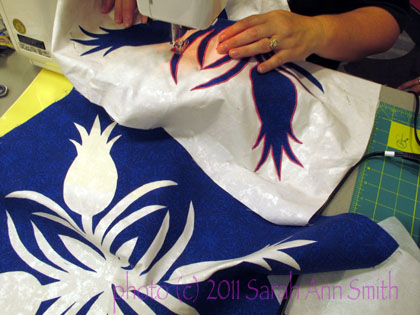
Here is the same block being stitched, plus the "negative" or "opposite" block, white pineapples with a deep blue field
For the small blocks, students have a choice of the Taro leaf or a turtle.
Here’s a picture of the classroom:
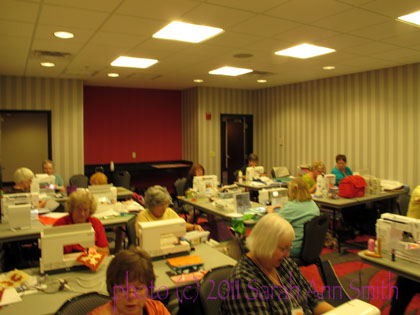
Sewing, sewing, sewing! As you'll notice, we requisitioned another table from the hallway to go down the center... the narrow tables were not roomy enough for three students each! Thanks to all the ladies for being so gracious about the cozy quarters.
And a few more of the larger squares… I just love the variety in the fabric selections!
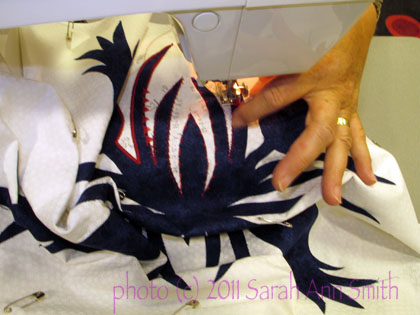
One student used her "positive" cut-out to test various decorative stitches, then wanted to work on the negative (white pineapple, dark background) at home. Great way to test...she did what I always suggest, writing notes right on the white fabric to remember which stitch, what settings. Really like that spike-y stitch!
(Oh…. tacky moment: these patterns are all from my Nourish the Body, Nourish the Soul pattern available here.)
And finally, two rousing red blocks. This student looked at various threads to satin stitch, from black to white to red, and settled on an orange that will set off the edges but not scream:
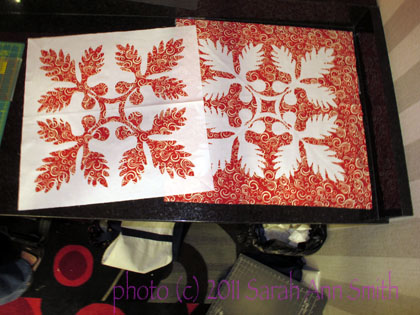
You cut one square of red (carefully) and fuse it onto two white backgrounds--two blocks for the price of one!
I had a total blast teaching in Nebraska. The students were great, the many volunteers who put this event together were great! Thanks so much for inviting me, ladies, and hope you my readers have enjoyed visiting with me!
To continue the story of my trip to Quilt Nebraska….
The next day, Friday, I was in the new convention center located a short walk (less than from the far reaches of the Hilton in Houston to the convention center floor, and they are all attached!), which was lovely. The rooms had not been completed when they toured the facility (it was still under construction, the place is SO new), so some of us ended up in rather cozy classrooms. The students were incredibly gracious about the tight quarters…not one single person complained (at least to me) and they all just figured this was what we had, so work with it, and we did! I moved my stuff to the floors to create more workspace, and the rooms had these really nice counters in back which we appropriated for work and cutting surfaces. They also has an awesome front-of-room thing with a white board, pull down screen, and two “doors” that covered it that could hold either a large pad of paper or on which you could PIN stuff… PERFECT!
Friday, the second day, I taught one of my all time favorite classes to teach: Fine Finishes. I teach four basic techniques, but share a number of others. Depending on how quickly students work, they can explore some of the other techniques… I just have them tell me which one, then I explain that one to them….there are enough hours in a class day to teach all the techiques, so I cover the essentials then let students learn what they came for. My theory is that I am there for them to pick my brain and learn as much as they can and as I can teach, so I share as much as possible!
One of the best moments was toward the end of the day when a student asked something I’ve never been asked before: how to bind an *inside* corner. Fortunately, I remembered how. We used one of her quilt mini-sandwiches to do up a sample. I liked this so much I’m going to make up a sample to have on my own to add to the offerings!
Two students shared their bias strips to try piping with a binding…they look great!
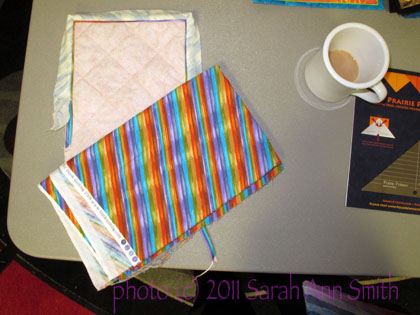 This striped fabric looks a bit bold, but when used as a piping it was subtle and fabulous!
And on Saturday, another totally fun class, Hawaiian Applique by machine! Stay tuned for the many photos in part 3!