email Youtube

Home
Galleries
Blog
Workshops & Calendar
Store
Resources
About
Contact

Author Archive

Painting–the inside of the house, part 2

Tuesday, March 6th, 2012

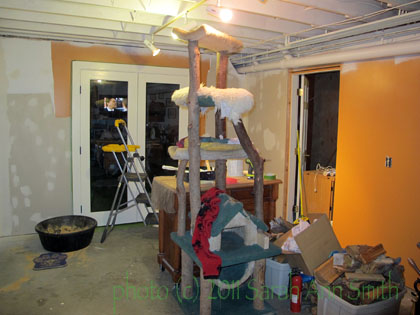
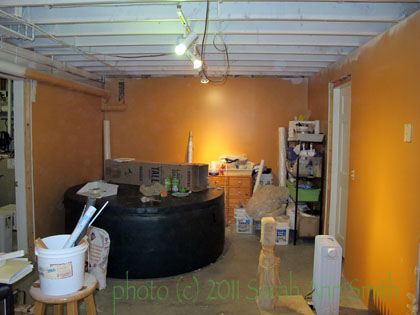
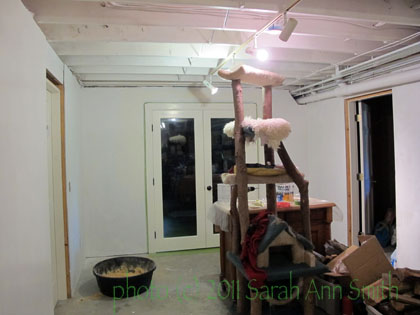
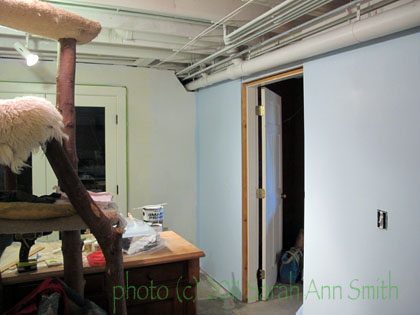
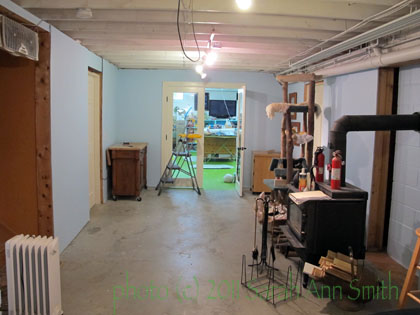
So here was the really big change and paint job:   The basement has a long rectangular area in the center, with rooms off of it:  a utility room (housing the furnace, oil tank, etc), a wood room (to hold all the wood for the winter heating by woodstove), a workroom, a space they used as a family room (with NO windows and painted an icky dark green with drab taupe on the ceiling) and we use as storage), and what has become my studio.  This area was painted a “roasted pumpkin” color…think the color of pumpkin pie, but a tad more orange-y.  Not a bad color, but not on walls of an area with no windows!  The stairs down to the basement were the same color.

Stuff pushed to center, prior condition...unpainted drywall and some of that pumpkin color....


The other end, in pumpkin. Yes, that is a hot tub. In a windowless basement. ??? Never used. Time to sell it I think....

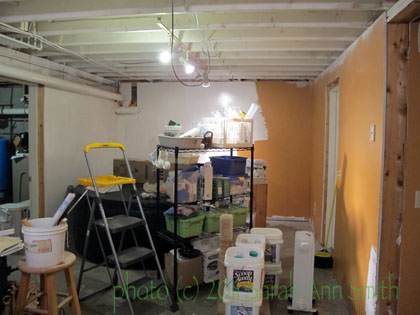
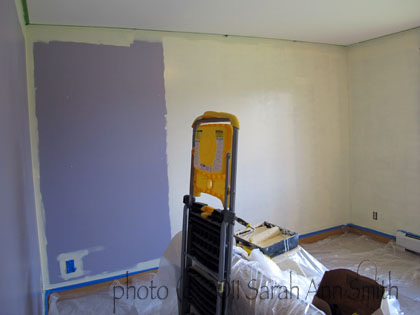
So last summer, I took a gallon of leftover sky blue (from the boys’ bathroom) and mixed it with a gallon of white to lighten it somewhat, and painted the walls in the center area.  First, it needed a primer though to cover up that dark pumpkin:

Looking better with the primer just on part of the walls

Hallelujah....lighter! brighter! What a welcome change!

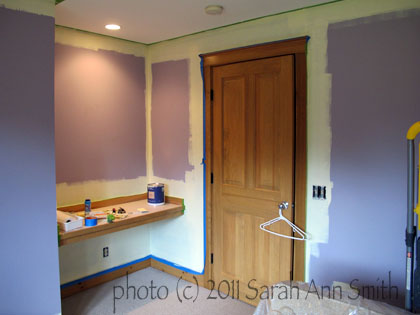
Next, Blue:

primer on the wall on the left, blue (first coat) on the right

Looking toard my studio...isn't that BETTER?!!!!

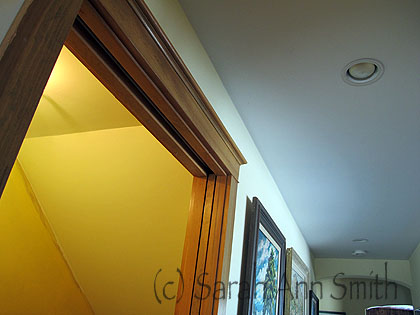
The stairs down (see on the far left in the photo just above) was just as awful.   So I tackled that about two weeks ago:

I painted the ceiling, too, in the stairs. It had been smudged when the previous owners moved out, and was this gloomy color. The light fixture alters the color somewhat, but in this photo you can see how gray the ceiling is in the rest of the house/hallway, ad the warmer "gardenia" color I put on the stairway ceiling

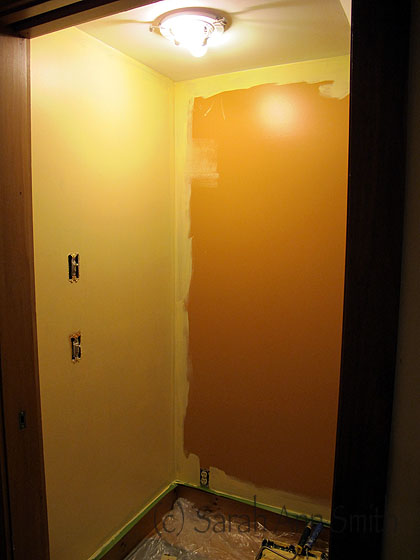
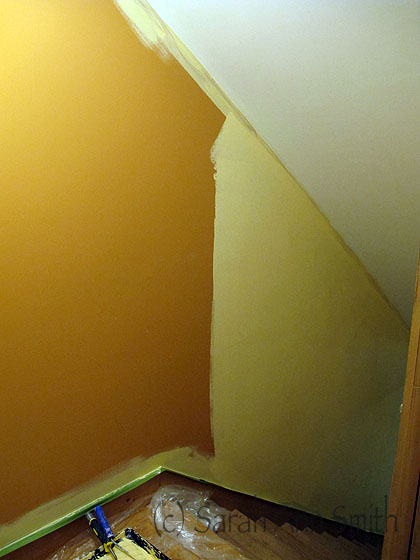
And getting rid of the last of the pumpkin just this past month:

Stair landing, halfway done

A nice Sunrise yellow color replaced the pumpkin! Mo bettah!

Quilting at last! or….Rituals, #1: Strength and Calm

Saturday, March 3rd, 2012

For the third year, I’ve been lucky to be invited to submit a quilt for consideration for a special exhibit to debut at the International Quilt Festival in Long Beach (and which has moved on to Houston and beyond for the past two years).  My earlier entries were the portrait of our son, Joshua, for the “Beneath the Surface” challenge and a self-portrait for “The Space Between.”  Curated by Leslie Tucker Jenison and Jamie Fingal of Dinner@8Artists, this year’s theme is “Rituals,” but the size has changed to a more challenging 24″ wide by 60″ long.
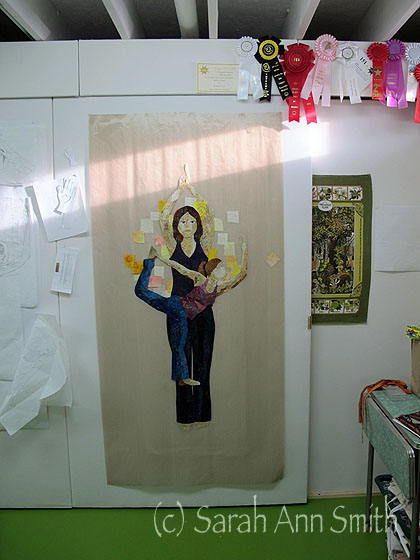
Fairly early in the fusing process for Strength and Calm

My first thought was to do a triptych of sorts:  breakfast is tea at my laptop with oatmeal (Irish oats), lunch is dog walkies, evening is decaf tea and a good book.  But I was bored with it before I even began.  And I was stumped.  I don’t feel like I really have any other rituals.  I’m sure I do, but what?  And could I make ANYthing of interest to ANYone?

While mulling over my lack of ideas, I signed up for a class at the local Y called Bodyforging.  This class combines some yoga positions, Pilates and other exercises to develop core strength, flexibility, and I’m sure there is something else.   One day while working on a “mermaid” pose, I was watching a classmate thinking how beautiful the shapes of her body are while doing these stretches and the idea for a “yoga” quilt was born.  At first the idea was just to do a figure, perhaps with some ghosting of the movements through the sequence.  But then I realized I could use this theme for Rituals, as this class has become an essential ritual in my week.  After a nearly 20 month hiaitus in exercise thanks to too much life happening, it was time to get serious and do something about my increasingly weak and flabby body.

Good news:  the body is getting stronger, flexibility has returned, I love the class, AND I morphed the idea for a “yoga” quilt into this project.

To fill the long space, I decided to use a woman in “Mountain” pose: standing straight with arms above her head, but with a closed fist and an open hand, since our teacher closes each class with the thought of the fist for strength, the open hand for calm, as we go into our days.

But a single figure like that would be boring, so I thought about layering figures and poses.  I loved “Mermaid” and “Warrior” so knew I would use those.  I needed another vertical image, so in googling yoga poses, chose the figure with the lifted leg.  Checks with a few friends indicated they didn’t like the pose with the arm extended in front (and therefore cut off from visibility on the quilt), so I moved her arm up for balance which is a challenging variation on the pose.  And I love what is known to me as the pretzel stretch.

I began by assembling various generic photos to use to create my sketches; when done, I outline using a fine black felt-tip pen.  The paper used below is medical exam table paper which is cheap, fairly thin and can be cut long—a lot more thrifty than tracing paper.:
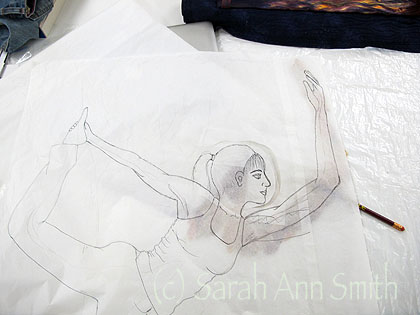
Full-size pencil sketch of one of the two main figures--I later realized that the arm in front is disproportionately long and fixed that.

Then I decided to begin with the two main figures in cloth, starting with the hardest parts:  the faces and exposed body parts.  I picked a bunch of pre-fused (I love Love LOVE MistyFuse!) skin tone fabrics:
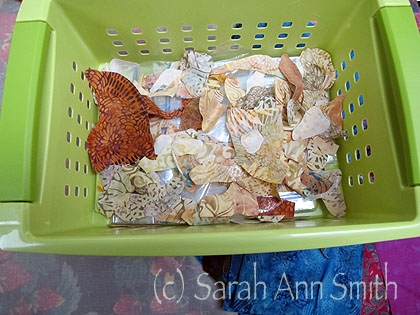
Skin tone fabrics--with skin tone being very loosely defined, since some of these include lavender and green and burgundy--cut into collage-able chunks.

I started with the face:
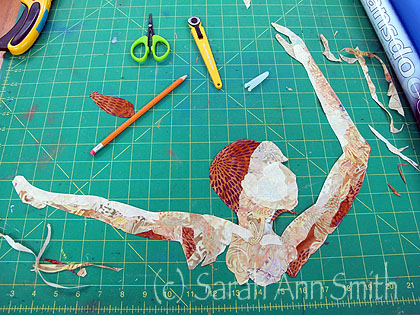
Blocking out the shapes. I cut to approximately the shape I need, then fine tune after "fuse-tacking" in place. Here I've moved the in-progress piece to the green mat to improve contrast for a photo
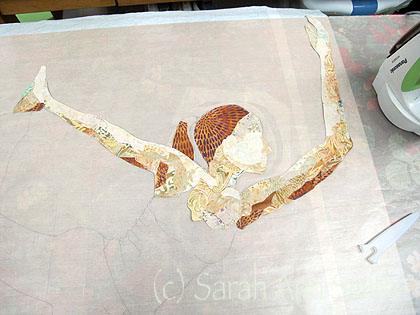
A bit more fabric added, blending done. You can see underneath the nonstick press sheet the ink outlines on my inked sketch. I position the fabrics on top and fuse them to each other. If you look at the very first photo, you'll see the head and arms UNDER the sketch. I will position them under the inked outline and add transfer paper to transfer the final edge and trim.

I’ll go through several building stages, starting with face/neck, adding head shape then more hair, then exposed body parts.
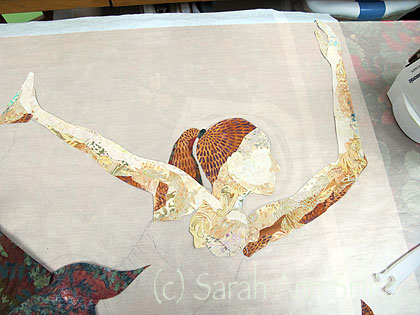
Refined a bit more; the fabrics on the left are ones used to cut slivers for more hair

The garments go together a lot more quickly, and use much larger segments of fabric:
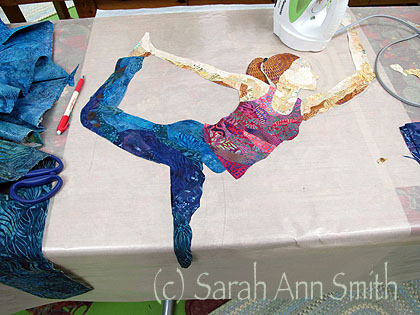
shirt made, pants in progress

Then there is the lady in the Mountain pose:
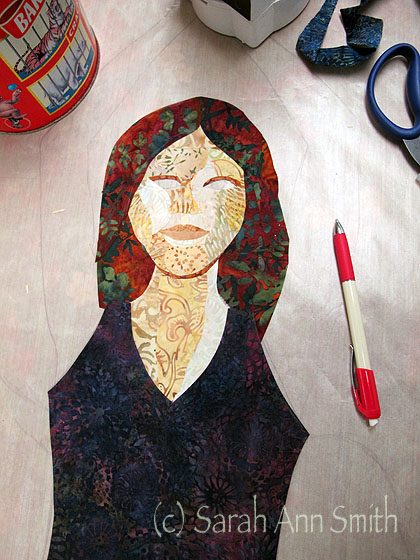
Working on the face...looks kinda creepy with the eyes not yet inserted under the openings.
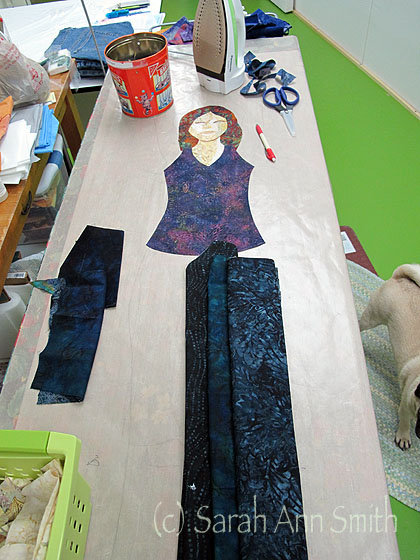
Checking fabrics for her pants. I wanted the garments for this figure to be darker and more toned in color than the woman in the foreground.

I didn’t want to use an exact replica of the photo I found on the internet, so I kinda made up this figure and her face.  I can tell.  For the hands, I used the camera on my laptop to take pictures of my hands in the position I wanted.  I struggled with the face getting the eyes and pupils and whatnot “just right.”  Now that it is done, it isn’t perfect, but it is improved one tiny sliver and trim at a time.

Here are the two mostly-completed figures pinned up on the wall:
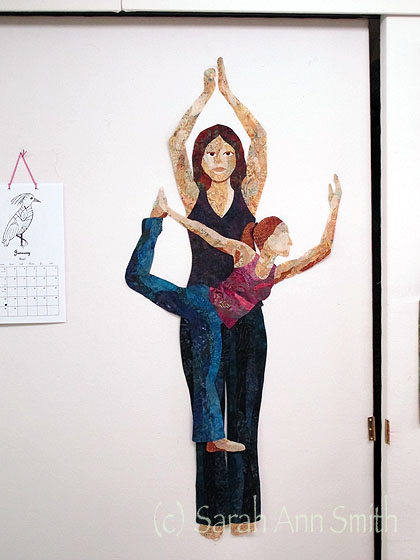
Mostly done and on the wall to review: there isn't enough contrast between the standing leg of the woman in front and the woman behind, so I revised the fabric on the standing leg. The accuracy of shading isn't right any more, but it works better overall.

I wanted to have the color radiate out from behind the figure with the lightest color like an aura/halo behind the standing woman, merging from yellow to coral and pink to plum.  I could have pieced it, but all those seams are lumpy and bumpy to quilt, and I wanted something fairly jiggedy-jaggedy.  So I fused it.  I prepared but using my stash of pre-fused fabrics and fusing up some larger chunks to cut into sorta-square-ish shapes.
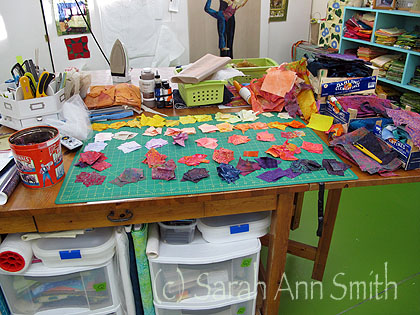
Ready to start on the background. I cut the shapes then sorted them into a color gradation.

Then I started working my way out, as seen in the photo up top, which I’m repeating here:

Fairly early in the fusing process for Strength and Calm--note the tan press sheet on the wall and see the text and link below.

For the next post, I’ll show the some photos of working out the background, then deciding what to do for the additional figures.  At this point I still didn’t know if I was going to use fabric–either collaged or silhouette or sheer, or simply quilted outlines, or what.

And a plug:  that long tan bit on the design wall is a ginormous non-stick applique press sheet.  It is pretty much the same thing which MistyFuse uses to make their nonstick Goddess press sheets, but really BIG.  I ordered it from art quilter Valerie Hearder, in Canada, here.  After several years of dithering and waiting to have some savings in the bank, I bought TWO pieces each 36″ wide by 72″ long!  One covers my big-board ironing surface, the other is pinned to the design wall.  It was totally worth the expense, and really easy to order from Canada–passing through Customs and international mail was easy peasy.  Valerie sells it in either 18 or 36 inch wide bits, and sells it by the yard so you can get just the length you need for your available space.

Painting–the inside of the house, Part 1

Thursday, March 1st, 2012

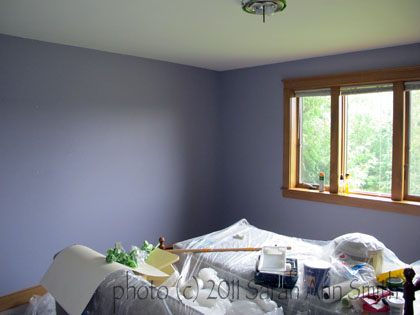
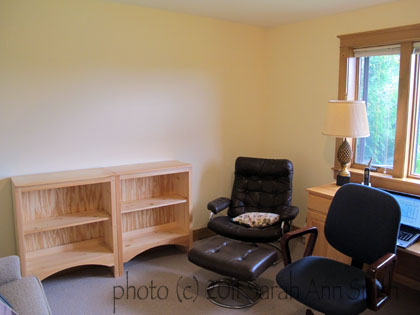
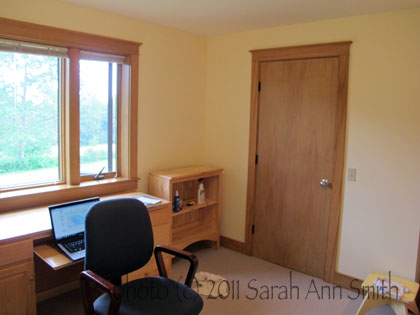
I never did blog about all the painting I did last summer/fall, and just finished more.  The house we moved into last February was in great shape but we decidedly did not share the previous owner’s taste in color.  At all.  When we moved in, we had painters do Eli’s room, the two bathrooms,  the dining room and my studio, but left the rest to do ourselves (meaning me).  Joshua wasn’t happy with the idea of moving at all, and instead of painting the lavender (Shudder) color in his room, just covered it up with posters.  When he moved out last July (and he’s doing GREAT by the way), Paul took that room as his office.  I realized the ceiling was grim…very dingy and gray ish in color.  So I painted not just the lavender walls, but the ceiling.  With the help of Leanne at the local EBS (Ellsworth Building Supply, a small Maine lumber company/hardware store), we chose Gardenia, a warm white. What a difference color makes…and not just in quilts!

Before: very lavender. VERY. and it turns out even the ceiling paint was tinged (and dingy-ed?) lavender....

Ceiling has been painted, cutting in with the pale yellow Paul chose....

Then,

The largest wall, halfway done...takes a lot of pale yellow to cover medium lavender!

Done....that long wall is no longer purple!

This is called turning gloom into happy!

And the other side of the room, again in sunny, happy yellow

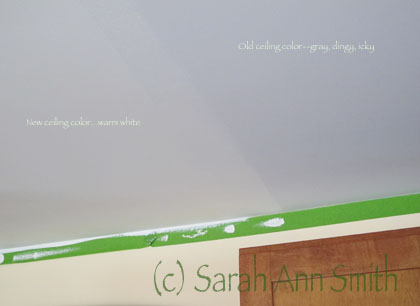
I discovered the ceilings throughout the house were this dingy grayed white.  UGH.  So I decided the entire house needs new ceiling color.  I can tell you, I DETEST painting ceilings, but I will do it.  In February, I did the kitchen and entry hall (all one big space).  Since a photo of a ceiling isn’t exactly exciting, you only get one:

The kitchen ceiling...original color on right, improved color on left, and green tape!

So after doing THAT obnoxious job, I treated myself to some quilting.  WOOT!  Back soon with quilting, Cheers, Sarah

Wrestling Season begins

Sunday, February 26th, 2012

This will be our seventh year attending middle school wrestling:  first three years with Joshua (they could begin in 6th grade then) and now four more years with Eli (by which time they could begin in 5th grade).  With occasional wrestling breaking out in the living room since he was barely as tall as the dearly-departed dog-beast, Eli has had a good bit of time to learn.  And learn he has!  Last year, devoted readers may recall, the boy was Eastern Maine Regional Champion and came in a close second in the state.  This year, Eli’s hoping to do at least as well if not better!  He’s off to a good start…

Yesterday marked his first meet of the season (he had the stomach flu for the first meet).  He had three regular matches and one “exhibition” match.  He won four matches.  In the first period.  ALL by pins.  Two of the four in 12 seconds or less.  Ahem.  Glad I’m not facing him on a wrestling mat!

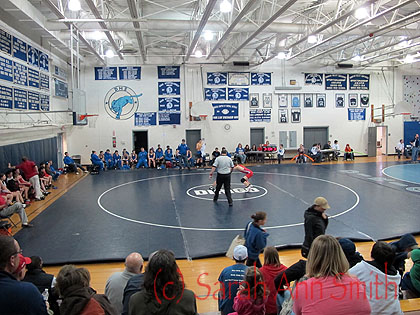
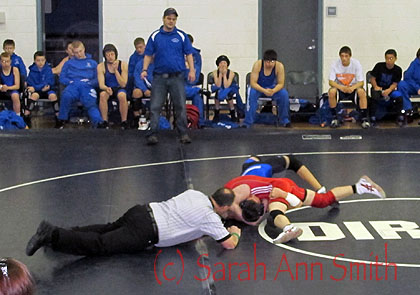
For his first match of the season, Eli (in red, on the right) faced a boy from Bath. He let the kid grab his ankle/leg at the start, so it took a moment to get his bearings and decide to dominate.

The meet was….erg…. in the Western Region.  The Pine Tree Wrestling League (to the dismay of many parents) has decided to expand the regular season meets across regional lines to give the boys more experience.  That is good.  Driving on twisty turny two lane snowy roads, well…not so much fun. It was a good two hours each way to Dirigo from our home!  At least the nasty weather ended early enough for the roads to be mostly plowed/cleared.

The boys moved out of bounds, came back to the center, and Eli went after the win. Here, he is pinning the kid--the aim is to win. The best win (in terms of points for the team) is a "win by fall" or "pin" where you get the opponent's shoulders on the mat. The ref is down on the mat to get a straight-on view to make sure both shoulders are down before the welcome (if you are the one doing the pinning, and not the one being pinned) slap on the mat to indicate pin! Match over! Opposing coach is now looking glumly resigned. Mama-Smile!

At Eli’s mid-weight-range the competition tends to fall into two groups:  really good—really competitive, and rank beginners.  When your kids are young or somewhat plumpish, it is disconcerting (to say the least, for moms, kids, coaches), to see some very muscular and skilled 7th or 8th grader walk onto the mat looking determined. For those who aren’t intimately familiar with wrestling:  kids are grouped by age (in this case 5th-8th, next will be high school) and by weight class.  In our league, it is (in pounds)  75, 82, 89, 96, 103, 110, 117, 124, 131, 138, 145, 155, 170, 190, 210, 240.  And yes, there really are middle school boys in the 210 and 240 range.  So a 131-pounder can be lean and strong or small and plumpish.  Guess who wins, especially with experience.

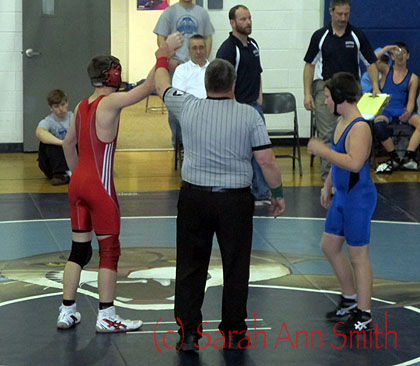
This dear boy in blue didn't stand a chance. Took all of ten seconds for Eli to grab him, get him to the mat, onto his shoulders, and the win called by the ref. In a RARE event, I managed to get the ref holding up Eli's hand for the win.

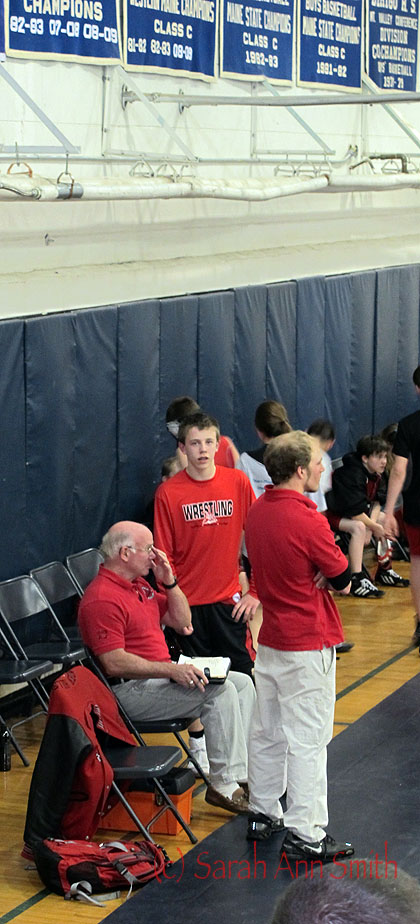
And an even more rare photo, Eli with dad (asst. coach) and True Bragg, a Maine State Champion in high school and head coach:

Eli and coaches (dad on left, sitting, and True on right, teammates behind)

When teams meet up, there are often “defaults” where only one team has a kid in a given weight class.  At regular season meets there will often be “exhibition” matches to give the kids more  opportunities to wrestle.  These are good for learning and bragging rights, but don’t count toward the kids season-end standings as they go into regionals and states.  Eli wrestled Spencer Vaughn from Dirigo again…. he wrestled him last year at states and pinned him.  This year, Spencer is a weight class heavier than Eli, but since he, too, made States, it means he is a good wrestler. General rule of thumb is that it is harder to wrestle someone heavier as they have more muscle.  But not always. And skill counts.

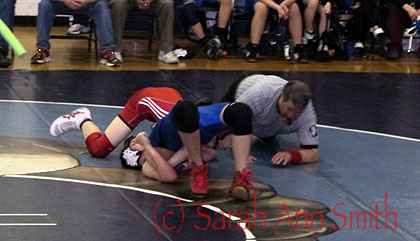
The Dirigo boy is arched up trying to keep his shoulder blades off the mat and avoid getting pinned. He did not succeed. Again, the refs need good knees to get up and down from being on the mat to see what body part is where!

Eli pinned him again!  This photo was moments before the match was “win by Fall” for Eli!  I must say, I DO like it when Eli wraps up the win promptly and it doesn’t come down to the final seconds of the final/third period!  Next on the blogging list:  painting the house and (get ready….) quilting…yes, I ‘ve actually done some quilting!  Now Eli needs the laptop for homework, so those posts must wait.

Dropping in for a moment

Thursday, February 23rd, 2012

just to let you all know I’m still bubbling along busier than ever…. painted the kitchen ceiling, painted the stairs to the basement (where my studio is) both walls and ceiling, made a quilt for a special exhibit, made another small quilt for the chapter challenge, Eli’s wrestling season and meets have begun and it is spring break…can you say WHOOOSH?  Time has evaporated.  The good news is I got both quilts done, and will blog lots soon.

And I’ve begun working out–taking a “Bodyforging” class two days a week that is a combination of yoga moves and pilates, and also riding the exercise bike.  The great news is I am getting stronger and more fit and feel great, but the bad news is the amount of time that eats.  Oh well…worth it!  AND This is Winter Vacation week in Maine, so Eli is home and today we are  driving south to Portland (almost  2 hours) to go shopping…fun stuff!   Anyway, back with lots to post and share SOON!